鸿蒙基础
-
- 1.自定义构建函数
-
- [1. 构建函数-@Builder (/Builder )](#1. 构建函数-@Builder )
- [2. 构建函数-传参传递(单向)](#2. 构建函数-传参传递(单向))
- [3. 构建函数-传递参数(双向)](#3. 构建函数-传递参数(双向))
- [4. 构建函数-传递参数练习](#4. 构建函数-传递参数练习)
- [5. 构建函数-@BuilderParam (/BuilderParam ) 传递UI](#5. 构建函数-@BuilderParam 传递UI)
- 2.组件状态共享
-
- [1. 状态共享-父子单向](#1. 状态共享-父子单向)
- [2. 状态共享-父子双向](#2. 状态共享-父子双向)
- [3. 状态共享-后代组件](#3. 状态共享-后代组件)
- [4. 状态共享-状态监听器](#4. 状态共享-状态监听器)
- [5. 综合案例 - 相册图片选取](#5. 综合案例 - 相册图片选取)
- [6. @Observed与@ObjectLink (/ObjectLink )](#6. @Observed与@ObjectLink )
- [7. Next新增修饰符-Require-Track](#7. Next新增修饰符-Require-Track)
- 3.应用状态
-
- [1. UIAbility内状态-LocalStorage](#1. UIAbility内状态-LocalStorage)
- [2. 应用状态-AppStorage](#2. 应用状态-AppStorage)
- 概述
-
- [3. 状态持久化-PersistentStorage](#3. 状态持久化-PersistentStorage)
- 限制条件
-
- [4. 状态持久化-preferences首选项](#4. 状态持久化-preferences首选项)
- [5. 设备状态-Environment(了解)](#5. 设备状态-Environment(了解))
- 4.网络管理(需要模拟器)
-
- [1. 应用权限](#1. 应用权限)
- [2. HTTP请求(需要模拟器)](#2. HTTP请求(需要模拟器))
- request接口开发步骤
- 5.今日案例-美团外卖
-
- [1. 目录结构-入口页面](#1. 目录结构-入口页面)
- [2. 页面结构-底部组件](#2. 页面结构-底部组件)
- [3. 顶部结构-MTTop(复制粘贴)](#3. 顶部结构-MTTop(复制粘贴))
- [4. 页面结构-商品菜单和商品列表](#4. 页面结构-商品菜单和商品列表)
- [5. 页面结构-购物车](#5. 页面结构-购物车)
- [6. 业务逻辑-渲染商品菜单和列表](#6. 业务逻辑-渲染商品菜单和列表)
- [7. 业务逻辑-封装新增加菜和减菜组件](#7. 业务逻辑-封装新增加菜和减菜组件)
- [8. 业务逻辑-加入购物车](#8. 业务逻辑-加入购物车)
- 9.加菜和减菜按钮加入购物车
- 10.清空购物车
- 11.底部内容汇总
- 美团案例完整代码
1.自定义构建函数
1. 构建函数-@Builder
:::info
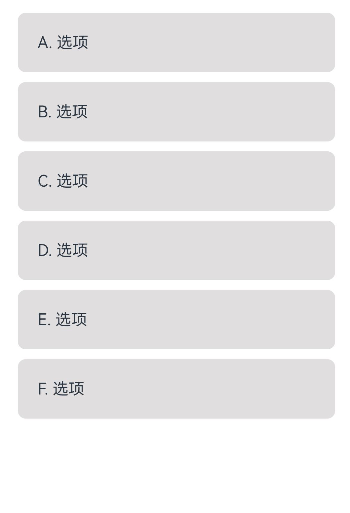
如果你不想在直接抽象组件,ArkUI还提供了一种更轻量 的UI元素复用机制 @Builder,可以将重复使用的UI元素抽象成一个方法,在 build 方法里调用。称之为自定义构建函数
:::
只要使用Builder修饰符修饰的内容,都可以做成对应的UI描述
typescript
@Entry
@Component
struct BuilderCase {
  @State
  list: string[] = ["A", "B","C", "D", "E", "F"]

  @Builder
  getItemBuilder (itemName: string) {
    Row() {
      Text(`${itemName}. 选项`)
    }
    .height(60)
    .backgroundColor("#ffe0dede")
    .borderRadius(8)
    .width("100%")
    .padding({
      left: 20,
      right: 20
    })
  }

  build() {
    Column({ space: 10 }) {
      ForEach(this.list, (item: string) => {
        this.getItemBuilder(item)
      })
    }
    .padding(20)
  }
}- 用法- 使用@Builder修饰符修饰
typescript
@Entry
@Component
struct BuilderCase02 {
build() {
Row() {
Column() {
Row() {
Row() {
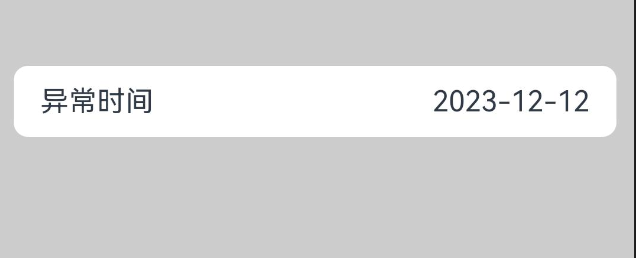
Text("异常时间")
Text("2023-12-12")
}
.width('100%')
.justifyContent(FlexAlign.SpaceBetween)
.padding({
left: 15,
right: 15
})
.borderRadius(8)
.height(40)
.backgroundColor(Color.White)
}.padding({
left: 10,
right: 10
})
}
.width('100%')
}
.height('100%')
.backgroundColor('#ccc')
}
}:::info
假设你有N个这样的单个元素,但是重复的去写会浪费大量的代码,丧失代码的可读性,此时我们就可以使用
builder构建函数
:::
- 全局定义- @Builder function name () {}
typescript
@Builder
function getCellContent(leftTitle: string, rightValue: string) {
  Row() {
    Row() {
      Text(leftTitle)
      Text(rightValue)
    }
    .width('100%')
    .justifyContent(FlexAlign.SpaceBetween)
    .padding({
      left: 15,
      right: 15
    })
    .borderRadius(8)
    .height(40)
    .backgroundColor(Color.White)
  }.padding({
    left: 10,
    right: 10
  })

}- 在组件中使用
typescript
Column({ space: 10 }) {
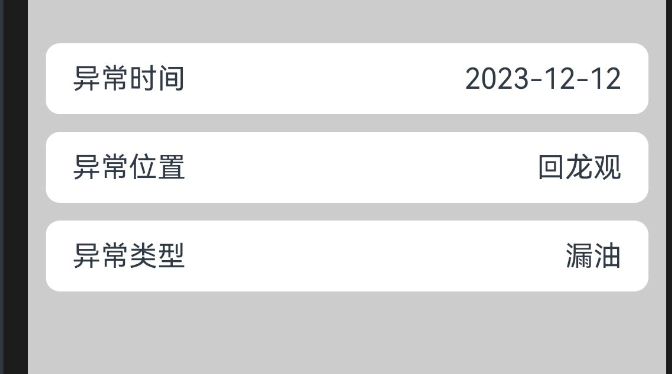
getCellContent("异常时间", "2023-12-12")
getCellContent("异常位置", "回龙观")
getCellContent("异常类型", "漏油")
}
.width('100%')Next里面最大的变化就是全局的自定义Builder函数可以被引用,也就是你的一些公共的builder函数可以抽提出来,像使用函数那样来复用一些样式
2. 构建函数-传参传递(单向)
:::success
传的参数是按值的话,那个builder不具备响应式特征
传的参数是复杂数据, 而且复杂数据类型中的参数有响应式修饰符修饰,那么具备响应式特征
:::
typescript
@Entry
@Component
struct BuilderTransCase {
  @State
  area: string = "望京"
  @Builder
  getCardItem (leftTitle: string, rightValue: string) {
    Row() {
      Text(leftTitle)
      Text(rightValue)
    }
    .justifyContent(FlexAlign.SpaceBetween)
    .width('100%')
    .height(50)
    .borderRadius(8)
    .backgroundColor(Color.White)
    .padding({
      left: 20,
      right: 20
    })
  }
  @Builder
  getCardItemObj (item: ICardItem) {
    Row() {
      Text(item.leftTitle)
      Text(item.rightValue)
    }
    .justifyContent(FlexAlign.SpaceBetween)
    .width('100%')
    .height(50)
    .borderRadius(8)
    .backgroundColor(Color.White)
    .padding({
      left: 20,
      right: 20
    })
  }

  build() {
   Column({ space: 20 }) {
     Text(this.area)
     this.getCardItem("异常位置", this.area)  // 按值传递不具备响应式
     this.getCardItemObj({  leftTitle: '异常位置', rightValue: this.area }) // 按照引用传递可以实现数据更新
     this.getCardItem("异常时间", "2023-12-12")
     this.getCardItem("异常类型", "漏油")
     Button("上报位置")
       .onClick(() => {
         this.area = "厦门"
       })
   }
   .justifyContent(FlexAlign.Center)
    .width('100%')
    .height('100%')
    .padding(20)
    .backgroundColor(Color.Gray)
  }
}
interface ICardItem {
  leftTitle: string
  rightValue: string
}
:::info
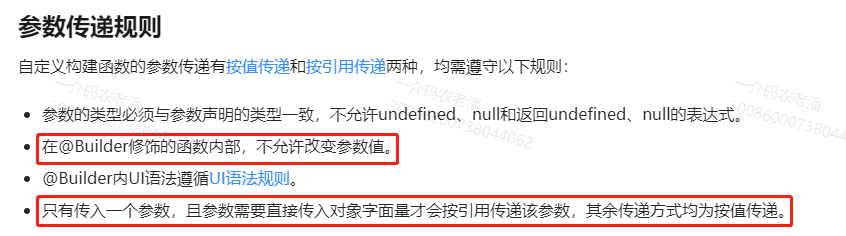
自定义构建函数的参数传递有按值传递和按引用传递两种,均需遵守以下规则:
- 参数的类型必须与参数声明的类型一致,不允许undefined、null和返回undefined、null的表达式。
- 在自定义构建函数内部,不允许改变参数值。如果需要改变参数值,且同步回调用点,建议使用@Link。
- @Builder内UI语法遵循UI语法规则。
:::
我们发现上一个案例,使用了string这种基础数据类型,即使它属于用State修饰的变量,也不会引起UI的变化
- 按引用传递参数时,传递的参数可为状态变量,且状态变量的改变会引起@Builder方法内的UI刷新。ArkUI提供**$$**作为按引用传递参数的范式。
typescript
ABuilder( $$ : 类型 );:::info
- 也就是我们需要在builder中传入一个对象, 该对象使用$$(可使用其他字符)的符号来修饰,此时数据具备响应式了
:::
typescript
class CellParams {
  leftTitle: string = ""
  rightValue: string = ""
}
@Builder
function getCellContent($$: CellParams) {
  Row() {
    Row() {
      Text($$.leftTitle)
      Text($$.rightValue)
    }
    .width('100%')
    .justifyContent(FlexAlign.SpaceBetween)
    .padding({
      left: 15,
      right: 15
    })
    .borderRadius(8)
    .height(40)
    .backgroundColor(Color.White)
  }.padding({
    left: 10,
    right: 10
  })

}- 传值
typescript
this.getCellContent({ leftTitle: '异常位置', rightValue: this.formData.location })
this.getCellContent({ leftTitle: '异常时间', rightValue: this.formData.time })
this.getCellContent({ leftTitle: '异常类型', rightValue: this.formData.type })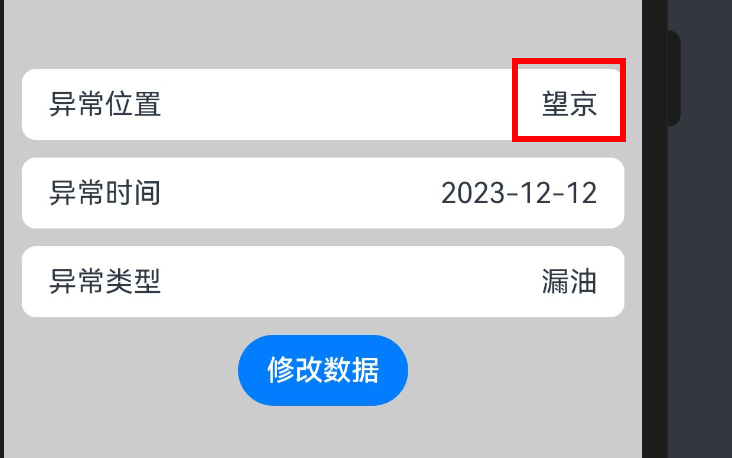
:::info
同样的,全局Builder同样支持这种用法
:::
typescript
@Entry
@Component
struct BuilderCase {
  @State formData: CardClass = {
    time: "2023-12-12",
    location: '回龙观',
    type: '漏油'
  }
  @Builder
  getCellContent($$: CellParams) {
    Row() {
      Row() {
        Text($$.leftTitle)
        Text($$.rightValue)
      }
      .width('100%')
      .justifyContent(FlexAlign.SpaceBetween)
      .padding({
        left: 15,
        right: 15
      })
      .borderRadius(8)
      .height(40)
      .backgroundColor(Color.White)
    }.padding({
      left: 10,
      right: 10
    })

  }
  build() {
    Row() {
      Column() {
        Column({ space: 10 }) {
          this.getCellContent({ leftTitle: '异常时间', rightValue: this.formData.time })
          this.getCellContent({ leftTitle: '异常位置', rightValue: this.formData.location })
          this.getCellContent({ leftTitle: '异常类型', rightValue: this.formData.type })
        }
        .width('100%')
        Button("修改数据").onClick(() => {
          this.formData.location = "望京"
        })
      }
      .width('100%')
    }
    .height('100%')
    .backgroundColor('#ccc')
  }
}

class CardClass {
  time: string = ""
  location: string = ""
  type: string = ""
}
class CellParams {
  leftTitle: string = ""
  rightValue: string = ""
}
@Builder
function getCellContent($$: CellParams  ) {
  Row() {
    Row() {
      Text($$.leftTitle)
      Text($$.rightValue)
    }
    .width('100%')
    .justifyContent(FlexAlign.SpaceBetween)
    .padding({
      left: 15,
      right: 15
    })
    .borderRadius(8)
    .height(40)
    .backgroundColor(Color.White)
  }.padding({
    left: 10,
    right: 10
  })

}
:::info
- 使用
@Builder复用逻辑的时候,支持传参可以更灵活的渲染UI - 参数可以使用
状态数据,不过建议通过对象的方式传入@Builder
:::
3. 构建函数-传递参数(双向)
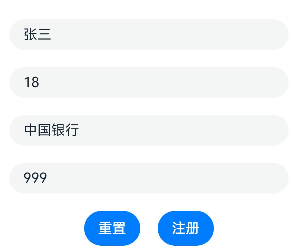
:::info
之前我们做过这样一个表单,$$不能绑定整个对象,有没有什么解决办法呢?
:::
新建一个的builder -FormBuilder
json
@Entry
@Component
struct BuilderCase03 {
  @State
  formData: FormData = {
    name: '张三',
    age: '18',
    bank: '中国银行',
    money: '999'
  }
  @Builder
  FormBuilder(formData:FormData) {
    Column({ space: 20 }) {
      TextInput({ placeholder: '请输入姓名',text:formData.name})
      TextInput({ placeholder: '请输入年龄',text:formData.age})
      TextInput({ placeholder: '请输入银行',text:formData.bank })
      TextInput({ placeholder: '请输入银行卡余额',text:formData.money})
    }.width('100%')
  }
  build() {
    Row() {
      Column({space:20}) {
        this.FormBuilder(this.formData)
        Row({space:20}){
          Button('重置')
            .onClick(()=>{
              this.formData = {
                name: '',
                age: '',
                bank: '',
                money: ''
              }
            })
          Button('注册')
        }
      }
      .width('100%')
      .padding(20)
    }
    .height('100%')
  }
}

interface FormData {
  name: string
  age: string
  bank: string
  money: string
}
:::danger
在页面上尝试使用builder,传入需要展示的数据,点击重置时,会发现UI并不能更新!
因为传递参数必须是{ params1:数据 }格式,params1才是响应式的
:::
改造传值,发现此时响应式了
json
@Entry
@Component
struct BuilderCase03 {
  @State
  formData: FormData = {
    name: '张三',
    age: '18',
    bank: '中国银行',
    money: '999'
  }
  @Builder
  FormBuilder(formData:FormDataInfo) {
    Column({ space: 20 }) {
      TextInput({ placeholder: '请输入姓名',text:formData.data.name})
      TextInput({ placeholder: '请输入年龄',text:formData.data.age})
      TextInput({ placeholder: '请输入银行',text:formData.data.bank })
      TextInput({ placeholder: '请输入银行卡余额',text:formData.data.money})
    }.width('100%')
  }
  build() {
    Row() {
      Column({space:20}) {
        this.FormBuilder({data:this.formData})
        Row({space:20}){
          Button('重置')
            .onClick(()=>{
              this.formData = {
                name: '',
                age: '',
                bank: '',
                money: ''
              }
            })
          Button('注册')
        }
      }
      .width('100%')
      .padding(20)
    }
    .height('100%')
  }
}

interface FormData {
  name: string
  age: string
  bank: string
  money: string
}
interface FormDataInfo{
  data:FormData
}
改造成双向绑定,builder内部改变时也能通知外层
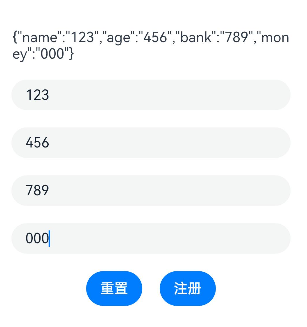
json
@Entry
@Component
struct BuilderCase03 {
  @State
  formData: FormData = {
    name: '张三',
    age: '18',
    bank: '中国银行',
    money: '999'
  }
  @Builder
  FormBuilder($$:FormDataInfo) {
    Column({ space: 20 }) {
      TextInput({ placeholder: '请输入姓名',text:$$.data.name})
      TextInput({ placeholder: '请输入年龄',text:$$.data.age})
      TextInput({ placeholder: '请输入银行',text:$$.data.bank })
      TextInput({ placeholder: '请输入银行卡余额',text:$$.data.money})
    }.width('100%')
  }
  build() {
    Row() {
      Column({space:20}) {
        Text(JSON.stringify(this.formData))
        this.FormBuilder({data:this.formData})
        Row({space:20}){
          Button('重置')
            .onClick(()=>{
              this.formData = {
                name: '',
                age: '',
                bank: '',
                money: ''
              }
            })
          Button('注册')
        }
      }
      .width('100%')
      .padding(20)
    }
    .height('100%')
  }
}

interface FormData {
  name: string
  age: string
  bank: string
  money: string
}
interface FormDataInfo{
  data:FormData
}
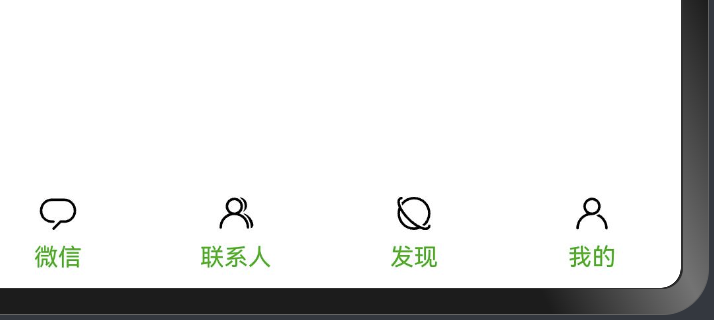
4. 构建函数-传递参数练习
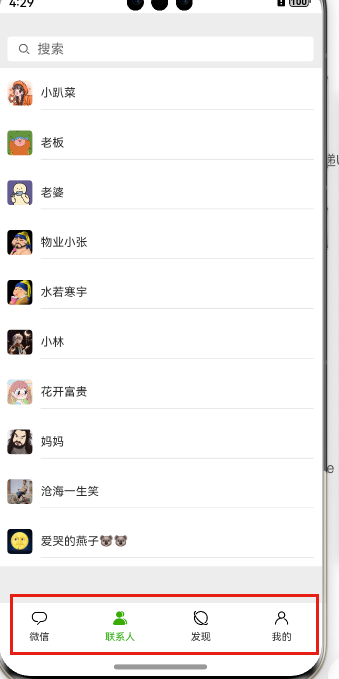
上图中,是tabs组件中的tabbar属性,支持自定义builder,意味着我们可以定制它的样式
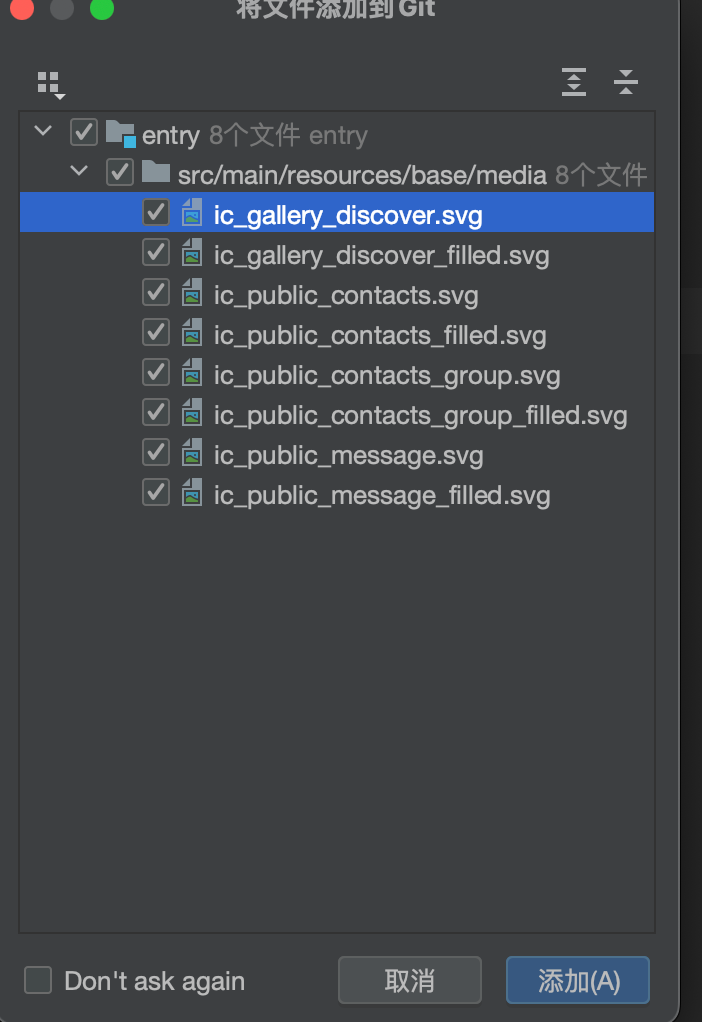
- 准备八个图标放到资源目录下
- 新建一个页面, 声明一个interface并建立四个数据的状态
typescript
interface TabInterface {
  name: string
  icon: ResourceStr
  selectIcon: ResourceStr
  title: string
}- 循环生成对应的TabContent
typescript
@Entry
@Component
struct TabBarBuilderCase {
  @State
  list: TabInterface[] = [{
    icon: $r("app.media.ic_public_message"),
    selectIcon: $r('app.media.ic_public_message_filled'),
    name: 'wechat',
    title: '微信',
  }, {
    icon: $r('app.media.ic_public_contacts_group'),
    selectIcon: $r('app.media.ic_public_contacts_group_filled'),
    name: 'connect',
    title: '联系人',
  }, {
    icon: $r('app.media.ic_gallery_discover'),
    selectIcon: $r('app.media.ic_gallery_discover_filled'),
    name: 'discover',
    title: '发现',
  }, {
    icon: $r('app.media.ic_public_contacts'),
    selectIcon: $r('app.media.ic_public_contacts_filled'),
    name: 'my',
    title: '我的',
  }]


  build() {
    Tabs() {
     ForEach(this.list, (item: TabInterface) => {
       TabContent() {
         Text(item.title)
       }
       .tabBar(item.title)
     })
    }
    .barPosition(BarPosition.End)
  }
}
interface TabInterface {
  name: string
  icon: ResourceStr
  selectIcon: ResourceStr
  title: string
}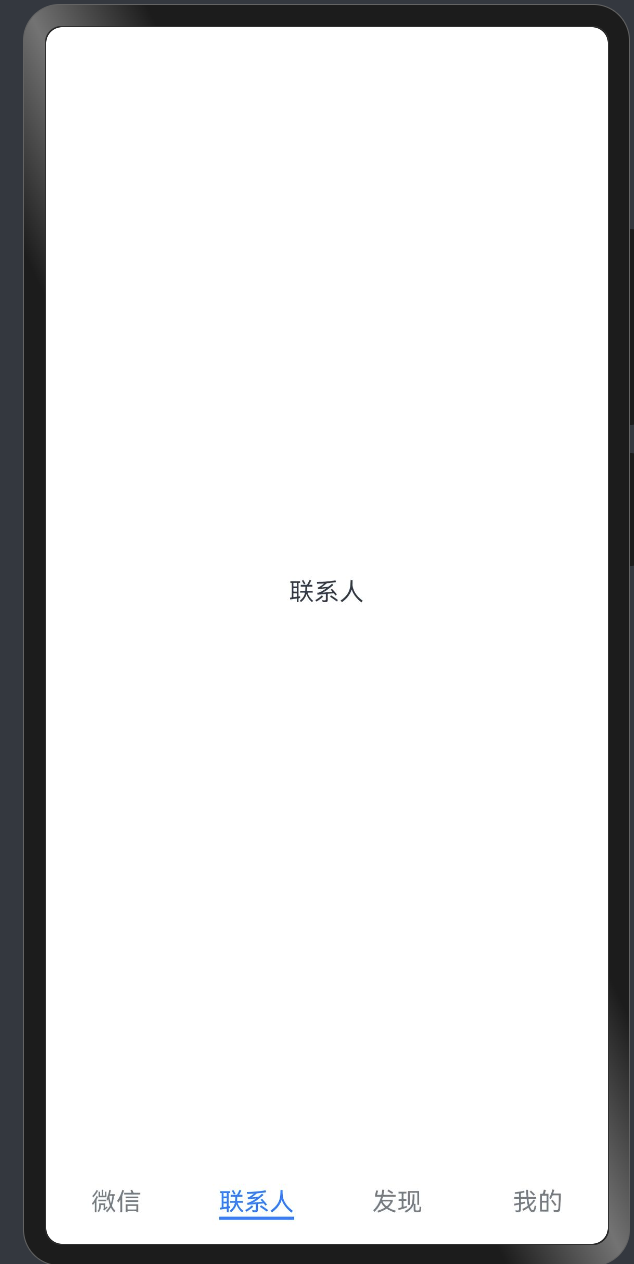
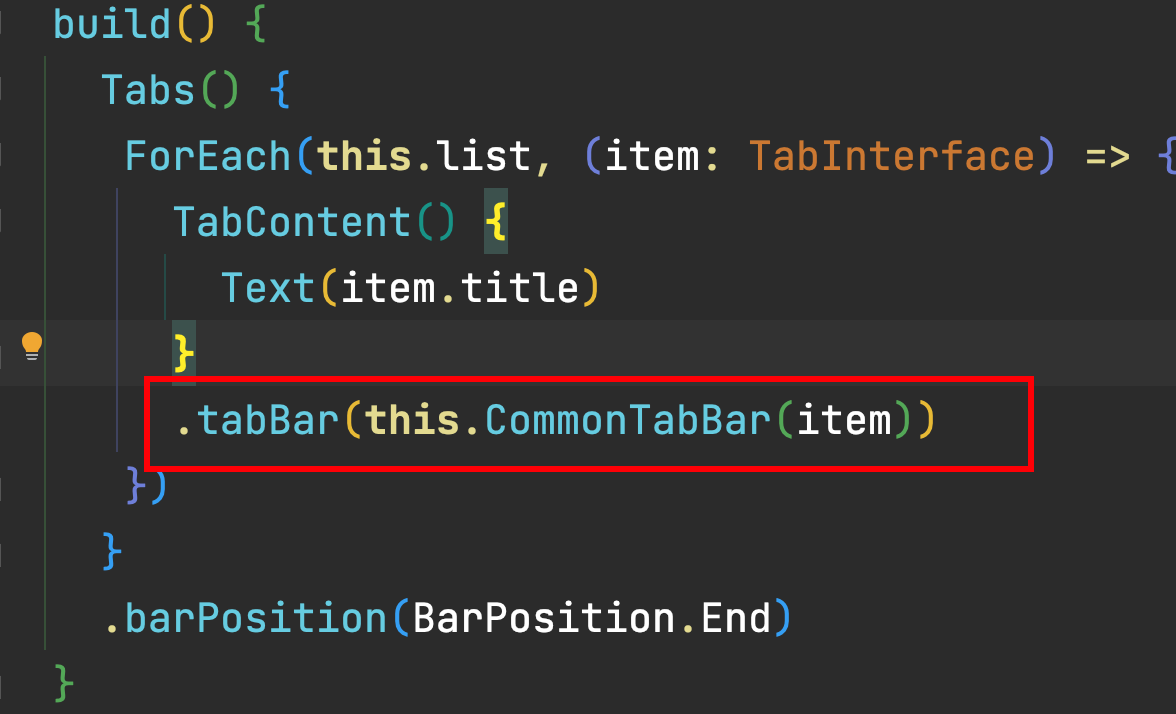
此时,如果我们想实现图中对应的效果,就需要使用自定义Builder来做,因为TabContent的tabBar属性支持CustomBuilder类型,CustomBuilder类型就是builder修饰的函数
- 在当前组件中声明一个builder函数
typescript
 @Builder
  CommonTabBar (item: TabInterface) {
    Column () {
      Image(item.icon)
        .width(20)
        .height(20)
      Text(item.title)
        .fontSize(12)
        .fontColor("#1AAD19")
        .margin({
          top: 5
        })
    }
  }
- 定义一个数据来绑定当前tabs的激活索引
typescript
  @State
  currentIndex: number = 0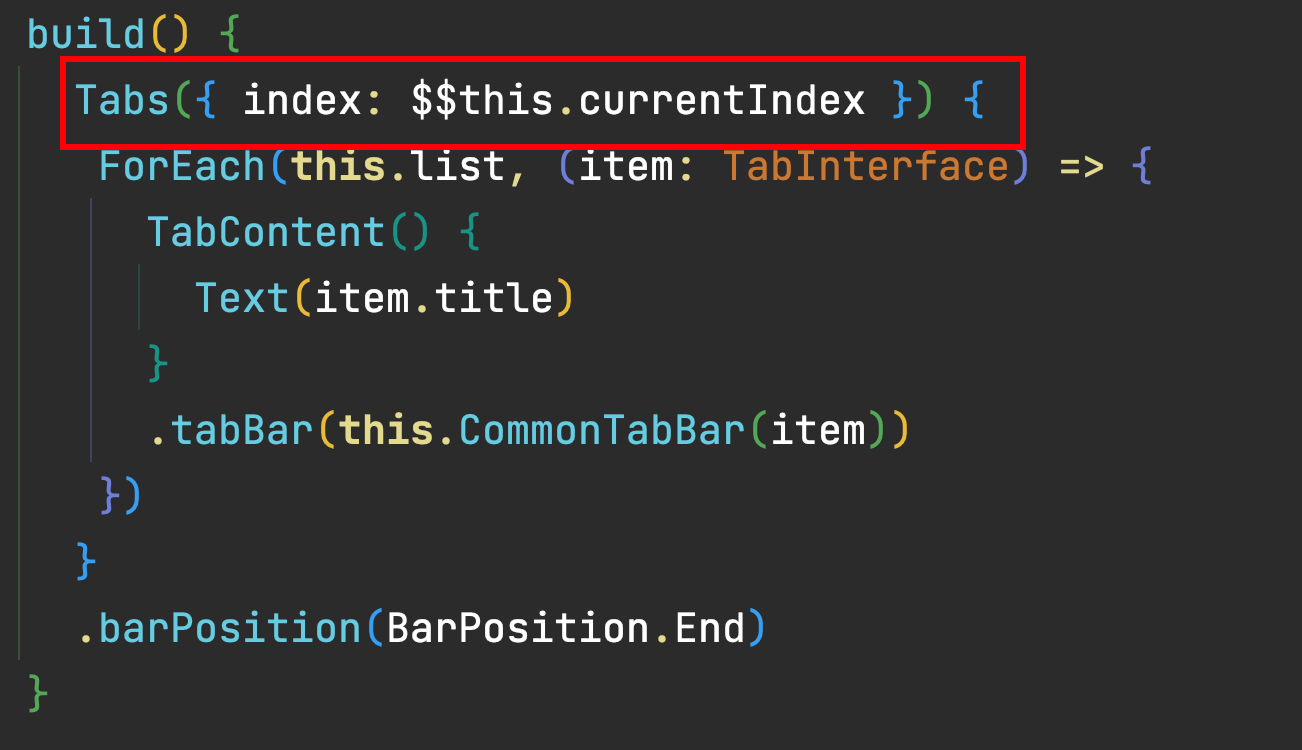
- 根据当前激活索引设置不同的颜色的图标
typescript
 @Builder
  CommonTabBar (item: TabInterface) {
    Column () {
      Image(item.name === this.list[this.currentIndex].name ? item.selectIcon : item.icon)
        .width(20)
        .height(20)
      Text(item.title)
        .fontSize(12)
        .fontColor(item.name === this.list[this.currentIndex].name ? "#1AAD19": "#2A2929")
        .margin({
          top: 5
        })
    }
  }
5. 构建函数-@BuilderParam 传递UI
:::success
插槽-Vue-Slot React-RenderProps
-
把UI结构体的函数(Builder修饰的函数)当成参数传入到组件中,让组件放入固定的位置去渲染
-
子组件接收传入的函数的修饰符/装饰器叫做BuilderParam
:::
:::info
-
Component可以抽提组件
-
Builder可以实现轻量级的UI复用
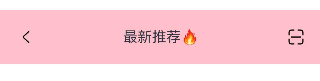
完善了吗? 其实还不算,比如下面这个例子
:::
- BuilderParam的基本使用 - 如何实现定制化Header?

:::success
使用BuilderParam的步骤
- 前提:需要出现父子组件的关系
- 前提:BuilderParam应出现在子组件中
-
- 子组件声明 @BuilderParam getConent: () => void
-
- BuilderParam的参数可以不给初始值,如果给了初始值, 就是没有内容的默认内容
-
- 父组件传入的时候,它需要用builder修饰的函数又或者是 一个箭头函数中包裹着
-
- 调用builder函数的逻辑
:::
- 调用builder函数的逻辑
json
@Entry
@Component
struct BuildParamCase {
  // 声明的一个要传递的内容!
  @Builder
  LeftBuilder() {
    Image($r('sys.media.ohos_ic_compnent_titlebar_back'))
      .width(20)
  }
  @Builder
  CenterBuilder(){
   Row(){
     Text('最新推荐')

     Text('🔥')
   }
   .layoutWeight(1)
    .justifyContent(FlexAlign.Center)
  }
  @Builder
  RightBuilder(){
    Image($r('sys.media.ohos_ic_public_scan'))
      .width(20)
  }

  build() {
    Row() {
      Column() {
        //   Header容器
        MyBuilderParamChild()
      }
      .width('100%')
    }
    .height('100%')
  }
}

@Component
struct MyBuilderParamChild {
  @Builder
  defaultLeftParam(){
    Text('返回')
  }
  @BuilderParam
  leftContent:()=>void = this.defaultLeftParam


  @Builder
  defaultCenterParam(){
    Text('首页')
      .layoutWeight(1)
      .textAlign(TextAlign.Center)
  }
  @BuilderParam
  centerContent:()=>void =  this.defaultCenterParam

  @Builder
  defaultRightParam(){
    Text('确定')
  }
  @BuilderParam
  rightContent:()=>void =  this.defaultRightParam
  build() {
    Row() {
      //   左
      this.leftContent()
      //   中
      this.centerContent()
      //   右
      this.rightContent()
    }.width('100%')
    .backgroundColor(Color.Pink)
    .padding(20)
  }
}-
builderParam传值
:::success
-
当我们使用builderParam的时候,又需要拿到渲染的数据该怎么办?
场景: 当我们有一个列表组件,该组件的列表格式是固定的,但是每个选项的内容由传入的结构决定怎么搞?
- 列表组件可以渲染数据-但是每一个选项的UI结构由使用者决定
- 拷贝图片到assets
:::
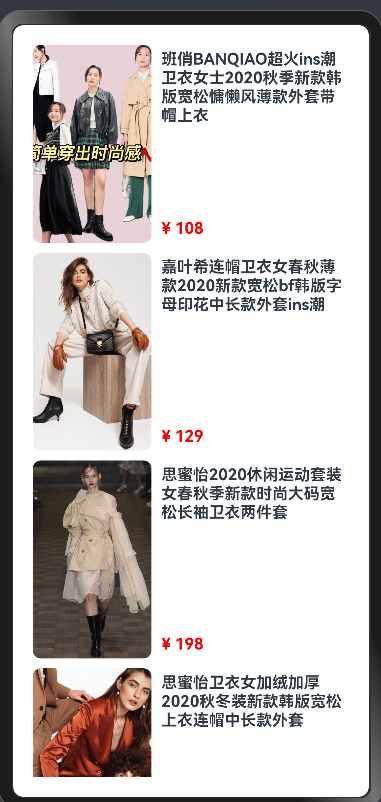
- 封装一个列表的组件,可以渲染传入的数组
typescript
@Preview
@Component
// 列表组件
struct HmList {
  @State
  list: object[] = [] // 不知道传入的是什么类型 统一认为是object
  @BuilderParam
  renderItem: (obj: object) => void

  build() {
    // Grid List WaterFlow
    // 渲染数组
    List ({ space: 10 }) {
      ForEach(this.list, (item: object) => {
        ListItem() {
          // 自定义的结构
          if(this.renderItem) {
            this.renderItem(item)
            // 函数中的this始终指向调用者
          }
        }
      })
    }
    .padding(20)
  }
}
export { HmList }

// WaterFlow FlowItem Grid GirdItem List ListItem- 父组件调用
typescript
import { BuilderParamChild } from './components/BuilderParamChild'
@Entry
@Component
struct BuilderParamCase {
  @State
  list: GoodItem[] = [
    {
      "id": 1,
      "goods_name": "班俏BANQIAO超火ins潮卫衣女士2020秋季新款韩版宽松慵懒风薄款外套带帽上衣",
      "goods_img": "assets/1.webp",
      "goods_price": 108,
      "goods_count": 1,
    },
    {
      "id": 2,
      "goods_name": "嘉叶希连帽卫衣女春秋薄款2020新款宽松bf韩版字母印花中长款外套ins潮",
      "goods_img": "assets/2.webp",
      "goods_price": 129,
      "goods_count": 1,
    },
    {
      "id": 3,
      "goods_name": "思蜜怡2020休闲运动套装女春秋季新款时尚大码宽松长袖卫衣两件套",
      "goods_img": "assets/3.webp",
      "goods_price": 198,
      "goods_count": 1,
    },
    {
      "id": 4,
      "goods_name": "思蜜怡卫衣女加绒加厚2020秋冬装新款韩版宽松上衣连帽中长款外套",
      "goods_img": "assets/4.webp",
      "goods_price": 99,
      "goods_count": 1,
    },
    {
      "id": 5,
      "goods_name": "幂凝早秋季卫衣女春秋装韩版宽松中长款假两件上衣薄款ins盐系外套潮",
      "goods_img": "assets/5.webp",
      "goods_price": 156,
      "goods_count": 1,
    },
    {
      "id": 6,
      "goods_name": "ME&CITY女装冬季新款针织抽绳休闲连帽卫衣女",
      "goods_img": "assets/6.webp",
      "goods_price": 142.8,
      "goods_count": 1,
    },
    {
      "id": 7,
      "goods_name": "幂凝假两件女士卫衣秋冬女装2020年新款韩版宽松春秋季薄款ins潮外套",
      "goods_img": "assets/7.webp",
      "goods_price": 219,
      "goods_count": 2,
    },
    {
      "id": 8,
      "goods_name": "依魅人2020休闲运动衣套装女秋季新款秋季韩版宽松卫衣 时尚两件套",
      "goods_img": "assets/8.webp",
      "goods_price": 178,
      "goods_count": 1,
    },
    {
      "id": 9,
      "goods_name": "芷臻(zhizhen)加厚卫衣2020春秋季女长袖韩版宽松短款加绒春秋装连帽开衫外套冬",
      "goods_img": "assets/9.webp",
      "goods_price": 128,
      "goods_count": 1,
    },
    {
      "id": 10,
      "goods_name": "Semir森马卫衣女冬装2019新款可爱甜美大撞色小清新连帽薄绒女士套头衫",
      "goods_img": "assets/10.webp",
      "goods_price": 153,
      "goods_count": 1,
    }
  ]
  @Builder
  renderItem (item: GoodItem) {
    Row({ space: 10 }) {
      Image(item.goods_img)
        .borderRadius(8)
        .width(120)
        .height(200)
      Column() {
        Text(item.goods_name)
          .fontWeight(FontWeight.Bold)
        Text("¥ "+item.goods_price.toString())
          .fontColor(Color.Red)
          .fontWeight(FontWeight.Bold)
      }
      .padding({
        top: 5,
        bottom: 5
      })
      .alignItems(HorizontalAlign.Start)
      .justifyContent(FlexAlign.SpaceBetween)
      .height(200)
      .layoutWeight(1)
    }
    .width('100%')
  }
  build() {
    Row() {
      Column() {
        BuilderParamChild({
          list:this.list,
          builderItem:(item:object)=>{
            this.renderItem(item as GoodItem)
          }
        })
      }
      .width('100%')
    }
    .height('100%')
  }
}
interface GoodItem {
  goods_name: string
  goods_price: number
  goods_img: string
  goods_count: number
  id: number
}
:::success
1.BuildParam可以没有默认值,但是调用的时候最好判断一下
2.BuildParam可以声明参数,调用的时候传递的参数最后回传给父组件传递的Builder
:::
-
尾随闭包
:::success
Column () { } 中大括号就是尾随闭包的写法
:::
:::info
当我们的组件只有一个BuilderParam 的时候,此时可以使用尾随闭包 的语法 也就是像我们原来使用Column或者Row组件时一样,直接在大括号中传入
:::
-
父组件使用尾随闭包传入
神领物流中有很多这样的Panel栏


我们用尾随闭包来封装这样的组件,理解一下BuildParam的使用

首先封装一个Panel组件
typescript
@Component
struct PanelComp {
  @State
  leftText:string = '左侧标题'

  @BuilderParam
  rightContent:()=>void = this.defaultContent
  @Builder
  defaultContent(){
    Row({space:16}){
      Checkbox().select(true).shape(CheckBoxShape.CIRCLE)
      Text('是')
    }
  }

  build() {
    Row(){
      Text(this.leftText)
      this.rightContent()
    }
    .width('100%')
    .padding(20)
    .backgroundColor('#ccc')
    .borderRadius(8)
    .justifyContent(FlexAlign.SpaceBetween)
  }
}

export { PanelComp }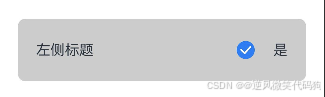
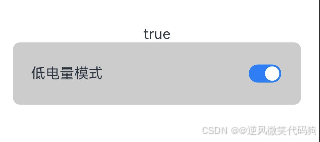
- 接下来父组件使用,并分别传递左侧文字和右侧的结构
typescript
import { PanelComp } from './components/PanelComp'

@Entry
@Component
struct BuilderParamClosure {
  @State
  isOn:boolean = false
  build() {
    Row() {
      Column() {
        Text(''+this.isOn)
        PanelComp({
          // 数据
          leftText:'低电量模式'
        }){
          // 结构
          Toggle({
            type:ToggleType.Switch,
            isOn:$$this.isOn
          })
        }
      }
      .width('100%')
      .padding(20)
    }
    .height('100%')
  }
}
:::success
只有一个BuilderParam且不需要传参的时候,可以使用尾随闭包
注意:尾随闭包用空大括号就代表传递空内容,会替代默认内容
:::
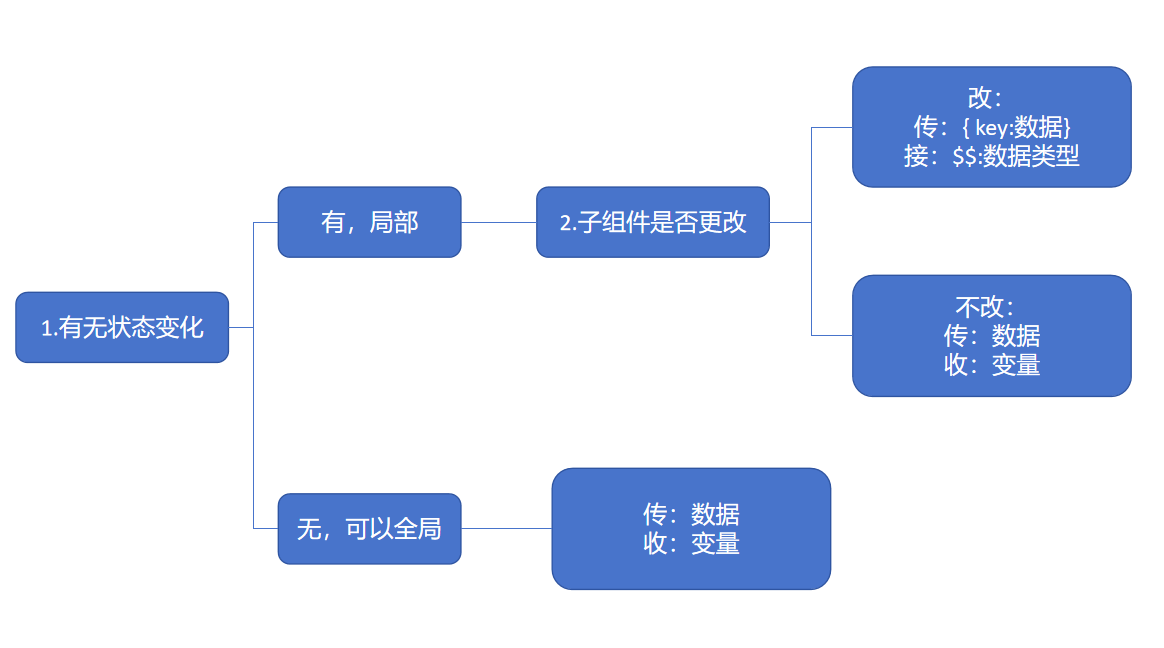
2.组件状态共享
State是当前组件的状态, 用State修饰的数据变化会驱动UI的更新(只有第一层)
父传子的时候,子组件定义变量的时候,如果没有任何的修饰符,那么该值只会在第一次渲染时生效
:::info
接下来,我们学习组件状态传递
我们知道 State是当前组件的状态,它的数据变化可以驱动UI,但是子组件接收的数据没办法更新,我们需要
更多的修饰符来帮助我们完成数据的响应式传递
:::
1. 状态共享-父子单向

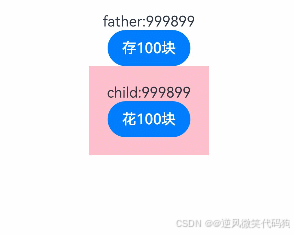
比如我们希望实现这样一个效果,粉色区域是一个子组件,父组件有一个值
如何让父子同时可以进行修改,且保持同步呢?
- 先写页面
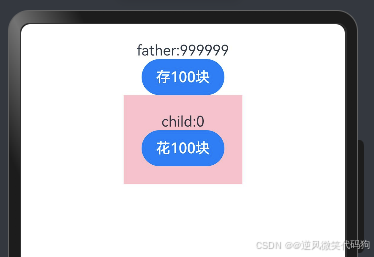
typescript
@Entry
@Component
struct ComponentQuestionCase {
  @State money: number = 999999;

  build() {
    Column() {
      Text('father:' + this.money)
      Button('存100块')
      CompQsChild()
    }
    .padding(20)
    .width('100%')
    .height('100%')
  }
}

@Component
struct CompQsChild {
  @State money: number = 0

  build() {
    Column() {
      Text('child:' + this.money)
      Button('花100块')
    }
    .padding(20)
    .backgroundColor(Color.Pink)
  }
}- 传递值给子组件,绑定点击事件修改money,此时会发现,父子组件各改各的

typescript
@Entry
@Component
struct PropCase {
  @State
  money: number = 999999

  build() {
    Column() {
      Text('father:' + this.money)
      Button('存100块')
        .onClick(() => {
          this.money += 100
        })
      // ---------
      // 父给子传值,默认只生效一次
      PropChild({
        money:this.money
      })
    }
    .width('100%')
  }
}

@Component
struct PropChild {
  // @State
  // 用于和传入的值保持同步(单向),如果传入的值改变也会引起UI的更新
  // 自身可以进行修改,但是不推荐
  // 因为父组件再次改变会覆盖自己的内容
  @Prop
  money: number = 0

  build() {
    Column() {
      Text('father:' + this.money)
      Button('花100块')
        .onClick(() => {
          this.money -= 100
        })
    }
    .padding(20)
    .backgroundColor(Color.Pink)
  }
}此时,我们就可以学习一个新的修饰符@Prop,被@Prop修饰过的数据可以自动监听传递的值,同步保持更新,修改子组件的money修饰符为@Prop,此时就能实现父组件改变,子组件同步更新
:::success
@Prop装饰的变量可以和父组件建立单向的同步关系。@Prop装饰的变量是可变的,但是变化不会同步回其父组件。
:::

typescript
@Entry
@Component
struct ComponentQuestionCase {
  @State money: number = 999999;

  build() {
    Column() {
      Text('father:' + this.money)
      Button('存100块')
        .onClick(()=>{
          this.money+=100
        })
      CompQsChild({money:this.money})
    }
    .padding(20)
    .width('100%')
    .height('100%')
  }
}

@Component
struct CompQsChild {
  @Prop money: number = 0

  build() {
    Column() {
      Text('child:' + this.money)
      Button('花100块')
        .onClick(()=>{
          this.money-=100
        })
    }
    .padding(20)
    .backgroundColor(Color.Pink)
  }
}
:::info
Prop 支持类型和State修饰符基本一致,并且Prop可以给初始值,也可以不给
注意:子组件仍然可以改自己,更新UI,但不会通知父组件(单向),父组件改变后会覆盖子组件自己的值

:::
2. 状态共享-父子双向
-
Prop修饰符- 父组件数据更新-让子组件更新- 子组件更新-父组件不为所动
:::info
Prop是单向的,而Link修饰符则是双向的数据传递,只要使用Link修饰了传递过来的数据,这个时候就是双向同步了
注意点:
Link修饰符不允许给初始值:::
-
将刚刚的案例改造成双向的
子组件中被@Link装饰的变量与其父组件中对应的数据源建立双向数据绑定。
typescript
@Entry
@Component
struct ComponentQuestionCase {
  @State
  money: number = 999999;

  build() {
    Column() {
      Text('father:' + this.money)
      Button('存100块')
        .onClick(()=>{
          this.money+=100
        })
      CompQsChild({money:this.money})
    }
    .padding(20)
    .width('100%')
    .height('100%')
  }
}

@Component
struct CompQsChild {
  // 各玩各的
  // @State money: number = 0
  // 听爸爸的话
  // @Prop money: number
  // 团结一心
  @Link money: number

  build() {
    Column() {
      Text('child:' + this.money)
      Button('花100块')
        .onClick(()=>{
          this.money-=100
        })
    }
    .padding(20)
    .backgroundColor(Color.Pink)
  }
}
:::danger
Link修饰符的要求- 你的父组件传值时传的必须是Link或者State修饰的数据
:::
下面这段代码的问题出现在哪里?
typescript
@Entry
@Component
struct ComponentQuestionCase {
  @State
  dataInfo: MoneyInfo = {
    money: 99999,
    bank: '中国银行'
  }

  build() {
    Column() {
      Text('father:' + this.dataInfo.money)
      Button('存100块')
        .onClick(() => {
          this.dataInfo.money += 100
        })
      CompQsChild({ dataInfo: this.dataInfo })
    }
    .padding(20)
    .width('100%')
    .height('100%')
  }
}

@Component
struct CompQsChild {
  // 各玩各的
  // @State money: number = 0
  // 听爸爸的话
  // @Prop money: number
  // 团结一心
  @Link dataInfo: MoneyInfo

  build() {
    Column() {
      Text('child:' + this.dataInfo.money)
      Button('花100块')
        .onClick(() => {
          this.dataInfo.money -= 100
        })
      ChildChild({ money: this.dataInfo.money })
    }
    .padding(20)
    .backgroundColor(Color.Pink)
  }
}

@Component
struct ChildChild {
  // 各玩各的
  // @State money: number = 0
  // 听爸爸的话
  // @Prop money: number
  // 团结一心
  @Link money: number

  // @Link dataInfo: MoneyInfo

  build() {
    Column() {
      Text('ChildChild:' + this.money)
      Button('花100块')
        .onClick(() => {
          this.money -= 100
        })
    }
    .padding(20)
    .backgroundColor(Color.Red)
  }
}

interface MoneyInfo {
  money: number
  bank: string
}
3. 状态共享-后代组件
:::info
如果我们的组件层级特别多,ArkTS支持跨组件传递状态数据来实现双向同步@Provide和 @Consume
这特别像Vue中的依赖注入
:::
- 改造刚刚的案例,不再层层传递,仍然可以实现效果
typescript
@Entry
@Component
struct ComponentQuestionCase1 {
  @Provide
  dataInfo: MoneyInfo1 = {
    money: 99999,
    bank: '中国银行'
  }

  build() {
    Column() {
      Text('father:' + this.dataInfo.money)
      Button('存100块')
        .onClick(() => {
          this.dataInfo.money += 100
        })
      CompQsChild1()
    }
    .padding(20)
    .width('100%')
    .height('100%')
  }
}

@Component
struct CompQsChild1 {
  // 各玩各的
  // @State money: number = 0
  // 听爸爸的话
  // @Prop money: number
  // 团结一心
  @Consume
  dataInfo: MoneyInfo1

  build() {
    Column() {
      Text('child:' + this.dataInfo.money)
      Button('花100块')
        .onClick(() => {
          this.dataInfo.money -= 100
        })
      ChildChild1()
    }
    .padding(20)
    .backgroundColor(Color.Pink)
  }
}

@Component
struct ChildChild1 {
  // 各玩各的
  // @State money: number = 0
  // 听爸爸的话
  // @Prop money: number
  // 团结一心
  @Consume
  dataInfo: MoneyInfo1

  // @Link dataInfo: MoneyInfo

  build() {
    Column() {
      Text('ChildChild:' + this.dataInfo.money)
      Button('花100块')
        .onClick(() => {
          this.dataInfo.money -= 100
        })
    }
    .padding(20)
    .backgroundColor(Color.Red)
  }
}

interface MoneyInfo1 {
  money: number
  bank: string
}
:::info
注意: 在不指定Provide名称的情况下,你需要使用相同的名字来定义和接收数据
:::
如果组件已有该命名变量,可以起别名进行提供/接收
:::info
1.提供起别名
@Provide('newName') 重起一个别名叫newName,后代就只能接收newName
:::

:::info
2.接收起别名
@Consume('ProvideName')
newName:类型
提供的时候没有起别名,接收的时候重起一个别名叫newName
:::
:::info
3.同理,提供的时候起了别名,接收的时候也需要起别名该怎么做呢?
:::
:::danger
注意:@Consume代表数据是接收的,不能有默认值
不要想太多,ArkTS所有内容都不支持深层数据更新 UI渲染
:::
- 后代传值-案例
:::success
黑马云音乐-播放状态传递

:::

:::info
各个页面共享同一个播放状态,而且可以互相控制,如果传递来传递去会非常的麻烦,但是他们都是Tabs组件内的,我们在index页面提供 一个状态,在各个组件接收 即可
:::
借用之前的TabbarCase进行改造

- 创建两个子组件,一个是播放控制的子组件,一个是背景播放的子组件
背景播放组件

typescript
@Component
struct BackPlayComp {
  @Consume
  isPlay:boolean
  build() {
    Row(){
      Row({space:20}){
        Image($r('app.media.b')).width(40)
        Text('耍猴的 - 二手月季')
      }
      Image(this.isPlay?$r('sys.media.ohos_ic_public_pause'):$r('sys.media.ohos_ic_public_play'))
        .width(20)
        .aspectRatio(1)
        .onClick(()=>{
          this.isPlay=!this.isPlay
        })
    }
    .width('100%')
    .padding({left:20,right:20,top:6,bottom:6})
    .backgroundColor(Color.Grey)
    .justifyContent(FlexAlign.SpaceBetween)
  }
}
export {BackPlayComp}
播放控制组件

typescript
@Component
struct PlayControlComp {
  @Consume
  isPlay:boolean
  build() {
    Row({space:20}){
      Image($r('sys.media.ohos_ic_public_play_last'))
        .width(20)
        .aspectRatio(1)

      Image(this.isPlay?$r('sys.media.ohos_ic_public_pause'):$r('sys.media.ohos_ic_public_play'))
        .width(20)
        .aspectRatio(1)
        .onClick(()=>{
          this.isPlay=!this.isPlay
        })

      Image($r('sys.media.ohos_ic_public_play_next'))
        .width(20)
        .aspectRatio(1)
    }
    .width('100%')
    .padding(20)
    .backgroundColor(Color.Pink)
    .justifyContent(FlexAlign.Center)
  }
}
export {PlayControlComp}
首页引用
typescript
import { BackPlayComp } from './components/ConnectComp'
import { PlayControlComp } from './components/WechatComp'

@Entry
@Component
struct TabBarCase {
  @State
  list: TabInterface[] = [
    {
      icon: $r("app.media.ic_public_message"),
      selectIcon: $r('app.media.ic_public_message_filled'),
      name: 'wechat',
      title: '微信',
    },
    {
      icon: $r('app.media.ic_public_contacts_group'),
      selectIcon: $r('app.media.ic_public_contacts_group_filled'),
      name: 'connect',
      title: '联系人',
    }, {
    icon: $r('app.media.ic_gallery_discover'),
    selectIcon: $r('app.media.ic_gallery_discover_filled'),
    name: 'discover',
    title: '发现',
  }, {
    icon: $r('app.media.ic_public_contacts'),
    selectIcon: $r('app.media.ic_public_contacts_filled'),
    name: 'my',
    title: '我的',
  }]
  // 组件内的
  @State
  currenIndex: number = 0

  @Provide
  isPlay:boolean = false
  @Builder
  tabBarItem(item: TabInterface) {
    Column({ space: 6 }) {
      Image(item.name === this.list[this.currenIndex].name ? item.selectIcon : item.icon)
        .width(20)
      Text(item.title)
        .fontSize(12)
        .fontColor(item.name === this.list[this.currenIndex].name ? '#1caa20' : '#000')
    }
  }

  build() {
    Row() {
      Stack({alignContent:Alignment.Bottom}) {
        Tabs({ index: $$this.currenIndex }) {
          ForEach(this.list, (item: TabInterface) => {
            TabContent() {
              //   切换展示的内容放这里
              // Text(item.title)
              if (item.name === 'wechat') {
                PlayControlComp()
              } else if (item.name === 'connect') {
                PlayControlComp()
              }

            }.tabBar(this.tabBarItem(item))
          })
        }.barPosition(BarPosition.End)
        BackPlayComp()
          .translate({
            y:-60
          })
      }
      .width('100%')
    }
    .height('100%')
  }
}

interface TabInterface {
  name: string
  icon: ResourceStr
  selectIcon: ResourceStr
  title: string
}
:::info
此时,各个页面共享了播放状态,只要任意地方进行改变,都能保持同步
:::
4. 状态共享-状态监听器
如果开发者需要关注某个状态变量的值是否改变,可以使用
@Watch为状态变量设置回调函数。Watch("回调函数名")中的回调必须在组件中声明,该函数接收一个参数,参数为修改的属性名
注意:Watch修饰符要写在 State Prop Link Provide的修饰符下面,否则会有问题
- 在第一次初始化的时候,@Watch装饰的方法不会被调用
前面我们做了一个'抖音'文字抖动效果,如果希望播放的时候希望文字抖动,暂停的时候文字暂停,如下

改造我们的播放控制组件,添加层叠的文字,并将写死的x,y方向的值设置为变量
typescript
@Component
struct PlayControlComp {
  @State
  shakenX:number = 0
  @State
  shakenY:number = 0
  @Consume
  isPlay:boolean

  build() {
    Column(){
      Stack(){
        Text('抖音')
          .fontSize(50)
          .fontWeight(FontWeight.Bold)
          .fontColor('#ff2d83b3')
          .translate({
            x:this.shakenX,
            y:this.shakenY
          })
          .zIndex(1)
        Text('抖音')
          .fontSize(50)
          .fontWeight(FontWeight.Bold)
          .fontColor('#ffe31fa9')
          .translate({
            x:this.shakenY,
            y:this.shakenX
          })
          .zIndex(2)

        Text('抖音')
          .fontSize(50)
          .fontWeight(FontWeight.Bold)
          .fontColor('#ff030000')
          .translate({
            x:0,
            y:0
          })
          .zIndex(3)
      }
      Row({space:20}){
        Image($r('sys.media.ohos_ic_public_play_last'))
          .width(20)
          .aspectRatio(1)

        Image(this.isPlay?$r('sys.media.ohos_ic_public_pause'):$r('sys.media.ohos_ic_public_play'))
          .width(20)
          .aspectRatio(1)
          .onClick(()=>{
            this.isPlay=!this.isPlay
          })

        Image($r('sys.media.ohos_ic_public_play_next'))
          .width(20)
          .aspectRatio(1)
      }
      .width('100%')
      .padding(20)
      .backgroundColor(Color.Pink)
      .justifyContent(FlexAlign.Center)
    }

  }
}
export {PlayControlComp}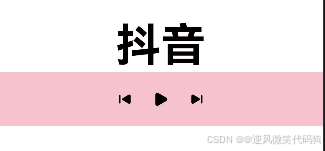
:::info
此时我们就可以用@Watch需要观察isPlay的属性了,只要isPlay变了就开始抖动文字
:::
typescript
  @Consume
  @Watch('update') //watch写在要监听的数据下方
  isPlay:boolean
  //监听的数据改变时会触发这个函数
  update(){
    if(this.isPlay){
      this.timer = setInterval(()=>{
        this.shakenX = 2 - Math.random()*4
        this.shakenY = 2 - Math.random()*4
      },100)
    }else{
      clearInterval(this.timer)
      this.shakenX = 0
      this.shakenY = 0
    }
}- 完整代码
typescript
@Component
struct PlayControlComp {
  @State
  shakenX:number = 0
  @State
  shakenY:number = 0
  timer:number = -1
  @Consume
  @Watch('update')
  isPlay:boolean
  update(){
    if(this.isPlay){
      this.timer = setInterval(()=>{
        this.shakenX = 2 - Math.random()*4
        this.shakenY = 2 - Math.random()*4
      },100)
    }else{
      clearInterval(this.timer)
      this.shakenX = 0
      this.shakenY = 0
    }
  }
  build() {
    Column(){
      Stack(){
        Text('抖音')
          .fontSize(50)
          .fontWeight(FontWeight.Bold)
          .fontColor('#ff2d83b3')
          .translate({
            x:this.shakenX,
            y:this.shakenY
          })
          .zIndex(1)
        Text('抖音')
          .fontSize(50)
          .fontWeight(FontWeight.Bold)
          .fontColor('#ffe31fa9')
          .translate({
            x:this.shakenY,
            y:this.shakenX
          })
          .zIndex(2)

        Text('抖音')
          .fontSize(50)
          .fontWeight(FontWeight.Bold)
          .fontColor('#ff030000')
          .translate({
            x:0,
            y:0
          })
          .zIndex(3)
      }
      Row({space:20}){
        Image($r('sys.media.ohos_ic_public_play_last'))
          .width(20)
          .aspectRatio(1)

        Image(this.isPlay?$r('sys.media.ohos_ic_public_pause'):$r('sys.media.ohos_ic_public_play'))
          .width(20)
          .aspectRatio(1)
          .onClick(()=>{
            this.isPlay=!this.isPlay
          })

        Image($r('sys.media.ohos_ic_public_play_next'))
          .width(20)
          .aspectRatio(1)
      }
      .width('100%')
      .padding(20)
      .backgroundColor(Color.Pink)
      .justifyContent(FlexAlign.Center)
    }

  }
}
export {PlayControlComp}
:::info
简单点说@Watch可以用于主动检测数据变化,需要绑定一个函数,当数据变化时会触发这个函数
:::
5. 综合案例 - 相册图片选取
基于我们已经学习过的单向、双向、后台、状态监听,我们来做一个综合案例,感受一下有了新的修饰符加成,再进行复杂的案例传值时,是否还想之前的知乎一样绕人

:::info
分析:
1.准备一个用于选择图片的按钮,点击展示弹层
2.准备弹层,渲染所有图片
3.图片添加点击事件,点击时检测选中数量后添加选中状态
4.点击确定,将选中图片同步给页面并关闭弹层
5.取消时,关闭弹层
:::
1-页面布局,准备一个选择图片的按钮并展示
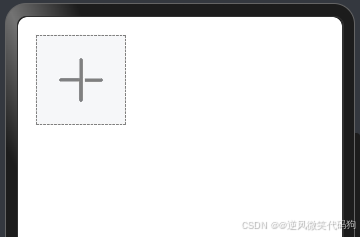
- 选择图片Builder
typescript
@Builder
export function SelectImageIcon() {
  Row() {
    Image($r('sys.media.ohos_ic_public_add'))
      .width('100%')
      .height('100%')
      .fillColor(Color.Gray)
  }
  .width('100%')
  .height('100%')
  .padding(20)
  .backgroundColor('#f5f7f8')
  .border({
    width: 1,
    color: Color.Gray,
    style: BorderStyle.Dashed
  })
}- 页面布局,使用Builder
typescript
import { SelectImageIcon } from './builders/SelectBuilder'
@Entry
@Component
struct ImageSelectCase {
build() {
Grid() {
GridItem() {
SelectImageIcon()
}.aspectRatio(1)
}
.padding(20)
.width('100%')
.height('100%')
.rowsGap(10)
.columnsGap(10)
.columnsTemplate('1fr 1fr 1fr')
}
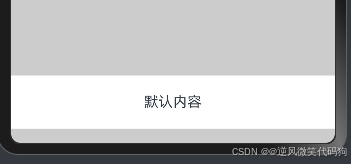
}2-准备弹层,点击时展示弹层
:::info
弹层的使用分为3步
1.声明弹层

2.注册弹层

3.使用弹层

:::
- 弹层组件
typescript
// 1.声明一个弹层
@CustomDialog
struct MyDialog {
  controller:CustomDialogController
  build() {
    Column() {
      Text('默认内容')
    }
    .width('100%')
    .padding(20)
    .backgroundColor('#fff')
  }
}

export { MyDialog }- 使用弹层
typescript
import { SelectImageIcon } from './builders/SelectBuilder'
import { MyDialog } from './components/CustomDialog'
@Entry
@Component
struct ImageSelectCase {
  // 2.注册弹层
  myDialogController:CustomDialogController = new CustomDialogController({
    builder:MyDialog()
  })
  build() {
    Grid() {
      GridItem() {
        SelectImageIcon()
      }.aspectRatio(1)
      .onClick(()=>{
          // 3.使用弹层
          this.myDialogController.open()
      })
    }
    .padding(20)
    .width('100%')
    .height('100%')
    .rowsGap(10)
    .columnsGap(10)
    .columnsTemplate('1fr 1fr 1fr')
  }
}
:::info
理想很丰满,显示很骨感,不论如何使用弹层,下方都会有一个空白边
这种下半屏或者全屏的展示不适合用CustomDialog,这里只做学习即可
我们看到的效果,更适合用通用属性bindSheet,半模态转场

需要传入三个参数:
第一个,是否显示模态框
第二个,模态框自定义构建函数
第三个(非必传),模态框的配置项
所以,我们进行改造
:::
typescript
import { SelectImageIcon } from './builders/SelectBuilder'
import { MyDialog } from './components/CustomDialog'
import { SelectImage } from './components/SelectImage'

@Entry
@Component
struct ImageSelectCase {
  // 2.注册弹层
  // myDialogController:CustomDialogController = new CustomDialogController({
  //   builder:MyDialog(),
  //   customStyle:true
  // })
  // 下方有留白,取消不了,换一种方案
  @State
  showDialog: boolean = false
  @State
  imageList: ResourceStr[] = [
    "assets/1.webp",
    "assets/2.webp",
    "assets/3.webp",
    "assets/4.webp",
    "assets/5.webp",
    "assets/6.webp",
    "assets/7.webp",
    "assets/8.webp",
    "assets/9.webp",
    "assets/10.webp"
  ]
  @State
  selectList: ResourceStr[] = []
  @State
  selectedList: ResourceStr[] = []

  @Builder
  ImageListBuilder() {
    // 大坑:最外层必须得是容器组件
    Column(){
      SelectImage({imageList:this.imageList})
    }
  }

  build() {
    Grid() {
      GridItem() {
        SelectImageIcon()
      }.aspectRatio(1)
      .onClick(() => {
        // 3.使用弹层
        // this.myDialogController.open()
        this.showDialog = true
      })
    }
    .padding(20)
    .width('100%')
    .height('100%')
    .rowsGap(10)
    .columnsGap(10)
    .columnsTemplate('1fr 1fr 1fr')
    .bindSheet($$this.showDialog, this.ImageListBuilder(), { showClose: false, height: '60%' })
  }
}
:::info
犹豫bindSheet需要一个builder,所以我们声明了一个builder
但是又考虑到了复用,如果其他地方也要选取图片怎么办?我们把内部又抽离成了一个组件
注意 :builder内部根级必须是内置组件
:::
typescript
@Component
struct SelectImage {
  @Prop
  imageList:ResourceStr[] = []
  build() {
    Column() {
      Row() {
        Text('取消')
        Text('已选中 0/9 张')
          .layoutWeight(1)
          .textAlign(TextAlign.Center)
        Text('确定')
      }.width('100%').padding(20)
      Grid() {
        ForEach(this.imageList, (item: ResourceStr) => {
          GridItem() {
              Image(item)
          }.aspectRatio(1)
        })
      }
      .padding(20)
      .layoutWeight(1)
      .rowsGap(10)
      .columnsGap(10)
      .columnsTemplate('1fr 1fr 1fr')
    }
    .width('100%')
    .height('100%')
    .backgroundColor('#f5f7f8')
  }
}
export { SelectImage }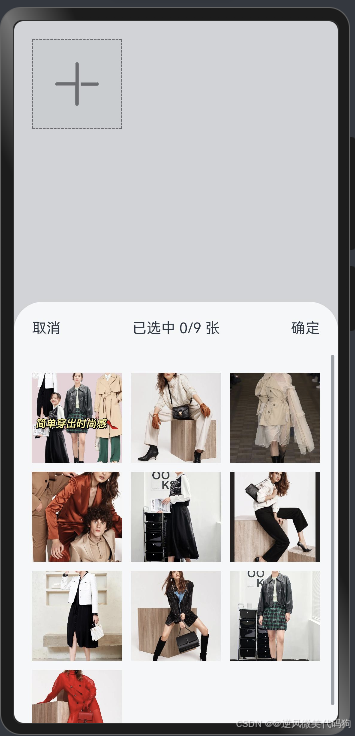
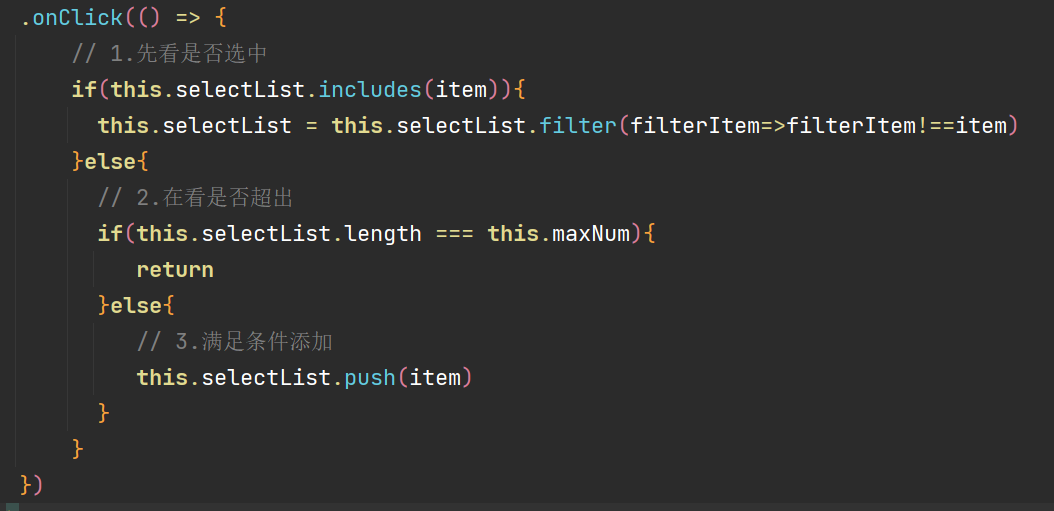
3-添加点击事件,设置选中状态
- 对图片进行改造,统一添加点击事件,并声明一个选中的列表用来收集选中的图片
typescript
@Component
struct SelectImage {
  @Prop
  imageList: ResourceStr[] = []
  @State
  selectList: ResourceStr[] = []

  build() {
    Column() {
      Row() {
        Text('取消')
        Text(`已选中${this.selectList.length}/9 张`)
          .layoutWeight(1)
          .textAlign(TextAlign.Center)
        Text('确定')
      }.width('100%').padding(20)
      Grid() {
        ForEach(this.imageList, (item: ResourceStr) => {
          GridItem() {
            Stack({ alignContent: Alignment.BottomEnd }) {
              Image(item)
              if (this.selectList.includes(item)) {
                Image($r('sys.media.ohos_ic_public_select_all'))
                  .width(30)
                  .aspectRatio(1)
                  .fillColor('#ff397204')
                  .margin(4)
              }
            }
          }
          .aspectRatio(1)
          .onClick(() => {
            this.selectList.push(item)
          })
        })
      }
      .padding(20)
      .layoutWeight(1)
      .rowsGap(10)
      .columnsGap(10)
      .columnsTemplate('1fr 1fr 1fr')
    }
    .width('100%')
    .height('100%')
    .backgroundColor('#f5f7f8')
  }
}

export { SelectImage }
:::info
选是能选了,但是选的多了,没有加限制,而且不一定每次都是选多张,所以把能选几张控制一下
包括选中的,要可以取消才行
:::

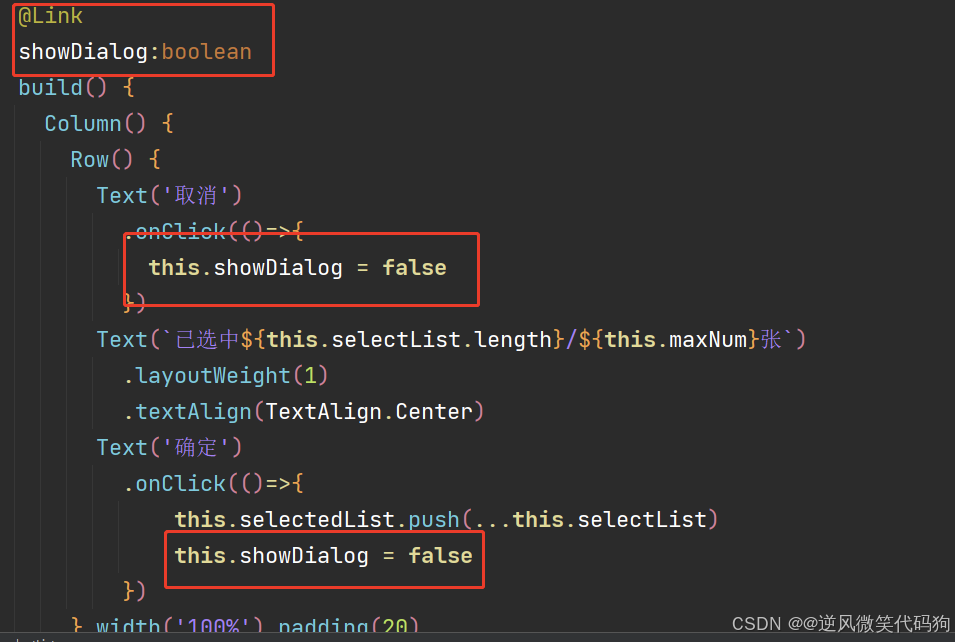
4-点击确定同步给页面
这个就类似于知乎的点赞了,子组件声明一个可以接收父组件传递过来改数据的方法,点确定的时候调用即可
但是,我们学习那么多的修饰符了,就没必要这么麻烦了,既然想子改父,完全可以父传子,用Link接收直接改
父传

子改

:::info
到这效果基本就完成了,最后一个关闭弹层,你能想到怎么做了吗?
:::
5.关闭弹层
:::info
再添加一个预览图片的需求,添加后的图片可以点击预览查看,该如何实现呢?
:::
绑定添加事件,用弹层展示图片
- 自定义弹层
typescript
// 1.声明一个弹层
@CustomDialog
struct MyDialog {
  controller:CustomDialogController
  @Prop
  selectedList:ResourceStr[] = []
  @State
  selectIndex:number = 0
  build() {
    Column() {
      Swiper(){
        ForEach(this.selectedList,(item:ResourceStr)=>{
          Image(item)
            .width('100%')
        })
      }.index($$this.selectIndex)
      Text(`${this.selectIndex+1}/${this.selectedList.length}`)
        .fontColor('#fff')
        .margin(20)
    }
    .width('100%')
    .height('100%')
    .backgroundColor('#000')
    .justifyContent(FlexAlign.Center)
    .onClick(()=>{
      this.controller.close()
    })
  }
}

export { MyDialog }- 使用弹层
typescript
import { SelectImageIcon } from './builders/SelectBuilder'
import { MyDialog } from './components/CustomDialog'
import { SelectImage } from './components/SelectImage'

@Entry
@Component
struct ImageSelectCase {
  @State
  selectedList: ResourceStr[] = []
  // 2.注册弹层
  myDialogController:CustomDialogController = new CustomDialogController({
    builder:MyDialog({
      // 传递的属性必须先声明
      selectedList:this.selectedList
    }),
    customStyle:true
  })
  // 下方有留白,取消不了,换一种方案
  @State
  showDialog: boolean = false
  @State
  imageList: ResourceStr[] = [
    "assets/1.webp",
    "assets/2.webp",
    "assets/3.webp",
    "assets/4.webp",
    "assets/5.webp",
    "assets/6.webp",
    "assets/7.webp",
    "assets/8.webp",
    "assets/9.webp",
    "assets/10.webp"
  ]


  @Builder
  ImageListBuilder() {
    // 大坑:最外层必须得是容器组件
    Column(){
      SelectImage({
        imageList:this.imageList,
        selectedList:this.selectedList,
        showDialog:this.showDialog
      })
    }
  }

  build() {
    Grid() {
      ForEach(this.selectedList,(item:ResourceStr)=>{
        GridItem() {
          Image(item)
        }.aspectRatio(1)
        .onClick(()=>{
          this.myDialogController.open()
        })
      })
      GridItem() {
        SelectImageIcon()
      }.aspectRatio(1)
      .onClick(() => {
        // 3.使用弹层
        // this.myDialogController.open()
        this.showDialog = true
      })
    }
    .padding(20)
    .width('100%')
    .height('100%')
    .rowsGap(10)
    .columnsGap(10)
    .columnsTemplate('1fr 1fr 1fr')
    .bindSheet($$this.showDialog, this.ImageListBuilder(), { showClose: false, height: '60%' })
  }
}
6. @Observed与@ObjectLink
:::info
之前讲解Link的时候,我们说了一个要求,就是只有@State或者@Link修饰的数据才能用,
如果是一个数组内有多个对象,将对象传递给子组件的时候就没有办法使用Link了
ArtTS支持 Observed和@ObjectLink来实现这个需求
:::
例如美团点菜,菜品肯定是一个数组,如果我们将每个菜品封装成组件
当对菜品进行修改的时候,就没法再用Link同步了

使用步骤:
- 使用
@Observed修饰这个类- 初始化数据:数据确保是通过
@Observed修饰的类new出来的- 通过
@ObjectLink修饰传递的数据,可以直接修改被关联对象来更新UI
模拟一个点菜的案例来演示用法
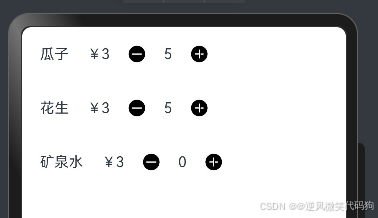
typescript
@Entry
@Component
struct ObservedObjectLinkCase {
  @State
  goodsList:GoodsTypeModel[] = [
    new GoodsTypeModel({
      name:'瓜子',
      price:3,
      count:0
    }),
    new GoodsTypeModel({
      name:'花生',
      price:3,
      count:0
    }),
    new GoodsTypeModel({
      name:'矿泉水',
      price:3,
      count:0
    })
  ]
  build() {
    Column(){
      ForEach(this.goodsList,(item:GoodsTypeModel)=>{
        // 2.确保传递的对象是new过observed修饰的
        GoodItemLink({
          goodItem:item
        })
      })
    }
  }
}

@Component
struct GoodItemLink {
  // 3.用ObjectLink修饰
  @ObjectLink
  goodItem:GoodsTypeModel
  build() {
    Row({space:20}){
      Text(this.goodItem.name)
      Text('¥'+this.goodItem.price)
      Image($r('sys.media.ohos_ic_public_remove_filled'))
        .width(20)
        .aspectRatio(1)
        .onClick(()=>{
          this.goodItem.count--
        })
      Text(this.goodItem.count.toString())
      Image($r('sys.media.ohos_ic_public_add_norm_filled'))
        .width(20)
        .aspectRatio(1)
        .onClick(()=>{
          this.goodItem.count++
        })
    }.width('100%').padding(20)
  }
}

interface GoodsType {
  name:string
  price:number
  count:number
}
// 1.使用observed修饰一个类
@Observed
export class GoodsTypeModel implements GoodsType {
  name: string = ''
  price: number = 0
  count: number = 0

  constructor(model: GoodsType) {
    this.name = model.name
    this.price = model.price
    this.count = model.count
  }
}
:::success
改造-知乎案例
点赞- 需求是当前数据的点赞量+1或者-1, 之前实际实现是: 把一条数据 给到父组件-替换了父组件的整行的数据, 并且造成了案例中头像的闪烁-因为这个组件数据被销毁然后被创建
理想效果: 其他一切都不动,只动数量的部分-也就是UI视图的局部更新- 需要使用Observed和ObjectLink
:::
typescript
@Observed
export class ReplyItemModel implements ReplyItem {
  avatar: ResourceStr = ''
  author: string = ''
  id: number = 0
  content: string = ''
  time: string = ''
  area: string = ''
  likeNum: number = 0
  likeFlag: boolean | null = null

  constructor(model: ReplyItem) {
    this.avatar = model.avatar
    this.author = model.author
    this.id = model.id
    this.content = model.content
    this.time = model.time
    this.area = model.area
    this.likeNum = model.likeNum
    this.likeFlag = model.likeFlag
  }
}- 给知乎的评论组件增加一个ObjectLink修饰符
typescript
 // 接收渲染的选项
  @ObjectLink
item: ReplyItemModel- 评论子组件实现点赞的方法
typescript
// 更新逻辑
  changeLike () {
    if(this.item.likeFlag) {
      // 点过赞
      this.item.likeNum--
    }
    else {
      // 没有点过赞
      this.item.likeNum++
    }
    this.item.likeFlag = !this.item.likeFlag // 取反
}- 父组件传值优化
typescript
 ForEach(this.commentList, (item: ReplyItemModel) => {
         ListItem() {
           HmCommentItem({
             item: item
           })
         }
       })
:::info
细节 :此时,我们的头像不再闪动,说明数据已经不需要去更新整条数据来让父组件完成UI的更新,而是子组件内部局部的更新
:::
:::info
注意点:
- ObjectLink只能修饰被Observed修饰的class类型
- Observed修饰的class的数据如果是复杂数据类型,需要采用赋值的方式才可以具备响应式特性-因为它只能监听到第一层
- 如果出现复杂类型嵌套,只需要Observed我们需要的class即可
- ObjectLink修饰符不能用在Entry修饰的组件中
:::
:::info
此知识点不太好理解,同学们一定一定多敲几遍!!!!!
:::
7. Next新增修饰符-Require-Track
:::success
Require修饰符
4.0的编辑器中- 如果子组件定义了Prop,那么父组件必须得传,不传则报错
Next版本中,如果你想让父组件必须传递一个属性给你的Prop,作为强制性的约束条件,可以使用Require修饰符
:::
:::success
Require修饰符只能作用在两个修饰符前面Prop BuilderParam
:::
typescript
@Entry
@Component
struct RequireCase {
  @State
  message: string = 'Hello World';

  @Builder
  parentContent(){
    Text('builderParam')
  }
  build() {
    Row() {
      Column() {
        RequireChild({
          message: this.message
        }){
          this.parentContent()
        }
      }
      .width('100%')
    }
    .height('100%')
  }
}


@Component
struct RequireChild {
  // 1.Prop
  @Require
  @Prop
  message: string
  // 2.BuilderParam
  @Require
  @BuilderParam
  defaultContent: () => void
  build() {
    Column() {
      Text(this.message)
      this.defaultContent()
    }
  }
}
:::success
Track修饰符- 只针对对象中的某个属性的更新起作用,其余没修饰的属性不能进行UI展示
:::
该修饰符不存在新的视觉效果,属于性能优化级的,改造知乎点赞,对数据添加@Track查看效果
typescript
export interface ReplyItem {
  avatar: ResourceStr // 头像
  author: string   // 作者
  id: number  // 评论的id
  content: string // 评论内容
  time: string // 发表时间
  area: string // 地区
  likeNum: number // 点赞数量
  likeFlag: boolean | null // 当前用户是否点过赞
}
@Observed
export class ReplyItemModel implements ReplyItem {
  @Track
  avatar: ResourceStr = ''
  @Track
  author: string = ''
  @Track
  id: number = 0
  @Track
  content: string = ''
  @Track
  time: string = ''
  @Track
  area: string = ''
  @Track
  likeNum: number = 0
  @Track
  likeFlag: boolean | null = null

  constructor(model: ReplyItem) {
    this.avatar = model.avatar
    this.author = model.author
    this.id = model.id
    this.content = model.content
    this.time = model.time
    this.area = model.area
    this.likeNum = model.likeNum
    this.likeFlag = model.likeFlag
  }
}
:::success
Track的作用只更新对象中的某些字段, Track修饰符用来作用在class中的某些字段,只有被标记的字段才会更新,并且没有被Track标记的字段不能被使用
场景:
假如只想根据对象中某个字段来更新或者渲染视图 就可以使用Track
:::
3.应用状态
:::success
State 组件内状态
Prop 父组件传入
Link 父组件传入
Provide 跨级组件传入
Consume 跨级组件接收
ObjectLink 父组件传入局部更新状态
:::
:::info
ArtTS提供了好几种状态用来帮助我们管理我们的全局数据
- LocalStorage-UIAbility状态(内存- 注意:和前端的区分开,它非持久化,非全应用)
- AppStorage- 应用内状态-多UIAbility共享-(内存-非持久化-退出应用同样消失)
- PersistentStorage-全局持久化状态(写入磁盘-持久化状态-退出应用 数据同样存在)
- 首选项- 写入磁盘
- 关系型数据库 - 写入磁盘
- 端云数据库
- 接口调用-云端数据(服务器数据)
:::
1. UIAbility内状态-LocalStorage
:::info
LocalStorage 是页面级的UI状态存储,通过 @Entry 装饰器接收的参数可以在页面内共享同一个 LocalStorage 实例。 LocalStorage 也可以在 UIAbility 内,页面间共享状态。
用法
-
创建
LocalStorage实例:const storage = new LocalStorage({ key: value }) -
单向
@LocalStorageProp('user')组件内可变 -
双向
@LocalStorageLink('user')全局均可变:::
案例-修改用户信息
-
创建一个LocalStorage,用于各个页面间共享数据
:::info
步骤:
1.准备一个含有类型声明的对象作为共享数据
2.将数据传入new LocalStorage(),得到可以共享的对象
3.导入共享对象,在需要使用的页面导入该对象,并传入@Entry
4.声明一个变量,用@LocalStorageProp或@LocalStorageLink修饰进行接收
5.使用声明的变量进行渲染
:::
-
LocalStorage的声明与导出
typescript
// self是要共享的数据
const   self: Record<string, ResourceStr> = {
  'age': '18',
  'nickName': '一介码农',
  'gender': '男',
  'avtar': $r('app.media.b')
}
// localUserInfo是共享的数据
export const localUserInfo = new LocalStorage(self)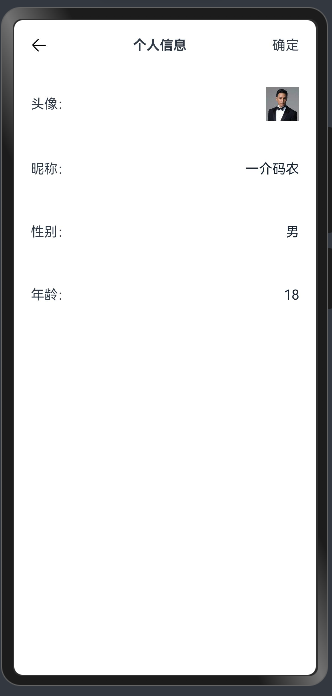
页面结构直接复制粘贴即可
typescript
@Entry
@Component
struct LocalStorageCase01 {
  build() {
    Column() {
      Row() {
        Image($r('sys.media.ohos_ic_back'))
          .width(20)
          .aspectRatio(1)
        Text('个人信息1')
          .fontWeight(FontWeight.Bold)
          .layoutWeight(1)
          .textAlign(TextAlign.Center)
        Text('确定')
      }.width('100%')
      .padding(20)
      .alignItems(VerticalAlign.Center)

      Row() {
        Text('头像:')
        Image('')
          .width(40)
      }.width('100%')
      .padding(20)
      .justifyContent(FlexAlign.SpaceBetween)

      Row() {
        Text('昵称:')
        TextInput({ text: '' })
          .textAlign(TextAlign.End)
          .layoutWeight(1)
          .backgroundColor('#fff')
          .padding({
            right: 0
          })
      }.width('100%')
      .padding(20)
      .justifyContent(FlexAlign.SpaceBetween)

      Row() {
        Text('性别:')
        TextInput({ text: '' })
          .textAlign(TextAlign.End)
          .layoutWeight(1)
          .backgroundColor('#fff')
          .padding({
            right: 0
          })
      }.width('100%')
      .padding(20)
      .justifyContent(FlexAlign.SpaceBetween)

      Row() {
        Text('年龄:')
        TextInput({ text: '' })
          .textAlign(TextAlign.End)
          .layoutWeight(1)
          .backgroundColor('#fff')
          .padding({
            right: 0
          })
      }.width('100%')
      .padding(20)
      .justifyContent(FlexAlign.SpaceBetween)
    }
    .width('100%')
    .height('100%')
  }
}- 页面引用并传递共享的数据进行使用
typescript
// 1.引入可以共享的数据
import { localUserInfo } from './LocalStorageModel'
import { router } from '@kit.ArkUI'

// 2.传递给页面
@Entry(localUserInfo)
@Component
struct LocalStorageCase02 {
  // 3.使用localUserInfo

  @LocalStorageLink('avtar')
  avtar: ResourceStr = ''
  @LocalStorageLink('nickName')
  nickName: ResourceStr = ''
  @LocalStorageLink('gender')
  gender: ResourceStr = ''
  @LocalStorageLink('age')
  age: ResourceStr = ''

  build() {
    Column() {
      Row() {
        Image($r('sys.media.ohos_ic_back'))
          .width(20)
          .aspectRatio(1)
          .onClick(()=>{
            router.back()
          })
        Text('个人信息2')
          .fontWeight(FontWeight.Bold)
          .layoutWeight(1)
          .textAlign(TextAlign.Center)
        Text('确定')
      }.width('100%')
      .padding(20)
      .alignItems(VerticalAlign.Center)

      Row() {
        Text('头像:')
        Image(this.avtar)
          .width(40)
      }.width('100%')
      .padding(20)
      .justifyContent(FlexAlign.SpaceBetween)

      Row() {
        Text('昵称:')
        TextInput({ text: $$this.nickName })
          .textAlign(TextAlign.End)
          .layoutWeight(1)
          .backgroundColor('#fff')
          .padding({
            right: 0
          })
      }.width('100%')
      .padding(20)
      .justifyContent(FlexAlign.SpaceBetween)

      Row() {
        Text('性别:')
        TextInput({ text: $$this.gender})
          .textAlign(TextAlign.End)
          .layoutWeight(1)
          .backgroundColor('#fff')
          .padding({
            right: 0
          })
      }.width('100%')
      .padding(20)
      .justifyContent(FlexAlign.SpaceBetween)

      Row() {
        Text('年龄:')
        TextInput({ text: $$this.age })
          .textAlign(TextAlign.End)
          .layoutWeight(1)
          .backgroundColor('#fff')
          .padding({
            right: 0
          })
      }.width('100%')
      .padding(20)
      .justifyContent(FlexAlign.SpaceBetween)
    }
    .width('100%')
    .height('100%')
  }
}- 新建一个页面,将共享的数据同时作用到两个页面,router.pushUrl可以跳转页面
typescript
//跳转
Text('修改')
          .onClick(()=>{
            router.pushUrl({
              url:'pages/08/LocalStorageDemo/LocalStorageCase01'
            })
          })
//返回
 Image($r('sys.media.ohos_ic_back'))
          .width(20)
          .aspectRatio(1)
          .onClick(()=>{
            router.back()
})- 使用LocalStorageLink实现双向绑定
typescript
  @LocalStorageLink('nickName')
  nickName:string = ''
:::info
- 将LocalStorage实例从UIAbility共享到一个或多个视图,参考 官方示例
- 使用场景:
服务卡片-只能通过LocalStorage进行接收参数
:::
typescript
import { AbilityConstant, UIAbility, Want } from '@kit.AbilityKit';
import { hilog } from '@kit.PerformanceAnalysisKit';
import { window } from '@kit.ArkUI';

export default class EntryAbility extends UIAbility {
  // self是要共享的数据
  self: Record<string, ResourceStr> = {
    'age': '19',
    'nickName': '一介码农',
    'gender': '男',
    'avtar': $r('app.media.b')
  }
  // localUserInfo是共享的数据
  localUserInfo:LocalStorage = new LocalStorage(this.self)
  onCreate(want: Want, launchParam: AbilityConstant.LaunchParam): void {
    hilog.info(0x0000, 'testTag', '%{public}s', 'Ability onCreate');
  }

  onDestroy(): void {
    hilog.info(0x0000, 'testTag', '%{public}s', 'Ability onDestroy');
  }

  onWindowStageCreate(windowStage: window.WindowStage): void {
    windowStage.loadContent('pages/08/LocalStorage/LocalStorage02',this.localUserInfo );
  }

  onWindowStageDestroy(): void {
    // Main window is destroyed, release UI related resources
    hilog.info(0x0000, 'testTag', '%{public}s', 'Ability onWindowStageDestroy');
  }

  onForeground(): void {
    // Ability has brought to foreground
    hilog.info(0x0000, 'testTag', '%{public}s', 'Ability onForeground');
  }

  onBackground(): void {
    // Ability has back to background
    hilog.info(0x0000, 'testTag', '%{public}s', 'Ability onBackground');
  }
}
2. 应用状态-AppStorage
LocalStorage是针对UIAbility的状态共享- 一个UIAbility有个页面
一个应用可能有若干个UIAbility
:::success
概述
AppStorage是在应用启动的时候会被创建的单例。它的目的是为了提供应用状态数据的中心存储,这些状态数据在应用级别都是可访问的。AppStorage将在应用运行过程保留其属性。属性通过唯一的键字符串值访问。
AppStorage可以和UI组件同步,且可以在应用业务逻辑中被访问。
AppStorage支持应用的主线程内多个UIAbility实例间的状态共享。
AppStorage中的属性可以被双向同步,数据可以是存在于本地或远程设备上,并具有不同的功能,比如数据持久化(详见PersistentStorage)。这些数据是通过业务逻辑中实现,与UI解耦,如果希望这些数据在UI中使用,需要用到@StorageProp和@StorageLink。
:::
:::info
AppStorage 是应用全局的UI状态存储,是和应用的进程绑定的,由UI框架在应用程序启动时创建,为应用程序UI状态属性提供中央存储。-注意它也是内存数据,不会写入磁盘
第一种用法-使用UI修饰符
- **如果是初始化使用 **
**AppStorage.setOrCreate(key,value)** - 单向
**@StorageProp('user')**组件内可变 - 双向
**@StorageLink('user')**全局均可变
第二种用法 使用API方法
-
**AppStorage.get<ValueType>(key)**** 获取数据** -
**AppStorage.set<ValueType>(key,value)**** 覆盖数据**:::
:::success
AppStorage.setOrCreate("", T) // 创建或者设置某个字段的属性
AppStorage.get("") // 获取的全局状态类型
如果遇到获取数据的类型为空,可以用if判断,也可以用非空断言来解决
StorageLink . - 直接修改-自动同步到全局状态
StorageProp- 可以改,只会在当前组件生效,只是改的全局状态的副本,不会对全局状态产生影响
:::
准备两个页面,A页面登录获取用户信息,B页面展示修改
-
A页面登录模版,用于存入AppStorage
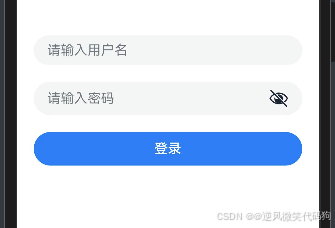
typescript
@Entry
@Component
struct AppStorageCase01 {
  @State
  username: string = ""
  @State
  password: string = ""
  build() {
    Row() {
      Column({ space: 20 }) {
        TextInput({ placeholder: '请输入用户名', text: $$this.username })
        TextInput({ placeholder: '请输入密码', text: $$this.password })
          .type(InputType.Password)
        Button("登录")
          .width('100%')
      }
      .padding(20)
      .width('100%')
    }
    .height('100%')
  }
}- B页面登录模版,用于展示AppStorage

typescript
@Entry
@Component
struct AppStorageCase02 {
  build() {
    Column() {
      Row({ space: 20 }) {
        Image($r('app.media.b'))
          .width(60)
          .aspectRatio(1)
          .borderRadius(30)
        Column({ space: 10 }) {
          Text('姓名:老潘')
          Text(`年龄:18岁`)
        }
      }
      .alignItems(VerticalAlign.Center)
      .padding(20)
      .width('100%')

      Button("退出")
    }
    .width('100%')
    .height('100%')
  }
}- A页面点击登录
typescript
import { router } from '@kit.ArkUI'

@Entry
@Component
struct AppStorageCase01 {
  @State
  username: string = ""
  @State
  password: string = ""
  login(){
    const userInfo:Record<string,string> = {
      'name':'一介码农',
      'age':'99',
    }
    AppStorage.setOrCreate<Record<string,string>>('userInfo',userInfo)
    router.pushUrl({
      url:'pages/08/AppStorageDemo/AppStorageCase1'
    })
  }
  build() {
    Row() {
      Column({ space: 20 }) {
        TextInput({ placeholder: '请输入用户名', text: $$this.username })
        TextInput({ placeholder: '请输入密码', text: $$this.password })
          .type(InputType.Password)
        Button("登录")
          .width('100%')
          .onClick(()=>{
            this.login()
          })
      }
      .padding(20)
      .width('100%')
    }
    .height('100%')
  }
}- B页面展示登录信息
typescript
@Entry
@Component
struct AppStorageCase02 {
  // 用法1
  // @StorageProp('userInfo')
  // userInfo:Record<string,string> = {}
  // 用法2
  @State
  userInfo:Record<string,string> = {}
  aboutToAppear(): void {
    const userInfo = AppStorage.get<Record<string,string>>('userInfo')
    this.userInfo = userInfo!
  }
  build() {
    Column() {
      Row({ space: 20 }) {
        Image($r('app.media.b'))
          .width(60)
          .aspectRatio(1)
          .borderRadius(30)
        Column({ space: 10 }) {
          Text(`姓名:${this.userInfo.name}`)
          Text(`年龄:${this.userInfo.age}岁`)
        }
      }
      .alignItems(VerticalAlign.Center)
      .padding(20)
      .width('100%')

      Button("退出")
        .onClick(()=>{
          AppStorage.set('userInfo',null)
          router.back()
        })
    }
    .width('100%')
    .height('100%')
  }
}
新建一个Ability,打开新的UIAbility查看状态
arkts
 let want:Want = {
      'deviceId': '', // deviceId为空表示本设备
      'bundleName': 'com.example.harmonyos_next_base',
      'abilityName': 'EntryAbility1',
    };
    (getContext() as common.UIAbilityContext).startAbility(want)
3. 状态持久化-PersistentStorage
:::info
前面讲的所有状态均为内存状态,也就是应用退出便消失,所以如果我们想持久化的保留一些数据,应该使用
PersistentStorage。
注意:
UI和业务逻辑不直接访问 PersistentStorage 中的属性,所有属性访问都是对 AppStorage 的访问,AppStorage 中的更改会自动同步到 PersistentStorage。
也就是,我们和之前访问AppStorage是一样的,只不过需要提前使用PersistentStorage来声明
:::
PersistentStorage将选定的AppStorage属性保留在设备磁盘上。
:::warning
- 支持:number, string, boolean, enum 等简单类型;
- 如果:要支持对象类型,可以转换成json字符串
- 持久化变量最好是小于2kb的数据,如果开发者需要存储大量的数据,建议使用数据库api。
用法:
PersistentStorage.PersistProp('属性名', 值)
注意: 如果用了持久化, 那么AppStorage读取出来的对象实际上是PersistentStorage存储的json字符串
如果没用持久化 。那么读取出来的对象就是AppStorage对象
:::
将刚刚的token直接持久化存储
typescript
PersistentStorage.PersistProp("user", '123') // 初始化磁盘,给一个读取不到时加载的默认值:::info
只要初始化了数据,我们以后使用AppStorage就可以读取和设置,它会自动同步到我们的磁盘上
目前不支持复杂对象的持久化,如果你需要存储,你需要把它序列化成功字符串
- 测试:需要在真机或模拟器调试
:::

大家可以在上一个例子之前添加 PersistentStorage.PersistProp('属性名', 值)
然后直接使用AppStorage进行set就可以了,设置完成之后,使用模拟器先把任务销毁,然后再查看数据是否显示
:::success
限制条件
PersistentStorage允许的类型和值有:
- number, string, boolean, enum 等简单类型。
- 可以被JSON.stringify()和JSON.parse()重构的对象。例如Date, Map, Set等内置类型则不支持,以及对象的属性方法不支持持久化。
PersistentStorage不允许的类型和值有:
- 不支持嵌套对象(对象数组,对象的属性是对象等)。因为目前框架无法检测AppStorage中嵌套对象(包括数组)值的变化,所以无法写回到PersistentStorage中。
- 不支持undefined 和 null 。
持久化数据是一个相对缓慢的操作,应用程序应避免以下情况:
- 持久化大型数据集。
- 持久化经常变化的变量。
PersistentStorage的持久化变量最好是小于2kb的数据,不要大量的数据持久化,因为PersistentStorage写入磁盘的操作是同步的,大量的数据本地化读写会同步在UI线程中执行,影响UI渲染性能。如果开发者需要存储大量的数据,建议使用数据库api。
PersistentStorage只能在UI页面内使用,否则将无法持久化数据。
:::
4. 状态持久化-preferences首选项
:::success
此时此刻,需要做一件事, 有token跳转到主页,没有token跳转到登录
:::
:::success
首选项
- 每一个key的value的长度最大为8kb
- 创建首选项-仓库的概念- 应用可以有N个仓库,一个仓库中可以有N个key
:::
typescript
import { Context } from '@kit.AbilityKit'
import { preferences } from '@kit.ArkData'
// 两种方式引入的是同一个东西
// import preferences from '@ohos.data.preferences'

export class PreferencesClass {
  // static代表的是静态,可以直接通过类访问
  // store名称
  static defaultStore: string = 'DEFAULT_STORE'
  static firstStore: string = 'FIRST_STORE'
  // 字段名称,一个字段配2个方法,读取和写入
  static tokenKey:string = 'TOKEN_KEY'
  //   仓库中存储字段
  static setToken(content:Context,token:string,storeName:string=PreferencesClass.defaultStore){
    const store = preferences.getPreferencesSync(content,{name:storeName})
    store.putSync(PreferencesClass.tokenKey,token)
    store.flush()
  }
  //   读取仓库中字段
  static getToken(content:Context,storeName:string=PreferencesClass.defaultStore){
    const store = preferences.getPreferencesSync(content,{name:storeName})
    return store.getSync(PreferencesClass.tokenKey,'')
  }
}- 在ability中判断

5. 设备状态-Environment(了解)
:::info
开发者如果需要应用程序运行的设备的环境参数,以此来作出不同的场景判断,比如多语言,暗黑模式等,需要用到Environment设备环境查询。
:::

- 1.将设备的色彩模式存入AppStorage,默认值为Color.LIGHT
arkts
Environment.EnvProp('colorMode', Color.LIGHT);- 2.可以使用@StorageProp进行查询,从而实现不同UI
typescript
@StorageProp('colorMode')
lang : bgColor = Color.White';
- 该环境变量只能查询后写入AppStorage,可以在AppStorage中进行修改,改目前使用场景比较鸡肋,作为面试知识点储备即可
typescript
// 使用Environment.EnvProp将设备运行languageCode存入AppStorage中;
Environment.EnvProp('colorMode', 'en');
// 从AppStorage获取单向绑定的languageCode的变量
const lang: SubscribedAbstractProperty<string> = AppStorage.Prop('colorMode');

if (lang.get() ===  Color.LIGHT) {
  console.info('亮色');
} else {
  console.info('暗色');
}
4.网络管理(需要模拟器)
1. 应用权限
ATM (AccessTokenManager) 是HarmonyOS上基于AccessToken构建的统一的应用权限管理能力
应用权限保护的对象可以分为数据和功能:
- 数据包含了个人数据(如照片、通讯录、日历、位置等)、设备数据(如设备标识、相机、麦克风等)、应用数据。
- 功能则包括了设备功能(如打电话、发短信、联网等)、应用功能(如弹出悬浮框、创建快捷方式等)等。
根据授权方式的不同,权限类型可分为system_grant(系统授权)和user_grant(用户授权)。
- 配置文件权限声明
- 向用户申请授权
例如:访问网络需要联网权限
system_grant(系统授权)配置后直接生效
json
{
"module" : {
// ...
"requestPermissions":[
{
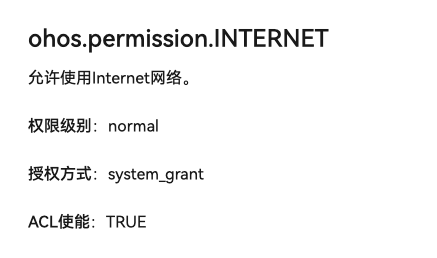
"name" : "ohos.permission.INTERNET"
}
]
}
}例如:获取地址位置权限
user_grant(用户授权)向用户申请

1.首先在module.json5中配置权限申请地址位置权限
json
{
  "module" : {
    // ...
    "requestPermissions":[
      {
        "name" : "ohos.permission.INTERNET"
      },
      {
        "name": "ohos.permission.APPROXIMATELY_LOCATION",
        "reason": "$string:permission_location",
        "usedScene": {"abilities": ["EntryAbility"]}
      }
    ]
  }
}
2.在ability中申请用户授权

通过abilityAccessCtrl创建管理器进行申请权限
json
 async onCreate(want: Want, launchParam: AbilityConstant.LaunchParam): Promise<void> {
    const manager = abilityAccessCtrl.createAtManager() // 创建程序控制管理器
    await manager.requestPermissionsFromUser(this.context,
      [
        "ohos.permission.APPROXIMATELY_LOCATION"
      ])
  }
开启权限后可以获取经纬度坐标

json
import { geoLocationManager } from '@kit.LocationKit';

@Entry
@Component
struct HuaweiMapDemo {
  @State
  result:geoLocationManager.Location  = {} as geoLocationManager.Location
  build() {
    Column() {
      Button('获取经纬度')
        .onClick(async ()=>{
          this.result = await geoLocationManager.getCurrentLocation()
        })
      Text('经度:'+this.result.latitude)
      Text('纬度:'+this.result.longitude)
    }.height('100%')
  }
}
2. HTTP请求(需要模拟器)
:::success
request接口开发步骤
- 从@ohos.net.http.d.ts中导入http命名空间。
- 调用createHttp()方法,创建一个HttpRequest对象。
- 调用该对象的on()方法,订阅http响应头事件,此接口会比request请求先返回。可以根据业务需要订阅此消息。
- 调用该对象的request()方法,传入http请求的url地址和可选参数,发起网络请求。
- 按照实际业务需要,解析返回结果。
- 调用该对象的off()方法,取消订阅http响应头事件。
- 当该请求使用完毕时,调用destroy()方法主动销毁。
:::
typescript
// 引入包名
import http from '@ohos.net.http';
import { BusinessError } from '@ohos.base';
// 每一个httpRequest对应一个HTTP请求任务,不可复用
let httpRequest = http.createHttp();
// 用于订阅HTTP响应头,此接口会比request请求先返回。可以根据业务需要订阅此消息
// 从API 8开始,使用on('headersReceive', Callback)替代on('headerReceive', AsyncCallback)。 8+
httpRequest.on('headersReceive', (header) => {
console.info('header: ' + JSON.stringify(header));
});
httpRequest.request(
// 填写HTTP请求的URL地址,可以带参数也可以不带参数。URL地址需要开发者自定义。请求的参数可以在extraData中指定
"EXAMPLE_URL",
{
method: http.RequestMethod.POST, // 可选,默认为http.RequestMethod.GET
// 开发者根据自身业务需要添加header字段
header: [{
'Content-Type': 'application/json'
}],
// 当使用POST请求时此字段用于传递内容
extraData: "data to send",
expectDataType: http.HttpDataType.STRING, // 可选,指定返回数据的类型
usingCache: true, // 可选,默认为true
priority: 1, // 可选,默认为1
connectTimeout: 60000, // 可选,默认为60000ms
readTimeout: 60000, // 可选,默认为60000ms
usingProtocol: http.HttpProtocol.HTTP1_1, // 可选,协议类型默认值由系统自动指定
usingProxy: false, // 可选,默认不使用网络代理,自API 10开始支持该属性
caPath:'/path/to/cacert.pem', // 可选,默认使用系统预制证书,自API 10开始支持该属性
clientCert: { // 可选,默认不使用客户端证书,自API 11开始支持该属性
certPath: '/path/to/client.pem', // 默认不使用客户端证书,自API 11开始支持该属性
keyPath: '/path/to/client.key', // 若证书包含Key信息,传入空字符串,自API 11开始支持该属性
certType: http.CertType.PEM, // 可选,默认使用PEM,自API 11开始支持该属性
keyPassword: "passwordToKey" // 可选,输入key文件的密码,自API 11开始支持该属性
},
multiFormDataList: [ // 可选,仅当Header中,'content-Type'为'multipart/form-data'时生效,自API 11开始支持该属性
{
name: "Part1", // 数据名,自API 11开始支持该属性
contentType: 'text/plain', // 数据类型,自API 11开始支持该属性
data: 'Example data', // 可选,数据内容,自API 11开始支持该属性
remoteFileName: 'example.txt' // 可选,自API 11开始支持该属性
}, {
name: "Part2", // 数据名,自API 11开始支持该属性
contentType: 'text/plain', // 数据类型,自API 11开始支持该属性
// data/app/el2/100/base/com.example.myapplication/haps/entry/files/fileName.txt
filePath: `${getContext(this).filesDir}/fileName.txt`, // 可选,传入文件路径,自API 11开始支持该属性
remoteFileName: 'fileName.txt' // 可选,自API 11开始支持该属性
}
]
}, (err: BusinessError, data: http.HttpResponse) => {
if (!err) {
// data.result为HTTP响应内容,可根据业务需要进行解析
console.info('Result:' + JSON.stringify(data.result));
console.info('code:' + JSON.stringify(data.responseCode));
// data.header为HTTP响应头,可根据业务需要进行解析
console.info('header:' + JSON.stringify(data.header));
console.info('cookies:' + JSON.stringify(data.cookies)); // 8+
// 当该请求使用完毕时,调用destroy方法主动销毁
httpRequest.destroy();
} else {
console.error('error:' + JSON.stringify(err));
// 取消订阅HTTP响应头事件
httpRequest.off('headersReceive');
// 当该请求使用完毕时,调用destroy方法主动销毁
httpRequest.destroy();
}
}
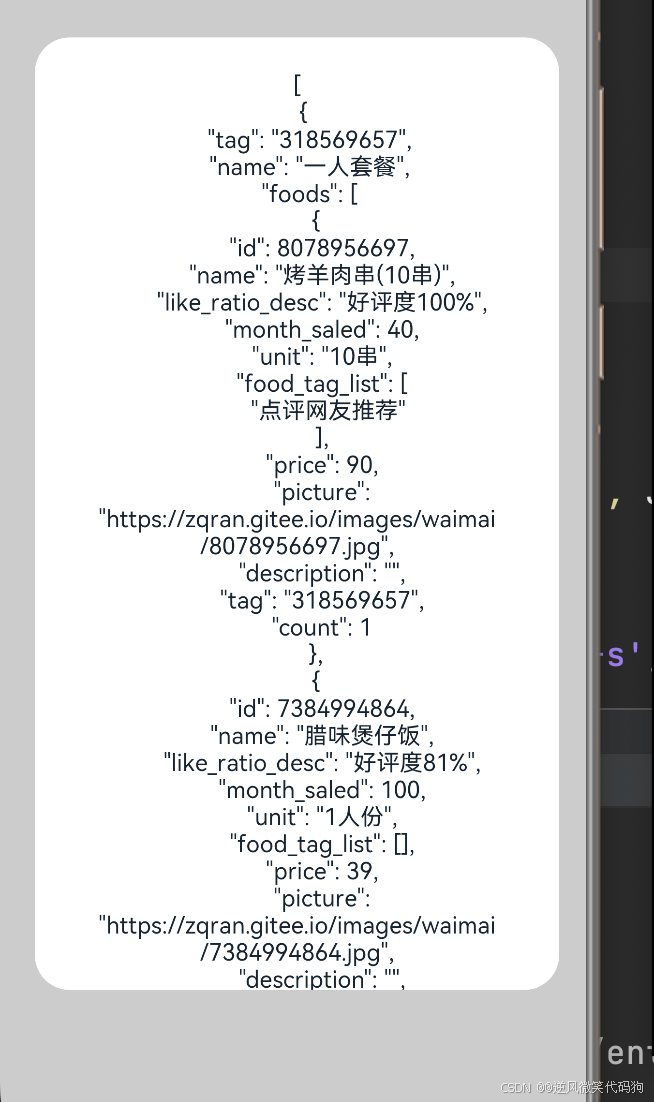
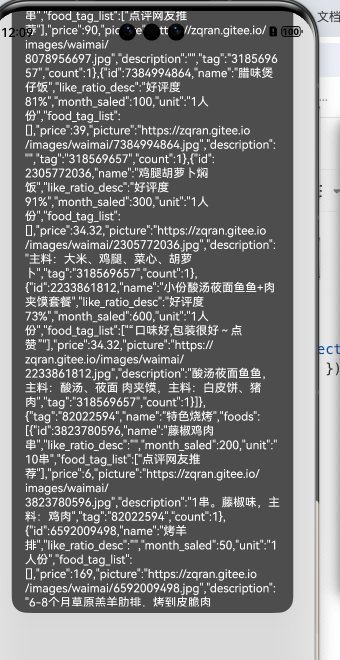
);美团外卖接口地址: https://zhousg.atomgit.net/harmonyos-next/takeaway.json
2)使用 @ohos.net.http 模块发请求
typescript
import http from '@ohos.net.http'

@Entry
@Component
struct HttpCase {
  aboutToAppear() {
    this.getMeiTuanData()
  }

  async getMeiTuanData() {
    try {
      const req = http.createHttp()
      const res = await  req.request("https://zhousg.atomgit.net/harmonyos-next/takeaway.json")
      AlertDialog.show({
        message: res.result as string
      })
    } catch (e) {

    }

  }

  build() {
    Row() {
      Column() {

      }
      .width('100%')
    }
    .height('100%')
  }
}
:::success
使用第三方包 axios
:::
:::success
openharmony中心仓地址
:::
- 安装axios
bash
$ ohpm install @ohos/axios- 发起请求
typescript
import axios, { AxiosResponse } from '@ohos/axios'
import { promptAction } from '@kit.ArkUI';

@Entry
@Component
struct HttpCase {
  @State message: string = 'Hello World';

  async getData() {
    const result = await axios.get<object, AxiosResponse<object,null>>("https://zhousg.atomgit.net/harmonyos-next/takeaway.json")
    promptAction.showToast({ message: JSON.stringify(result) })
  }

  build() {
    Row() {
      Column() {
        Text(this.message)
          .fontSize(50)
          .fontWeight(FontWeight.Bold)
        Button("测试请求")
          .onClick(() => {
            this.getData()
          })
      }
      .width('100%')
    }
    .height('100%')
  }
}
interface Data {
  name: string
}
5.今日案例-美团外卖
:::success
准备基础色值
在一个标准项目中,应该会有几套标准的配色,此时可以使用resources/base/element/color.json来帮我们统一管理,使用时使用$r("app.color.xxx")来取值即可
:::
- 将color赋值到resources/base/element/color.json中
json
{
  "color": [
    {
      "name": "start_window_background",
      "value": "#FFFFFF"
    },
    {
      "name": "white",
      "value": "#FFFFFF"
    },
    {
      "name": "black",
      "value": "#000000"
    },
    {
      "name": "bottom_back",
      "value": "#222426"
    },
    {
      "name": "main_color",
      "value": "#f8c74e"
    },
    {
      "name": "select_border_color",
      "value": "#fa0"
    },
    {
      "name": "un_select_color",
      "value": "#666"
    },
    {
      "name": "search_back_color",
      "value": "#eee"
    },
    {
      "name": "search_font_color",
      "value": "#999"
    },
    {
      "name": "food_item_second_color",
      "value": "#333"
    },
    {
      "name": "food_item_label_color",
      "value": "#fff5e2"
    },
    {
      "name": "top_border_color",
      "value": "#e4e4e4"
    },
    {
      "name": "left_back_color",
      "value": "#f5f5f5"
    },{
      "name": "font_main_color",
      "value": "#ff8000"
    }
  ]
}
!

1. 目录结构-入口页面
:::success
新建如下目录结构
pages
-MeiTuan
-api
-components
-models
-utils
-MTIndex.ets(Page)
:::
- 在MTIndex.ets中设置基础布局
typescript
@Entry
  @Component
  struct MTIndex {
    build() {
      Column() {

      }
      .width('100%')
        .height("100%")
        .backgroundColor($r("app.color.white"))
    }
  }
- 新建MTTop-MTMain-MTBottom三个组件-在components目录下
typescript
@Component
struct MTMain {
  build() {
    Text("MTMain")
  }
}
export default MTMain
typescript
@Component
struct MTTop {
  build() {
    Text("MTTop")
  }
}
export default MTTop
typescript
@Component
struct MTBottom {
  build() {
    Text("MTBottom")
  }
}
export default MTBottom- 在MTIndex.ets中放入
typescript
import MTBottom from './components/MTBottom'
import MTMain from './components/MTMain'
import MTTop from './components/MTTop'

@Entry
@Component
struct MTIndex {
  build() {
    Column() {
      Stack({ alignContent: Alignment.Bottom }) {
        Column() {
          MTTop()
          MTMain()
        }
        .height("100%")
        MTBottom()
      }.layoutWeight(1)
    }
    .width('100%')
    .height("100%")
    .backgroundColor($r("app.color.white"))
  }
}
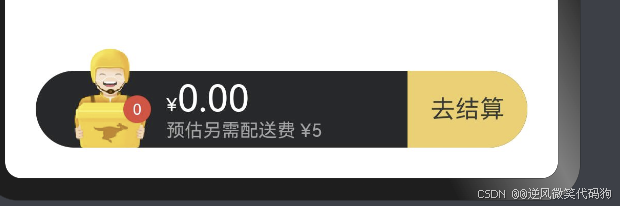
2. 页面结构-底部组件
:::success
将图片资源 图片.zip放入到资源目录下 resources/media
:::

typescript
@Preview
@Component
struct MTBottom {
  build() {
    Row () {
      Row() {
        // 小哥的显示
        Badge({
          value: '0',
          position: BadgePosition.Right,
          style: {
            badgeSize: 18
          }
        }){
           Image($r("app.media.ic_public_cart"))
             .width(47)
             .height(69)
             .position({
               y: -20
             })
        }
        .margin({
          left: 25,
          right: 10
        })
        // 显示费用
        Column() {
          Text(){
            // span imageSpan
            Span("¥")
              .fontSize(12)
            Span("0.00")
              .fontSize(24)
          }
            .fontColor($r("app.color.white"))
          Text("预估另需配送费¥5元")
            .fontColor($r("app.color.search_font_color"))
            .fontSize(14)
        }
        .alignItems(HorizontalAlign.Start)
        .layoutWeight(1)

        Text("去结算")
          .height(50)
          .width(100)
          .backgroundColor($r("app.color.main_color"))
          .textAlign(TextAlign.Center)
          .borderRadius({
            topRight: 25,
            bottomRight: 25
          })
      }
      .height(50)
      .backgroundColor($r("app.color.bottom_back"))
      .width('100%')
      .borderRadius(25)
    }
    .width('100%')
    .padding({
      left: 20,
      right: 20,
      bottom: 20
    })
  }
}
export default MTBottom
3. 顶部结构-MTTop(复制粘贴)

typescript
@Component
struct MTTop {
  @Builder
  NavItem(active: boolean, title: string, subTitle?: string) {
    Column() {
      Text() {
        Span(title)
        if (subTitle) {
          Span(' ' + subTitle)
            .fontSize(10)
            .fontColor(active ? $r("app.color.black") : $r("app.color.un_select_color"))
        }
      }.layoutWeight(1)
      .fontColor(active ? $r("app.color.black") : $r("app.color.un_select_color"))
      .fontWeight(active ? FontWeight.Bold : FontWeight.Normal)

      Text()
        .height(1)
        .width(20)
        .margin({ left: 6 })
        .backgroundColor(active ? $r("app.color.select_border_color") : 'transparent')
    }
    .width(73)
    .alignItems(HorizontalAlign.Start)
    .padding({ top: 3 })
  }
  build() {
    Row() {
      this.NavItem(true, '点菜')
      this.NavItem(false, '评价', '1796')
      this.NavItem(false, '商家')
      Row() {
        Image($r('app.media.ic_public_search'))
          .width(14)
          .aspectRatio(1)
          .fillColor($r("app.color.search_font_color"))
        Text('请输入菜品名称')
          .fontSize(12)
          .fontColor($r("app.color.search_back_color"))
      }
      .backgroundColor($r("app.color.search_back_color"))
      .height(25)
      .borderRadius(13)
      .padding({ left: 5, right: 5 })
      .layoutWeight(1)

    }
    .padding({ left: 15, right: 15 })
    .height(40)
    .border({ width: { bottom: 0.5 }, color: $r("app.color.top_border_color") })
  }
}

export default MTTop
4. 页面结构-商品菜单和商品列表

- 抽提MTFoodItem组件(粘贴)
typescript
@Preview
@Component
struct MTFoodItem {
  build() {
    Row() {
      Image('https://yjy-teach-oss.oss-cn-beijing.aliyuncs.com/meituan/1.jpg')
        .width(90)
        .aspectRatio(1)
      Column({ space: 5 }) {
        Text('小份酸汤莜面鱼鱼+肉夹馍套餐')
          .textOverflow({
            overflow: TextOverflow.Ellipsis,
          })
          .maxLines(2)
          .fontWeight(600)
        Text('酸汤莜面鱼鱼,主料:酸汤、莜面 肉夹馍,主料:白皮饼、猪肉')
          .textOverflow({
            overflow: TextOverflow.Ellipsis,
          })
          .maxLines(1)
          .fontSize(12)
          .fontColor($r("app.color.food_item_second_color"))
        Text('点评网友推荐')
          .fontSize(10)
          .backgroundColor($r("app.color.food_item_label_color"))
          .fontColor($r("app.color.font_main_color"))
          .padding({ top: 2, bottom: 2, right: 5, left: 5 })
          .borderRadius(2)
        Text() {
          Span('月销售40')
          Span(' ')
          Span('好评度100%')
        }
        .fontSize(12)
        .fontColor($r("app.color.black"))

        Row() {
          Text() {
            Span('¥ ')
              .fontColor($r("app.color.font_main_color"))
              .fontSize(10)
            Span('34.23')
              .fontColor($r("app.color.font_main_color"))
              .fontWeight(FontWeight.Bold)
          }
        }
        .justifyContent(FlexAlign.SpaceBetween)
        .width('100%')
      }
      .layoutWeight(1)
      .alignItems(HorizontalAlign.Start)
      .padding({ left: 10, right: 10 })
    }
    .padding(10)
    .alignItems(VerticalAlign.Top)
  }
}
export default MTFoodItem- 在MTMain中使用
typescript
import MTFoodItem from './MTFoodItem'

@Component
struct MTMain {
  list: string[] = ['一人套餐', '特色烧烤', '杂粮主食']
  @State
  activeIndex: number = 0
  build() {
    Row() {
      Column() {
        ForEach(this.list, (item: string, index: number) => {
          Text(item)
            .height(50)
            .width('100%')
            .textAlign(TextAlign.Center)
            .fontSize(14)
            .backgroundColor(this.activeIndex === index ? $r("app.color.white") : $r("app.color.left_back_color"))
            .onClick(() => {
              this.activeIndex = index
            })
        })
      }
      .width(90)

      //   右侧内容
      List() {
        ForEach([1,2,3,4,5,6,7,8,9], () => {
          ListItem() {
            MTFoodItem()
          }
        })
      }.layoutWeight(1)
      .backgroundColor('#fff')
      .padding({
        bottom: 80
      })
    }
    .layoutWeight(1)
    .alignItems(VerticalAlign.Top)
    .width('100%')
  }
}
export default MTMain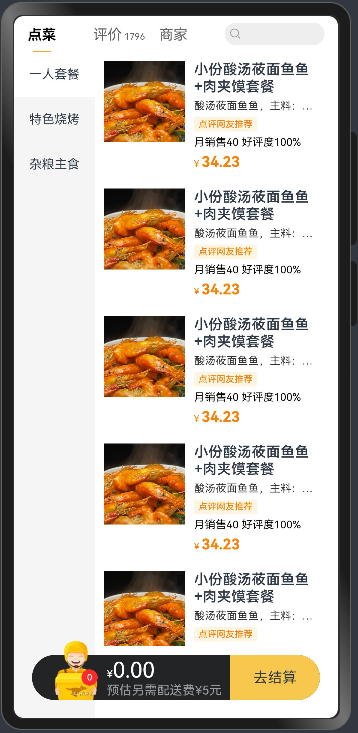
5. 页面结构-购物车
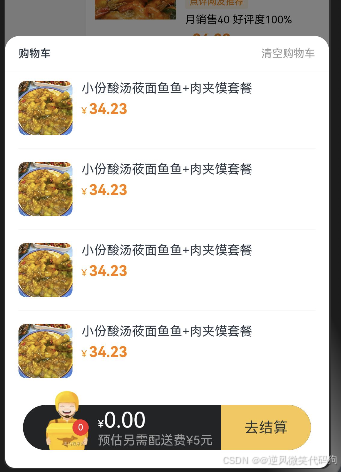
- 新建MTCart组件
typescript
import MTCartItem from './MTCartItem'

@Component
struct MTCart {
  build() {
    Column() {
      Column() {
        Row() {
          Text('购物车')
            .fontSize(12)
            .fontWeight(600)
          Text('清空购物车')
            .fontSize(12)
            .fontColor($r("app.color.search_font_color"))
        }
        .width('100%')
        .height(40)
        .justifyContent(FlexAlign.SpaceBetween)
        .border({ width: { bottom: 0.5 }, color: $r("app.color.left_back_color") })
        .margin({ bottom: 10 })
        .padding({ left: 15, right: 15 })

        List({ space: 30 }) {
          ForEach([1,2,3,4], () => {
            ListItem() {
              MTCartItem()
            }
          })
        }
        .divider({
          strokeWidth: 0.5,
          color: $r("app.color.left_back_color")
        })
        .padding({ left: 15, right: 15, bottom: 100 })
      }
      .backgroundColor($r("app.color.white"))
      .borderRadius({
        topLeft: 16,
        topRight: 16
      })
    }
    .height('100%')
    .width('100%')
    .justifyContent(FlexAlign.End)
    .backgroundColor('rgba(0,0,0,0.5)')
  }
}
export default MTCart- 新建MTCartItem组件(粘贴)
typescript
@Component
struct MTCartItem {
  build() {
    Row() {
      Image('https://yjy-teach-oss.oss-cn-beijing.aliyuncs.com/meituan/4.jpeg')
        .width(60)
        .aspectRatio(1)
        .borderRadius(8)
      Column({ space: 5 }) {
        Text('小份酸汤莜面鱼鱼+肉夹馍套餐')
          .fontSize(14)
          .textOverflow({
            overflow: TextOverflow.Ellipsis
          })
          .maxLines(2)
        Row() {
          Text() {
            Span('¥ ')
              .fontColor($r("app.color.font_main_color"))
              .fontSize(10)
            Span('34.23')
              .fontColor($r("app.color.font_main_color"))
              .fontWeight(FontWeight.Bold)
          }
        }
        .justifyContent(FlexAlign.SpaceBetween)
        .width('100%')
      }
      .layoutWeight(1)
      .alignItems(HorizontalAlign.Start)
      .padding({ left: 10, right: 10 })
    }
    .alignItems(VerticalAlign.Top)
  }
}
export default MTCartItem- 在MTIndex.ets中声明管控显示购物车变量
typescript
@Provide showCart: boolean = false- 在MTIndex.ets中控制显示
typescript
import MTBottom from './components/MTBottom'
import MTCart from './components/MTCart'
import MTMain from './components/MTMain'
import MTTop from './components/MTTop'

@Entry
@Component
struct MTIndex {
  @Provide showCart: boolean = false
  build() {
    Column() {
      Stack({ alignContent: Alignment.Bottom }) {
        Column() {
          MTTop()
          MTMain()
        }
        .height("100%")
        if(this.showCart) {
          MTCart()
        }
        MTBottom()

      }.layoutWeight(1)

    }
    .width('100%')
    .height("100%")
    .backgroundColor($r("app.color.white"))
  }
}
:::success
这里MTCart要放在MTBottom前面 利用层级的先后关系实现底部内容挡在购物车前面的效果
:::
- 点击购物车图标显示隐藏购物车-MTBottom.ets
typescript
@Component
struct MTBottom {
  @Consume
  showCart: boolean
  build() {
    Row() {
      Row() {
        Badge({
          value: '0',
          position: BadgePosition.Right,
          style: { badgeSize: 18 }
        }) {
          Image($r("app.media.ic_public_cart"))
            .width(47)
            .height(69)
            .position({ y: -19 })
        }
        .width(50)
        .height(50)
        .margin({ left: 25, right: 10 })
        .onClick(() => {
           this.showCart = !this.showCart
        })

        Column() {
          Text() {
            Span('¥')
              .fontColor('#fff')
              .fontSize(12)
            Span('0.00')
              .fontColor('#fff')
              .fontSize(24)
          }

          Text('预估另需配送费 ¥5')
            .fontSize(12)
            .fontColor('#999')
        }
        .layoutWeight(1)
        .alignItems(HorizontalAlign.Start)

        Text('去结算')
          .backgroundColor($r("app.color.main_color"))
          .alignSelf(ItemAlign.Stretch)
          .padding(15)
          .borderRadius({
            topRight: 25,
            bottomRight: 25
          })
      }
      .height(50)
      .width('100%')
      .backgroundColor($r("app.color.bottom_back"))
      .borderRadius(25)
    }
    .width('100%')
    .padding({ left: 20, right: 20, bottom: 20 })
  }
}
export default MTBottom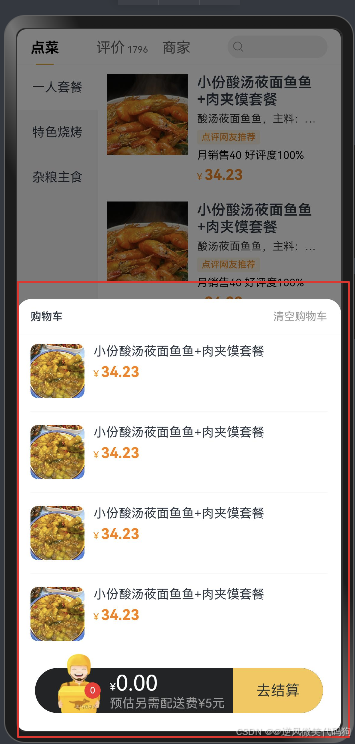
- 返回键关闭购物车
组件生命周期有一个方法叫onBackPress,可以在Index监听这个方法进行关闭
typescript
onBackPress(): boolean | void {
    this.showCart = false
  }
6. 业务逻辑-渲染商品菜单和列表
- 准备结构返回的数据模型(粘贴)
typescript
export class FoodItem {
  id: number = 0
  name: string = ""
  like_ratio_desc: string = ""
  food_tag_list: string[] = []
  price: number = 0
  picture: string = ""
  description: string = ""
  tag: string = ""
  month_saled: number = 0
  count: number = 0
}


export class Category {
  tag: string = ""
  name: string =""
  foods: FoodItem[] = []
}- api/index.ets 使用
http发送请求,获取数据
typescript
import { http } from '@kit.NetworkKit'
export class FoodItem {
  id: number = 0
  name: string = ""
  like_ratio_desc: string = ""
  food_tag_list: string[] = []
  price: number = 0
  picture: string = ""
  description: string = ""
  tag: string = ""
  month_saled: number = 0
  count: number = 0
}
export class Category {
  tag: string = ""
  name: string =""
  foods: FoodItem[] = []
}
export const getData =async () => {
  const req = http.createHttp()
  const res = await req.request('https://zhousg.atomgit.net/harmonyos-next/takeaway.json')
  return JSON.parse(res.result as string) as Category[]
}- 在MTMain.ets中获取数据
typescript
@State
list: Category[] = []
  async aboutToAppear(){
     this.list = await getAllData()
}- MTMain循环内容渲染
typescript
import { getAllData } from '../api'
import { Category, FoodItem } from '../models'
import MTFoodItem from './MTFoodItem'

@Component
struct MTMain {
  @State
  activeIndex: number = 0
  @State
  list: Category[] = []
  async aboutToAppear(){
     this.list = await getAllData()
  }
  build() {
    Row() {
      Column() {
        ForEach(this.list, (item: Category, index: number) => {
          Text(item.name)
            .height(50)
            .width('100%')
            .textAlign(TextAlign.Center)
            .fontSize(14)
            .backgroundColor(this.activeIndex === index ? $r("app.color.white") : $r("app.color.left_back_color"))
            .onClick(() => {
              this.activeIndex = index
            })
        })
      }
      .width(90)

      //   右侧内容
      List() {
        ForEach(this.list[this.activeIndex]?.foods || [], (item: FoodItem) => {
          ListItem() {
            MTFoodItem({ item })
          }
        })
      }.layoutWeight(1)
      .backgroundColor($r("app.color.white"))
      .padding({
        bottom: 80
      })
    }
    .layoutWeight(1)
    .alignItems(VerticalAlign.Top)
    .width('100%')
  }
}
export default MTMain- MTFoodItem组件使用属性接收数据
typescript
import { FoodItem } from '../models'

@Preview
@Component
struct MTFoodItem {
  item: FoodItem = new FoodItem()

  build() {
    Row() {
      Image(this.item.picture)
        .width(90)
        .aspectRatio(1)
      Column({ space: 5 }) {
        Text(this.item.name)
          .textOverflow({
            overflow: TextOverflow.Ellipsis,
          })
          .maxLines(2)
          .fontWeight(600)
        Text(this.item.description)
          .textOverflow({
            overflow: TextOverflow.Ellipsis,
          })
          .maxLines(1)
          .fontSize(12)
          .fontColor($r("app.color.food_item_second_color"))
        ForEach(this.item.food_tag_list, (tag: string) => {
          Text(tag)
            .fontSize(10)
            .backgroundColor($r("app.color.food_item_label_color"))
            .fontColor($r("app.color.font_main_color"))
            .padding({ top: 2, bottom: 2, right: 5, left: 5 })
            .borderRadius(2)
        })

        Text() {
          Span('月销售' + this.item.month_saled)
          Span(' ')
          Span(this.item.like_ratio_desc)
        }
        .fontSize(12)
        .fontColor($r("app.color.black"))

        Row() {
          Text() {
            Span('¥ ')
              .fontColor($r("app.color.font_main_color"))
              .fontSize(10)
            Span(this.item.price?.toString())
              .fontColor($r("app.color.font_main_color"))
              .fontWeight(FontWeight.Bold)
          }
        }
        .justifyContent(FlexAlign.SpaceBetween)
        .width('100%')
      }
      .layoutWeight(1)
      .alignItems(HorizontalAlign.Start)
      .padding({ left: 10, right: 10 })
    }
    .padding(10)
    .alignItems(VerticalAlign.Top)
  }
}

export default MTFoodItem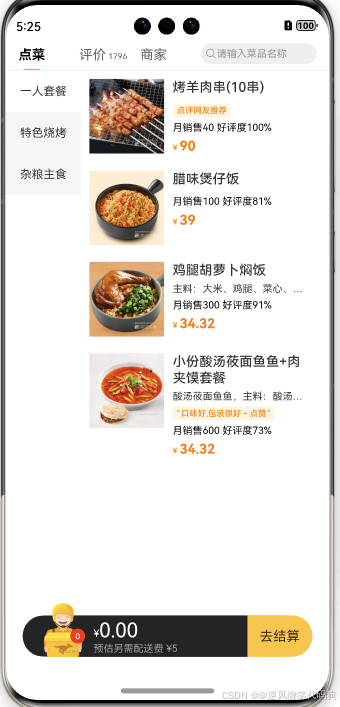
7. 业务逻辑-封装新增加菜和减菜组件

- 准备组件的静态结构(粘贴)
typescript
@Preview
@Component
struct MTAddCut {
  build() {
    Row({ space: 8 }) {
      Row() {
        Image($r('app.media.ic_screenshot_line'))
          .width(10)
          .aspectRatio(1)
      }.width(16)
      .aspectRatio(1)
      .justifyContent(FlexAlign.Center)
      .backgroundColor($r("app.color.white"))
      .borderRadius(4)
      .border({ width: 0.5 , color: $r("app.color.main_color")})
      Text('0').fontSize(14)
      Row() {
        Image($r('app.media.ic_public_add_filled'))
          .width(10)
          .aspectRatio(1)

      }.width(16)
      .aspectRatio(1)
      .justifyContent(FlexAlign.Center)
      .backgroundColor($r("app.color.main_color"))
      .borderRadius(4)
    }
  }
}
export default MTAddCut- 放置在MTFoodItem中
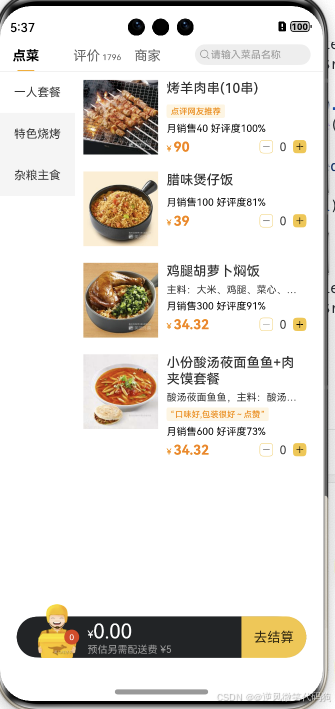
8. 业务逻辑-加入购物车
:::info
设计购物车模型
我们需要持久化的数据,使用 PersistentStorage.persistProp(CART_KEY, \[\])
:::
- 购物车数据更新
typescript
import { FoodItem } from '../api'
PersistentStorage.persistProp('cart_list', [])
export class CartStore {
  static addCutCart(item: FoodItem, flag: boolean = true) {
    const list = AppStorage.get<FoodItem[]>('cart_list')!
    const index = list.findIndex(listItem => listItem.id === item.id)
    if (flag) {
      if (index < 0) {
        item.count = 1
        //   新增
        list.unshift(item)
      } else {
        list[index].count++
        // 让第一层发生变化
        list.splice(index, 1,list[index])
      }
    } else {
      list[index].count--
      // 如果减到0就删掉
      if (list[index].count === 0){
        list.splice(index, 1)
      }else{
        // 让第一层发生变化
        list.splice(index, 1,list[index])
      }
    }
    AppStorage.setOrCreate('cart_list',list)
  }
}
:::success
切记:改第二层UI是不会响应式更新的,所以一定是数组自身,或者数组的第一层要变化才行!
:::
- 现在我们有了加菜-减菜的方法-也可以调用加入菜品
- 购物车视图更新
:::info
在MTCart中使用StorageLink直接取出购物车数据进行双向绑定
:::
typescript
import { FoodItem } from '../api'
import MTAddCut from './MTAddCut'

@Component
struct MTCartItem {
  item:FoodItem = new FoodItem()
  build() {
    Row() {
      Image(this.item.picture)
        .width(60)
        .aspectRatio(1)
        .borderRadius(8)
      Column({ space: 5 }) {
        Text(this.item.name)
          .fontSize(14)
          .textOverflow({
            overflow: TextOverflow.Ellipsis
          })
          .maxLines(2)
        Row() {
          Text() {
            Span('¥ ')
              .fontColor($r("app.color.font_main_color"))
              .fontSize(10)
            Span(this.item.price.toString())
              .fontColor($r("app.color.font_main_color"))
              .fontWeight(FontWeight.Bold)
          }
          MTAddCut({
            food:this.item
          })
        }
        .justifyContent(FlexAlign.SpaceBetween)
        .width('100%')
      }
      .layoutWeight(1)
      .alignItems(HorizontalAlign.Start)
      .padding({ left: 10, right: 10 })
    }
    .alignItems(VerticalAlign.Top)
  }
}
export default MTCartItem- MTCartItem中使用item
typescript
import { FoodItem } from '../api'
import MTAddCut from './MTAddCut'

@Component
struct MTCartItem {
  item:FoodItem = new FoodItem()
  build() {
    Row() {
      Image(this.item.picture)
        .width(60)
        .aspectRatio(1)
        .borderRadius(8)
      Column({ space: 5 }) {
        Text(this.item.name)
          .fontSize(14)
          .textOverflow({
            overflow: TextOverflow.Ellipsis
          })
          .maxLines(2)
        Row() {
          Text() {
            Span('¥ ')
              .fontColor($r("app.color.font_main_color"))
              .fontSize(10)
            Span(this.item.price.toString())
              .fontColor($r("app.color.font_main_color"))
              .fontWeight(FontWeight.Bold)
          }
          MTAddCut({
            food:this.item
          })
        }
        .justifyContent(FlexAlign.SpaceBetween)
        .width('100%')
      }
      .layoutWeight(1)
      .alignItems(HorizontalAlign.Start)
      .padding({ left: 10, right: 10 })
    }
    .alignItems(VerticalAlign.Top)
  }
}
export default MTCartItem
9.加菜和减菜按钮加入购物车
:::info
-
使用AppStorage接收所有购物车数据
-
根据数量显示减菜按钮和数量元素
:::
typescript
import { FoodItem } from '../api'
import { CarCalcClass } from '../utils/CartCalcClass'

@Preview
@Component
struct MTAddCut {
  @StorageLink('cart_list')
  cartList: FoodItem[] = []
  food: FoodItem = new FoodItem()

  getCount(): number {
    const index = this.cartList.findIndex(listItem => listItem.id === this.food.id)
    return index < 0 ? 0 : this.cartList[index].count
  }

  build() {
    Row({ space: 8 }) {
      Row() {
        Image($r('app.media.ic_screenshot_line'))
          .width(10)
          .aspectRatio(1)
      }
      .width(16)
      .aspectRatio(1)
      .justifyContent(FlexAlign.Center)
      .backgroundColor($r("app.color.white"))
      .borderRadius(4)
      .border({ width: 0.5, color: $r("app.color.main_color") })
      .visibility(this.getCount()>0?Visibility.Visible:Visibility.Hidden)
      .onClick(() => {
        CartStore.addCutCart(this.food, false)
      })

      Text(this.getCount().toString()).fontSize(14)
      Row() {
        Image($r('app.media.ic_public_add_filled'))
          .width(10)
          .aspectRatio(1)

      }
      .width(16)
      .aspectRatio(1)
      .justifyContent(FlexAlign.Center)
      .backgroundColor($r("app.color.main_color"))
      .borderRadius(4)
      .onClick(() => {
        CartStore.addCutCart(this.food)
      })
    }
  }
}

export default MTAddCut- 给AddCutCart传入Item
typescript
MTAddCut({ item: this.item }):::success
在MTCartItem中同样需要放置AddCutCart
:::
typescript
MTAddCut({ item: this.item }):::success
解决在购物车中添加图片卡的问题
:::
typescript
ForEach(this.cartList, (item: FoodItem) => {
            ListItem() {
              MTCartItem({ item  })
            }
          }, (item: FoodItem) => item.id.toString())
10.清空购物车
typescript
 Text('清空购物车')
            .fontSize(12)
            .fontColor('#999')
            .onClick(() => {
              CartStore.clearCart()
})- 清空方法
typescript
 static clearCarts () {
    AppStorage.set<FoodItem[]>("cart_list", [])
  }
11.底部内容汇总
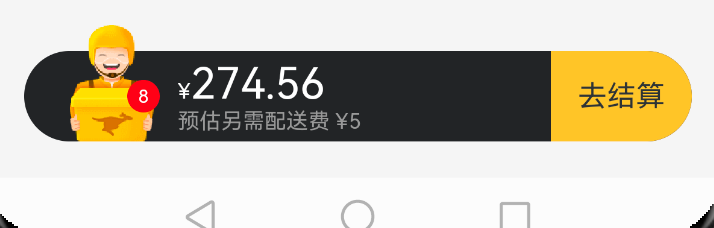
typescript
import { FoodItem } from '../api'

@Component
struct MTBottom {
  @Consume
  showCart: boolean
  @StorageLink('cart_list')
  cartList: FoodItem[] = []
  getAllCount () {
    return this.cartList.reduce((preValue, item) => preValue + item.count, 0).toString()
  }
  getAllPrice () {
    return this.cartList.reduce((preValue, item) => preValue + item.count * item.price, 0).toFixed(2)
  }
  build() {
    Row() {
      Row() {
        Badge({
          value: '0',
          position: BadgePosition.Right,
          style: {
            badgeSize: 18
          }
        }) {
          Image($r('app.media.ic_public_cart'))
            .width(48)
            .height(70)
            .position({
              y: -20,
            })
        }
        .margin({
          left:25,
          right:10
        })
        .onClick(() => {
          this.showCart = !this.showCart
        })
        Column() {
          Text(){
            // span imageSpan
            Span("¥")
              .fontSize(12)
            Span("0.00")
              .fontSize(24)
          }
          .fontColor($r("app.color.white"))
          Text("预估另需配送费¥5元")
            .fontColor($r("app.color.search_font_color"))
            .fontSize(14)
        }
        .alignItems(HorizontalAlign.Start)
        .layoutWeight(1)

        Text("去结算")
          .height(50)
          .width(100)
          .backgroundColor($r("app.color.main_color"))
          .textAlign(TextAlign.Center)
          .borderRadius({
            topRight: 25,
            bottomRight: 25
          })
      }
      .height(50)
      .width('100%')
      .backgroundColor($r('app.color.bottom_back'))
      .borderRadius(25)
    }
    .width('100%')
    .padding(20)
  }
}

export default MTBottom
美团案例完整代码
- MTIndex.ets
typescript
import { Category, getData } from './models'
import MTBottom from './components/MTBottom'
import MTCart from './components/MTCart'
import MTMain from './components/MTMain'
import MTTop from './components/MTTop'
import { promptAction } from '@kit.ArkUI'

@Entry
@Component
struct MTIndex {
  @Provide showCart: boolean = false
  @State
  list: Category[] = []

  onBackPress(): boolean | void {
    this.showCart = false
  }

  async aboutToAppear() {
    this.list = await getData()

  }

  build() {
    Stack({ alignContent: Alignment.Bottom }) {
      Column() {
        MTTop()
        MTMain({
          list: this.list
        })
      }
      .height('100%')
      .width('100%')

      if (this.showCart) {
        MTCart()
      }
      MTBottom()
    }
    .width('100%')
    .height('100%')
  }
}- components/MTTop.ets
typescript
@Component
struct MTTop {
  @Builder
  NavItem(active: boolean, title: string, subTitle?: string) {
    Column() {
      Text() {
        Span(title)
        if (subTitle) {
          Span(' ' + subTitle)
            .fontSize(10)
            .fontColor(active ? $r("app.color.black") : $r("app.color.un_select_color"))
        }
      }.layoutWeight(1)
      .fontColor(active ? $r("app.color.black") : $r("app.color.un_select_color"))
      .fontWeight(active ? FontWeight.Bold : FontWeight.Normal)

      Text()
        .height(1)
        .width(20)
        .margin({ left: 6 })
        .backgroundColor(active ? $r("app.color.select_border_color") : 'transparent')
    }
    .width(73)
    .alignItems(HorizontalAlign.Start)
    .padding({ top: 3 })
  }
  build() {
    Row() {
      this.NavItem(true, '点菜')
      this.NavItem(false, '评价', '1796')
      this.NavItem(false, '商家')
      Row() {
        Image($r('app.media.ic_public_search'))
          .width(14)
          .aspectRatio(1)
          .fillColor($r("app.color.search_font_color"))
        Text('请输入菜品名称')
          .fontSize(12)
          .fontColor($r("app.color.search_back_color"))
      }
      .backgroundColor($r("app.color.search_back_color"))
      .height(25)
      .borderRadius(13)
      .padding({ left: 5, right: 5 })
      .layoutWeight(1)

    }
    .padding({ left: 15, right: 15 })
    .height(40)
    .border({ width: { bottom: 0.5 }, color: $r("app.color.top_border_color") })
  }
}

export default MTTop- components/MTMain.ets
typescript
import { Category, FoodItem } from '../models'
import MTFoodItem from './MTFoodItem'

@Component
struct MTMain {
  @Link
  list:Category[]

  @State
  activeIndex:number = 0
  build() {
    Row() {
      Column() {
        ForEach(this.list, (item: Category,index:number) => {
          Text(item.name)
            .width('100%')
            .fontSize(14)
            .textAlign(TextAlign.Center)
            .height(50)
            .backgroundColor(this.activeIndex===index?$r("app.color.white") : $r("app.color.left_back_color"))
            .onClick(() => {
              this.activeIndex = index
            })
        })
      }
      .width(90)
      .height('100%')
      .backgroundColor($r("app.color.left_back_color"))

      //   右侧内容
      List() {
        if(this.list.length>0){
          ForEach(this.list[this.activeIndex].foods, (food:FoodItem) => {
            ListItem() {
              MTFoodItem({
                food:food
              })
            }
          })
        }else{
          ListItem(){
            Text('暂无商品~')
              .width('100%')
              .padding(20)
              .textAlign(TextAlign.Center)
              .fontColor($r('app.color.left_back_color'))
          }
        }
      }
      .layoutWeight(1)
      .backgroundColor('#fff')
      .padding({
        bottom: 80
      })
    }
    .width('100%')
    .layoutWeight(1)
    .alignItems(VerticalAlign.Top)
  }
}

export default MTMain- components/MTBottom.ets
typescript
import { FoodItem } from '../models'

@Component
struct MTBottom {
  @Consume
  showCart: boolean
  @StorageLink('cart_list')
  cartList: FoodItem[] = []
  getAllCount () {
    return this.cartList.reduce((preValue, item) => preValue + item.count, 0).toString()
  }
  getAllPrice () {
    return this.cartList.reduce((preValue, item) => preValue + item.count * item.price, 0).toFixed(2)
  }
  build() {
    Row() {
      Row() {
        Badge({
          value: '0',
          position: BadgePosition.Right,
          style: {
            badgeSize: 18
          }
        }) {
          Image($r('app.media.ic_public_cart'))
            .width(48)
            .height(70)
            .position({
              y: -20,
            })
        }
        .margin({
          left:25,
          right:10
        })
        .onClick(() => {
          this.showCart = !this.showCart
        })
        Column() {
          Text(){
            // span imageSpan
            Span("¥")
              .fontSize(12)
            Span("0.00")
              .fontSize(24)
          }
          .fontColor($r("app.color.white"))
          Text("预估另需配送费¥5元")
            .fontColor($r("app.color.search_font_color"))
            .fontSize(14)
        }
        .alignItems(HorizontalAlign.Start)
        .layoutWeight(1)

        Text("去结算")
          .height(50)
          .width(100)
          .backgroundColor($r("app.color.main_color"))
          .textAlign(TextAlign.Center)
          .borderRadius({
            topRight: 25,
            bottomRight: 25
          })
      }
      .height(50)
      .width('100%')
      .backgroundColor($r('app.color.bottom_back'))
      .borderRadius(25)
    }
    .width('100%')
    .padding(20)
  }
}

export default MTBottom- components/MTCart.ets
typescript
import { FoodItem } from '../models'
import MTCartItem from './MTCartItem'
@Component
struct MTCart {
  @Consume
  showCart:boolean
  @StorageLink('cart_list')
  cartList:FoodItem[] = []
  build() {
    Column() {
      Blank()
        .backgroundColor('rgba(0,0,0,0.5)')
        .onClick(()=>{
          this.showCart = false
        })
      Column() {
        Row() {
          Text('购物车')
            .fontSize(12)
            .fontWeight(600)
          Text('清空购物车')
            .fontSize(12)
            .fontColor($r("app.color.search_font_color"))
        }
        .width('100%')
        .height(40)
        .justifyContent(FlexAlign.SpaceBetween)
        .border({ width: { bottom: 0.5 }, color: $r("app.color.left_back_color") })
        .margin({ bottom: 10 })
        .padding({ left: 15, right: 15 })

        List({ space: 30 }) {
          ForEach(this.cartList, (item:FoodItem) => {
            ListItem() {
              MTCartItem({
                item:item
              })
            }
          },(item:FoodItem)=>item.id.toString())
        }
        .divider({
          strokeWidth: 0.5,
          color: $r("app.color.left_back_color")
        })
        .padding({ left: 15, right: 15, bottom: 100 })
      }
      .backgroundColor($r("app.color.white"))
      .borderRadius({
        topLeft: 16,
        topRight: 16
      })
    }
    .height('100%')
    .width('100%')
  }
}
export default MTCart- components/MTFoodItem.ets
typescript
import { FoodItem } from '../models'
import MTAddCut from './MTAddCut'

@Preview
@Component
struct MTFoodItem {
  food:FoodItem = new FoodItem()
  build() {
    Row() {
      Image(this.food.picture)
        .width(90)
        .aspectRatio(1)
      Column({ space: 5 }) {
        Text(this.food.name)
          .textOverflow({
            overflow: TextOverflow.Ellipsis,
          })
          .maxLines(2)
          .fontWeight(600)
        Text(this.food.description)
          .textOverflow({
            overflow: TextOverflow.Ellipsis,
          })
          .maxLines(1)
          .fontSize(12)
          .fontColor($r("app.color.food_item_second_color"))
        Text(this.food.tag)
          .fontSize(10)
          .backgroundColor($r("app.color.food_item_label_color"))
          .fontColor($r("app.color.font_main_color"))
          .padding({ top: 2, bottom: 2, right: 5, left: 5 })
          .borderRadius(2)
        Text() {
          Span('月销售'+this.food.month_saled)
          Span(' ')
          Span(`好评度${this.food.like_ratio_desc}%`)
        }
        .fontSize(12)
        .fontColor($r("app.color.black"))

        Row() {
          Text() {
            Span('¥ ')
              .fontColor($r("app.color.font_main_color"))
              .fontSize(10)
            Span(this.food.price.toString())
              .fontColor($r("app.color.font_main_color"))
              .fontWeight(FontWeight.Bold)
          }
          MTAddCut({
            food:this.food
          })
        }
        .justifyContent(FlexAlign.SpaceBetween)
        .width('100%')
      }
      .layoutWeight(1)
      .alignItems(HorizontalAlign.Start)
      .padding({ left: 10, right: 10 })
    }
    .padding(10)
    .alignItems(VerticalAlign.Top)
  }
}
export default MTFoodItem- components/MTCartItem.ets
typescript
import { FoodItem } from '../models'
import MTAddCut from './MTAddCut'

@Component
struct MTCartItem {
  item:FoodItem = new FoodItem()
  build() {
    Row() {
      Image(this.item.picture)
        .width(60)
        .aspectRatio(1)
        .borderRadius(8)
      Column({ space: 5 }) {
        Text(this.item.name)
          .fontSize(14)
          .textOverflow({
            overflow: TextOverflow.Ellipsis
          })
          .maxLines(2)
        Row() {
          Text() {
            Span('¥ ')
              .fontColor($r("app.color.font_main_color"))
              .fontSize(10)
            Span(this.item.price.toString())
              .fontColor($r("app.color.font_main_color"))
              .fontWeight(FontWeight.Bold)
          }
          MTAddCut({
            food:this.item
          })
        }
        .justifyContent(FlexAlign.SpaceBetween)
        .width('100%')
      }
      .layoutWeight(1)
      .alignItems(HorizontalAlign.Start)
      .padding({ left: 10, right: 10 })
    }
    .alignItems(VerticalAlign.Top)
  }
}
export default MTCartItem- components/MTAddCut.ets
typescript
import { FoodItem } from '../models'
import { CartStore } from '../utils/CartCalcClass'

@Preview
@Component
struct MTAddCut {
  @StorageLink('cart_list')
  cartList: FoodItem[] = []
  food: FoodItem = new FoodItem()

  getCount(): number {
    const index = this.cartList.findIndex(listItem => listItem.id === this.food.id)
    return index < 0 ? 0 : this.cartList[index].count
  }

  build() {
    Row({ space: 8 }) {
      Row() {
        Image($r('app.media.ic_screenshot_line'))
          .width(10)
          .aspectRatio(1)
      }
      .width(16)
      .aspectRatio(1)
      .justifyContent(FlexAlign.Center)
      .backgroundColor($r("app.color.white"))
      .borderRadius(4)
      .border({ width: 0.5, color: $r("app.color.main_color") })
      .visibility(this.getCount()>0?Visibility.Visible:Visibility.Hidden)
      .onClick(() => {
        CartStore.addCutCart(this.food, false)
      })

      Text(this.getCount().toString()).fontSize(14)
      Row() {
        Image($r('app.media.ic_public_add_filled'))
          .width(10)
          .aspectRatio(1)

      }
      .width(16)
      .aspectRatio(1)
      .justifyContent(FlexAlign.Center)
      .backgroundColor($r("app.color.main_color"))
      .borderRadius(4)
      .onClick(() => {
        CartStore.addCutCart(this.food)
      })
    }
  }
}

export default MTAddCut- api/index.ets
typescript
import { http } from '@kit.NetworkKit'
import { Category } from '../models'

export const  getAllData = async () => {
  const req = http.createHttp()
  const res = await  req.request(" https://zhousg.atomgit.net/harmonyos-next/takeaway.json")
  return JSON.parse(res.result as string) as Category[]
}- models/index.ets
typescript
export class FoodItem {
  id: number = 0
  name: string = ""
  like_ratio_desc: string = ""
  food_tag_list: string[] = []
  price: number = 0
  picture: string = ""
  description: string = ""
  tag: string = ""
  month_saled: number = 0
  count: number = 0
}
export class Category {
  tag: string = ""
  name: string =""
  foods: FoodItem[] = []
}- utils/index.ets
arkts
import { FoodItem } from '../models'
PersistentStorage.persistProp('cart_list', [])
export class CartStore {
  static addCutCart(item: FoodItem, flag: boolean = true) {
    const list = AppStorage.get<FoodItem[]>('cart_list')!
    const index = list.findIndex(listItem => listItem.id === item.id)
    if (flag) {
      if (index < 0) {
        item.count = 1
        //   新增
        list.unshift(item)
      } else {
        list[index].count++
        list.splice(index, 1,list[index])
      }
    } else {
      list[index].count--
      // 如果减到0就删掉
      if (list[index].count === 0){
        list.splice(index, 1)
      }else{
        list.splice(index, 1,list[index])
      }
    }
    AppStorage.setOrCreate('cart_list',list)
  }
  static clearCarts () {
    AppStorage.set<FoodItem[]>("cart_list", [])
  }
}