- 🍨 本文为 🔗365天深度学习训练营中的学习记录博客
- 🍖 原作者: K同学啊
1.检查GPU
import torch
import torch.nn as nn
import matplotlib.pyplot as plt
import torchvision

device=torch.device("cuda" if torch.cuda.is_available() else "cpu")
device
2.查看数据
import os,PIL,random,pathlib

data_dir='data/45-data/'
data_dir=pathlib.Path(data_dir)
data_paths=list(data_dir.glob('*'))
classNames=[str(path).split('\\')[2] for path in data_paths]
classNames
3.划分数据集
python
total_datadir='data/45-data/'
train_trainsforms=transforms.Compose([
    transforms.Resize([224,224]),
    transforms.ToTensor(),
    transforms.Normalize(
        mean=[0.485, 0.456, 0.406],
        std=[0.229, 0.224, 0.225]
    ),
])
total_data=datasets.ImageFolder(total_datadir,train_trainsforms)
total_data

import torch.utils


train_size=int(0.8*len(total_data))
test_size=len(total_data)-train_size
train_dataset,test_dataset=torch.utils.data.random_split(total_data,[train_size,test_size])
train_dataset,test_dataset

import torch.utils.data
import torch.utils.data.dataloader


batch_size=32
train_dl=torch.utils.data.DataLoader(train_dataset,
                                     batch_size,
                                     shuffle=True,
                                     num_workers=1)
test_dl=torch.utils.data.DataLoader(test_dataset,
                                     batch_size,
                                     shuffle=True,
                                     num_workers=1)

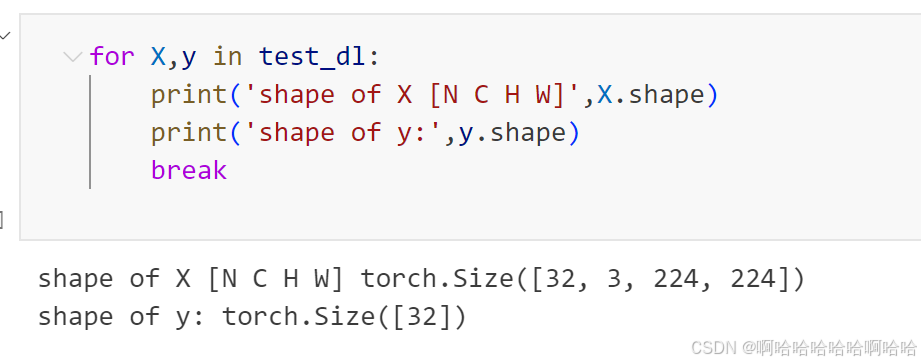
for X,y in test_dl:
    print('shape of X [N C H W]',X.shape)
    print('shape of y:',y.shape)
    break

4.构建模型
python
import torch.nn.functional as F

class Network_bn(nn.Module):
    def __init__(self):
        super(Network_bn, self).__init__()
        self.conv1 = nn.Conv2d(in_channels=3, out_channels=12, kernel_size=5, stride=1, padding=0)
        self.bn1 = nn.BatchNorm2d(12)
        self.conv2 = nn.Conv2d(in_channels=12, out_channels=12, kernel_size=5, stride=1, padding=0)
        self.bn2 = nn.BatchNorm2d(12)
        self.pool1 = nn.MaxPool2d(2,2)
        self.conv4 = nn.Conv2d(in_channels=12, out_channels=24, kernel_size=5, stride=1, padding=0)
        self.bn4 = nn.BatchNorm2d(24)
        self.conv5 = nn.Conv2d(in_channels=24, out_channels=24, kernel_size=5, stride=1, padding=0)
        self.bn5 = nn.BatchNorm2d(24)
        self.pool2 = nn.MaxPool2d(2,2)
        self.fc1 = nn.Linear(24*50*50, len(classNames))

    def forward(self, x):
        x = F.relu(self.bn1(self.conv1(x)))
        x = F.relu(self.bn2(self.conv2(x)))
        x = self.pool1(x)
        x = F.relu(self.bn4(self.conv4(x)))
        x = F.relu(self.bn5(self.conv5(x)))
        x = self.pool2(x)
        x = x.view(-1, 24*50*50)
        x = self.fc1(x)

        return x

device = "cuda" if torch.cuda.is_available() else "cpu"
print("Using {} device".format(device))

model = Network_bn().to(device)
model
5.编译及训练模型
python
loss_fn=nn.CrossEntropyLoss()
learn_rate=1e-3
opt=torch.optim.SGD(model.parameters(),lr=learn_rate)

def train(dataloader, model, loss_fn, optimizer):
    size = len(dataloader.dataset)
    num_batches = len(dataloader)
    train_loss, correct = 0, 0
    model.train()
    for X, y in dataloader:
        X, y = X.to(device), y.to(device)
        pred = model(X)
        loss = loss_fn(pred, y)

        optimizer.zero_grad()
        loss.backward()
        optimizer.step()

        train_loss += loss.item()
        correct += (pred.argmax(1) == y).type(torch.float).sum().item()
    train_loss /= num_batches
    train_acc = correct / size
    return train_acc, train_loss

def test(dataloader, model, loss_fn):
    size = len(dataloader.dataset)
    num_batches = len(dataloader)
    model.eval()
    test_loss, correct = 0, 0
    with torch.no_grad():
        for imgs, target in dataloader:
            imgs, target = imgs.to(device), target.to(device)
            target_pred = model(imgs)
            loss = loss_fn(target_pred, target)
            test_loss += loss.item()
            correct += (target_pred.argmax(1) == target).type(torch.float).sum().item()
    test_loss /= num_batches
    test_acc = correct / size
    return test_acc, test_loss

def save_best_model(model, best_acc, current_acc, path='best_model.pth'):
    if current_acc > best_acc:
        best_acc = current_acc
        torch.save(model.state_dict(), path)
        print(f"Best model saved with accuracy: {best_acc*100:.2f}%")
    return best_acc

epochs = 20
best_test_acc = 0.0
train_losses = []
train_accuracies = []
test_losses = []
test_accuracies = []

for epoch in range(epochs):
    model.train()
    epoch_train_acc, epoch_train_loss = train(train_dl, model, loss_fn, opt)

    model.eval()
    epoch_test_acc, epoch_test_loss = test(test_dl, model, loss_fn)

    # 保存最佳模型
    best_test_acc = save_best_model(model, best_test_acc, epoch_test_acc)

    # 存储结果用于绘图
    train_losses.append(epoch_train_loss)
    train_accuracies.append(epoch_train_acc)
    test_losses.append(epoch_test_loss)
    test_accuracies.append(epoch_test_acc)

    print(f'Epoch:{epoch+1:2d}, Train_acc:{epoch_train_acc*100:.1f}%, Train_loss:{epoch_train_loss:.3f}, '
          f'Test_acc:{epoch_test_acc*100:.1f}%, Test_loss:{epoch_test_loss:.3f}')

print('Finished Training')
6.结果可视化
python
import matplotlib.pyplot as plt
# 绘制训练和测试的损失与准确率变化趋势
plt.figure(figsize=(12, 5))

# 绘制损失变化趋势
plt.subplot(1, 2, 1)
plt.plot(range(1, epochs + 1), train_losses, label='Train Loss')
plt.plot(range(1, epochs + 1), test_losses, label='Test Loss', linestyle='--')
plt.xlabel('Epoch')
plt.ylabel('Loss')
plt.title('Loss over Epochs')
plt.legend()

# 绘制准确率变化趋势
plt.subplot(1, 2, 2)
plt.plot(range(1, epochs + 1), [acc * 100 for acc in train_accuracies], label='Train Accuracy')
plt.plot(range(1, epochs + 1), [acc * 100 for acc in test_accuracies], label='Test Accuracy', linestyle='--')
plt.xlabel('Epoch')
plt.ylabel('Accuracy (%)')
plt.title('Accuracy over Epochs')
plt.legend()

plt.tight_layout()
plt.show()
7.加载本地模型并预测本地图片
python
from torch.utils.data import DataLoader
def load_best_model_and_predict(image_path, model, transform=None):
    # 加载最佳模型
    model.load_state_dict(torch.load('best_model.pth'))
    model.eval()

    # 对单张图片进行预测
    if transform is None:
        transform = transforms.Compose([
            transforms.Resize((224, 224)),  # 根据模型需求调整尺寸
            transforms.ToTensor(),
        ])

    image = datasets.ImageFolder(image_path, transform=transform)
    image_loader = DataLoader(image, batch_size=1, shuffle=False)

    with torch.no_grad():
        for img, _ in image_loader:
            img = img.to(device)
            output = model(img)
            _, predicted = torch.max(output, 1)
            print(f'Predicted class: {predicted.item()}')
            break  # 我们只预测一张图片
    return output,predicted

# 加载最佳模型并预测本地图片
image_path = 'data/猴痘预测'
output,predicted=load_best_model_and_predict(image_path, model)
print(output)
print(predicted)总结:
1.保存最优模型参数到本地
python
def save_best_model(model, best_acc, current_acc, path='best_model.pth'):
    if current_acc > best_acc:
        best_acc = current_acc
        torch.save(model.state_dict(), path)
        print(f"Best model saved with accuracy: {best_acc*100:.2f}%")
    return best_acc
2.使用本地模型参数预测本地图片
python
from torch.utils.data import DataLoader
def load_best_model_and_predict(image_path, model, transform=None):
    # 加载最佳模型
    model.load_state_dict(torch.load('best_model.pth'))
    model.eval()

    # 对单张图片进行预测
    if transform is None:
        transform = transforms.Compose([
            transforms.Resize((224, 224)),  # 根据模型需求调整尺寸
            transforms.ToTensor(),
        ])

    image = datasets.ImageFolder(image_path, transform=transform)
    image_loader = DataLoader(image, batch_size=1, shuffle=False)

    with torch.no_grad():
        for img, _ in image_loader:
            img = img.to(device)
            output = model(img)
            _, predicted = torch.max(output, 1)
            print(f'Predicted class: {predicted.item()}')
            break  # 我们只预测一张图片
    return output,predicted

# 加载最佳模型并预测本地图片
image_path = 'data/猴痘预测'
output,predicted=load_best_model_and_predict(image_path, model)
print(output)
print(predicted)


