#最近工作当中遇到一个问题,需要将markdown格式的内容转成word文档
并且有如下要求:
1.markdown内容有标题、图片、项目符号、echarts、表格等格式
2.导出的word文档格式要跟markdown格式一直
基于上述的需求以及自己的理解,通过不断尝试和检索最终得出如下代码
工具准备
1.安装Pandoc
markdown 转word需要借助于pandoc,所以本地需要安装pandoc并且配置好环境变量
参考:https://blog.csdn.net/weixin_65644655/article/details/139455283
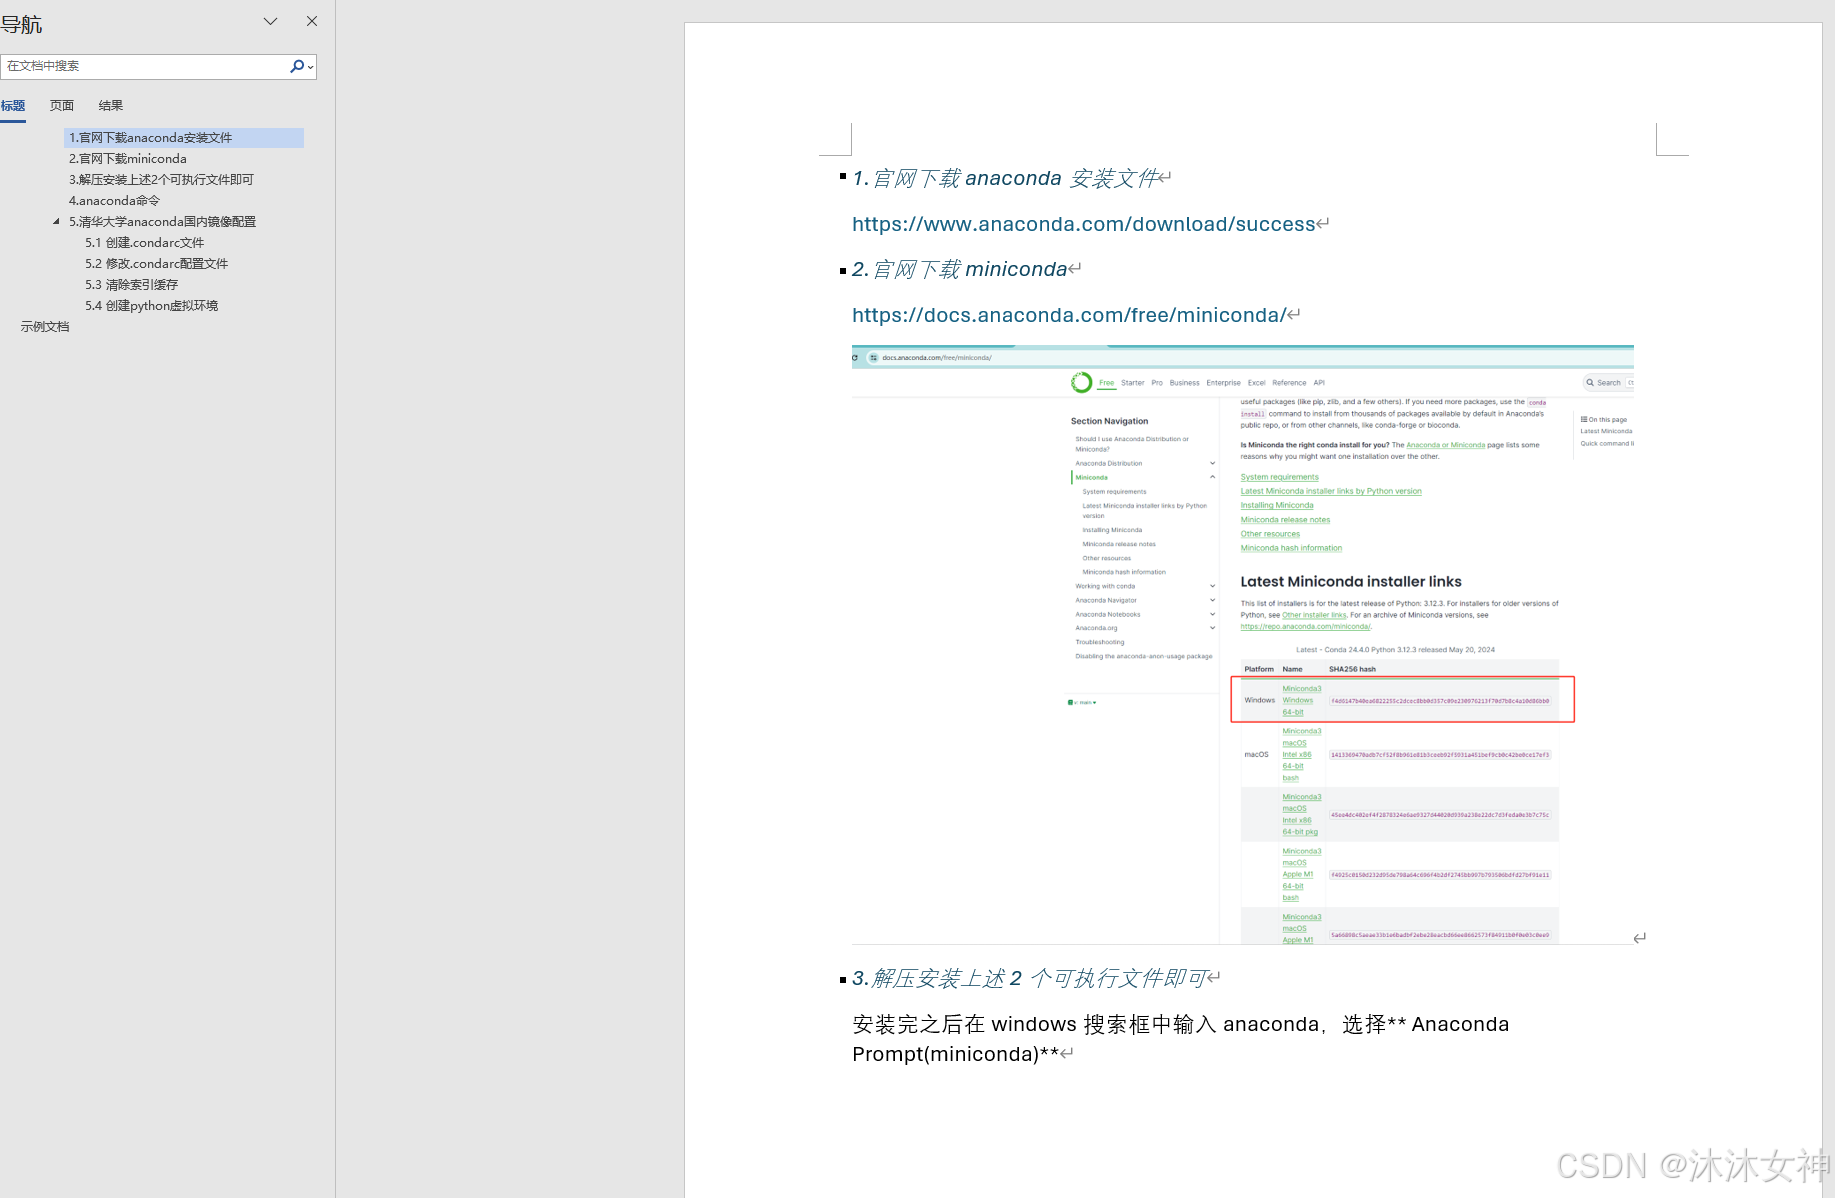
2.安装chromedriver插件
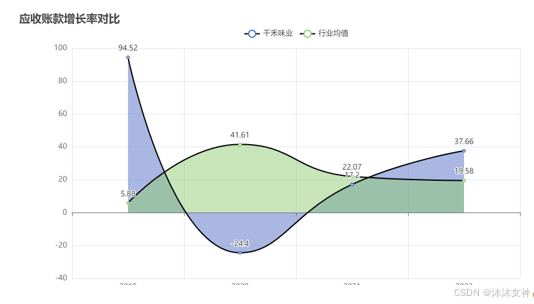
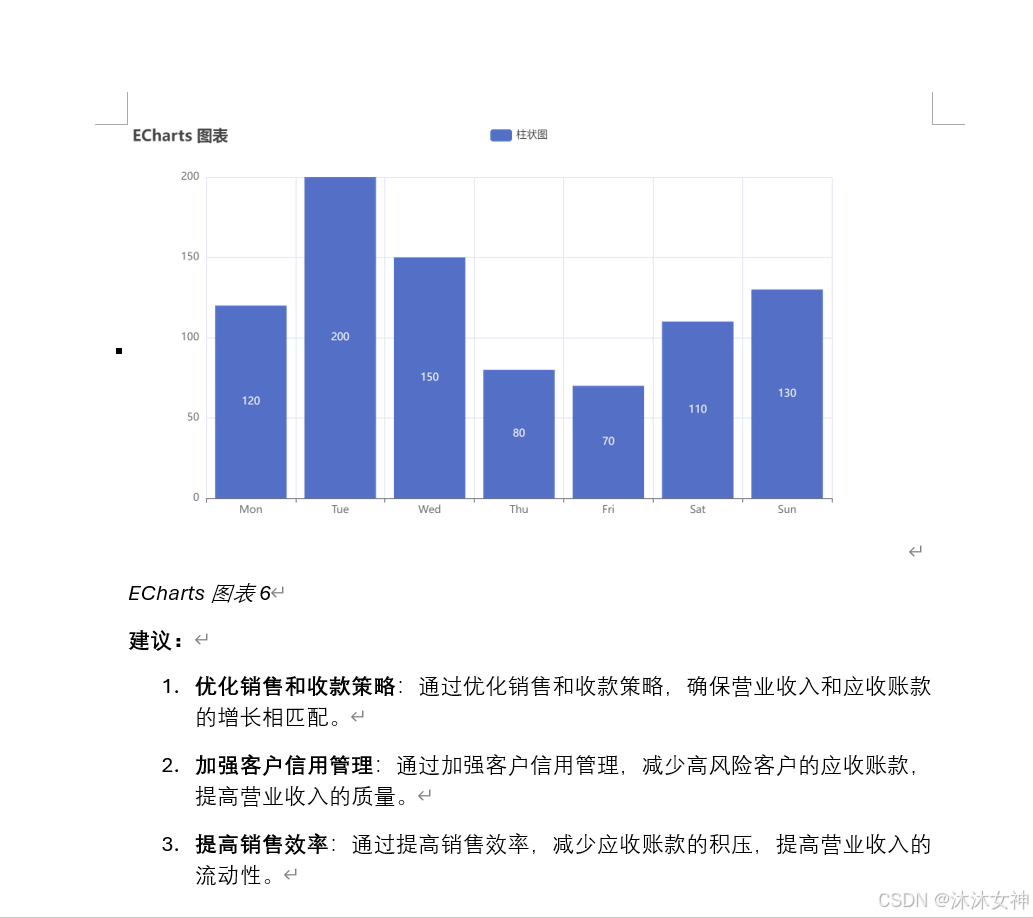
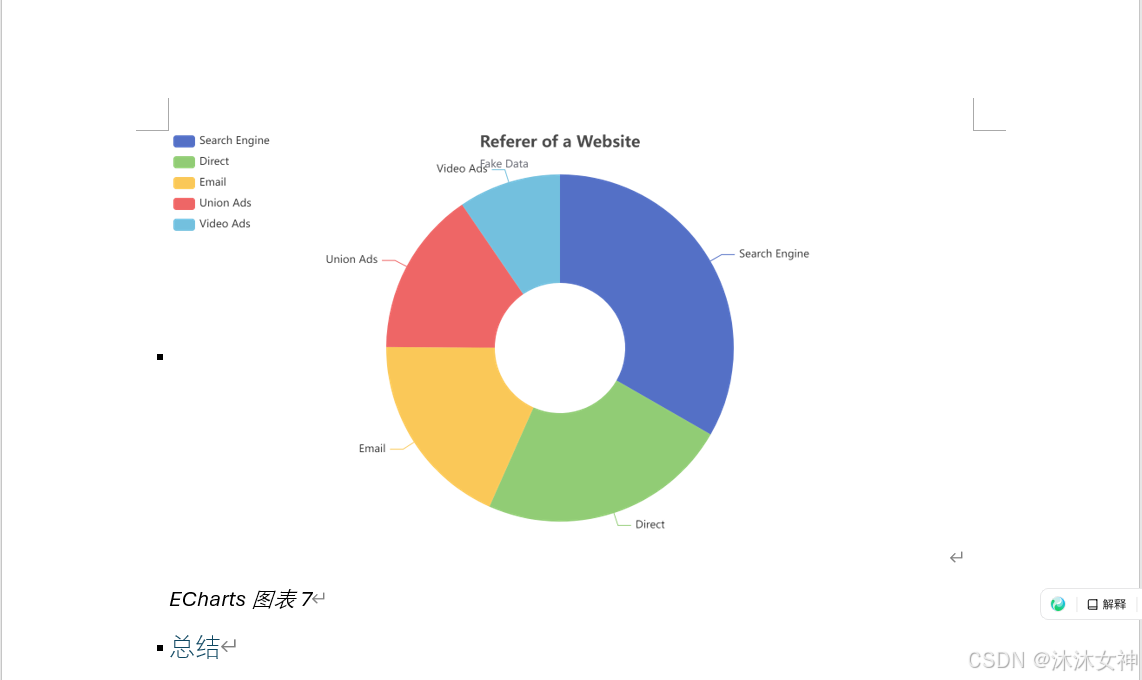
echarts转图片需要有个过程 echarts -> html -> 图片
在将echarts转html过程中,本地需要安装chromdriver,如果你本地是windows只要装了chrome就不用单独安装,如果是linux或者unbutu 自行安装即可
3.安装python所需依赖包
首先需要导入依赖的包
pip install pyecharts pypandoc snapshot_selenium requests
代码
python
import json
import re
import os
import time
from pyecharts.charts import Line,Pie,Bar
from pyecharts import options as opts
from pyecharts.render import make_snapshot
from snapshot_selenium import snapshot
import pypandoc
import requests
def check_list_type(list):
if all(isinstance(item, tuple) for item in list):
return "tuple"
elif all(isinstance(item, dict) for item in list):
return "dict"
else:
return ""
def generate_pie_chart(data, output_path):
pie = Pie()
pie_data = []
for series in data.get("series", {}):
series_data = data["series"][0]["data"]
if check_list_type(series_data) == 'tuple':
pie_data = series_data
elif check_list_type(series_data) == 'dict':
for item in series_data:
pie_data.append((item['name'], item['value']))
else:
print("Invalid data format")
if series.get("type") == "pie":
pie.add(
series_name=data["series"][0]["name"], # 图例名称
#data_pair=data["series"][0]["data"], # 数据
data_pair=pie_data,
radius=["30%", "80%"], # 设置饼图的内外半径
label_opts=opts.LabelOpts(is_show=True, position="outside") # 外部标签
)
pie.set_global_opts(
title_opts=opts.TitleOpts(
title=data.get("title", {}).get("text", "示例饼状图"),
subtitle=data.get("title", {}).get("subtext", ""),
pos_left="center"
),
tooltip_opts=opts.TooltipOpts(trigger="item"),
legend_opts=opts.LegendOpts(orient="vertical", pos_left="left")
)
# 设置强调样式(使用较简洁的设置)
pie.set_series_opts(
emphasis_opts=opts.EmphasisOpts(
itemstyle_opts=opts.ItemStyleOpts(
color="#ff6347", # 举例:设置强调颜色为红色
# 使用简单的颜色、阴影等效果(避免使用不支持的属性)
opacity=0.8 # 示例:添加透明度
)
)
)
html = pie.render('pie_echarts.html')
# 渲染并保存为图片
make_snapshot(snapshot, html, output_path)
print(f"ECharts 饼状图已保存为图片: {output_path}")
# 柱状图
def generate_bar_chart(data, output_path):
"""
根据 ECharts 数据生成柱状图并保存为图片。
Args:
data (dict): ECharts 数据。
output_path (str): 图片保存路径。
"""
bar = Bar()
x_data = data.get("xAxis", {}).get("data", [])
bar.add_xaxis(x_data)
for series in data.get("series", []):
if series.get("type") == "bar":
bar.add_yaxis(
series["name"],
series.get("data", [])
)
# 设置全局选项
bar.set_global_opts(
title_opts=opts.TitleOpts(title=data.get("title", {}).get("text", "ECharts 图表")),
tooltip_opts=opts.TooltipOpts(trigger="axis"),
legend_opts=opts.LegendOpts(is_show=True),
xaxis_opts=opts.AxisOpts(type_="category"),
yaxis_opts=opts.AxisOpts(type_="value", axislabel_opts=opts.LabelOpts(formatter="{value}")) # 关键修改:添加坐标轴标签
)
bar_html = bar.render("bar_echarts.html")
make_snapshot(snapshot, bar_html, output_path)
print(f"ECharts 柱状图已保存为图片: {output_path}")
def generate_line_chart(data, output_path):
line = Line()
x_data = data.get("xAxis", {}).get("data", [])
line.add_xaxis(x_data)
for series in data.get("series", []):
item_style = series.get("itemStyle", {}).get("color", "#000") # 默认颜色黑色
line.add_yaxis(
series["name"],
series.get("data", []),
areastyle_opts=opts.AreaStyleOpts(opacity=0.5),
is_smooth=series.get("smooth", True),
linestyle_opts=opts.LineStyleOpts(width=2, color=item_style),
)
line.set_global_opts(
title_opts=opts.TitleOpts(title=data.get("title", {}).get("text", "ECharts 图表")),
tooltip_opts=opts.TooltipOpts(trigger="axis"),
xaxis_opts=opts.AxisOpts(type_="category"),
yaxis_opts=opts.AxisOpts(type_="value"),
legend_opts=opts.LegendOpts(is_show=True, pos_top="5%"),
)
make_snapshot(snapshot, line.render(), output_path)
print(f"ECharts 图表已保存为图片: {output_path}")
def generate_chart(data, output_path):
"""
根据 ECharts 数据生成折线图并保存为图片。
Args:
data (dict): ECharts 数据。
output_path (str): 图片保存路径。
"""
type = ''
for series in data.get("series", []):
type = series.get("type",'')
break
if type == 'line':
generate_line_chart(data, output_path)
elif type == 'pie':
generate_pie_chart(data, output_path)
elif type == 'bar':
generate_bar_chart(data,output_path)
else:
print("未知类型")
def process_markdown_with_echarts(markdown_content, output_dir):
"""
解析 Markdown 中的 ECharts 数据并生成对应的图片。
Args:
markdown_content (str): Markdown 内容。
output_dir (str): 图片输出目录。
Returns:
str: 替换后的 Markdown 内容。
"""
os.makedirs(output_dir, exist_ok=True)
# 正则匹配 ECharts 数据
echarts_pattern = r"```echarts\s*([\s\S]*?)\s*```"
matches = re.findall(echarts_pattern, markdown_content, re.S)
for i, match in enumerate(matches):
try:
# 解析 ECharts 数据
echarts_data = json.loads(match)
output_path = os.path.join(output_dir, f"echarts_{i + 1}.png")
generate_chart(echarts_data, output_path)
#替换 Markdown 中的 ECharts 数据为图片引用
markdown_content = markdown_content.replace(
f"```echarts\n{match}\n```", f""
)
except Exception as e:
print(f"处理 ECharts 数据失败: {e}")
return markdown_content
def download_image(url, output_dir):
"""
下载网络图片并保存到本地。
Args:
url (str): 图片 URL。
output_dir (str): 图片保存的目录。
Returns:
str: 本地图片路径或 None。
"""
try:
os.makedirs(output_dir, exist_ok=True) # 创建图片存储目录
response = requests.get(url, stream=True)
response.raise_for_status()
# 提取图片名称并保存
filename = os.path.basename(url)
local_path = os.path.join(output_dir, filename)
with open(local_path, "wb") as file:
file.write(response.content)
return local_path
except Exception as e:
print(f"下载图片失败: {url},错误: {e}")
return None
def process_markdown_with_images(markdown_content, output_dir):
"""
替换 Markdown 中的图片 URL 为本地路径。
Args:
markdown_content (str): Markdown 字符串。
output_dir (str): 本地图片存储目录。
Returns:
str: 替换后的 Markdown 字符串。
"""
img_pattern = r"!\[.*?\]\((https?://[^\)]+)\)"
matches = re.findall(img_pattern, markdown_content)
for url in matches:
local_path = download_image(url, output_dir)
if local_path:
markdown_content = markdown_content.replace(url, local_path)
return markdown_content
def ensure_correct_list_format(markdown_content):
"""
确保Markdown中的列表项格式正确,避免格式错误导致转换问题。
Args:
markdown_content (str): 原始Markdown内容。
Returns:
str: 经过格式化的Markdown内容。
"""
# 在此函数中检查和修复Markdown中的项目符号格式(可选)
# 确保项目符号使用标准格式
markdown_content = re.sub(r"^\s*\*\s+", "\n- ", markdown_content, flags=re.MULTILINE) # 星号替换为连字符
markdown_content = re.sub(r"^\s*\-\s+", "\n- ", markdown_content, flags=re.MULTILINE) # 短横线替换为标准项目符号
markdown_content = re.sub(r"^\s*\d+\.\s+", "\n1. ", markdown_content, flags=re.MULTILINE) # 确保有序列表的数字后有空格
# 其他必要的格式修正
return markdown_content
def fix_title_styles_in_markdown(markdown_content):
"""
修正 Markdown 中的标题格式,确保标题没有斜体样式,同时保留子标题层级。
"""
# 修正标题中的斜体问题,去除标题中的任何 * 符号,确保标题格式一致。
markdown_content = re.sub(r"(\#{1,6})\s?\*([^\*]+)\*|\s*(\#{1,6})\s*(.*)", lambda m: f'<h{len(m.group(1) or m.group(3))} style="color: blue;">{m.group(2) or m.group(4)}</h{len(m.group(1) or m.group(3))}>', markdown_content)
return markdown_content
def convert_markdown_to_word(markdown_content, word_file, output_dir):
"""
将 Markdown 内容转换为 Word 文档。
Args:
markdown_content (str): Markdown 内容。
word_file (str): 输出的 Word 文件路径。
output_dir (str): 图片存储目录。
"""
# 处理图片
processed_image = process_markdown_with_images(markdown_content, output_dir)
# 处理echarts
processed_markdown = process_markdown_with_echarts(processed_image, output_dir)
# 修改项目符号
processed_markdown = ensure_correct_list_format(processed_markdown)
# 设置标题格式
# processed_markdown = fix_title_styles_in_markdown(processed_markdown)
processed_markdown = processed_markdown.encode("utf-8").decode("utf-8")
#css_file = "style.css"
#command = f"pandoc {processed_markdown} -o {word_file} --css {css_file}"
extra_args = ['--wrap=none']
pypandoc.convert_text(processed_markdown, "docx", format="md", outputfile=word_file,extra_args=extra_args)
print(f"Word 文档已生成: {word_file}")
def extract_markdown_content(file_path):
"""
从 Markdown 文件中提取内容并解析为 HTML。
Args:
file_path (str): Markdown 文件路径。
Returns:
str: 解析后的 HTML 内容。
"""
with open(file_path, 'r', encoding='utf-8') as file:
markdown_content = file.read()
return markdown_content
if __name__ == "__main__":
start_time = time.time()
# 示例 Markdown 内容
markdown_content = extract_markdown_content("test.md")
# 配置路径
word_file_dir = "E:\mdtoword"
word_file_name = os.path.join(word_file_dir, "test.docx")
image_output_dir = os.path.join(word_file_dir, "images")
# 转换 Markdown 到 Word
convert_markdown_to_word(markdown_content, word_file_name, image_output_dir)
end_time = time.time()
execution_time = end_time - start_time
print('接口响应时间:',execution_time)运行结果:


