背景需求:
基于1.0版手表表盘制作中的问题------幼儿一只手不能自行佩戴、幼儿佩戴时抽拉表带容易撕裂表带或卡扣。
由此产生三个手表调整思路
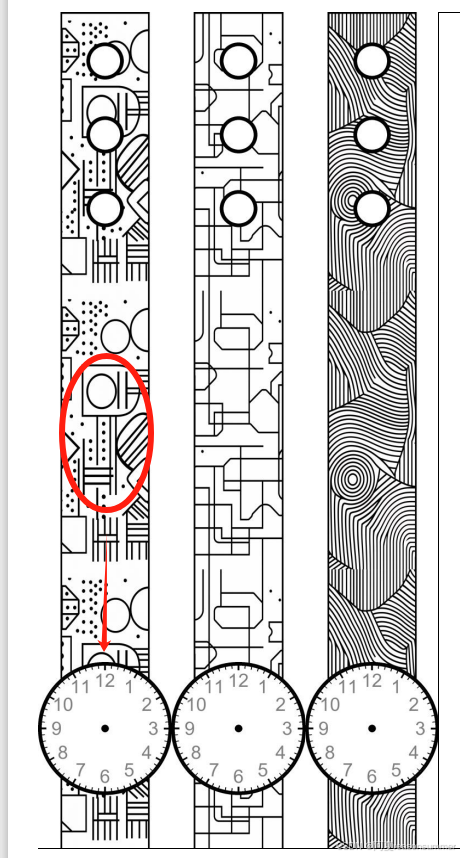
1、把圆环位置放到表带底部
2、雌雄扣位置不变(内1,点3)因为调整改过,所以参数变化,显示是正圆形
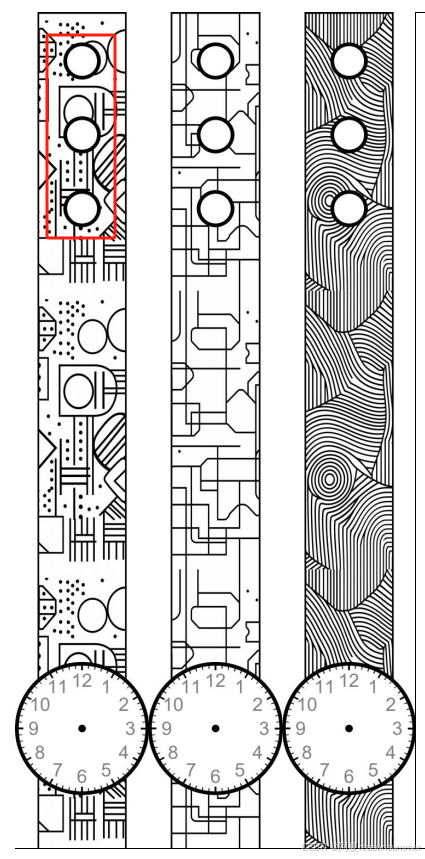
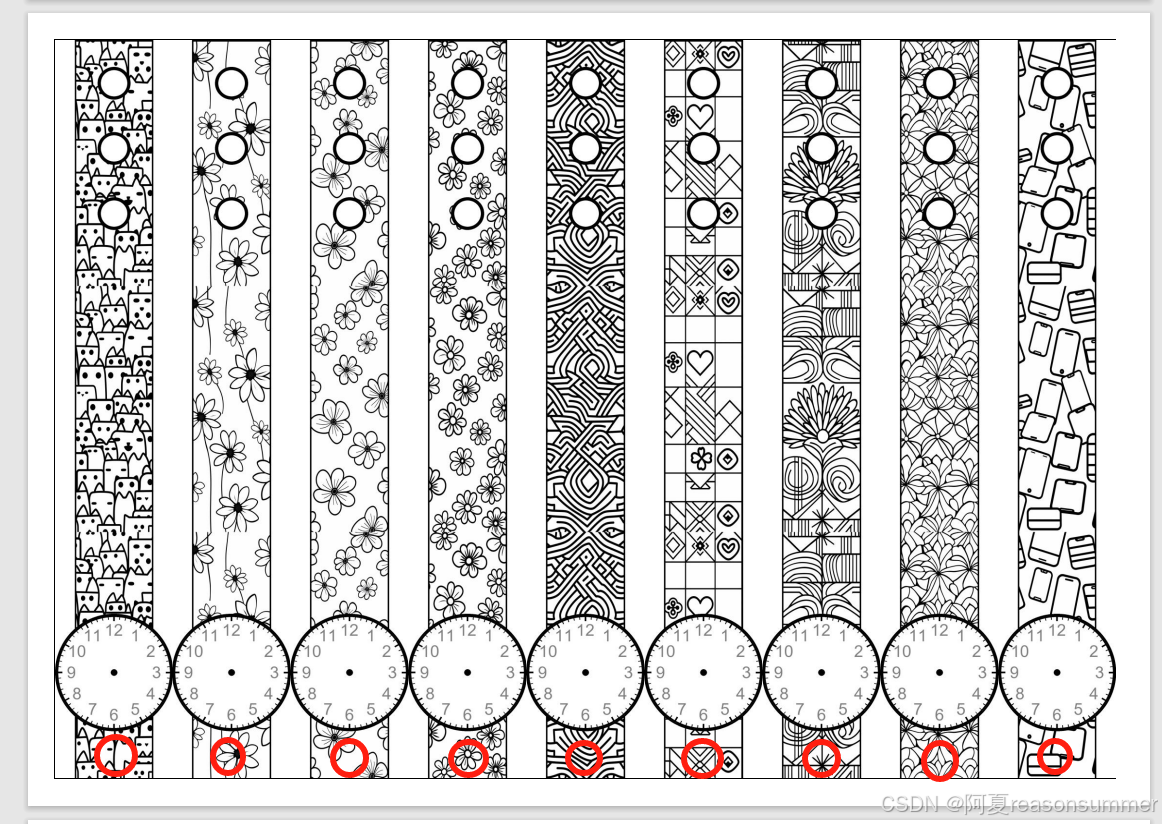
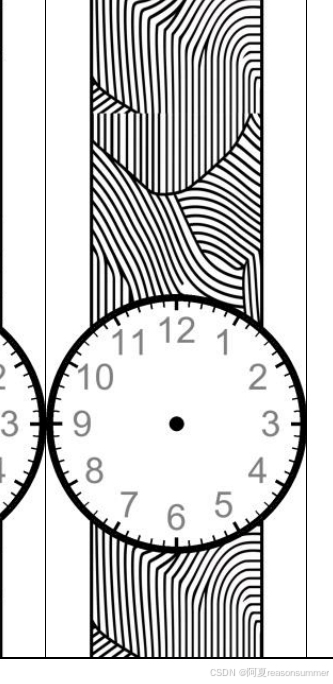
3、表带顶部配上一个表盘,也就是表带和表盘在一张纸上,不用黏贴,同时表盘上有数字。
4、不要设计环扣(不容易对称剪,同时纸片容易拉断)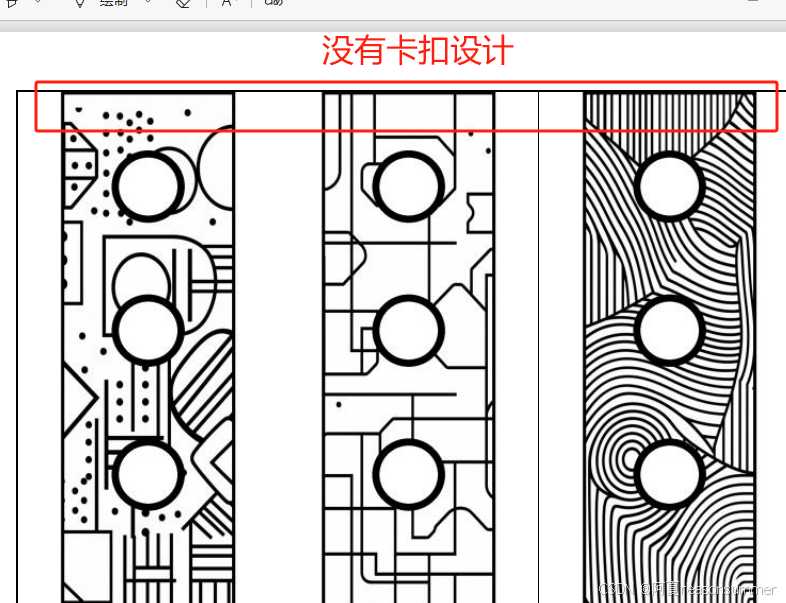
5、希望手表上的表盘圆形和雌雄扣的三个圆点保持正圆形,不是原来的拉长后变形的椭圆形。
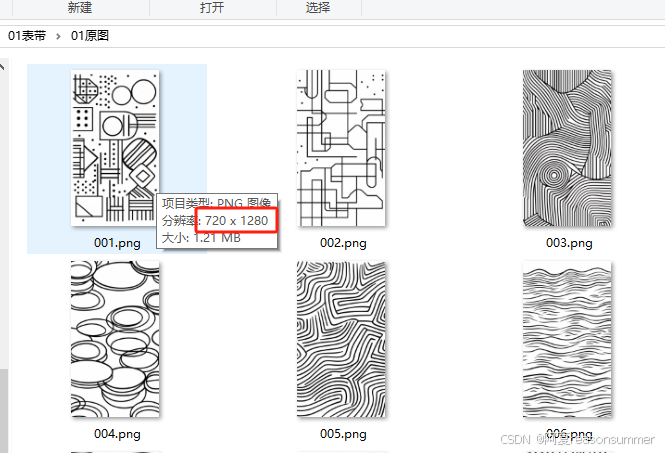
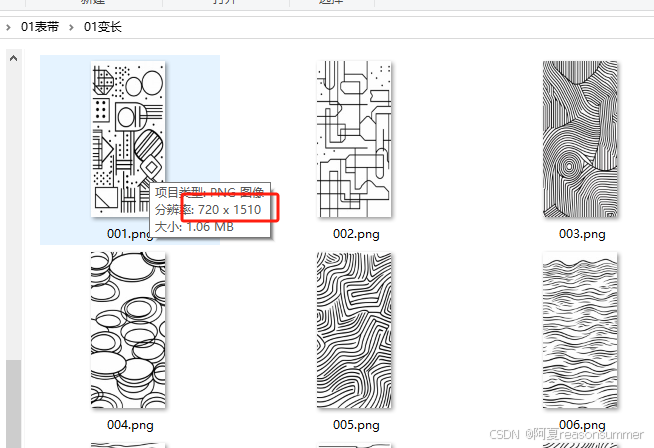
手动调试,把原图720*1280的1280长度扩大,反复测试,发现高度达到1510时,复制3倍长度正好凑满单元格的长度
由此代码设计思路流程是
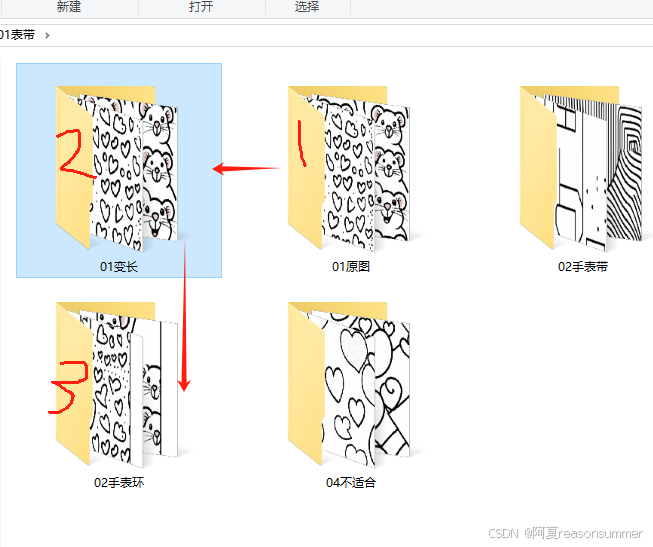
1、读取原图的720*1280,重新设置高度为1.18倍等于720*1510、放到"变长"文件夹
 ,
,
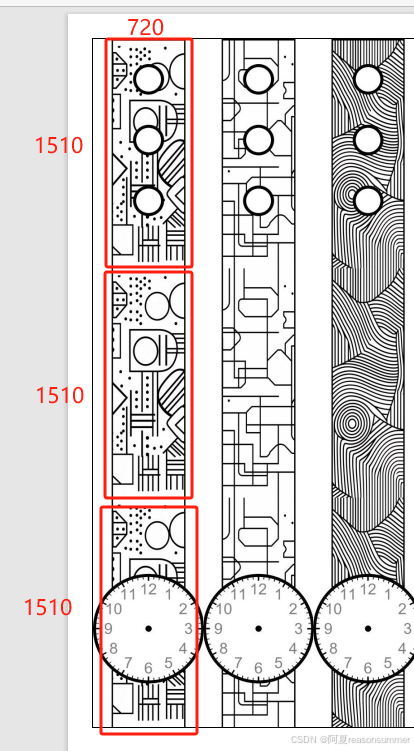
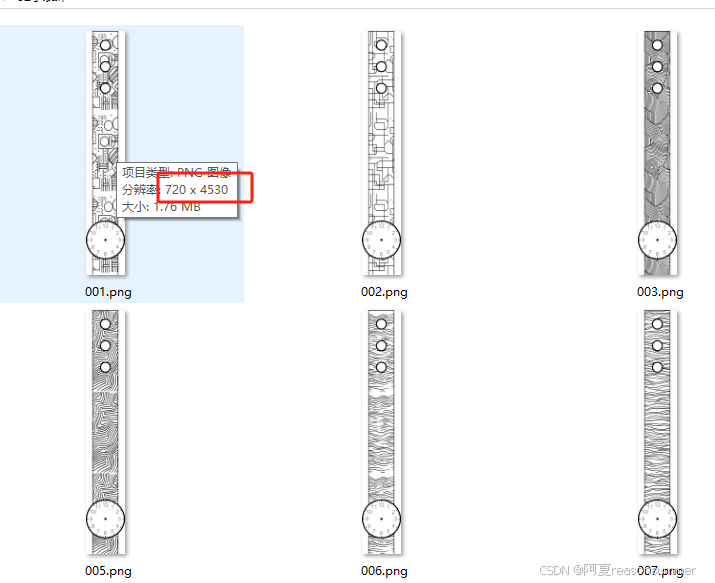
2、把拉长的图片复制3份,去掉左右0.5CM的白色部分,做表带,然后在上面画表盘和三个点
生成的图片放在"02手表环",每张尺寸720*4530
代码展示
python
# 3.89*2*5条
'''
表带3.12CM9条
星火讯飞、阿夏
2024年12月09日
'''
import os,math,time
from PIL import Image, ImageDraw
from PIL import Image
import shutil
from docx import Document
from docx.shared import Cm
from PIL import Image
from PyPDF2 import PdfFileMerger, PdfFileReader
from PIL import Image, ImageDraw, ImageFont
import os,random
print('----1、房屋切割成左右对称两片------------')
path=r'D:\20241204手表表皮表盘'
folder_path2=path+r'\01表带\01原图'
t=9
import os
from PIL import Image
folder_path=path +r'\01表带\01变长'
os.makedirs(folder_path,exist_ok=True)
# 遍历文件夹中的所有文件
for filename in os.listdir(folder_path2):
# 检查文件是否为图片
if filename.lower().endswith(('.png', '.jpg', '.jpeg', '.bmp', '.gif')):
# 拼接完整的文件路径
file_path = os.path.join(folder_path2, filename)
# 打开图片
with Image.open(file_path) as img:
# 获取图片的宽度和高度
width, height = img.size
print(f"{filename}:宽 = {width}, 长 = {height}")
# 计算新的高度(原高度的一半)
n_height = int(height*1.18)
print(f"{filename}:宽 = {width}, 长 = {n_height}")
# 003.png:宽 = 720, 长 = 1280
# 调整图片大小
resized_img = img.resize((width, n_height))
# 保存调整后的图片
new_file_path = os.path.join(folder_path, f"{filename}")
resized_img.save(new_file_path)
print(f"已保存调整后的图片: {new_file_path}")
# 720, 1280
# 003.png:宽 = 720, 长 = 1510
# # 设置文件夹路径
output_folder = path+r'\01表带\02手表环'
if not os.path.exists(output_folder):
os.makedirs(output_folder)
# 遍历文件夹中的所有文件
for filename in os.listdir(folder_path):
# 检查文件是否为图片
if filename.lower().endswith(('.png', '.jpg', '.jpeg', '.bmp', '.gif')):
# 拼接完整的文件路径
file_path = os.path.join(folder_path, filename)
# 打开图片
with Image.open(file_path) as img:
# 获取图片的宽度和高度
original_width, original_height = img.size
# 创建一个新的空白图片,宽度不变,高度为原图的两倍
new_width = original_width
new_height = original_height * 3
new_img = Image.new('RGB', (new_width, new_height), color='white')
# 在0,0和0,高度的一半位置插入两次原图
top_position = (0, 0)
middle_position = (0, original_height)
three_position = (0, original_height*2)
new_img.paste(img, top_position)
new_img.paste(img, middle_position)
new_img.paste(img, three_position)
# 创建一个绘图对象
draw = ImageDraw.Draw(new_img)
# 画线
# 设置虚线样式,每段2磅黑线和2磅空白交替出现
# dash_length = 40
# space_length = 30
# # 获取top和bottom的值
# tt=[]
# tt.append(top)
# tt.append(bottom)
# # 定义起始点和结束点
# for hh in tt:
# start_point = (original_width/6,top)
# end_point = (original_width/6*5,top)
# start_point = (original_width/6,hh)
# end_point = (original_width/6*5,hh)
# # 计算总长度
# total_length = end_point[0] - start_point[0]
# # 绘制虚线
# current_x = start_point[0]
# while current_x < end_point[0]:
# next_x = min(current_x + dash_length, end_point[0])
# draw.line([(current_x, start_point[1]), (next_x, start_point[1])], fill='black', width=10)
# current_x += dash_length + space_length
# draw.line([ (original_width/6,top), (original_width/6*5,top)], fill='black', width=2,dashes=dash_pattern)
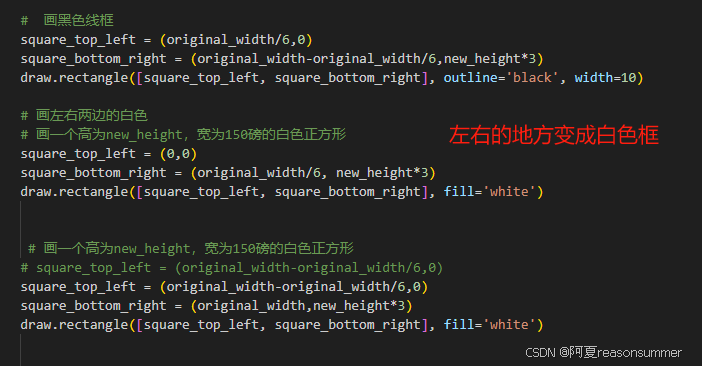
# 画黑色线框
square_top_left = (original_width/6,0)
square_bottom_right = (original_width-original_width/6,new_height*3)
draw.rectangle([square_top_left, square_bottom_right], outline='black', width=10)
# 画左右两边的白色
# 画一个高为new_height,宽为150磅的白色正方形
square_top_left = (0,0)
square_bottom_right = (original_width/6, new_height*3)
draw.rectangle([square_top_left, square_bottom_right], fill='white')
# 画一个高为new_height,宽为150磅的白色正方形
# square_top_left = (original_width-original_width/6,0)
square_top_left = (original_width-original_width/6,0)
square_bottom_right = (original_width,new_height*3)
draw.rectangle([square_top_left, square_bottom_right], fill='white')
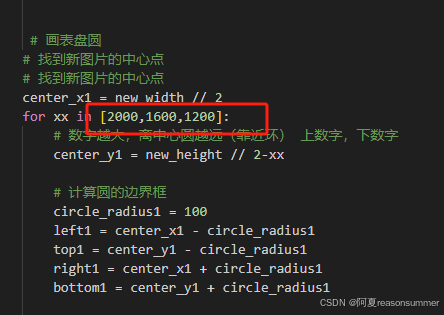
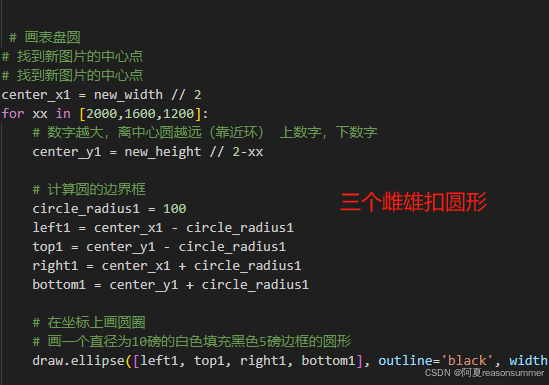
# 画表盘圆
# 找到新图片的中心点
# 找到新图片的中心点
center_x1 = new_width // 2
for xx in [2000,1600,1200]:
# 数字越大,离中心圆越远(靠近环) 上数字,下数字
center_y1 = new_height // 2-xx
# 计算圆的边界框
circle_radius1 = 100
left1 = center_x1 - circle_radius1
top1 = center_y1 - circle_radius1
right1 = center_x1 + circle_radius1
bottom1 = center_y1 + circle_radius1
# 在坐标上画圆圈
# 画一个直径为10磅的白色填充黑色5磅边框的圆形
draw.ellipse([left1, top1, right1, bottom1], outline='black', width=20, fill='white')
# # 在圆圈内填充1像素的小圆点
# for i in range(10):
# for j in range(10):
# draw.point((95 + i, 95 + j), fill='black')
# 顶部的手表环# 画一个高为new_height,宽为150磅的白色正方形
# square1= (0,0)
# square2 = (original_width,original_width/2)
# draw.rectangle([square1, square2], outline='black', width=10, )
# # fill='white'
# 顶部的手表环# 画一个高为new_height,宽为150磅的白色正方形
# square1= (original_width/6,original_width/6)
# square2 = (original_width/6*5,original_width/6*2)
# draw.rectangle([square1, square2], outline='black', width=10, fill='white')
# # 在三个点坐标上画一个左三角形,白色填充
# triangle_points = [(original_width/6, new_height), (original_width/6,new_height/6*4), (center_x-circle_radius1*2,new_height)]
# draw.polygon(triangle_points, fill='white')
# # 画线
# draw.line([ (original_width/6,new_height/6*4), (center_x-circle_radius1*2,new_height)], fill='black', width=10)
# # 在三个点坐标上画一个左三角形,白色填充
# triangle_points = [(original_width/6*5, new_height), (original_width/6*5,new_height/6*4), (center_x+circle_radius1*2,new_height)]
# draw.polygon(triangle_points, fill='white')
# # 画线
# draw.line([ (original_width/6*5,new_height/6*4), (center_x+circle_radius1*2,new_height)], fill='black', width=10)
# # 在斜线上画黑线
# 画表盘圆
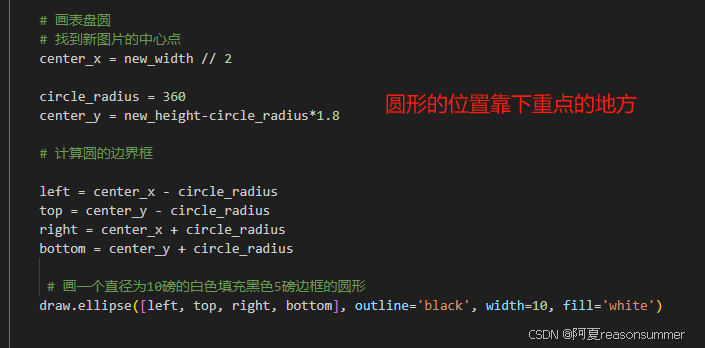
# 找到新图片的中心点
center_x = new_width // 2
circle_radius = 360
center_y = new_height-circle_radius*1.8
# 计算圆的边界框
left = center_x - circle_radius
top = center_y - circle_radius
right = center_x + circle_radius
bottom = center_y + circle_radius
# 画一个直径为10磅的白色填充黑色5磅边框的圆形
draw.ellipse([left, top, right, bottom], outline='black', width=10, fill='white')
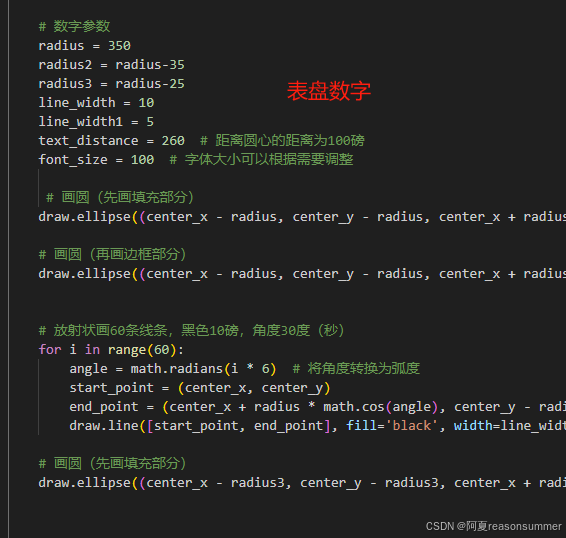
# 数字参数
radius = 350
radius2 = radius-35
radius3 = radius-25
line_width = 10
line_width1 = 5
text_distance = 260 # 距离圆心的距离为100磅
font_size = 100 # 字体大小可以根据需要调整
# 画圆(先画填充部分)
draw.ellipse((center_x - radius, center_y - radius, center_x + radius, center_y + radius), fill='white')
# 画圆(再画边框部分)
draw.ellipse((center_x - radius, center_y - radius, center_x + radius, center_y + radius), outline='black', width=line_width)
# 放射状画60条线条,黑色10磅,角度30度(秒)
for i in range(60):
angle = math.radians(i * 6) # 将角度转换为弧度
start_point = (center_x, center_y)
end_point = (center_x + radius * math.cos(angle), center_y - radius * math.sin(angle))
draw.line([start_point, end_point], fill='black', width=line_width1)
# 画圆(先画填充部分)
draw.ellipse((center_x - radius3, center_y - radius3, center_x + radius3, center_y + radius3), fill='white')
# 放射状画12条线条,黑色10磅,角度30度(分)
for i in range(12):
angle = math.radians(i * 30) # 将角度转换为弧度
start_point = (center_x, center_y)
end_point = (center_x + radius * math.cos(angle), center_y - radius * math.sin(angle))
draw.line([start_point, end_point], fill='black', width=line_width)
# 画圆(先画填充部分)
draw.ellipse((center_x - radius2, center_y - radius2, center_x + radius2, center_y + radius2), fill='white')
# 在中心点上画一个直径为10的黑色圆形
small_radius = 20 # 半径为5,直径为10
draw.ellipse((center_x - small_radius, center_y - small_radius, center_x + small_radius, center_y + small_radius), fill='black')
# 加载字体
font = ImageFont.truetype("arial.ttf", font_size)
# 计算文本位置
text_position_90 = (center_x + text_distance, center_y)
text_position_180 = (center_x, center_y + text_distance)
# 每隔30度写一个数字(1-12)
for i in range(12):
angle = math.radians(60+i * -30) # 将角度转换为弧度,
text_position = (center_x + text_distance * math.cos(angle), center_y - text_distance * math.sin(angle))
draw.text(text_position, str(i + 1), fill="gray", font=font, anchor="mm")
# 另存为新文件
new_filename = f"{os.path.splitext(filename)[0]}.png"
new_file_path = os.path.join(output_folder, new_filename)
new_img.save(new_file_path)
print(f"Saved {new_file_path}")
# 合并图案
import os,time
import shutil
from docx import Document
from docx.shared import Cm
from PIL import Image
from PyPDF2 import PdfFileMerger, PdfFileReader
from PIL import Image, ImageDraw, ImageFont
import os,random
# 获取文件夹下的所有图片文件
image_files = [os.path.join(output_folder, f) for f in os.listdir(output_folder) if f.endswith(('.jpg', '.jpeg', '.png'))]
print(image_files)
print(len(image_files))
# 9
# image_files=[]
# for a in range(len(image_file)):
# for _ in range(1): # 每个图片复制5次
# image_files.append(image_file[a])
# # image_files.append('')
# print(image_files)
# print(len(image_files))
# 将图片拆成14个一组
grouped_files = [image_files[i:i + t] for i in range(0, len(image_files), t)]
print(grouped_files)
print(len(grouped_files))
# 12
# 创建临时文件夹
new_folder = path+r'\零时文件夹'
os.makedirs(new_folder, exist_ok=True)
print('----3、插入docx,制作pdf------------')
# 处理每一组图片
for group_index, group in enumerate(grouped_files):
# 创建新的Word文档
doc = Document(path+r'\表带3.12CM9条.docx')
# print(group)
# 遍历每个单元格,并插入图片
for i in range(1):
for cell_index, image_file in enumerate(group):
# 计算图片长宽(单位:厘米)
# 如果是空格,就跳过
if not image_file:
continue
# 插入图片到单元格
table = doc.tables[0]
cell = table.cell(int(cell_index / t), cell_index % t)
# 如果第一行有2个格子,两个数字都写2
cell_paragraph = cell.paragraphs[0]
cell_paragraph.clear()
run = cell_paragraph.add_run()
run.add_picture(image_file, width=Cm(3.12), height=Cm(19.54))
# run.add_picture(image_file, width=Cm(2), height=Cm(3.89))
# 3.89
# 保存Word文档
doc.save(os.path.join(new_folder, f'{group_index + 1:03d}.docx'))
import os
from docx import Document
from docx.shared import Cm
grouped_files = [image_files[i:i + t] for i in range(0, len(image_files), t)]
print(len(grouped_files))
# 创建临时文件夹
new_folder = path + r'\零时文件夹'
os.makedirs(new_folder, exist_ok=True)
print('----3、插入docx,制作pdf------------')
# 处理每一组图片
for group_index, group in enumerate(grouped_files):
# 创建新的Word文档
doc = Document(path + fr'\表带3.12CM{t}条.docx')
# 获取表格对象
table = doc.tables[0]
# 遍历每个单元格,并插入图片
cell_index = 0
for row in table.rows:
for cell in row.cells:
if cell_index < len(group):
image_file = group[cell_index]
if image_file:
cell_paragraph = cell.paragraphs[0]
cell_paragraph.clear()
run = cell_paragraph.add_run()
run.add_picture(image_file, width=Cm(3.12), height=Cm(19.54))
cell_index += 1
elif cell_index >= len(group):
break
# 保存Word文档
doc.save(os.path.join(new_folder, f'{group_index + 1:03d}.docx'))
# 将10个docx转为PDF
import os
from docx2pdf import convert
from PyPDF2 import PdfFileMerger
# pdf_output_path = path+fr'\\01表带{int(len(grouped_files))}张共{int(len(image_files)/2)}图3.89五条.pdf'
# pdf_output_path = path+fr'\\01表带{int(len(grouped_files))}张共{int(len(image_files)/2)}图19.45.pdf'
pdf_output_path = path+fr'\\01表带3.12CM{t}条{(len(grouped_files))}张共{int(len(image_files))}图.pdf'
# 将所有DOCX文件转换为PDF
for docx_file in os.listdir(new_folder):
if docx_file.endswith('.docx'):
docx_path = os.path.join(new_folder, docx_file)
convert(docx_path, docx_path.replace('.docx', '.pdf'))
time.sleep(5)
# 合并零时文件里所有PDF文件
merger = PdfFileMerger()
for pdf_file in os.listdir(new_folder):
if pdf_file.endswith('.pdf'):
pdf_path = os.path.join(new_folder, pdf_file)
merger.append(pdf_path)
time.sleep(5)
# 保存合并后的PDF文件
merger.write(pdf_output_path)
merger.close()
# 删除输出文件夹
shutil.rmtree(new_folder)
time.sleep(2)最后合成的效果

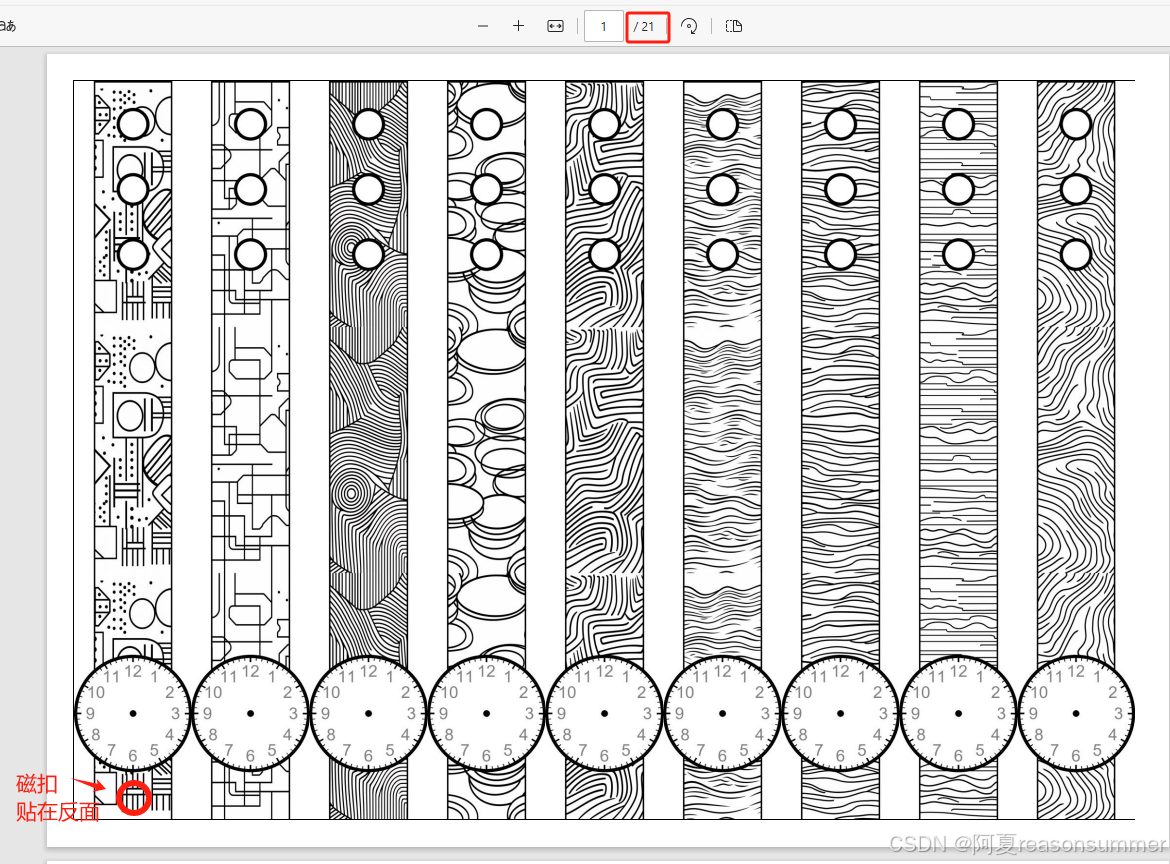
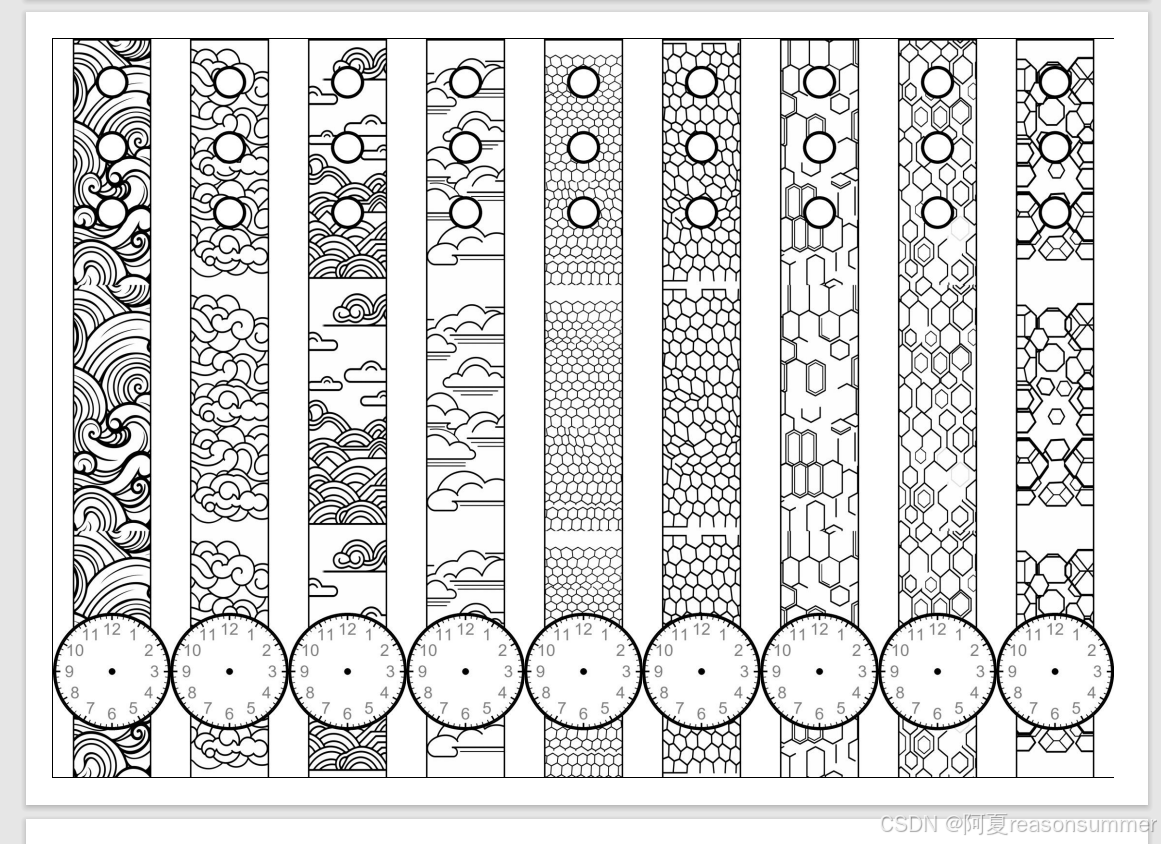
因为这个手表是表盘和表带连在一起的,所以3.12CM宽的表盘和2.12里面的表带在一起,所以只能用3.12CM9条的word模板。2CM哪一款就不做了。