【写在前面】
在 Qt 的 Quick 模块中,QQuickPaintedItem 是一个非常有用的类,它允许我们在 Qml 中自定义绘制逻辑。
我们可以通过这种方式实现水印工具,包括在文本、图片或整个窗口上添加水印。
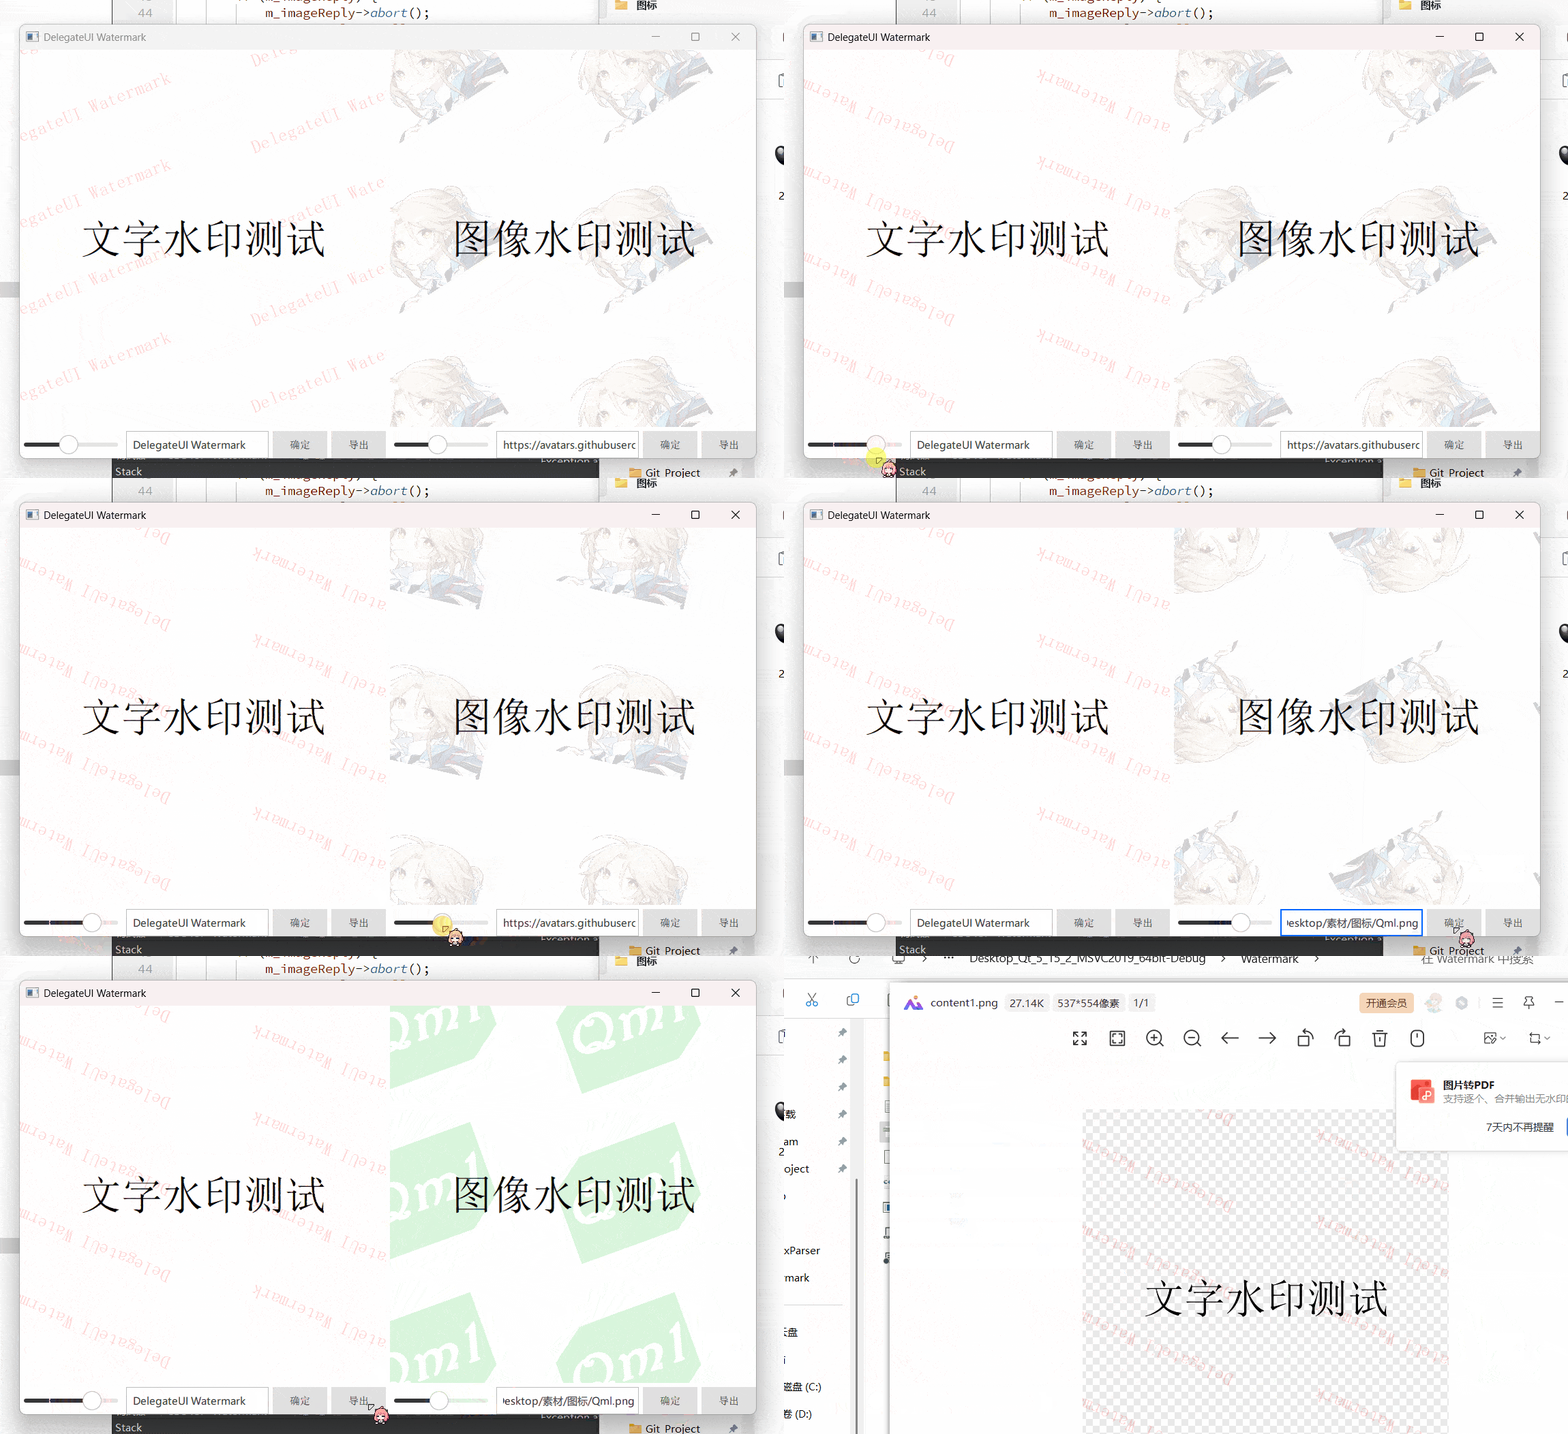
本文将介绍如何在 Qml 中实现一个简单但功能强大的水印工具,包括水印文本的透明度、颜色、字体大小、旋转角度等自定义功能。
【正文开始】
一、效果图

二、水印工具类的设计
首先,我们需要设计一个 C++ 类来表示水印工具。这个类将继承自 QQuickPaintedItem,并添加一些属性来控制水印的外观和行为。这些属性包括水印文本、图像、大小、间距、偏移量、旋转角度、字体和字体颜色。
watermark.h
在 Watermark 类的头文件中,我们声明了所有的属性和相应的信号、槽函数。使用 Q_PROPERTY 宏来声明 Qml 中可访问的属性。
cpp
#ifndef WATERMARK_H
#define WATERMARK_H

#include <QQuickPaintedItem>

QT_FORWARD_DECLARE_CLASS(WatermarkPrivate);

class Watermark : public QQuickPaintedItem
{
    Q_OBJECT

    // 声明QML中可访问的属性
    Q_PROPERTY(QString text READ text WRITE setText NOTIFY textChanged FINAL)
    Q_PROPERTY(QUrl image READ image WRITE setImage NOTIFY imageChanged FINAL)
    Q_PROPERTY(QSize markSize READ markSize WRITE setMarkSize NOTIFY markSizeChanged FINAL)
    Q_PROPERTY(QPointF gap READ gap WRITE setGap NOTIFY gapChanged FINAL)
    Q_PROPERTY(QPointF offset READ offset WRITE setOffset NOTIFY offsetChanged FINAL)
    Q_PROPERTY(qreal rotate READ rotate WRITE setRotate NOTIFY rotateChanged FINAL)
    Q_PROPERTY(QFont font READ font WRITE setFont NOTIFY fontChanged FINAL)
    Q_PROPERTY(QColor fontColor READ fontColor WRITE setFontColor NOTIFY fontColorChanged FINAL)

public:
    Watermark(QQuickItem *parent = nullptr);
    ~Watermark();

    // 属性的getter和setter函数
    QString text() const;
    void setText(const QString &text);

    QUrl image() const;
    void setImage(const QUrl &image);

    QSize markSize() const;
    void setMarkSize(const QSize &markSize);

    QPointF gap() const;
    void setGap(const QPointF &gap);

    QPointF offset() const;
    void setOffset(const QPointF &offset);

    qreal rotate() const;
    void setRotate(qreal rotate);

    QFont font() const;
    void setFont(const QFont &font);

    QColor fontColor() const;
    void setFontColor(const QColor &fontColor);

signals:
    void textChanged();
    void imageChanged();
    void markSizeChanged();
    void gapChanged();
    void offsetChanged();
    void rotateChanged();
    void fontChanged();
    void fontColorChanged();

protected:
    void paint(QPainter *painter);

private:
    Q_DECLARE_PRIVATE(Watermark);
    QScopedPointer<WatermarkPrivate> d_ptr;
};

#endif // WATERMARK_H
watermark.cpp
在 Watermark 类的实现文件中,我们主要实现了属性的 setter 和 getter 函数,这些函数在属性值改变时会触发相应的信号,并调用update()函数来请求重新绘制。同时,我们也实现了paint()函数,它使用 QPainter 来绘制水印。
cpp
// watermark.cpp的实现省略,具体可参考提供的 watermark.cpp 文件WatermarkPrivate.h
WatermarkPrivate 是 Watermark 类的私有实现部分,它包含了所有的成员变量和辅助函数。这些成员变量包括水印文本、图像URL、网络请求回复、图像缓存、字体和字体颜色等。
cpp
// WatermarkPrivate类的声明省略,具体可参考watermark.cpp文件中的WatermarkPrivate部分三、 Qml 中的使用
main.qml
在 Qml 文件中,我们可以使用 Watermark 元素来添加水印。通过设置 Watermark 的属性,我们可以控制水印的外观和行为。
javascript
import QtQuick 2.15
import QtQuick.Controls 2.15
import QtQuick.Window 2.15
import QtQuick.Layouts 1.15

import DelegateUI.Controls 1.0

Window {
    id: window
    width: 1080
    height: 600
    visible: true
    title: qsTr("DelegateUI Watermark")

    RowLayout {
        anchors.fill: parent

        ColumnLayout {
            Layout.preferredWidth: parent.width * 0.5
            Layout.preferredHeight: parent.height * 0.5

            Item {
                id: content1
                Layout.fillWidth: true
                Layout.fillHeight: true

                Watermark {
                    id: watermark1
                    anchors.fill: parent
                    offset.x: -50
                    offset.y: -50
                    rotate: slider1.value
                    fontColor: "#30ff0000"
                }

                Text {
                    anchors.centerIn: parent
                    text: qsTr("文字水印测试")
                    font.pointSize: 36
                }
            }

            RowLayout {
                Layout.fillWidth: true
                Layout.maximumHeight: 40

                Slider {
                    id: slider1
                    Layout.preferredWidth: 150
                    Layout.fillHeight: true
                    value: -22
                    from: -360
                    to: 360
                    stepSize: 1
                }

                TextField {
                    id: markText
                    Layout.fillWidth: true
                    Layout.fillHeight: true
                    text: "DelegateUI Watermark"
                    placeholderText: qsTr("输入水印文本")
                    font.family: "微软雅黑"
                    selectByMouse: true
                }

                Button {
                    Layout.preferredWidth: 80
                    Layout.fillHeight: true
                    text: qsTr("确定")
                    onClicked: watermark1.text = markText.text;
                }

                Button {
                    Layout.preferredWidth: 80
                    Layout.fillHeight: true
                    text: qsTr("导出")
                    onClicked: {
                        content1.grabToImage((result)=>{
                                                 result.saveToFile("./content1.png");
                                                 Qt.openUrlExternally("file:./");
                                             });
                    }
                }
            }
        }

        ColumnLayout {
            Layout.preferredWidth: parent.width * 0.5
            Layout.preferredHeight: parent.height * 0.5

            Item {
                id: content2
                Layout.fillWidth: true
                Layout.fillHeight: true

                Watermark {
                    id: watermark2
                    anchors.fill: parent
                    offset.x: -50
                    offset.y: -50
                    markSize.width: 200
                    markSize.height: 150
                    rotate: slider2.value
                    opacity: 0.2
                }

                Text {
                    anchors.centerIn: parent
                    text: qsTr("图像水印测试")
                    font.pointSize: 36
                }
            }

            RowLayout {
                Layout.fillWidth: true
                Layout.maximumHeight: 40

                Slider {
                    id: slider2
                    Layout.preferredWidth: 150
                    Layout.fillHeight: true
                    value: -22
                    from: -360
                    to: 360
                    stepSize: 1
                }

                TextField {
                    id: markImage
                    Layout.fillWidth: true
                    Layout.fillHeight: true
                    text: "https://avatars.githubusercontent.com/u/33405710?v=4"
                    placeholderText: qsTr("输入水印图片链接")
                    font.family: "微软雅黑"
                    selectByMouse: true
                }

                Button {
                    Layout.preferredWidth: 80
                    Layout.fillHeight: true
                    text: qsTr("确定")
                    onClicked: watermark2.image = markImage.text;
                }

                Button {
                    Layout.preferredWidth: 80
                    Layout.fillHeight: true
                    text: qsTr("导出")
                    onClicked: {
                        content2.grabToImage((result)=>{
                                                 result.saveToFile("./content2.png");
                                                 Qt.openUrlExternally("file:./");
                                             });
                    }
                }
            }
        }
    }
}
在这个 Qml 文件中,我们创建了两个个 Watermark 元素并通过设置 Watermark 的各种属性,我们实现了一个带有文本和图像的水印效果,并且可以控制水印的大小、间距、偏移量、旋转角度、字体和字体颜色。
【结语】
通过使用 QQuickPaintedItem,我们可以在 Qml 中实现了一个功能丰富的水印工具。
这个工具允许我们自定义水印的外观和行为,并且可以很方便地在 Qml 中使用。
最后:项目链接(多多star呀..⭐_⭐):