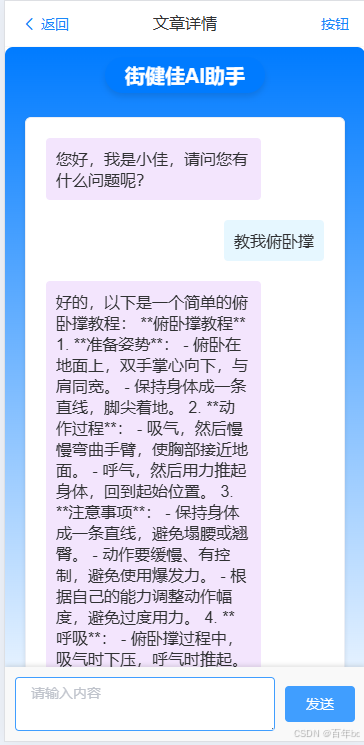
成品展示
一、首先去注册个账号然后申请个API keys

二、引入依赖
XML
        <dependency>
            <groupId>cn.bigmodel.openapi</groupId>
            <artifactId>oapi-java-sdk</artifactId>
            <version>release-V4-2.3.0</version>
        </dependency>
        <dependency>
            <groupId>com.alibaba</groupId>
            <artifactId>fastjson</artifactId>
            <version>1.2.75</version>
        </dependency>
三、后端代码
此处参考的是这位大佬的文章Java(Spring boot)集成智谱AI聊天(简易版)_智谱ai问答springboot-CSDN博客
ZhipuAIService.java:
java
import com.fasterxml.jackson.core.type.TypeReference;
import com.fasterxml.jackson.databind.ObjectMapper;
import com.zhipu.oapi.ClientV4;
import com.zhipu.oapi.Constants;
import com.zhipu.oapi.service.v4.model.ChatCompletionRequest;
import com.zhipu.oapi.service.v4.model.ChatMessage;
import com.zhipu.oapi.service.v4.model.ModelApiResponse;
import org.springframework.beans.factory.annotation.Value;
import org.springframework.stereotype.Service;
import java.util.ArrayList;
import java.util.List;
import java.util.Map;
@Service
public class ZhipuAIService {
    private final ClientV4 client;
    private final ObjectMapper objectMapper;
    public ZhipuAIService(@Value("${bigmodel.api.key}") String apiKey) {
        this.client = new ClientV4.Builder(apiKey).build();
        this.objectMapper = new ObjectMapper();
    }
    //构建信息
    public String invokeChatCompletion(String userMessage) {
        List<ChatMessage> messages = new ArrayList<>();
        ChatMessage chatMessage = new ChatMessage("user", userMessage);
        messages.add(chatMessage);
        ChatCompletionRequest chatCompletionRequest = ChatCompletionRequest.builder()
                //表明使用的模型
                .model("glm-4-flash")
                //表示不使用流式响应
                .stream(Boolean.FALSE)
                .invokeMethod(Constants.invokeMethod)
                .messages(messages)
                .requestId("request-id-" + System.currentTimeMillis())
                .build();
        ModelApiResponse response = client.invokeModelApi(chatCompletionRequest);
        try {
            // 将response的数据转换为Map
            String jsonString = objectMapper.writeValueAsString(response.getData());
            Map<String, Object> dataMap = objectMapper.readValue(jsonString, new TypeReference<Map<String, Object>>() {});
            // 提取内容
            if (dataMap.containsKey("choices")) {
                List<Map<String, Object>> choices = (List<Map<String, Object>>) dataMap.get("choices");
                if (!choices.isEmpty()) {
                    Map<String, Object> firstChoice = choices.get(0);
                    Map<String, Object> message = (Map<String, Object>) firstChoice.get("message");
                    if (message != null && message.containsKey("content")) {
                        return (String) message.get("content");
                    }
                }
            }
            return "找不到内容";
        } catch (Exception e) {
            return "响应错误";
        }
    }
}
ZhipuAiController.java:
java
import org.springframework.beans.factory.annotation.Autowired;
import org.springframework.web.bind.annotation.PostMapping;
import org.springframework.web.bind.annotation.RequestBody;
import org.springframework.web.bind.annotation.RequestMapping;
import org.springframework.web.bind.annotation.RestController;

import java.io.UnsupportedEncodingException;
import java.net.URLDecoder;
import java.nio.charset.StandardCharsets;


@RestController
@RequestMapping("/app/chat")
public class ZhipuAiController {

    @Autowired
    private final ZhipuAIService zhipuAiService;

    public ZhipuAiController(ZhipuAIService zhipuAiService) {
        this.zhipuAiService = zhipuAiService;
    }

    @PostMapping("/ask")
    public String chat(@RequestBody String userInput) {
        try {
            // 对接收到的userInput进行URL解码
            userInput = URLDecoder.decode(userInput, StandardCharsets.UTF_8.toString());
        } catch (UnsupportedEncodingException e) {
            return "解码错误";
        }
        String response = zhipuAiService.invokeChatCompletion(userInput);
        return response;
    }

}
四、前端代码
请求路径要换成自己的
javascript
<template>
    <div class="ai-chat">
      <!-- 页面栏 -->
      <van-nav-bar title="文章详情" left-text="返回" right-text="按钮" left-arrow @click-left="onClickLeft" />
      <div class="ai-chat-container">
        <div class="title">街健佳AI助手</div>
        <el-card class="chat-card">
          <div v-for="(message, index) in messages" :key="index" class="message">
            <div :class="{ 'user-message': message.role === 'USER', 'ai-message': message.role === 'AI' }">
              {{ message.content }}
            </div>
          </div>
          <div v-if="isAnalyzing" class="analyzing">分析中...</div>
          <div class="input-wrapper">
            <el-input
              type="textarea"
              v-model="inputMessage"
              :rows="2"
              placeholder="请输入内容"
              class="chat-input"
              @keyup.enter.native="sendMessage"
            ></el-input>
            <el-button type="primary" @click="sendMessage">发送</el-button>
          </div>
        </el-card>
      </div>
    </div>
  </template>
  <script>
  import axios from 'axios';
  import { MessageBox } from 'element-ui';
  import { API_URL } from '../../config/config';

  export default {
    data() {
      return {
        messages: [],
        inputMessage: '',
        isAnalyzing: false,
      };
    },
    created() {
      // 页面加载时发送欢迎消息
      this.messages.push({ role: 'AI', content: '您好,我是小佳,请问您有什么问题呢?' });
    },
    methods: {
      async sendMessage() {
        if (this.inputMessage.trim()) {
          this.messages.push({ role: 'USER', content: this.inputMessage });
          this.isAnalyzing = true; // 显示"分析中"提示
          try {
            const response = await axios.post(API_URL + 'app/chat/ask', { message: this.inputMessage });
            this.isAnalyzing = false; // 隐藏"分析中"提示
            if (response.data) {
              this.messages.push({ role: 'AI', content: response.data });
            } else {
              MessageBox.alert('没有收到AI的回复', '提示', { type: 'warning' });
            }
          } catch (error) {
            this.isAnalyzing = false; // 隐藏"分析中"提示
            MessageBox.alert('发送失败: ' + error.message, '错误', { type: 'error' });
          }
          this.inputMessage = '';
        }
      },
      onClickLeft() {
        this.$router.go(-1);
      },
    },
  };
  </script>
  <style scoped>
  .ai-chat {
    display: flex;
    flex-direction: column;
    height: 100vh;
  }

  .ai-chat-container {
    background: linear-gradient(to bottom, #007bff, #ffffff);
    max-width: 800px;
    height: calc(100vh - 50px); /* 减去顶部栏的高度 */
    margin: auto;
    padding: 20px;
    border-radius: 8px;
    box-shadow: 0 4px 6px rgba(0, 0, 0, 0.1);
    overflow: hidden;
    position: relative;
    overflow-y: auto; /* 允许垂直滚动 */
  }

  .title {
    position: absolute;
    top: 10px;
    left: 50%;
    transform: translateX(-50%);
    background-color: #007bff;
    color: #ffffff;
    padding: 5px 20px;
    border-radius: 999px;
    text-align: center;
    font-size: 20px;
    font-weight: bold;
    box-shadow: 0 4px 6px rgba(0, 0, 0, 0.1);
  }

  .chat-card {
    background-color: #fff;
    border-radius: 6px;
    box-shadow: 0 2px 4px rgba(0, 0, 0, 0.1);
    padding: 0px;
    margin-top: 50px;
    flex: 1;
    overflow-y: auto;
  }

  .message {
    margin-bottom: 20px;
    display: flex;
    align-items: flex-end;
  }

  .user-message {
    background-color: #e6f7ff;
    border-radius: 4px;
    padding: 10px;
    max-width: 60%;
    margin-left: auto;
  }

  .ai-message {
    background-color: #f3e5fd;
    border-radius: 4px;
    padding: 10px;
    max-width: 70%;
    margin-right: auto;
    text-align: left;
  }

  .input-wrapper {
    display: flex;
    align-items: center;
    position: fixed;
    bottom: 0;
    left: 0;
    right: 0;
    background-color: #f9f9f9;
    padding: 10px;
    box-shadow: 0 -2px 4px rgba(0, 0, 0, 0.1);
  }

  .chat-input {
    flex-grow: 1;
    margin-right: 10px;

  }

  .el-button {
    width: auto;
    padding: 10px 20px;
  }

  .analyzing {
    text-align: center;
    margin-top: 20px;
    color: #909399;
  }
  </style>
如果这篇文章帮助到了您,麻烦点个赞哦~