参考
https://blog.csdn.net/weixin_46059351/article/details/140649426
https://blog.csdn.net/qq_46028493/article/details/144993598
Centos 安装 GitLab
修改 yum 的配置
首先查看目前配置的 yum:
shell
cat /etc/yum.repos.d/CentOS-Base.repo应该是这个样子的:
shell
# CentOS-Base.repo
#
# The mirror system uses the connecting IP address of the client and the
# update status of each mirror to pick mirrors that are updated to and
# geographically close to the client.  You should use this for CentOS updates
# unless you are manually picking other mirrors.
#
# If the mirrorlist= does not work for you, as a fall back you can try the
# remarked out baseurl= line instead.
#
#

[base]
name=CentOS-$releasever - Base
mirrorlist=http://mirrorlist.centos.org/?release=$releasever&arch=$basearch&repo=os&infra=$infra
#baseurl=http://mirror.centos.org/centos/$releasever/os/$basearch/
gpgcheck=1
gpgkey=file:///etc/pki/rpm-gpg/RPM-GPG-KEY-CentOS-7

#released updates
[updates]
name=CentOS-$releasever - Updates
mirrorlist=http://mirrorlist.centos.org/?release=$releasever&arch=$basearch&repo=updates&infra=$infra
#baseurl=http://mirror.centos.org/centos/$releasever/updates/$basearch/
gpgcheck=1
gpgkey=file:///etc/pki/rpm-gpg/RPM-GPG-KEY-CentOS-7

#additional packages that may be useful
[extras]
name=CentOS-$releasever - Extras
mirrorlist=http://mirrorlist.centos.org/?release=$releasever&arch=$basearch&repo=extras&infra=$infra
#baseurl=http://mirror.centos.org/centos/$releasever/extras/$basearch/
gpgcheck=1
gpgkey=file:///etc/pki/rpm-gpg/RPM-GPG-KEY-CentOS-7

#additional packages that extend functionality of existing packages
[centosplus]
name=CentOS-$releasever - Plus
mirrorlist=http://mirrorlist.centos.org/?release=$releasever&arch=$basearch&repo=centosplus&infra=$infra
#baseurl=http://mirror.centos.org/centos/$releasever/centosplus/$basearch/
gpgcheck=1
enabled=0
gpgkey=file:///etc/pki/rpm-gpg/RPM-GPG-KEY-CentOS-7
两个地方要改:
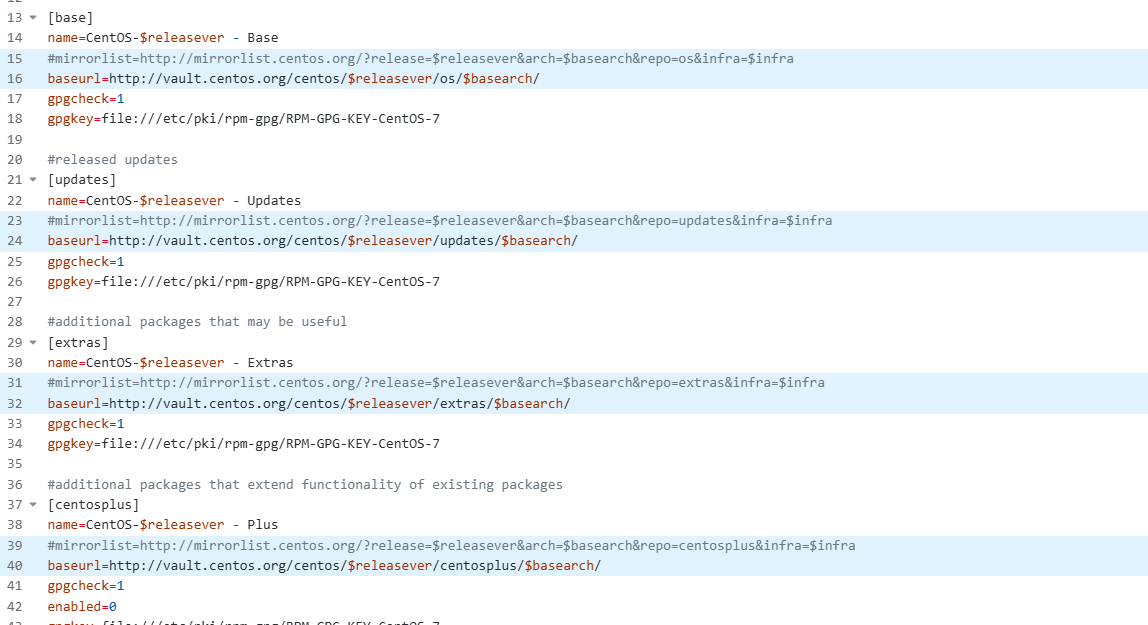
- 注释掉 mirrorlist 并且打开 baseurl 的注释
- 由于 centos7 在 24 年六月停更新版本了,所以把 baseurl 里的 mirror 改成 vault
修改后的配置:
shell
# CentOS-Base.repo
#
# The mirror system uses the connecting IP address of the client and the
# update status of each mirror to pick mirrors that are updated to and
# geographically close to the client.  You should use this for CentOS updates
# unless you are manually picking other mirrors.
#
# If the mirrorlist= does not work for you, as a fall back you can try the
# remarked out baseurl= line instead.
#
#

[base]
name=CentOS-$releasever - Base
#mirrorlist=http://mirrorlist.centos.org/?release=$releasever&arch=$basearch&repo=os&infra=$infra
baseurl=http://vault.centos.org/centos/$releasever/os/$basearch/
gpgcheck=1
gpgkey=file:///etc/pki/rpm-gpg/RPM-GPG-KEY-CentOS-7

#released updates
[updates]
name=CentOS-$releasever - Updates
#mirrorlist=http://mirrorlist.centos.org/?release=$releasever&arch=$basearch&repo=updates&infra=$infra
baseurl=http://vault.centos.org/centos/$releasever/updates/$basearch/
gpgcheck=1
gpgkey=file:///etc/pki/rpm-gpg/RPM-GPG-KEY-CentOS-7

#additional packages that may be useful
[extras]
name=CentOS-$releasever - Extras
#mirrorlist=http://mirrorlist.centos.org/?release=$releasever&arch=$basearch&repo=extras&infra=$infra
baseurl=http://vault.centos.org/centos/$releasever/extras/$basearch/
gpgcheck=1
gpgkey=file:///etc/pki/rpm-gpg/RPM-GPG-KEY-CentOS-7

#additional packages that extend functionality of existing packages
[centosplus]
name=CentOS-$releasever - Plus
#mirrorlist=http://mirrorlist.centos.org/?release=$releasever&arch=$basearch&repo=centosplus&infra=$infra
baseurl=http://vault.centos.org/centos/$releasever/centosplus/$basearch/
gpgcheck=1
enabled=0
gpgkey=file:///etc/pki/rpm-gpg/RPM-GPG-KEY-CentOS-7
要修改的是标注出来的那些行:
如果还是不行,建议将 yum 源切换为阿里云:
https://www.yuque.com/u22375957/sg1s9y/gxw2ueau0dzskfef
https://blog.csdn.net/qq_46028493/article/details/144993598
创建安装脚本并执行安装
在用户 home 目录下创建 bin 目录(有了就不创建):
shell
cd ~
mkdir bin
创建安装脚本:
shell
vim gitlab-install.sh脚本内容如下:
shell
sudo yum install -y curl policycoreutils-python openssh-server perl
sudo rpm -ivh /opt/software/gitlab-ce-16.2.1-ce.0.el7.x86_64.rpm
sudo yum install -y postfix
sudo systemctl enable postfix
sudo systemctl start postfix
修改脚本权限并执行:
shell
chmod +x gitlab-install.sh
sh gitlab-install.sh
初始化
shell
sudo gitlab-ctl reconfigure执行过程大概需要3分钟
默认用户名是 root,密码通过如下命令获取:
shell
sudo cat /etc/gitlab/initial_root_password启动后,通过 80 端口访问 gitlab 的 web 页面。
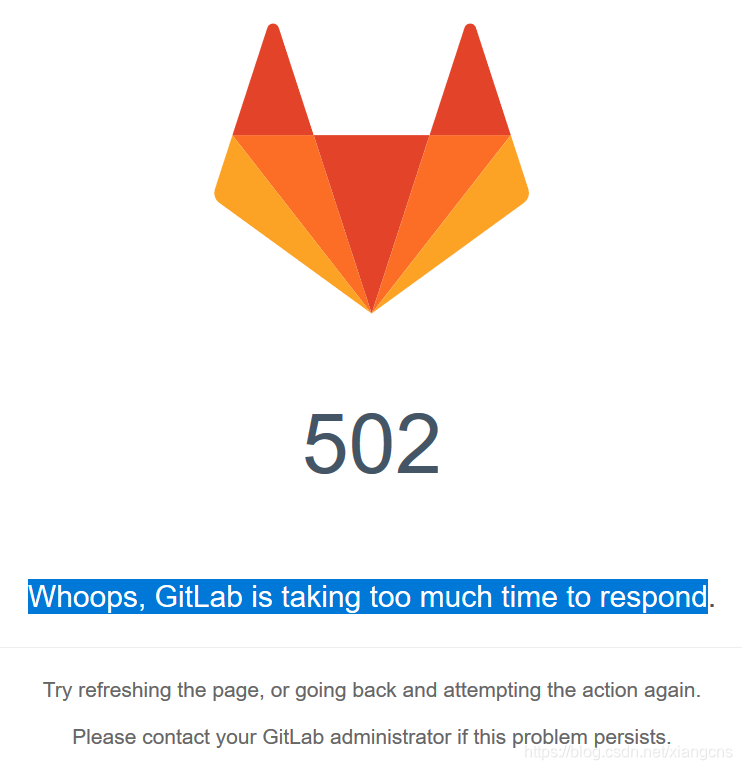
出现下面这个页面,大概率是内存不足或 Zookeeper 占用了 8080 端口(解决办法见下面的内容):
启停命令
启动命令:
shell
sudo gitlab-ctl start停止命令:
shell
sudo gitlab-ctl stop重启命令:
shell
sudo gitlab-ctl restart彻底卸载:
shell
# 1 卸载 gitlab
sudo rpm -e gitlab-ce-16.2.1-ce.0.el7.x86_64
# 2 删除 gitlab 文件
sudo rm -rf /etc/gitlab
sudo rm -rf /var/opt/gitlab
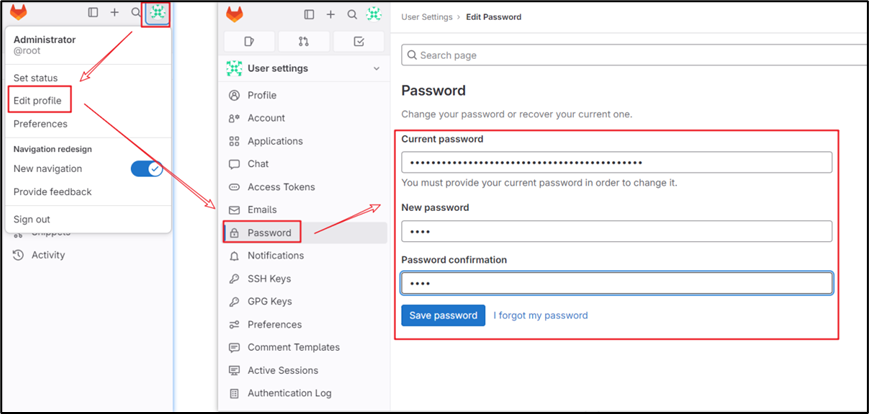
sudo rm -rf /opt/gitlab修改密码
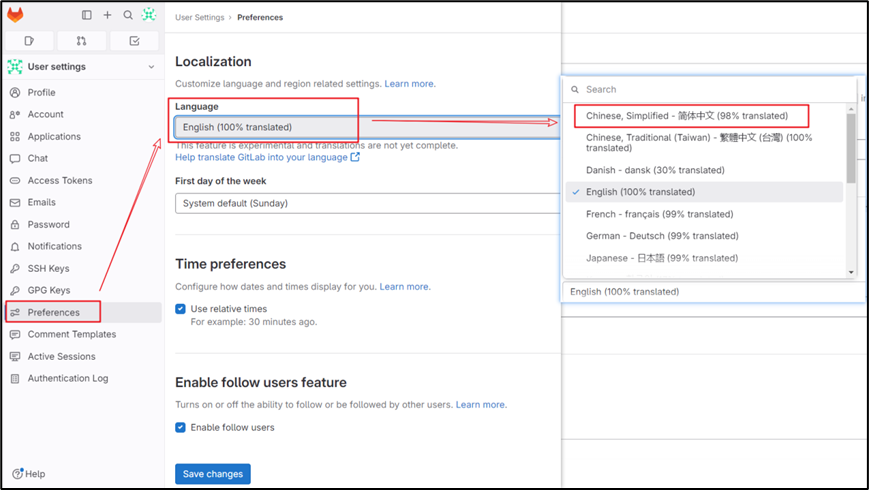
修改语言为中文
修改 external_url
external_url 配置项是 GitLab 配置文件中的一个关键设置,它指定了 GitLab 实例在外部网络中可访问的 URL。这个配置对于 GitLab 的正常运行和用户访问至关重要。
作用总结:
● 定义访问地址: 告诉 GitLab,用户应该通过哪个 URL 来访问实例。
● 影响URL生成: GitLab 在生成各种 URL(例如项目地址、用户页面等)时会以此为基础。
● 影响HTTPS配置: 如果设置了 HTTPS,这个配置会影响证书的配置。
● 确保正确访问: 只有正确配置了 external_url,用户才能通过浏览器或其他客户端访问 GitLab。
shell
sudo vim /etc/gitlab/gitlab.rb修改为如下内容(gitlab 所在的主机名):
ruby
external_url 'http://hadoop32'重启生效:
shell
sudo gitlab-ctl restart修改 host
此处的 host 决定了 Web 端项目 Clone 标签下看到的 URL 中使用的域名或主机名,比如:
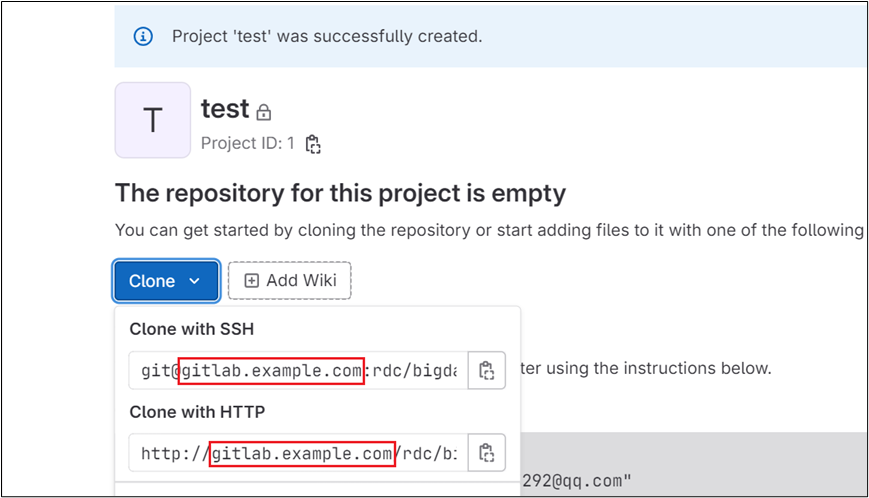
shell
sudo vim /opt/gitlab/embedded/service/gitlab-rails/config/gitlab.yml修改为如下内容:
yaml
  ## GitLab settings
  gitlab:
    ## Web server settings (note: host is the FQDN, do not include http://)
    host: hadoop32
    port: 80
    https: false
重启 gitlab 生效:
shell
sudo gitlab-ctl restart解决 8080 端口冲突
从GitLab 13.0开始,Puma 是默认的应用程序服务器,GitLab 14.0 及更高版本已删除对 Unicorn 的支持。Puma 需要使用 8080 端口,而 Zookeeper 当前版本的 Admin 服务也会占用 8080 端口,因此,如果 Zookeeper 先于 GitLab 启动,则通过 Web 端访问 GitLab 将会报错,错误码为 502,如下:
修改 puma.rb,将Puma绑定的 TCP 端口更改为 8089 :
shell
sudo vim /var/opt/gitlab/gitlab-rails/etc/puma.rb
ruby
bind 'tcp://127.0.0.1:8089's修改 gitlab.rb:
shell
sudo vim /etc/gitlab/gitlab.rb打开注释并修改为 8089:
ruby
puma['port'] = 8089重新加载配置并重启 gitlab:
shell
sudo gitlab-ctl reconfigure
sudo gitlab-ctl restart
重启后可能需要等待几十秒方可恢复Web端访问
解决 8060 端口冲突
默认情况下GitLab会在本地的8060端口启动服务来监控NGINX服务的状态,而Doris的brpc_port默认端口也是8060,这个端口是用于Backends之间及Backends和Frontends通信的,如果被占用则Backend进程无法启动。
我们可以修改Doris集群Backends的brpc_port端口,也可以修改GitLab的nginx-status端口,此处选择后者。
shell
sudo vim /etc/gitlab/gitlab.rb
ruby
nginx['status'] = {
  "enable" => true,
  "listen_addresses" => ["127.0.0.1"],
  "fqdn" => "127.0.0.1",
  "port" => 9999,
  "vts_enable" => true,
  "options" => {
    "server_tokens" => "on", # Don't show the version of NGINX
    "access_log" => "on", # Disable logs for stats
    "allow" => "127.0.0.1", # Only allow access from localhost
    "deny" => "all" # Deny access to anyone else
  }
}
重新加载配置并重启 gitlab:
shell
sudo gitlab-ctl reconfigure
sudo gitlab-ctl restart
执行以下两行命令验证 8060 没有使用,9999 端口使用了:

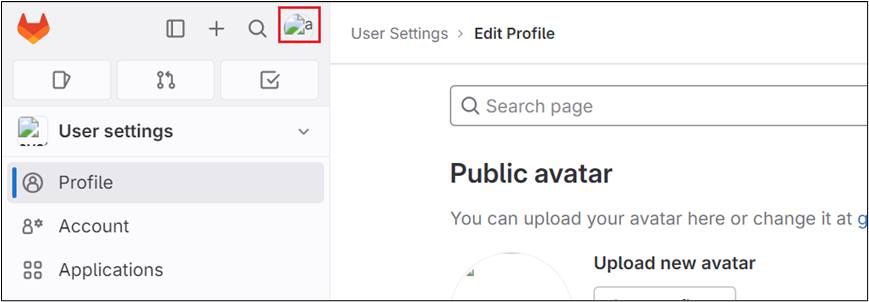
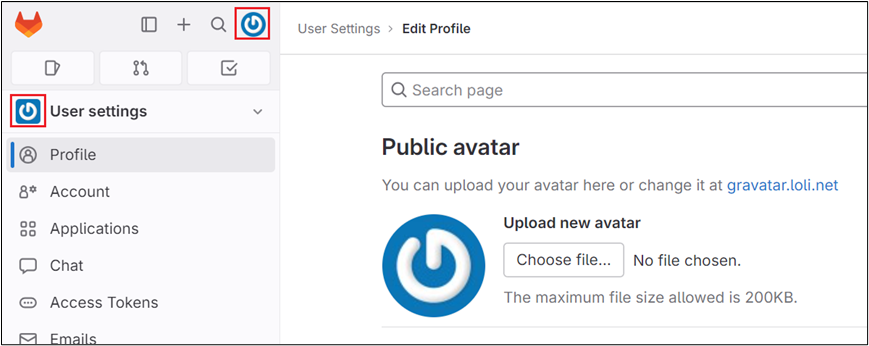
解决头像异常问题
通过浏览器访问GitLab会发现头像显示异常,这是因为GitLab默认使用Gravatar的服务器提供头像服务,国内无法访问。
编辑 gitlab.rb 配置:
shell
sudo vim /etc/gitlab/gitlab.rb打开plain_url和ssl_url的注释并修改:
ruby
### Gravatar Settings
gitlab_rails['gravatar_plain_url'] = 'http://gravatar.loli.net/avatar/'
gitlab_rails['gravatar_ssl_url'] = 'https://gravatar.loli.net/avatar/'
重新加载配置并重启 gitlab:
shell
sudo gitlab-ctl reconfigure
sudo gitlab-ctl restart
在到 gitlab 的页面上看头像正常了:
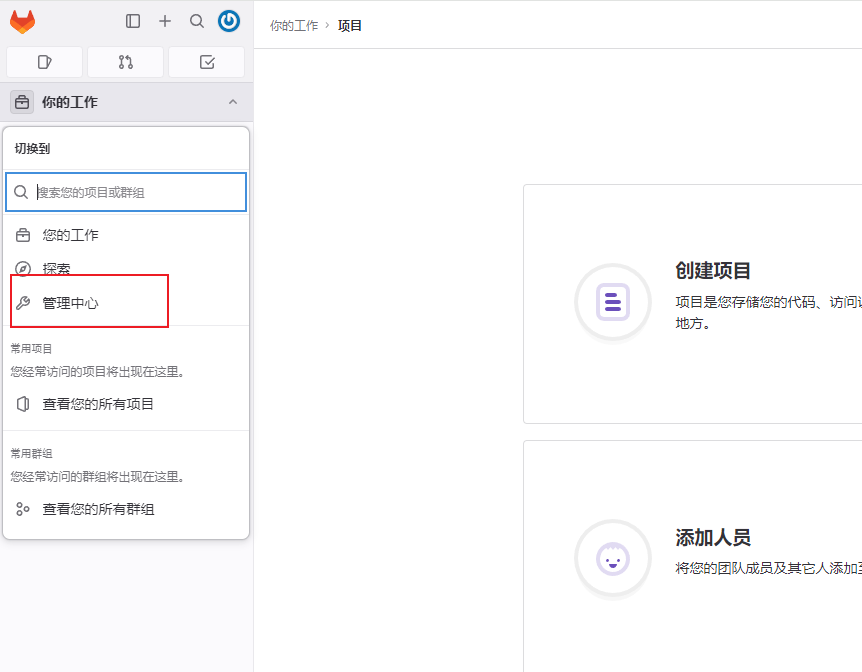
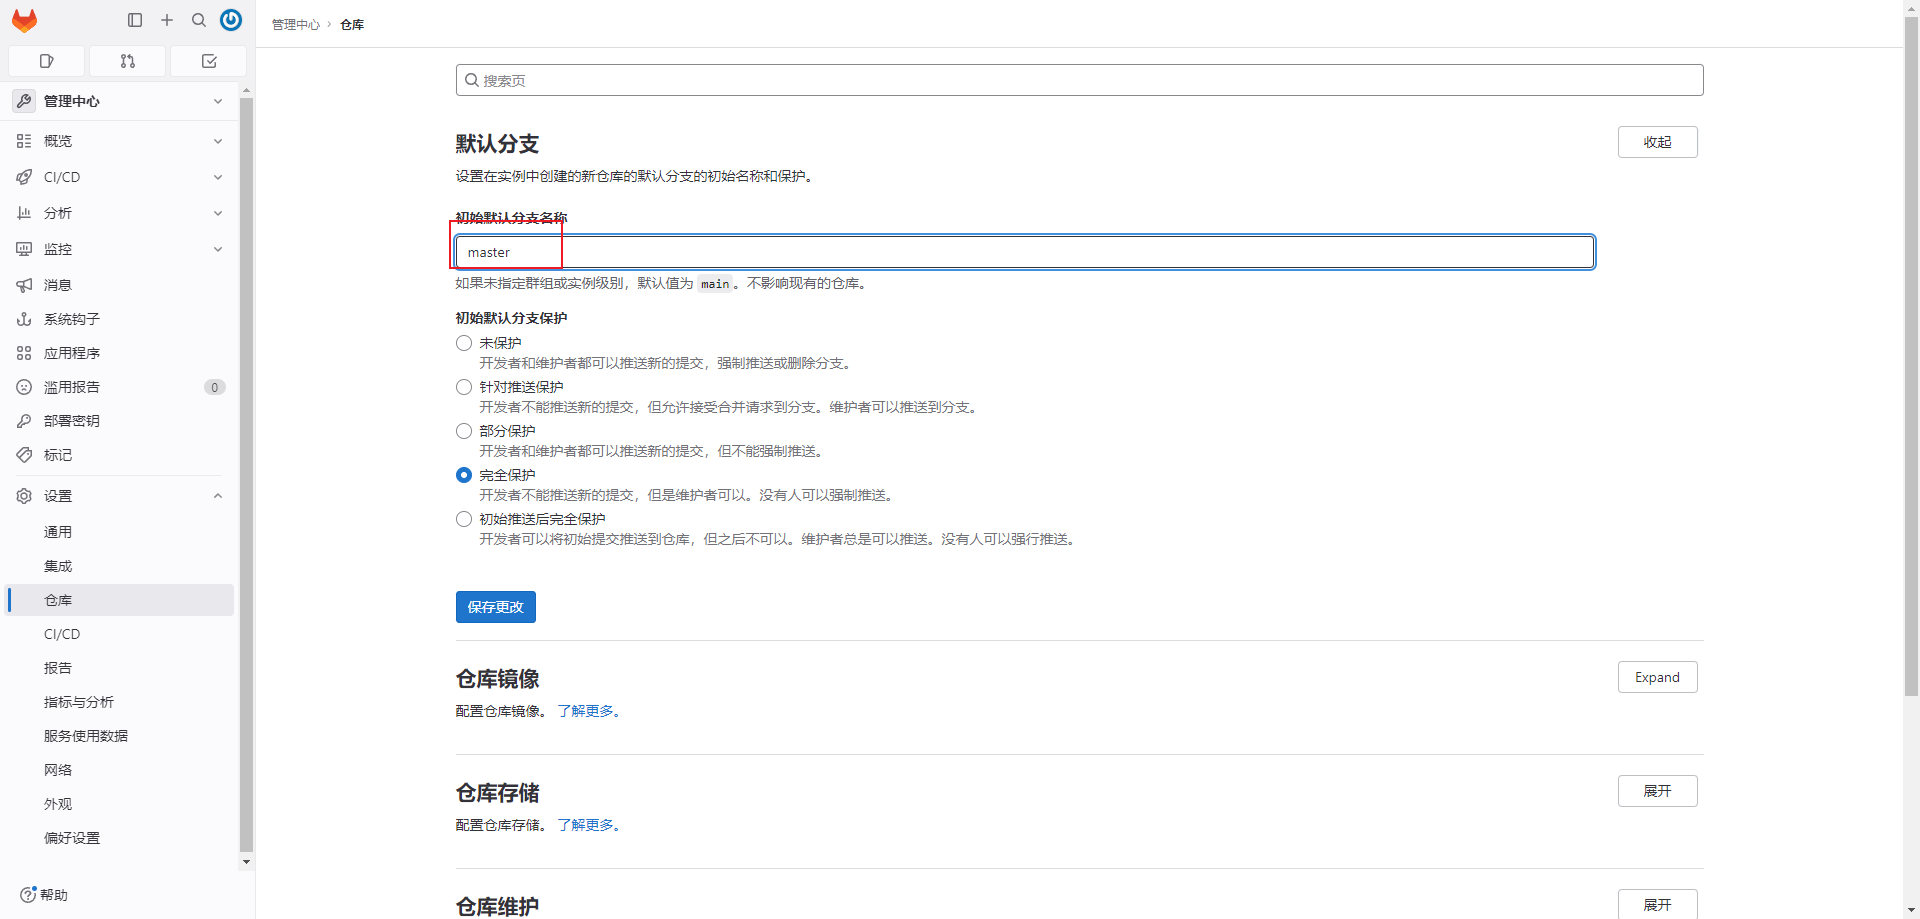
设置主分支名为 master
gitlab 默认主分支名为 main,需要修改为 master。