在Windows11上安装sever(服务)端和客户端
server端安装
打开官网MySQL
进入到主页
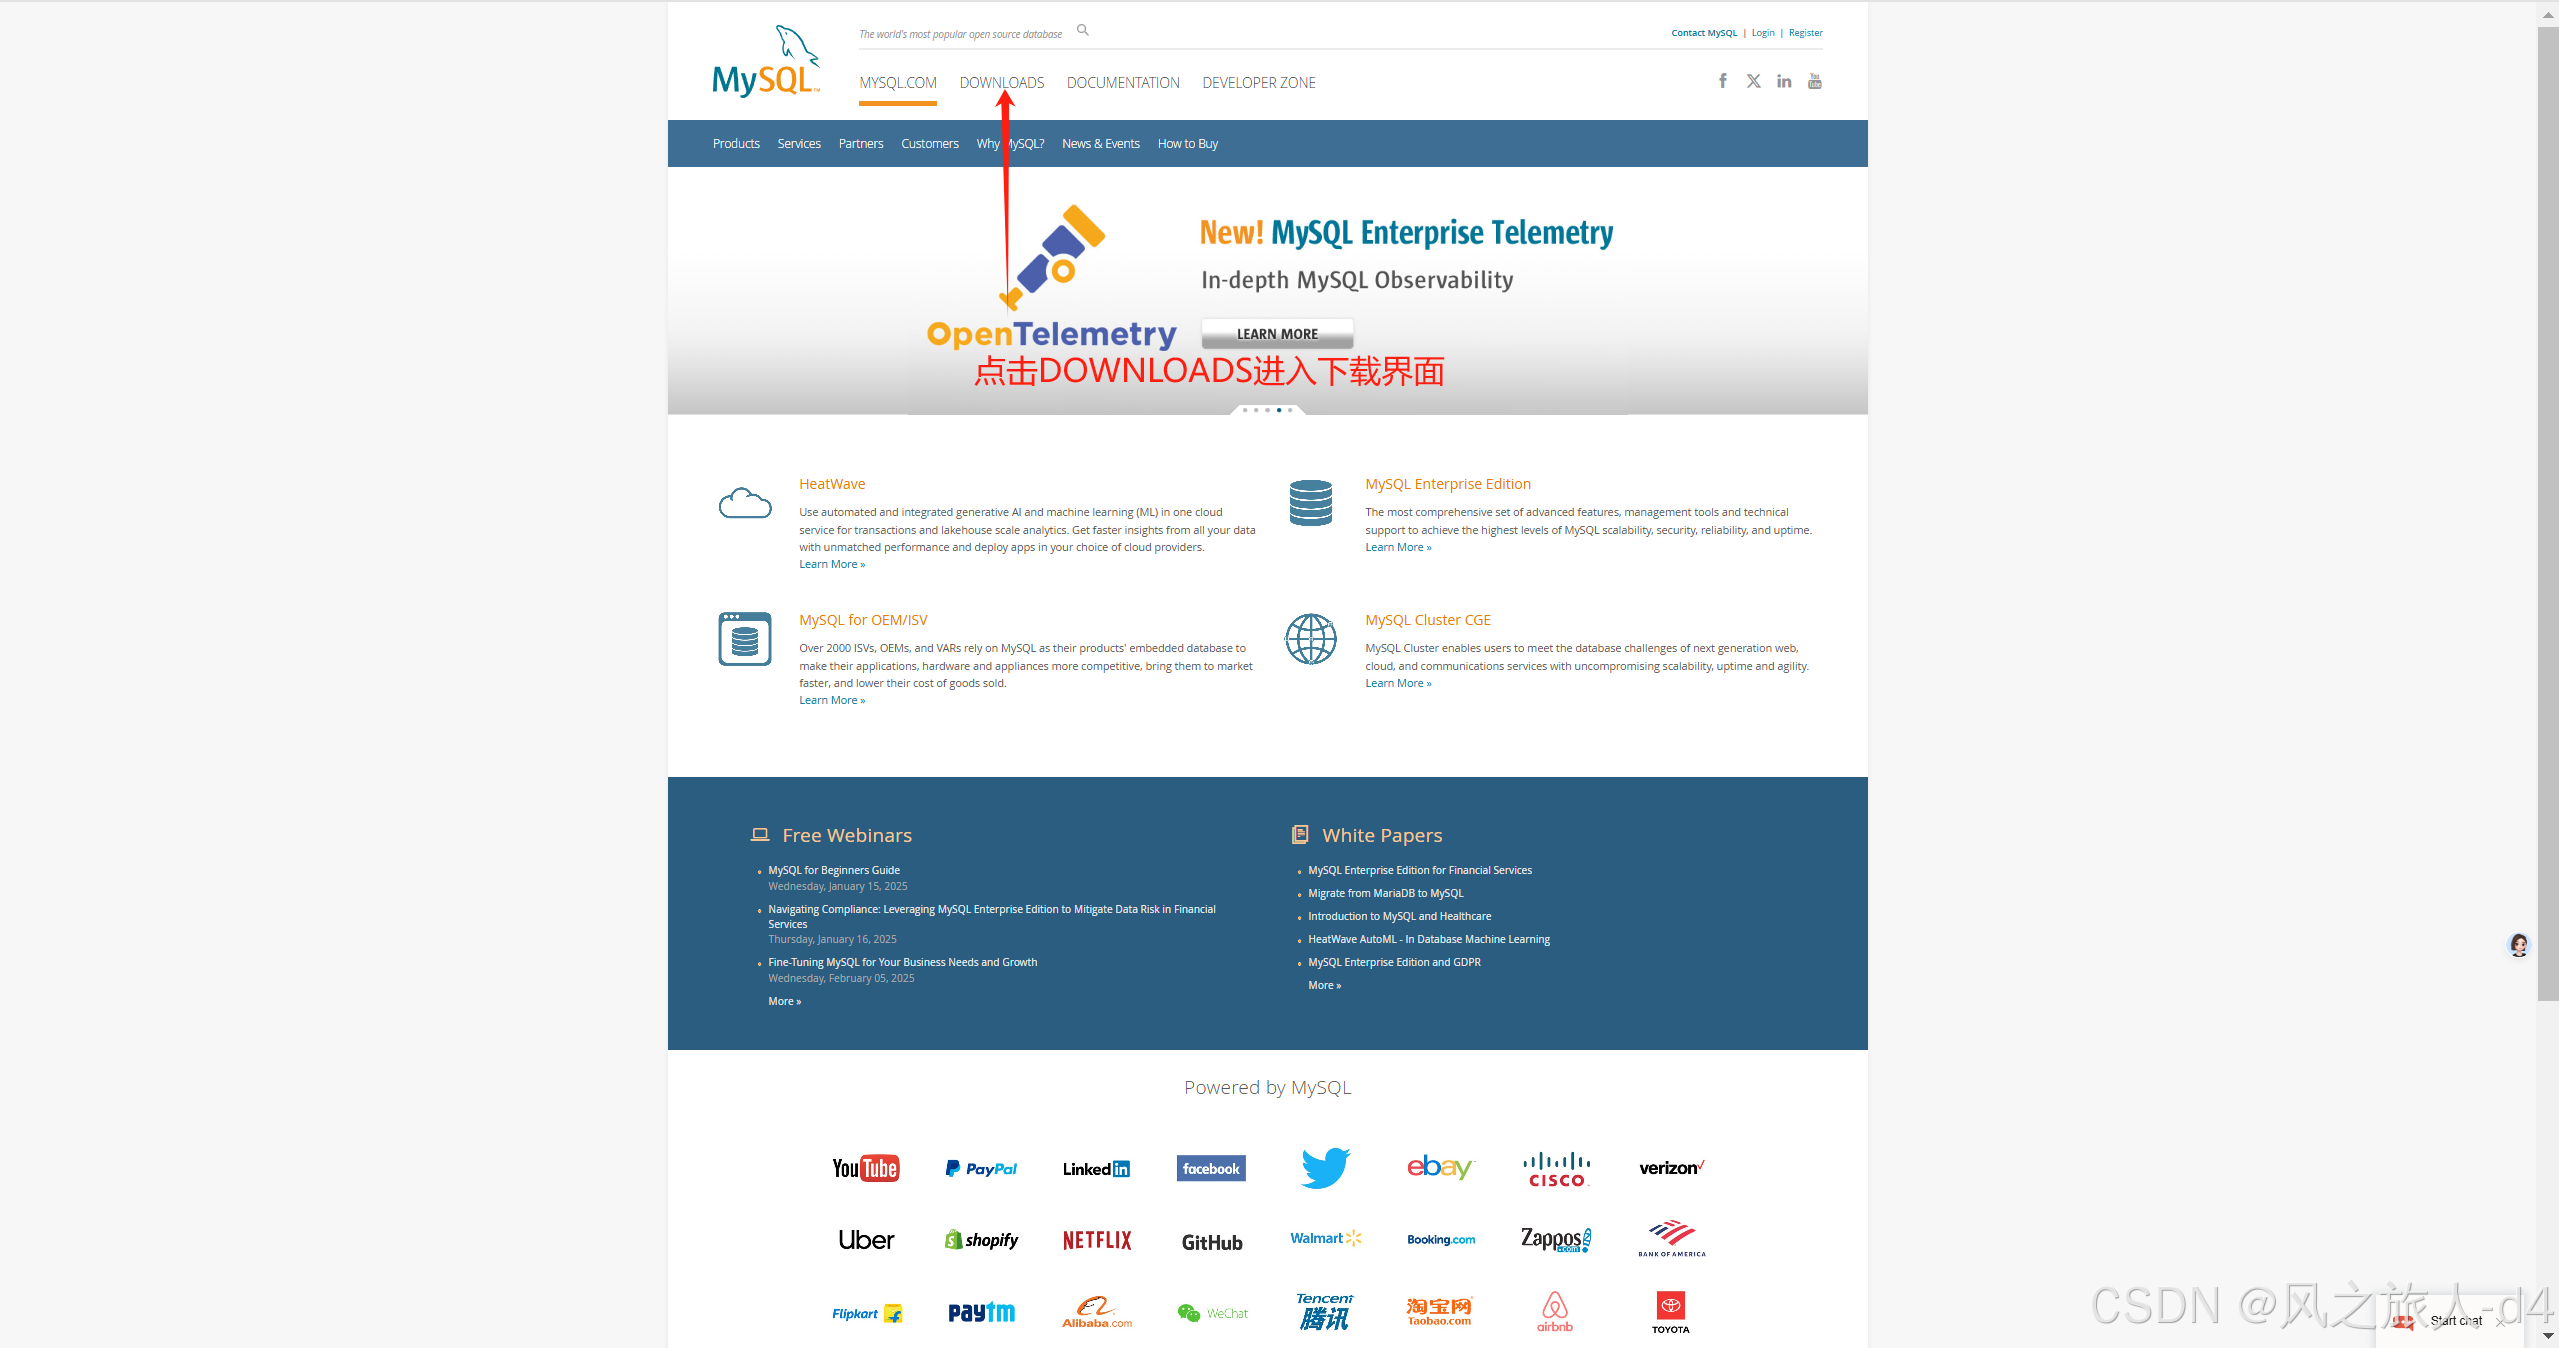
点击DOWMLOAD 进入下载界面
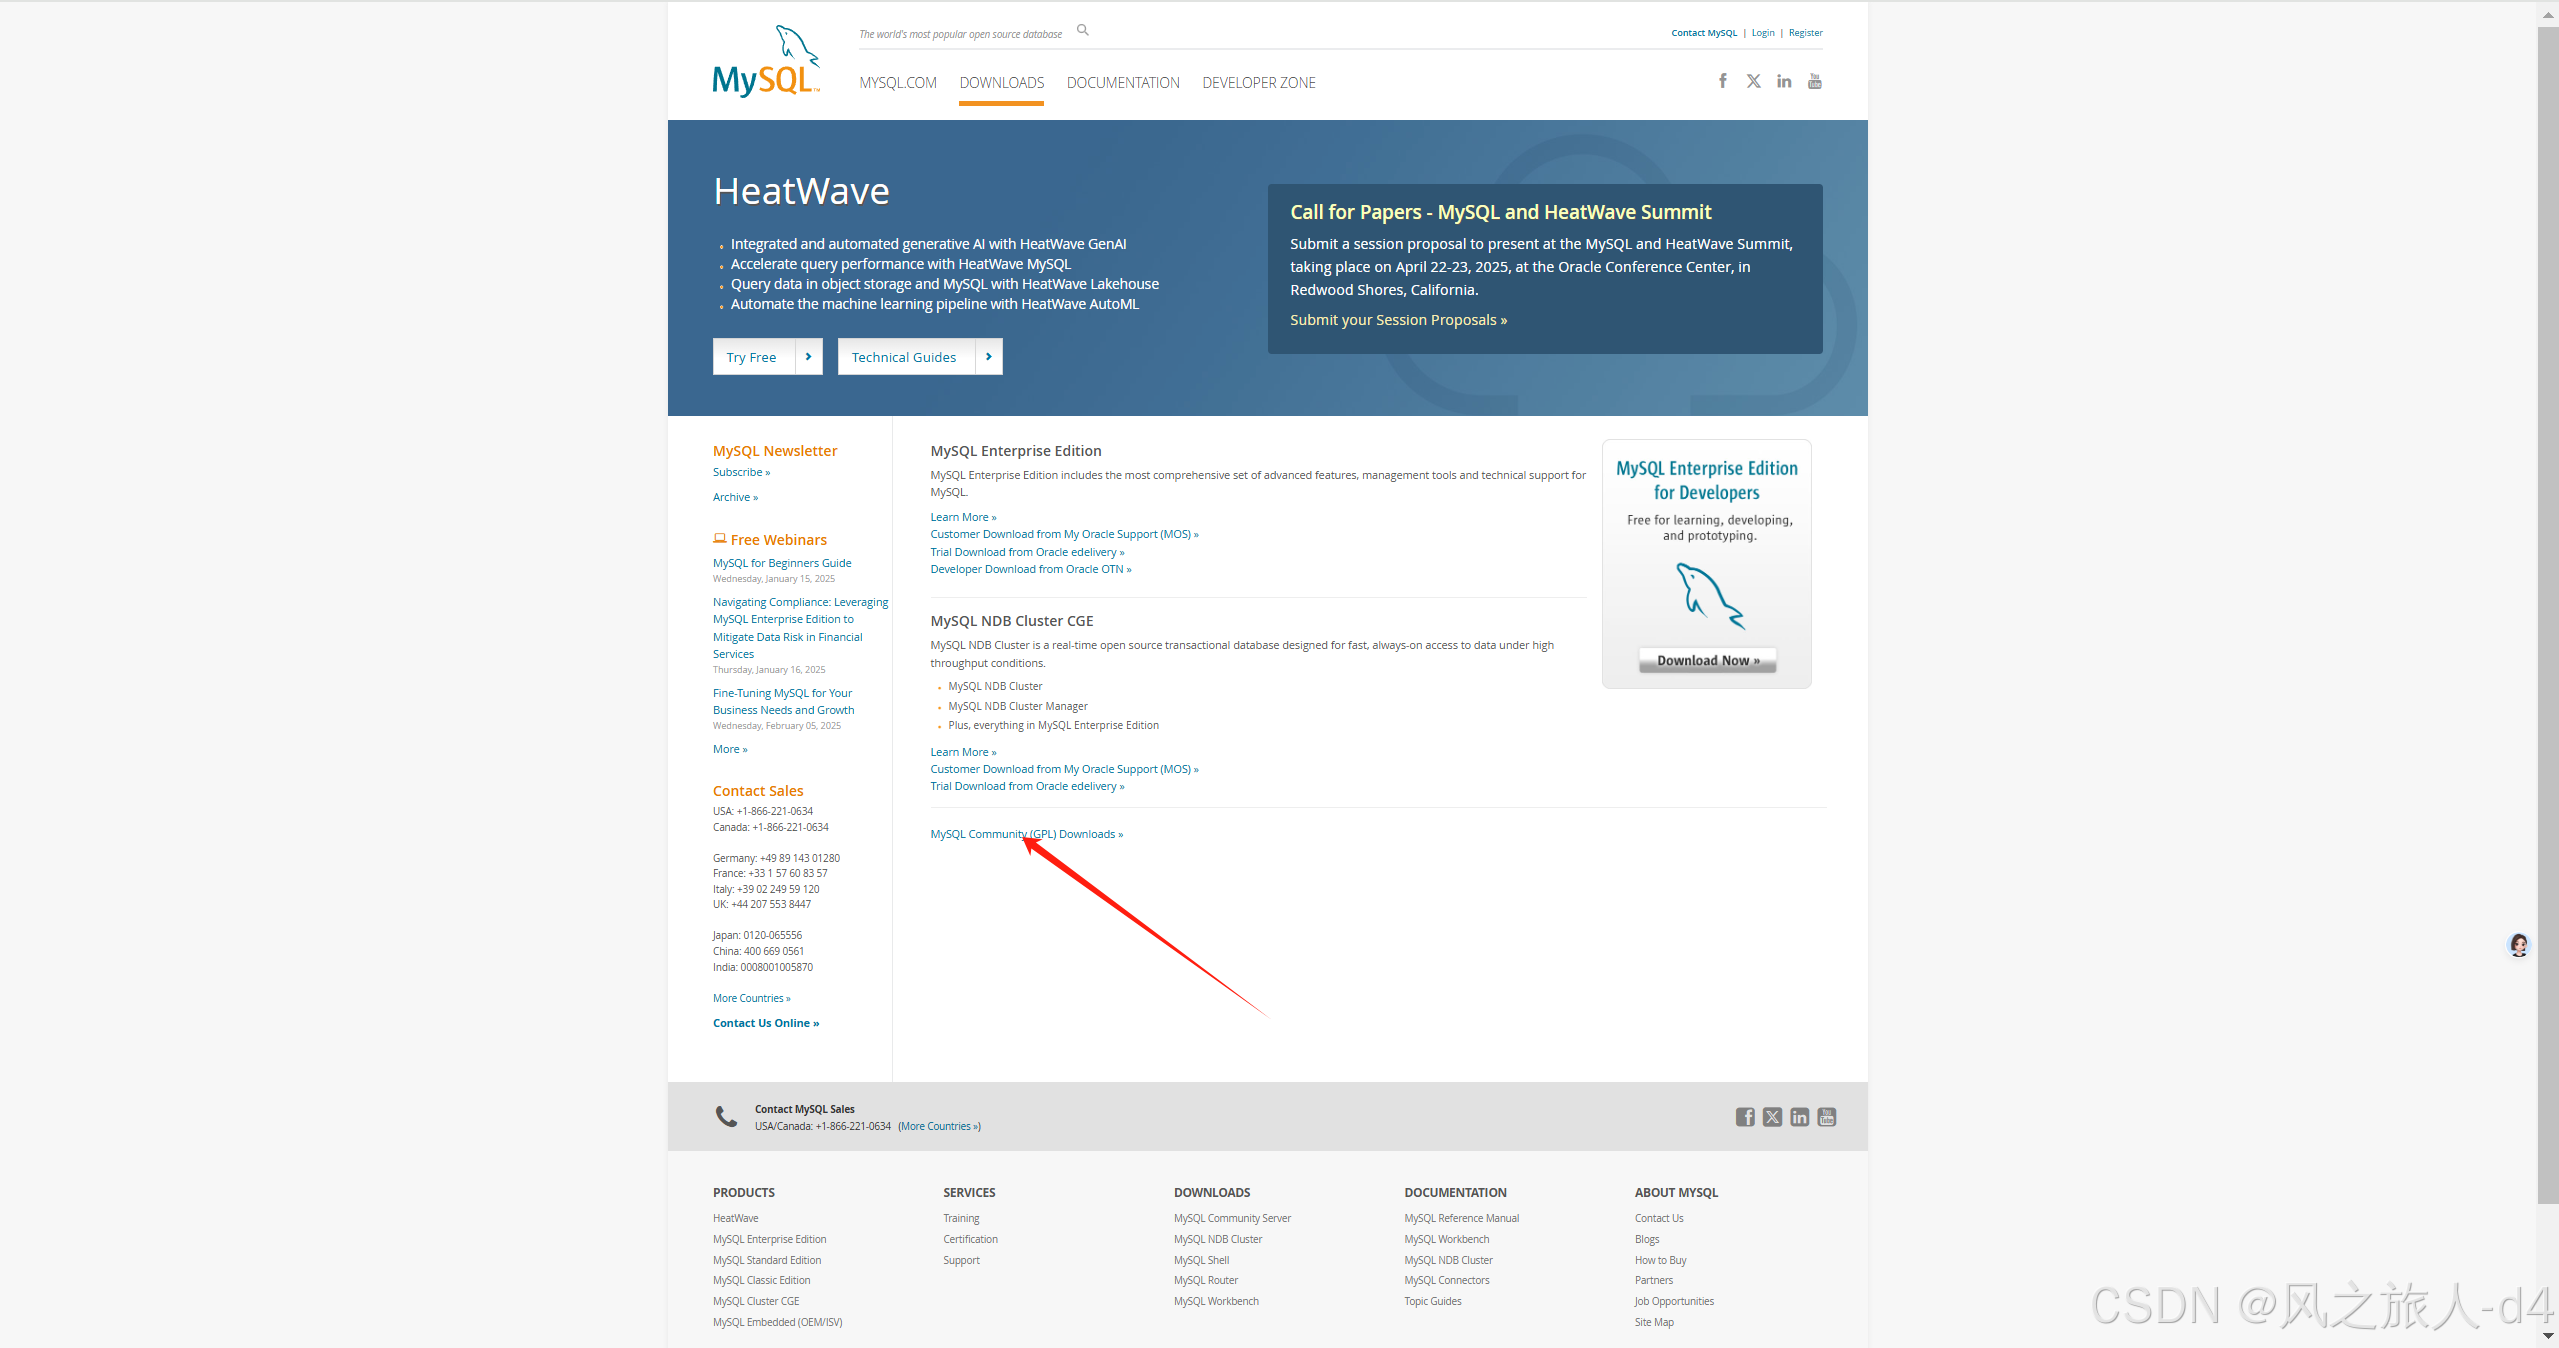
点击下方MySQL Community (GPL) Downloads >>进入社区版mysql下载界面
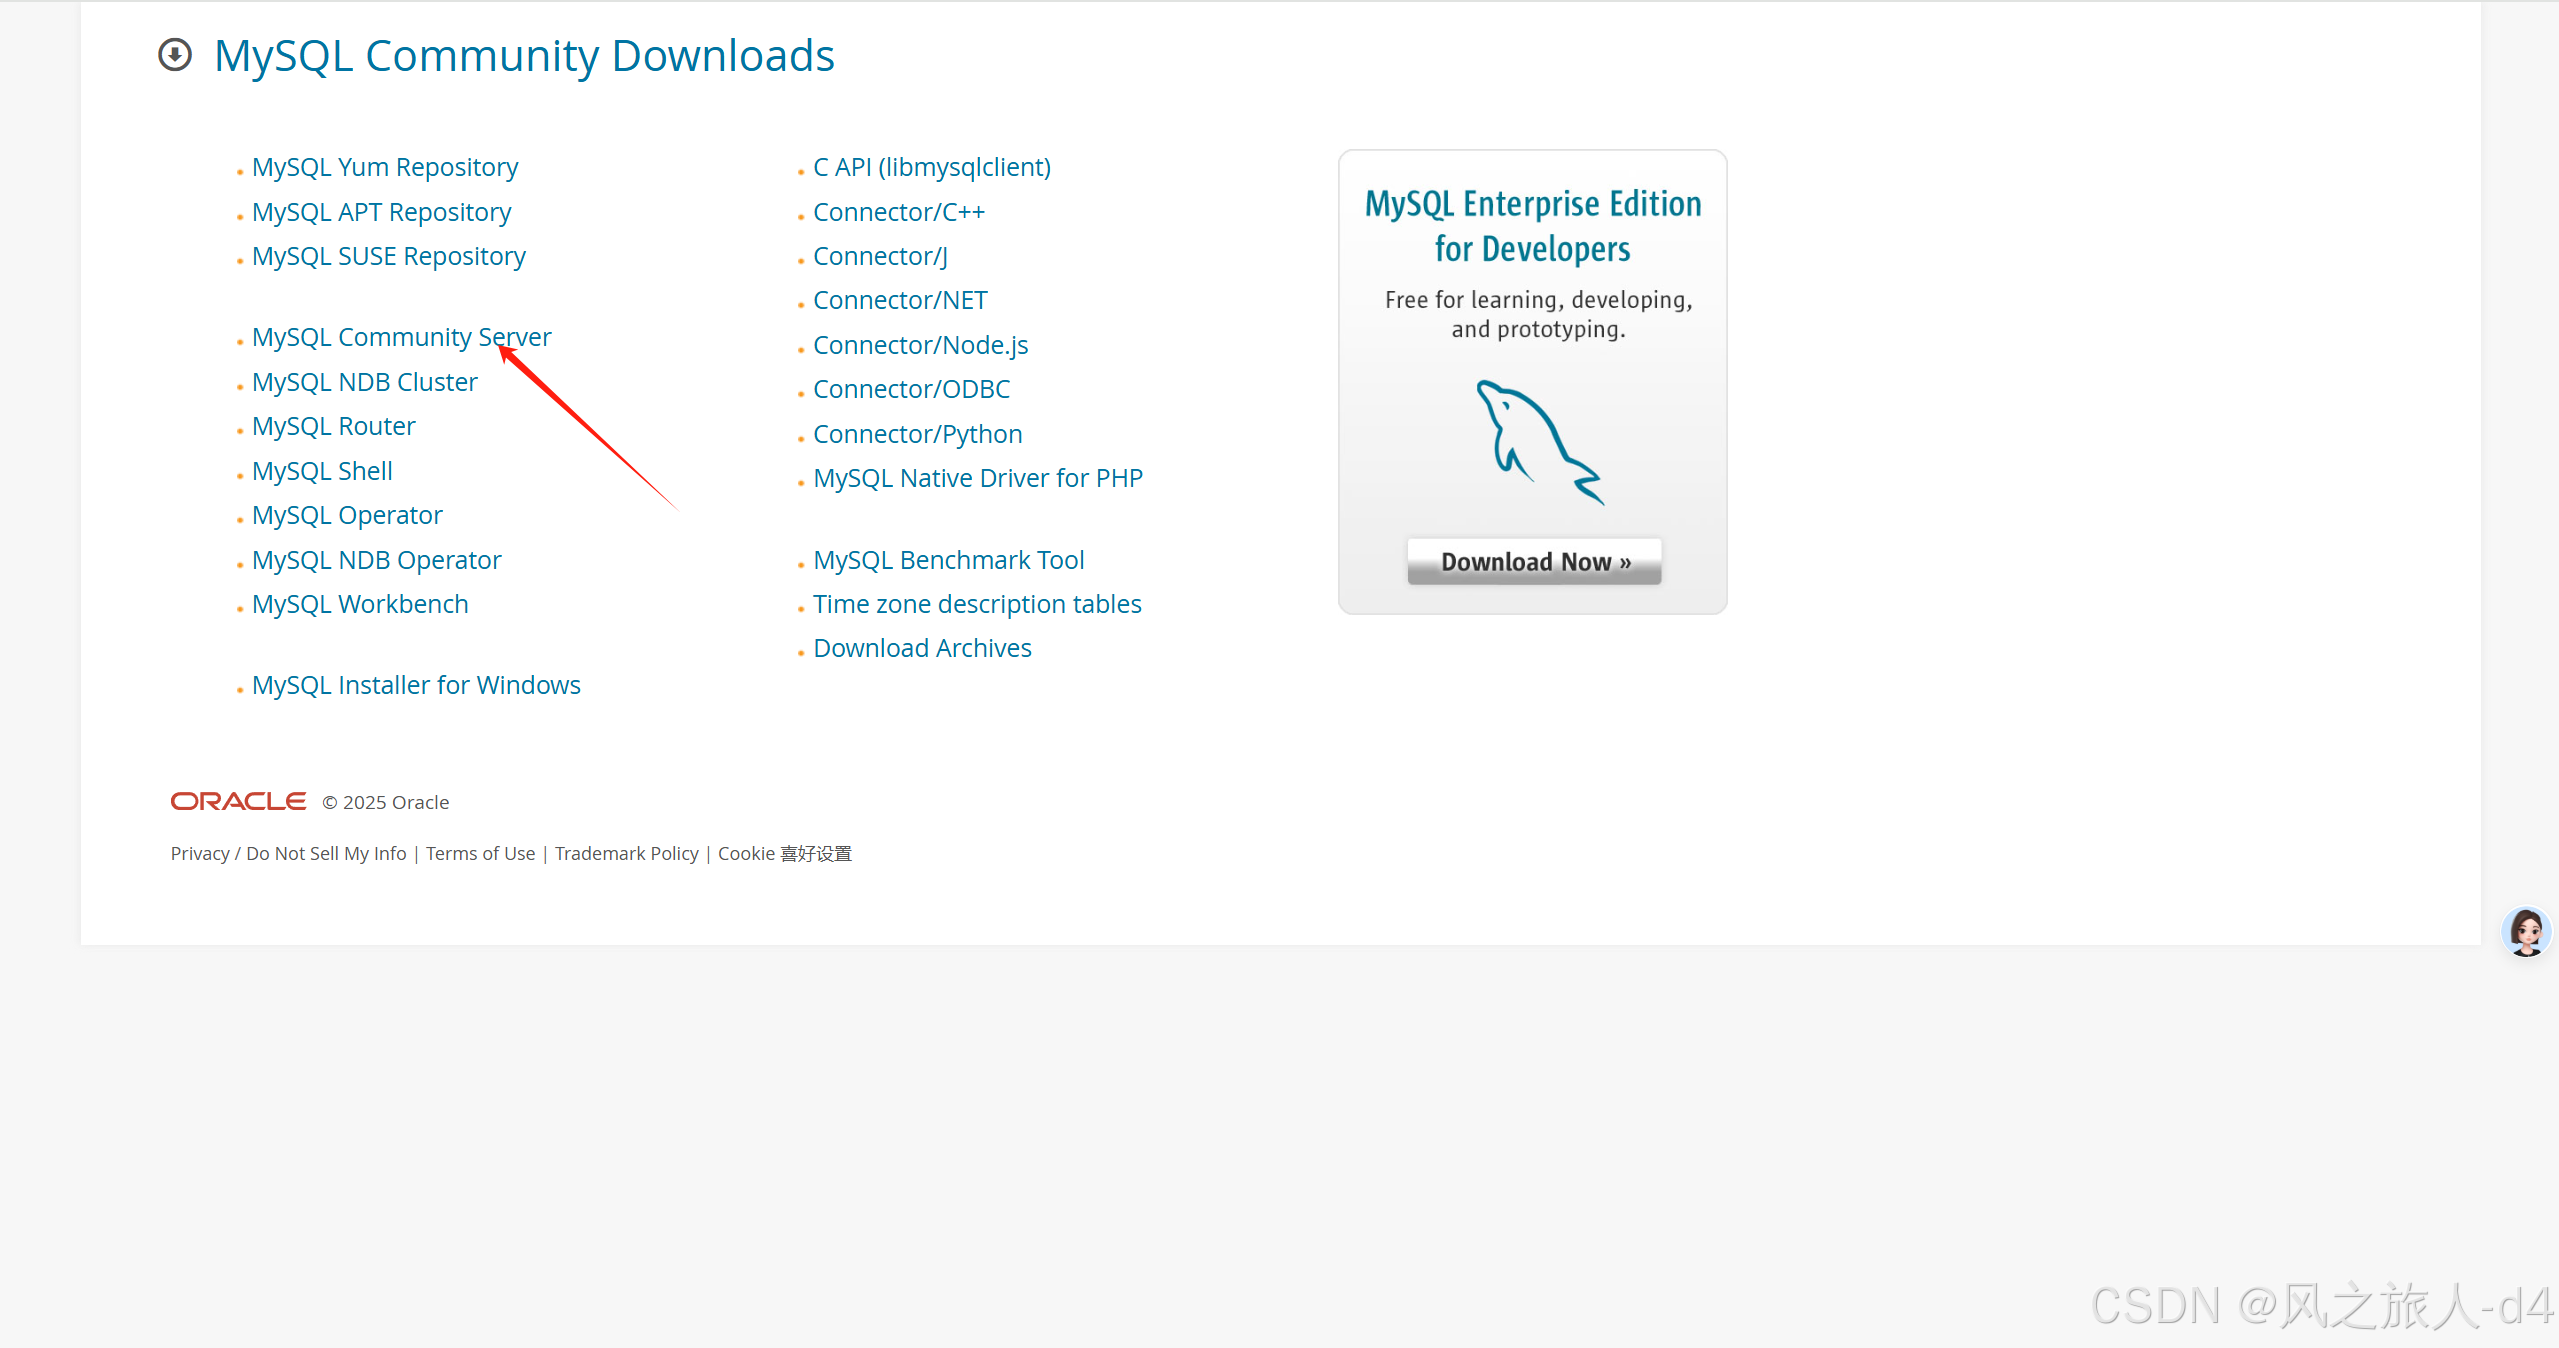
点击
进入server端下载
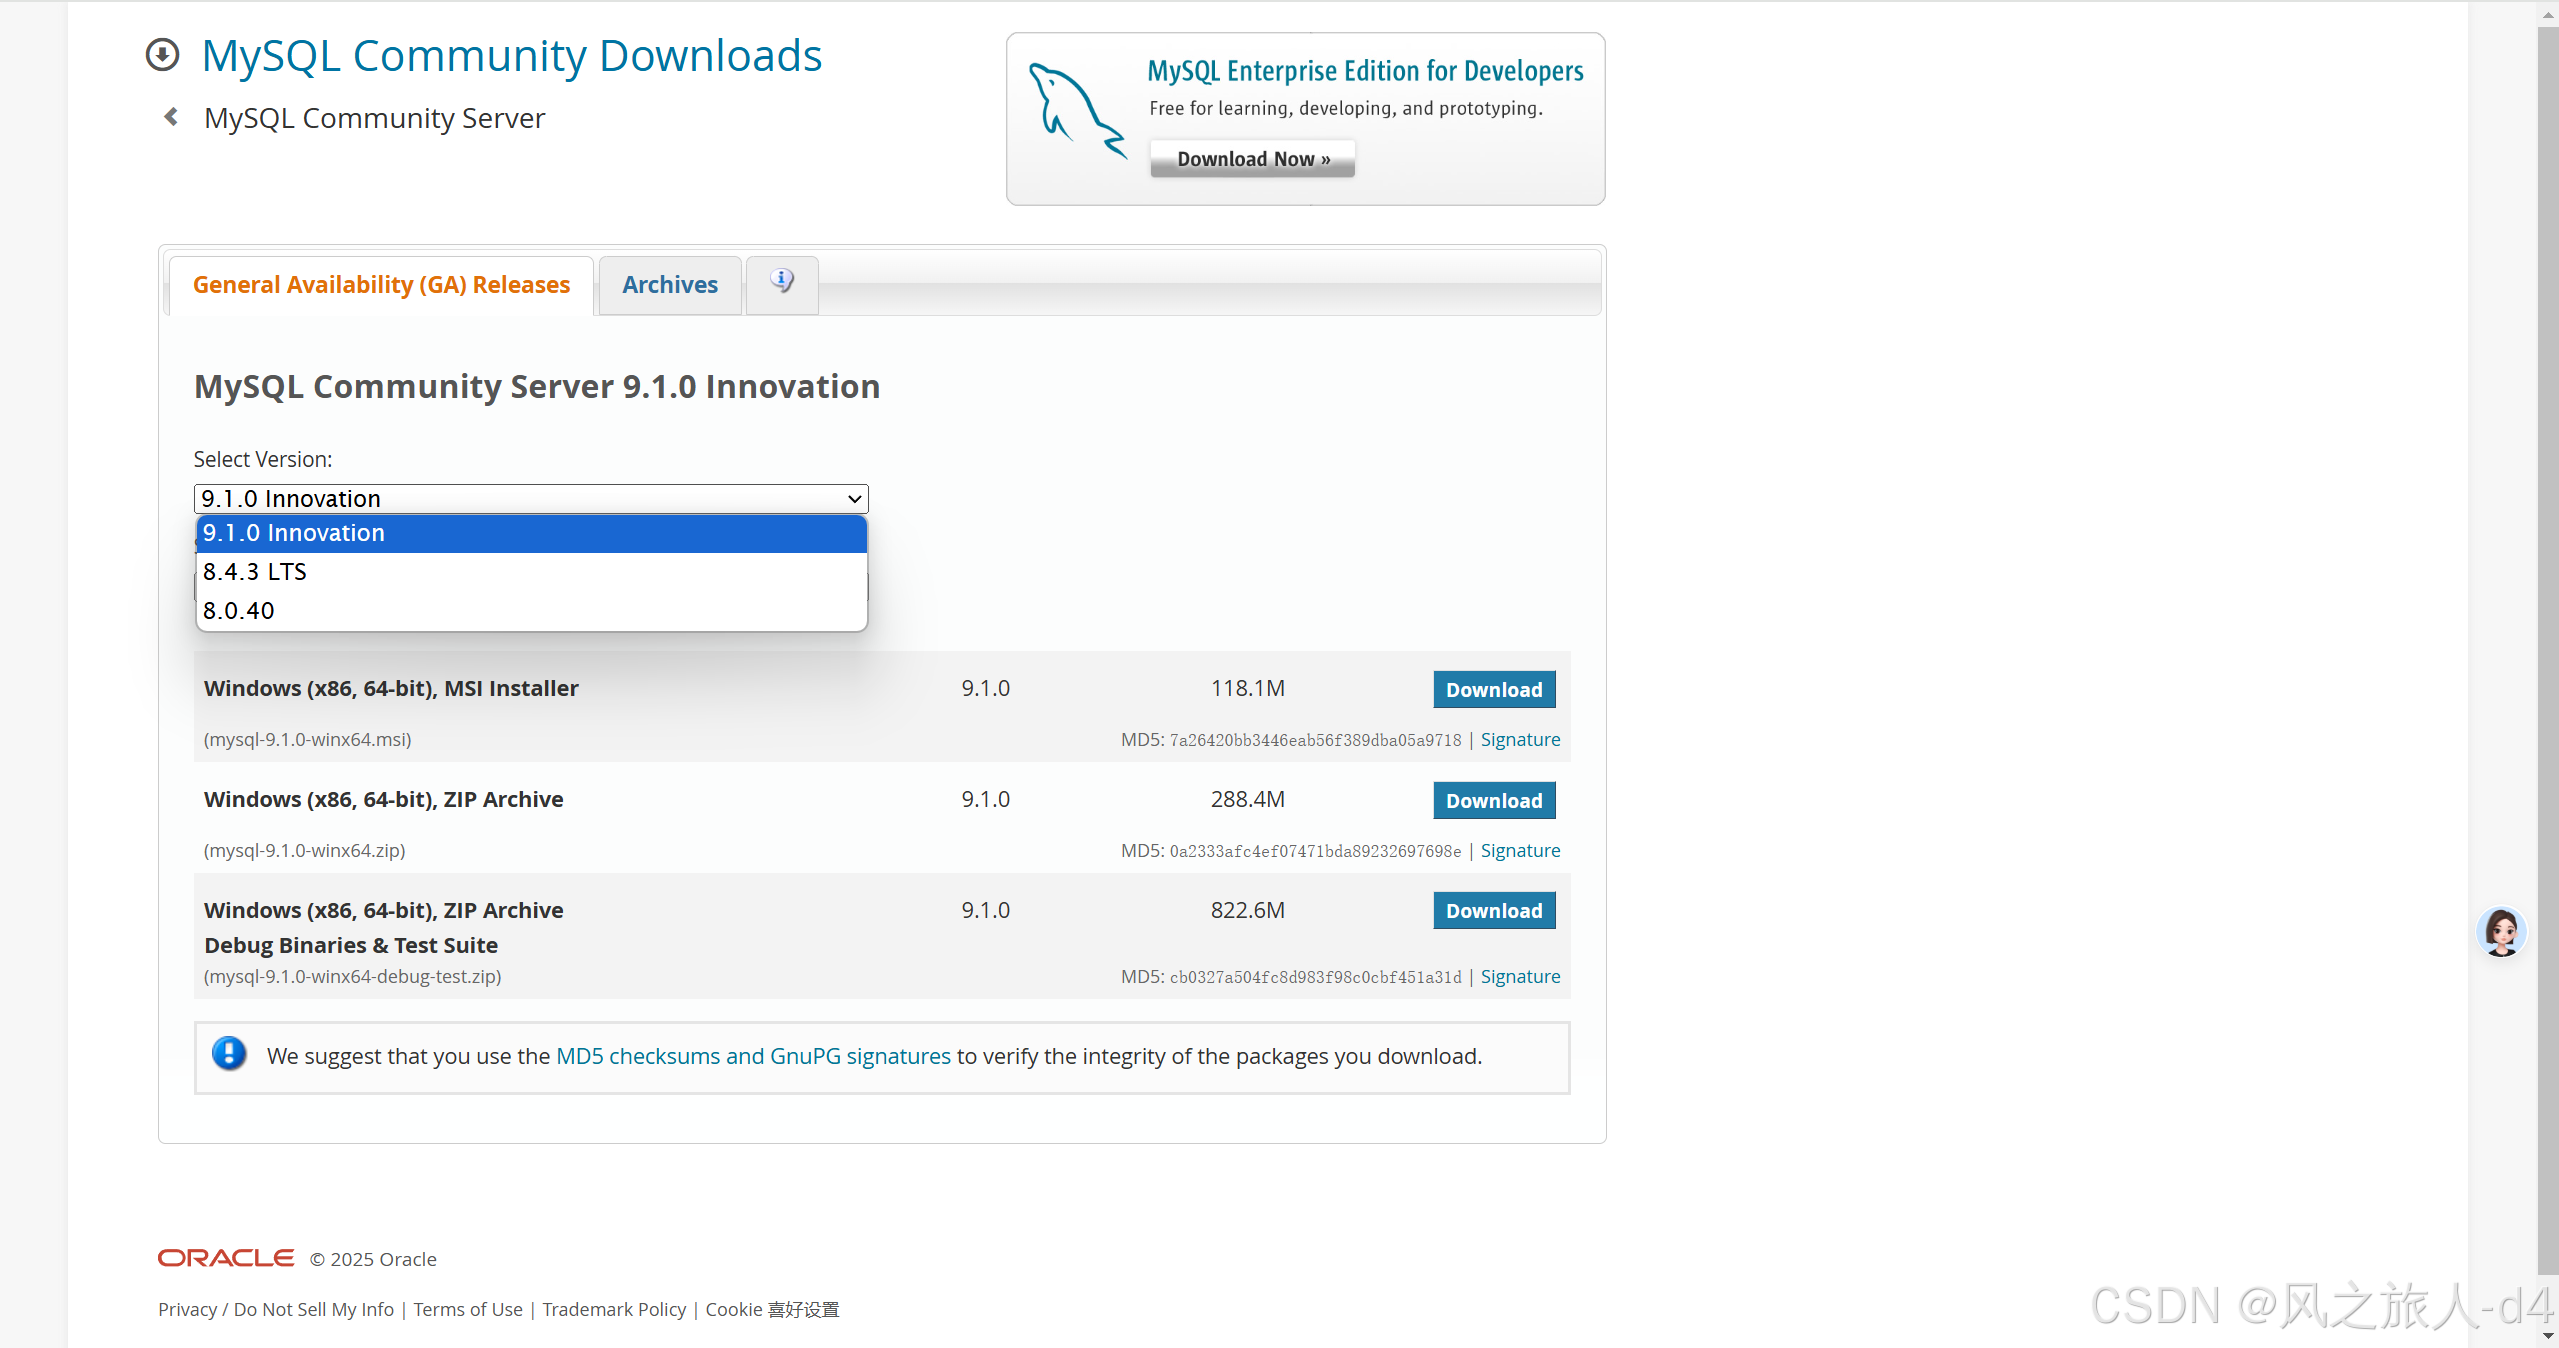
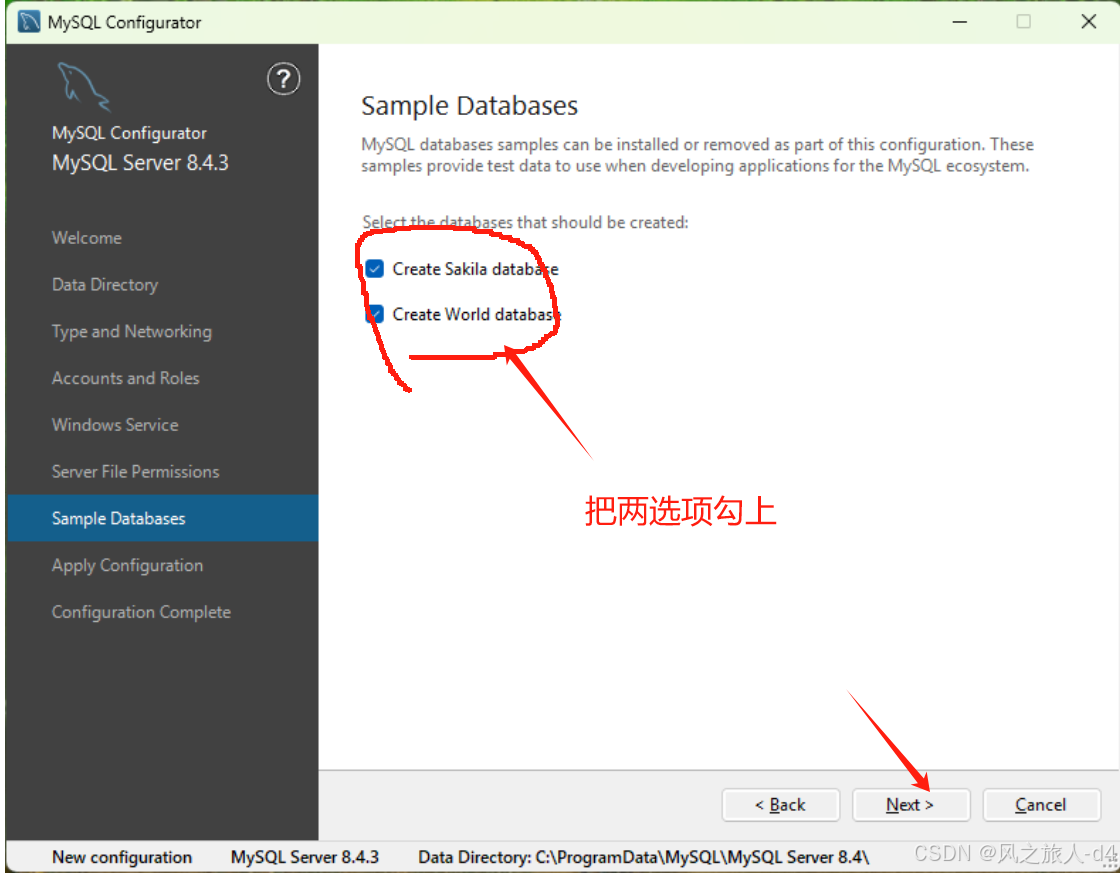
选择8.4.3LTS(长期支撑版)
点击
进入Windows x64 下载界面
点击
开始下载安装包
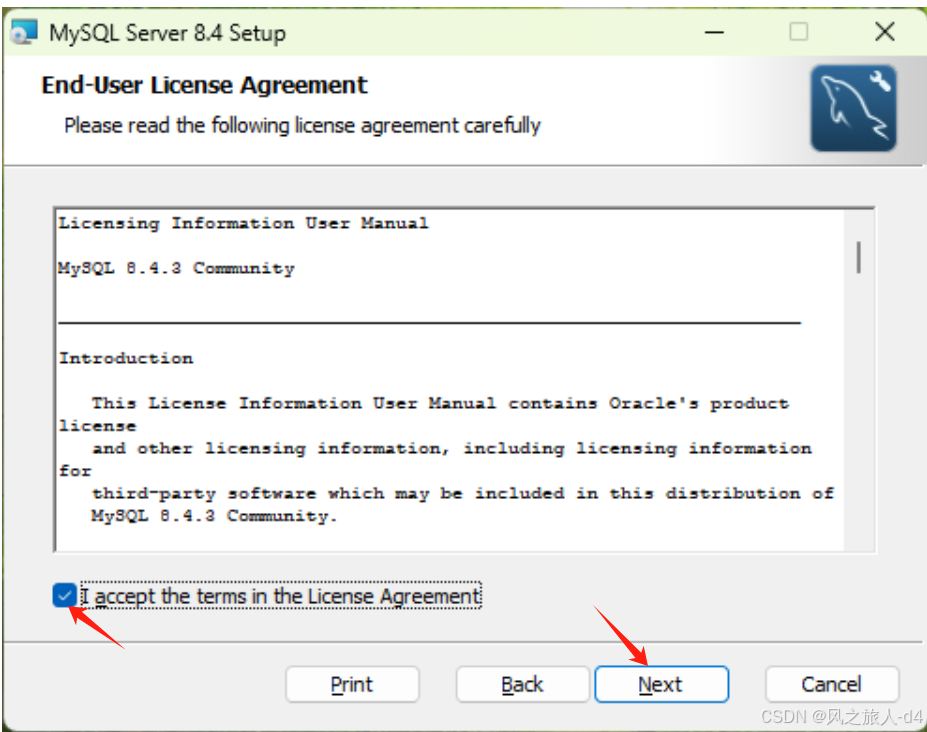
点击安装程序:
进入安装引导程序
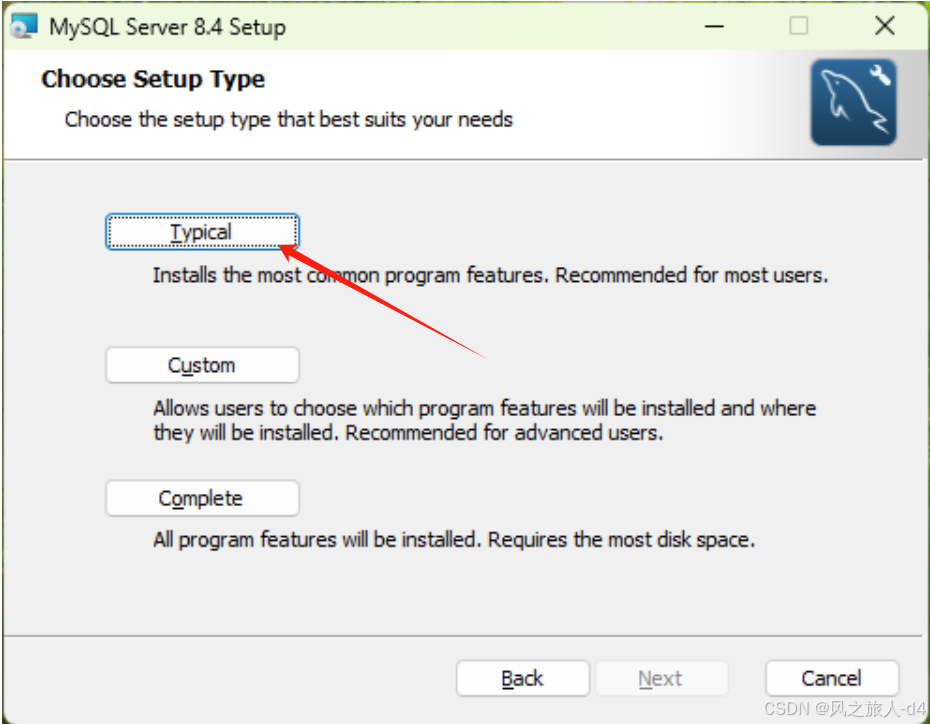
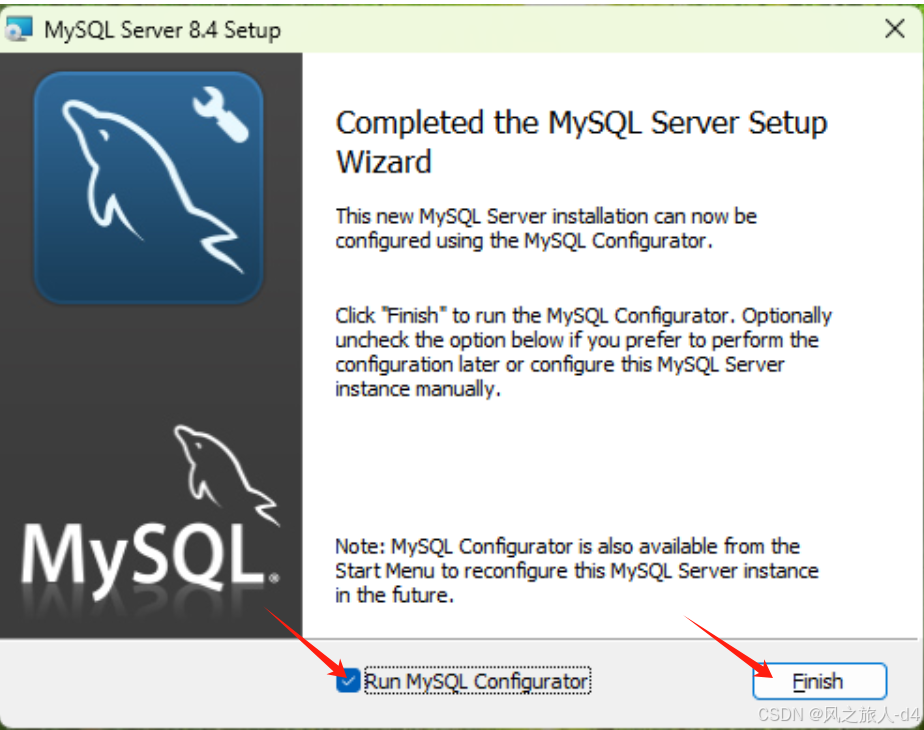
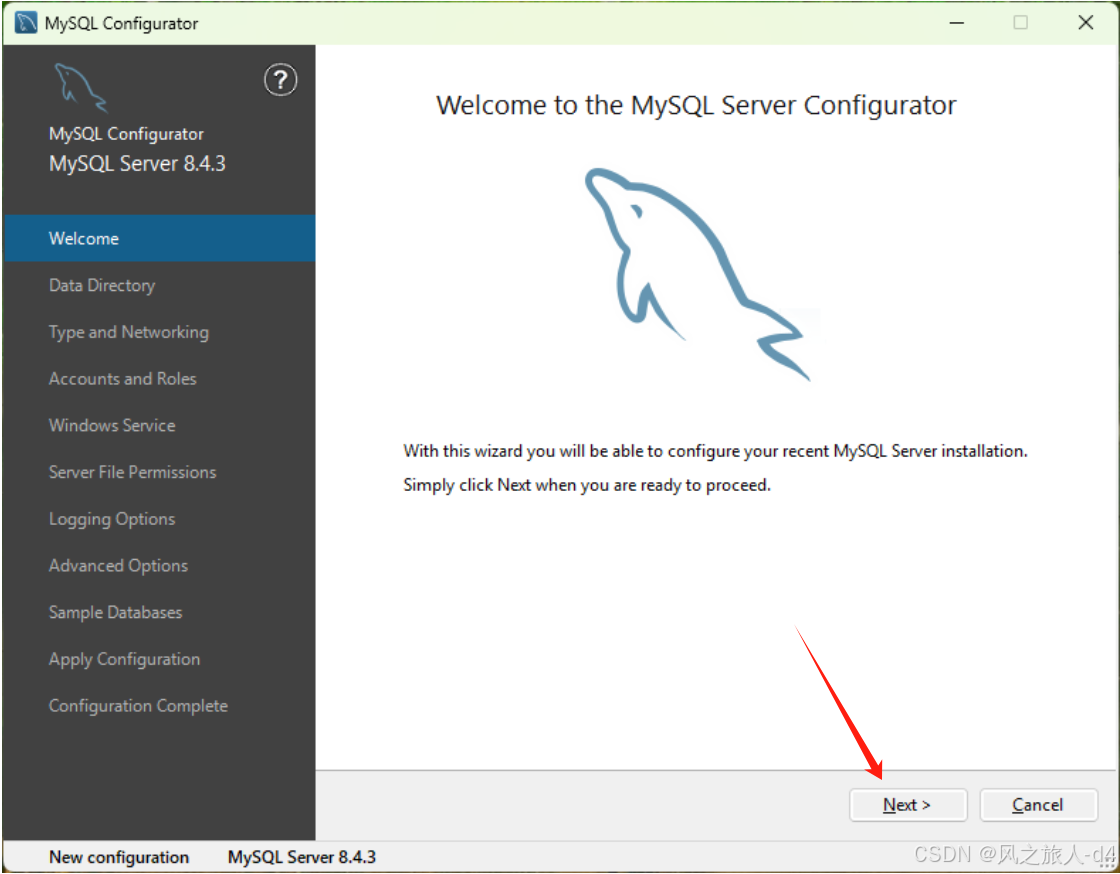
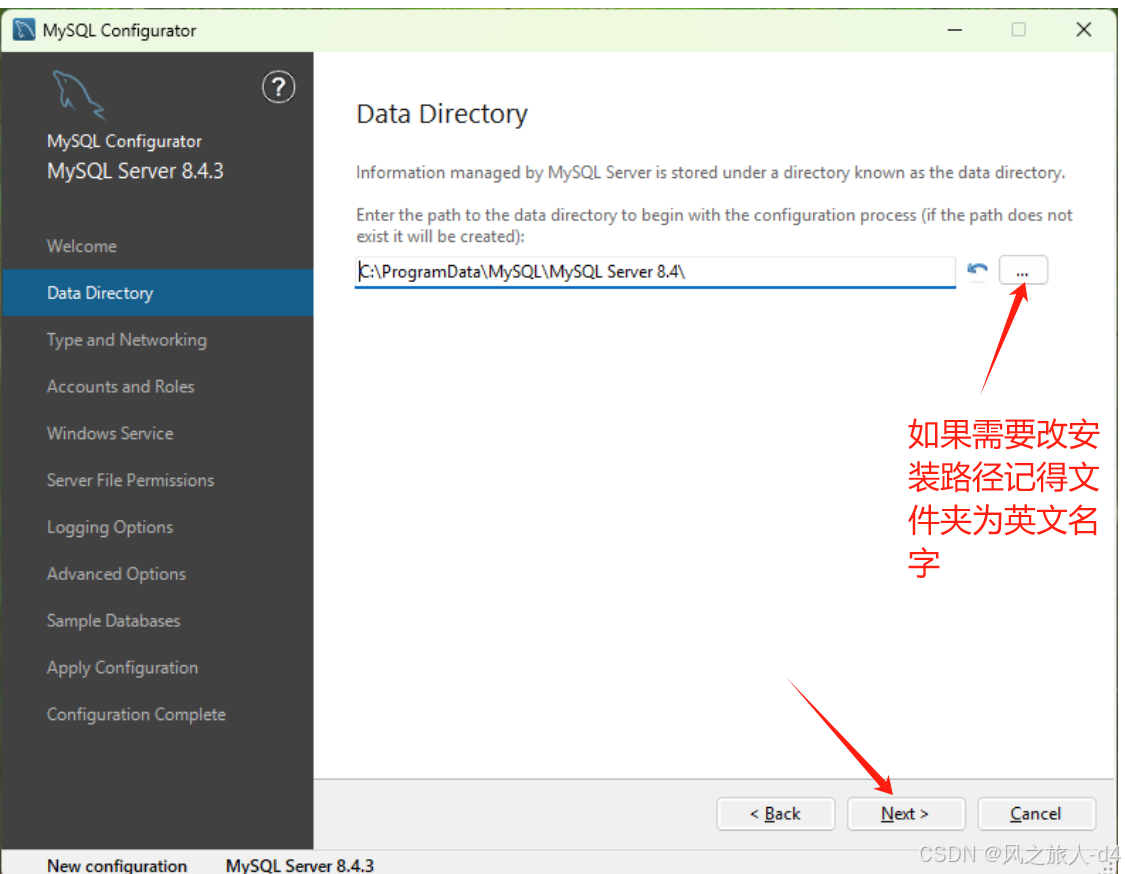
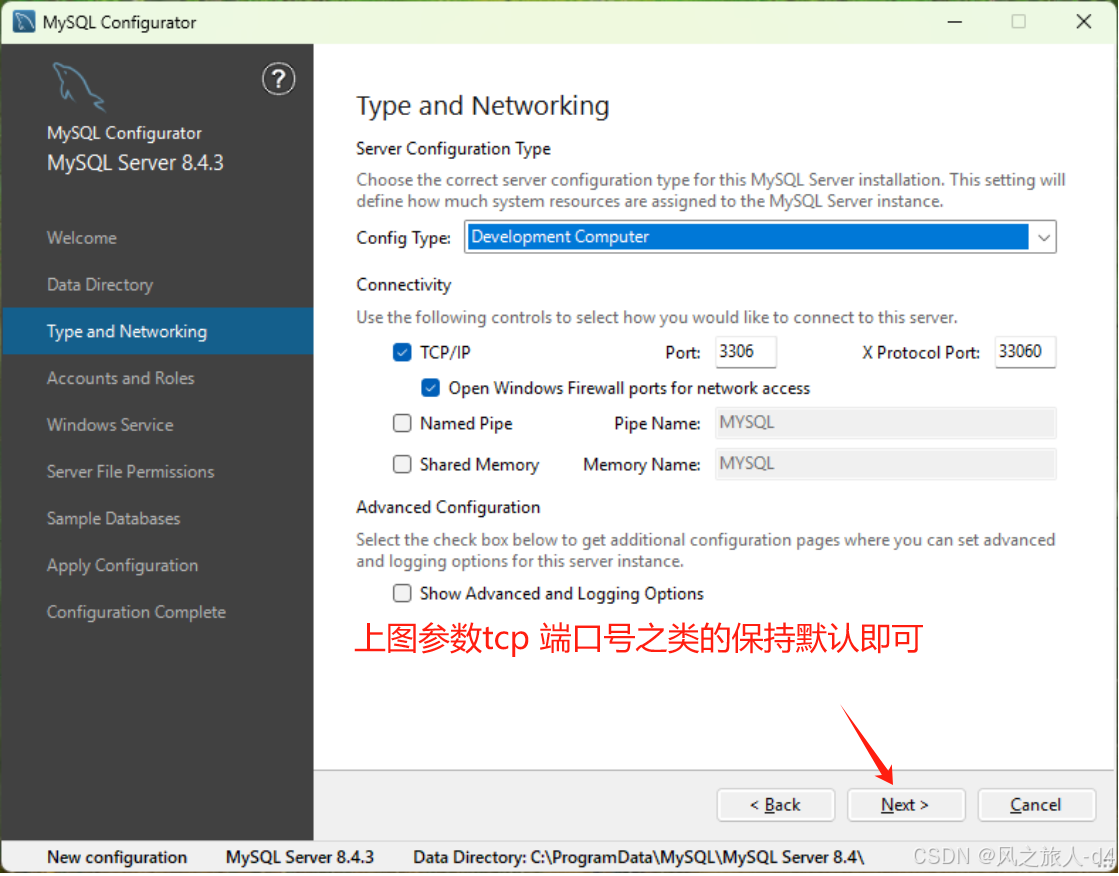
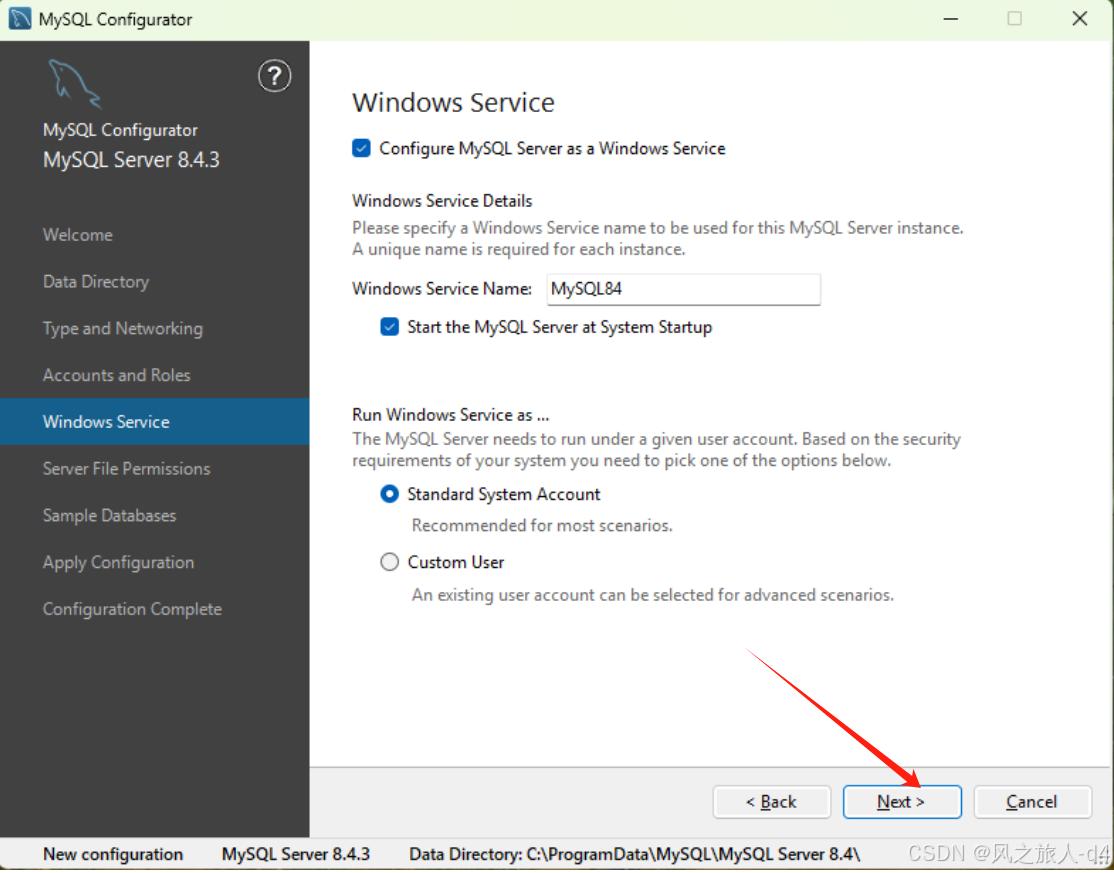
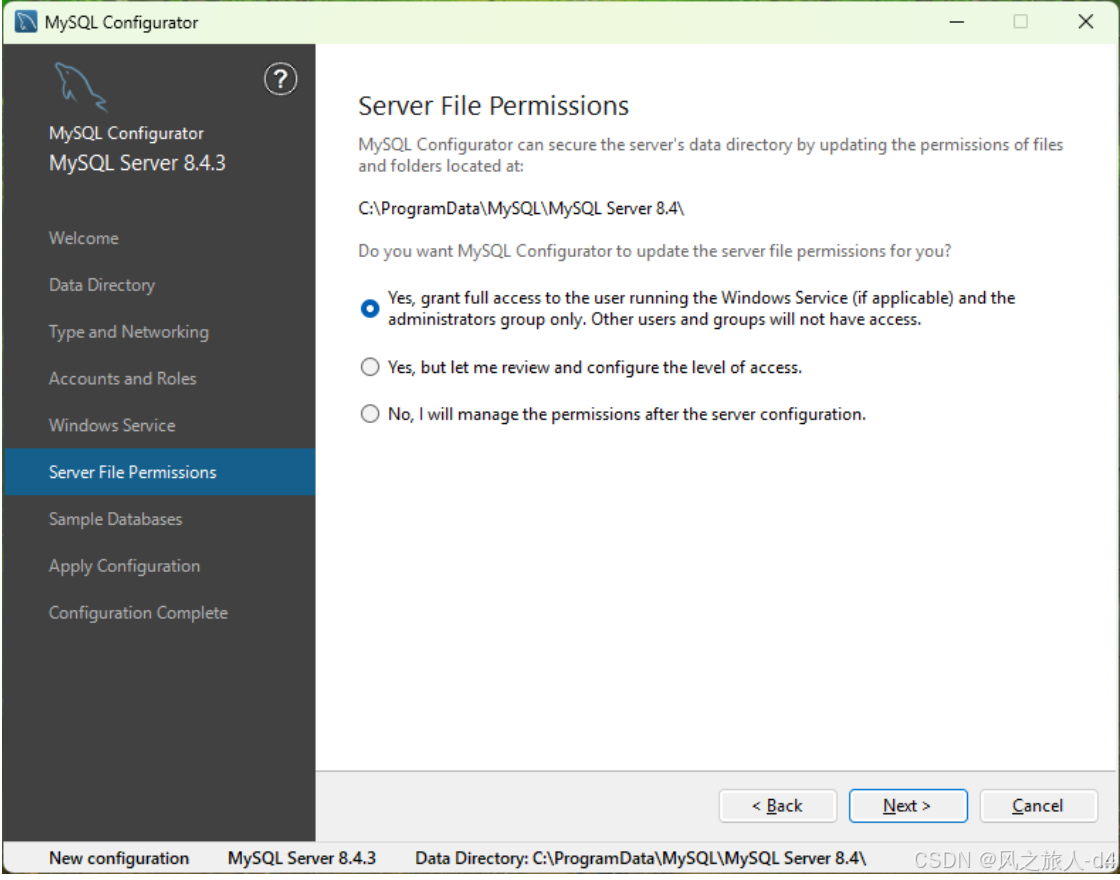
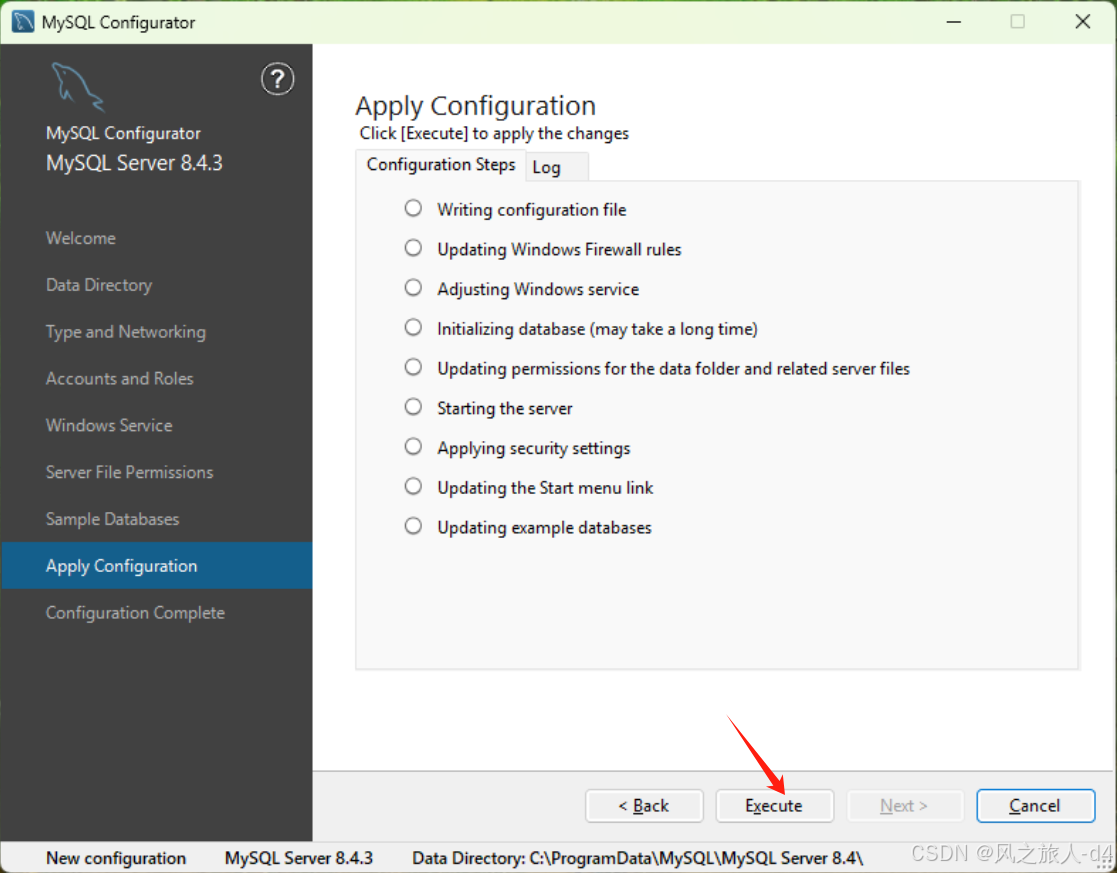
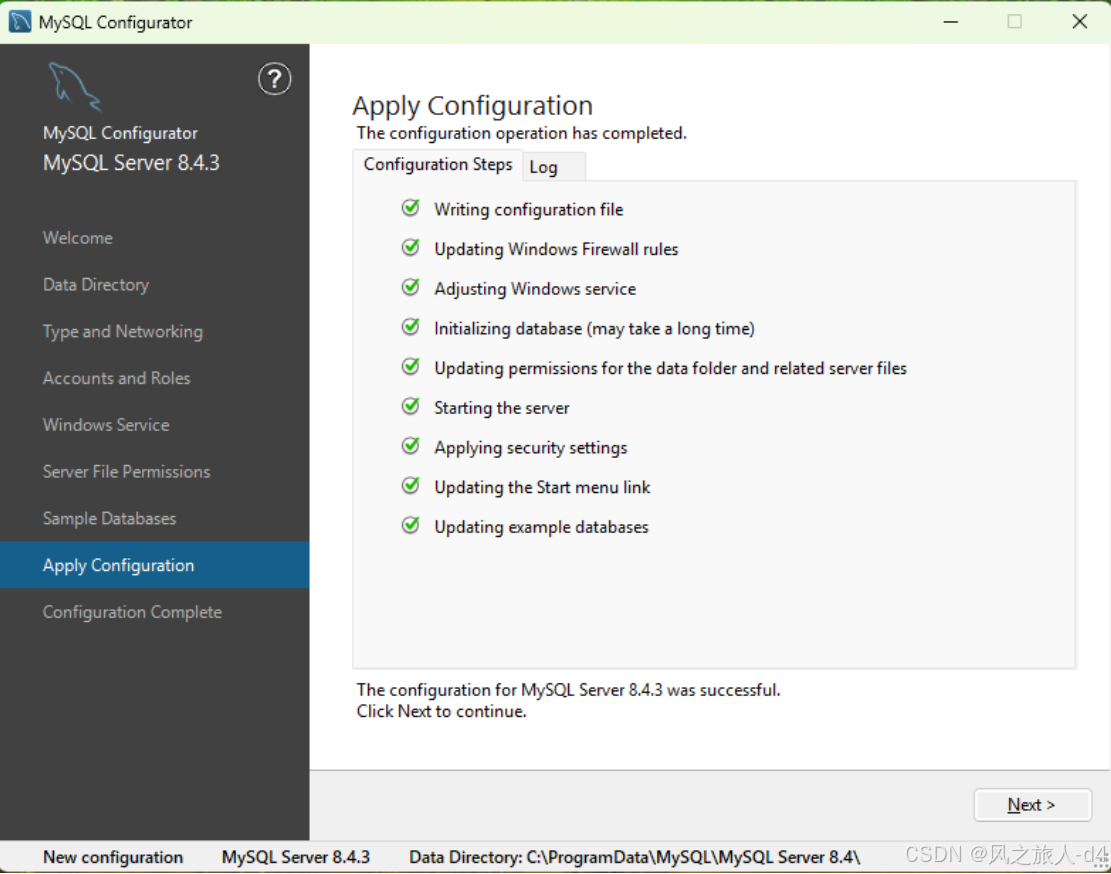
按照下图箭头指示安装引导即可:


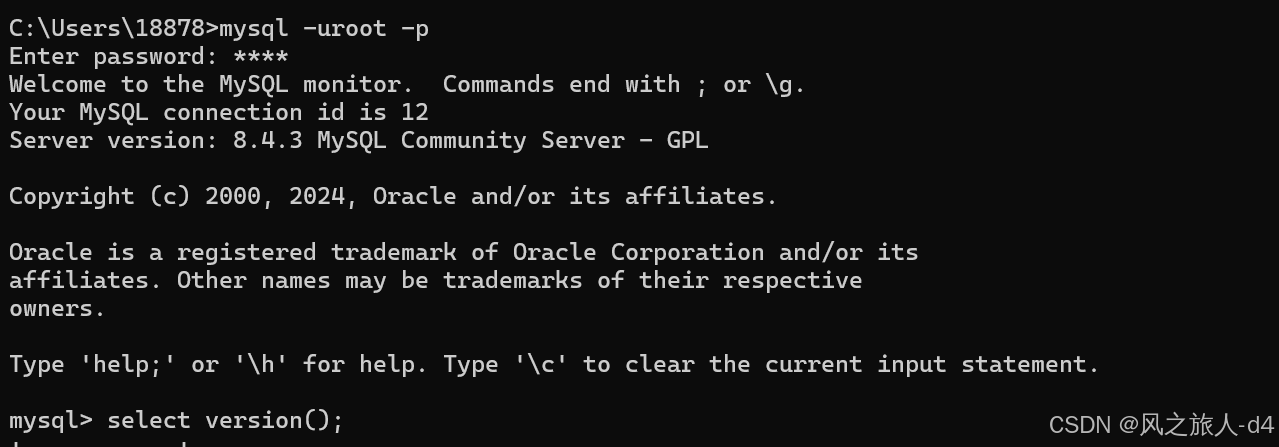
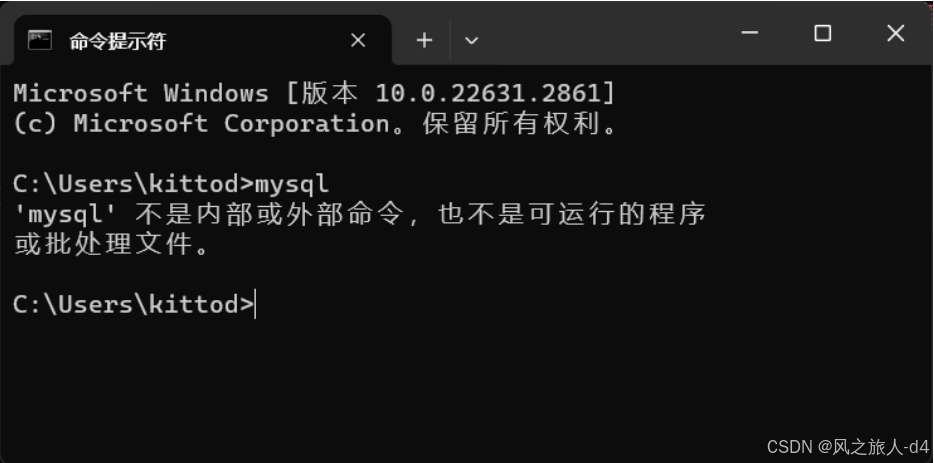
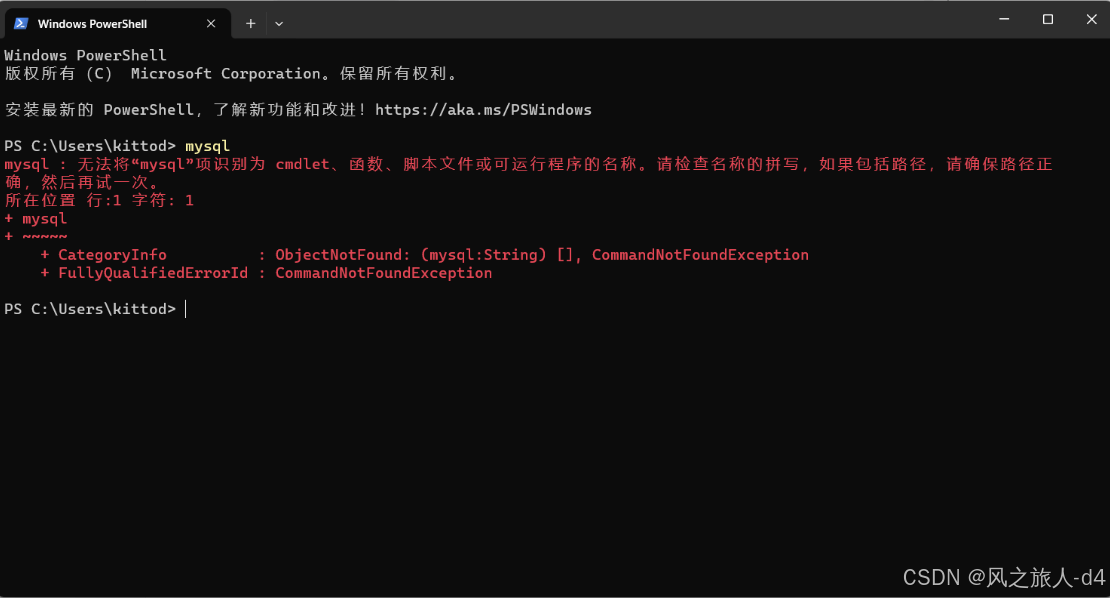
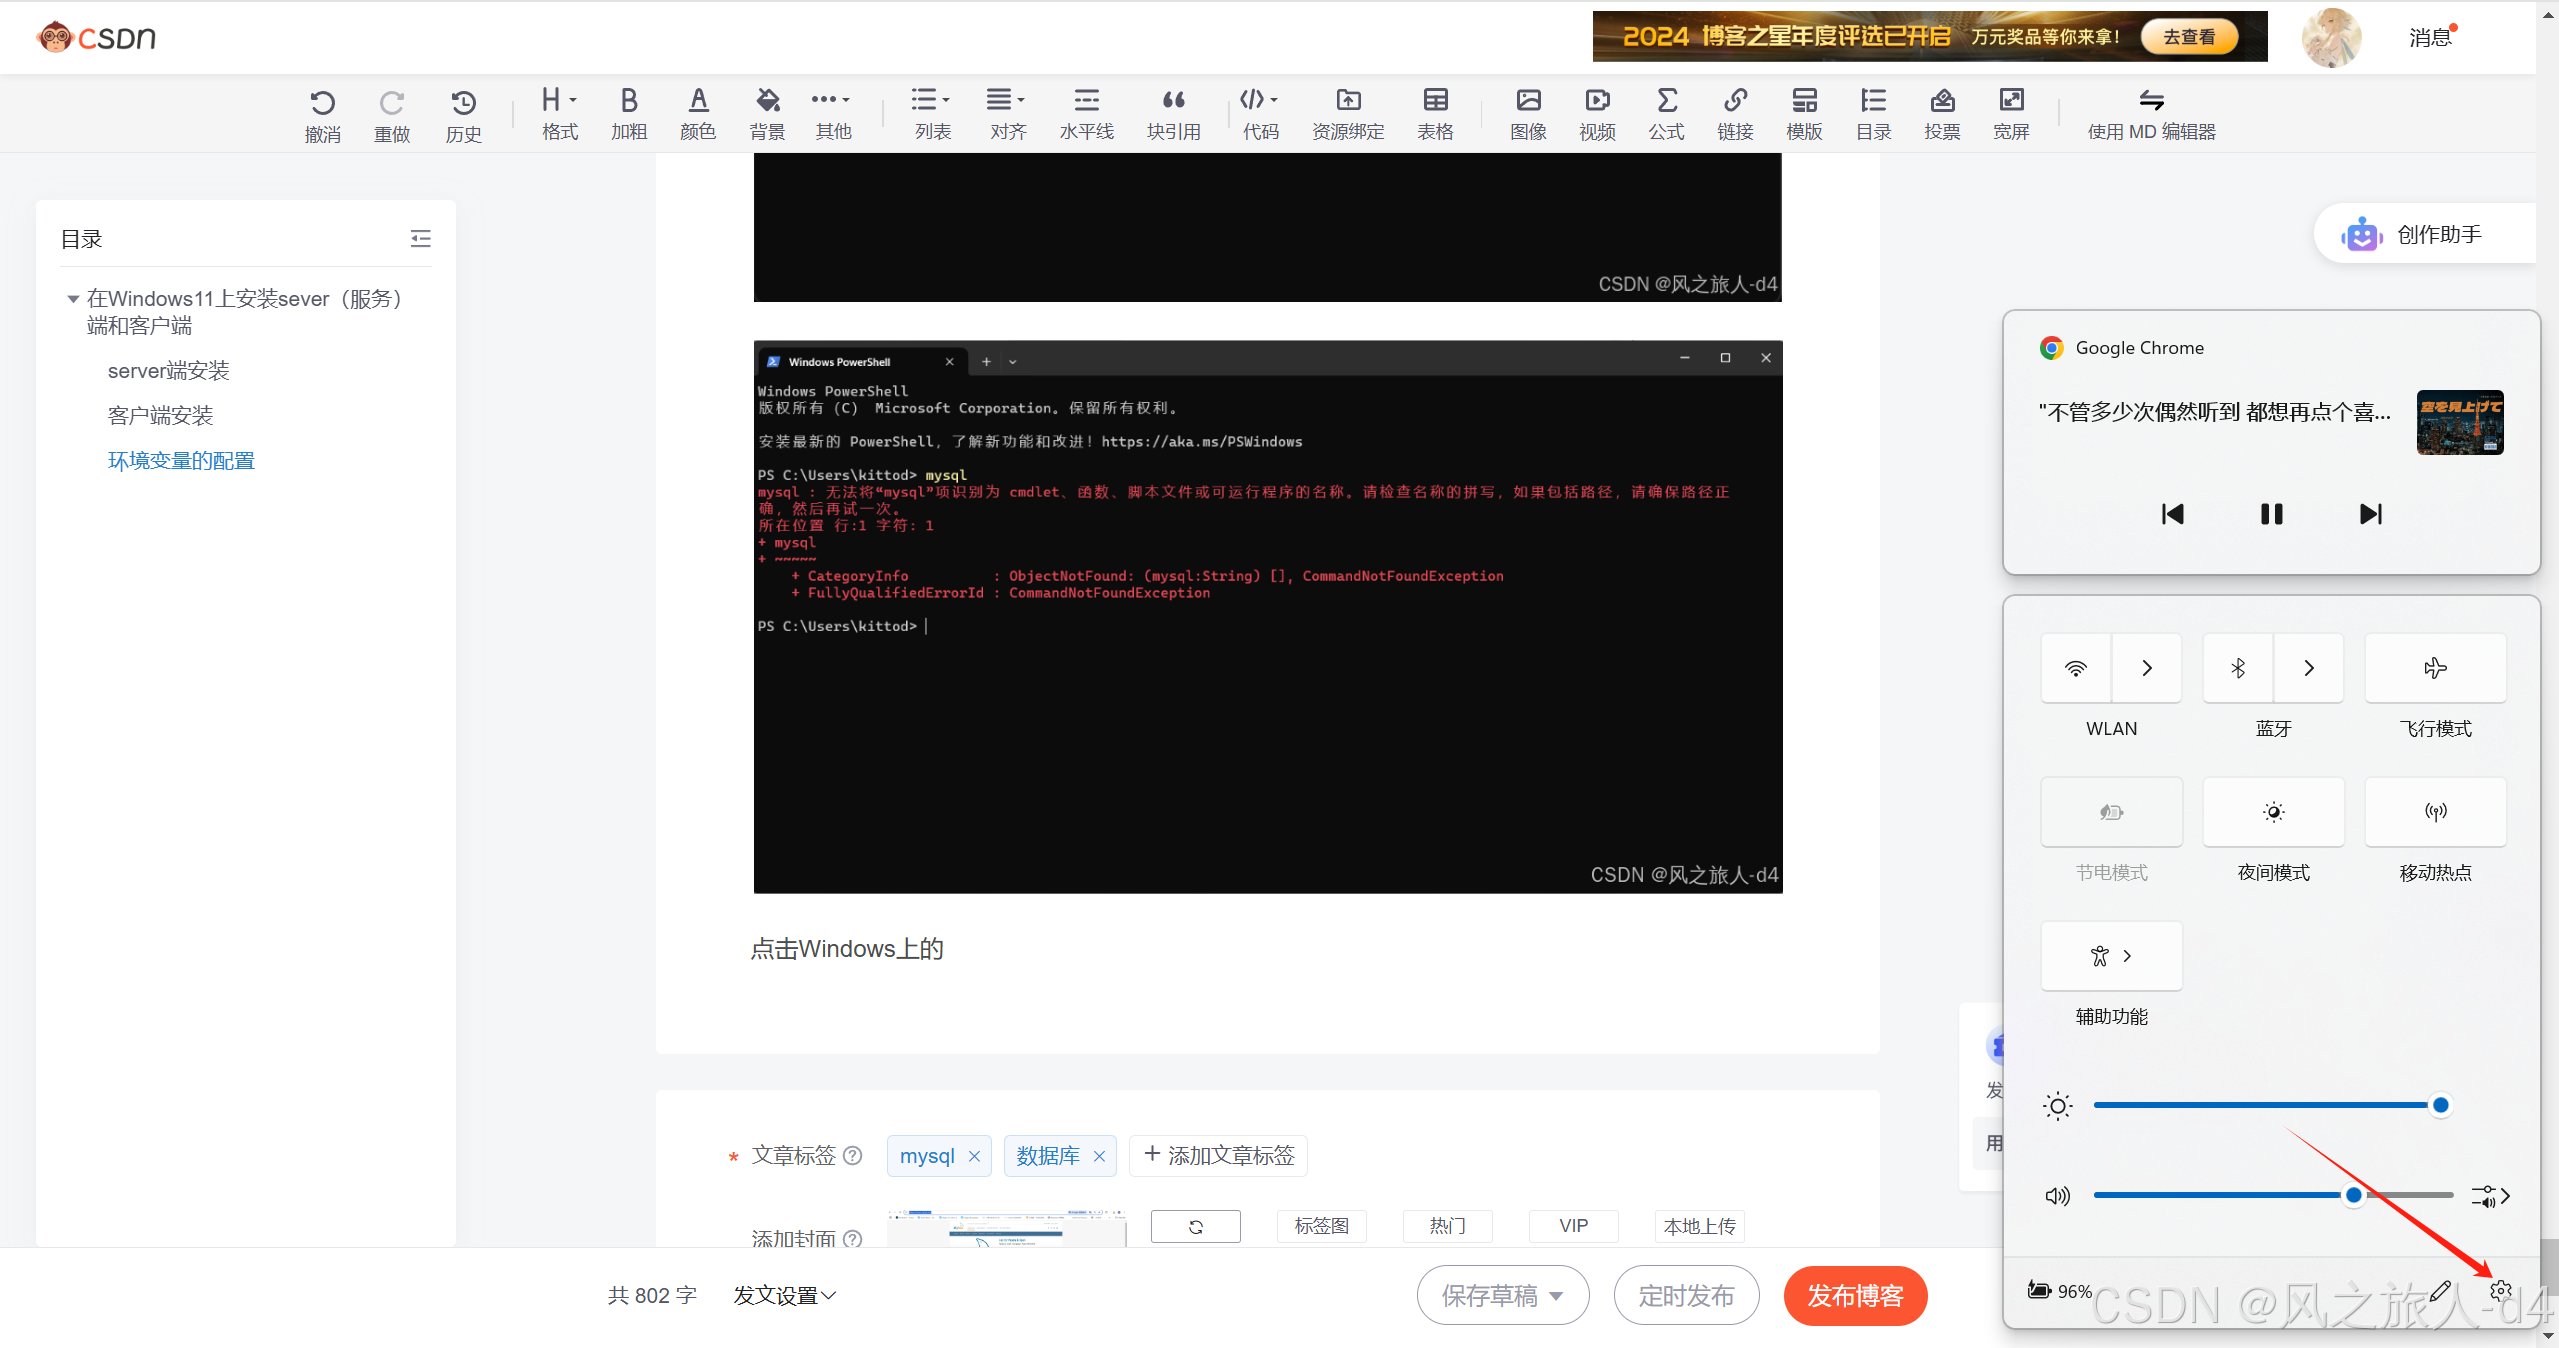
然后打开cmd命令行输入
mysql -uroot -p然后输入密码
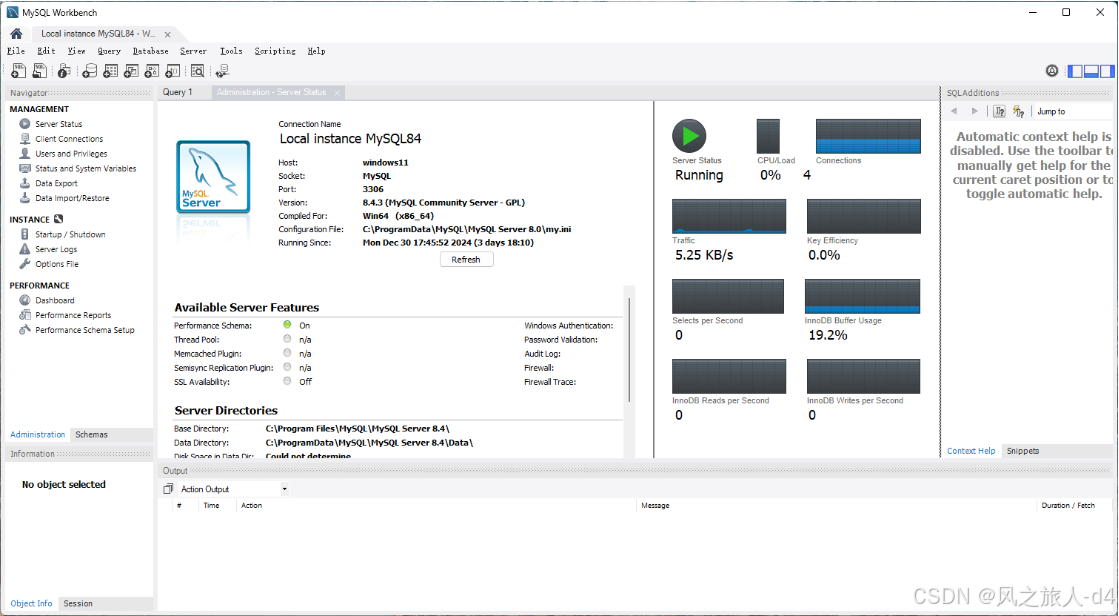
如果能有如下界面表明mysql server 8.4.3lts版本安装成功
客户端安装
返回到这一界面官网:MySQL :: MySQL Downloads
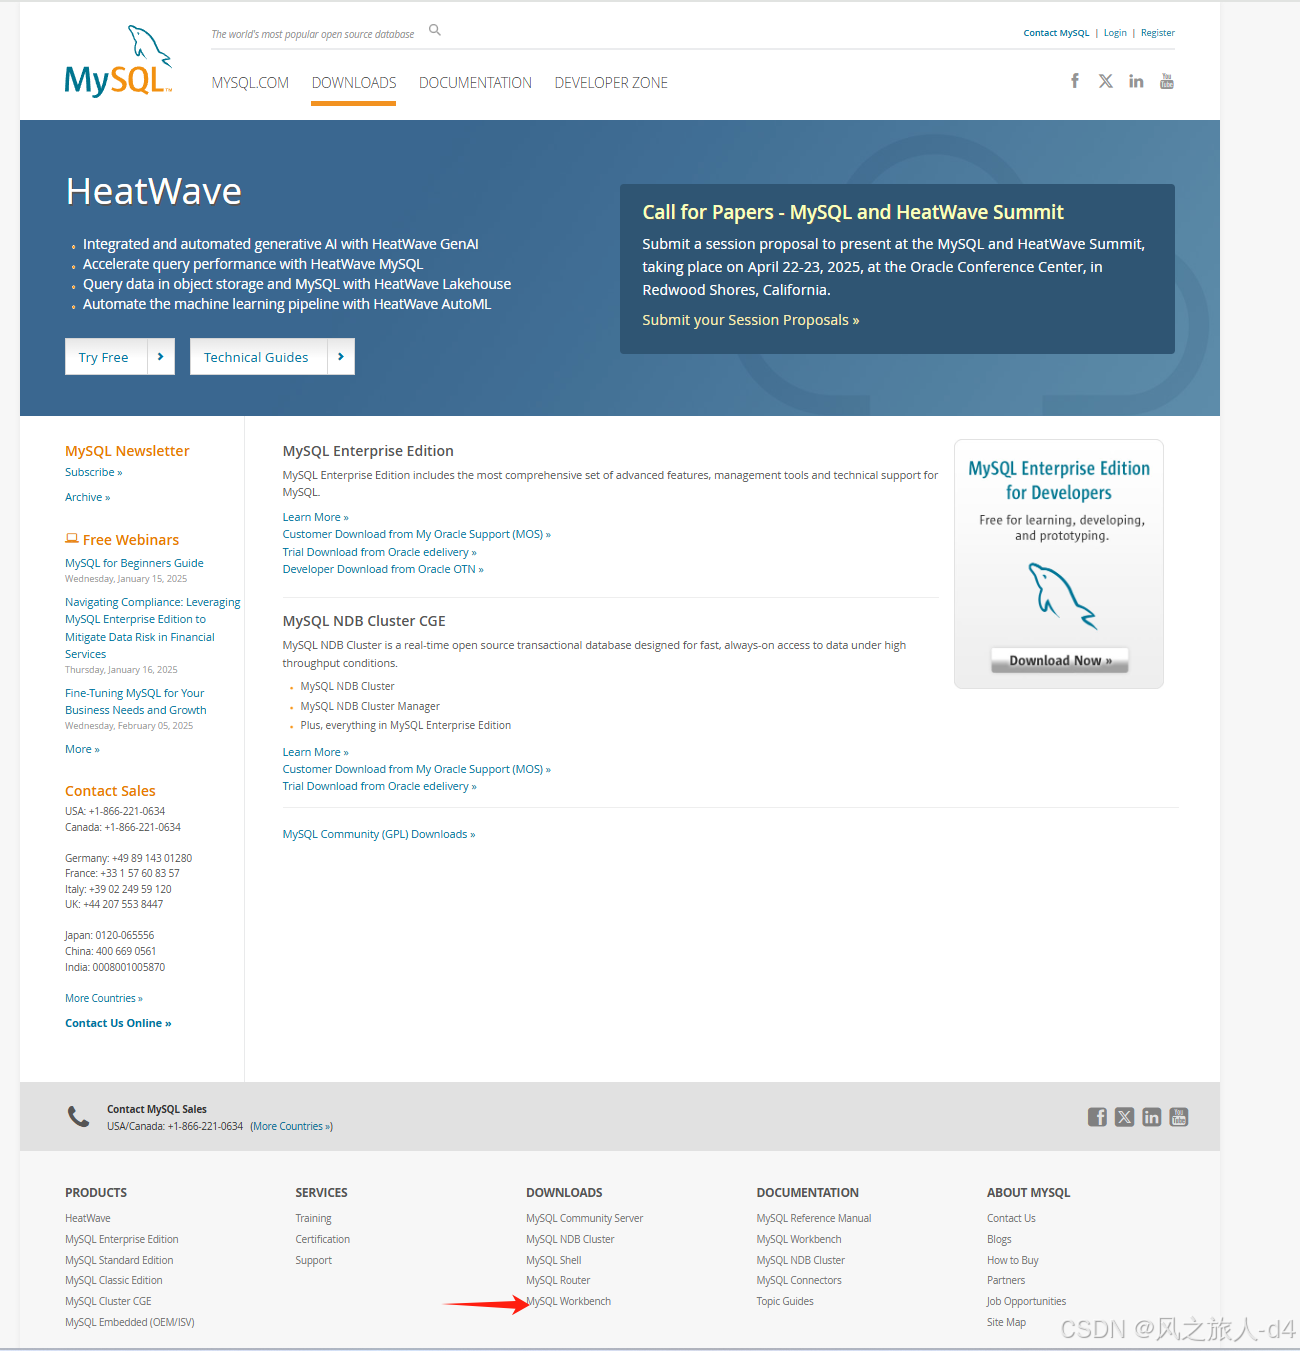
滑到最下面 点击
然后跳转到

点击download跳转到
点击
No thanks, just start my download.进行下载mysql客户端安装包
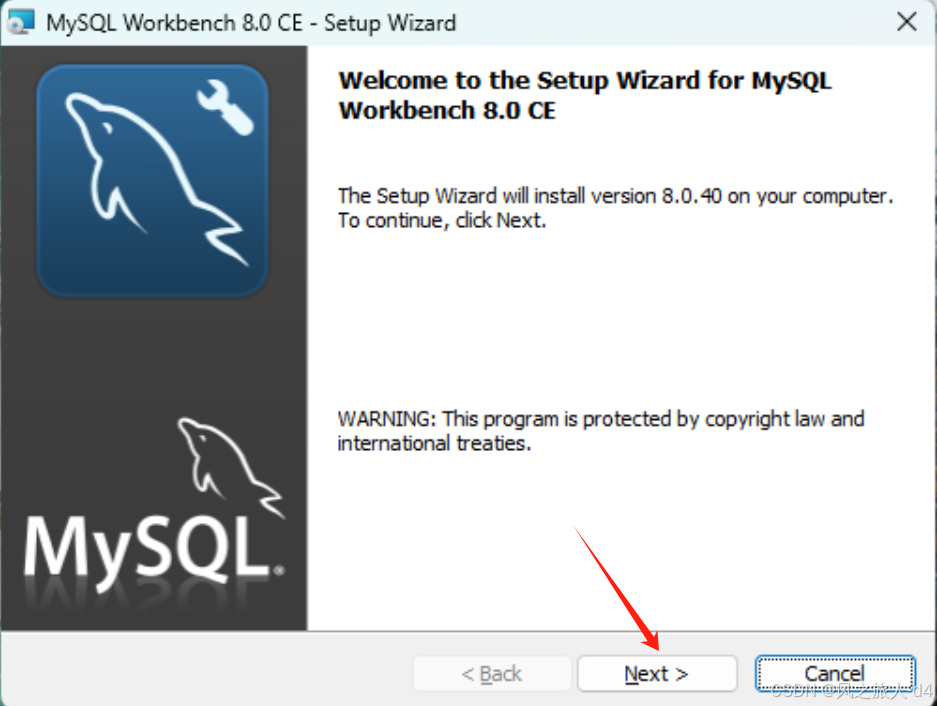
得到安装包 点击安装
点击安装
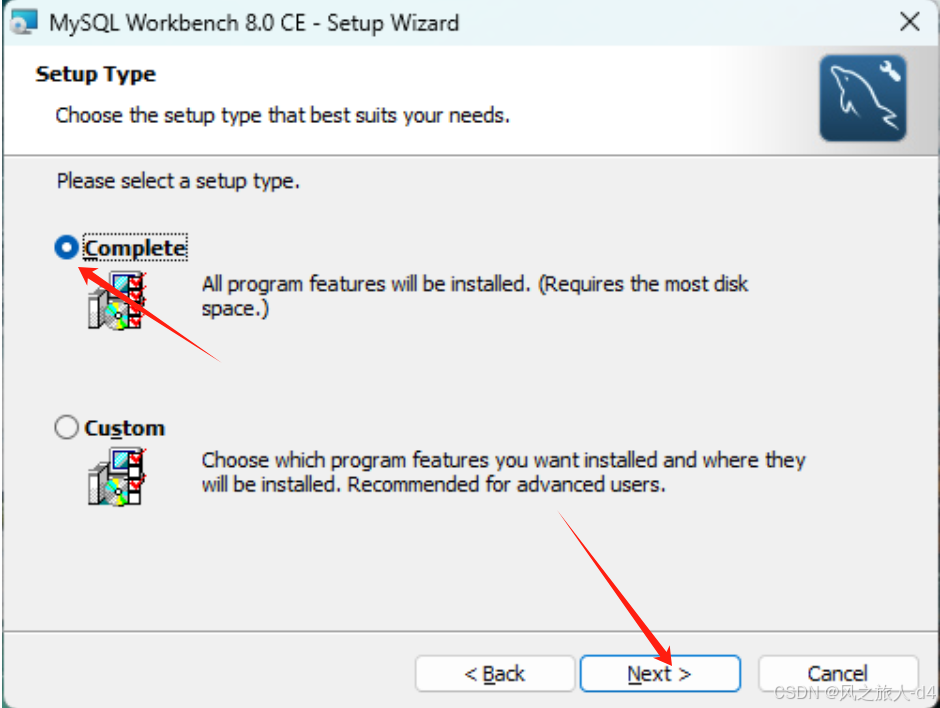
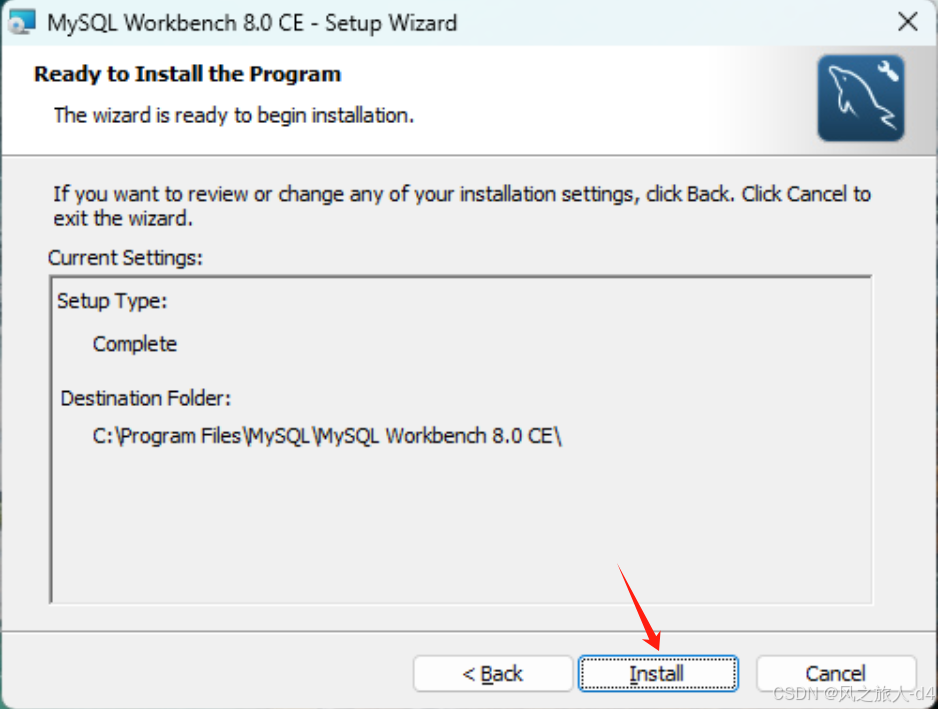
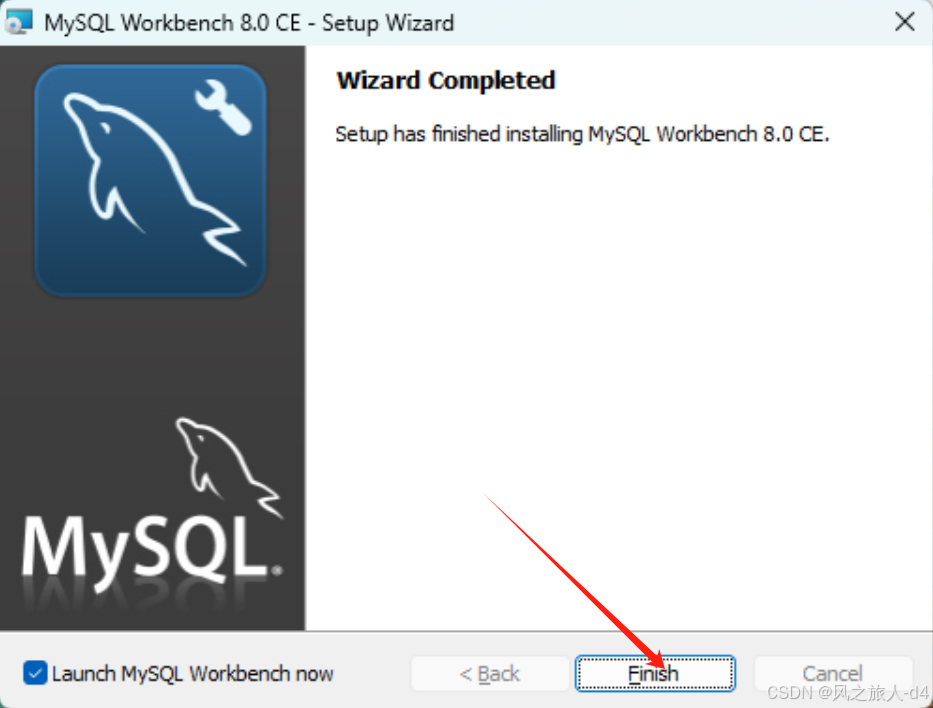
然后下面按箭头指示进行安装mysql客户端
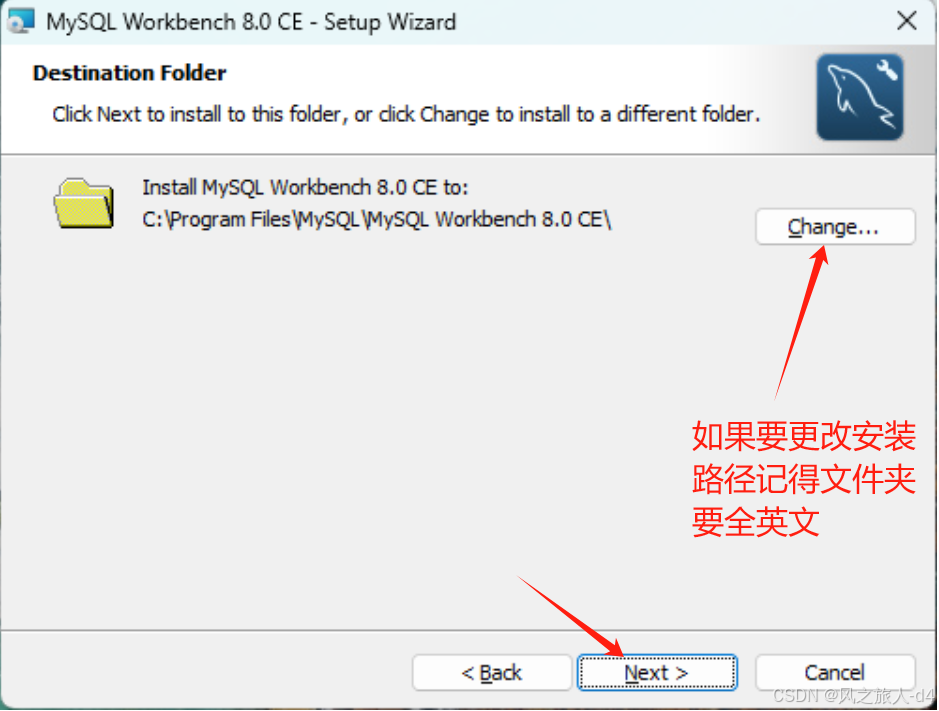
默认会话打开有可能会报错
记得找到(安装路径)下如:C:\Program Files\MySQL\MySQL Workbench 8.0\workbench 目录下的 os_utils.py 文件,使用记事本之类的软件进行更改
打开os_utils.py文件 点击键盘上是ctrl+f 搜索utf-8 发现在356行有这个代码如图所示

将utf-8改为gbk字符

保存并退出 记得一定要管理员模式运行!!!
保存成功后,再次打开 MySQL Workbench。
环境变量的配置
在配置环境变量之前有可能会出现两种情况
点击Windows上的设置按钮
进入界面:
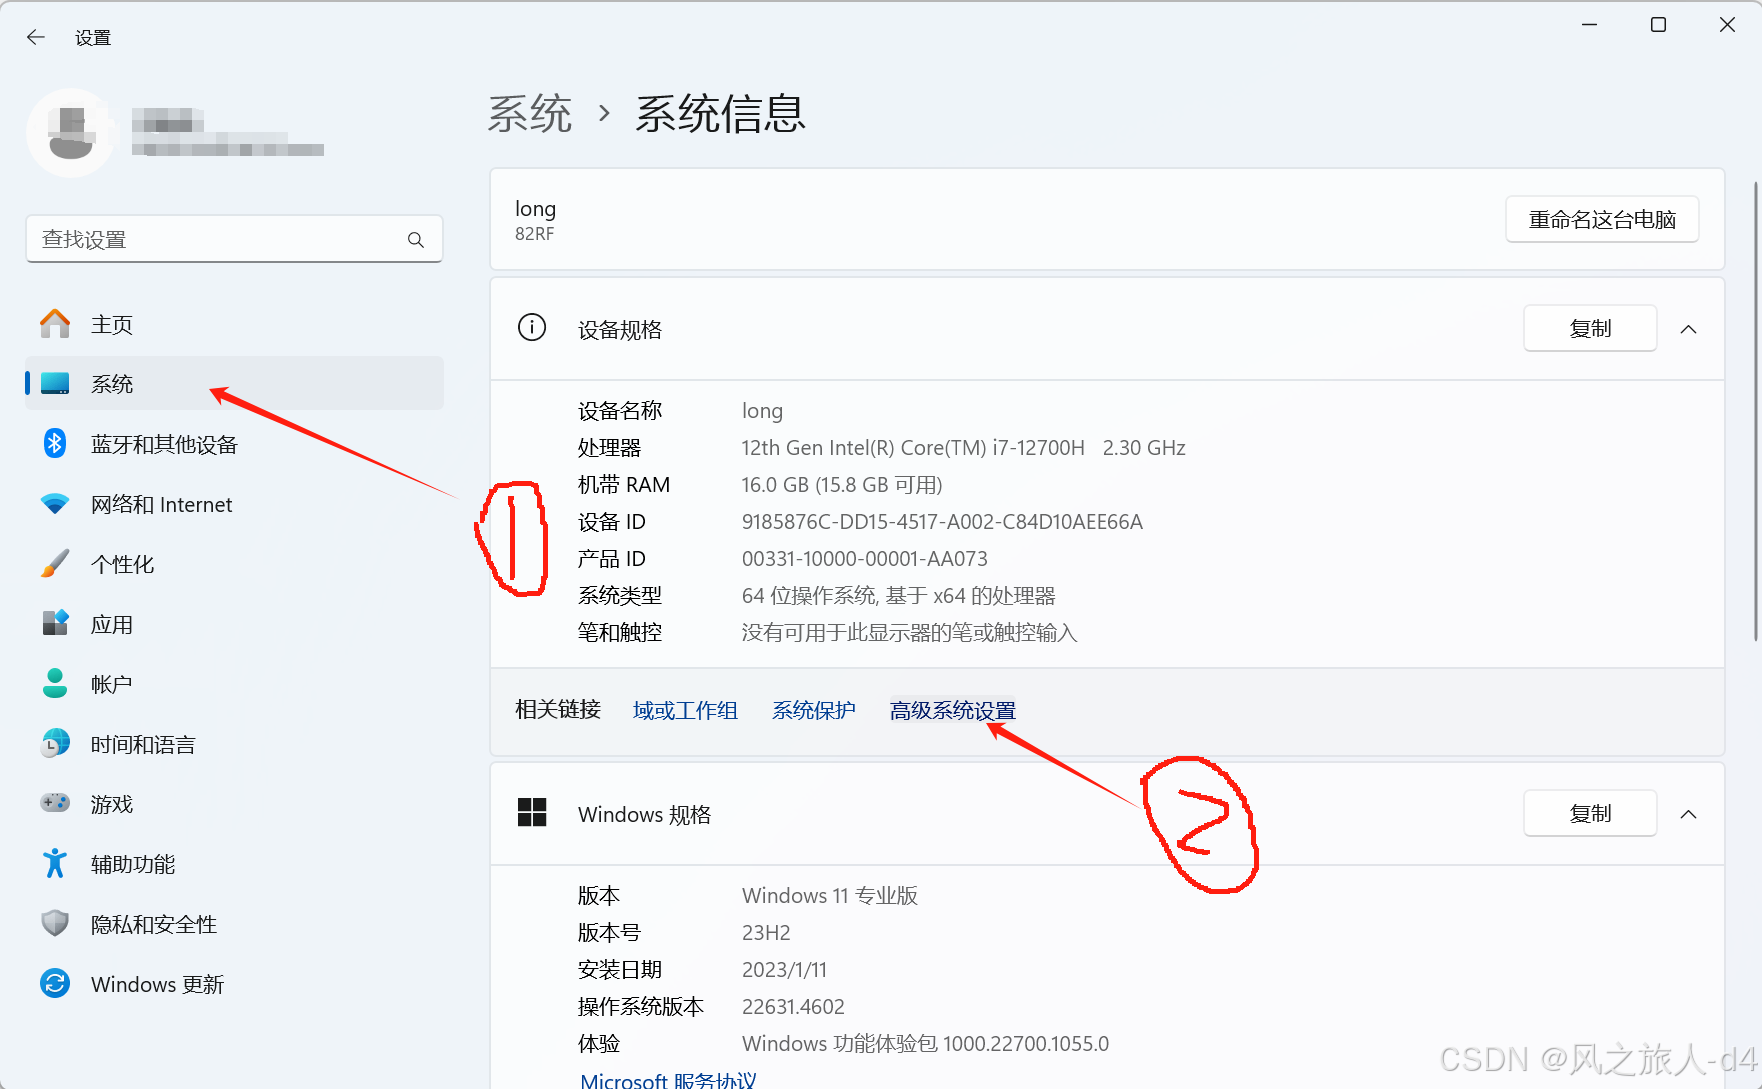
单击高级系统设置
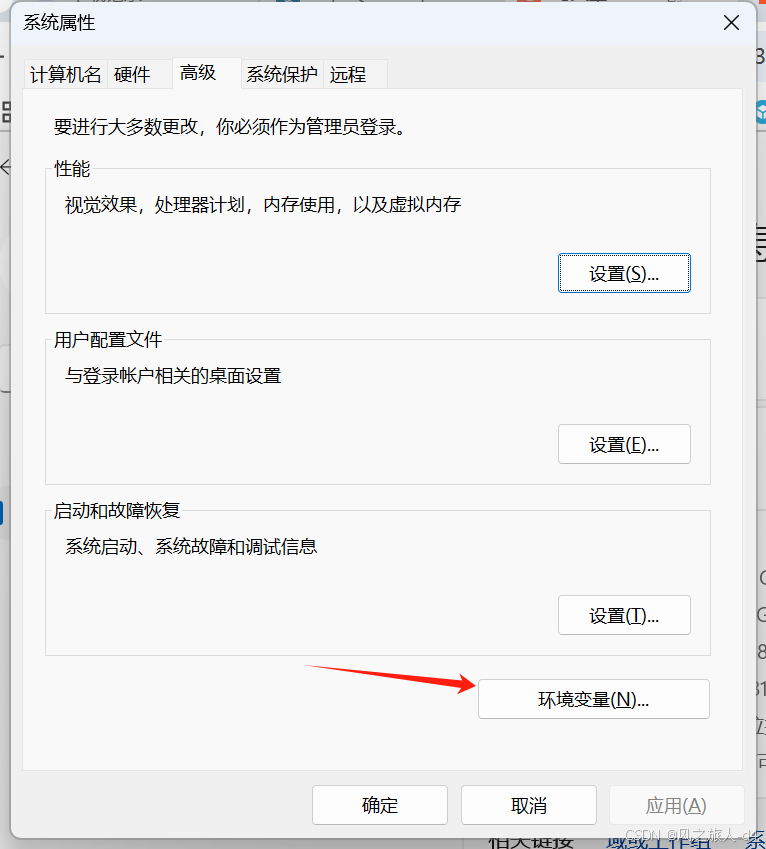
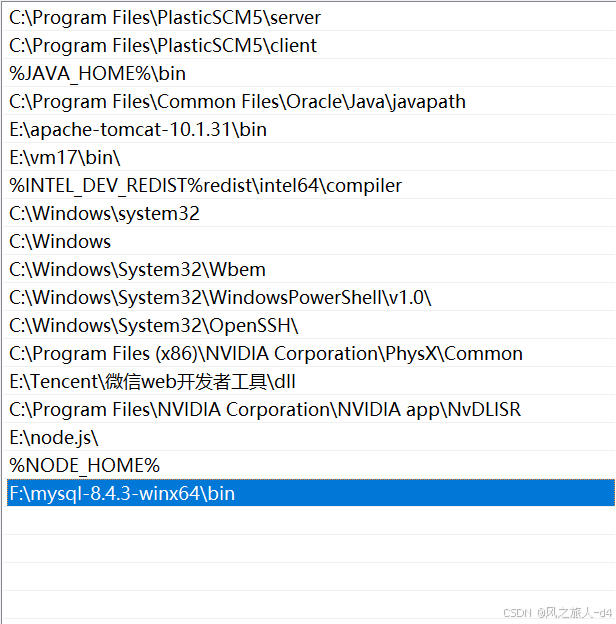
找到Path变量点击编辑:
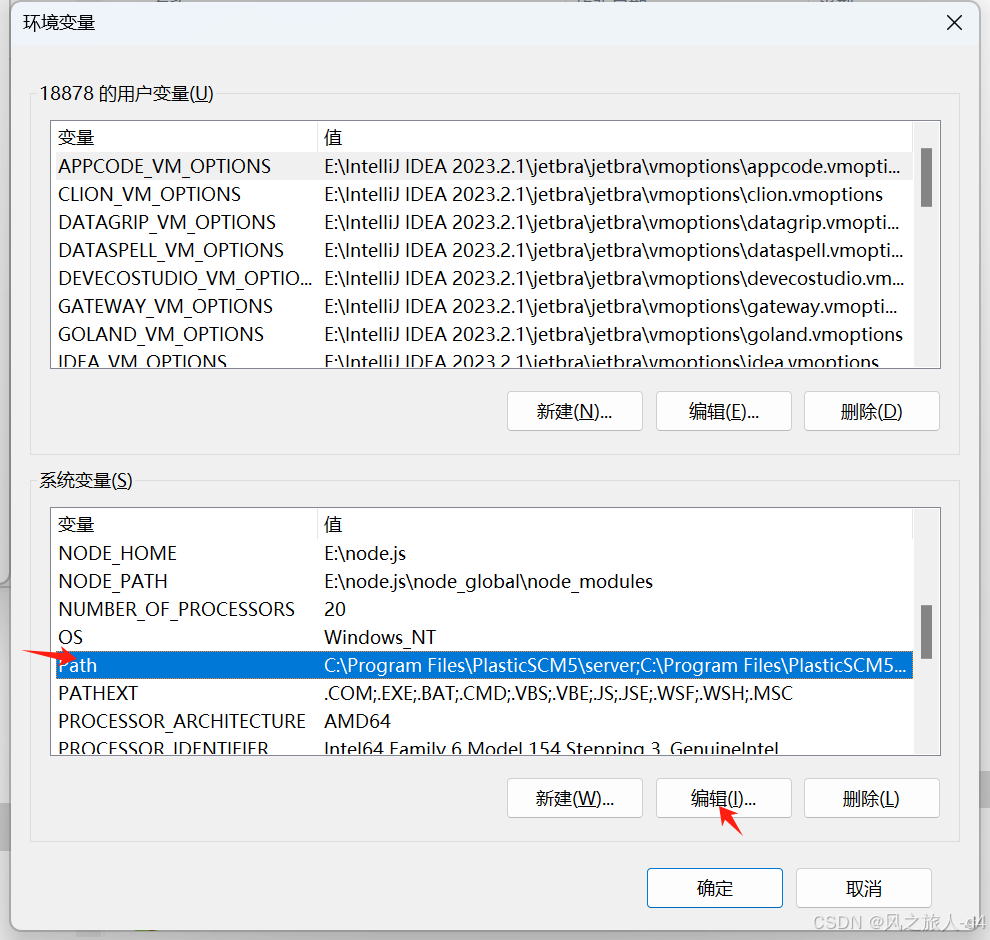
点击新建:
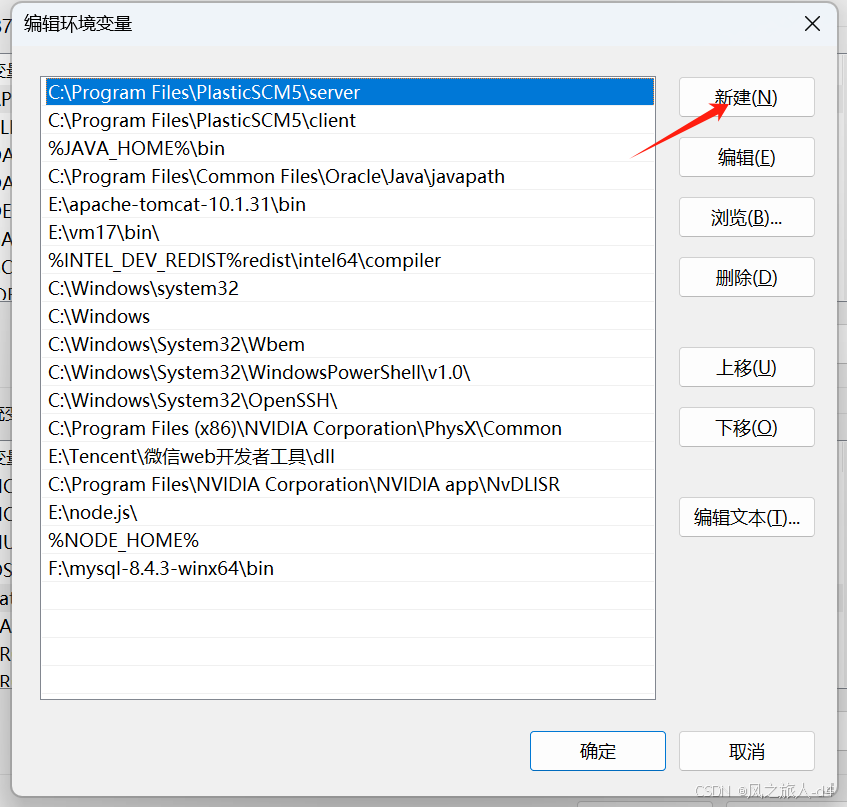
复制mysql的路径
点击确认
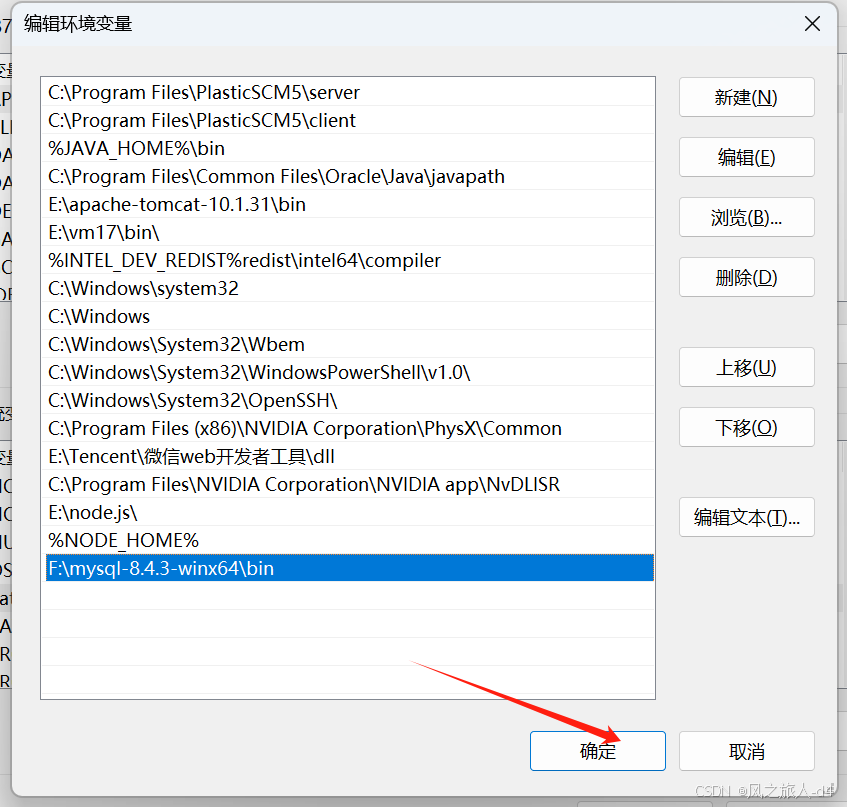
环境变量配置好
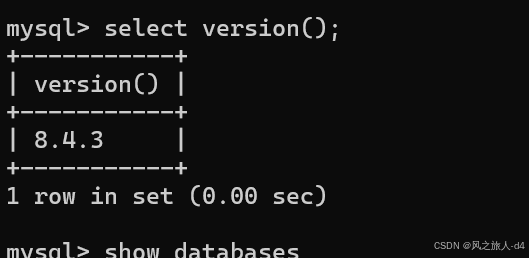
再返回cmd界面发现mysql server能正常使用
在vm17虚拟机上用红帽rh9系统上配置mysql
在线yum源
在这个路径下~/etc/yum.repos.d情况下配置yum源(建议使用阿里云的)
cd ~/etc/yum.repos.d然后
vim redhat.repo修改此yum源就行:
[AppStream]
name = AppStream - RH9.1
baseurl = /mnt/BaseOS
gpgcheck = 0
enabled = 1

[BaseOS]
name = BaseOS - RH9.1
baseurl = /mnt/AppStream
gpgcheck = 0
enabled = 1
然后
cd ~切换为根目录在跟目录安装
使用rpm命令安装包
[root@MySQL ~]# rpm -i https://repo.mysql.com//mysql84-community-releaseel9-1.noarch.rpm
warning: /var/tmp/rpm-tmp.QsZluK: Header V4 RSA/SHA256 Signature, key ID
a8d3785c: NOKEY
[root@MySQL ~]# dnf repolist
Updating Subscription Management repositories.
Unable to read consumer identity
This system is not registered with an entitlement server. You can use "rhc"
or "subscription-manager" to register.
repo id repo
name
appstream
appstream
baseos
baseos
mysql-8.4-lts-community
MySQL 8.4 LTS Community Server
mysql-connectors-community
MySQL Connectors Community
mysql-tools-8.4-lts-community
MySQL Tools 8.4 LTS Community
然后发现三个包安装完毕,安装数据库包
[root@MySQL ~]# dnf install mysql-server
Updating Subscription Management repositories.
Unable to read consumer identity
This system is not registered with an entitlement server. You can use "rhc"
or "subscription-manager" to register.
Last metadata expiration check: 0:03:04 ago on Mon 30 Dec 2024 12:30:35 PM
CST.
Dependencies resolved.
============================================================================
=====================================================================
Package Architecture
Version Repository Size
============================================================================
=====================================================================
Installing:
mysql-community-server x86_64
8.4.3-1.el9 mysql-8.4-lts-community 50 M
Installing dependencies:
mysql-community-client x86_64
8.4.3-1.el9 mysql-8.4-lts-community 3.1 M
mysql-community-client-plugins x86_64
8.4.3-1.el9 mysql-8.4-lts-community 1.5 M
mysql-community-common x86_64
8.4.3-1.el9 mysql-8.4-lts-community 575 k
mysql-community-icu-data-files x86_64
8.4.3-1.el9 mysql-8.4-lts-community 2.3 M
mysql-community-libs x86_64
8.4.3-1.el9 mysql-8.4-lts-community 1.5 M
Transaction Summary
============================================================================
=====================================================================
Install 6 Packages
Total download size: 59 M
Installed size: 330 M
Is this ok [y/N]: y
Downloading Packages:
(1/6): mysql-community-common-8.4.3-1.el9.x86_64.rpm
1.8 MB/s | 575 kB 00:00
(2/6): mysql-community-client-plugins-8.4.3-1.el9.x86_64.rpm
3.8 MB/s | 1.5 MB 00:00
(3/6): mysql-community-icu-data-files-8.4.3-1.el9.x86_64.rpm
13 MB/s | 2.3 MB 00:00
(4/6): mysql-community-libs-8.4.3-1.el9.x86_64.rpm
12 MB/s | 1.5 MB 00:00
(5/6): mysql-community-client-8.4.3-1.el9.x86_64.rpm
5.3 MB/s | 3.1 MB 00:00
(6/6): mysql-community-server-8.4.3-1.el9.x86_64.rpm
29 MB/s | 50 MB 00:01
----------------------------------------------------------------------------
---------------------------------------------------------------------
Total
27 MB/s | 59 MB 00:02
MySQL 8.4 LTS Community Server
3.0 MB/s | 3.1 kB 00:00
Importing GPG key 0xA8D3785C:
Userid : "MySQL Release Engineering <mysql-build@oss.oracle.com>"
Fingerprint: BCA4 3417 C3B4 85DD 128E C6D4 B7B3 B788 A8D3 785C
From : /etc/pki/rpm-gpg/RPM-GPG-KEY-mysql-2023
Is this ok [y/N]: y
Key imported successfully
Running transaction check
Transaction check succeeded.
Running transaction test
Transaction test succeeded.
Running transaction
Preparing :
1/1
Installing : mysql-community-common-8.4.3-1.el9.x86_64
1/6
Installing : mysql-community-client-plugins-8.4.3-1.el9.x86_64
2/6
Installing : mysql-community-libs-8.4.3-1.el9.x86_64
3/6
Running scriptlet: mysql-community-libs-8.4.3-1.el9.x86_64
3/6
Installing : mysql-community-client-8.4.3-1.el9.x86_64
4/6
Installing : mysql-community-icu-data-files-8.4.3-1.el9.x86_64
5/6
Running scriptlet: mysql-community-server-8.4.3-1.el9.x86_64
6/6
Installing : mysql-community-server-8.4.3-1.el9.x86_64
6/6
Running scriptlet: mysql-community-server-8.4.3-1.el9.x86_64
6/6
Verifying : mysql-community-client-8.4.3-1.el9.x86_64
1/6
Verifying : mysql-community-client-plugins-8.4.3-1.el9.x86_64
2/6
Verifying : mysql-community-common-8.4.3-1.el9.x86_64
3/6
Verifying : mysql-community-icu-data-files-8.4.3-1.el9.x86_64
4/6
Verifying : mysql-community-libs-8.4.3-1.el9.x86_64
5/6
Verifying : mysql-community-server-8.4.3-1.el9.x86_64
6/6
Installed products updated.
Installed:
mysql-community-client-8.4.3-1.el9.x86_64 mysql-community-clientplugins-8.4.3-1.el9.x86_64 mysql-community-common-8.4.3-1.el9.x86_64
mysql-community-icu-data-files-8.4.3-1.el9.x86_64 mysql-community-libs-
8.4.3-1.el9.x86_64 mysql-community-server-8.4.3-1.el9.x86_64
Complete!
删除清理
[root@MySQL ~]# dnf remove mysql-server -y
[root@MySQL ~]# rm -rf /var/lib/mysql
[root@MySQL ~]# rm -rf /var/log/mysqld.log
[root@MySQL ~]# userdel -r mysql
userdel: mysql mail spool (/var/spool/mail/mysql) not found
userdel: mysql home directory (/var/lib/mysql) not found
源码部署
安装Docker相关软件
[root@MySQL ~]# dnf install docker-ce docker-ce-cli containerd.io dockerbuildx-plugin docker-compose-plugin
Updating Subscription Management repositories.
Unable to read consumer identity
This system is not registered with an entitlement server. You can use "rhc"
or "subscription-manager" to register.
Last metadata expiration check: 0:19:43 ago on Mon 30 Dec 2024 03:11:17 PM
CST.
Dependencies resolved.
============================================================================
=====================================================================
Package Architecture
Version Repository Size
============================================================================
=====================================================================
Installing:
containerd.io x86_64
1.7.24-3.1.el9 docker-ce-stable 43 M
docker-buildx-plugin x86_64
0.19.3-1.el9 docker-ce-stable 14 M
docker-ce x86_64
3:27.4.1-1.el9 docker-ce-stable 27 M
docker-ce-cli x86_64
1:27.4.1-1.el9 docker-ce-stable 8.0 M
docker-compose-plugin x86_64
2.32.1-1.el9 docker-ce-stable 14 M
Installing dependencies:
container-selinux noarch
3:2.232.1-1.el9 appstream 60 k
fuse-overlayfs x86_64 1.14-
1.el9 appstream 69 k
libslirp x86_64 4.4.0-
8.el9 appstream 70 k
slirp4netns x86_64 1.3.1-
1.el9 appstream 49 k
Installing weak dependencies:
docker-ce-rootless-extras x86_64
27.4.1-1.el9 docker-ce-stable 4.4 M
Transaction Summary
============================================================================
=====================================================================
Install 10 Packages
Total size: 110 M
Installed size: 430 M
Is this ok [y/N]: y
Downloading Packages:
[SKIPPED] containerd.io-1.7.24-3.1.el9.x86_64.rpm: Already downloaded
[SKIPPED] docker-buildx-plugin-0.19.3-1.el9.x86_64.rpm: Already downloaded
[SKIPPED] docker-ce-27.4.1-1.el9.x86_64.rpm: Already downloaded
[SKIPPED] docker-ce-cli-27.4.1-1.el9.x86_64.rpm: Already downloaded
[SKIPPED] docker-ce-rootless-extras-27.4.1-1.el9.x86_64.rpm: Already
downloaded
[SKIPPED] docker-compose-plugin-2.32.1-1.el9.x86_64.rpm: Already downloaded
Running transaction check
Transaction check succeeded.
Running transaction test
Transaction test succeeded.
Running transaction
Preparing :
1/1
Running scriptlet: container-selinux-3:2.232.1-1.el9.noarch
1/10
Installing : container-selinux-3:2.232.1-1.el9.noarch
1/10
Running scriptlet: container-selinux-3:2.232.1-1.el9.noarch
1/10
Installing : docker-compose-plugin-2.32.1-1.el9.x86_64
2/10
Running scriptlet: docker-compose-plugin-2.32.1-1.el9.x86_64
2/10
Installing : containerd.io-1.7.24-3.1.el9.x86_64
3/10
Running scriptlet: containerd.io-1.7.24-3.1.el9.x86_64
3/10
Installing : libslirp-4.4.0-8.el9.x86_64
4/10
Installing : slirp4netns-1.3.1-1.el9.x86_64
5/10
Installing : fuse-overlayfs-1.14-1.el9.x86_64
6/10
Running scriptlet: fuse-overlayfs-1.14-1.el9.x86_64
6/10
Installing : docker-buildx-plugin-0.19.3-1.el9.x86_64
7/10
启动Docker服务
Running scriptlet: docker-buildx-plugin-0.19.3-1.el9.x86_64
7/10
Installing : docker-ce-cli-1:27.4.1-1.el9.x86_64
8/10
Running scriptlet: docker-ce-cli-1:27.4.1-1.el9.x86_64
8/10
Installing : docker-ce-rootless-extras-27.4.1-1.el9.x86_64
9/10
Running scriptlet: docker-ce-rootless-extras-27.4.1-1.el9.x86_64
9/10
Installing : docker-ce-3:27.4.1-1.el9.x86_64
10/10
Running scriptlet: docker-ce-3:27.4.1-1.el9.x86_64
10/10
Running scriptlet: container-selinux-3:2.232.1-1.el9.noarch
10/10
Running scriptlet: docker-ce-3:27.4.1-1.el9.x86_64
10/10
Verifying : containerd.io-1.7.24-3.1.el9.x86_64
1/10
Verifying : docker-buildx-plugin-0.19.3-1.el9.x86_64
2/10
Verifying : docker-ce-3:27.4.1-1.el9.x86_64
3/10
Verifying : docker-ce-cli-1:27.4.1-1.el9.x86_64
4/10
Verifying : docker-ce-rootless-extras-27.4.1-1.el9.x86_64
5/10
Verifying : docker-compose-plugin-2.32.1-1.el9.x86_64
6/10
Verifying : container-selinux-3:2.232.1-1.el9.noarch
7/10
Verifying : fuse-overlayfs-1.14-1.el9.x86_64
8/10
Verifying : libslirp-4.4.0-8.el9.x86_64
9/10
Verifying : slirp4netns-1.3.1-1.el9.x86_64
10/10
Installed products updated.
Installed:
container-selinux-3:2.232.1-1.el9.noarch containerd.io-1.7.24-
3.1.el9.x86_64 docker-buildx-plugin-0.19.3-1.el9.x86_64
docker-ce-3:27.4.1-1.el9.x86_64 docker-ce-cli-1:27.4.1-
1.el9.x86_64 docker-ce-rootless-extras-27.4.1-1.el9.x86_64
docker-compose-plugin-2.32.1-1.el9.x86_64 fuse-overlayfs-1.14-
1.el9.x86_64 libslirp-4.4.0-8.el9.x86_64
slirp4netns-1.3.1-1.el9.x86_64
Complete!
启动Docker服务
[root@MySQL ~]# systemctl enable --now docker
Created symlink /etc/systemd/system/multi-user.target.wants/docker.service →
/usr/lib/systemd/system/docker.service.
拉取MySQL镜像
[root@MySQL ~]# docker search mysql
NAME DESCRIPTION STARS
OFFICIAL
mysql MySQL is a widely used, open-source relation... 15562
[OK]
bitnami/mysql Bitnami container image for MySQL 122
circleci/mysql MySQL is a widely used, open-source relation... 30
cimg/mysql 3
bitnamicharts/mysql Bitnami Helm chart for MySQL 0
ubuntu/mysql MySQL open source fast, stable, multi-thread... 66
rapidfort/mysql RapidFort optimized, hardened image for MySQL 26
elestio/mysql Mysql, verified and packaged by Elestio 1
google/mysql MySQL server for Google Compute Engine 25
docksal/mysql MySQL service images for Docksal - https://d... 0
alpine/mysql mysql client 3
mysql/mysql-server Optimized MySQL Server Docker images. Create... 1024
jumpserver/mysql 1
datajoint/mysql MySQL image pre-configured to work smoothly ... 2
ddev/mysql ARM64 base images for ddev-dbserver-mysql-8.... 1
mysql/mysql-router MySQL Router provides transparent routing be... 28
mirantis/mysql 0
ilios/mysql Mysql configured for running Ilios 1
corpusops/mysql https://github.com/corpusops/docker-images/ 0
mysql/mysql-cluster Experimental MySQL Cluster Docker images. Cr... 100
javanile/mysql MySQL for development 0
vulhub/mysql 1
mysql/mysql-operator MySQL Operator for Kubernetes 1
vitess/mysql Lightweight image to run MySQL with Vitess 1
nasqueron/mysql 1

[root@MySQL ~]# docker pull mysql:8.4.3
8.4.3: Pulling from library/mysql
2c0a233485c3: Pull complete
6f5cca38a221: Pull complete
d7c84b66ede0: Pull complete
299f6f88c6cf: Pull complete
d39eae8f9927: Pull complete
ec0557361569: Pull complete
f6d0f80cb1be: Pull complete
d496030b710c: Pull complete
4d755d8c89d1: Pull complete
699d8e3dc44b: Pull complete
Digest:
sha256:106d5197fd8e4892980469ad42eb20f7a336bd81509aae4ee175d852f5cc4565
Status: Downloaded newer image for mysql:8.4.3
docker.io/library/mysql:8.4.3

[root@MySQL ~]# docker images
REPOSITORY TAG IMAGE ID CREATED SIZE
mysql 8.4.3 3818a28b4a67 2 months ago 594MB
启动容器
[root@MySQL ~]# docker run --name mysqltest -e MYSQL_ROOT_PASSWORD=123456 -d
mysql:8.4.3
74d9d3e6cd837c7bb1fda3b97083f743e5bba58119ce6b3d68374e9806f23f99
查看并测试
[root@MySQL ~]# docker ps
CONTAINER ID IMAGE COMMAND CREATED
STATUS PORTS NAMES
74d9d3e6cd83 mysql:8.4.3 "docker-entrypoint.s..." 26 seconds ago Up 25
seconds 3306/tcp, 33060/tcp mysqltest
[root@MySQL ~]# docker exec -it mysqltest /bin/bash
bash-5.1# mysql -uroot -p
Enter password:
Welcome to the MySQL monitor. Commands end with ; or \g.
Your MySQL connection id is 8
Server version: 8.4.3 MySQL Community Server - GPL
Copyright (c) 2000, 2024, Oracle and/or its affiliates.
Oracle is a registered trademark of Oracle Corporation and/or its
affiliates. Other names may be trademarks of their respective
owners.
Type 'help;' or '\h' for help. Type '\c' to clear the current input
statement.
mysql> select version();
+-----------+
| version() |
+-----------+
| 8.4.3 |
+-----------+
1 row in set (0.01 sec)
mysql> show databases;
+--------------------+
| Database |
+--------------------+
| information_schema |
| mysql |
| performance_schema |
| sys |
+--------------------+
4 rows in set (0.00 sec)
mysql> exit
Bye
bash-5.1# exit
exit
删除清理
[root@MySQL ~]# docker stop mysqltest
mysqltest
[root@MySQL ~]# docker rm mysqltest
mysqltest
[root@MySQL ~]# docker ps -a
CONTAINER ID IMAGE COMMAND CREATED STATUS PORTS NAMES
如果无法正常使用 docker 镜像仓库,可以使用以下指令进行导入导出:
### 导出镜像
[root@MySQL ~]# docker save -o MySQL843.tar mysql:8.4.3
### 导入镜像
[root@MySQL ~]# docker load -i MySQL843.tar
7600fdef234b: Loading layer
[==================================================>] 116.5MB/116.5MB
e17cefd60af0: Loading layer
[==================================================>] 11.26kB/11.26kB
1fa6f54b3274: Loading layer
[==================================================>] 2.359MB/2.359MB
af5010f21ea7: Loading layer
[==================================================>] 17.18MB/17.18MB
abee1c5192d7: Loading layer
[==================================================>] 6.656kB/6.656kB
0576c12e071e: Loading layer
[==================================================>] 3.072kB/3.072kB
66e0995dbcea: Loading layer
[==================================================>] 140.6MB/140.6MB
06bb0f112933: Loading layer
[==================================================>] 3.072kB/3.072kB
793b5c3cdf77: Loading layer
[==================================================>] 335.2MB/335.2MB
099ca8e33f5e: Loading layer
[==================================================>] 17.41kB/17.41kB
Loaded image: mysql:8.4.3