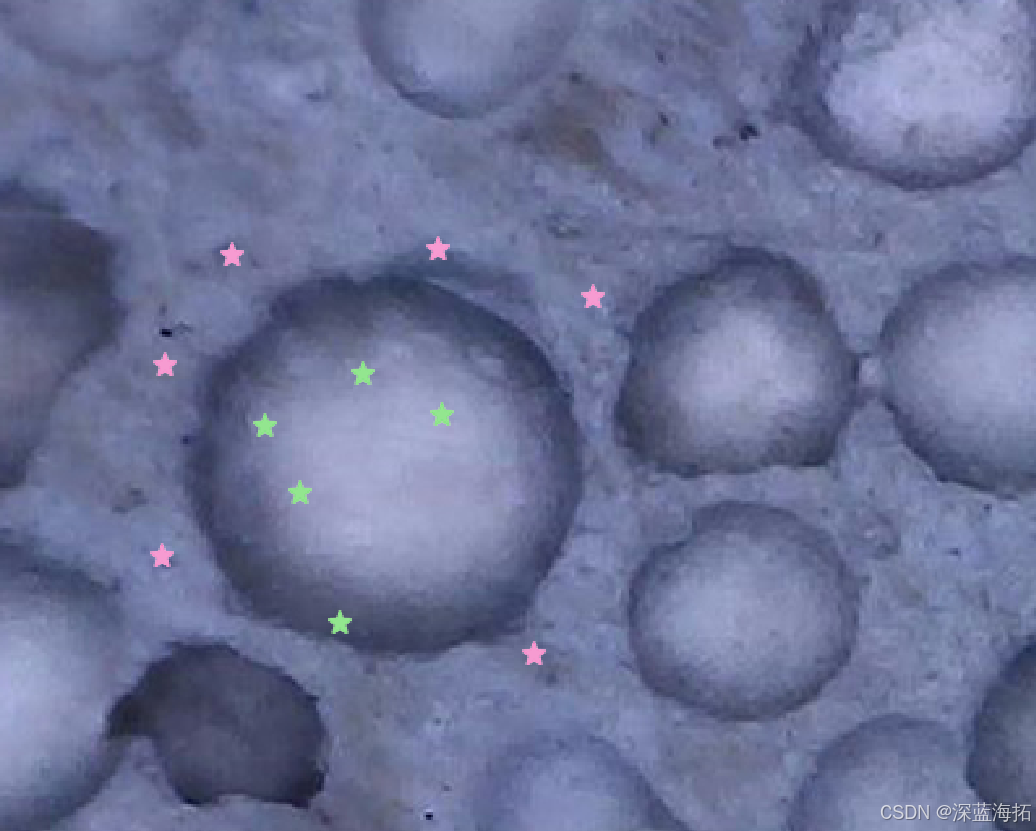
用以标注图像的一个基本框架demo
python
import sys
from PySide6.QtWidgets import QApplication, QGraphicsView, QGraphicsScene, QMainWindow, QLabel, QGraphicsPixmapItem
from PySide6.QtGui import QPixmap, QPainter, QTransform
from PySide6.QtCore import Qt, QPointF, Slot, Signal


class ImageViewer(QGraphicsView):
    mouse_pos = Signal(int, int)  # 原图像素坐标信号
    def __init__(self, image_path, parent=None):
        super(ImageViewer, self).__init__(parent)

        # 场景的初始化
        def init_scene():
            # 设置场景
            self.scene = QGraphicsScene(self)
            self.setScene(self.scene)
            # 设置渲染提示
            self.setRenderHint(QPainter.Antialiasing)   # 开启抗锯齿
            self.setRenderHint(QPainter.SmoothPixmapTransform)  # 开启平滑缩放
            # 设置缩放锚点
            self.setTransformationAnchor(QGraphicsView.AnchorUnderMouse)  # 转换时以鼠标为中心
            self.setResizeAnchor(QGraphicsView.AnchorUnderMouse)  # 缩放时以鼠标为中心
            # 创建基础的显示内容
            pixmap = QPixmap(image_path)
            self.pixmap_item = QGraphicsPixmapItem(pixmap)
            self.scene.addItem(self.pixmap_item)
            # 标记点的数量
            self.mark_count = 0
            # 遮罩的数量
            self.mask_count = 0
        init_scene()
        self.mouse_pos.connect(self.update_mouse_position)


    def add_mark(self, pixmap, pos=(0, 0), scale=1.0):
        """
        添加标记到场景
        :param pixmap: 图像数据
        :param pos:  坐标
        :param scale: 缩放比例
        :return:  None
        """
        # 加载图像
        pixmap_item = QGraphicsPixmapItem(pixmap)  # 创建图形项
        mark_x = pos[0] - pixmap.width() / 2 * scale
        mark_y = pos[1] - pixmap.height() / 2 * scale
        pixmap_item.setPos(mark_x, mark_y)  # 设置位置
        if scale != 1.0:  # 设置比例
            pixmap_item.setScale(scale)
        self.scene.addItem(pixmap_item)
        self.mark_count += 1

    def add_mask(self):
        """
        添加遮罩
        :return:
        """
        pass

    def remove_mark(self):
        """
        删除一个标记
        :return: None
        """
        if self.mark_count > 0:
            self.scene.removeItem(self.scene.items()[0])
            self.mark_count -= 1

    def remove_mask(self):
        """
        删除一个遮罩
        :return: None
        """
        if self.mask_count > 0:
            self.scene.removeItem(self.scene.items()[0])
            self.mask_count -= 1

    def remove_all_marks(self):
        """
        删除所有标记
        :return:
        """
        while self.mark_count > 0:
            self.scene.removeItem(self.scene.items()[0])
            self.mark_count -= 1


    # # 使用变换矩阵(如果需要)
    def transform(self, t):
        # self.transform = t
        # self.pixmap_item.setTransform(self.transform)
        pass

    # 处理滚轮事件以实现缩放
    def wheelEvent(self, event):
        factor = 1.001 ** event.angleDelta().y()  # 滚轮每滚动一格,缩放比例变化
        self.scale(factor, factor)

    # 处理鼠标单击事件以显示原图像素坐标
    def mousePressEvent(self, event):
        super(ImageViewer, self).mousePressEvent(event)
        scene_pos = self.mapToScene(event.position().toPoint())  # 记录当前鼠标在场景中的位置
        pixmap_rect = self.pixmap_item.boundingRect()   # 记录图像的边界矩形
        # 如果鼠标在图像边界矩形内,则显示像素坐标
        if pixmap_rect.contains(scene_pos):
            pos = self.pixmap_item.mapFromScene(scene_pos)  # 计算图像坐标
            x, y = pos.x(), pos.y()
            print(f"鼠标在图像内,坐标为: ({x}, {y})")

            if event.button() == Qt.LeftButton:  # 左键
                if event.modifiers() == Qt.ShiftModifier:  # Shift 键
                    self.remove_mark()    # 删除标记
                else:
                    self.add_mark(pixmap_mark, (x, y), 0.6)  # 添加标记

            elif event.button() == Qt.RightButton:   # 右键
                if event.modifiers() == Qt.ShiftModifier:   # Shift 键
                    self.remove_all_marks()   # 删除所有标记
                else:
                    self.add_mark(pixmap_unmark, (x, y), 0.6)   # 添加标记

    @Slot()
    def update_mouse_position(self, x, y):
        pass
        # 更新状态栏显示
        # self.status_bar.showMessage(f"原图像素坐标: ({x}, {y})")

class MainWindow(QMainWindow):
    def __init__(self, image_path):
        super(MainWindow, self).__init__()
        self.setGeometry(100, 100, 800, 600)

        # 创建状态栏
        self.status_bar = self.statusBar()

        # 创建 ImageViewer 实例
        self.image_viewer = ImageViewer(image_path, self)
        self.setCentralWidget(self.image_viewer)


if __name__ == "__main__":
    app = QApplication(sys.argv)

    # 生成标记图像
    pixmap_mark = QPixmap("mark.png")   # 标记图像(前景)
    pixmap_unmark = QPixmap("un_mark.png")   # 未标记图像(背景)

    image_path = "IMG_PP.jpg"      # 基础图像路径

    # 创建主窗口
    window = MainWindow(image_path)
    window.show()

    sys.exit(app.exec())
截图:
