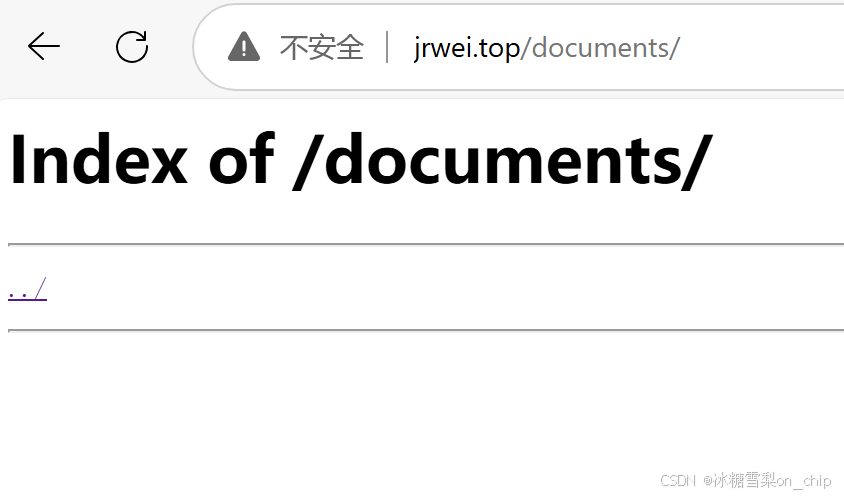
效果如图

如果url不对,这是404页面

步骤
确定文件存放目录
先确定你要把文件放到哪个目录中,比如我要放在/var/www/jrwei.top/documents中
bash
# 创建目录
sudo mkdir -p /var/www/jrwei.top/documents

# 设置目录权限
sudo chown -R nginx:nginx /var/www/jrwei.top/documents
sudo chmod -R 755 /var/www/jrwei.top/documents
404.html
至于404页面,nginx有自带的,但是为了调试方便,我们自己造一个。这样能看到究竟是正常的404页面还是服务不可用(nginx自带的404页面)。
放在/usr/share/nginx/html/wordpress/
<!DOCTYPE html>
<html lang="en">
<head>
    <meta charset="UTF-8">
    <meta name="viewport" content="width=device-width, initial-scale=1.0">
    <title>404 Not Found</title>
</head>
<body>
    <h1>404 Not Found</h1>
    <p>The page you are looking for does not exist.</p>
    <p>Please check the URL and try again.</p>
    <a href="http://jrwei.top">Return to Home</a>
</body>
</html>
修改配置文件
kimi去直接改主配置了,导致整个网站一波真404,而deepseek告诉我主配置(/etc/nginx/nginx.conf)不要改。所以我们去在/etc/nginx/conf.d目录下改default.conf.
原来:
server {
    listen       80;
    server_name  localhost;
    root /usr/share/nginx/html/wordpress;
    location / {
            index index.php index.html index.htm;
    }
    location ~ .php$ {
            root /usr/share/nginx/html/wordpress;
            fastcgi_pass 127.0.0.1:9000;
            fastcgi_index index.php;
            fastcgi_param SCRIPT_FILENAME $document_root$fastcgi_script_name;
            include fastcgi_params;
    }
    error_page   500 502 503 504  /50x.html;
    location = /50x.html {
        root   /usr/share/nginx/html;
    }
}
改为:
server {
    listen 80;
    server_name jrwei.top; # 必须与主站域名一致

    # WordPress主站配置(与原default.conf保持一致)
    root /usr/share/nginx/html/wordpress;
    index index.php index.html index.htm;

    # 文档访问路径
    location /documents/ {
        alias /var/www/jrwei.top/documents/;
        autoindex on;
        try_files $uri $uri/ =404; # 防止路径遍历
    }
     # 自定义404配置
    error_page 404 /404.html;
    location = /404.html {
        internal; # 禁止直接外部访问
        # 若404.html存放在/var/www/jrwei.top/404.html则不需要alias
        # 若存放在子目录如/var/www/jrwei.top/errors/404.html,需添加:
        # alias /var/www/jrwei.top/; # 必须以/结尾
    }
    # PHP处理(必须与原配置一致)
    location ~ \.php$ {
        fastcgi_pass 127.0.0.1:9000;
        fastcgi_index index.php;
        fastcgi_param SCRIPT_FILENAME $document_root$fastcgi_script_name;
        include fastcgi_params;
    }

    # WordPress固定链接支持
    location / {
        try_files $uri $uri/ /index.php?$args; # 关键!解决404问题
    }
}
重启nginx服务
在全部改动的最后,要重启服务
bash
#测试配置是否正确
sudo nginx -t
#重新加载 Nginx 服务
sudo systemctl reload nginx
接下来是从win向linux云服务器上传文件
使用Samba服务(没成功)
公网IP:
适用场景:当你的Windows客户端位于阿里云服务器所在的外部网络(如家庭网络、公司网络、其他云服务商)时,必须通过公网IP访问。
需在阿里云安全组开放Samba端口(139和445),且Samba服务监听了公网IP(默认可能仅监听内网)。
安装
yum install samba samba-client samba-common -y编辑配置文件
vim /etc/samba/smb.conf反正最后就是失败了。
使用xshell上传文件(大文件上传一堆乱码)
参考 https://blog.csdn.net/parker007/article/details/87935464
注意使用rz -be,否则一堆乱码
但上传大文件依旧不行
winscp(好用)
选sftp协议,也不用设置入方向安全组(ftp是21),直接输入公网ip、用户、密码,直接连上,又快又好。
文件名在终端显示正常,但在网页上乱码怎么办
在default.conf的location中添加一行:charset utf-8; 重启nginx服务就好了。
结果:
