一、训练并保存模型(我这里使用的是jupyter notebook跑的python预测代码)
python
import numpy as np
import pandas as pd
import matplotlib.pyplot as plt
from sklearn.model_selection import train_test_split
from sklearn.preprocessing import MinMaxScaler
from keras.models import Sequential
from keras.layers import LSTM, Dense, Input
from sklearn.metrics import mean_squared_error, mean_absolute_error, max_error, mean_absolute_percentage_error, r2_score


# 1. 加载 Excel 文件
file_path = './dataset/241204-250105.xlsx'
data = pd.read_excel(file_path, parse_dates=['time'], index_col='time')

# 2. 处理缺失值(如果有的话,这里以填充均值为例)
data.fillna(data.mean(), inplace=True)

# 3. 初始化 MinMaxScaler,归一化到 [0, 1]
scaler = MinMaxScaler(feature_range=(0, 1))
data['t_sensor_value_scaled'] = scaler.fit_transform(data[['temperature']])

# 4. 将归一化后的数据转为 NumPy 数组,防止多维索引错误
normalized_data = np.array(data['t_sensor_value_scaled'])


# 6. 准备数据集(时间步长 = 5
def create_dataset(data, time_step):
    X, y = [], []
    for i in range(len(data)-time_step-1):
        X.append(data[i:(i+time_step), 0])  # 特征:过去 5 天的温度值
        y.append(data[i+time_step, 0])      # 目标:第 6 天的温度值
    return np.array(X), np.array(y)

# 7. 准备数据
time_step = 5  # 使用过去 10 天的数据预测今天的温度
data_values = normalized_data.reshape(-1, 1)
X, y = create_dataset(data_values, time_step)

# 将数据转化为LSTM的输入格式 [samples, time_steps, features]
X = X.reshape(X.shape[0], X.shape[1], 1)

# 8. 划分训练集和测试集
X_train, X_test, y_train, y_test = train_test_split(X, y, test_size=0.2, shuffle=False)
plt.figure(figsize=(10, 6))
plt.plot(y_train, color='green', label='Normalized Temperature')
plt.xlabel('Time')
plt.ylabel('Normalized Temperature')
plt.title('Normalized Temperature Data')
plt.legend()
plt.show()

plt.figure(figsize=(10, 6))
plt.plot(y_test, color='yellow', label='Normalized Temperature')
plt.xlabel('Time')
plt.ylabel('Normalized Temperature')
plt.title('Normalized Temperature Data')
plt.legend()
plt.show()

# 9. 定义不同的LSTM模型并训练
def build_and_train_lstm(units_1, units_2):
    model = Sequential()
    model.add(Input(shape=(X.shape[1], 1)))
    model.add(LSTM(units=units_1, return_sequences=True))
    model.add(LSTM(units=units_2, return_sequences=False))
    model.add(Dense(units=1))  # 输出一个温度值

    model.compile(optimizer='adam', loss='mean_squared_error')
    model.fit(X_train, y_train, epochs=50, batch_size=32, verbose=0) # 进行训练
    return model

# 10. 训练并测试模型
unit_configs = [ (128, 64)]
for units_1, units_2 in unit_configs:
    print(f"Training LSTM with {units_1} and {units_2} units...")
    model = build_and_train_lstm(units_1, units_2)

    model.save("lstm_temperature_model.h5")

    # 11. 进行预测
    y_pred = model.predict(X_test)

    # 12. 反归一化
    y_pred = scaler.inverse_transform(y_pred)
    y_test_original = scaler.inverse_transform(y_test.reshape(-1, 1))

    # 13. 计算评价指标
    mse = mean_squared_error(y_test_original, y_pred)
    mae = mean_absolute_error(y_test_original, y_pred)
    mape = mean_absolute_percentage_error(y_test_original, y_pred)
    r2 = r2_score(y_test_original, y_pred)
    max_abs_error = max_error(y_test_original, y_pred)
    min_abs_error = np.min(np.abs(y_test_original - y_pred))  # 最小绝对误差

    # 输出最大、最小绝对误差
    print(f'Max Absolute Error: {max_abs_error}')
    print(f'Min Absolute Error: {min_abs_error}')

    # 输出评价指标
    print(f'Model with ({units_1}, {units_2}) units:')
    print(f'MSE: {mse}')
    print(f'MAE: {mae}')
    print(f'MAPE: {mape}')
    print(f'R²: {r2}')
    print('-' * 50)

    # 13. 绘制实际值与预测值
    plt.figure(figsize=(10, 6))
    plt.plot(y_test_original, color='blue', label='Actual Temperature')
    plt.plot(y_pred, color='red', label='Predicted Temperature')
    plt.xlabel('Time')
    plt.ylabel('Temperature')
    plt.title(f'Temperature Prediction with LSTM ({units_1}, {units_2})')
    plt.legend()
    plt.show()
二、使用保存好的模型进行本地预测(这里10为时间不长进行预测)
python
import numpy as np
from sklearn.preprocessing import MinMaxScaler
from keras.models import load_model

# 1. 输入5个温度值
input_temperature_values = [23.6, 23.7, 23.7, 23.7, 23.7, 23.6, 23.5, 23.5, 23.5,23.5]  # 例子:输入10个温度值

# 2. 确保输入数据为 numpy 数组并进行归一化
input_temperature_values = np.array(input_temperature_values).reshape(-1, 1)

# 3. 加载 LSTM 预测模型
model = load_model("lstm_temperature_model.h5")

# 4. 归一化温度数据(必须使用训练时的 scaler)
scaler = MinMaxScaler(feature_range=(0, 1))
input_scaled = scaler.fit_transform(input_temperature_values)

# 5. 为 LSTM 创建 3D 输入(时间步长为 5)
time_step = 10
X_pred = input_scaled.reshape(1, time_step, 1)

# 6. 进行 LSTM 预测
y_pred_scaled = model.predict(X_pred)

# 7. 反归一化预测结果
y_pred = scaler.inverse_transform(y_pred_scaled)

# 8. 输出预测结果
print(f"Predicted temperature: {y_pred.flatten()[0]:.2f}")
三、将保存的模型参数文件和预测部分文件保存到服务器
1、模型参数文件为:lstm_temperature_model.h5
2、在新建一个py文件 predicttemp.py 在服务器(
ps:这里我想要的效果是:给接口一个json数组,接口返回一个预测的数据的数据值。
)
3、下载所需要的python环境、pip环境、numpy等包环境
4、predicttemp.py文件创建FastAPI接口如下:
python
from fastapi import FastAPI
from pydantic import BaseModel
import numpy as np
from keras import models
from sklearn.preprocessing import MinMaxScaler
from typing import List

# 创建 FastAPI 实例
app = FastAPI()

# 请求数据模型
class TemperatureInput(BaseModel):
    temperatures: List[float]

@app.post("/predict")
async def predict_temperature(data: TemperatureInput):
    try:
        input_temperatures: List[float] = data.temperatures
        time_step = 10

        if len(input_temperatures) != time_step:
            raise ValueError(f"需要 {time_step} 个温度值,但输入了 {len(input_temperatures)} 个")

        input_temperatures = np.array(input_temperatures).reshape(-1, 1)

        # 3. 加载 LSTM 预测模型
        model = models.load_model("lstm_temperature_model.h5")

        # 4. 归一化温度数据(必须使用训练时的 scaler)
        scaler = MinMaxScaler(feature_range=(0, 1))
        input_scaled = scaler.fit_transform(input_temperatures)

        # 5. 为 LSTM 创建 3D 输入(时间步长为 5)
        time_step = 10
        X_pred = input_scaled.reshape(1, time_step, 1)

        # 6. 进行 LSTM 预测
        y_pred_scaled = model.predict(X_pred)

        # 7. 反归一化预测结果
        y_pred = scaler.inverse_transform(y_pred_scaled)

        # 8. 输出预测结果
        predicted_temperature = float(y_pred.flatten()[0])  # 转换为普通 float
        print(f"Predicted temperature:::::::: {predicted_temperature:.2f}")
        return {"predicted_temperature": round(predicted_temperature, 2)}  # 返回为 Python float 类型

    except Exception as e:
        return {"error": str(e)}


# 启动 FastAPI 服务
# 如果在本地运行时,执行以下命令启动服务:
# uvicorn predicttemp:app --reload --port 8011


@app.get("/")
async def read_root():
    return {"message": "Welcome to the API! I'm the best Andrew!!"}
5、使用代码将其运行:服务器端如下图:
bash
uvicorn predicttemp:app --reload --port 8011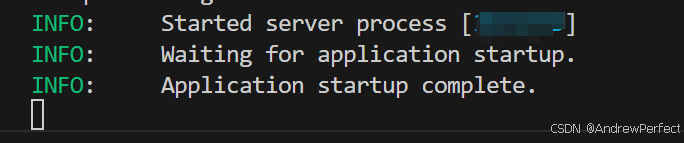
6、使用测试接口工具进行测试(工具这里使用的是apipost这个)端口号就是刚才创建的!
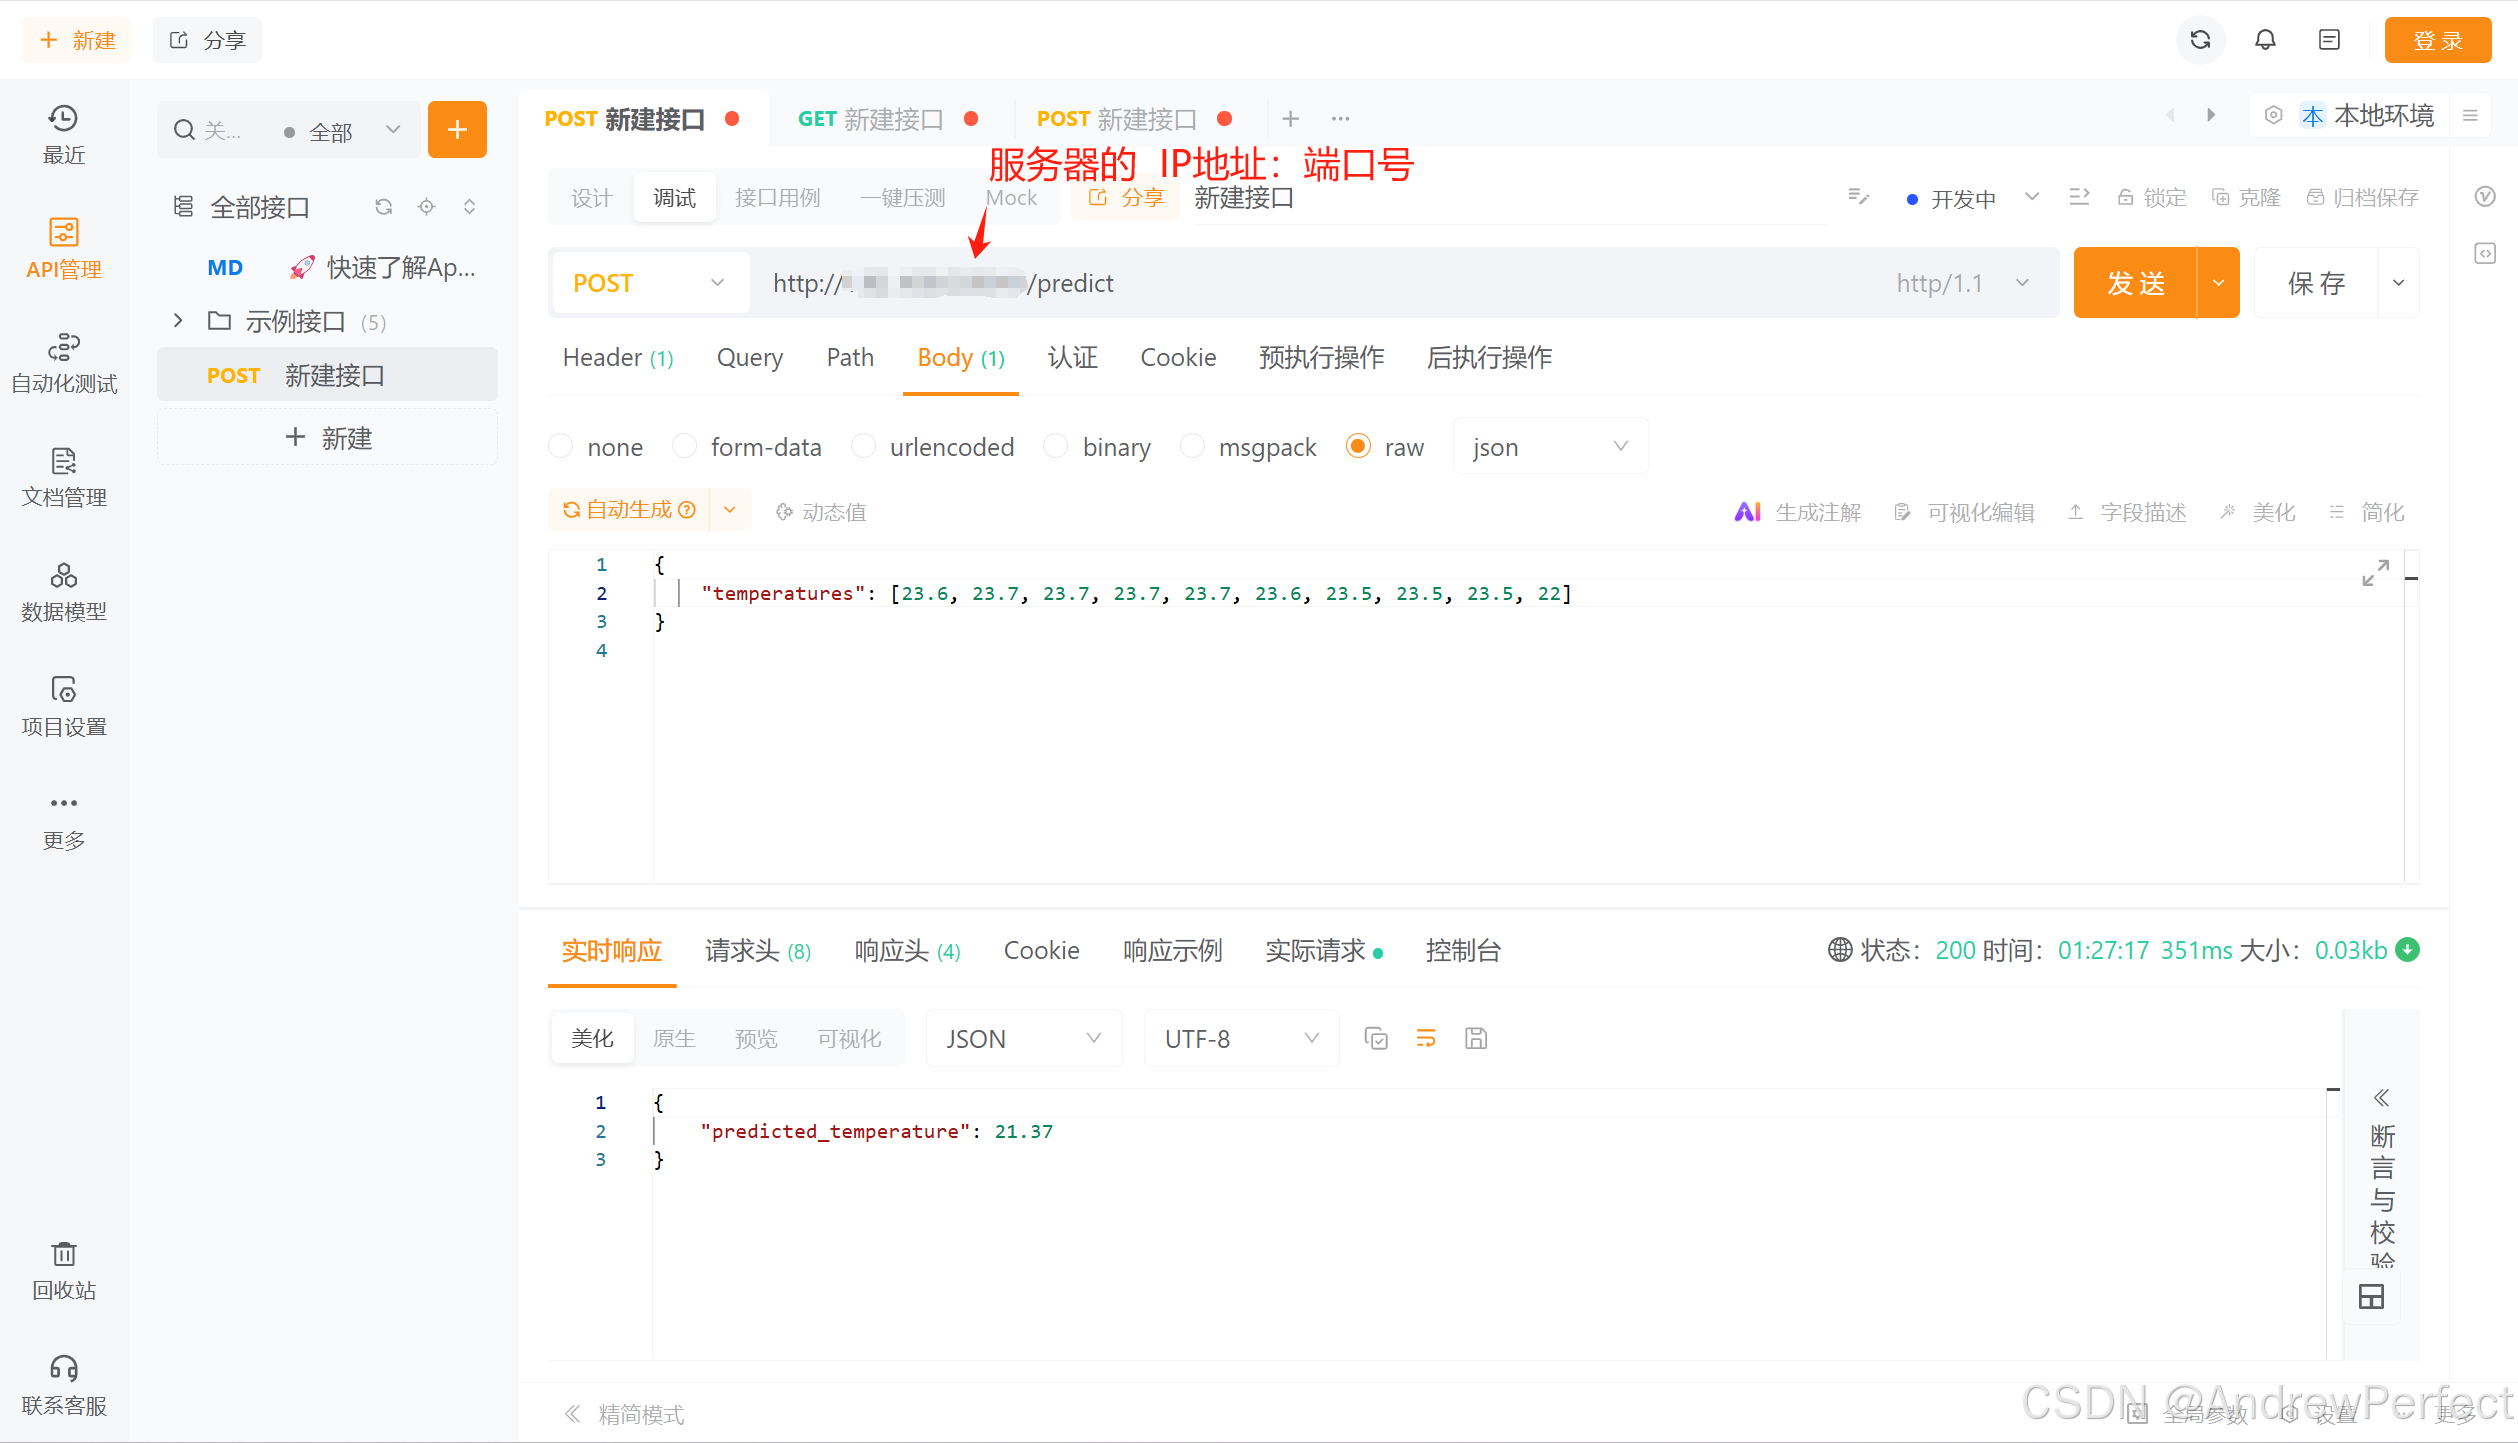
(其他模型部署同理哈!!加油,祝好运!!!)