一、准备数据
1、首先确保已安装VS5015和Qt5.14.2
2、下载Cmake并安装:Download CMake
3、下载VTK-8.2.0源码和数据并解压:Download | VTK
二、Cmake构建
1、在本地磁盘创建相关文件夹

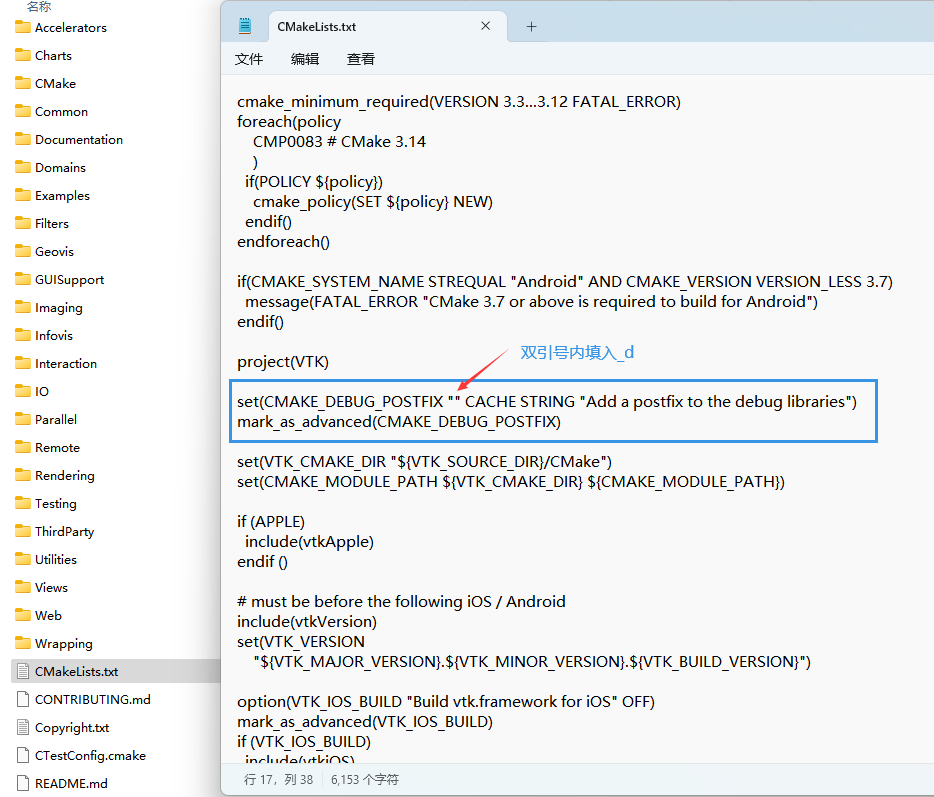
2、进入源码根目录,找到CmakeList.txt,修改CmakeList.txt中的选项,使得Debug模式下生成的lib和dll文件能自带后缀_d,便于Release的库文件进行区分,否则后面可能编译或链接有问题。
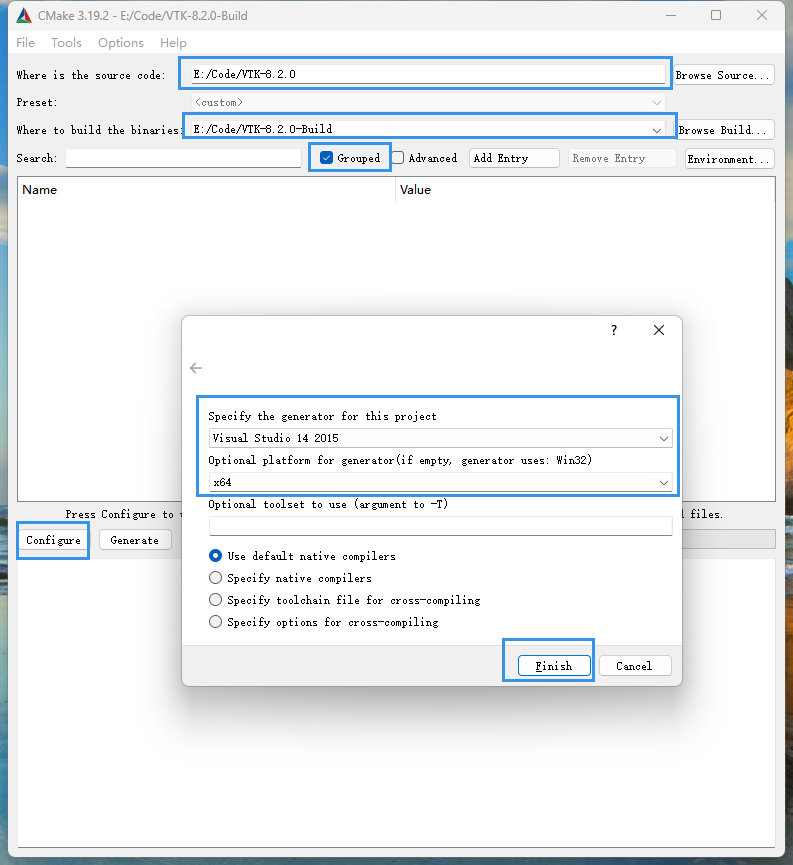
3、在Cmake中填入源码位置,编译后的位置,勾选Grouped方便看分组,点击Configure,选择VS2015,x64,点击Finish,等待配置完成。
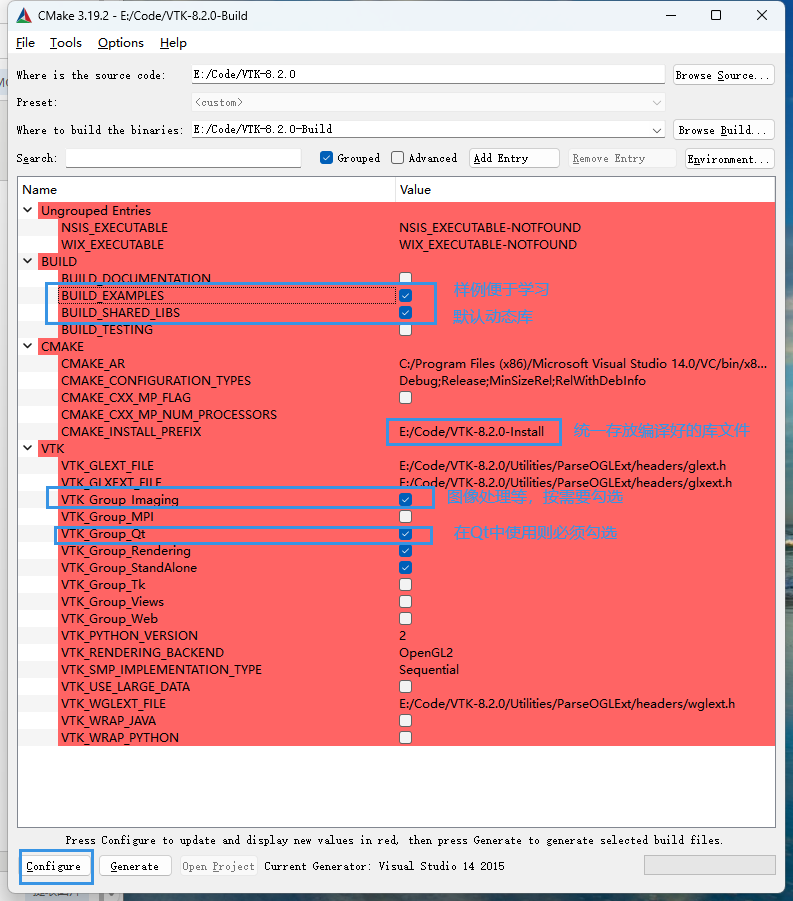
4、按下图勾选,并设置库文件统一存放目录,再次点击Configure。(如果勾选BUILD_TESTING后期VS编译时间会比较长,默认不勾选)
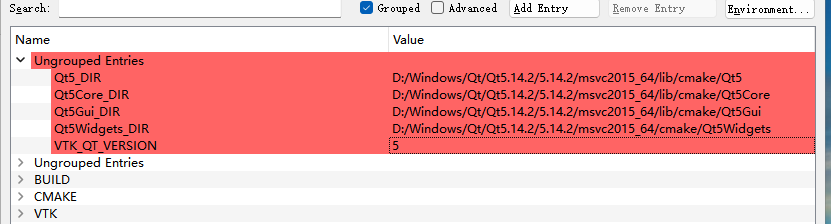
5、确认Qt的相关目录是否正确,不正确手动修改为正确的Qt的目录,VTK_QT_VERSION根据自己的Qt版本选择5或6,再次Configure,直至确认所有红色选项消失,点击Generate
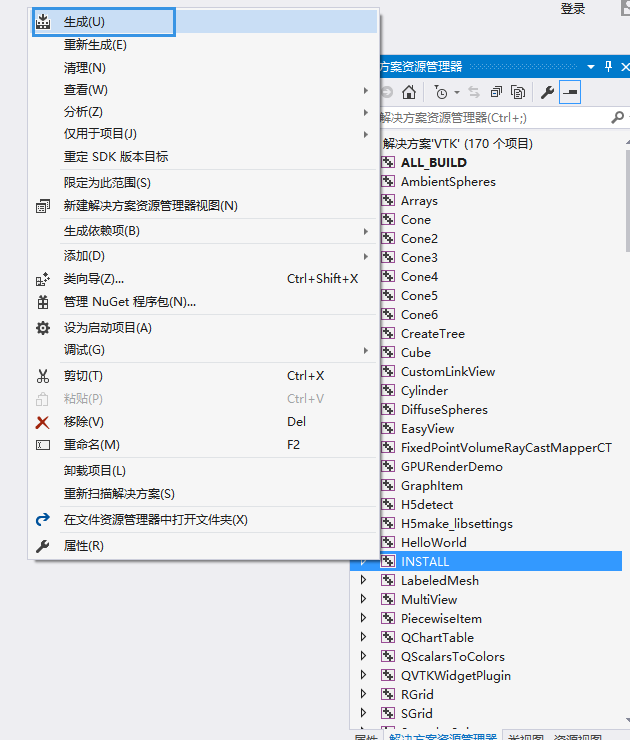
6、进入VTK-8.2.0-Build目录,找到VTK.sln,用VS2015打开,先选择Debug, x64平台,解决方案管理器中,找到INSTALL项目,右键,生成,等待VS编译完成。再选择Release,x64平台,再次生成INSTALL项目。
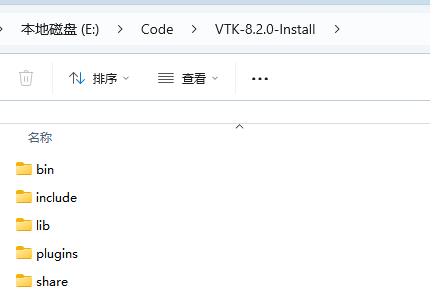
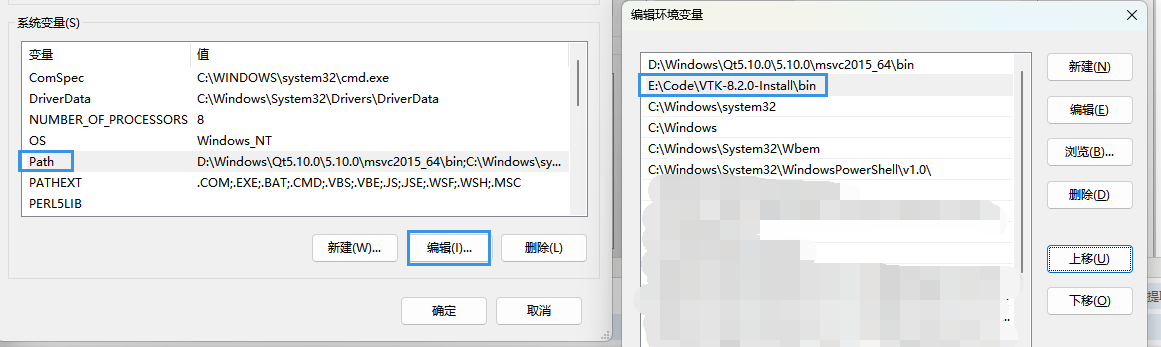
7、VS编译完成后,在VTK-8.2.0-Install文件夹中就会有我们想要的头文件、库文件(Debug和Release库都在里面),随后将bin文件夹加入系统环境变量,方便后续VS或Qt中使用
三、在QCreator中创建工程VTKTest,以官方代码Hello VTK为例,
1、打开pro文件,添加VTK库文件
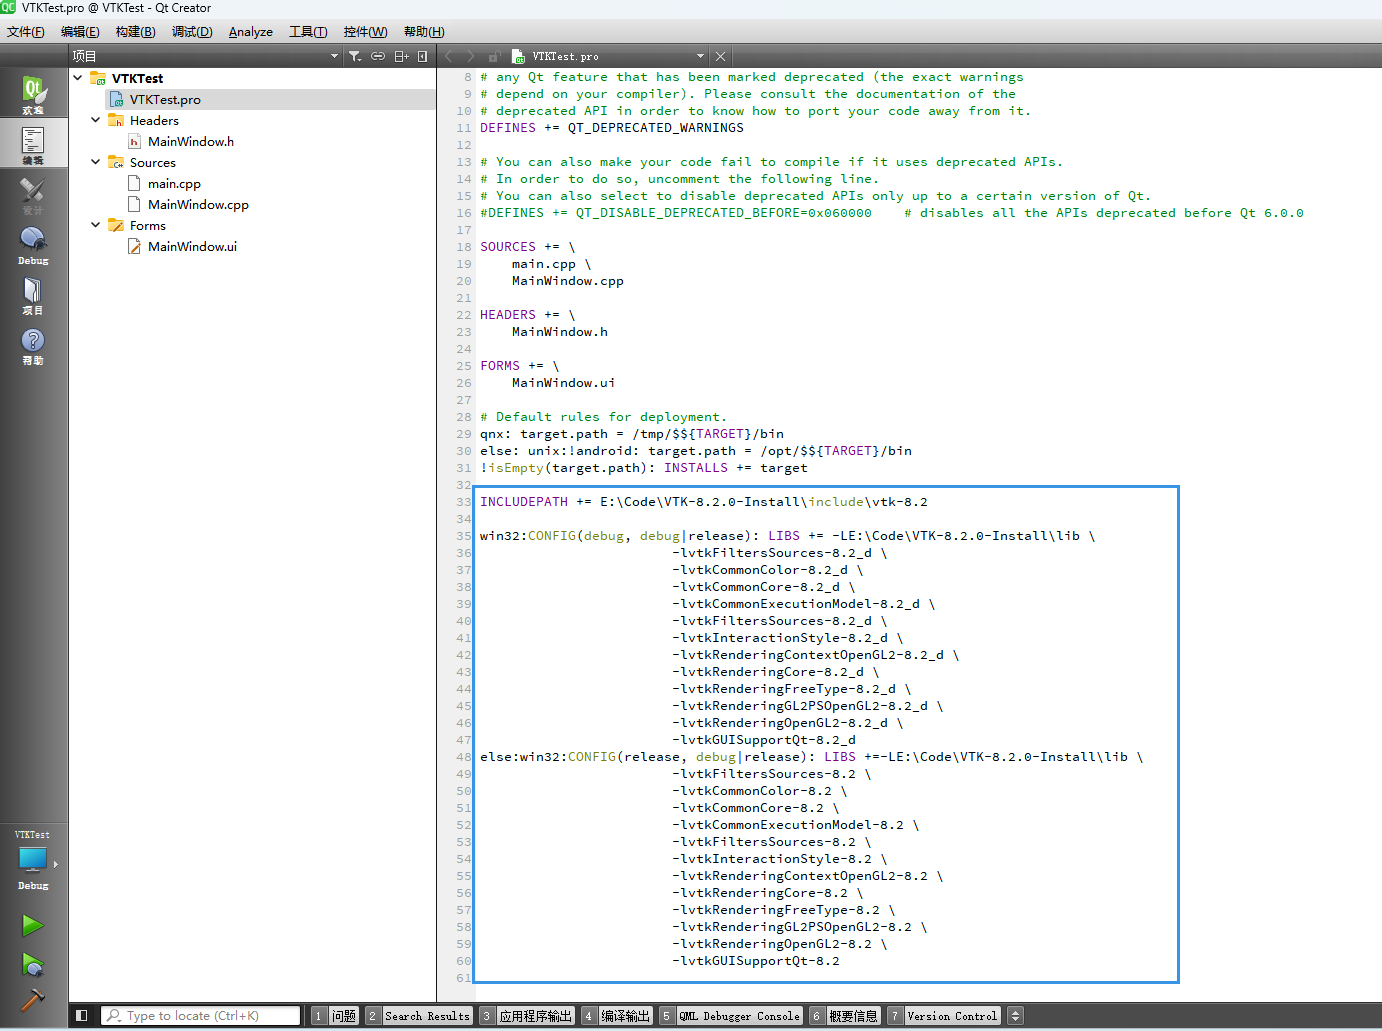
INCLUDEPATH += E:\Code\VTK-8.2.0-Install\include\vtk-8.2

win32:CONFIG(debug, debug|release): LIBS += -LE:\Code\VTK-8.2.0-Install\lib \
                        -lvtkFiltersSources-8.2_d \
                        -lvtkCommonColor-8.2_d \
                        -lvtkCommonCore-8.2_d \
                        -lvtkCommonExecutionModel-8.2_d \
                        -lvtkFiltersSources-8.2_d \
                        -lvtkInteractionStyle-8.2_d \
                        -lvtkRenderingContextOpenGL2-8.2_d \
                        -lvtkRenderingCore-8.2_d \
                        -lvtkRenderingFreeType-8.2_d \
                        -lvtkRenderingGL2PSOpenGL2-8.2_d \
                        -lvtkRenderingOpenGL2-8.2_d \
                        -lvtkGUISupportQt-8.2_d
else:win32:CONFIG(release, debug|release): LIBS +=-LE:\Code\VTK-8.2.0-Install\lib \
                        -lvtkFiltersSources-8.2 \
                        -lvtkCommonColor-8.2 \
                        -lvtkCommonCore-8.2 \
                        -lvtkCommonExecutionModel-8.2 \
                        -lvtkFiltersSources-8.2 \
                        -lvtkInteractionStyle-8.2 \
                        -lvtkRenderingContextOpenGL2-8.2 \
                        -lvtkRenderingCore-8.2 \
                        -lvtkRenderingFreeType-8.2 \
                        -lvtkRenderingGL2PSOpenGL2-8.2 \
                        -lvtkRenderingOpenGL2-8.2 \
                        -lvtkGUISupportQt-8.2
2、在main.cpp中添加初始化代码
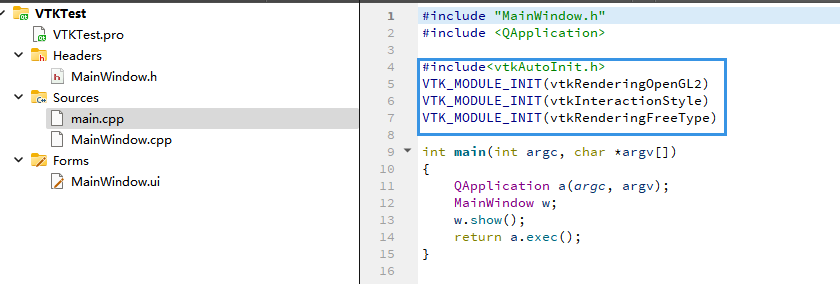
#include<vtkAutoInit.h>
VTK_MODULE_INIT(vtkRenderingOpenGL2)
VTK_MODULE_INIT(vtkInteractionStyle)
VTK_MODULE_INIT(vtkRenderingFreeType)
3、MainWindow.cpp,添加相关代码
#include "MainWindow.h"
#include "ui_MainWindow.h"
#include <vtkActor.h>
#include <vtkCamera.h>
#include <vtkCylinderSource.h>
#include <vtkNamedColors.h>
#include <vtkNew.h>
#include <vtkPolyDataMapper.h>
#include <vtkProperty.h>
#include <vtkRenderWindow.h>
#include <vtkRenderWindowInteractor.h>
#include <vtkRenderer.h>
#include <vtkGenericOpenGLRenderWindow.h>
#include <array>
MainWindow::MainWindow(QWidget *parent)
: QMainWindow(parent)
, ui(new Ui::MainWindow)
, m_pScene(nullptr)
{
ui->setupUi(this);
m_pScene = new QVTKOpenGLWidget();
this->setCentralWidget(m_pScene);
vtkNew<vtkNamedColors> colors;
// Set the background color.
std::array<unsigned char, 4> bkg{{26, 51, 102, 255}};
colors->SetColor("BkgColor", bkg.data());
// This creates a polygonal cylinder model with eight circumferential facets
// (i.e, in practice an octagonal prism).
vtkNew<vtkCylinderSource> cylinder;
cylinder->SetResolution(8);
// The mapper is responsible for pushing the geometry into the graphics
// library. It may also do color mapping, if scalars or other attributes are
// defined.
vtkNew<vtkPolyDataMapper> cylinderMapper;
cylinderMapper->SetInputConnection(cylinder->GetOutputPort());
// The actor is a grouping mechanism: besides the geometry (mapper), it
// also has a property, transformation matrix, and/or texture map.
// Here we set its color and rotate it around the X and Y axes.
vtkNew<vtkActor> cylinderActor;
cylinderActor->SetMapper(cylinderMapper);
cylinderActor->GetProperty()->SetColor(
colors->GetColor4d("Tomato").GetData());
cylinderActor->RotateX(30.0);
cylinderActor->RotateY(-45.0);
// The renderer generates the image
// which is then displayed on the render window.
// It can be thought of as a scene to which the actor is added
vtkNew<vtkRenderer> renderer;
renderer->AddActor(cylinderActor);
renderer->SetBackground(colors->GetColor3d("BkgColor").GetData());
// Zoom in a little by accessing the camera and invoking its "Zoom" method.
renderer->ResetCamera();
renderer->GetActiveCamera()->Zoom(1.5);
vtkSmartPointer<vtkGenericOpenGLRenderWindow> window = vtkSmartPointer<vtkGenericOpenGLRenderWindow>::New();
window->AddRenderer(renderer);
m_pScene->SetRenderWindow(window);
m_pScene->GetRenderWindow()->Render();
m_pScene->GetRenderWindow()->Start();
}
MainWindow::~MainWindow()
{
delete ui;
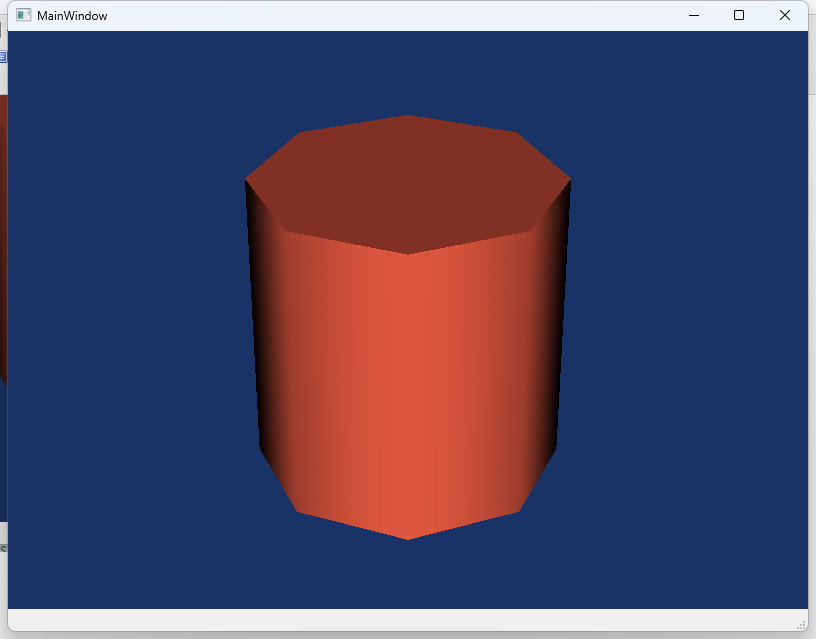
}4、结果。
总结:
最好事先在Debug模式下加入后缀_d,否则容易混淆库文件,按上述步骤,在Debug模式和Release模式下都可以运行!