目录
搭建一个简单的登录拦截页面。
首先,先来看一下最终的目录结构:
 最终目录结构
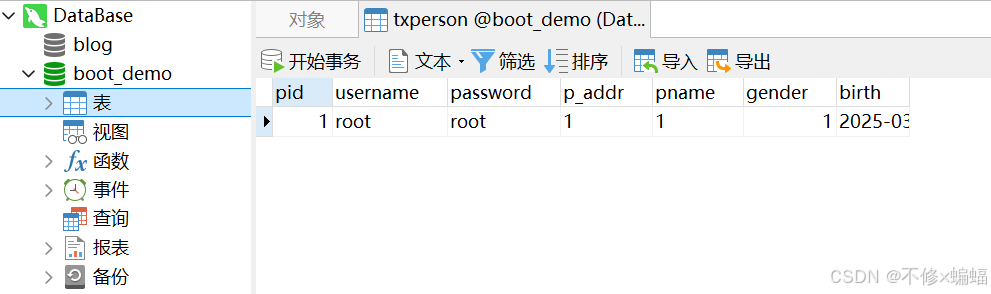
一、数据库搭建
这里演示案例用的是MySQL数据库,并且数据库名称和表格结构如下所示 :
可以通过手动图形点击的方式实现;或是打开一个查询页面,然后输入下面的SQL语句:
sql
-- 创建数据库(如果尚未存在)
CREATE DATABASE IF NOT EXISTS boot_demo;
-- 使用数据库
USE boot_demo;
-- 创建表格
CREATE TABLE IF NOT EXISTS txperson (
    pid INT PRIMARY KEY,
    username VARCHAR(255) NOT NULL,
    password VARCHAR(255) NOT NULL,
    p_addr INT,
    pname VARCHAR(255),
    gender INT,
    birth DATE
);
二、代码开发
首先创建一个springboot项目,详细步骤参见下面这篇文章(任选里面一种即可):
1.pom.xml
首先导入项目所需要的依赖;这是在搭建一个项目后开始写代码之前的第一步骤。
怎么在maven中央仓库找到自己需要的代码和版本参见下面这篇文章的这一部分:
SSM项目的基本目录结构_ssm框架项目的工程目录-CSDN博客文章浏览阅读662次,点赞19次,收藏21次。一个完整的SSM(Spring+SpringMVC+MyBatis)项目理应包含以下几个目录结构:上面是一个普通的maven项目。_ssm框架项目的工程目录https://blog.csdn.net/m0_74977981/article/details/145968984?spm=1001.2014.3001.5502#t17这里我的jdk版本的1.8即Java8;springboot框架是2.7.0版本,老规矩我会将演示案例的pom.xml文件内容展示出来:
XML
<?xml version="1.0" encoding="UTF-8"?>
<project xmlns="http://maven.apache.org/POM/4.0.0" xmlns:xsi="http://www.w3.org/2001/XMLSchema-instance"
	xsi:schemaLocation="http://maven.apache.org/POM/4.0.0 https://maven.apache.org/xsd/maven-4.0.0.xsd">
	<modelVersion>4.0.0</modelVersion>
	<parent>
		<groupId>org.springframework.boot</groupId>
		<artifactId>spring-boot-starter-parent</artifactId>
		<version>2.7.0</version>
		<relativePath/> <!-- lookup parent from repository -->
	</parent>
	<groupId>cn.tx.springboot</groupId>
	<artifactId>tx_sys</artifactId>
	<version>0.0.1-SNAPSHOT</version>
	<name>tx_sys</name>
	<description>Demo project for Spring Boot</description>

	<dependencies>
		<dependency>
			<groupId>org.springframework.boot</groupId>
			<artifactId>spring-boot-starter-web</artifactId>
		</dependency>

		<dependency>
			<groupId>org.springframework.boot</groupId>
			<artifactId>spring-boot-starter-test</artifactId>
			<scope>test</scope>
		</dependency>

		<dependency>
			<groupId>org.springframework.boot</groupId>
			<artifactId>spring-boot-devtools</artifactId>
			<optional>true</optional>
		</dependency>
		<dependency>
			<groupId>org.springframework.boot</groupId>
			<artifactId>spring-boot-starter-thymeleaf</artifactId>
		</dependency>
		<!--导入jquery-->
		<dependency>
			<groupId>org.webjars</groupId>
			<artifactId>jquery</artifactId>
			<version>3.3.1</version>
		</dependency>
		<dependency>
			<groupId>org.mybatis.spring.boot</groupId>
			<artifactId>mybatis-spring-boot-starter</artifactId>
			<version>1.3.1</version>
		</dependency>

		<dependency>
			<groupId>com.alibaba</groupId>
			<artifactId>druid</artifactId>
			<version>1.0.9</version>
		</dependency>
		<dependency>
			<groupId>log4j</groupId>
			<artifactId>log4j</artifactId>
			<version>1.2.17</version>
		</dependency>

		<dependency>
			<groupId>mysql</groupId>
			<artifactId>mysql-connector-java</artifactId>
			<scope>runtime</scope>
		</dependency>
		<dependency>
			<groupId>net.sourceforge.nekohtml</groupId>
			<artifactId>nekohtml</artifactId>
			<version>1.9.22</version>
		</dependency>
	</dependencies>

	<build>
		<plugins>
			<plugin>
				<groupId>org.springframework.boot</groupId>
				<artifactId>spring-boot-maven-plugin</artifactId>
			</plugin>
		</plugins>
	</build>

</project>
2.thymeleaf模块处理的配置类
java
package cn.tx.springboot.srcConfig;

import cn.tx.springboot.interceptor.LoginInterceptor;
import org.springframework.context.annotation.Configuration;
import org.springframework.web.servlet.config.annotation.InterceptorRegistry;
import org.springframework.web.servlet.config.annotation.ViewControllerRegistry;
import org.springframework.web.servlet.config.annotation.WebMvcConfigurer;

import java.util.ArrayList;
import java.util.List;

/**
 * Spring MVC 配置类
 * 用于配置视图控制器和拦截器
 */
@Configuration
public class TxMvcConfig implements WebMvcConfigurer {

    /**
     * 添加视图控制器
     * 用于直接将请求映射到视图页面,而不需要通过Controller类处理
     *
     * @param registry 视图控制器注册器
     */
    @Override
    public void addViewControllers(ViewControllerRegistry registry) {
        // 将 /index 请求映射到 index 视图页面
        registry.addViewController("/index").setViewName("index");
        // 将 /menu 请求映射到 menu 视图页面
        registry.addViewController("/menu").setViewName("menu");
        // 将 /header 请求映射到 header 视图页面
        registry.addViewController("/header").setViewName("header");
        // 将 /login 请求映射到 login 视图页面
        registry.addViewController("/login").setViewName("login");
        // 将 /add 请求映射到 add 视图页面
        registry.addViewController("/add").setViewName("add");
    }

    /**
     * 添加拦截器
     * 配置一个登录拦截器,用于拦截请求并执行登录验证逻辑
     *
     * @param registry 拦截器注册器
     */
    @Override
    public void addInterceptors(InterceptorRegistry registry) {
        // 创建一个排除路径的列表
        List<String> excludePatterns = new ArrayList<>();
        // 添加不需要拦截的路径
        excludePatterns.add("/css/**");       // 排除所有以 /css/ 开头的静态资源路径
        excludePatterns.add("/images/**");    // 排除所有以 /images/ 开头的静态资源路径
        excludePatterns.add("/webjars/**");   // 排除所有以 /webjars/ 开头的路径
        excludePatterns.add("/login");        // 排除登录页面路径
        excludePatterns.add("/toLogin");      // 排除跳转到登录页面的路径

        // 注册登录拦截器
        // 拦截所有请求路径,但排除上述定义的路径
        registry.addInterceptor(new LoginInterceptor())
                .addPathPatterns("/**")       // 拦截所有路径
                .excludePathPatterns(excludePatterns); // 排除指定路径
    }
}这段代码中使用了addViewController方法,它是ViewControllerRegistry接口提供的一个方法,用于将请求路径映射到视图名称(这么用主要是因为可以在一个方法中实现多条路径的映射)。具体语法如下:
java
registry.addViewController("/path").setViewName("viewName");3.application配置文件
接着在配置文件配置好链接数据库的信息:
python
spring:
  datasource:
    username: root
    password: 2020
    url: jdbc:mysql://localhost:3306/boot_demo?serverTimezone=GMT%2B8
    driver-class-name: com.mysql.cj.jdbc.Driver
    type: com.alibaba.druid.pool.DruidDataSource
    initialSize: 5
    minIdle: 5
    maxActive: 20
    maxWait: 60000
    timeBetweenEvictionRunsMillis: 60000
    minEvictableIdleTimeMillis: 300000
    validationQuery: SELECT 1 FROM DUAL
    testWhileIdle: true
    testOnBorrow: false
    testOnReturn: false
    poolPreparedStatements: true
    filters: stat,wall,log4j
    maxPoolPreparedStatementPerConnectionSize: 20
    useGlobalDataSourceStat: true
    connectionProperties: druid.stat.mergeSql=true;druid.stat.slowSqlMillis=500
  mvc:
    format:
date: yyyy-MM-dd这里面的配置项解析参见:SpringBoot 第三课(Ⅰ) 数据层开发-CSDN博客
除此之外,这里额外注意一点:
注意框起来的.cj.
在配置驱动时会遇见这个问题,有的加cj,有的不加cj,但是在某些时刻好像都是正确的,这就涉及到一些版本问题了:
MySQL现在三个版本:5.6(低版本);5.7(低版本);8.0(高版本)
但是能不能用cj,取决于jar包,并不是MySQL的版本决定的。
如果你需要使用
com.mysql.cj.jdbc.Driver,那么你需要引入 MySQL Connector/J 8.x 的依赖;同理如果是引入5.x的依赖,那么在配置文件这里就不用加cj。
4.配置(在启动类中)
可以选择加一个config包,里面写配置类;也可以写在springboot的项目启动类中,在这里我采用将配置写进启动类中(因为我这个演示的项目逻辑比较简单,一般情况下不建议这么做):
java
package cn.tx.springboot;

import com.alibaba.druid.pool.DruidDataSource;
import com.alibaba.druid.support.http.StatViewServlet;
import com.alibaba.druid.support.http.WebStatFilter;
import org.mybatis.spring.annotation.MapperScan;
import org.mybatis.spring.boot.autoconfigure.ConfigurationCustomizer;
import org.springframework.boot.SpringApplication;
import org.springframework.boot.autoconfigure.SpringBootApplication;
import org.springframework.boot.context.properties.ConfigurationProperties;
import org.springframework.boot.web.servlet.FilterRegistrationBean;
import org.springframework.boot.web.servlet.ServletRegistrationBean;
import org.springframework.context.annotation.Bean;

import java.util.Arrays;
import java.util.HashMap;
import java.util.Map;

@MapperScan("cn.tx.springboot.dao")  //在驱动类标注好mapper的文件包,这样就不用在每个dao接口文件中标注@Mapper了
@SpringBootApplication
public class TxSysApplication {

	public static void main(String[] args) {
		SpringApplication.run(TxSysApplication.class, args);
	}
	@ConfigurationProperties(prefix = "spring.datasource")
	@Bean
	public DruidDataSource getDruidDataSource(){
		return new DruidDataSource();
	}

	@Bean
	public ServletRegistrationBean statViewServlet(){
		ServletRegistrationBean bean = new ServletRegistrationBean(new StatViewServlet(),
				"/druid/*");
		Map<String,String> initParams = new HashMap<>();
		initParams.put("loginUsername","root");
		initParams.put("loginPassword","root");
		initParams.put("allow","");//默认就是允许所有访问
		initParams.put("deny","192.168.15.21");
		bean.setInitParameters(initParams);
		return bean;
	}

	//2、配置一个web监控的filter
	@Bean
	public FilterRegistrationBean webStatFilter(){
		FilterRegistrationBean bean;
		bean = new FilterRegistrationBean();
		bean.setFilter(new WebStatFilter());
		Map<String,String> initParams = new HashMap<>();
		initParams.put("exclusions","*.js,*.css,/druid/*");
		bean.setInitParameters(initParams);
		bean.setUrlPatterns(Arrays.asList("/*"));
		return bean;
	}


	@Bean
	public ConfigurationCustomizer getCustomizer(){
		return new ConfigurationCustomizer() {
			@Override
			public void customize(org.apache.ibatis.session.Configuration configuration) {
				configuration.setMapUnderscoreToCamelCase(true);
			}
		};
	}
}5.编写 数据层
①编写实体类
java
package cn.tx.springboot.model;

import java.util.Date;

public class TxPerson {

    private int pid;

    private String username;

    private String password;

    private String pAddr;

    private String pname;

    private int gender;

    private Date birth;


    public TxPerson() {
    }

    public TxPerson(int pid, String username, String password, String addr, int gender, Date birth) {
        this.pid = pid;
        this.username = username;
        this.password = password;
        this.pAddr = pAddr;
        this.gender = gender;
        this.birth = birth;
    }


    public int getPid() {
        return pid;
    }

    public void setPid(int pid) {
        this.pid = pid;
    }

    public String getPname() {
        return pname;
    }

    public void setPname(String pname) {
        this.pname = pname;
    }

    public String getUsername() {
        return username;
    }

    public void setUsername(String username) {
        this.username = username;
    }

    public String getPassword() {
        return password;
    }

    public void setPassword(String password) {
        this.password = password;
    }

    public String getpAddr() {
        return pAddr;
    }

    public void setpAddr(String pAddr) {
        this.pAddr = pAddr;
    }

    public int getGender() {
        return gender;
    }

    public void setGender(int gender) {
        this.gender = gender;
    }

    public Date getBirth() {
        return birth;
    }

    public void setBirth(Date birth) {
        this.birth = birth;
    }

    @Override
    public String toString() {
        return "TxPerson{" +
                "pid=" + pid +
                ", username='" + username + '\'' +
                ", password='" + password + '\'' +
                ", pAddr='" + pAddr + '\'' +
                ", pname='" + pname + '\'' +
                ", gender=" + gender +
                ", birth=" + birth +
                '}';
    }
}
②编写dao层
这里选用SQL全注解的形式编写dao接口文件:
java
package cn.tx.springboot.dao;

import cn.tx.springboot.model.TxPerson;
import org.apache.ibatis.annotations.*;
import org.springframework.stereotype.Service;
import org.springframework.ui.Model;

import java.util.List;
import java.util.Map;

//@Mapper
/**
 * IDEA在注入处报错(报红),因为找不到注入的对象,因为类是动态创建的,但是程序可以正确的执行。
 * 为了避免报错,可以在被注入dao接口上添加 @Repository 注解
 * */
@Repository

public interface PersonDao {

    @Select("select * from txperson")
    public List<TxPerson> select();

    @Select("select * from txperson where pid=#{pid}")
    public TxPerson getPersonById(int pid);

    @Update("update txperson set " +
            "username=#{username}," +
            "password=#{password}," +
            "pname=#{pname}," +
            "p_addr=#{pAddr}," +
            "gender=#{gender}," +
            "birth=#{birth} " +
            "where pid=#{pid}")
    public void updatePerson(TxPerson txPerson);

    @Options(useGeneratedKeys = true,keyProperty = "pid")
    @Insert("insert into txperson(pid, username,password,pname, p_addr,gender, birth)" +
            " values(#{pid}, #{username},#{password},#{pname}, #{pAddr},#{gender}, #{birth})")
    public void insert(TxPerson P);

    @Delete("delete from txperson where pid=#{pid}")
    public int delete(int pid);

    @Select("select * from txperson where username=#{username} and password=#{password}")
    public TxPerson getPersonUsepass(Map map);
}
可以看见在这个文件中,我将@Mapper注释掉了,但是项目启动后仍旧能够正常运行起来,这是因为我在启动类中标注了扫描路径。
 扫描路径配置一览 **注:**其实可以发现,这么编写相较于Spring框架的编写格式来说,省去了编写Mapper.xml文件(因为将sql语句直接赋予给dao接口了),这么编写大大节省的代码量。
但是这么写还是不够精简,后面为了方便项目开发,将引进MyBatisPlus技术,实现省略简单SQL语句的编写。
③编写service层
接口
java
package cn.tx.springboot.service;

import cn.tx.springboot.model.TxPerson;
import org.apache.ibatis.annotations.Delete;
import org.apache.ibatis.annotations.Insert;
import org.apache.ibatis.annotations.Options;
import org.apache.ibatis.annotations.Select;
import org.springframework.stereotype.Service;
import org.springframework.transaction.annotation.Transactional;

import java.util.List;
import java.util.Map;

@Transactional
public interface PersonService {


    public List<TxPerson> select();

    //修改首先通过id获取要修改的数据
    public TxPerson getPersonById(int pid);
    //在通过修改方法修改
    public void  updatePerson(TxPerson txPerson);


    public void insert(TxPerson P);


    public int delete(int pid);

    public TxPerson getPersonUsepass(Map map);
}
实现类
在service层的实现类中,一个方法中甚至可以调用多个dao的接口方法来实现一个业务逻辑方法(当然我这里展示的逻辑都比较简单)
java
package cn.tx.springboot.service.impl;

import cn.tx.springboot.dao.PersonDao;
import cn.tx.springboot.model.TxPerson;
import cn.tx.springboot.service.PersonService;
import org.springframework.beans.factory.annotation.Autowired;
import org.springframework.stereotype.Service;

import java.util.List;
import java.util.Map;

@Service
public class PersonServiceImpl implements PersonService {

    @Autowired
    private PersonDao personDao;


    @Override
    public List<TxPerson> select() {
        List<TxPerson> list = personDao.select();
        return list;
    }

    @Override
    public TxPerson getPersonById(int pid) {
        return personDao.getPersonById(pid);
    }

    @Override
    public void updatePerson(TxPerson txPerson) {
         personDao.updatePerson(txPerson);
    }

    @Override
    public void insert(TxPerson P) {
        personDao.insert(P);
    }

    @Override
    public int delete(int pid) {
        return personDao.delete(pid);
    }

    @Override
    public TxPerson getPersonUsepass(Map map) {
        TxPerson txPerson = personDao.getPersonUsepass(map);
        return txPerson;
    }
}
注意
controller层要注入service层(当然service的实现类注入dao"接口"同理;---@Autowired是进行注入的注释)
但是显而易见接口是不能被注入的,这里被注入的其实是实现这个接口的实体类。
注入(图Ⅰ)
补充(注入的3个注解)
提到这里就不得不多说一嘴有关实现注入的3个注解:
1.@AutoWired(类型注入)
什么叫类型注入?顾名思义,就是只用填写类型,不用明确指出名字。前面已经提了,接口是不能被注入的,本质上注入的都是实现类。
在Ⅰ图中我这么直接写是可以的,这是因为我的实现类层中只有一个实现类(参见图Ⅱ)
图Ⅱ
一旦我在impl中再创建一个实现PersonService接口的实现类,图Ⅰ 中的部分就将报错,这是因为同类型(即同样是实现PersonService接口的情况)下,有两个实现类了,导致@AutoWired注解注入混乱,因此报错。
2.@Qualifier(名称注入)
这个就很容易理解了,在使用这个注解时表明要注入的实体类的名称,而不是只标注它们实现接口的名称这么泛泛。
上面这两种注入方式(@AutoWired和@Qualifier)都是由Spring框架提供的,其中@AutoWired用到最多。
3.@Qualifier
可以按照名称再按照类型,并且是Jdk封装的,利用反射机制(不建议使用这个注解,主要还是上面那两种居多。)
④编写controller层
在编写controller之前,先将前端页面信息展示:
首先目录一共有这么几个页面:
 前端信息直接给
前端页面
1.add.html
html
<!DOCTYPE html PUBLIC "-//W3C//DTD XHTML 1.0 Transitional//EN" "http://www.w3.org/TR/xhtml1/DTD/xhtml1-transitional.dtd">
<html lang="en" xmlns:th="http://www.thymeleaf.org">
<head>
<meta http-equiv="Content-Type" content="text/html; charset=utf-8" />
<title>Untitled Document</title>
<style type="text/css">
body {font-family: Arial, Helvetica, sans-serif; font-size:12px; text-align:center;}
a { text-decoration: none;}
#all {widht: 100%; text-align:center; margin:auto;}
main {width: 96%; line-height: 1.8; margin:auto; border:1px #ccc dashed; text-align: left; text-indent: 2em;}
.mt{
    width: 1000px;
    border:1px solid #aca7a7 ;
    border-collapse: collapse;
}
.mt td{
     border: 1px solid #aca7a7;
}

</style>
</head>

<body>
<div id="all">
      <form th:action="@{/insert}" method="post">
       <table class="mt">
         <tr>
             <td>用户名</td>
             <td><input type="text" name="username"/></td>
             <td>密码</td>
             <td><input type="text" name="password"/></td>
             <td>姓名</td>
             <td><input type="text" name="pname"/></td>
             <td>地址</td>
             <td><input type="text" name="pAddr"/></td>
             <td>性别</td>
             <td>
                 <select name="gender">
                     <option value="1">男</option>
                     <option value="2">女</option>
                 </select>
             </td>
             <td>生日</td>
             <td><input type="text" name="birth"/></td>
             <td><input type="submit" value="提交"/></td>
         </tr>
       </table>
      </form>
</div>
</body>
</html>
2.header.html
html
<!DOCTYPE html PUBLIC "-//W3C//DTD XHTML 1.0 Transitional//EN" "http://www.w3.org/TR/xhtml1/DTD/xhtml1-transitional.dtd">
<html lang="en" xmlns:th="http://www.thymeleaf.org">
<head>
<meta http-equiv="Content-Type" content="text/html; charset=utf-8" />
<title>Admin Header</title>
    <link href="css/header.css" rel="stylesheet" type="text/css" />
<script type="text/javascript" language="javascript" src="js/jquery-1.3.2.min.js"></script>
<script type="text/javascript">
var oplist = new Array('about', 'user', 'news', 'mars', 'jielong', 'box', 'school', 'config', 'other');
$(document).ready(function() {
	$('#nav').find("a").click(function() {
		var id = $(this).attr('id');
		$.each(oplist, function(i, n) {
			$('#'+n).attr('class', 'inactive');
		});
		$(this).parents("li").attr('class', 'active');
	});
});
</script>
</head>

<body>
<div id="all">
	<div id="banner"><h1>Springboot实训</h1></div>
    <div id="nav">
    	<ul>
        	<li class="inactive" id="other"><a href="menu.html" target="menu">管理操作</a></li>
            <li class="inactive" id="about"><a href="menu.html" target="menu">管理操作</a></li>
            <li class="inactive" id="user"><a href="menu.html" target="menu">管理操作</a></li>
            <li class="inactive" id="news"><a href="menu.html" target="menu">管理操作</a></li>
            <li class="inactive" id="mars"><a href="menu.html" target="menu">管理操作</a></li>
            <li class="inactive" id="jielong"><a href="menu.html" target="menu">管理操作</a></li>
            <li class="inactive" id="box"><a href="menu.html" target="menu">管理操作</a></li>
            <li class="inactive" id="school"><a href="menu.html" target="menu">火柴学堂</a></li>
            <li class="active" id="config"><a href="menu.html" target="menu">站点设置</a></li>
        </ul>
    </div>
    <div id="main">
    	<div id="welcome">
            <span th:if="${session.user != null}" th:text="${session.user.username}+'欢迎你回来!'"></span>
            <a target="_top" th:if="${session.user == null}"  th:href="@{/login}">请登录</a>
            <img src="images/clock.gif" /> 学习是最好的投资
        </div>
        <div id="adminop">
            <ul>
                <li><a href="#">站点首页</a></li>
                <li><a href="javascript:parent.location.reload();">管理首页</a></li>
                <li><a href="javascript:parent.location.reload();">退出管理</a></li>
                <li><a href="#">站点首页</a></li>
            </ul>
        </div>
    </div>
</div>
</body>
</html>
3.index.html
html
<!DOCTYPE html PUBLIC "-//W3C//DTD XHTML 1.0 Transitional//EN" "http://www.w3.org/TR/xhtml1/DTD/xhtml1-transitional.dtd">
<html lang="en" xmlns:th="http://www.thymeleaf.org">
<head>
<meta http-equiv="Content-Type" content="text/html; charset=utf-8" />
<title>青城博雅教育首页</title>
</head>

<frameset cols="*" rows="136, *" id="frame_main"  border="0">
    <frame th:src="@{/header}" noresize="noresize" name="header">

    <frameset cols="240, *">
    	<frame th:src="@{/menu}" name="menu" />
    	<frame th:src="@{/main}" name="main">
    </frameset>
</frameset>

<noframes><body>
</body>
</noframes></html>
4.login.html
html
<!DOCTYPE html PUBLIC "-//W3C//DTD XHTML 1.0 Transitional//EN" "http://www.w3.org/TR/xhtml1/DTD/xhtml1-transitional.dtd">
<html lang="en" xmlns:th="http://www.thymeleaf.org">
<head>
<meta http-equiv="Content-Type" content="text/html; charset=UTF-8" />
<title>用户登录</title>
<link href="css/login.css" rel="stylesheet" type="text/css" />
	<script th:src="@{/webjars/jquery/3.3.1/jquery.js}"></script>
	<script>
		function login() {
			$("form").submit();
        }
	</script>
</head>
<body>

    <div id="login">

	     <div id="top">
		      <div id="top_left"><img src="images/login_03.gif" /></div>
			  <div id="top_center"></div>
		 </div>
		 <form th:action="@{/toLogin}" method="post">
		 <div id="center">
		      <div id="center_left"></div>
			  <div id="center_middle">
				  <div style="text-align: center; color: red" th:text="${tip}"></div>
			       <div id="user">用 户
			         <input type="text" name="username" />
			       </div>
				   <div id="password">密   码
				     <input type="password" name="password" />
				   </div>
				   <div id="btn"><a href="#" onclick="login()">登录</a><a href="#">清空</a></div>

			  </div>
			  <div id="center_right"></div>
		 </div>
		 </form>
		 <div id="down">
		      <div id="down_left">
			      <div id="inf">
                       <span class="inf_text">版本信息</span>
					   <span class="copyright">v2.0</span>
			      </div>
			  </div>
			  <div id="down_center"></div>
		 </div>

	</div>
</body>
</html>
5.main.html
html
<!DOCTYPE html PUBLIC "-//W3C//DTD XHTML 1.0 Transitional//EN" "http://www.w3.org/TR/xhtml1/DTD/xhtml1-transitional.dtd">
<html lang="en" xmlns:th="http://www.thymeleaf.org">
<head>
<meta http-equiv="Content-Type" content="text/html; charset=utf-8" />
<title>Untitled Document</title>
<style type="text/css">
body {font-family: Arial, Helvetica, sans-serif; font-size:12px; text-align:center;}
a { text-decoration: none;}
#all {widht: 100%; text-align:center; margin:auto;}
main {width: 96%; line-height: 1.8; margin:auto; border:1px #ccc dashed; text-align: left; text-indent: 2em;}
.mt{
    width: 1000px;
    border:1px solid #aca7a7 ;
    border-collapse: collapse;
}
.mt td{
     border: 1px solid #aca7a7;
}

</style>
</head>

<body>
<div id="all">

     <div><a th:href="@{/add}">添加</a></div>
       <table class="mt">
         <tr>
             <td>用户名</td>
             <td>姓名</td>
             <td>地址</td>
             <td>性别</td>
             <td>生日</td>
             <td>操作</td>
         </tr>
         <tr th:each="p:${list}">
               <td th:text="${p.username}"></td>
               <td th:text="${p.pname}"></td>
               <td th:text="${p.pAddr}"></td>
               <td th:text="${p.gender==1}?'男':'女'"></td>
               <td th:text="${#calendars.format(p.birth,'yyyy-MM-dd')}"></td>
               <td>
                   <a th:href="@{/getPerson(pid=${p.pid})}">修改</a>
                   <a th:href="@{/delete(pid=${p.pid})}" >删除</a>
               </td>
         </tr>
       </table>

</div>
</body>
</html>
6.menu.html
html
<!DOCTYPE html PUBLIC "-//W3C//DTD XHTML 1.0 Transitional//EN" "http://www.w3.org/TR/xhtml1/DTD/xhtml1-transitional.dtd">
<html lang="en" xmlns:th="http://www.thymeleaf.org">
<head>
<meta http-equiv="Content-Type" content="text/html; charset=utf-8" />
<title>无标题文档</title>
<link href="css/menu.css" rel="stylesheet" type="text/css" />
</head>
<body>
<div id="all">
<div id="menu">
<ul>
<li><img src="images/li.jpg" /> <a href="/main" target="main">员工管理</a></li>
<li><img src="images/li.jpg" /> <a href="" target="main">部门管理</a></li>
<li><img src="images/li.jpg" /> <a href="" target="main">绩效管理</a></li>
<li><img src="images/li.jpg" /> <a href="" target="main">财务管理</a></li>
</ul>
</div>
</div>
</body>
</html>7.update.html
html
<!DOCTYPE html PUBLIC "-//W3C//DTD XHTML 1.0 Transitional//EN" "http://www.w3.org/TR/xhtml1/DTD/xhtml1-transitional.dtd">
<html lang="en" xmlns:th="http://www.thymeleaf.org">
<head>
<meta http-equiv="Content-Type" content="text/html; charset=utf-8" />
<title>Untitled Document</title>
<style type="text/css">
body {font-family: Arial, Helvetica, sans-serif; font-size:12px; text-align:center;}
a { text-decoration: none;}
#all {widht: 100%; text-align:center; margin:auto;}
main {width: 96%; line-height: 1.8; margin:auto; border:1px #ccc dashed; text-align: left; text-indent: 2em;}
.mt{
    width: 1000px;
    border:1px solid #aca7a7 ;
    border-collapse: collapse;
}
.mt td{
     border: 1px solid #aca7a7;
}

</style>
</head>

<body>
<div id="all">
    <form th:action="@{/updatePerson}" method="post">
        <input type="hidden" name="pid" th:value="${p.pid}"/>
        <table class="mt">
            <tr>
                <td>用户名</td>
                <td><input type="text" name="username"  th:value="${p.username}"/></td>
                <td>密码</td>
                <td><input type="text" name="password"  th:value="${p.password}"/></td>
                <td>姓名</td>
                <td><input type="text" name="pname"  th:value="${p.pname}"/></td>
                <td>地址</td>
                <td><input type="text" name="pAddr"  th:value="${p.pAddr}"/></td>
                <td>性别</td>
                <td>
                    <select name="gender">
                        <option value="1" th:selected="${p.gender}==1">男</option>
                        <option value="2" th:selected="${p.gender}==2">女</option>
                    </select>
                </td>
                <td>生日</td>
                <td><input type="text" name="birth" th:value="${#calendars.format(p.birth,'yyy-MM-dd')}"/></td>
                <td><input type="submit" value="提交"/></td>
            </tr>
        </table>
    </form>
</div>
</body>
</html>
css
1.header.css
css
body {background: #686868; font-family:Arial, Helvetica, sans-serif; font-size:12px; margin:0px; margin-bottom:2px;border-bottom: 1px #ccc solid;}
h1 {color: #FFF;}
a {color: #FFF; text-decoration: none;/*防止滤镜下链接失效*/position:relative;}
ul { list-style:none;}
#all {width: 100%;}
#banner {margin-top: 8px; margin-left: 32px;}
#main {width: 100%; margin-bottom: 2px; background:#eeeeee; margin-left: 0px; margin-right:0px; height: 30px; color: #000; line-height: 2.4;overflow: auto;}
#main a {color:#000;}
#welcome { float:left; width: 40%; font-weight: 800; padding-left: 8px; position:relative;}
#adminop { float:left; width: 59%; position:relative; text-align:right; line-height:1; *line-height:2.2;}
#adminop ul li {float: right; width: 80px;}
#nav {width: 100%; clear: both;}
#nav ul li {float: right; width:82px; height:25px; line-height: 2.1; text-align: center;}
.inactive { background-image/**/:url(../images/admin/nav_bg_inactive2.png) !important;background: none; margin-left: 2px; margin-right:2px;filter:progid:DXImageTransform.Microsoft.AlphaImageLoader(src=images/admin/nav_bg_inactive2.png);}
.inactive a {color: #000;}
.active {background:url(../images/admin/nav_bg_active2.png) !important;background: none; margin-left: 2px; margin-right:2px;filter:progid:DXImageTransform.Microsoft.AlphaImageLoader(src=images/admin/nav_bg_active2.png);}
.active a {color:#fff;}
.blankgray {background:#bbb; height:2px; width:100%; margin:0; padding:0; clear:both; font-size:2px;}
2.login.css
css
body{margin:0; padding:0; font-size:9pt;}
#login{margin:auto; width:975px; height:368px; margin-top:120px;}
#top_left{width:691px; height:89px; float:left;}
#top_left img {margin-left:33px;}
#top_center{width:248px; height:89px; background:url(../images/03.jpg); float:left;}

#center_left{width:691px; height:190px; background:url(../images/04.jpg); float:left;}
#center_middle{width:248px; height:220px; float:left; background:url(../images/login_13.gif) repeat-y;}
#center_right{width:36px; height:190px; float:right; background:url(../images/login_11.gif);}

#down_left{width:691px; height:89px; float:left; margin-top:15px;}
#down_center{width:248px; height:89px; background:url(../images/login_16.gif); float:left;}
#inf{width:691px; height:38px; background:url(../images/login_18.gif) no-repeat; }
.inf_text{display:block; width:100px; height:20px; font-size:16px; font-weight:bolder; color:#fff; margin-left:17px; margin-top:12px; float:left;}
.copyright{display:block; float:left; margin-left:17px; margin-top:15px;}

#user{ margin-left:40px; margin-top:45px; height:25px;}
#password{margin-left:40px; margin-top:25px; height:25px;}
input{width:120px; height:18px; border:solid 1px #aca7a7; font-size:9pt;}
#btn{margin-left:30px; margin-top:40px;height:25px; margin-right:28px; text-align:center;}
#btn a{display:block; line-height:25px; background: url(../images/bt_bg.gif); border: solid 1px #b6b6b6; width:65px; float:left; margin-left:15px; text-decoration:none; color:#000;}
3.menu.css
css
html, body {height:100%;overflow:hidden;} /*为兼容ie7,ff*/
body {font-family:Arial, Helvetica, sans-serif; font-size:12px; margin:0px; text-align:center; border-right:1px #ccc solid;}
a {color: #000; text-decoration: none;}
#menu img {_margin-top: 12px;}/*没办法,ie6对list-style-image支持不好*/
#all {width: 100%;height:100%;}
#menu {width: 96%;}
#menu ul {padding:0; margin: 0; list-style: none;}
#menu ul li {background-image:url(../images/match/public/images/menu_bg.gif); background-repeat: repeat-x; background-position:center; height: 32px;;margin-top: 2px; margin-bottom: 2px; border:1px #ccc solid; line-height: 2.8;}
4.style.css
css
@CHARSET "UTF-8";
.pro{
	height: 8px;
	background-color: #4C4C4C;
	width: 500px;
	cursor: pointer;

}

.playball{
	height: 8px;
	width: 8px;
	background-color: orange;
	position: relative;

}

.time{
	width: 500px;
	height: 20px;
	border: 1px solid black;
}
controller代码
java
package cn.tx.springboot.controller;

import cn.tx.springboot.model.TxPerson;
import cn.tx.springboot.service.PersonService;
import org.springframework.beans.factory.annotation.Autowired;
import org.springframework.stereotype.Controller;
import org.springframework.stereotype.Repository;
import org.springframework.ui.Model;
import org.springframework.web.bind.annotation.GetMapping;
import org.springframework.web.bind.annotation.Mapping;
import org.springframework.web.bind.annotation.RequestMapping;

import javax.servlet.http.HttpSession;
import java.util.HashMap;
import java.util.List;
import java.util.Map;

@Controller
//@Repository
public class TxPersonController {

    @Autowired
    PersonService personService;

     @RequestMapping("/main")
     public String  main(Model model){

         List<TxPerson> list = personService.select();
         model.addAttribute("list",list);

         return "main";
     }


    @RequestMapping("/insert")
    public String  insert(TxPerson person){
         personService.insert(person);
          return "redirect:main";
    }

    @RequestMapping("/getPerson")
    public String  getPerson(int pid,Model model){
        TxPerson person = personService.getPersonById(pid);
        model.addAttribute("p",person);
        return "update";
    }

    @RequestMapping("/updatePerson")
    public String  update(TxPerson person){
        personService.updatePerson(person);
        return "redirect:main";
    }

    @RequestMapping("/delete")
    public String  delete(int pid){
        personService.delete(pid);
        return "redirect:main";
    }


    @RequestMapping("/toLogin")
    public String  login(String username, String password, HttpSession session, Model model){
        Map<String, String> map = new HashMap<String, String>();
        map.put("username", username);
        map.put("password", password);
        TxPerson txPerson = personService.getPersonUsepass(map);
        model.addAttribute("p",txPerson);
        if (txPerson!=null){
            session.setAttribute("user",txPerson);
            return "index";
        }else {
            model.addAttribute("tip","用户名或密码错误!");
            return "login";
        }
    }
}
⑤编写拦截类
java
package cn.tx.springboot.interceptor;

import cn.tx.springboot.model.TxPerson;
import org.springframework.web.context.request.WebRequestInterceptor;
import org.springframework.web.servlet.HandlerInterceptor;

import javax.servlet.http.HttpServletRequest;
import javax.servlet.http.HttpServletResponse;

public class LoginInterceptor implements HandlerInterceptor {
    @Override
    public boolean preHandle(HttpServletRequest request, HttpServletResponse response, Object handler) throws Exception {
        TxPerson user = (TxPerson) request.getSession().getAttribute("user");
        if(user!=null){
            return true;
        }
        response.sendRedirect(request.getContextPath()+"/login");
        return false;

    }
}
三、测试
实现上面的过程后就可以访问页面了(随便访问一个controller中对应的路径即可,因为在配置中配置了跳转路径,所以不登录直接访问,访问任何页面都会被跳转到login.html页面)
 按照自己数据库中的信息自行登录即可 注意: 我没有提供项目中的图片信息,所以打开可能并不是这个页面(图片自行下载微调前端即可)