前言:
最近在大模型预测,简单了解了lag-llama开源项目,网上也有很多讲解原理的,这里就将如何快速上手使用说一下,只懂得一点点皮毛,有错误的地方欢迎大佬指出。
简单介绍:
Lag-Llama 是一个开源的时间序列预测模型,基于 Transformer 架构设计,专注于利用 滞后特征(Lagged Features) 捕捉时间序列的长期依赖关系。其核心思想是将传统时间序列分析中的滞后算子(Lags)与现代深度学习结合,实现对复杂时序模式的高效建模。
相关技术原理:...(搜一下很多文章讲的都非常好)
实现模型预测:
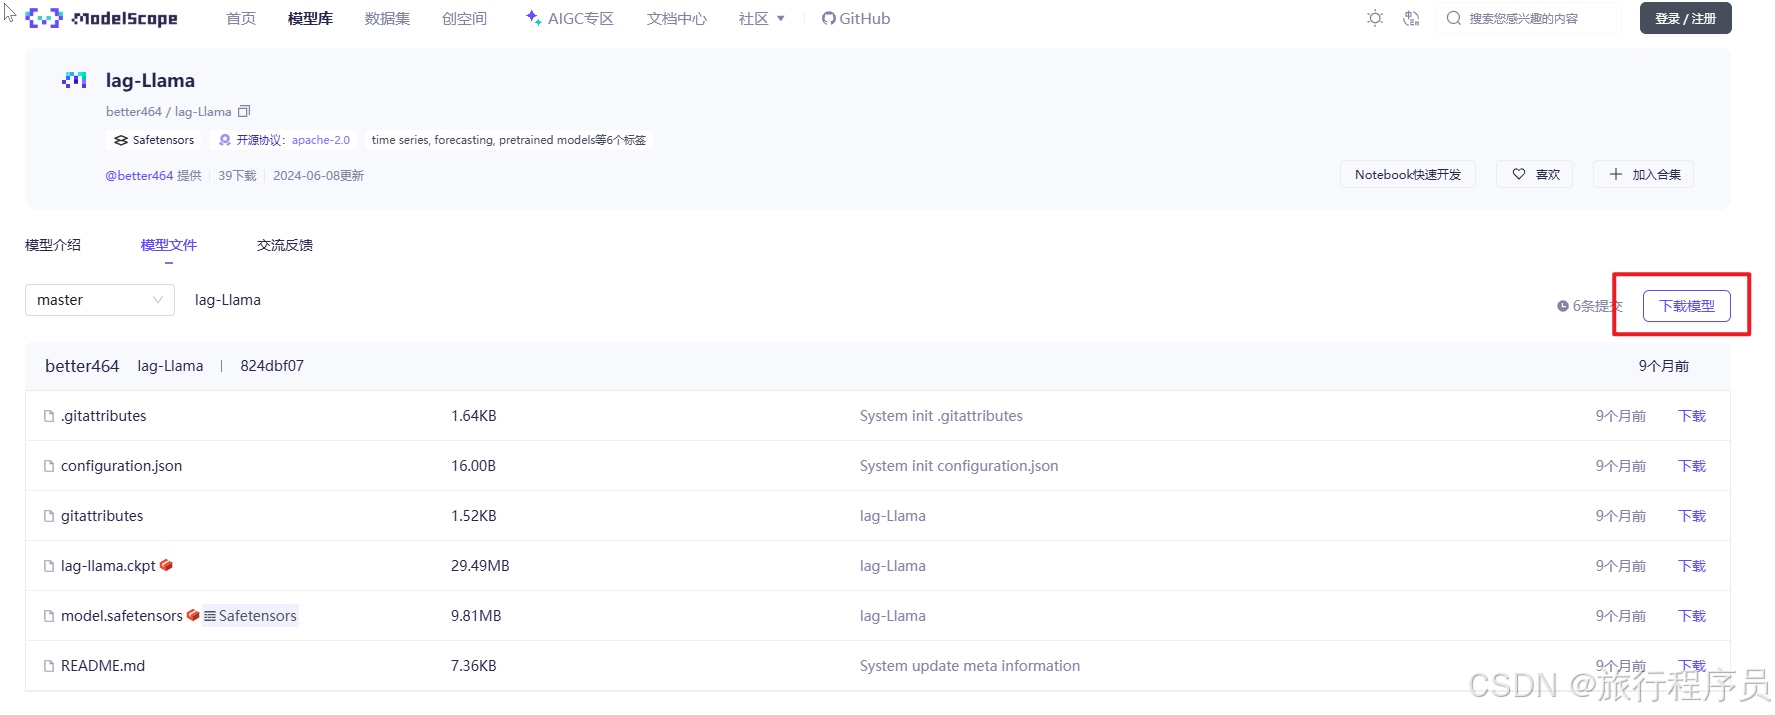
1.下载模型文件
从 HuggingFace下载,如果网络原因访问不了,建议从魔搭社区下载(lag-Llama · 模型库)
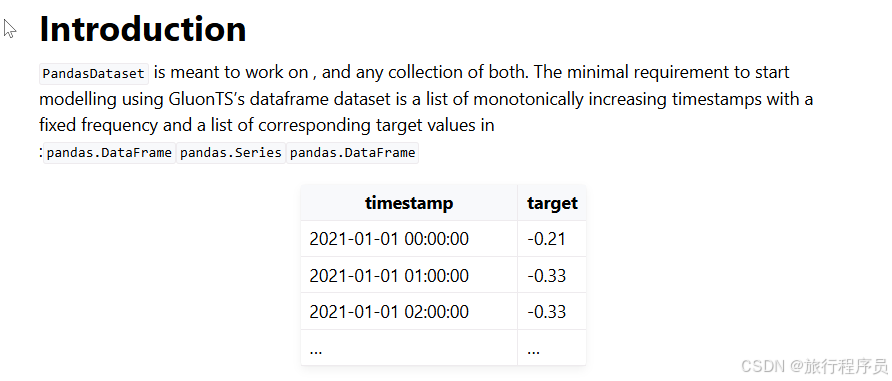
2.准备数据集
参考文档:pandas.DataFrame based dataset - GluonTS documentation
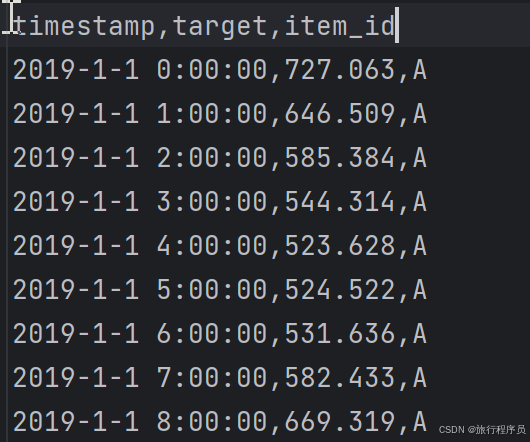
以我测试数据举例:
3.完整代码:(需要替换模型文件地址和数据集地址)
python
from itertools import islice

from matplotlib import pyplot as plt
import matplotlib.dates as mdates

import torch
from gluonts.evaluation import make_evaluation_predictions, Evaluator
from gluonts.dataset.repository.datasets import get_dataset

from gluonts.dataset.pandas import PandasDataset
import pandas as pd

from lag_llama.gluon.estimator import LagLlamaEstimator

def get_lag_llama_predictions(dataset, prediction_length, device, num_samples, context_length=32, use_rope_scaling=False):
    # 模型文件地址
    ckpt = torch.load("/models/lag-Llama/lag-llama.ckpt", map_location=device, weights_only=False)  # Uses GPU since in this Colab we use a GPU.
    estimator_args = ckpt["hyper_parameters"]["model_kwargs"]

    rope_scaling_arguments = {
        "type": "linear",
        "factor": max(1.0, (context_length + prediction_length) / estimator_args["context_length"]),
    }

    estimator = LagLlamaEstimator(
        # 模型文件地址
        ckpt_path="/models/lag-Llama/lag-llama.ckpt",
        prediction_length=prediction_length,
        context_length=context_length,
        # Lag-Llama was trained with a context length of 32, but can work with any context length

        # estimator args
        input_size=estimator_args["input_size"],
        n_layer=estimator_args["n_layer"],
        n_embd_per_head=estimator_args["n_embd_per_head"],
        n_head=estimator_args["n_head"],
        scaling=estimator_args["scaling"],
        time_feat=estimator_args["time_feat"],
        rope_scaling=rope_scaling_arguments if use_rope_scaling else None,

        batch_size=1,
        num_parallel_samples=100,
        device=device,
    )

    lightning_module = estimator.create_lightning_module()
    transformation = estimator.create_transformation()
    predictor = estimator.create_predictor(transformation, lightning_module)

    forecast_it, ts_it = make_evaluation_predictions(
        dataset=dataset,
        predictor=predictor,
        num_samples=num_samples
    )
    forecasts = list(forecast_it)
    tss = list(ts_it)

    return forecasts, tss


import pandas as pd
from gluonts.dataset.pandas import PandasDataset

url = (
    "/lag-llama/history.csv"
)
df = pd.read_csv(url, index_col=0, parse_dates=True)

# Set numerical columns as float32
for col in df.columns:
    # Check if column is not of string type
    if df[col].dtype != 'object' and pd.api.types.is_string_dtype(df[col]) == False:
        df[col] = df[col].astype('float32')

# Create the Pandas
dataset = PandasDataset.from_long_dataframe(df, target="target", item_id="item_id")

backtest_dataset = dataset
# 预测长度
prediction_length = 24  # Define your prediction length. We use 24 here since the data is of hourly frequency
# 样本数
num_samples = 1  # number of samples sampled from the probability distribution for each timestep
device = torch.device("cuda:1")  # You can switch this to CPU or other GPUs if you'd like, depending on your environment

forecasts, tss = get_lag_llama_predictions(backtest_dataset, prediction_length, device, num_samples)

# 提取第一个时间序列的预测结果
forecast = forecasts[0]
print('=================================')
# 概率预测的完整样本(形状: [num_samples, prediction_length])
samples = forecast.samples
print(samples)
关键参数说明:
|-------------------|--------------------------|
| 参数 | 说明 |
| prediction_length | 预测的未来时间步长 |
| context_length | 模型输入的历史时间步长(需 >= 季节性周期) |
| num_samples | 概率预测的采样次数(值越大,概率区间越准) |
| checkpoint_path | 预训练模型权重路径(需提前下载) |
| freq | 时间序列频率(如 "H" 小时、"D" 天) |
结果:

这里只是给出了简单的代码实现,想要更好的效果还需深入研究!!!