开源的代码仓库存在很多缺陷,想要项目能够跑起来,需要完成以下的几个改造。注意,以下内容建立在你已经看过官方部署说的基础上。如果你还没看过官方的部署说明,请先查看官方的部署说明,此处不赘述: Quick Start
1. 新增 LLM Client
开源代码库不支持 openai 的标准接口,只支持通过微软的智能化平台Azure部署的API接口(就很离谱)。其配置和调用的方式都和openai的接口不同,不过好在接口参数都是一样的(方便透传调用gpt接口)。我们需要新建一个openai的客户端接口,其实就是复制azure_open_ai_client.py,创建一个新的客户端open_ai_client.py,将其中创建Azure客户端的地方,修改为创建openai的客户端。
python
self._client = AzureOpenAI(**client_configs)修改为
python
        from openai import OpenAI
        api_key = os.environ.get("OPENAI_API_KEY", None)
        base_url = os.environ.get("OPENAI_BASE_URL", None)
        self._client = OpenAI(api_key=api_key, base_url=base_url)
完整代码如下:
python
import json
import os
import re
import time
from typing import List, Literal, Optional, Union

import openai
from langchain_core.embeddings import Embeddings
from openai.types import CreateEmbeddingResponse
from openai.types.chat.chat_completion import ChatCompletion
from pickledb import PickleDB

from pikerag.llm_client.base import BaseLLMClient
from pikerag.utils.logger import Logger


def parse_wait_time_from_error(error: openai.RateLimitError) -> Optional[int]:
    try:
        info_str: str = error.args[0]
        info_dict_str: str = info_str[info_str.find("{"):]
        error_info: dict = json.loads(re.compile('(?<!\\\\)\'').sub('\"', info_dict_str))
        error_message = error_info["error"]["message"]
        matches = re.search(r"Try again in (\d+) seconds", error_message)
        wait_time = int(matches.group(1)) + 3  # NOTE: wait 3 more seconds here.
        return wait_time
    except Exception as e:
        return None


class OpenAIClient(BaseLLMClient):
    NAME = "OpenAIClient"

    def __init__(
        self, location: str = None, auto_dump: bool = True, logger: Logger = None,
        max_attempt: int = 5, exponential_backoff_factor: int = None, unit_wait_time: int = 60, **kwargs,
    ) -> None:
        """LLM Communication Client for Azure OpenAI endpoints.

        Args:
            location (str): the file location of the LLM client communication cache. No cache would be created if set to
                None. Defaults to None.
            auto_dump (bool): automatically save the Client's communication cache or not. Defaults to True.
            logger (Logger): client logger. Defaults to None.
            max_attempt (int): Maximum attempt time for LLM requesting. Request would be skipped if max_attempt reached.
                Defaults to 5.
            exponential_backoff_factor (int): Set to enable exponential backoff retry manner. Every time the wait time
                would be `exponential_backoff_factor ^ num_attempt`. Set to None to disable and use the `unit_wait_time`
                manner. Defaults to None.
            unit_wait_time (int): `unit_wait_time` would be used only if the exponential backoff mode is disabled. Every
                time the wait time would be `unit_wait_time * num_attempt`, with seconds (s) as the time unit. Defaults
                to 60.
        """
        super().__init__(location, auto_dump, logger, max_attempt, exponential_backoff_factor, unit_wait_time, **kwargs)

        from openai import OpenAI
        api_key = os.environ.get("OPENAI_API_KEY", None)
        base_url = os.environ.get("OPENAI_BASE_URL", None)
        self._client = OpenAI(api_key=api_key, base_url=base_url)

    def _get_response_with_messages(self, messages: List[dict], **llm_config) -> ChatCompletion:
        response: ChatCompletion = None
        num_attempt: int = 0
        while num_attempt < self._max_attempt:
            try:
                # TODO: handling the kwargs not passed issue for other Clients
                response = self._client.chat.completions.create(messages=messages, **llm_config)
                break

            except openai.RateLimitError as e:
                self.warning("  Failed due to RateLimitError...")
                # NOTE: mask the line below to keep trying if failed due to RateLimitError.
                # num_attempt += 1
                wait_time = parse_wait_time_from_error(e)
                self._wait(num_attempt, wait_time=wait_time)
                self.warning(f"  Retrying...")

            except openai.BadRequestError as e:
                self.warning(f"  Failed due to Exception: {e}")
                self.warning(f"  Skip this request...")
                break

            except Exception as e:
                self.warning(f"  Failed due to Exception: {e}")
                num_attempt += 1
                self._wait(num_attempt)
                self.warning(f"  Retrying...")

        return response

    def _get_content_from_response(self, response: ChatCompletion, messages: List[dict] = None) -> str:
        try:
            content = response.choices[0].message.content
            if content is None:
                finish_reason = response.choices[0].finish_reason
                warning_message = f"Non-Content returned due to {finish_reason}"

                if "content_filter" in finish_reason:
                    for reason, res_dict in response.choices[0].content_filter_results.items():
                        if res_dict["filtered"] is True or res_dict["severity"] != "safe":
                            warning_message += f", '{reason}': {res_dict}"

                self.warning(warning_message)
                self.debug(f"  -- Complete response: {response}")
                if messages is not None and len(messages) >= 1:
                    self.debug(f"  -- Last message: {messages[-1]}")

                content = ""
        except Exception as e:
            self.warning(f"Try to get content from response but get exception:\n  {e}")
            self.debug(
                f"  Response: {response}\n"
                f"  Last message: {messages}"
            )
            content = ""

        return content

    def close(self):
        super().close()
        self._client.close()


class OpenAIEmbedding(Embeddings):
    def __init__(self, **kwargs) -> None:
        client_configs = kwargs.get("client_config", {})

        from openai import OpenAI
        api_key = os.environ.get("OPENAI_API_KEY", None)
        base_url = os.environ.get("OPENAI_BASE_URL", None)
        self._client = OpenAI(api_key=api_key, base_url=base_url)

        self._model = kwargs.get("model", "text-embedding-ada-002")

        cache_config = kwargs.get("cache_config", {})
        cache_location = cache_config.get("location", None)
        auto_dump = cache_config.get("auto_dump", True)
        if cache_location is not None:
            self._cache: PickleDB = PickleDB(location=cache_location)
        else:
            self._cache = None

    def _save_cache(self, query: str, embedding: List[float]) -> None:
        if self._cache is None:
            return

        self._cache.set(query, embedding)
        return

    def _get_cache(self, query: str) -> Union[List[float], Literal[False]]:
        if self._cache is None:
            return False

        return self._cache.get(query)

    def _get_response(self, texts: Union[str, List[str]]) -> CreateEmbeddingResponse:
        while True:
            try:
                response = self._client.embeddings.create(input=texts, model=self._model)
                break

            except openai.RateLimitError as e:
                expected_wait = parse_wait_time_from_error(e)
                if e is not None:
                    print(f"Embedding failed due to RateLimitError, wait for {expected_wait} seconds")
                    time.sleep(expected_wait)
                else:
                    print(f"Embedding failed due to RateLimitError, but failed parsing expected waiting time, wait for 30 seconds")
                    time.sleep(30)

            except Exception as e:
                print(f"Embedding failed due to exception {e}")
                exit(0)

        return response

    def embed_documents(self, texts: List[str], batch_call: bool=False) -> List[List[float]]:
        # NOTE: call self._get_response(texts) would cause RateLimitError, it may due to large batch size.
        if batch_call is True:
            response = self._get_response(texts)
            embeddings = [res.embedding for res in response.data]
        else:
            embeddings = [self.embed_query(text) for text in texts]
        return embeddings

    def embed_query(self, text: str) -> List[float]:
        embedding =  self._get_cache(text)
        if embedding is False:
            response = self._get_response(text)
            embedding = response.data[0].embedding
            self._save_cache(text, embedding)
        return embedding
同时,在 .env文件中,增加如下配置内容:
python
# Openai method
OPENAI_BASE_URL="https://api.openai.com/v1/"
OPENAI_API_KEY="{OPENAI_API_KEY}"
你可以直接配置openai的官方 url 和 api_key,或者其他三方提供的服务。
2. 获取测试数据
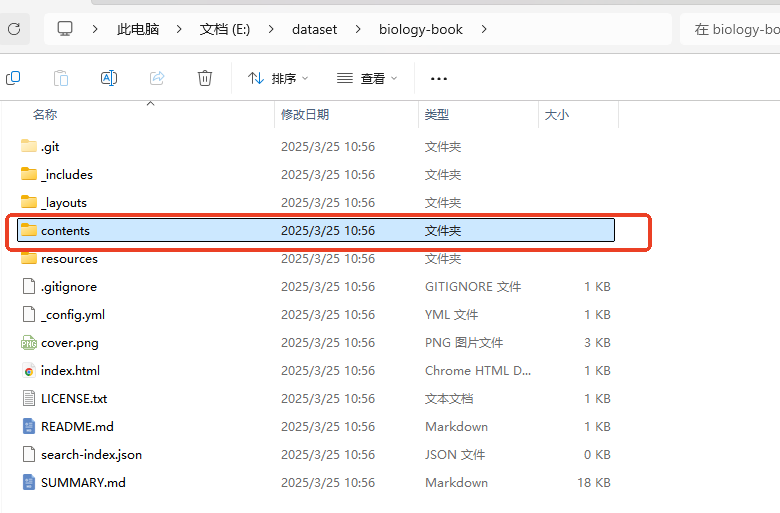
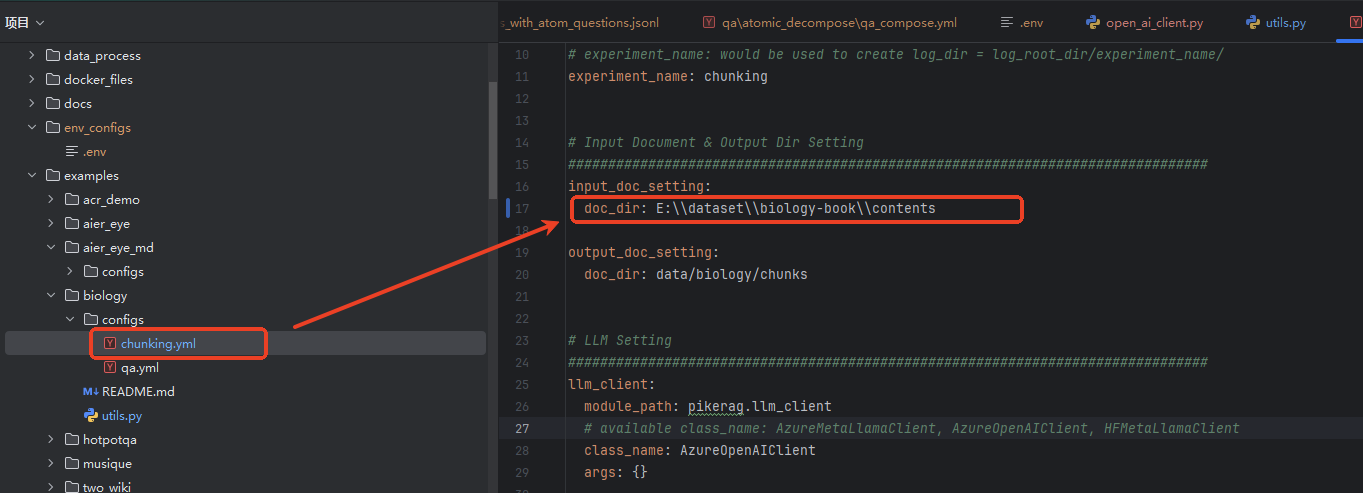
开源仓库中,只提供了框架代码,没有提供测试数据,如果想跑测试用例,需要自己下载测试数据。以 Biology Q&A为例,需要自己从github上去下载测试数据。具体链接参考:examples_biology_README。项目拉取下来后,将代码路径中的 content目录,配置到相关配置项中。
修改配置项。
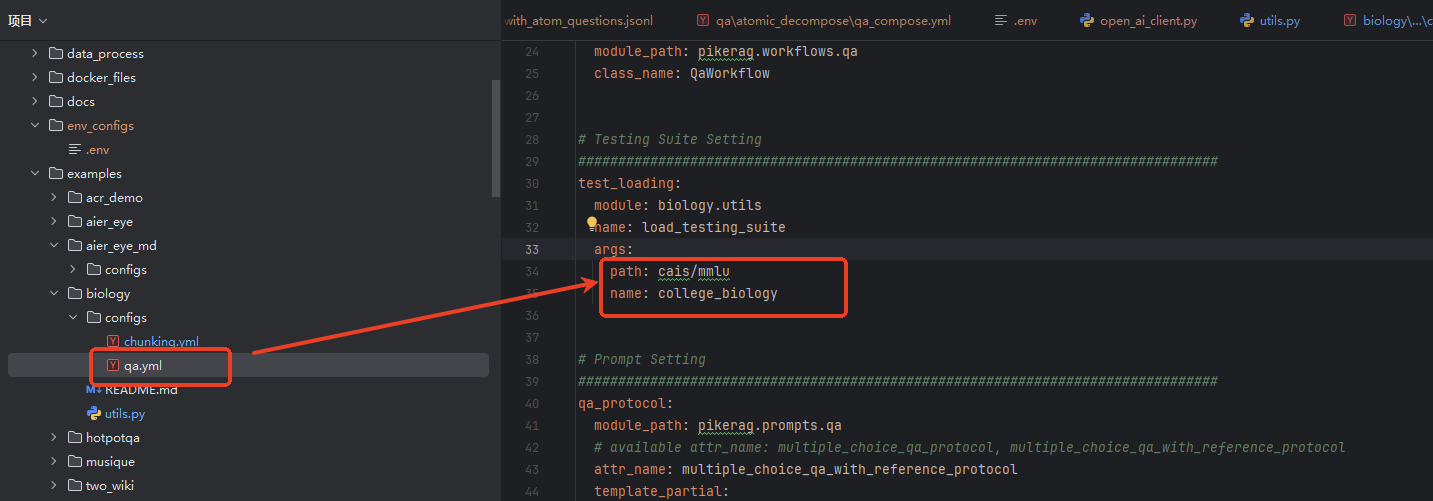
同时,你需要下载一个测试验证集,官方提供推荐的是 MMLU/college_biology。数据下载完成后,按照官方说明,配置到对应配置项中。
3. 用自己的文件进行测试
上述是官方的测试例子,数据比较多,跑一遍要耗费不少token,且是最简单的文档切分和基于分片的问答。准确的说,就是一个传统的RAG,没有啥亮点。下面介绍如何用自己的文档来做测试,并且调用一些其他的召回策略。
假设,我有一个文档,以及一些针对文档的验证问题,我希望能通过PIKE来验证效果,那我们可以这么做。
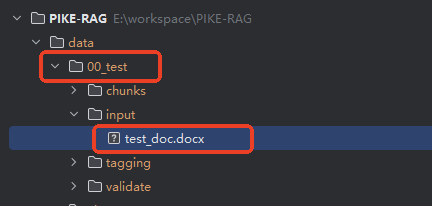
- 准备测试文档
在data目录下,创建一个自己的目录,并在这个目录中创建一个input目录,将自己的测试文件放到这个input目录下。
- 编写分片配置文件
同样在examples目录下,创建一个自己的目录,并复制一套配置文件过来,其中包含用于文档分片的chunking.yaml。

chunking.yaml配置文件有需要修改的地方如下:
yaml
# LLM Setting
################################################################################
llm_client:
  module_path: pikerag.llm_client
  # 修改为标准的openai接口客户端
  class_name: OpenAIClient
  args: {}

  llm_config:
    # 改成自己的模型名称即可
    model: DeepSeek-V3
    temperature: 0
代码有个地方需要调整,生成分片时,默认代码中没有chunk_id字段,在后续的tagging,以及召回时,chunk_id字段必不可少。所以需要修改如下代码,新增chunk_id,你也可以使用其他形式生成chunk_id,注意是字符串类型。这里采用了最简单的形式。
python
            # Add metadata
            for index, doc in enumerate(docs, start=1):
                doc.metadata.update({"filename": doc_name})
                doc.metadata.update({"chunk_id": str(index)})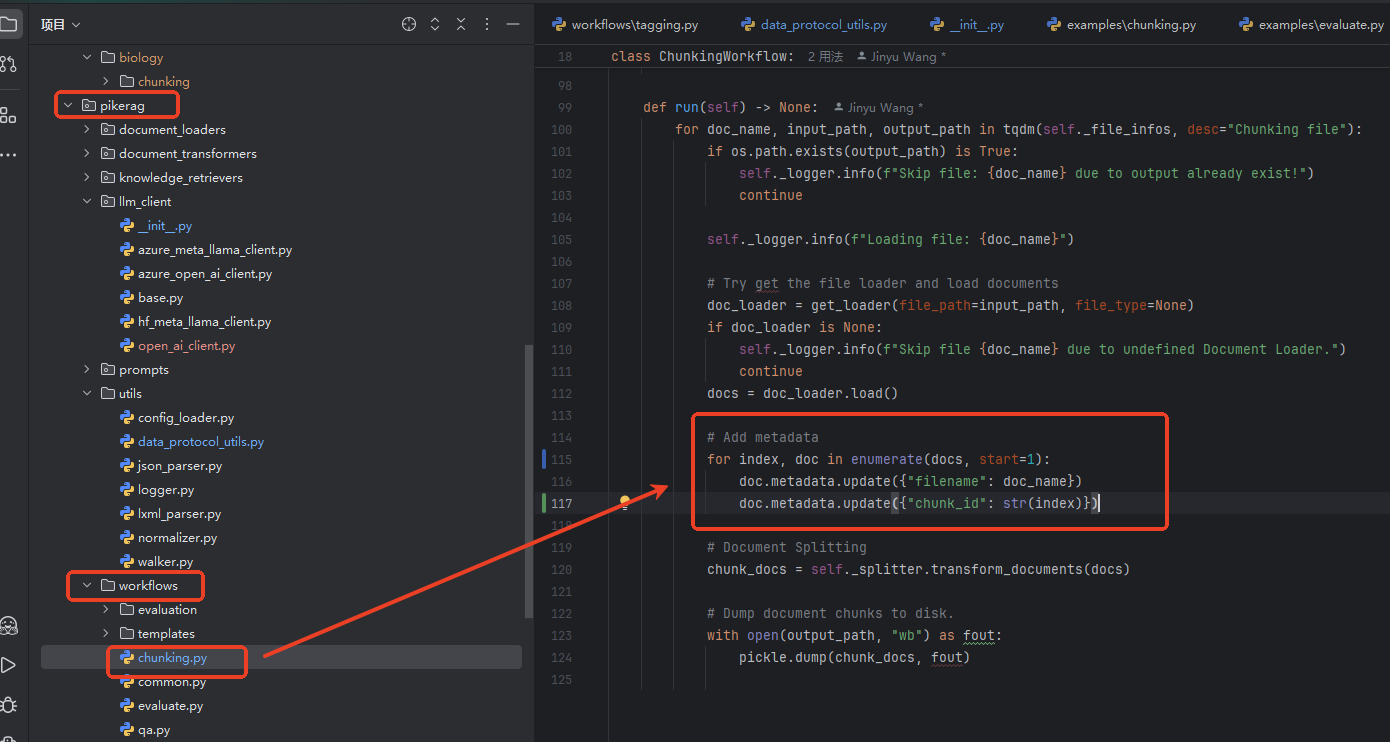
最后,按照手册中的调用方式,调用chunking.py,进行文档分片。默认分片结果以pkl的形式输出,当然也可以写成jsonl的形式,具体做法,自己查看源码。
shell
python .\examples\chunking.py ./examples/00_test/configs/chunking.yml
- 编写打标配置文件
这里的打标(tagging),其实就是基于分片,生成一系列的预置问题,后续召回时,根据这些问题来召回分片。
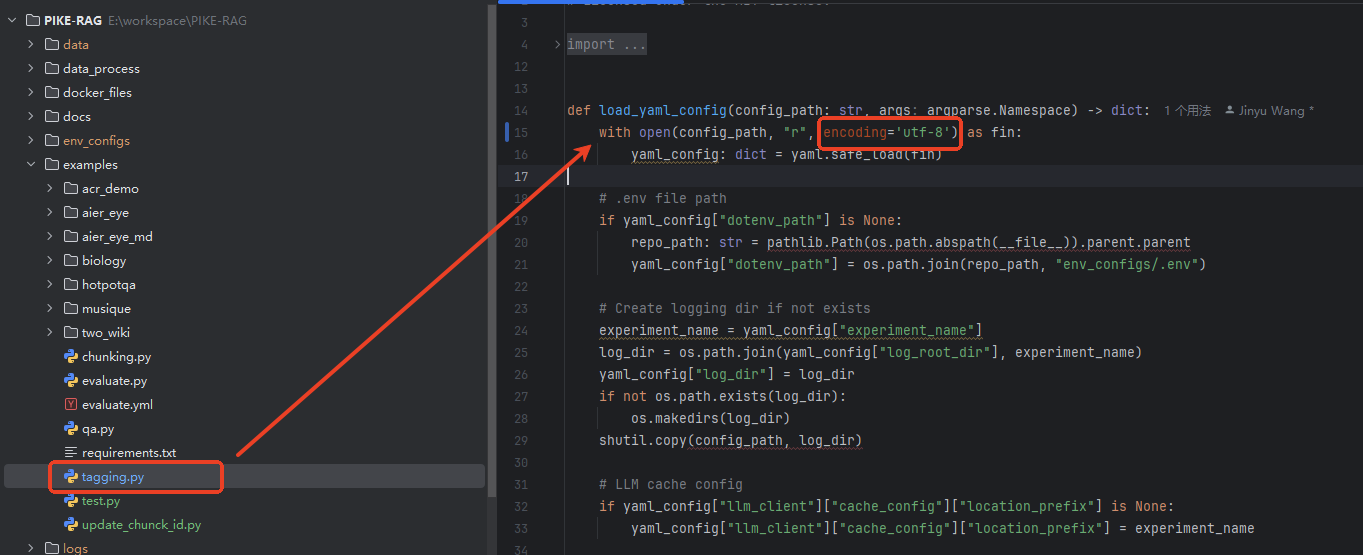
打标的配置文件,和示例一样,没什么特殊的,复制一个tagging配置文件,稍作修改即可。需要注意的是,如果你和我一样,在配置文件里面配置分片源文件时有中文内容,在加载配置文件时,会出现编码异常。

修改tagging.py文件,将编码格式设置为utf-8即可。
打标结束后,如果输出的时jsonl文件,则可以直接看到生成的问题列表了。

从官方的文档和开源的代码来看,目前 PIKE 能做的文件处理只有分片(包含格式转换和内容分片)、打标(生成预置问题)两部分。抽取知识实体和构建知识图谱,没有涉及。
- 准备验证问题
验证问题,以jsonl形式保存,主要的字段包括:
yaml
id: str # 问题编码
question_type: str #问题类型
metadata: dict #元数据,字典类型
question: str #验证问题
answer_labels: list #参考答案列表,list类型
按照以上格式,组织验证问题。

- 问答
基于分片
问答有多种召回方式,一个是基于分片(chunk)的召回,这个比较简单,支持BM25和向量召回。在如下地方进行控制:
yaml
# Retriever Setting
################################################################################
retriever:
  module_path: pikerag.knowledge_retrievers
  # 召回形式,更多的召回方法,参照module_path下的其他实现类
  class_name: BM25QaChunkRetriever
  args:
    retrieve_k: 8
    retrieve_score_threshold: 0.5
更多参数,可以参考用到了相关召回类的其他配置文件。这个比较简单,此处不赘述。
基于打标
还有一种是相对复杂的,基于原子的召回ChunkAtomRetriever,其实就是基于打标问题的召回。
在上述配置项中,将class_name设置为ChunkAtomRetriever,同时,需要修改部分代码。
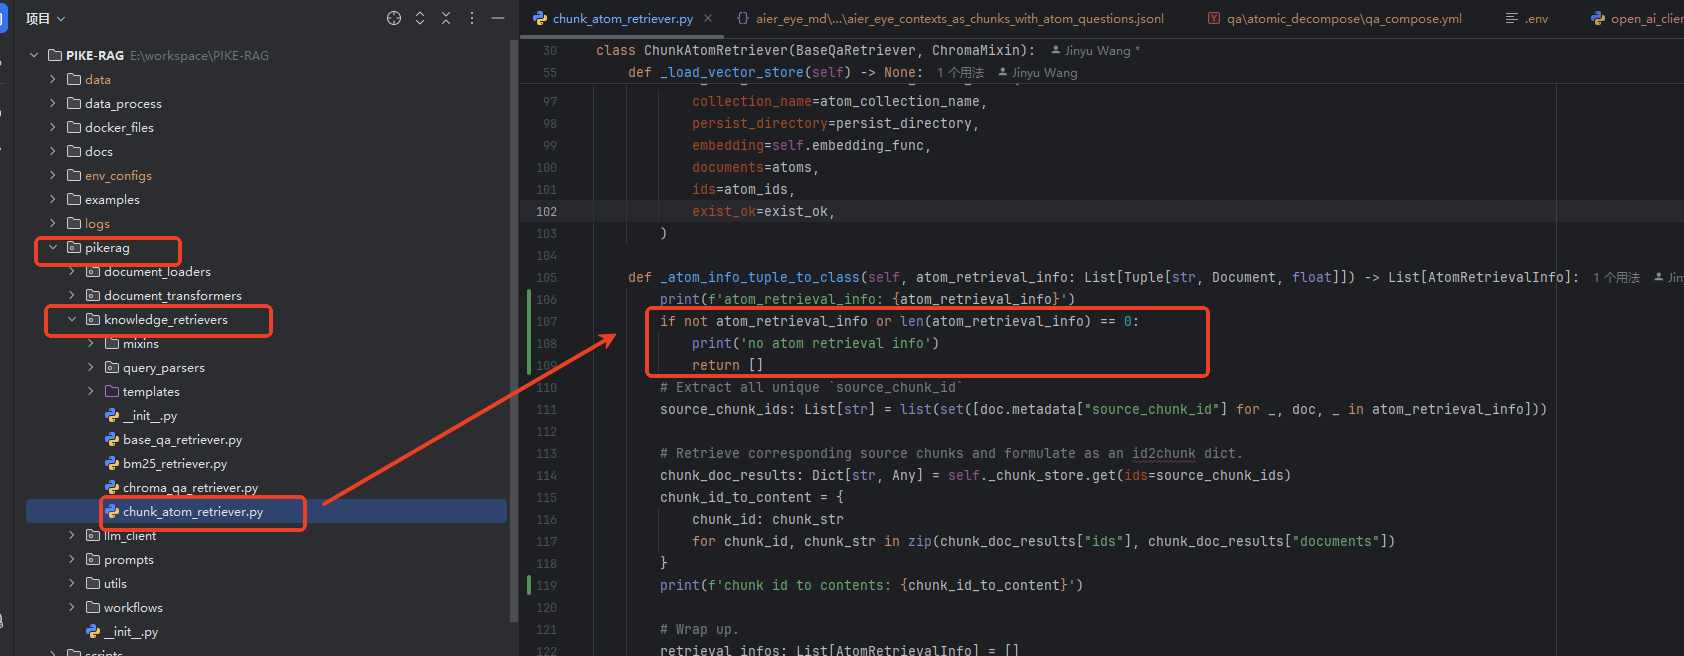
由于chunking中生成的chunk分片没有titile字段,而load分片时,需要title字段,导致异常。修改如下代码,将摘要(summary)设置为title。

另外,原代码,当召回内容为空(没有找到相关内容时)会报异常,终端验证,为了保证验证集能正常跑完,修改如下代码,当召回内容为空时,跳过处理。
按照示例中的方法,调用验证脚本进行测试。
shell
python .\examples\qa.py ./examples/00_test/configs/qa_compose.yml