在上一篇文章.NET 创建MCP使用大模型对话-CSDN博客中,我们简述了如何使用mcp client使用StdIo模式调用本地mcp server。本次实例将会展示如何使用mcp client模式调用远程mcp server。
一:创建mcp server
我们创建一个天气服务。
新建WebApi项目,选择.NET9框架,名称叫做MCPWebAPI。
添加ModelContextProtocol引用,注意当前是preview版本,需要勾选包含发行版才能搜到。
添加ModelContextProtocol.AspNetCore引用, 注意当前是preview版本。

1:在默认生成的Program.cs文件中,注入AddMcpServer和启用Mcp路由,如下图:
cs
using ModelContextProtocol.AspNetCore;

var builder = WebApplication.CreateBuilder(args);


builder.Services.AddControllers();
builder.Services.AddOpenApi();

//注册MCPServer,并从当前程序集加载Tool <新增代码>
builder.Services.AddMcpServer().WithToolsFromAssembly();

var app = builder.Build();

if (app.Environment.IsDevelopment())
{
    app.MapOpenApi();
}

app.UseHttpsRedirection();

app.UseAuthorization();

app.MapControllers();

//注册MCPServer的路由 <新增代码>
app.MapMcp();

app.Run();
2:新增天气Tool。代码和上篇文章一直,不再赘述。
cs
using ModelContextProtocol.Server;
using System.ComponentModel;
namespace MCPWebAPI.Tools
{
[McpServerToolType]
public class WeatherTool
{
[McpServerTool(Name = "Get City Weather"), Description("获取指定城市的天气,返回temperature温度和weather天气情况组成的json信息。")]
public static string GetCurrentWeather([Description("城市名称")] string city)
{
//随机温度
var temperature = new Random().Next(-20, 50);
//天气组
var weatherList = new string[] { "晴", "多云", "大雨", "小雨", "大雪" };
//随机天气
var weather = weatherList[new Random(Guid.NewGuid().GetHashCode()).Next(0, weatherList.Length - 1)];
//模仿json格式返回
return "{\"temperature\":" + temperature + ",\"weather\":\"" + weather + "\"}";
}
}
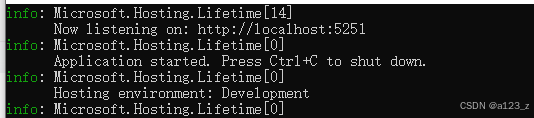
}3:运行程序,不报错即为成功。
可选调试工具:
首先,启动WebApi项目 ,本地端口:5251
在控制台运行 npx @modelcontextprotocol/inspector 命令

按提示打开http://127.0.0.1:6274/网页,选择sse模式,填写WebApi项目启动地址+/sse后缀:http://localhost:5251/sse,点击链接即可。
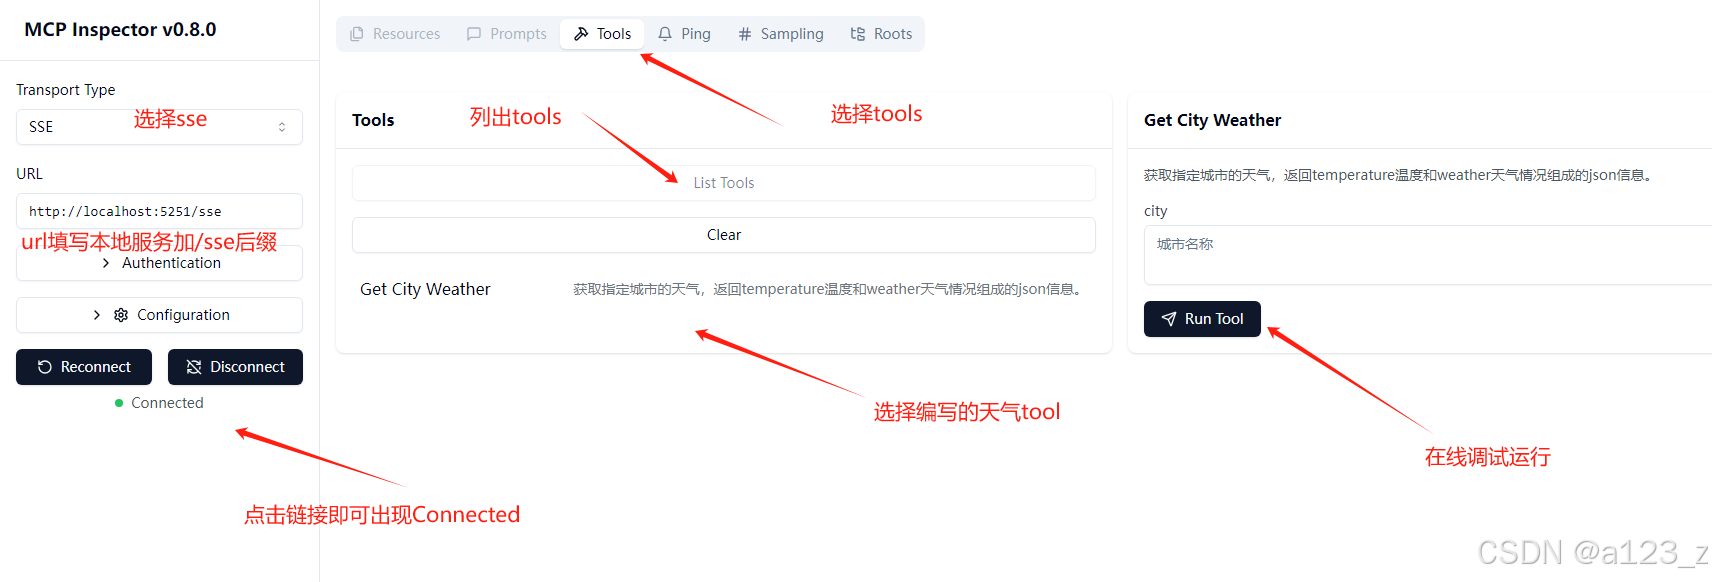
注:如遇报错 ReferenceError: fetch is not defined ,请升级你的node.js版本,确保高于V18.0。
二:创建 mcp client
流程和上个文章差不多,新建控制台项目,选择.NET9框架,名称叫做MCPClient。
添加ModelContextProtocol引用。
1. 注册Client
cs
McpClientOptions options = new()
{
    ClientInfo = new() { Name = "Weather Client", Version = "1.0.0" }
};

//1:注册MCPServer,以项目中引用为例。

//上一篇以stdio方式运行MCPServer
/*var config = new McpServerConfig
{
    Id = "weather",
    Name = "Weather MCP Server",
    TransportType = TransportTypes.StdIo,
    TransportOptions = new Dictionary<string, string>
    {
        //运行MCPServer
        ["command"] = "dotnet",
        ["arguments"] = "run --project ../../../../MCPServer --no-build",
    }
};*/

//本次以SSE远程方式连接MCPWebAPI
var config = new McpServerConfig
{
    Id = "weather",
    Name = "Weather MCP Server",
    TransportType = TransportTypes.Sse,
    Location = "http://127.0.0.1:5251/sse",
};
最大的区别就是使用TransportTypes.Sse模式通讯,并增加Location调用地址。
其他代码不变。列出Client所有代码:
cs
using Microsoft.Extensions.AI;
using Microsoft.Extensions.Logging;
using ModelContextProtocol.Client;
using ModelContextProtocol.Configuration;
using ModelContextProtocol.Protocol.Transport;
using OpenAI;

Console.WriteLine($"程序启动中,请稍后");

McpClientOptions options = new()
{
    ClientInfo = new() { Name = "Weather Client", Version = "1.0.0" }
};

//1:注册MCPServer,以项目中引用为例。

//SSE远程方式连接MCPWebAPI
var config = new McpServerConfig
{
    Id = "weather",
    Name = "Weather MCP Server",
    TransportType = TransportTypes.Sse,
    Location = "http://127.0.0.1:5251/sse",
};


using var factory =
    LoggerFactory.Create(builder => builder.AddConsole().SetMinimumLevel(LogLevel.Trace));

//2:创建MCPClient
await using var mcpClient = await McpClientFactory.CreateAsync(config, options);


//3:发现MCPServer中的Tool
var mcpTools = await mcpClient.ListToolsAsync();
foreach (var tool in mcpTools)
{
    Console.WriteLine($"{tool.Name} ({tool.Description})");
}

Console.WriteLine("---------- Tools");
Console.WriteLine();


//4:注册大模型

//注册方式1,使用本地模型。以本地使用Ollama启动的千问32b模型为例
//var openClient = new OllamaChatClient(new Uri("http://localhost:11434/"), "qwq:32b");

//注册方式2,使用远程模型。以阿里云百炼平台为例
var oclinet = new OpenAIClient(new System.ClientModel.ApiKeyCredential("密钥"), new OpenAIClientOptions
{
    Endpoint = new Uri("https://dashscope.aliyuncs.com/compatible-mode/v1")
});
//模型名称
var openClient = new OpenAIChatClient(oclinet, "qwen-max");

//测试模型,使用流式输出。
var res = openClient.GetStreamingResponseAsync("你好");
await foreach (var message in res)
{
    Console.Write(message);
}
Console.WriteLine();

Console.WriteLine("-------------llm test");
Console.WriteLine();


//5:创建Chat客户端
var client = new ChatClientBuilder(openClient)
    //添加日志
    .UseLogging(factory)
    //向聊天客户端添加函数调用
    .UseFunctionInvocation()
    .Build();

//6:执行对话
var msg = "";

while (true)
{
    Console.WriteLine();
    Console.WriteLine("这里是天气服务,你想咨询哪里的天气?");
    msg = Console.ReadLine();

    if (msg == "exit")
    {
        Console.WriteLine("程序退出");
        return;
    }

    IList<ChatMessage> messages =
    [
        //为ai设定身份
        new(ChatRole.System, """
                             你是一个天气助理,在输出天气时,请以家长口吻叮嘱用户添衣、带伞等。
                             """),
        new(ChatRole.User, msg)
    ];

    //区别于GetStreamingResponseAsync,此处示例非流式输出
    //注意,某些大模型要求流水输出,只能使用GetStreamingResponseAsync方式。
    var response =
    await client.GetResponseAsync(
        messages,
        new ChatOptions { Tools = [.. mcpTools] });

    Console.WriteLine(response);

}