MutableContextWrapper介绍
在上一篇 Context全解析:原理、类型与使用指南 中,介绍了Context的相关知识点,Context的两个子类 ContextWrapper 、ContextImpl:
kotlin
Context(抽象类)
│
├── ContextWrapper(mBase)
│   ├── ContextThemeWrapper(带主题的封装类)
│   │   ├── Activity
│   │
│   ├── Service
│   │
│   ├── Application
│   │
│   ├──MutableContextWrapper(动态改变context)
│   │
├── ContextImpl (Context的实现类,系统底层实现)
ContextWrapper的构造方法如下:
kotlin
//ContextWrapper.java
public class ContextWrapper extends Context {
    @UnsupportedAppUsage
    Context mBase;

    public ContextWrapper(Context base) {
        mBase = base;
    }
    //...其他...
    @Override
    public Resources getResources() {
        return mBase.getResources();
    }
}在ContextWrapper内部,大部分方法都是mBase的委托调用(如上面的getResources方法),这里的mBase是一个Context类型(mBase其实就是ContextImpl),调用ContextWrapper构造方法时,传入对应的Context参数默认是系统创建,不允许开发者自行创建。为了支持在运行时动态改变 Context这一特定场景,MutableContextWrapper应运而生!
MutableContextWrapper 继承自 ContextWrapper,提供了 setBaseContext(Context base) 方法,允许在运行时更改 Context,而不像 ContextWrapper 那样只能在创建时指定 Context。
kotlin
public class MutableContextWrapper extends ContextWrapper {
    public MutableContextWrapper(Context base) {
        super(base);
    }

    public void setBaseContext(Context base) {
        mBase = base;
    }
}
MutableContextWrapper 可以用于View提前初始化的场景,典型场景如WebView的复用:WebView 初始化代价高,如果在需要时再去初始化,在一些低端机上可能会出现卡顿问题,可以通过MutableContextWrapper让WebView提前初始化,在需要时直接拿过来用即可。
使用场景
1、WebView提前初始化
kotlin
object WebViewPool {
    private const val MAX_POOL_SIZE = 2 //WebView复用池最大容量
    private val webViewStack = LinkedList<Html5Webview>()

    /**
     * 预加载WebView,在前一个页面提前初始化,传入一个Application类型的Context
     */
    fun preloadWebView() {
        Looper.myQueue().addIdleHandler {
            if (webViewStack.isEmpty()) {
                for (index in 0..MAX_POOL_SIZE) {
                    webViewStack.push(createWebView(MyApplication.getApplication()))
                }
            }
            // 在系统空闲时执行的任务,返回false,只会执行一次;如果返回true,将在每次空闲时执行
            false
        }
    }

    /**
     * 获取WebView,在使用时将Context替换为当前Activity界面的Context
     */
    fun getCachedWebView(context: Context): Html5Webview? {
        if (webViewStack.isNotEmpty()) {
            val webView = webViewStack.pop()
            //要取出来用了,重新设置Context
            (webView.context as MutableContextWrapper).baseContext = context
            return webView
        }
        return null
    }

    /**
     * 清除所有WebView
     */
    fun releaseAll() {
        if (webViewStack.isEmpty()) return
        val iterator = webViewStack.iterator()
        while (iterator.hasNext()) {
            val webView = iterator.next()
            webView.settings.javaScriptEnabled = false
            webView.destroy()
            webView.loadUrl("about:blank") // 清除内容
            //...按需处理...
        }
    }

    /**
     * 创建 WebView
     */
    @SuppressLint("SetJavaScriptEnabled")
    private fun createWebView(context: Context): Html5Webview {
        val contextWrapper = MutableContextWrapper(context)
        return Html5Webview(contextWrapper).apply {
            settings.javaScriptEnabled = true // 启用JavaScript
            settings.domStorageEnabled = true // 启用DOM存储
            //...按需设置...
        }
    }
}
使用它:
kotlin
//在Application中提前初始化
class MyApplication : Application() {
    override fun onCreate() {
        super.onCreate()
        mApplication = this
        WebViewPool.preloadWebView() //提前缓存WebView
    }

    companion object {
        var mApplication: MyApplication? = null

        @JvmStatic
        fun getApplication(): MyApplication {
            return mApplication!!
        }
    }
}
在Activity中使用WebView:
kotlin
  val mContainer = findViewById(R.id.root)
  //尝试从缓存中获取
  val mWebView = WebViewPool.getCachedWebView(this)
  if (mWebView == null) {
      //没有缓存时,实时创建
      mWebView = Html5Webview(this)
  }
  val params = RelativeLayout.LayoutParams(RelativeLayout.LayoutParams.MATCH_PARENT, ViewGroup.LayoutParams.MATCH_PARENT)
  mContainer?.addView(mWebView, params)

  if (TextUtils.isEmpty(url)) {
      toast("url不能为空")
      return
  }
  mWebView?.loadUrl(url)
其中Html5Webview继承自WebView:
kotlin
class Html5Webview @JvmOverloads constructor(
    val mContext: Context,
    attrs: AttributeSet? = null,
    defStyleAttr: Int = 0
) : WebView(mContext, attrs, defStyleAttr) {
 //......
}
到这里,就完成了WebView的提前初始化并在使用时直接从缓存中获取。
2、修改Context的处理范围
直接上代码:
 UI层:
UI层:
kotlin
class MutableContextWrapperFragment : BaseFragment() {
    private val mContainer1: FrameLayout by id(R.id.fl_container1)
    private val mContainer2: FrameLayout by id(R.id.fl_container2)

    override fun getLayoutId(): Int {
        return R.layout.layout_mutable_context_fragment
    }
   override fun onViewCreated(view: View, savedInstanceState: Bundle?) {
        val context = requireContext()
        addChild(context, mContainer1)
        addChild(context, mContainer2)
    }

    private fun addChild(context: Context, parentView: ViewGroup) {
        LayoutInflater.from(context).inflate(R.layout.layout_child_button, parentView)
    }
}layout_child_button.xml:
kotlin
//R.layout.layout_child_button.xml
<?xml version="1.0" encoding="utf-8"?>
<Button xmlns:android="http://schemas.android.com/apk/res/android"
    android:layout_width="match_parent"
    android:layout_height="match_parent"
    android:background="@color/yellow_100"
    android:gravity="center"
    android:layout_gravity="center"
    android:textSize="14sp"
    android:text="我是一个按钮"/>
代码很简单,就是在两个FrameLayout各自添加了一个Button按钮,执行效果如下:  下面我们来改一下MutableContextWrapperFragment中的代码如下:
kotlin
    override fun onViewCreated(view: View, savedInstanceState: Bundle?) {
        val context = requireContext()
        addChild(context, mContainer1) //第一个容器

        val configuration = Configuration().apply {
            fontScale = 1.0f
        }
        val wrapper = MutableContextWrapper(context).createConfigurationContext(configuration)
        addChild(wrapper, mContainer2) //第二个容器
}其他代码不变,可以看到针对第二个容器,通过MutableContextWrapper修改了Configuration中的fontScale = 1.0,即不再跟随系统字体变化了,在设置中修改系统字体到最大:
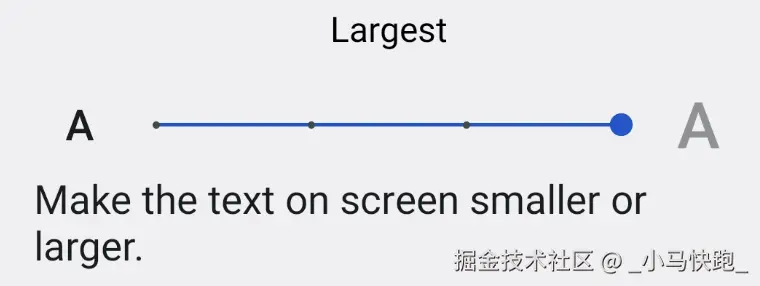
此时再看下效果:  可以看到第二个容器中的按钮文字确实没有跟随系统字体大小变化,改动成功。