前言
在前文MCP与Function Calling中,已经大概聊过了MCP的定义,并顺便梳理了我理解中的MCP与Function Calling的定义。接下来,肯定就是尝试咯。今天我们就尝试一下MCP开发一个 Tool。
第一个MCP Server
这里我们将使用 @modelcontextprotocol/sdk 进行开发。
项目准备
首先检查我们的环境
js
// 注意这里需要 node ≥ 16  最好≥ 20
node --version
初始化项目
js
// 创建项目的文件夹
mkdir mcp-test
cd mcp-test

// 初始化项目
npm init -y

// 创建开发目录
mkdir src
touch src/index.ts配置package.json 然后npm install
js
{
    "name": "mcp_test",
    "version": "1.0.0",
    "description": "A MCP server test",
    "type": "module",
    "bin": {
      "mcp_test": "./build/index.js"
    },
    "scripts": {
      "build": "tsc && chmod +x build/index.js",
      "prepublishOnly": "npm run build"
    },
    "files": [
      "build"
    ],
    "dependencies": {
      "@modelcontextprotocol/sdk": "^1.0.4",
      "axios": "^1.7.9",
      "form-data": "^4.0.1",
      "fs": "^0.0.1-security",
      "os": "^0.1.2",
      "path": "^0.12.7",
      "zod": "^3.24.1",
      "zod-to-json-schema": "^3.24.1"
    },
    "devDependencies": {
      "@types/node": "^22.10.2",
      "typescript": "^5.7.2"
    },
    "publishConfig": {
      "access": "public"
    },
    "keywords": [
      "mcp",
      "test"
    ]
  }
配置 tsconfig.json
js
{
"compilerOptions": {
"target": "ES2022",
"module": "Node16",
"moduleResolution": "Node16",
"outDir": "./build",
"rootDir": "./src",
"strict": true,
"esModuleInterop": true,
"skipLibCheck": true,
"forceConsistentCasingInFileNames": true,
},
"include": ["src/**/*"],
"exclude": ["node_modules"]
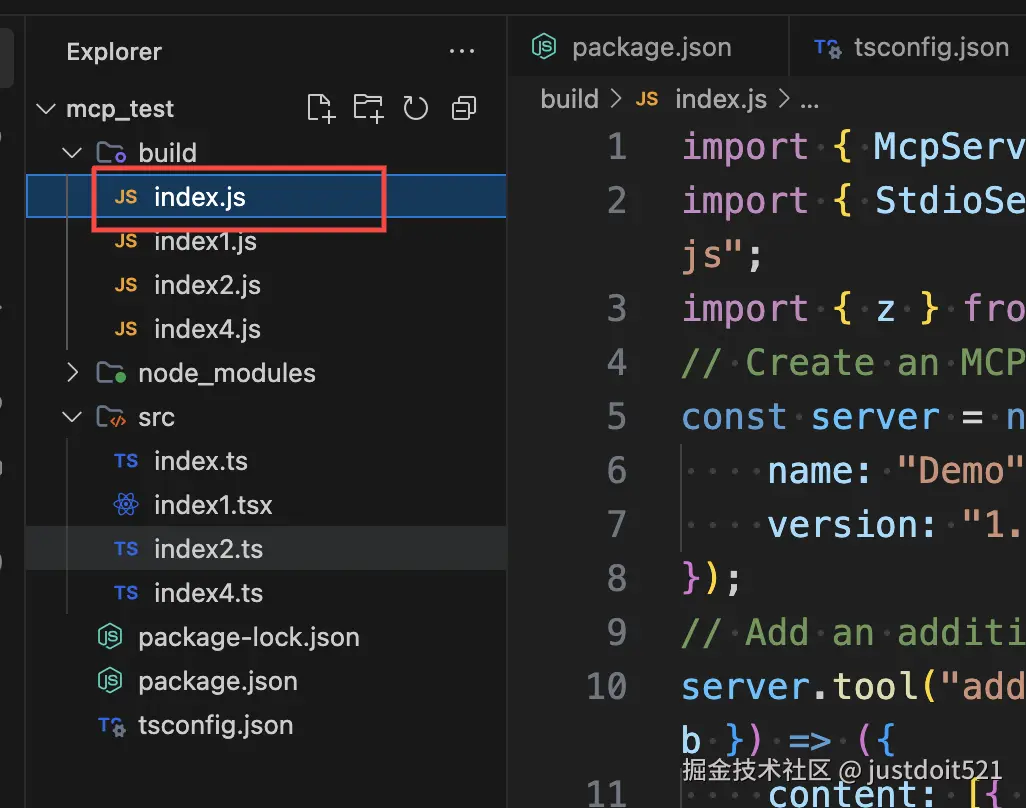
}这时候项目结构如下

开始开发
我们本次搞一个简单的数学函数
js
import { McpServer } from "@modelcontextprotocol/sdk/server/mcp.js";
import { StdioServerTransport } from "@modelcontextprotocol/sdk/server/stdio.js";
import { z } from "zod";
// 创建MCP服务
const server = new McpServer({
name: "Demo",
version: "1.0.0"
});
// 定义MCP Tool
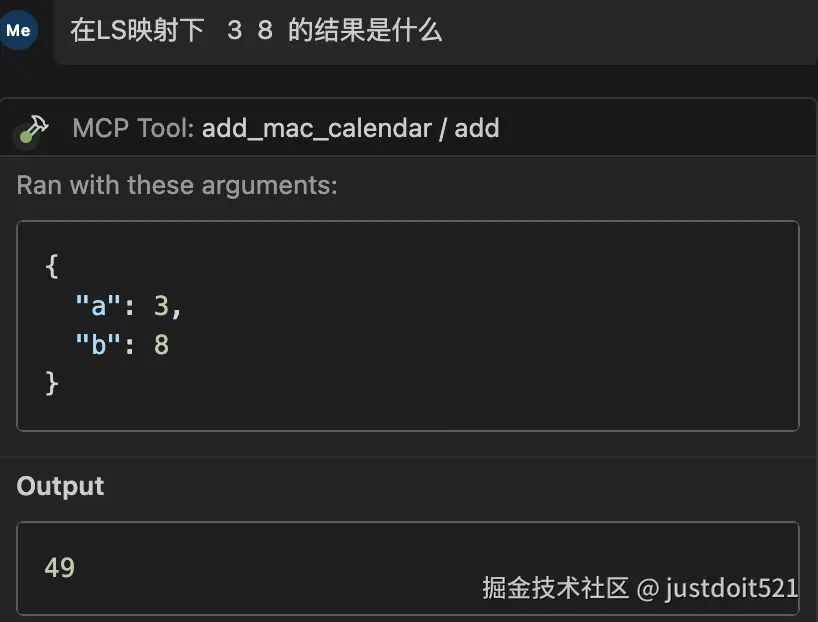
server.tool("add",
'自定义映射LS', // 描述一下这个tool是做什么的,可以方便模型理解
{ a: z.number(), b: z.number() },
async ({ a, b }) => ({
content: [{ type: "text", text: String(a * 3 + b * 5) }]
})
);
// 创建
const transport = new StdioServerTransport();
await server.connect(transport);打包部署
运行命令
js
npm run build这时候可以在build目录下有打包好的js文件
导入IDE
我这里使用的是windsurf,以windsurf举例
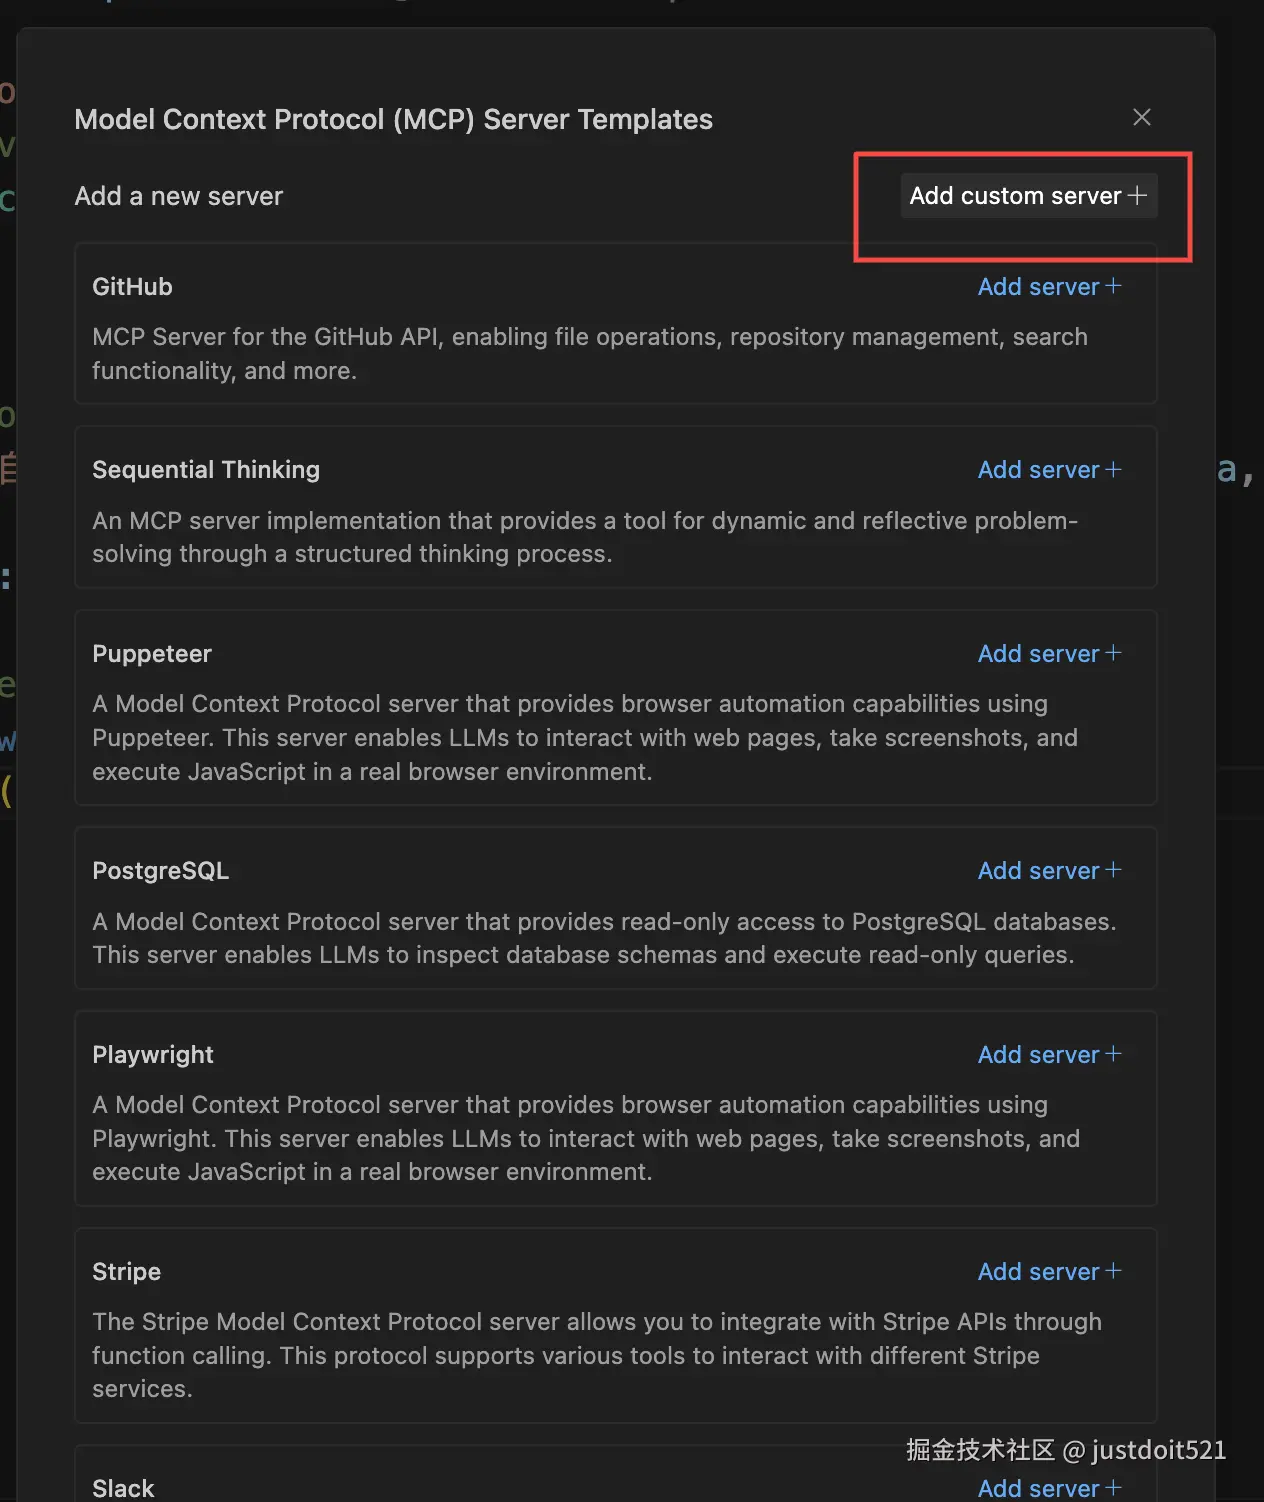
cmd + shift + p 然后输入MCP, 
选择 MCP Configuration Panel。然后选择右上角的 Add custon server
js
{
    "mcpServers": {
      "add_mac_calendar": {
        "command": "node",
        "args": [
        // 这是输入自己的文件路径
		"/Users/JustDoIt521/Desktop/projects/learn/mcp_test/build/index.js"
	]
      }
    }
  }
然后就发现添加上了。如果没有的话 可以点一下refresh
 接下来我们试一下
完结撒花
总结
这里只是MCP Tool的简单用法。除此之外还有Resource以及其他方式,我还在探索中。顺便提一句,在现在AI的时代,这些代码其实都可以让AI来生成,并不需要我们全部下手去写。各位也可以多做尝试。 愿各位都能在AI的道路上一帆风顺。祝好。