1.配置背景:
xx公司网络由三台路由器和一台交换机组成,现在想要三台路由器之间通过OSPF实现互连互通。
2.网络结构如下:

3.具体配置:
3.1路由器 RA 配置:
1.更改主机名称:
Router>en
Router#conf t
Enter configuration commands, one per line.  End with CNTL/Z.
Router(config)#hostname RA
RA(config)#
2.配置接口IP:
RA(config)#interface g0/0
RA(config-if)#ip address 192.168.1.1 255.255.255.0
RA(config-if)#no shutdown

RA(config-if)#
%LINK-5-CHANGED: Interface GigabitEthernet0/0, changed state to up

%LINEPROTO-5-UPDOWN: Line protocol on Interface GigabitEthernet0/0, changed state to up

RA(config-if)#
RA(config-if)#exit
RA(config)#interface loopback 0

RA(config-if)#
%LINK-5-CHANGED: Interface Loopback0, changed state to up

%LINEPROTO-5-UPDOWN: Line protocol on Interface Loopback0, changed state to up

RA(config-if)#ip add
RA(config-if)#ip address 192.168.31.11 255.255.255.255
RA(config-if)#exit
3.启动OSPF进程并进行宣告:
RA(config)#router ospf 1 # 启动OSPF进程,进程号为1,本地有效
RA(config-router)#router-id 192.168.31.11 # 配置路由器ID,一般使用环回接口地址
RA(config-router)#network 192.168.31.11 0.0.0.0 area 0 # 宣告环回接口网段
RA(config-router)#network 192.168.1.0 0.0.0.255 area 0 # 宣告直连网段,反掩码0.0.0.255,区域0
4.保存配置:
RA(config)#do wr
Building configuration...
[OK]
3.2路由器 RB 配置:
1.更改主机名称:
Router>en
Router#conf t
Enter configuration commands, one per line.  End with CNTL/Z.
Router(config)#hostname RB
RB(config)#
2.配置接口IP:
RB(config)#interface g0/0
RB(config-if)#ip address 192.168.1.2 255.255.255.0
RB(config-if)#no shutdown

RB(config-if)#
%LINK-5-CHANGED: Interface GigabitEthernet0/0, changed state to up

%LINEPROTO-5-UPDOWN: Line protocol on Interface GigabitEthernet0/0, changed state to up
RB(config-if)#exit
RB(config)#interface lo
RB(config)#interface loopback 0

RB(config-if)#
%LINK-5-CHANGED: Interface Loopback0, changed state to up

%LINEPROTO-5-UPDOWN: Line protocol on Interface Loopback0, changed state to up

RB(config-if)#ip address 192.168.31.22 255.255.255.255
RB(config-if)#exit
3.启动OSPF进程并进行宣告:
RB(config)#router ospf 1
RB(config-router)#router-id 192.168.31.22
RB(config-router)#network 192.168.1.0 0.0.0.255 area 0
RB(config-router)#network 192.168.31.22 0.0.0.0 area 0
RB(config-router)#exit
4.保存配置:
RB(config)#do wr
Building configuration...
[OK]
3.3路由器 RC 配置:
1.更改主机名称:
Router>en
Router#conf t
Enter configuration commands, one per line.  End with CNTL/Z.
Router(config)#hostname RC
RC(config)#
2.配置接口IP:
RC(config)#interface g0/0
RC(config-if)#ip address 192.168.1.3 255.255.255.0
RC(config-if)#no shutdown

RC(config-if)#
%LINK-5-CHANGED: Interface GigabitEthernet0/0, changed state to up

%LINEPROTO-5-UPDOWN: Line protocol on Interface GigabitEthernet0/0, changed state to up

RC(config-if)#
RC(config-if)#exit
RC(config)#interface loopback 0

RC(config-if)#
%LINK-5-CHANGED: Interface Loopback0, changed state to up

%LINEPROTO-5-UPDOWN: Line protocol on Interface Loopback0, changed state to up

RC(config-if)#ip address 192.168.31.33 255.255.255.255
RC(config-if)#exit
3.启动OSPF进程并进行宣告:
RC(config)#router ospf 1
RC(config-router)#router-id 192.168.31.33
RC(config-router)#network 192.168.31.33 0.0.0.0 area 0
RC(config-router)#network 192.168.1.0 0.0.0.255 area 0
RC(config-router)#exit
4.保存配置:
RC(config)#do wr
Building configuration...
[OK]
4.验证:
4.1查看RA\AB\RC邻居关系:


4.2查看RA\RB\RC路由表:


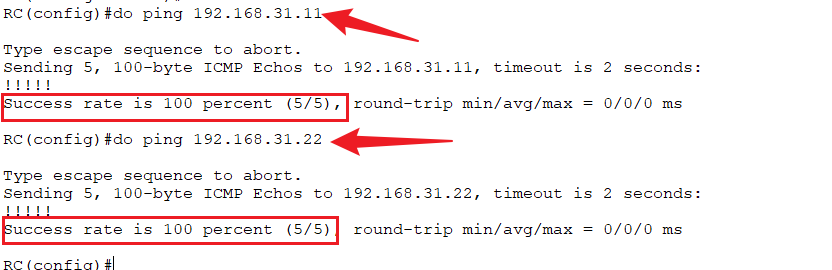
5.测试:
5.1RC访问RA和RB:
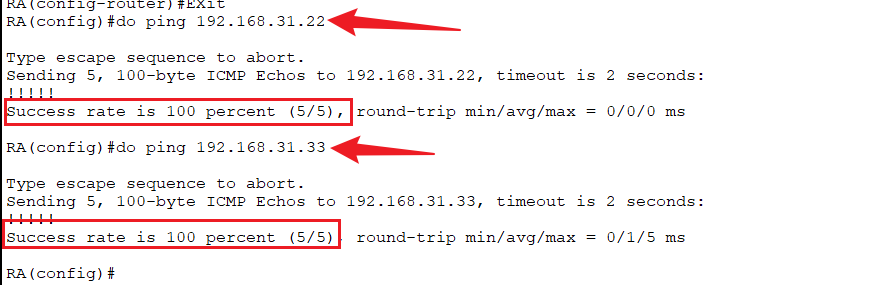
5.2RA访问RB和RC:
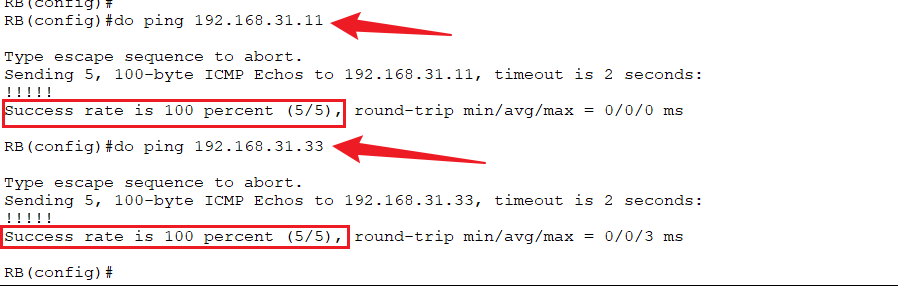
5.3RB访问RA和RC:
到此实验结束!!!