引言
上一部分,简单介绍了什么是MCP协议,并根据官方示例实现了一个STDIO模式的。不过STDIO模式的一般只适用于本地使用,不适合网络共享。同时,由于写上文时,关于Client与SSE服务器的BUG未处理完毕,故在本文主要是展示一下这俩东西的代码。
STDIO实现
见上一部分,或者见下方Github,本部分不再指赘述。
SSE模式实现
导入以来
在STDIO下,我们导入的包为
xml
<dependency>
    <groupId>org.springframework.ai</groupId>
    <artifactId>spring-ai-starter-mcp-server</artifactId>
</dependency>
而在SSE下,本部分改用了webmvc模式的mcp-server开发依赖
xml
<dependency>
    <groupId>org.springframework.ai</groupId>
    <artifactId>spring-ai-starter-mcp-server-webmvc</artifactId>
</dependency>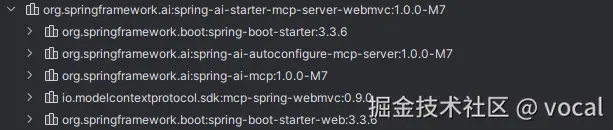
可见,该依赖是上一依赖的超集,多出了spring-boot-starter-web以及mcp-spring-webmvc
实际上仅需这一步,就能将STDIO转成SSE了,不需要再做任何额外更改,这也算是Spring Boot的优势。
定义工具
与STDIO类似,但由于使用网络连接,其编码格式为UTF-8。不需要再像STDIO(window系统)模式一样需要先把编码转回GBK再转到UTF-8了。
java
@Service
public class WeatherService {

    // 响应模板,自然语句格式
    private static final String RESPONSE_TEMPLATE = """
            %s的天气为%s, 气温为%s
            """;

    private final RestClient restClient;

    public WeatherService() {
        String apiUrl = "http://apis.juhe.cn/simpleWeather/query";
        this.restClient = RestClient.builder()
                .baseUrl(apiUrl)
                .defaultHeader("Content-Type", "application/x-www-form-urlencoded")
                .defaultHeader("Accept", "application/json")
                .defaultHeader("User-Agent", "WeatherApiClient/1.0")
                .build();
    }

    @Tool(description = "获得中国的天气信息")
    public String getWeather(
            @ToolParam(description = "城市") String city
    ) throws UnsupportedEncodingException {

        String apiKey = "xxxxxxxxx";
        // 发起网络连接
        RestClient.ResponseSpec retrieve = this.restClient.get()
                .uri("?key=" + apiKey + "&city=" + city)
                .retrieve();
        WeatherPojo body = retrieve.body(WeatherPojo.class);
        try {
            return String.format(RESPONSE_TEMPLATE,
                    city,
                    body.getResult().getRealtime().getInfo(),
                    body.getResult().getRealtime().getTemperature()
            );
        } catch (NullPointerException e) {
            return "抱歉,我无法获取到" + city + "的天气信息";
        }
    }
}
与STDIO相同
java
@SpringBootApplication
public class McpServerSseApplication {

    public static void main(String[] args) {
        SpringApplication.run(McpServerSseApplication.class, args);
    }

    // 需要先把对应的类注册为工具
    @Bean
    public ToolCallbackProvider weatherTools(WeatherService weatherService) {
        return  MethodToolCallbackProvider.builder().toolObjects(weatherService).build();
    }
}
Client实现
依赖导入
xml
<dependency>
    <groupId>org.springframework.ai</groupId>
    <artifactId>spring-ai-starter-mcp-client</artifactId>
</dependency>

<dependency>
    <groupId>org.springframework.ai</groupId>
    <artifactId>spring-ai-starter-model-ollama</artifactId>
</dependency>
配置信息
有两种配置方式,命令模式与sse模式
json
{
  "mcpServers": {  // 这是必须的
    "mcp-server": {  // 名字自己起
      "command": "java",
      "args": [
        "-jar",
        "D:\Documents\IdeaProjects\mcp-server\target\mcpserver-0.0.1-SNAPSHOT.jar"
      ]
    },
    "sse-server": {  // 名字自己起
        "url": "http://localhost:8080/sse"
    }
  }
}
ini
// 这个是要有的,不然tools无法被自动注册
spring.ai.mcp.client.toolcallback.enabled=true
下面是Spring AI的文档内容
When tool callbacks are enabled, the registered MCP Tools with all MCP clients are provided as a ToolCallbackProvider instance:
构造Chat客户端
java
@Configuration
public class ChatClientConfig {

    @Bean
    // 必须spring.ai.mcp.client.toolcallback.enabled=true
    // ToolCallbackProvider才能被导入
    public ChatClient chatClient(ChatClient.Builder chatClientBuilder, ToolCallbackProvider tools) {
        return chatClientBuilder
                .defaultTools(tools)
                .build();
    }
}
主函数
在 Spring Boot 完成应用上下文初始化并启动后立即运行。CommandLineRunner 是 Spring Boot 提供的一个接口,用于在应用启动后执行一些自定义逻辑。
java
@SpringBootApplication
public class McpClientApplication  {

    @Autowired
    private ChatClient chatClient;

    public static void main(String[] args) {
        SpringApplication.run(McpClientApplication.class, args);
    }

    @Bean
    public CommandLineRunner predefinedQuestions(ConfigurableApplicationContext context) {

        return args -> {
            System.out.println(">>> ASSISTANT: " + chatClient
                    .prompt()
                    .user("今天福州这个城市天气怎么样")
                    .call()
                    .content());
            context.close();
        };
    }
}
GitHub
具体的代码以及依赖在该代码库里 github.com/Vocal-map/m...