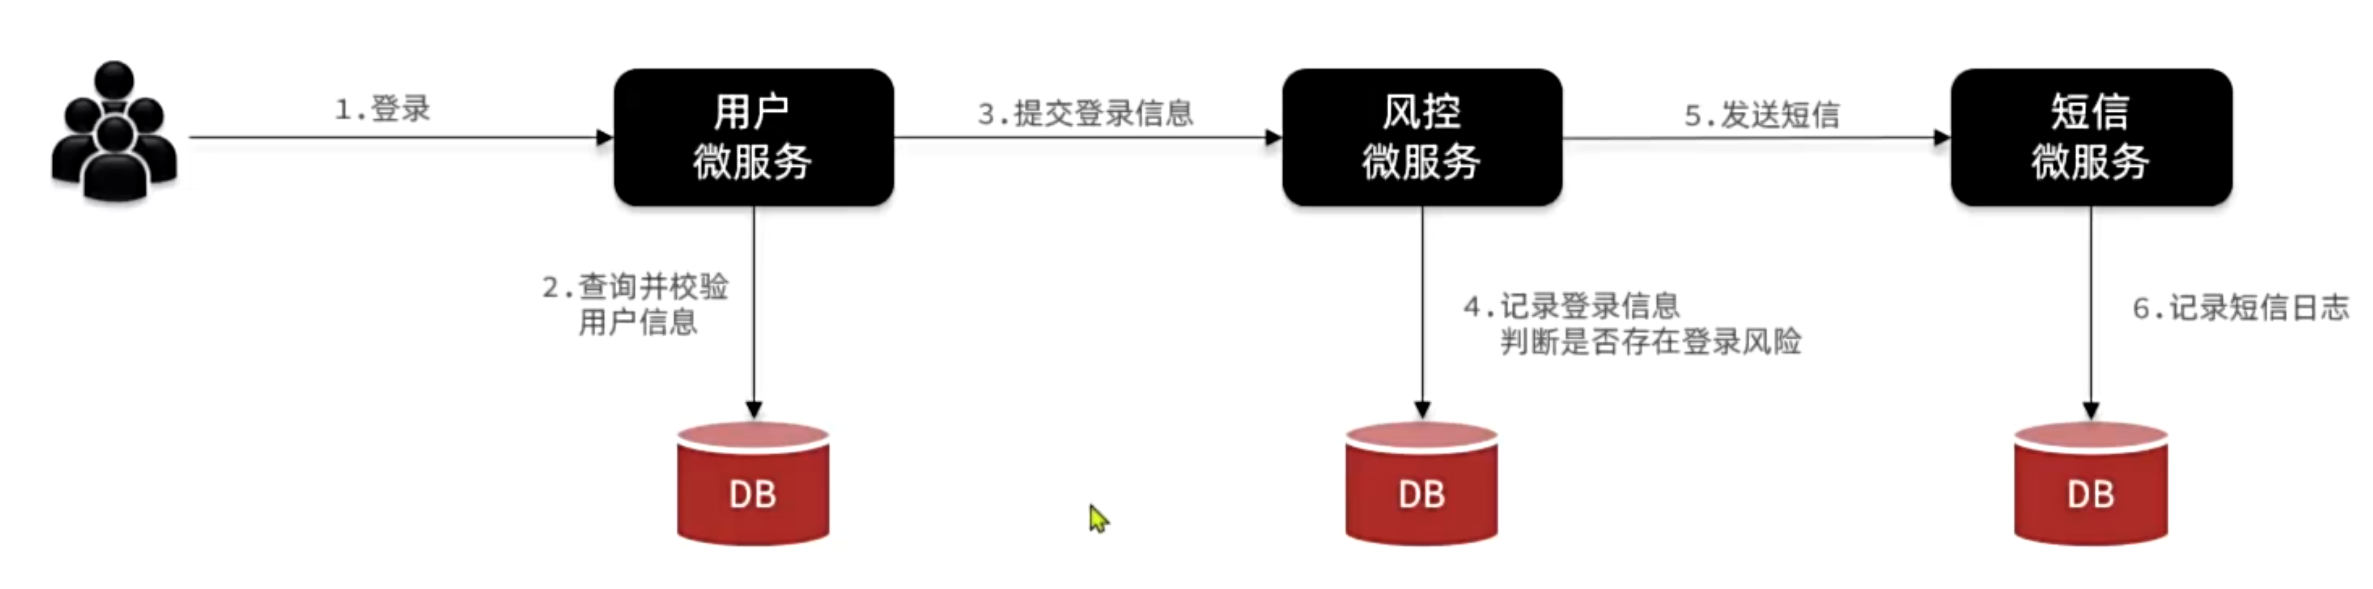
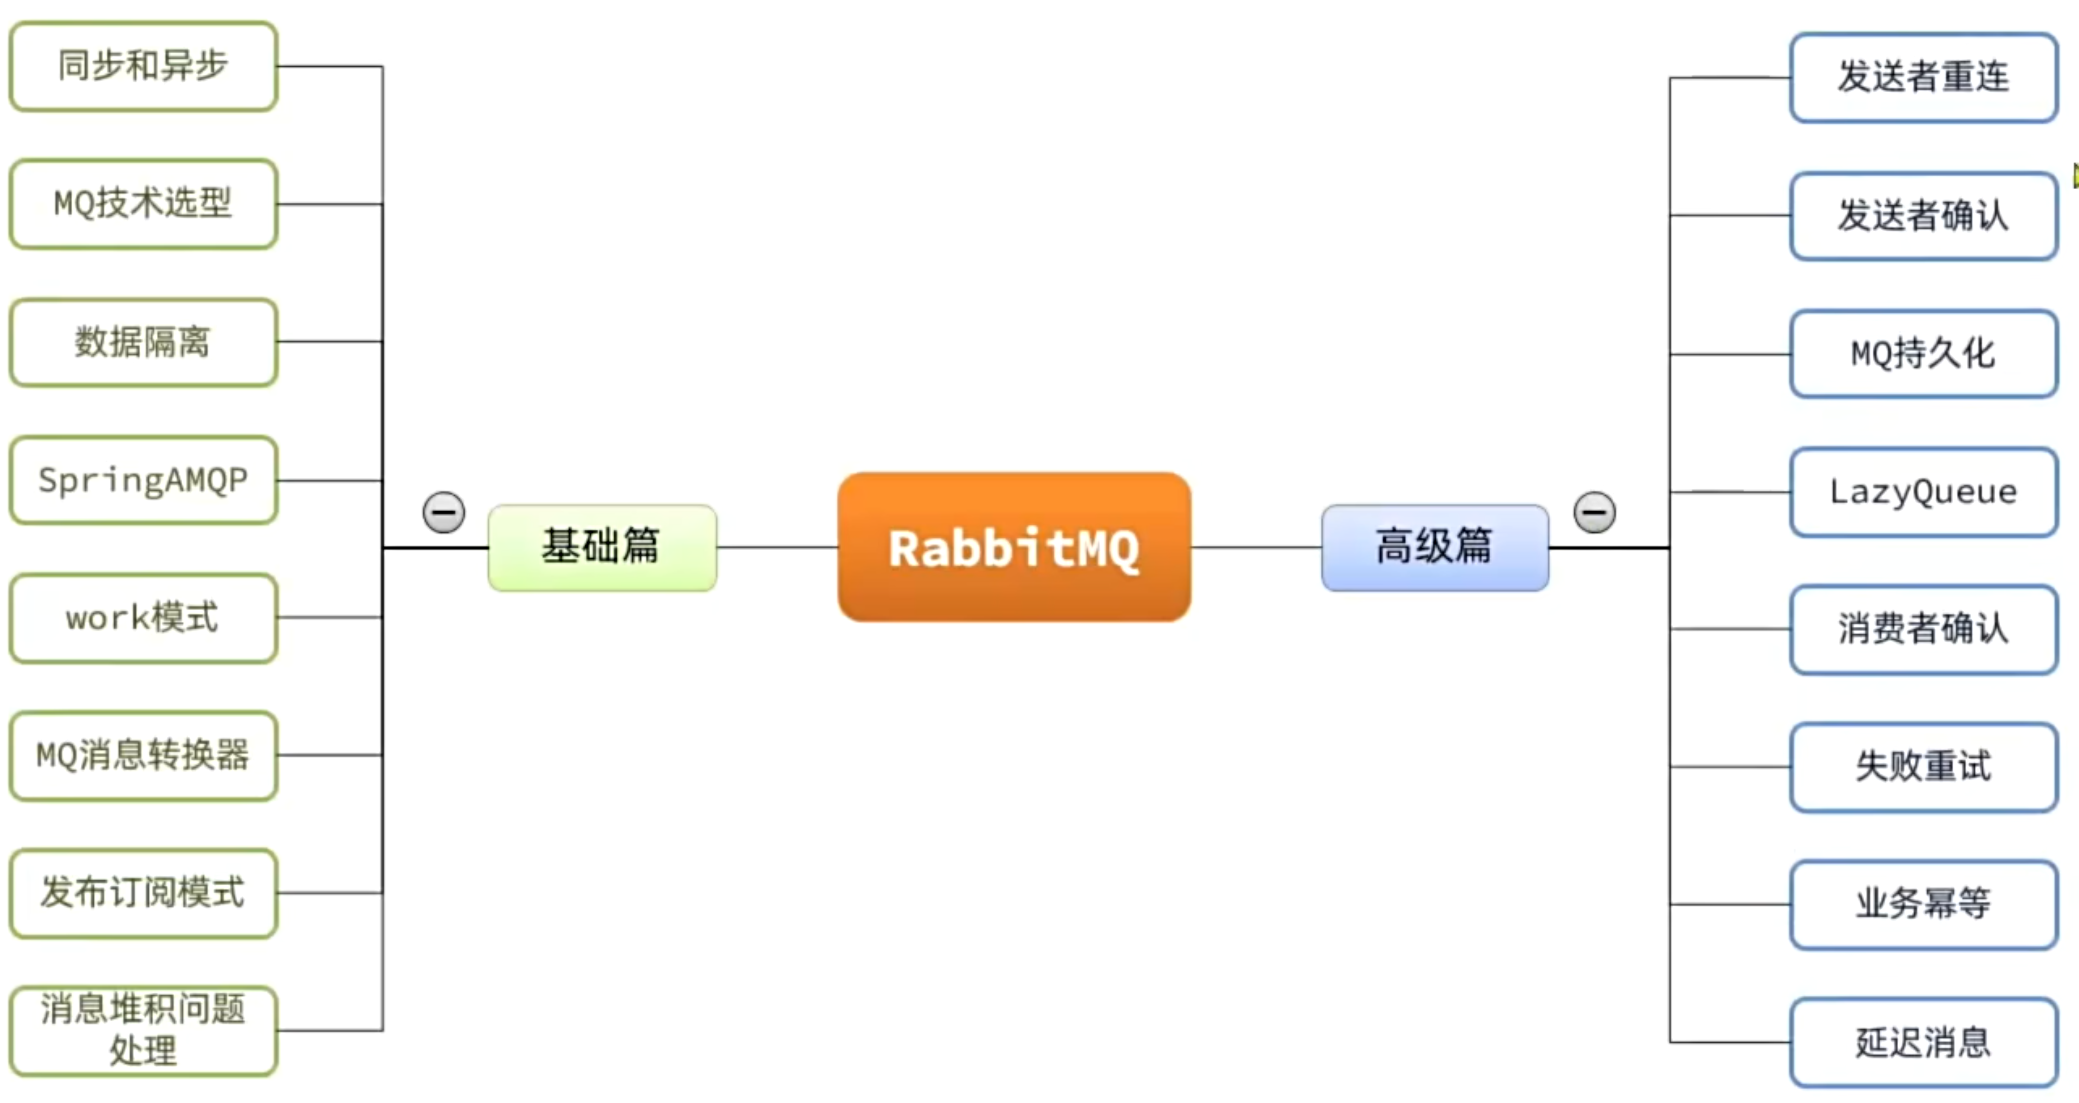
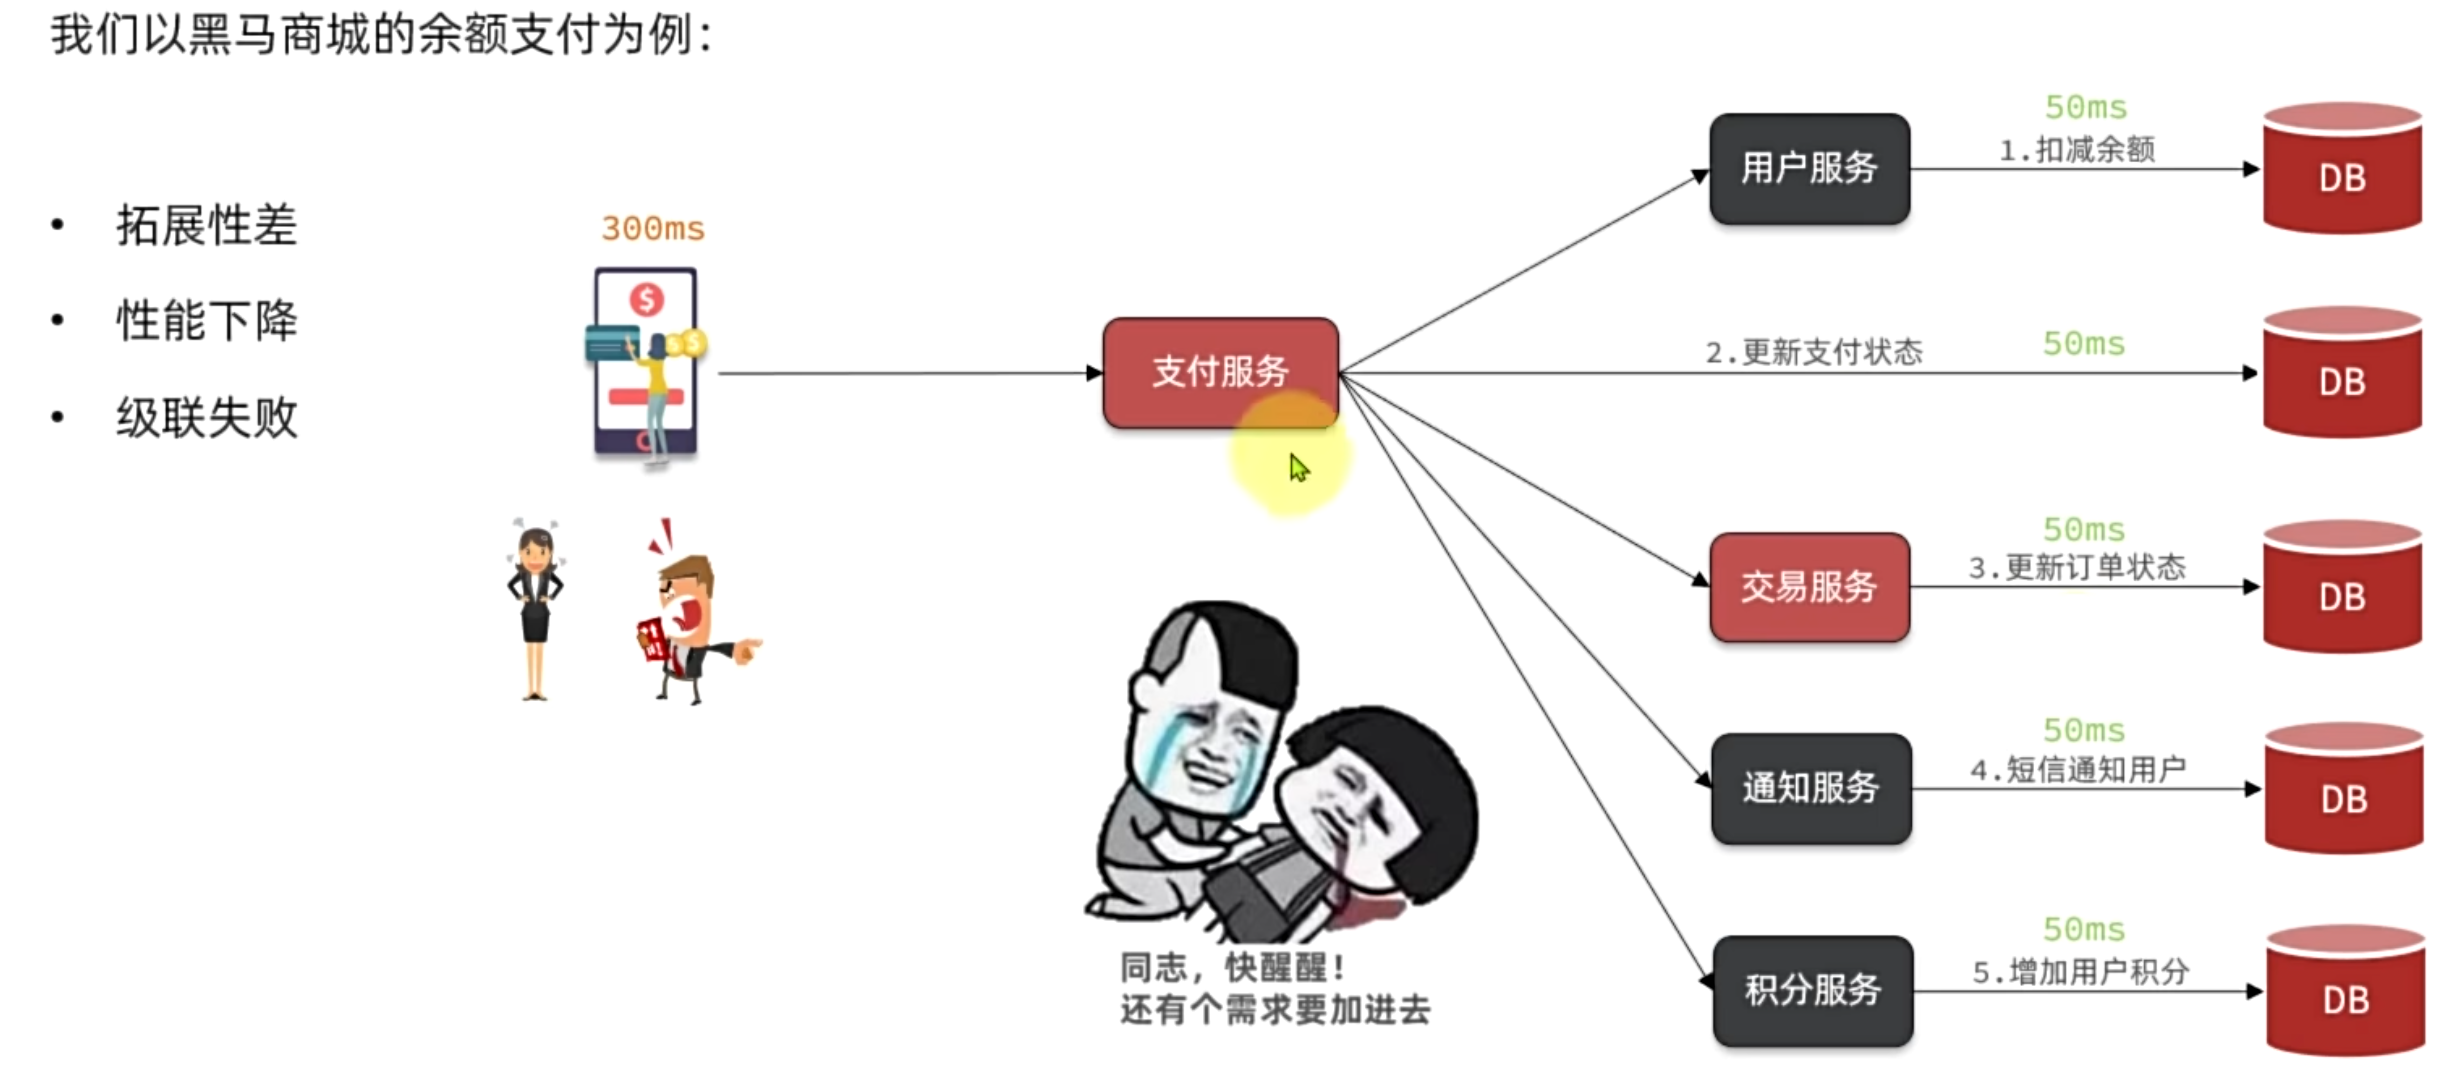
一、同步调用
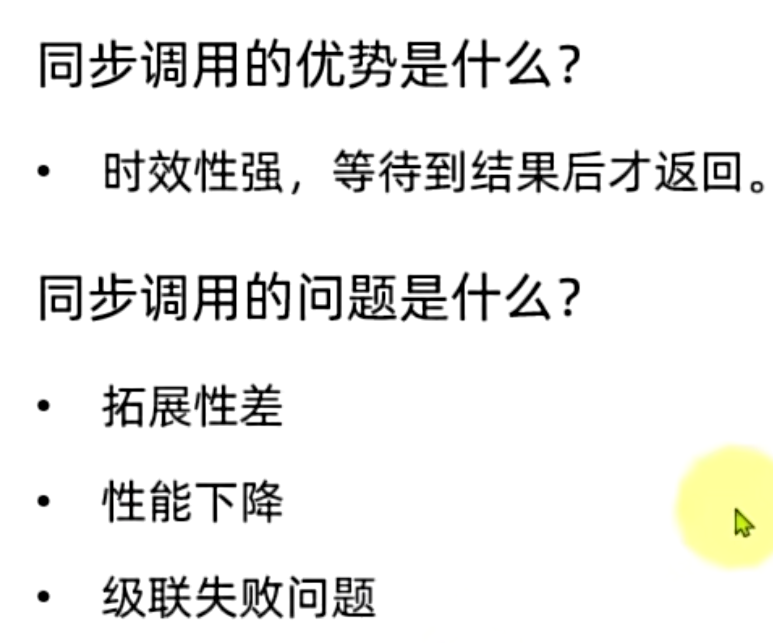
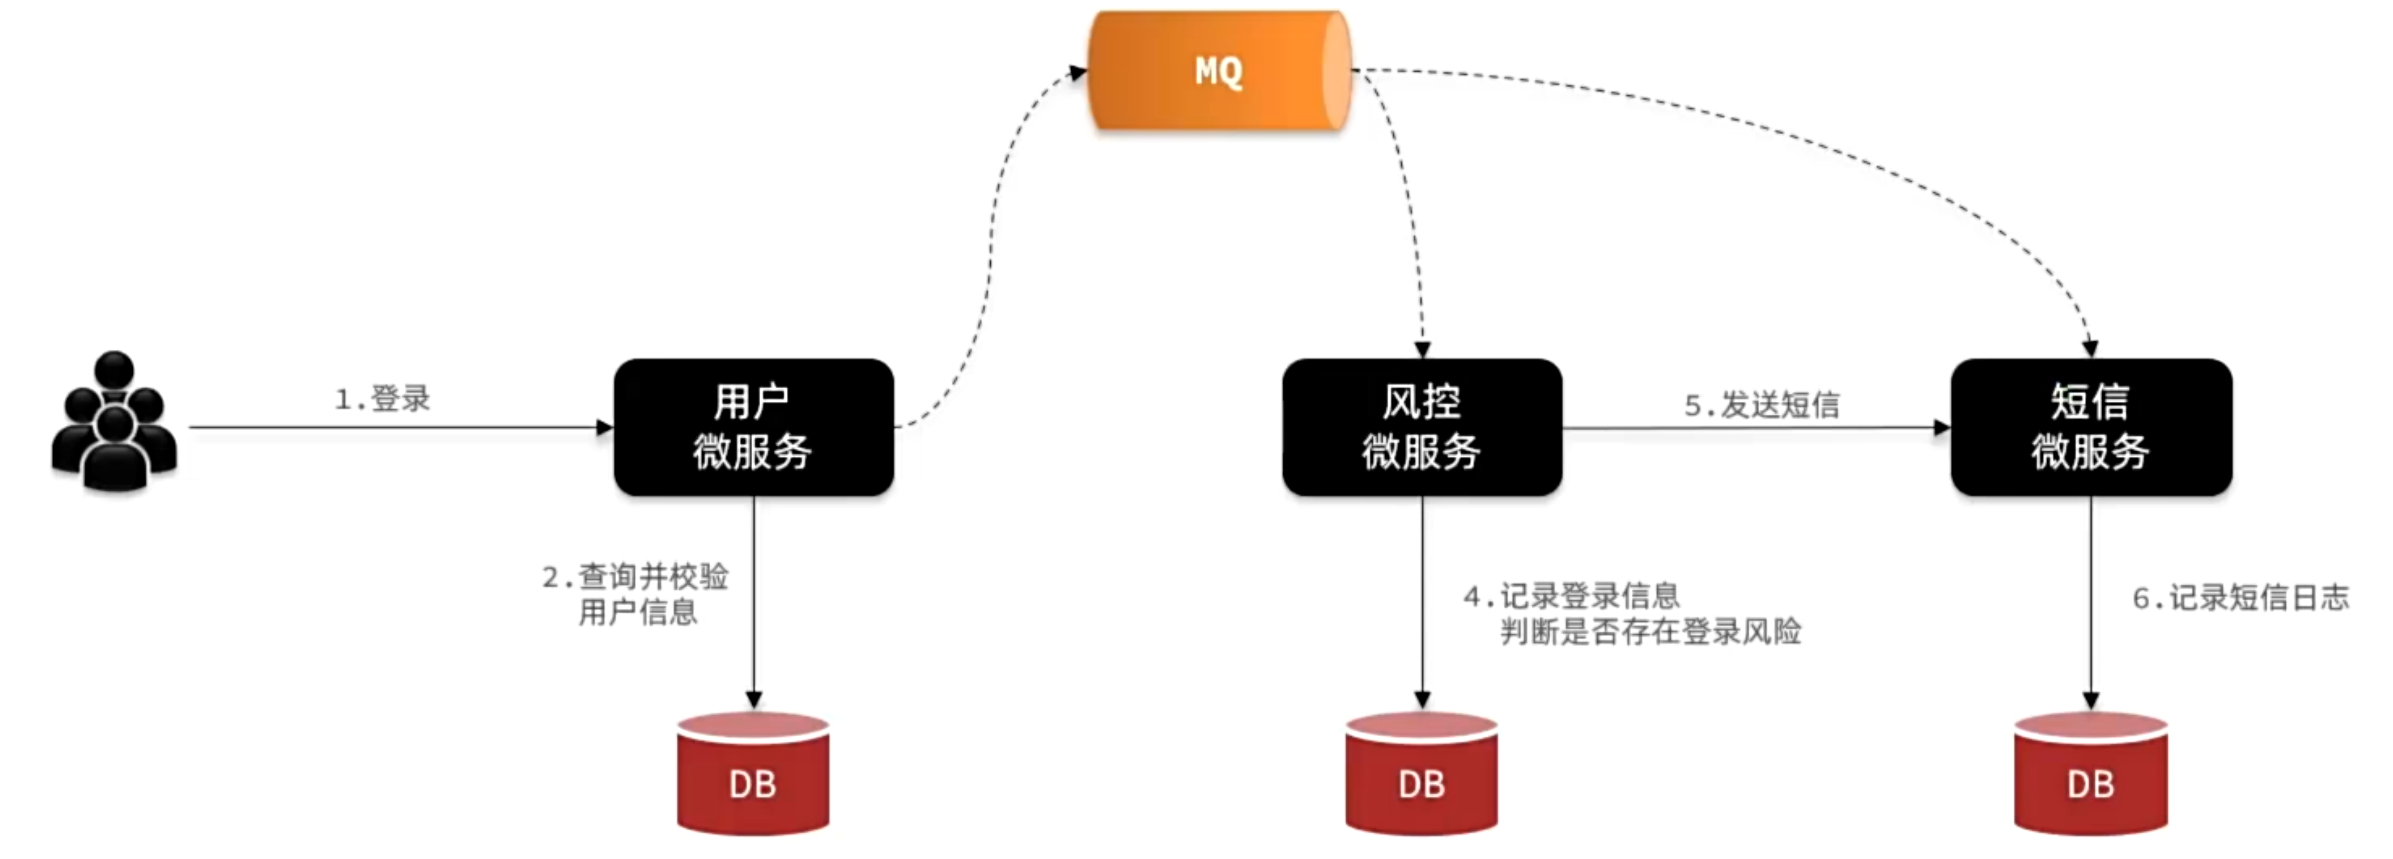
二、异步调用
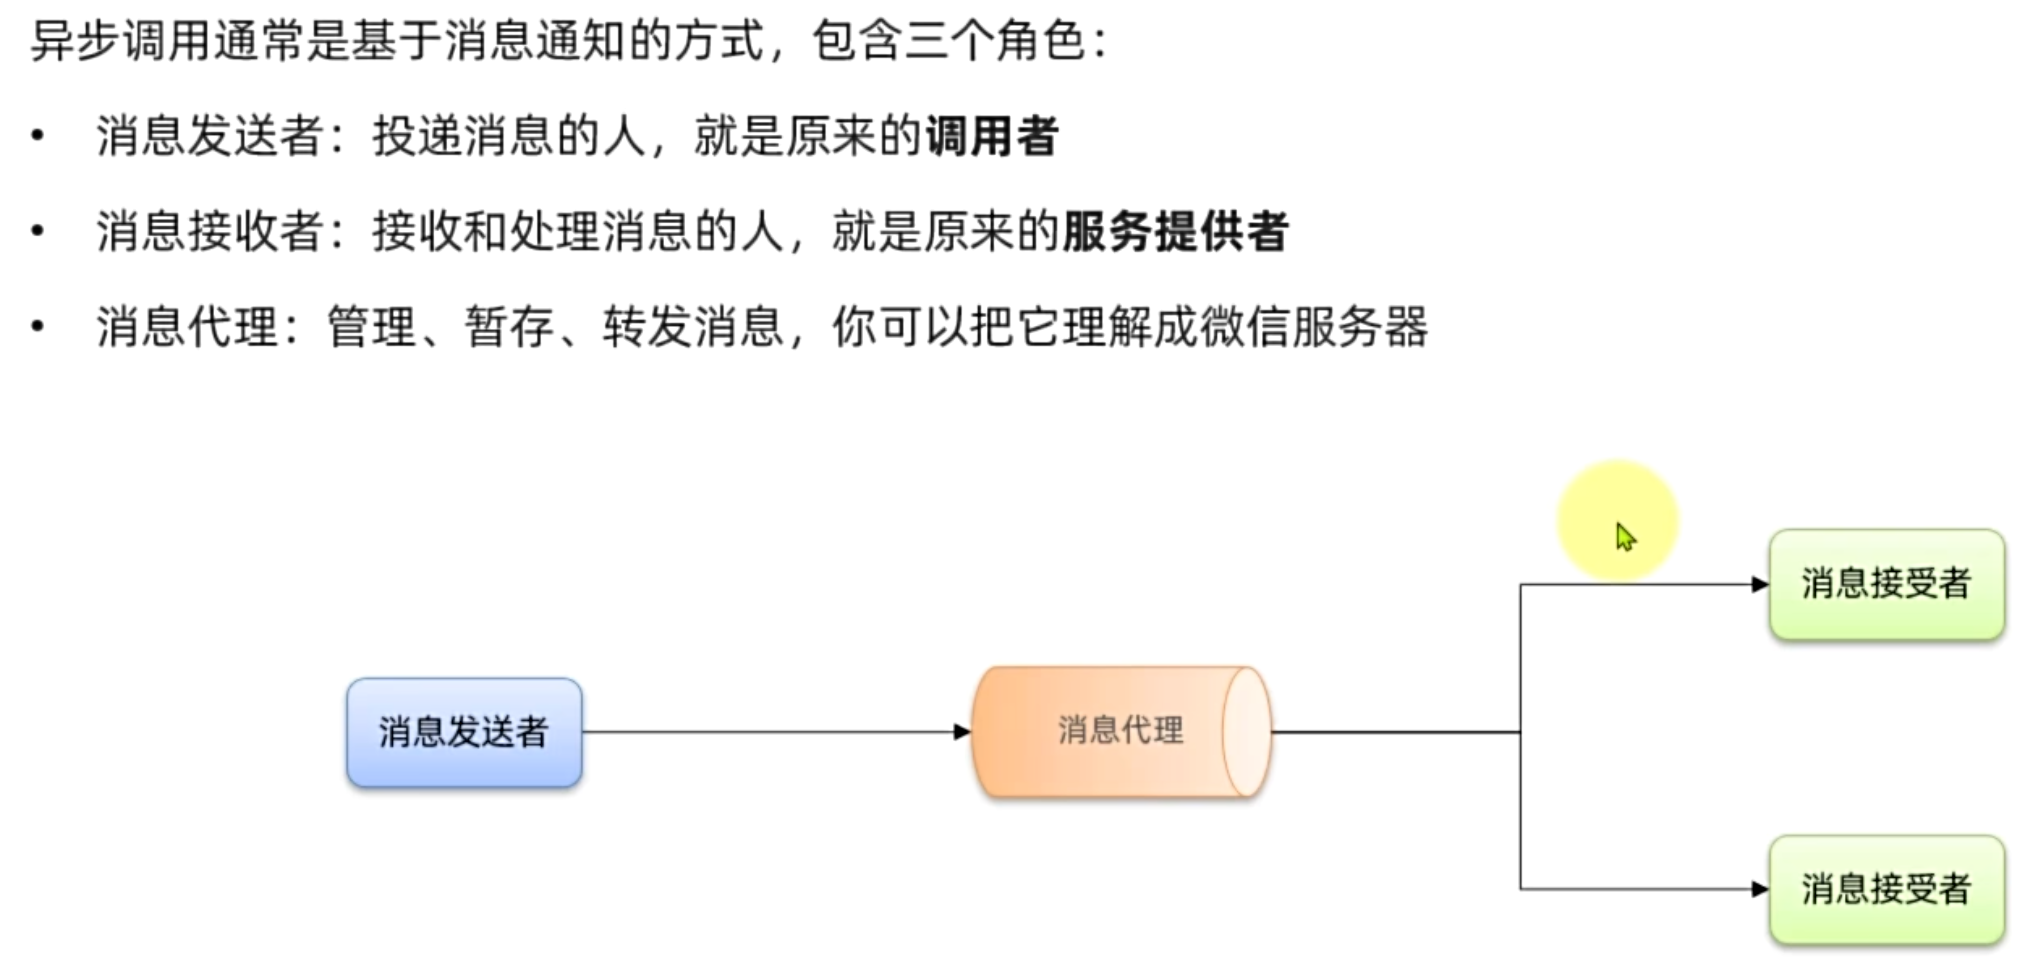
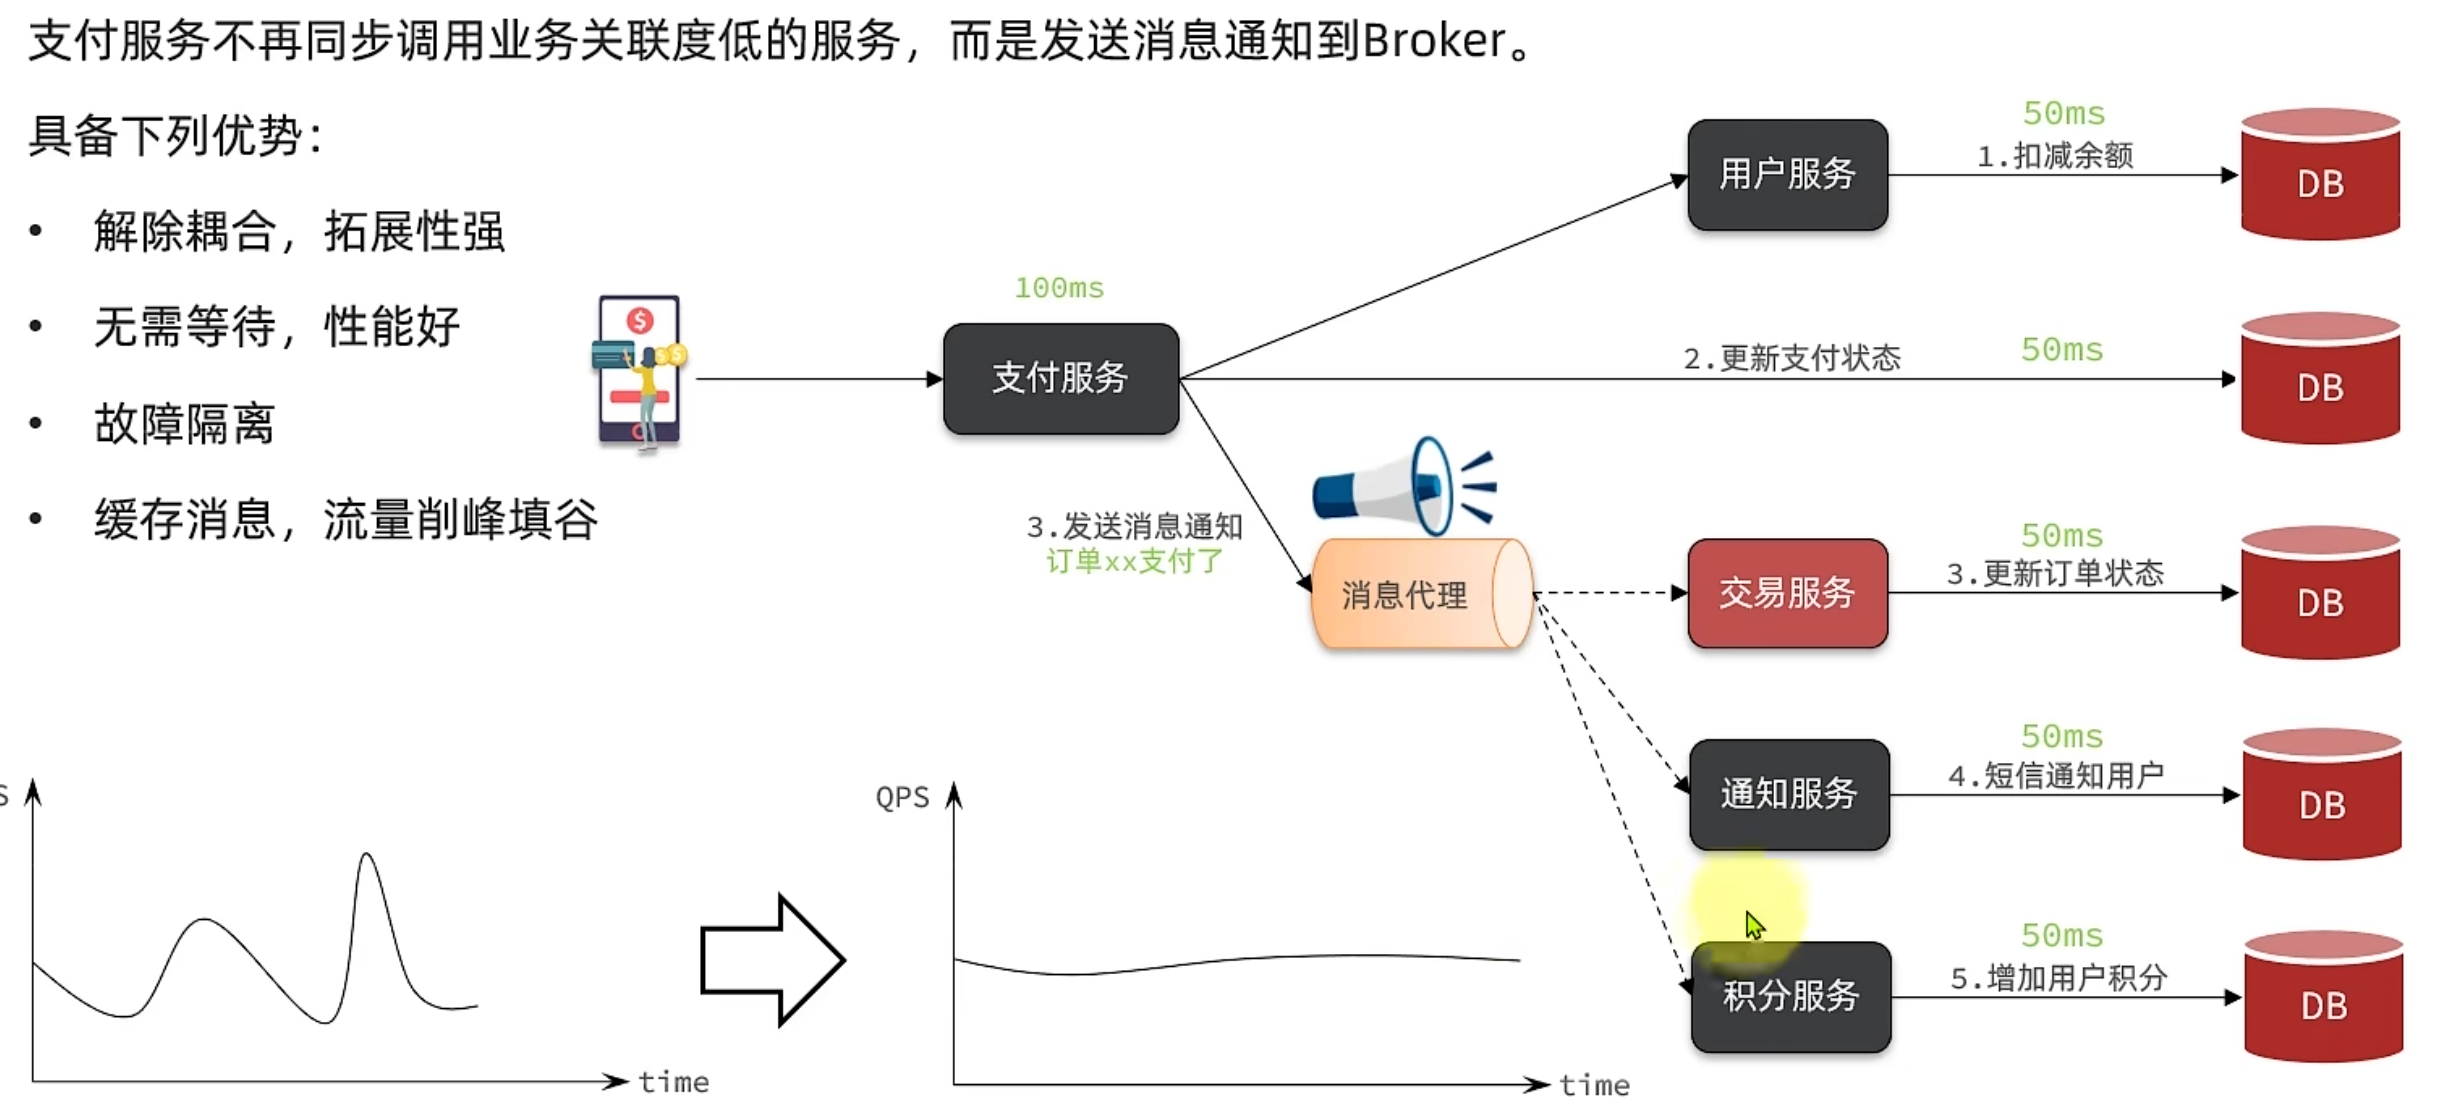
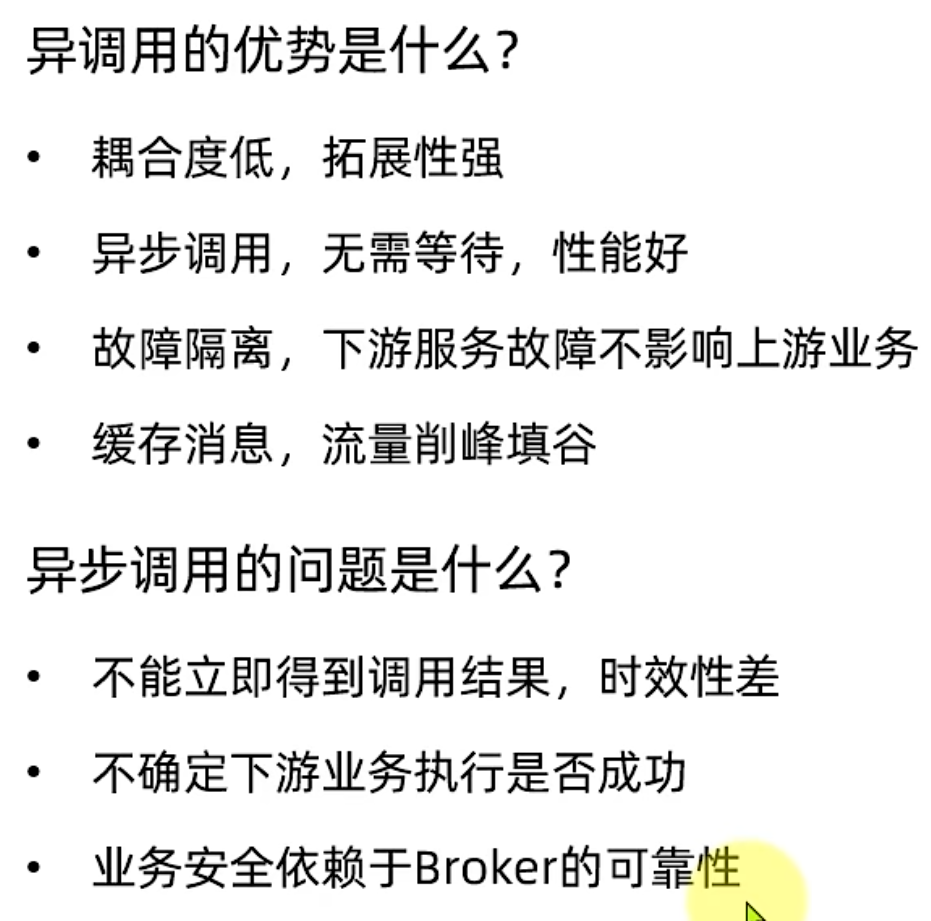
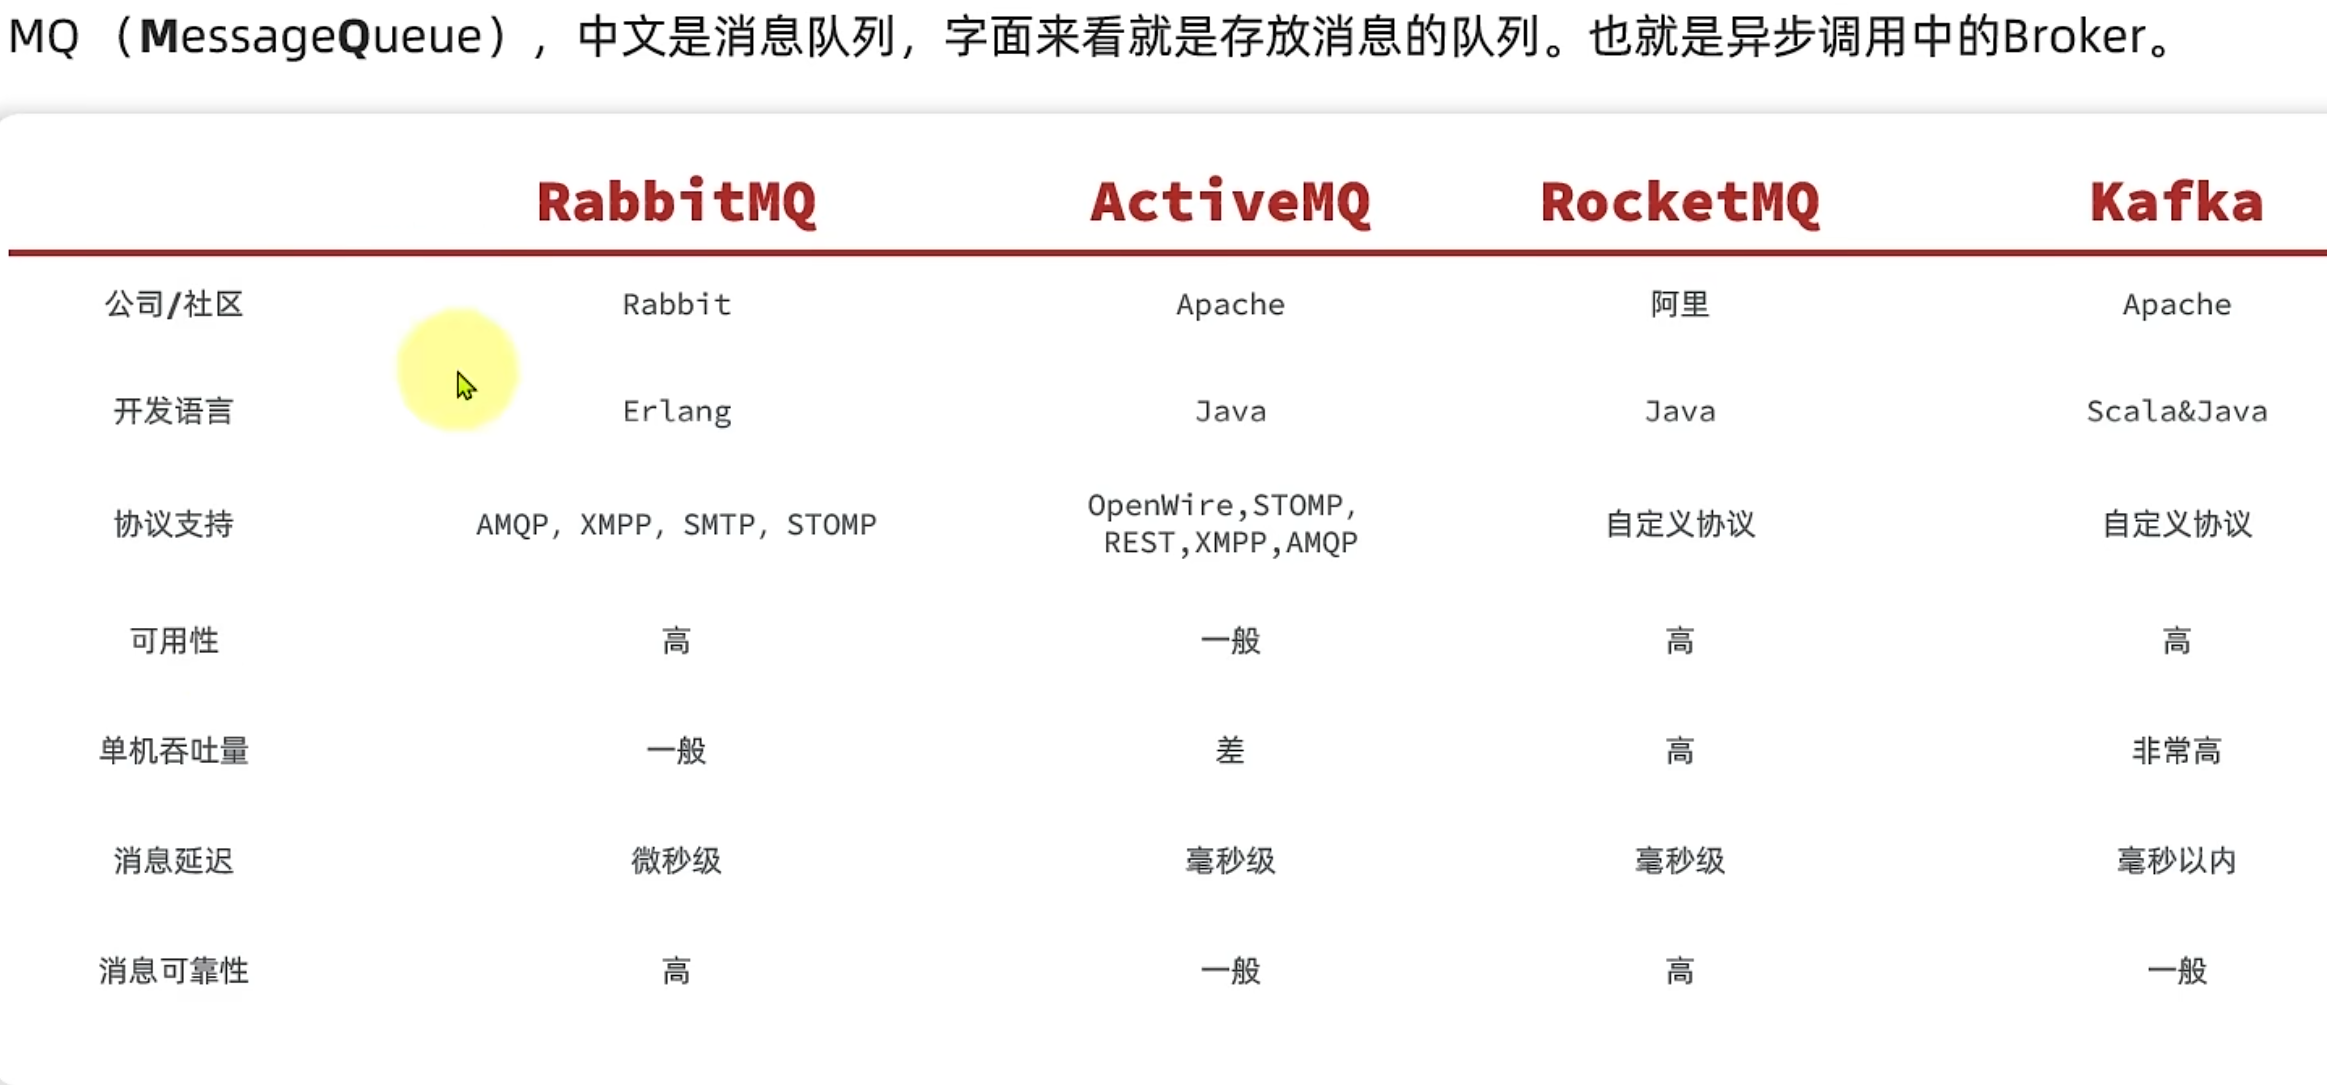
三、MQ技术选型
快速Docker部署:
bash
docker run \
 -e RABBITMQ_DEFAULT_USER=itheima \
 -e RABBITMQ_DEFAULT_PASS=123321 \
 -v mq-plugins:/plugins \
 --name mq \
 --hostname mq \
 -p 15672:15672 \
 -p 5672:5672 \
 --network hmall\
 -d \
 rabbitmq:3.8-management
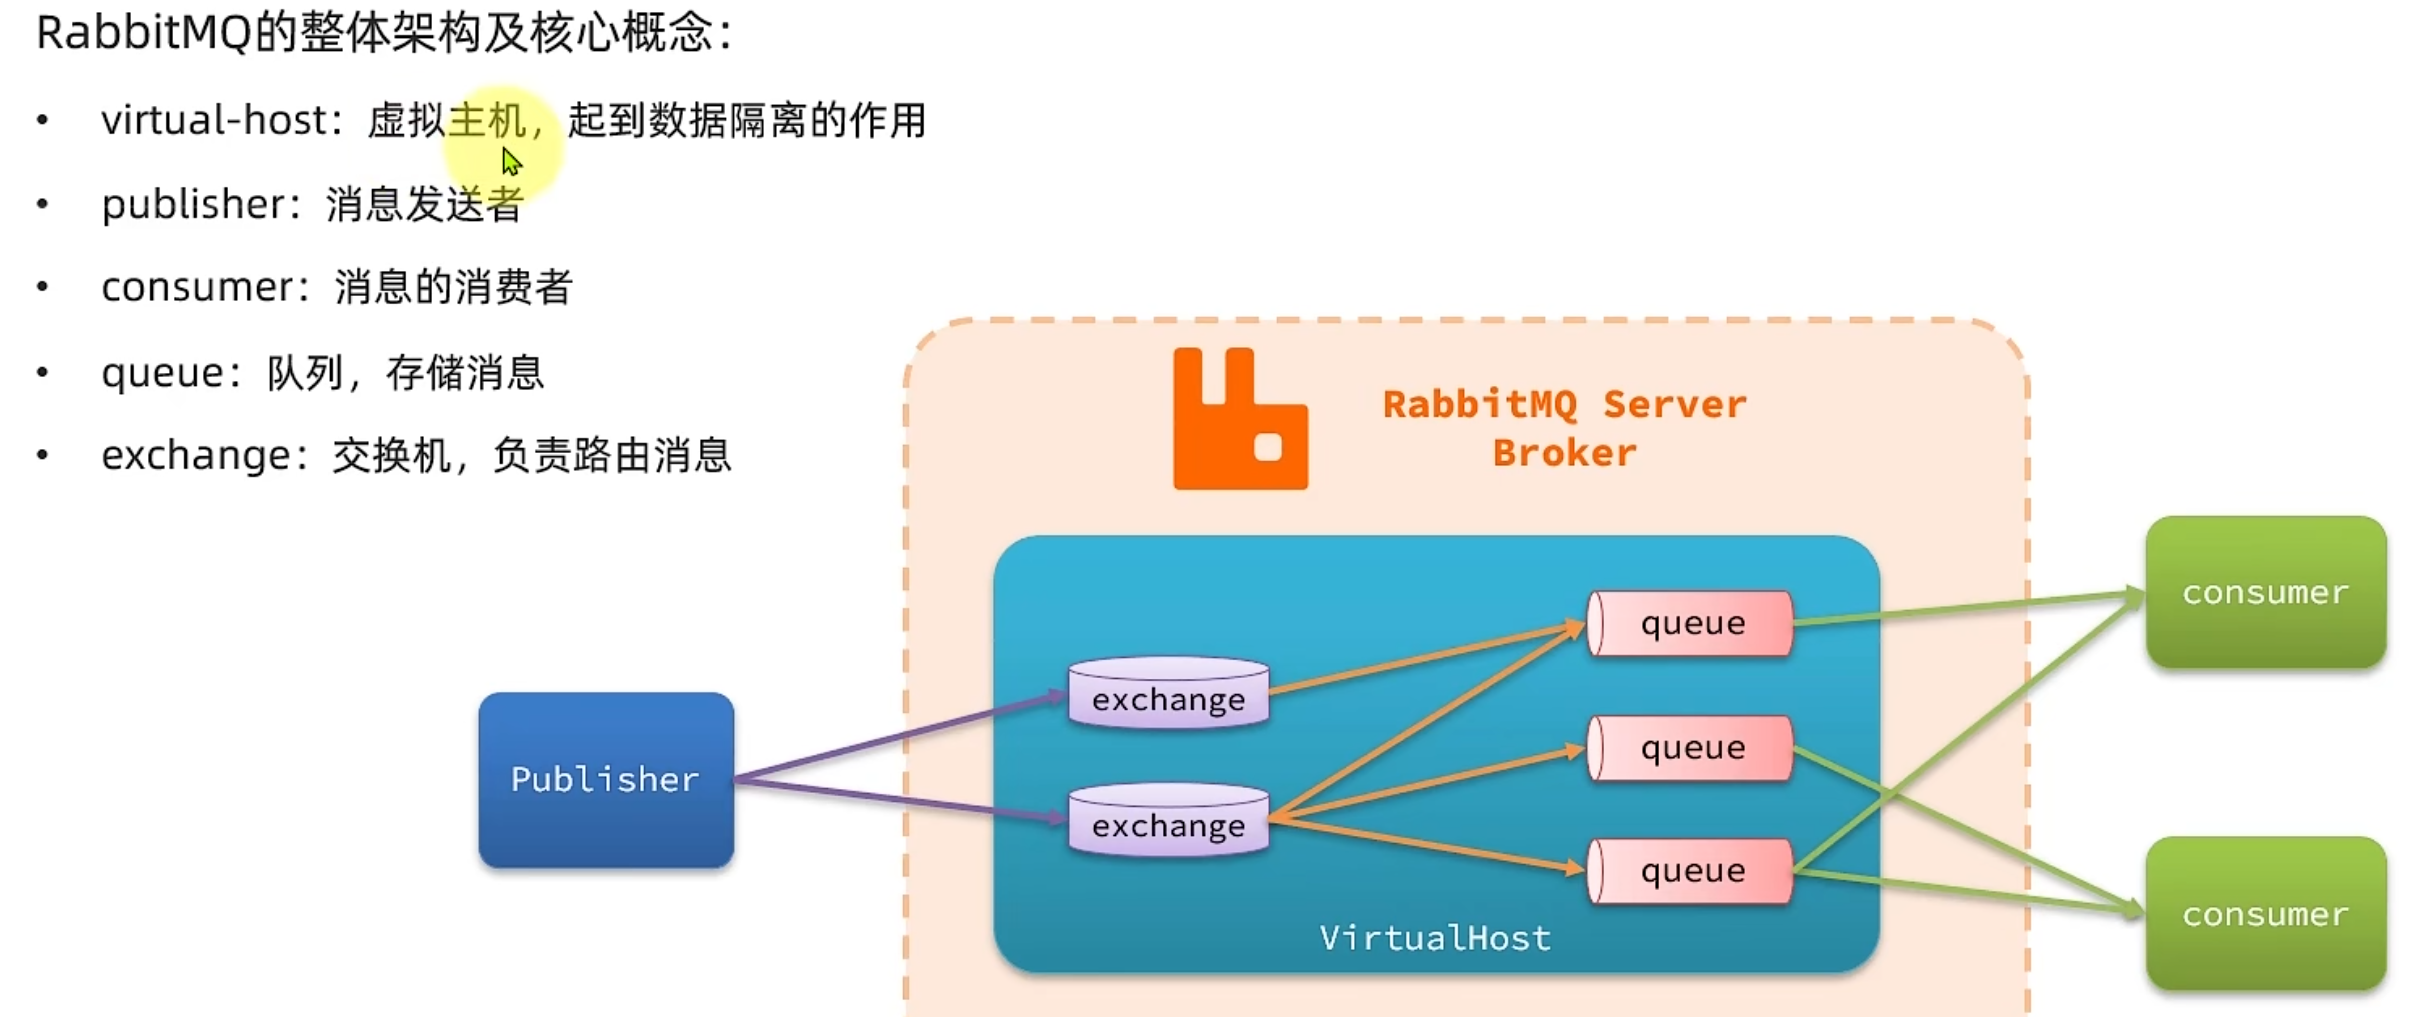
RabbitMQ:
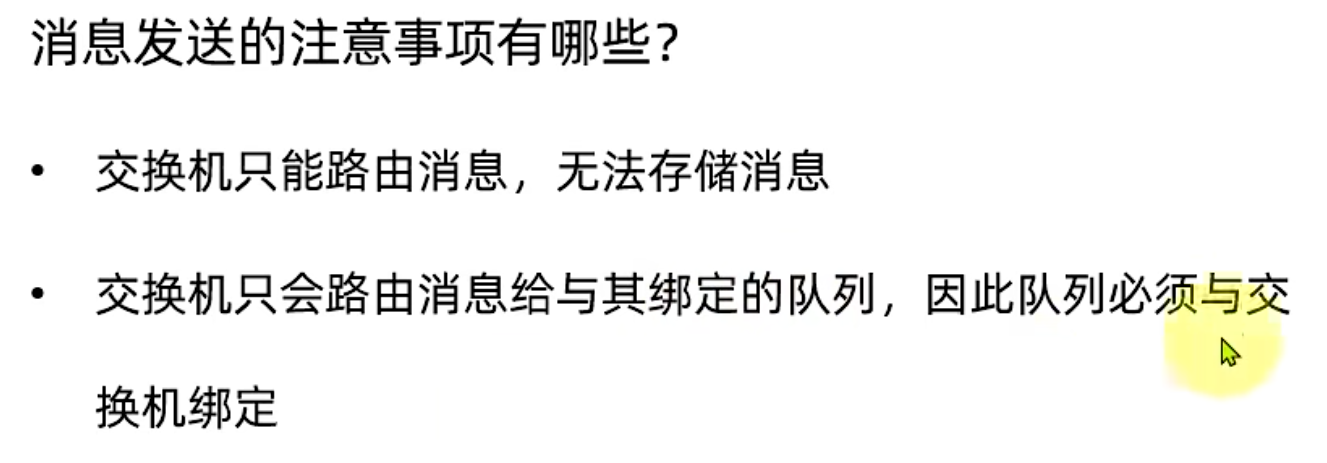
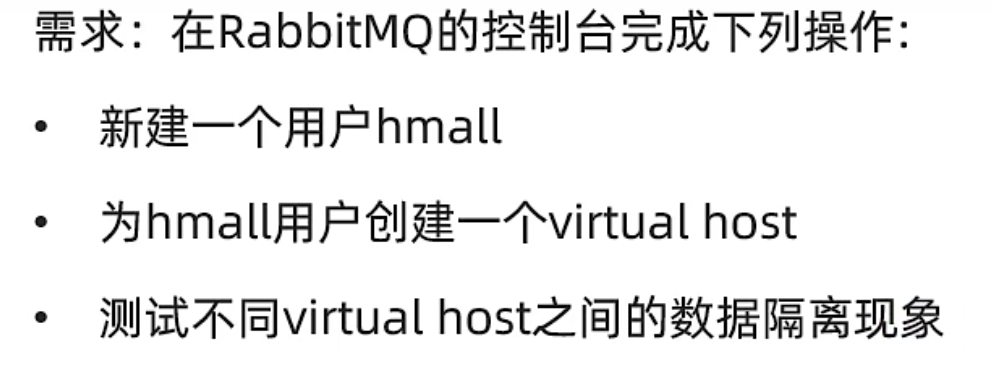
数据隔离:
案例:
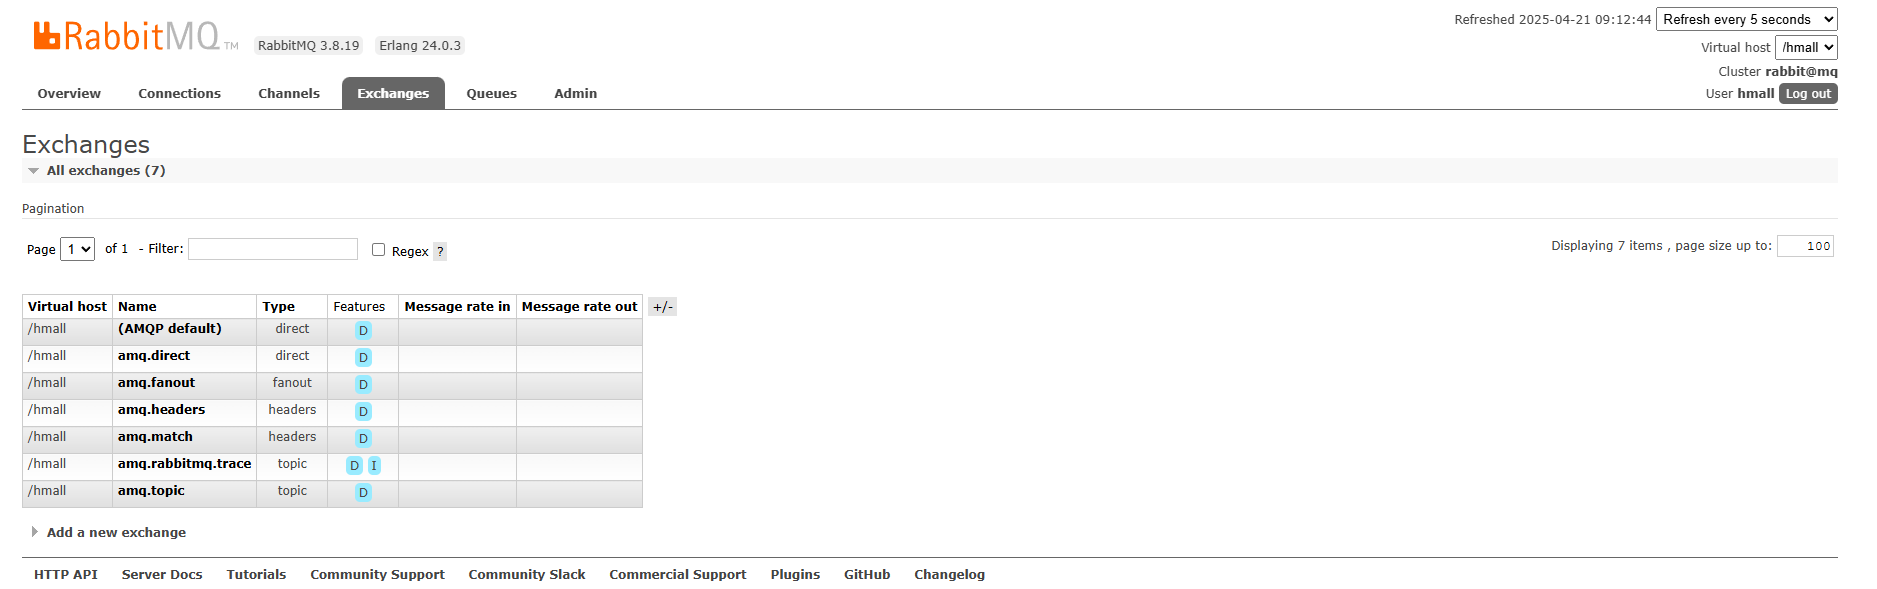
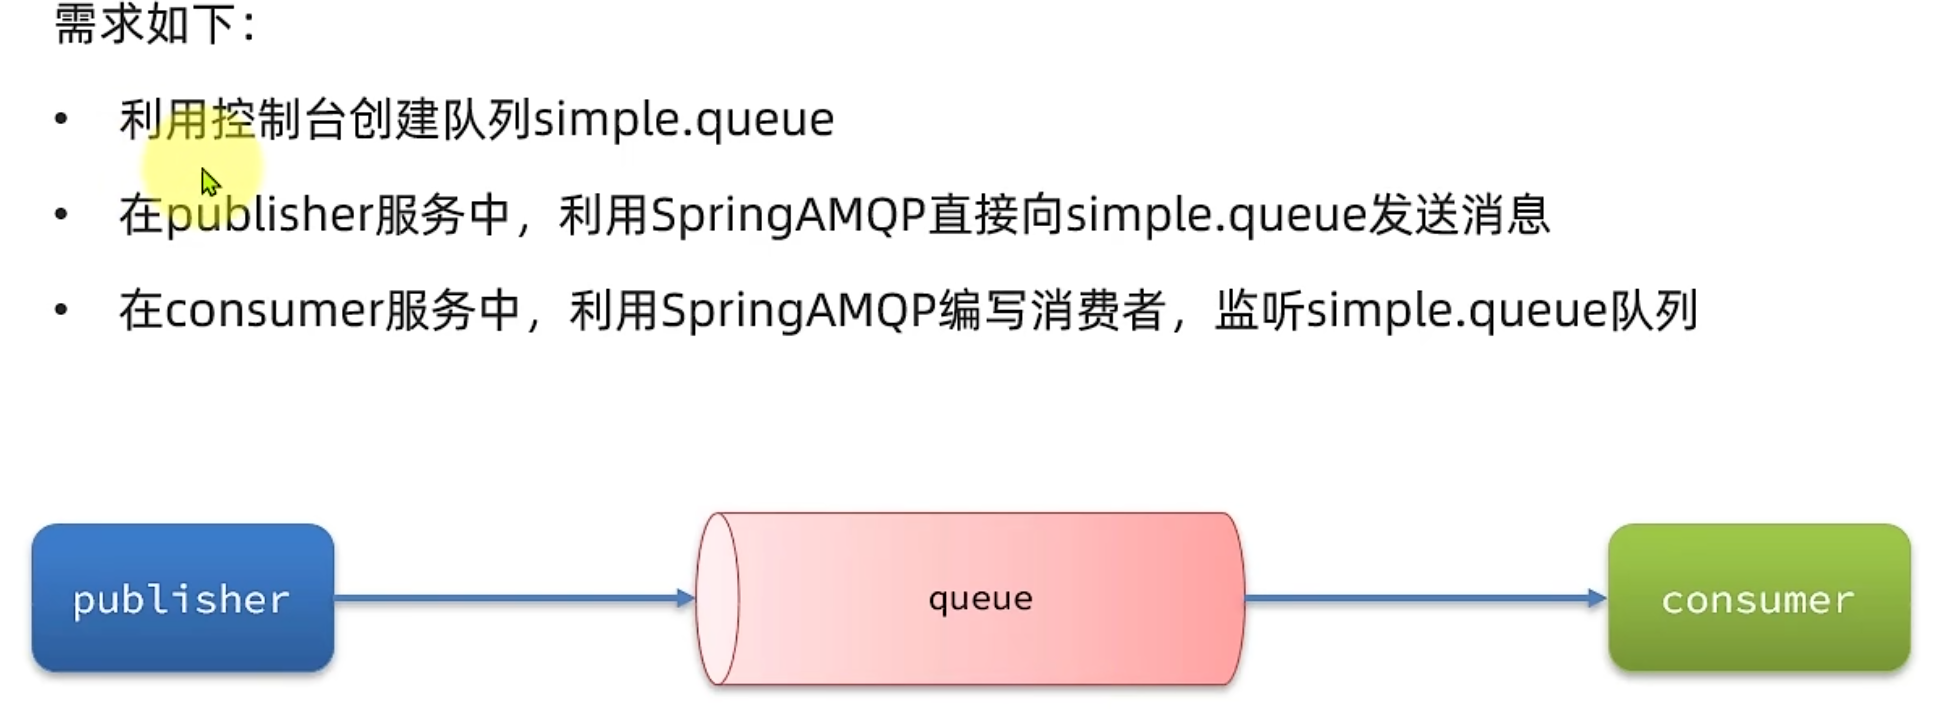
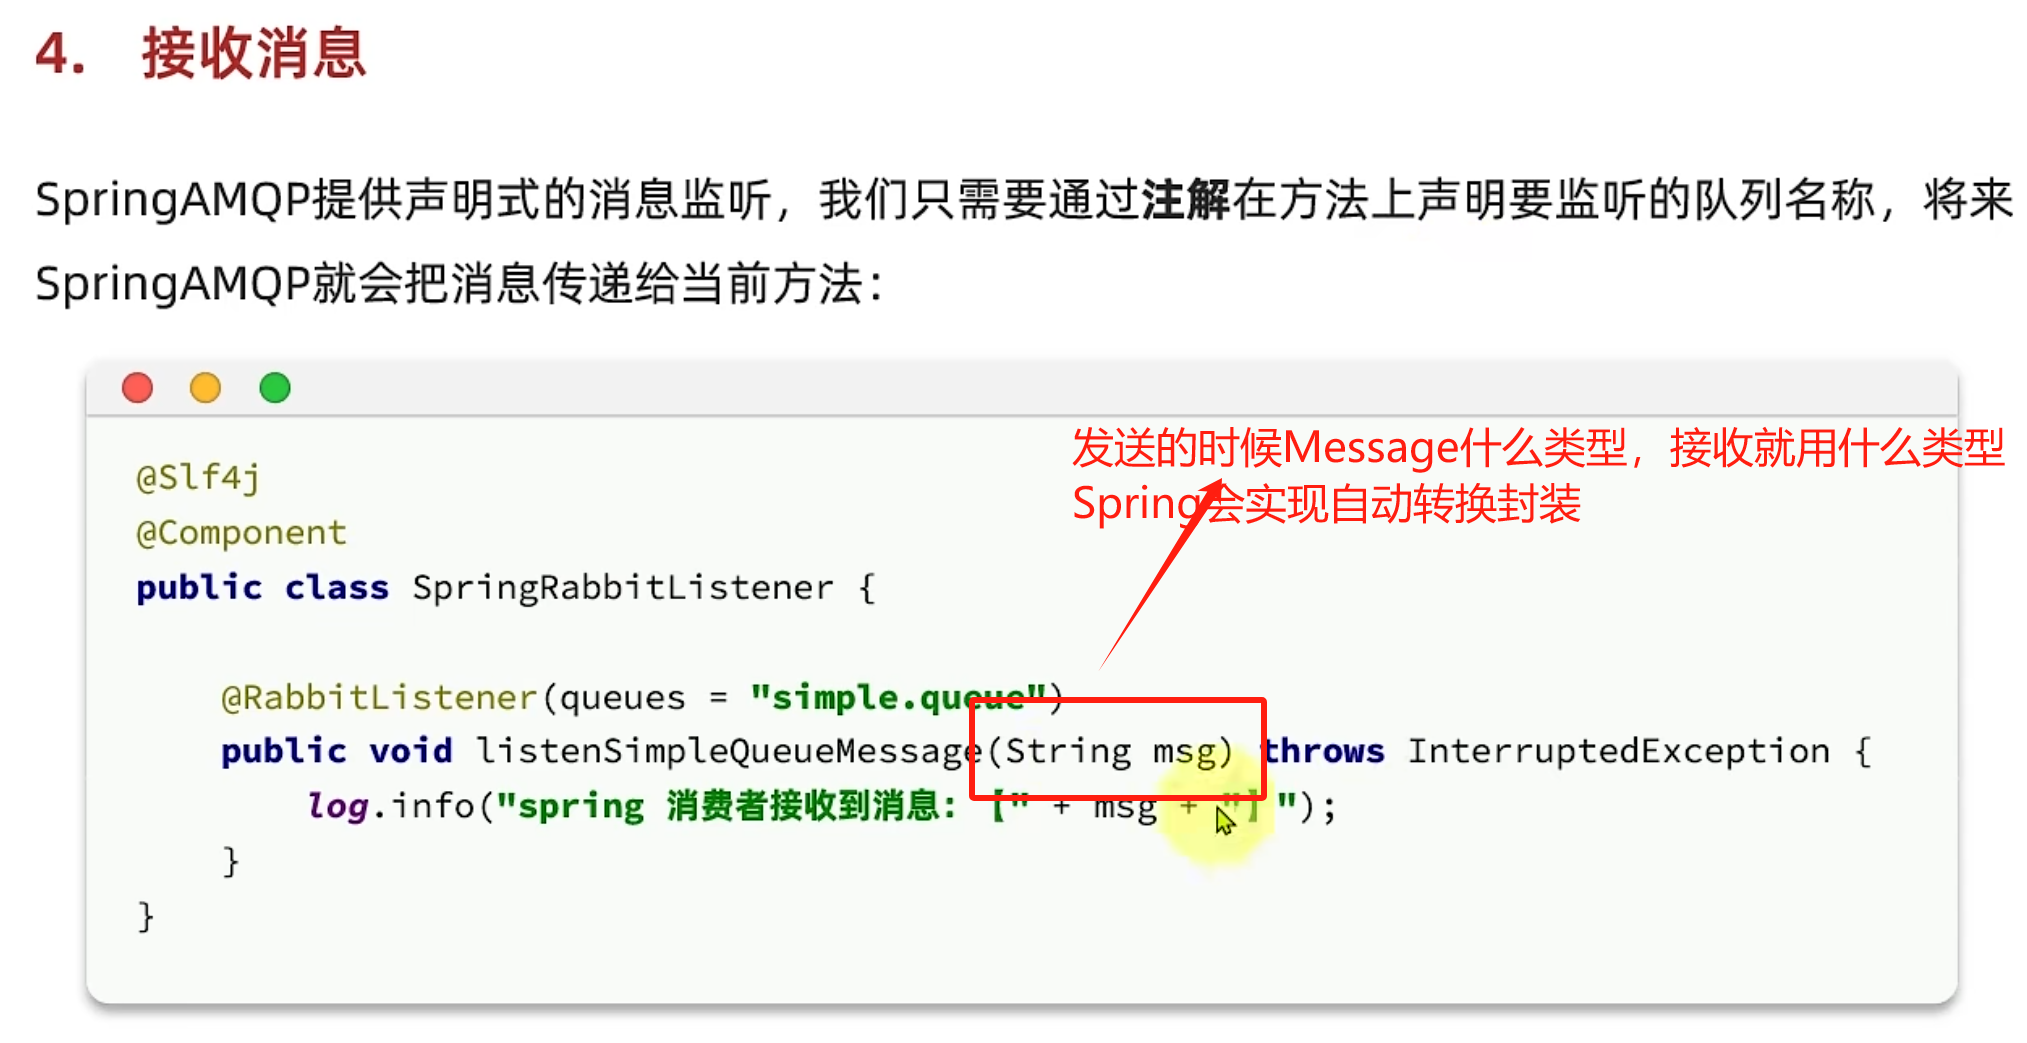
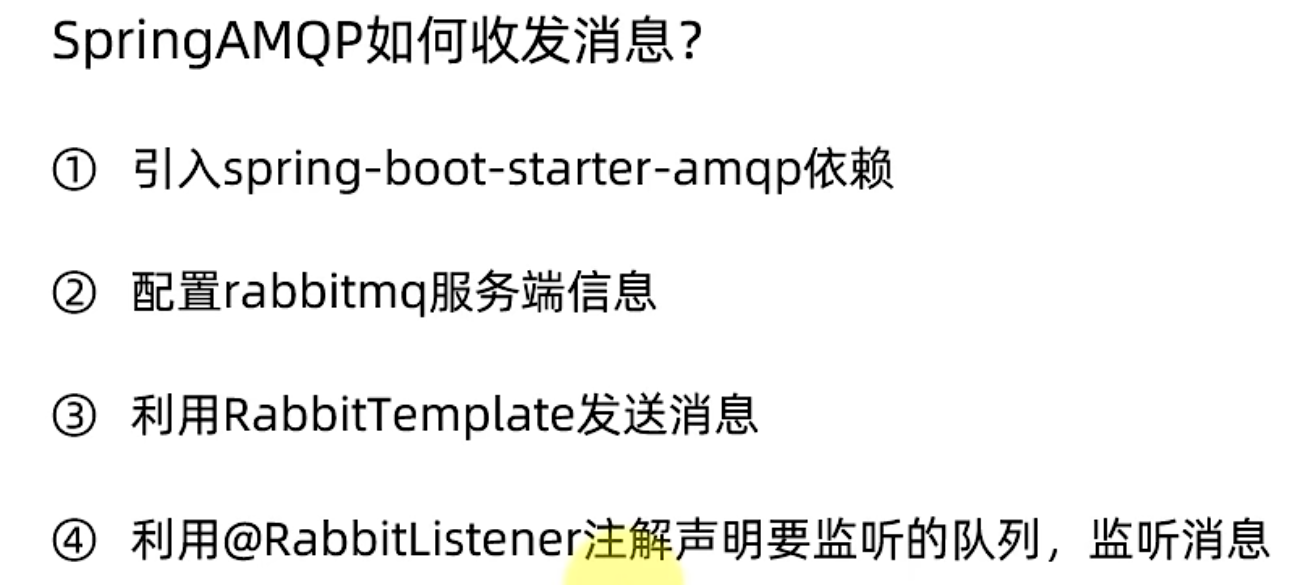
快速入门(实现基于MQ收发消息):
bash
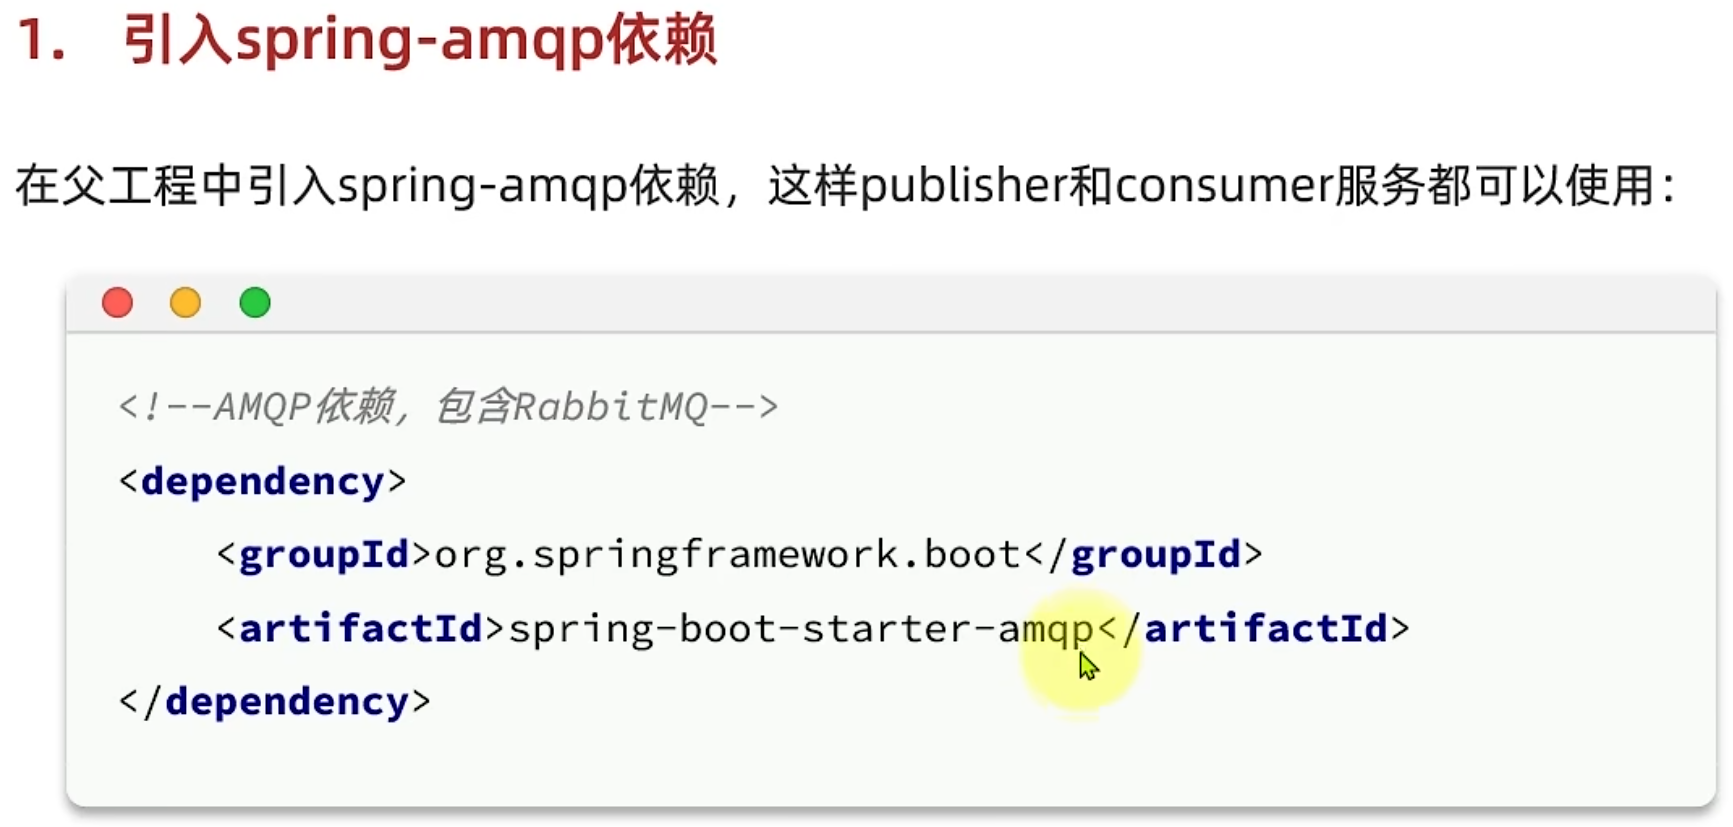
        <!--AMQP依赖,包含RabbitMQ-->
        <dependency>
            <groupId>org.springframework.boot</groupId>
            <artifactId>spring-boot-starter-amqp</artifactId>
        </dependency>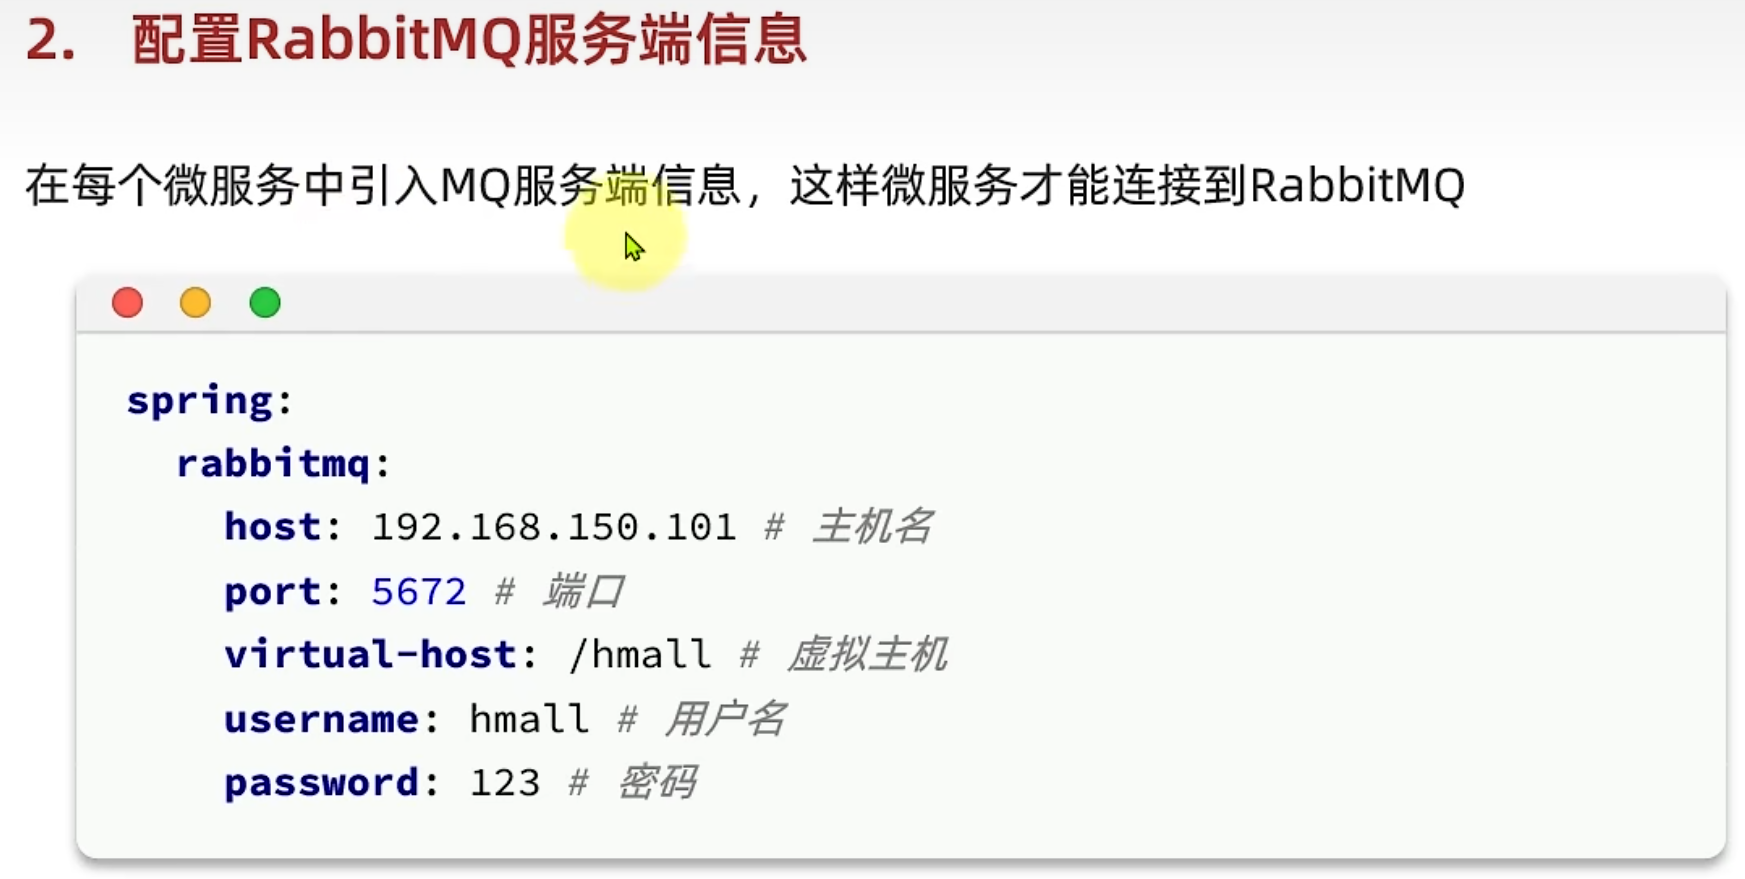
bash
spring:
  rabbitmq:
    host: 192.168.50.129 # 你的虚拟机IP
    port: 5672 # 端口
    virtual-host: /hmall # 虚拟主机
    username: hmall # 用户名
    password: 123 # 密码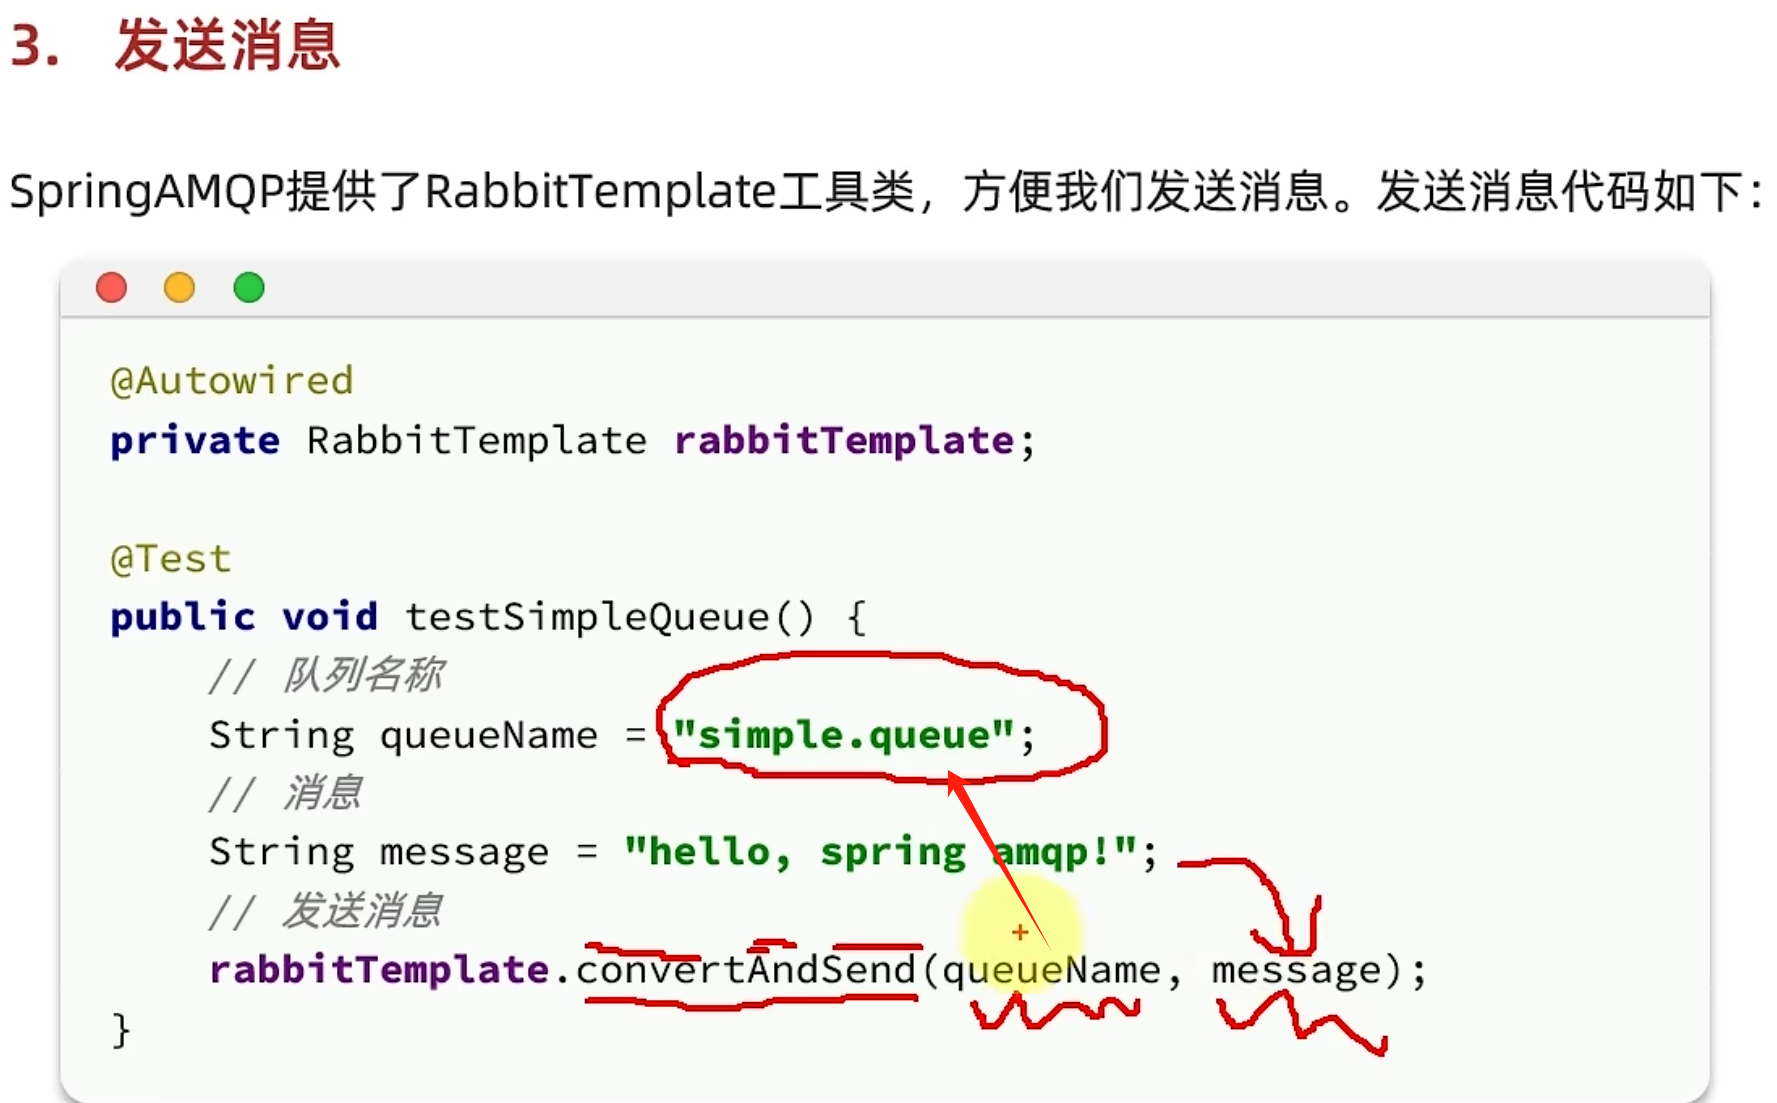

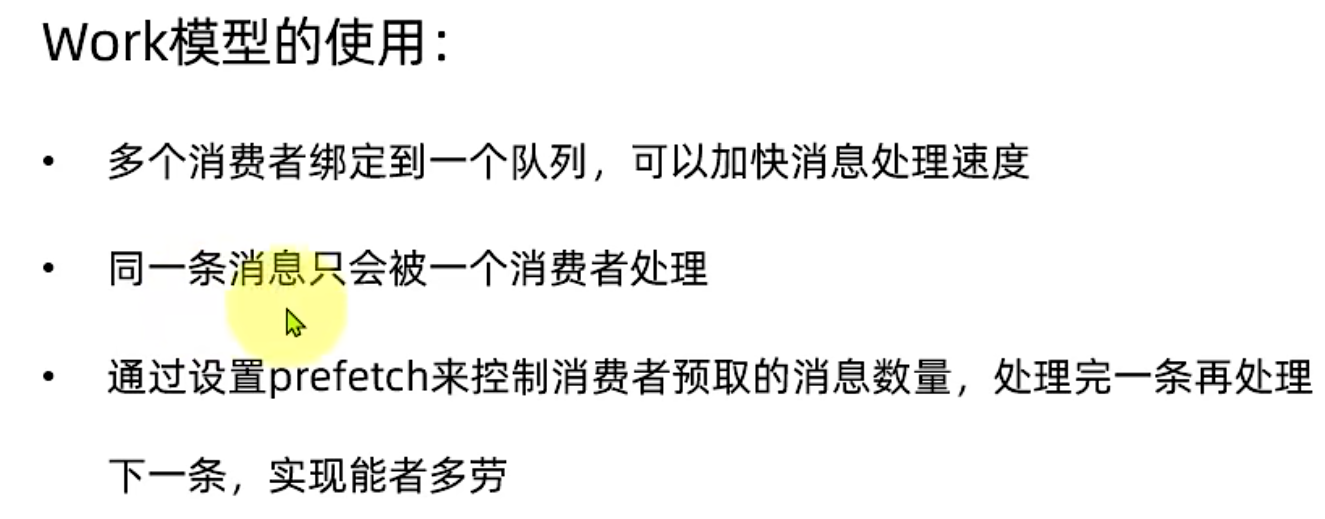
Work Queues:
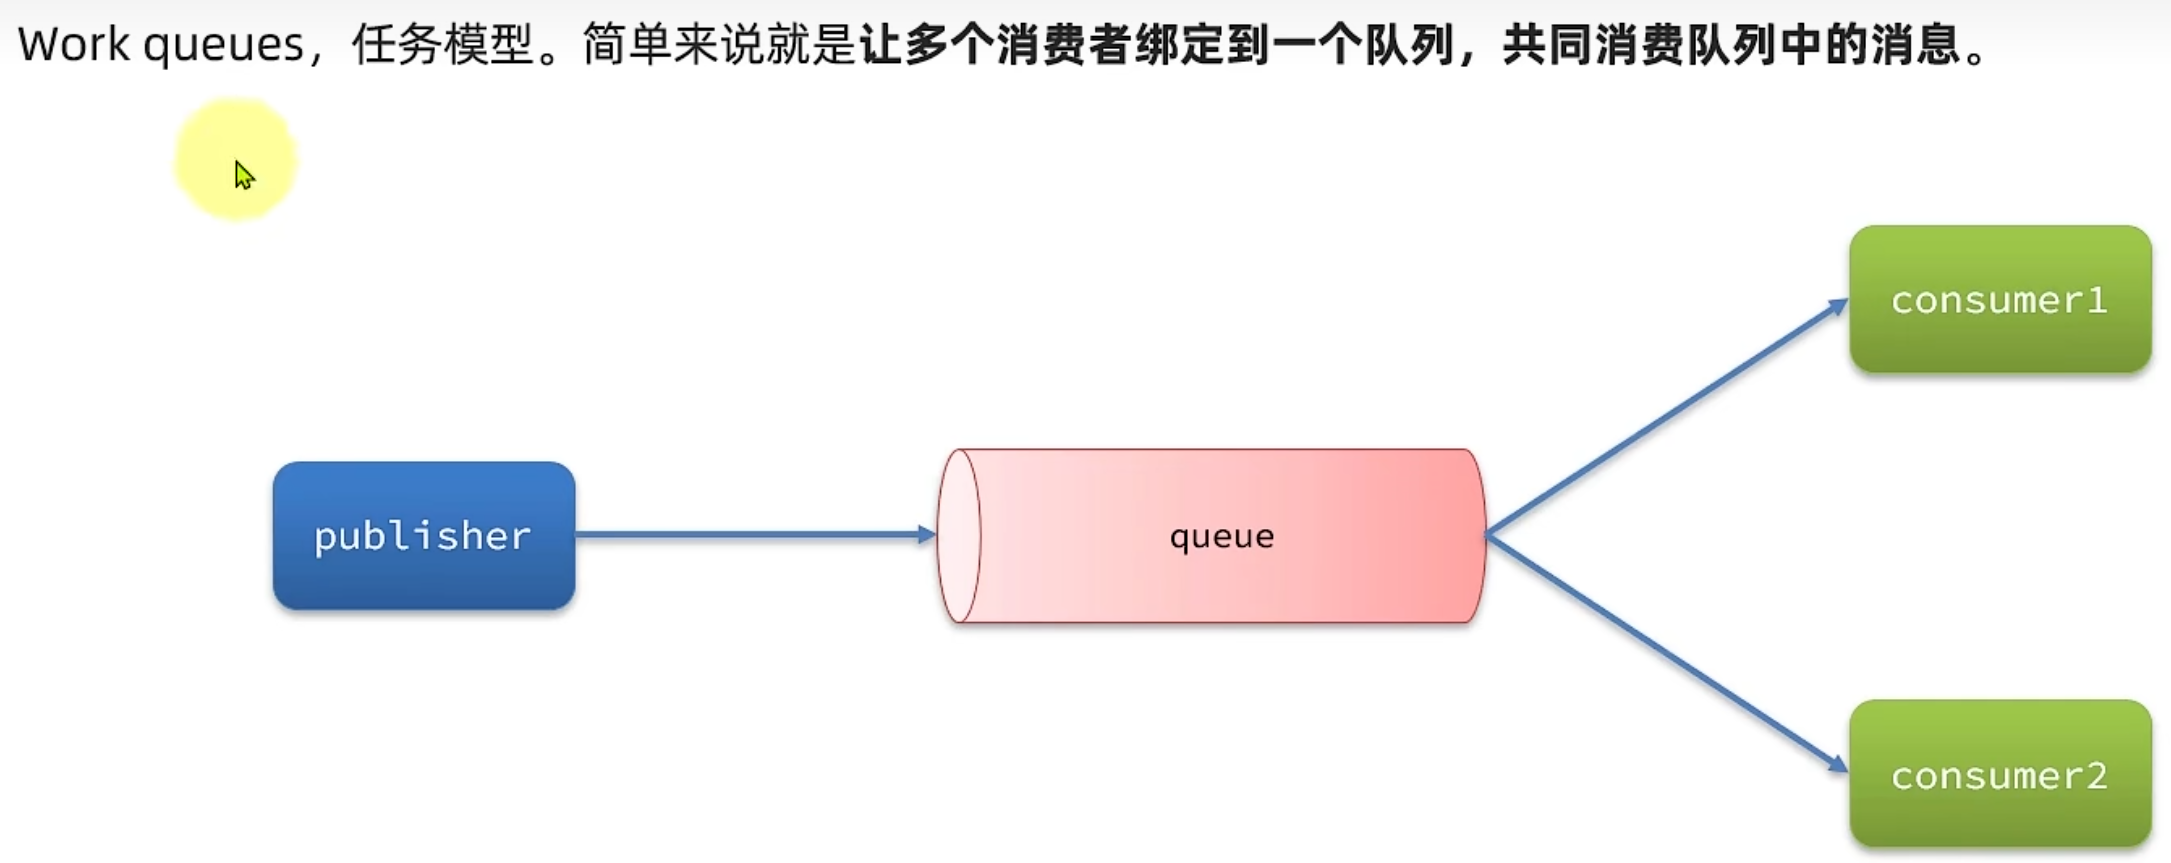 案例:
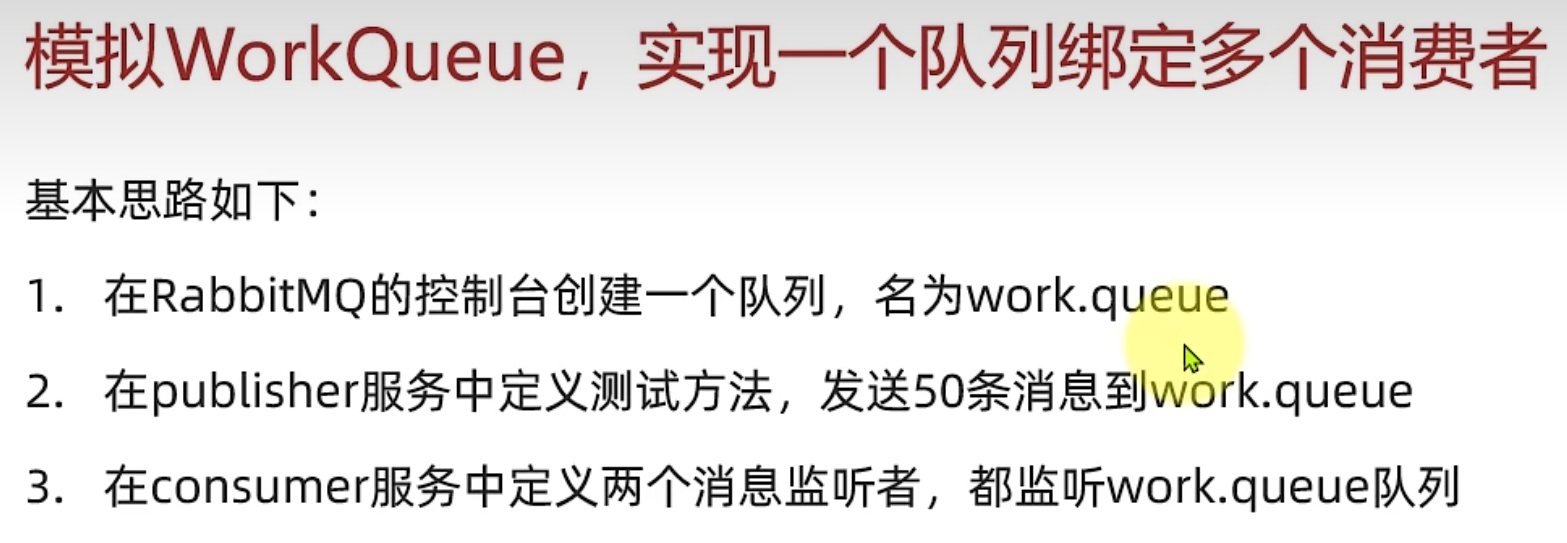
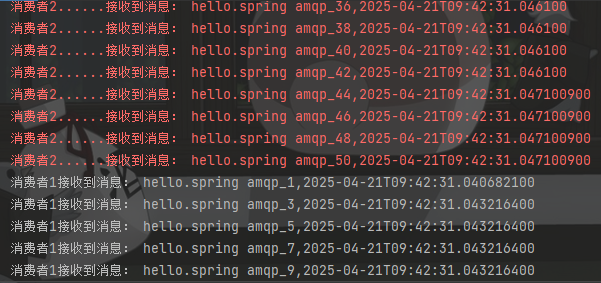
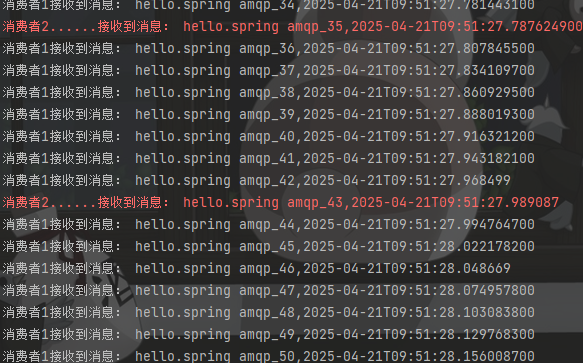
构造了两个方法模拟两个消费者
java
package com.itheima.consumer.mq;

import lombok.extern.slf4j.Slf4j;
import org.springframework.amqp.rabbit.annotation.RabbitListener;
import org.springframework.stereotype.Component;

import java.time.LocalDateTime;

@Slf4j
@Component
public class SpringRabbitListener {

    @RabbitListener(queues = "work.queue")
    public void listenWorkQueue1(String message){
        System.out.println("消费者1接收到消息: "+message+ ","+ LocalDateTime.now());
    }

    @RabbitListener(queues = "work.queue")
    public void listenWorkQueue2(String message){
        System.err.println("消费者2......接收到消息: "+message+ ","+ LocalDateTime.now());
    }


}
java
package com.itheima.publisher;

import org.junit.jupiter.api.Test;
import org.springframework.amqp.rabbit.core.RabbitTemplate;
import org.springframework.beans.factory.annotation.Autowired;
import org.springframework.boot.test.context.SpringBootTest;

@SpringBootTest
class SpringAmqpTest {

    @Autowired
    private RabbitTemplate rabbitTemplate;

    @Test
    public void testWorkQueue(){
        //1.队列名
        String queueName="work.queue";
        //2.消息
        for (int i=1;i<=50;i++){
            String message="hello.spring amqp_"+i;
            //3.发送消息
            rabbitTemplate.convertAndSend(queueName,message);
        }
    }
}

java
    @RabbitListener(queues = "work.queue")
    public void listenWorkQueue1(String message) throws InterruptedException {
        System.out.println("消费者1接收到消息: "+message+ ","+ LocalDateTime.now());
        Thread.sleep(25);
    }

    @RabbitListener(queues = "work.queue")
    public void listenWorkQueue2(String message) throws InterruptedException {
        System.err.println("消费者2......接收到消息: "+message+ ","+ LocalDateTime.now());
        Thread.sleep(200);
    }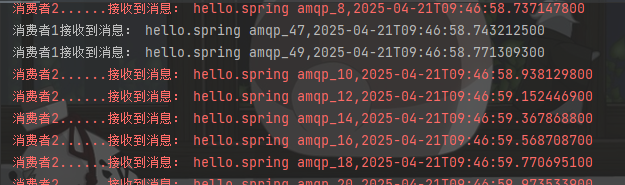
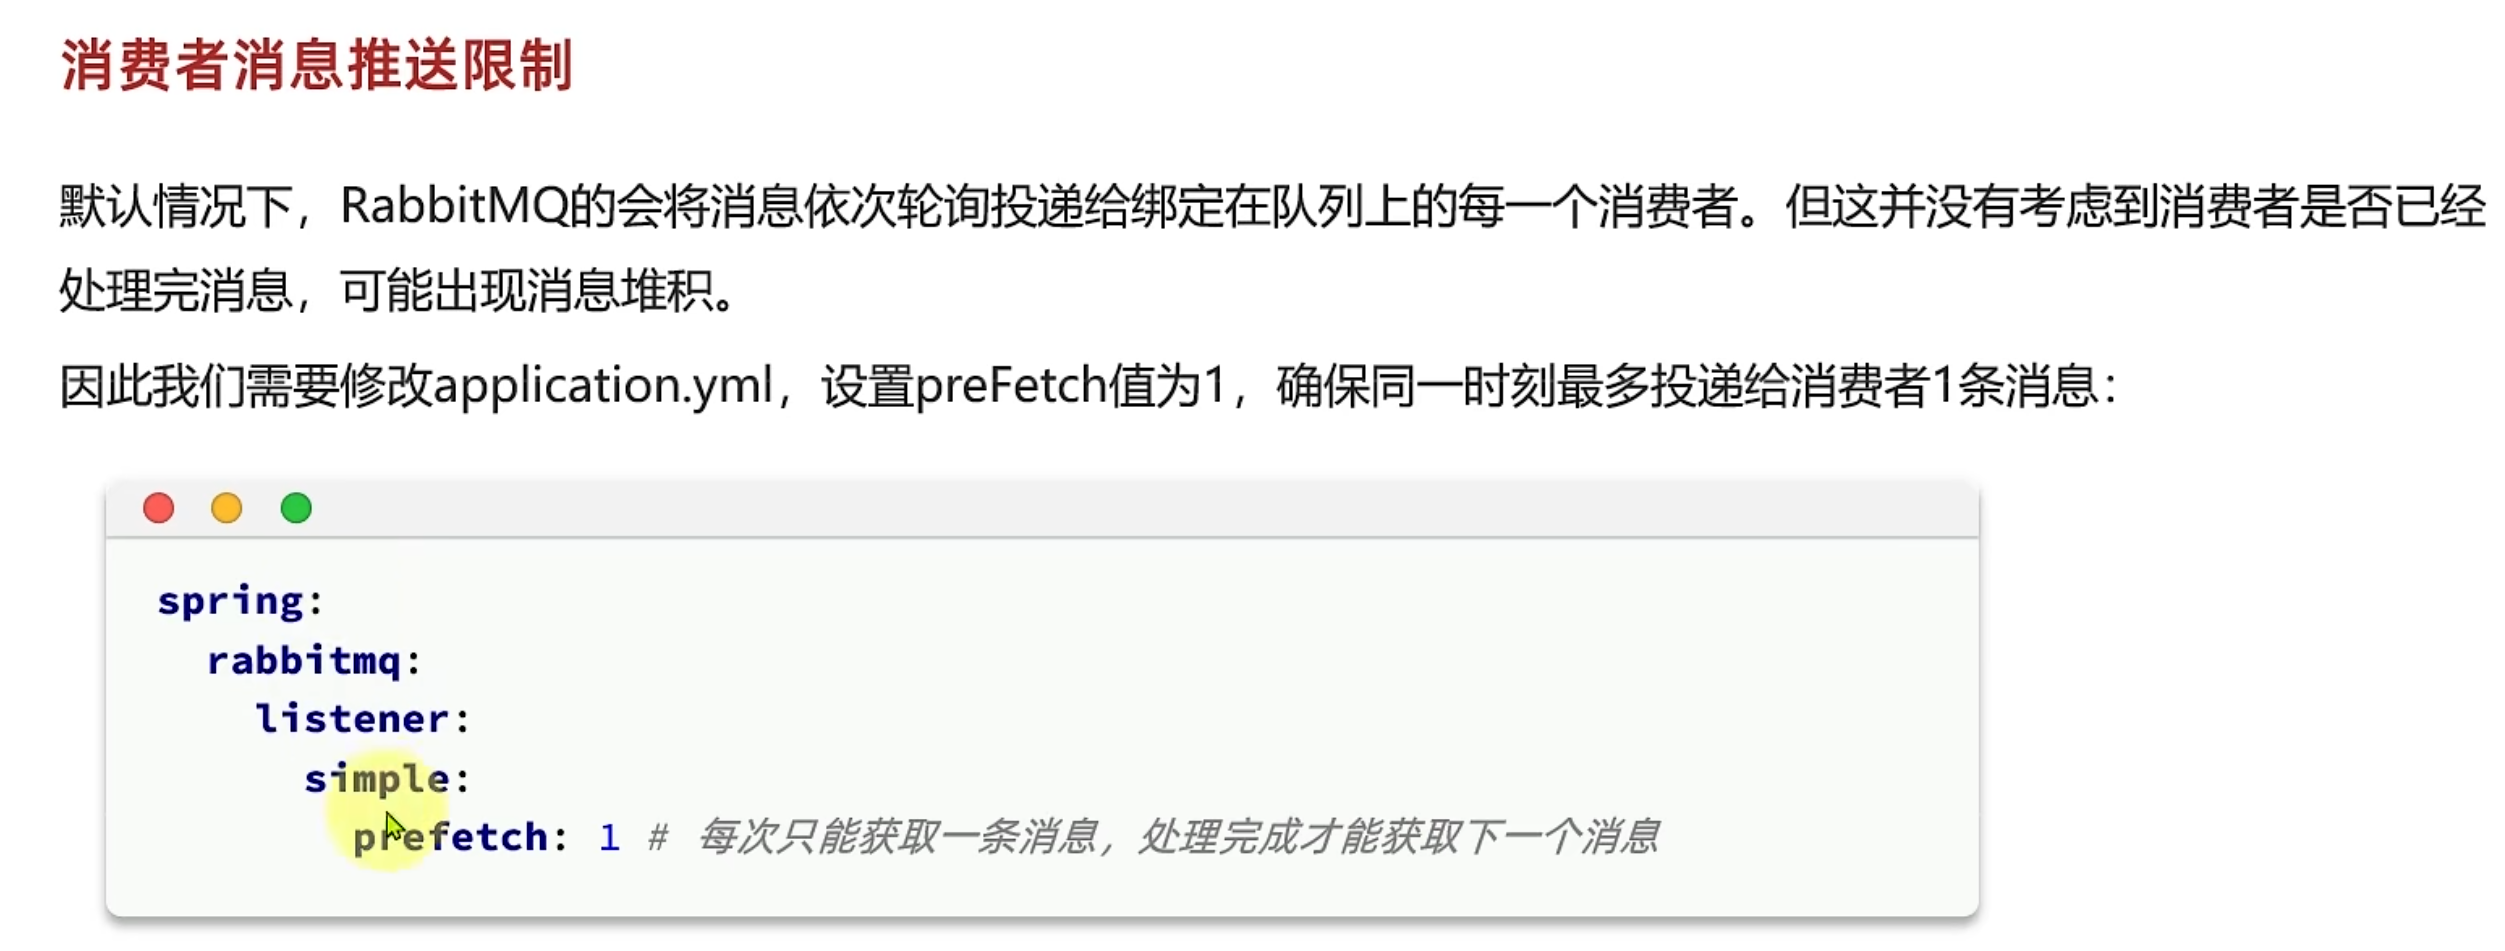
默认性能不影响分配规则
交换机:
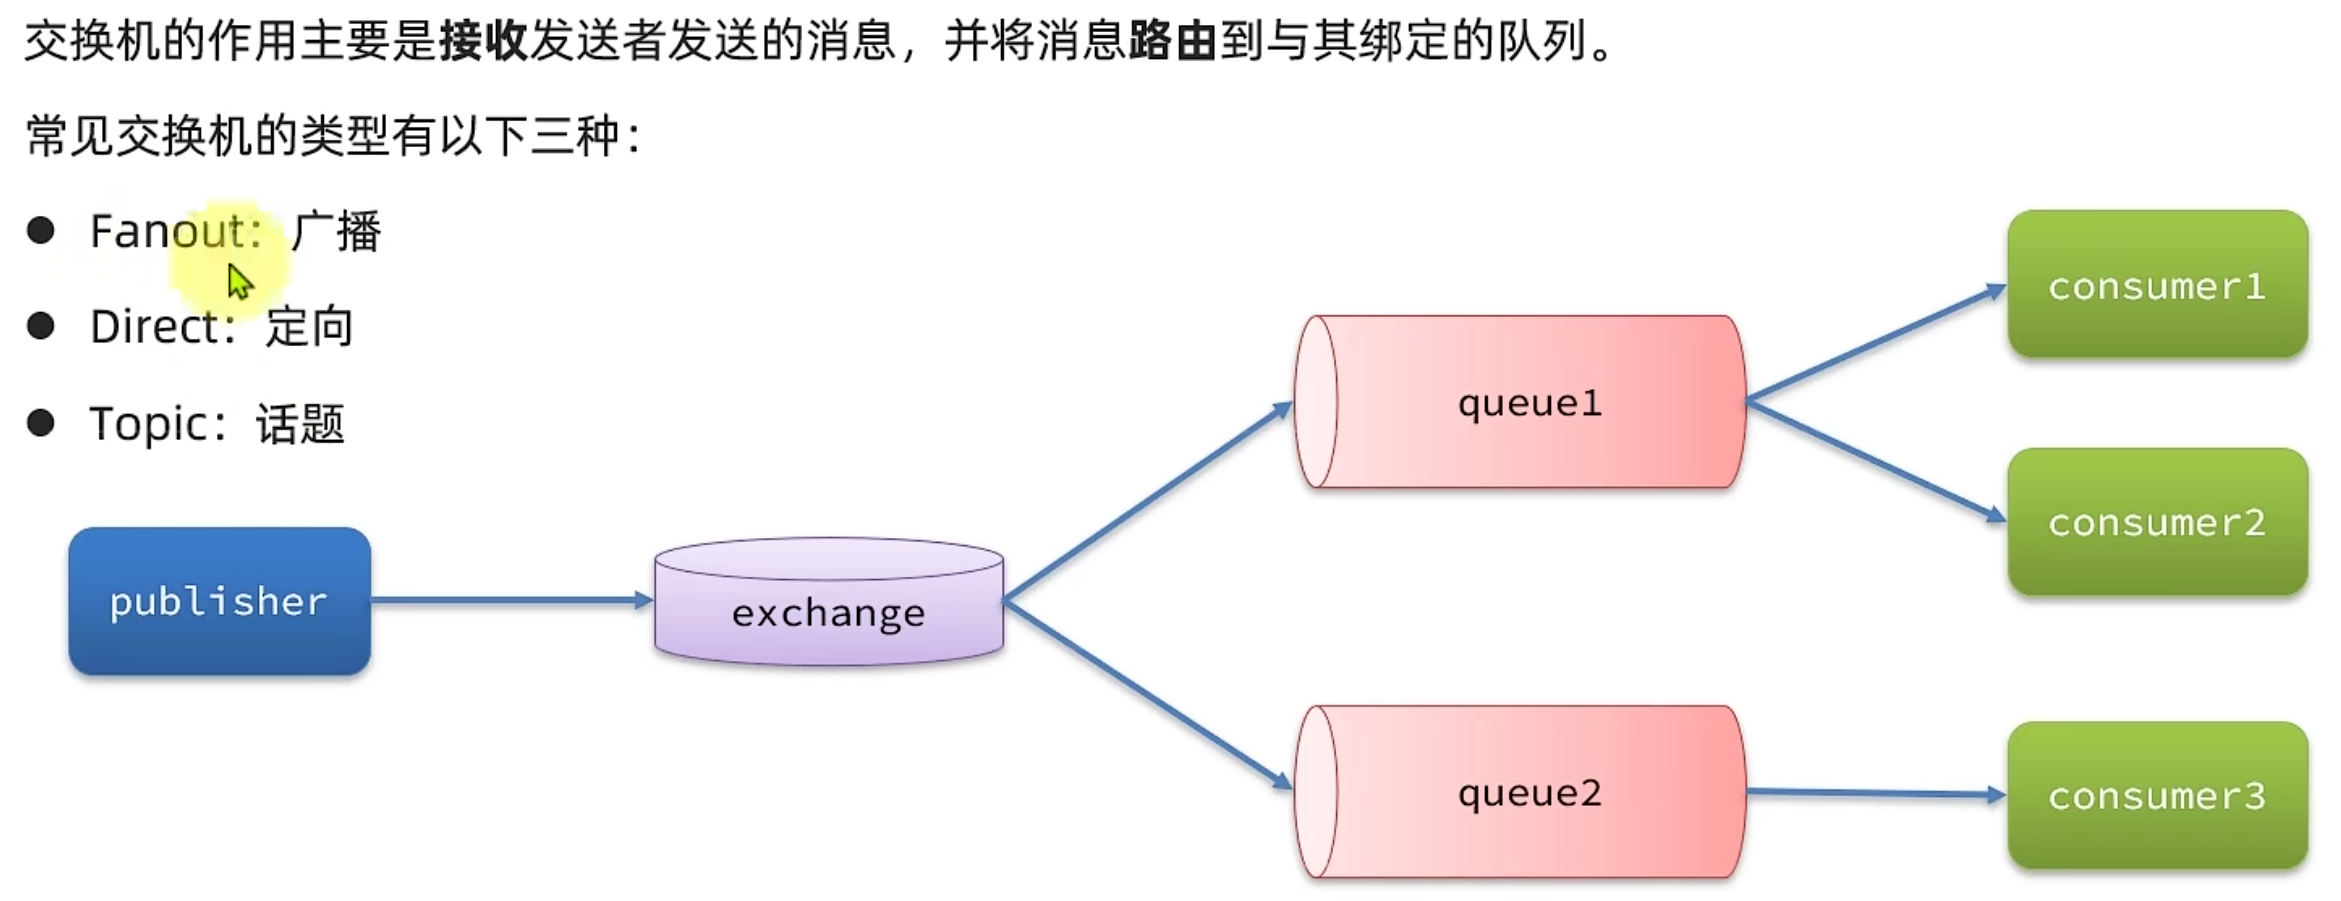
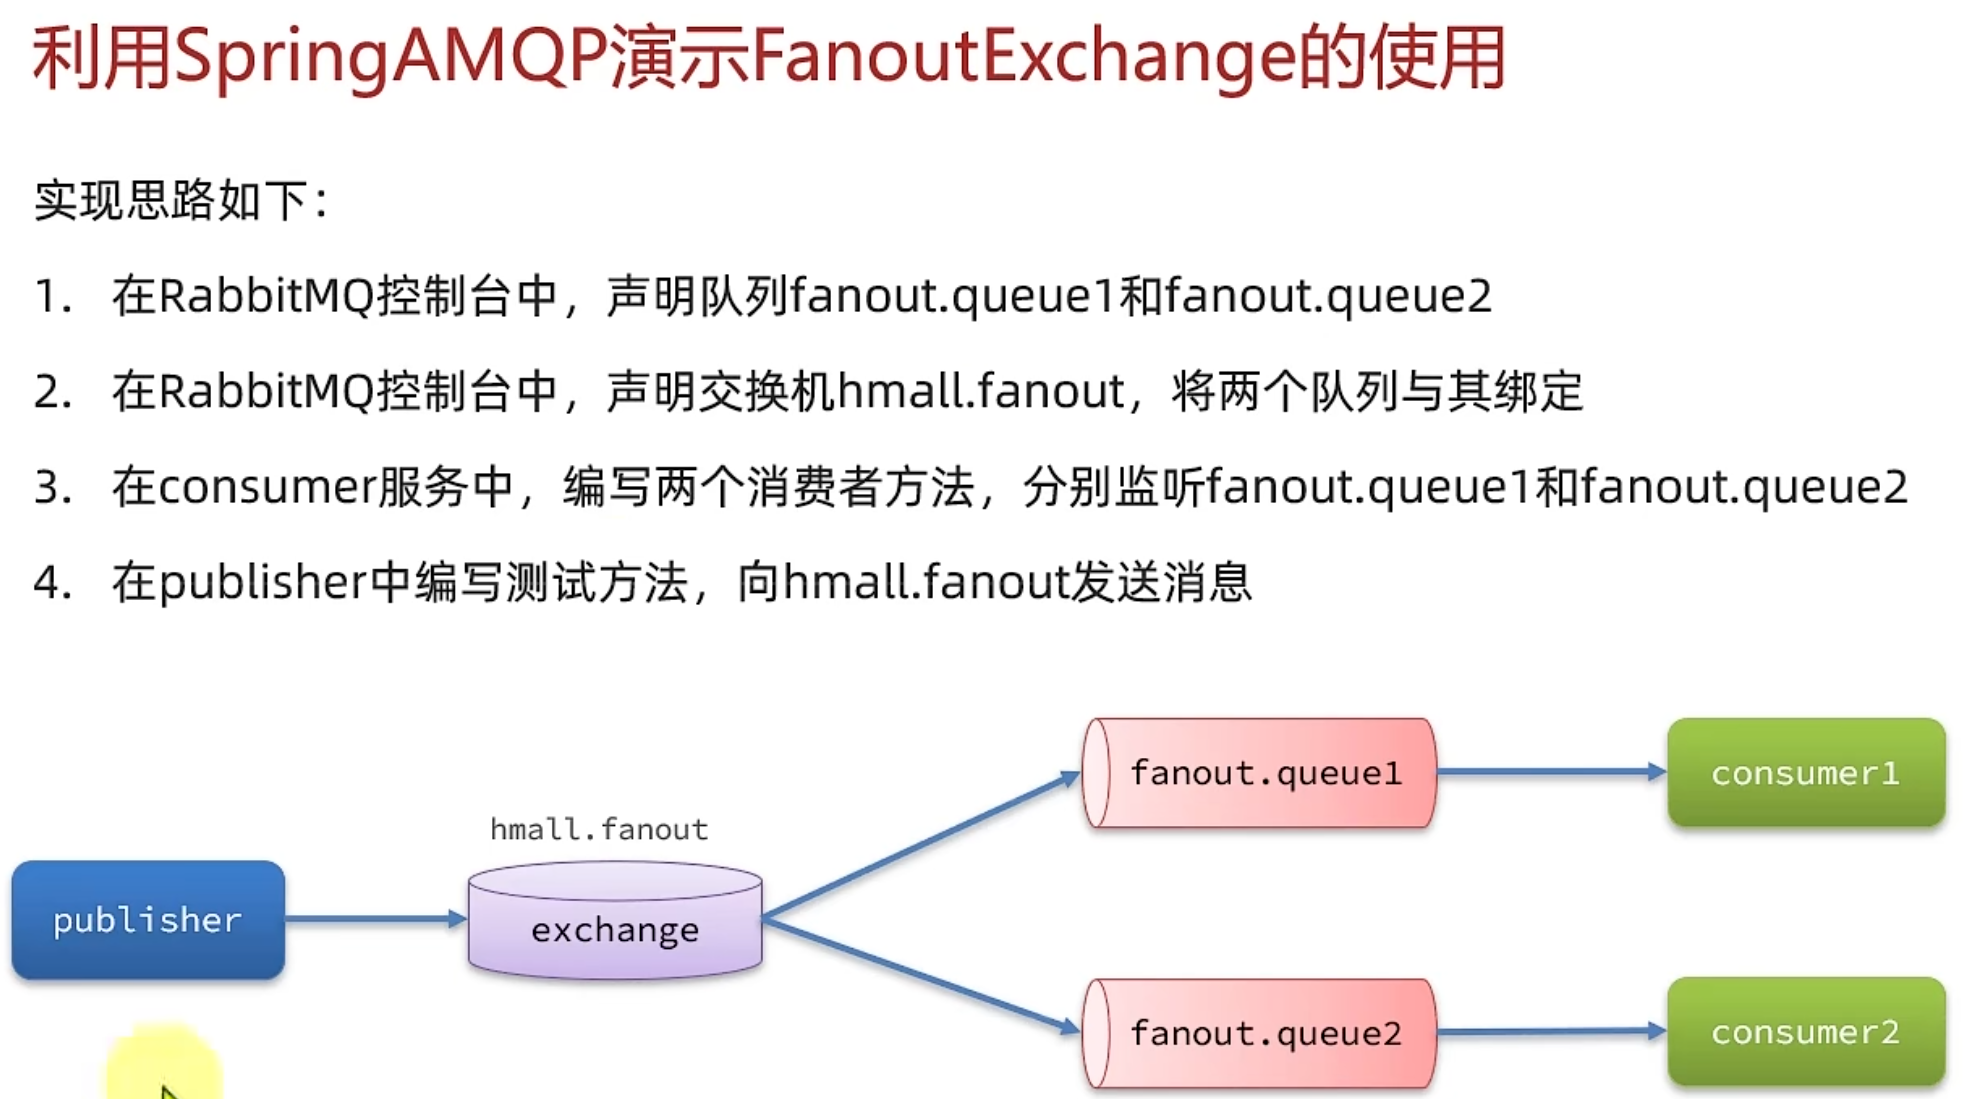
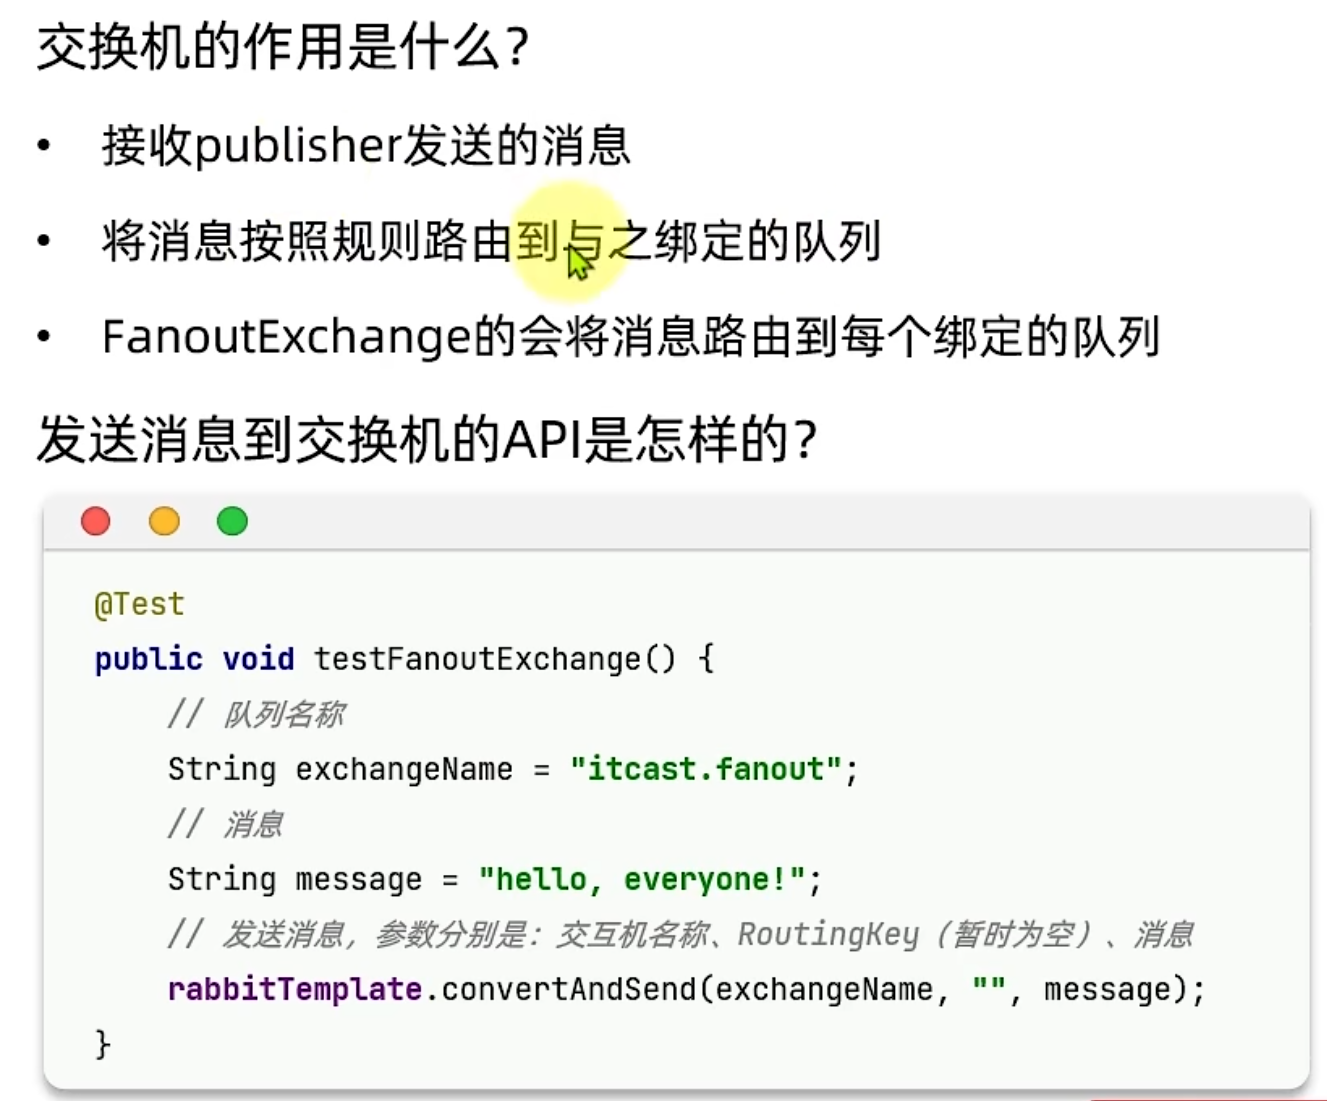
Fanout交换机:

案例:
java
    @Test
    public void testFanoutQueue(){
        //1.交换机名
        String exName="hmall.fanout";
        //2.消息
        String message="hello.everyone!";
        //3.发送消息
        rabbitTemplate.convertAndSend(exName,null,message);
    }
java
    @RabbitListener(queues = "fanout.queue1")
    public void listenFanoutQueue1(String message){
        log.info("消费者1监听到fanout.queue1的消息:{}",message);
    }

    @RabbitListener(queues = "fanout.queue2")
    public void listenFanoutQueue2(String message){
        log.info("消费者2监听到fanout.queue2的消息:{}",message);
    }
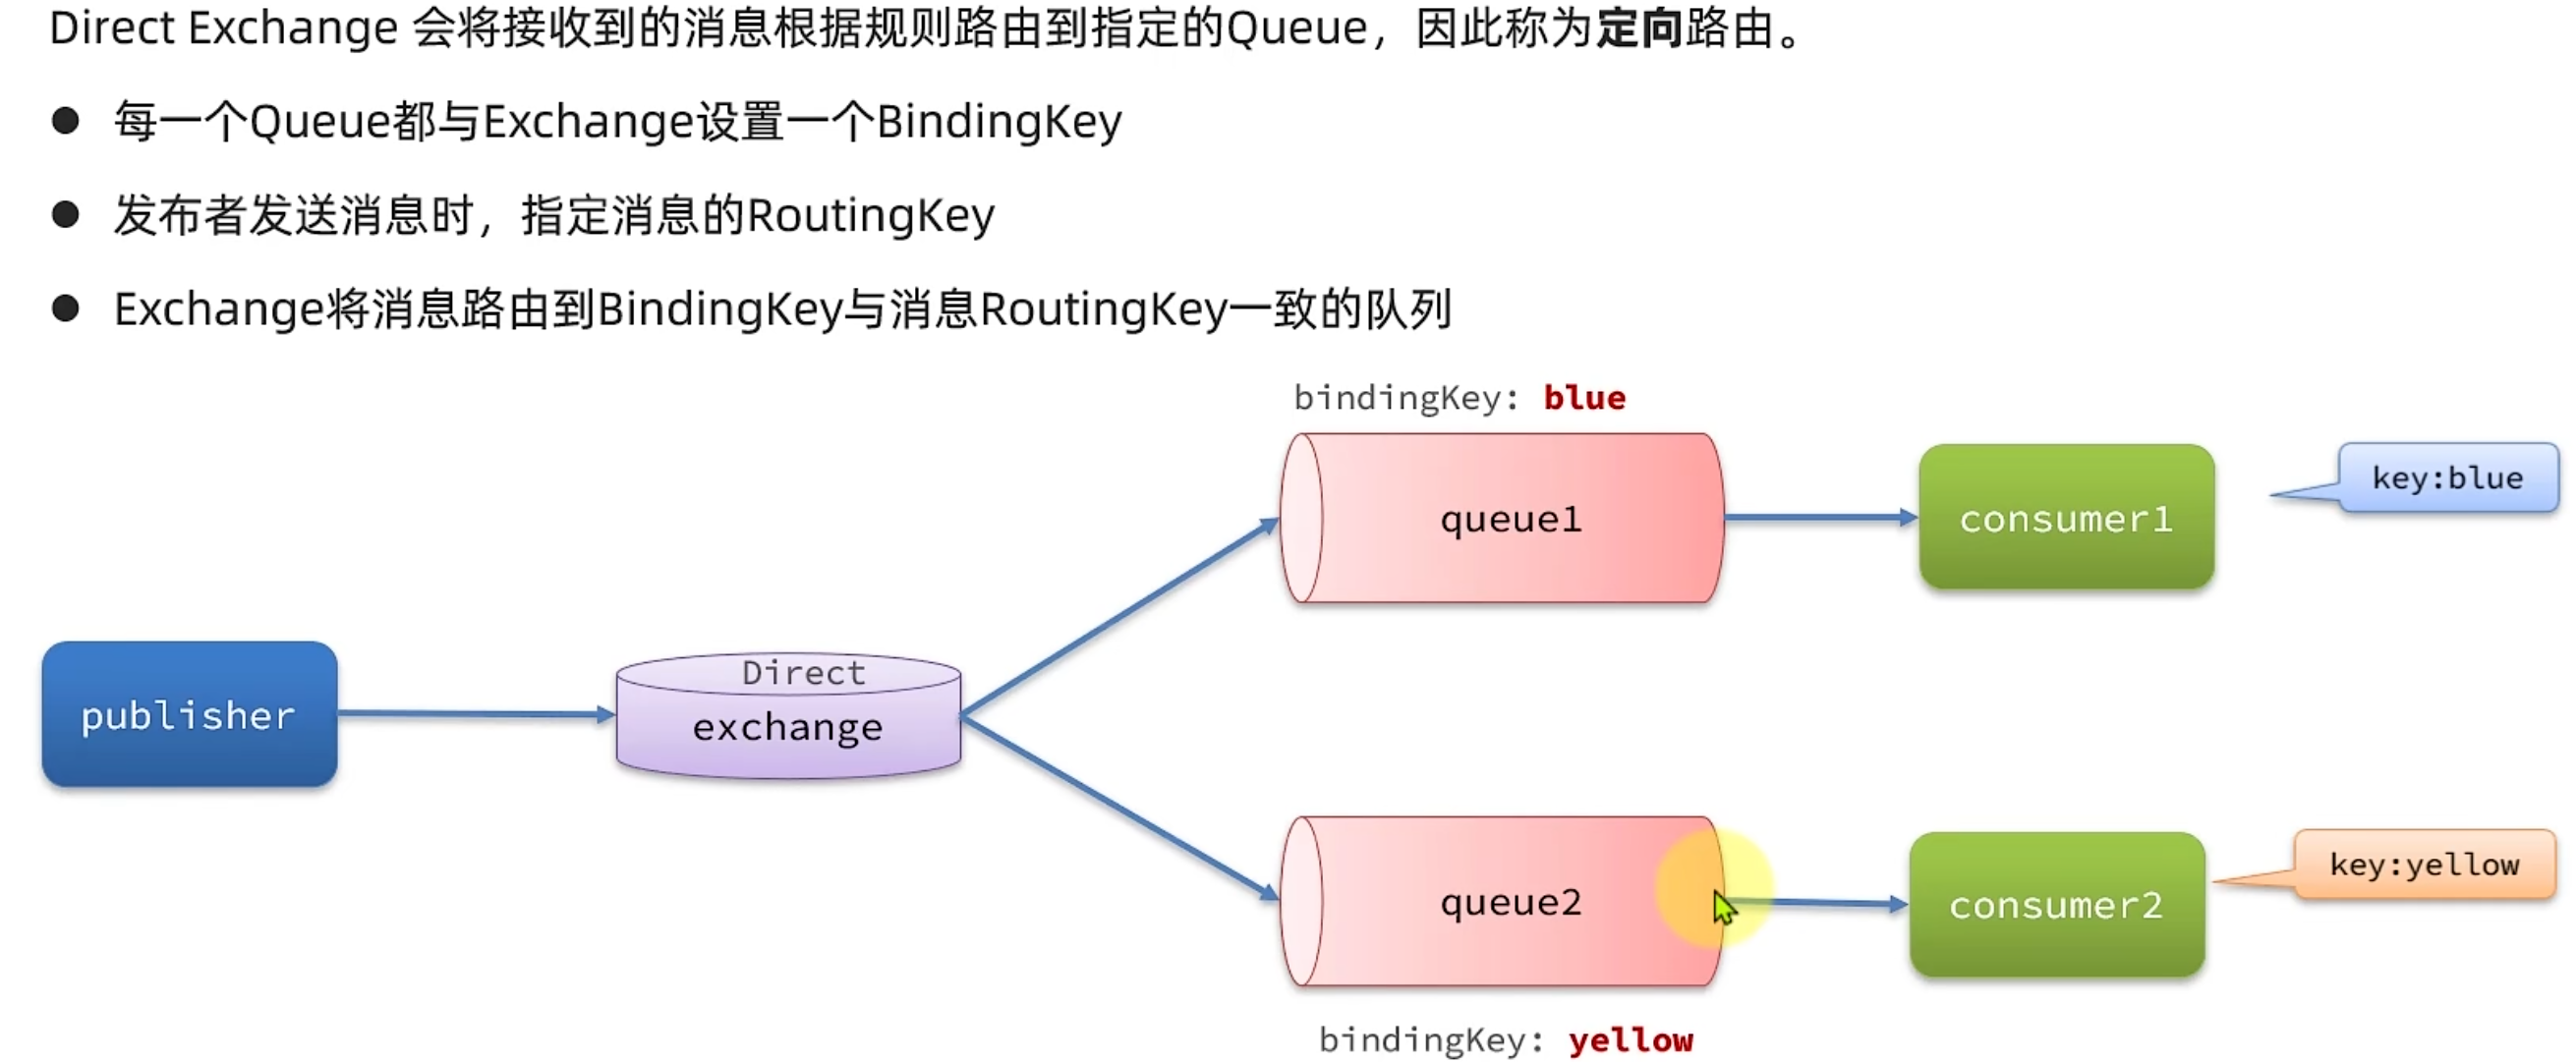
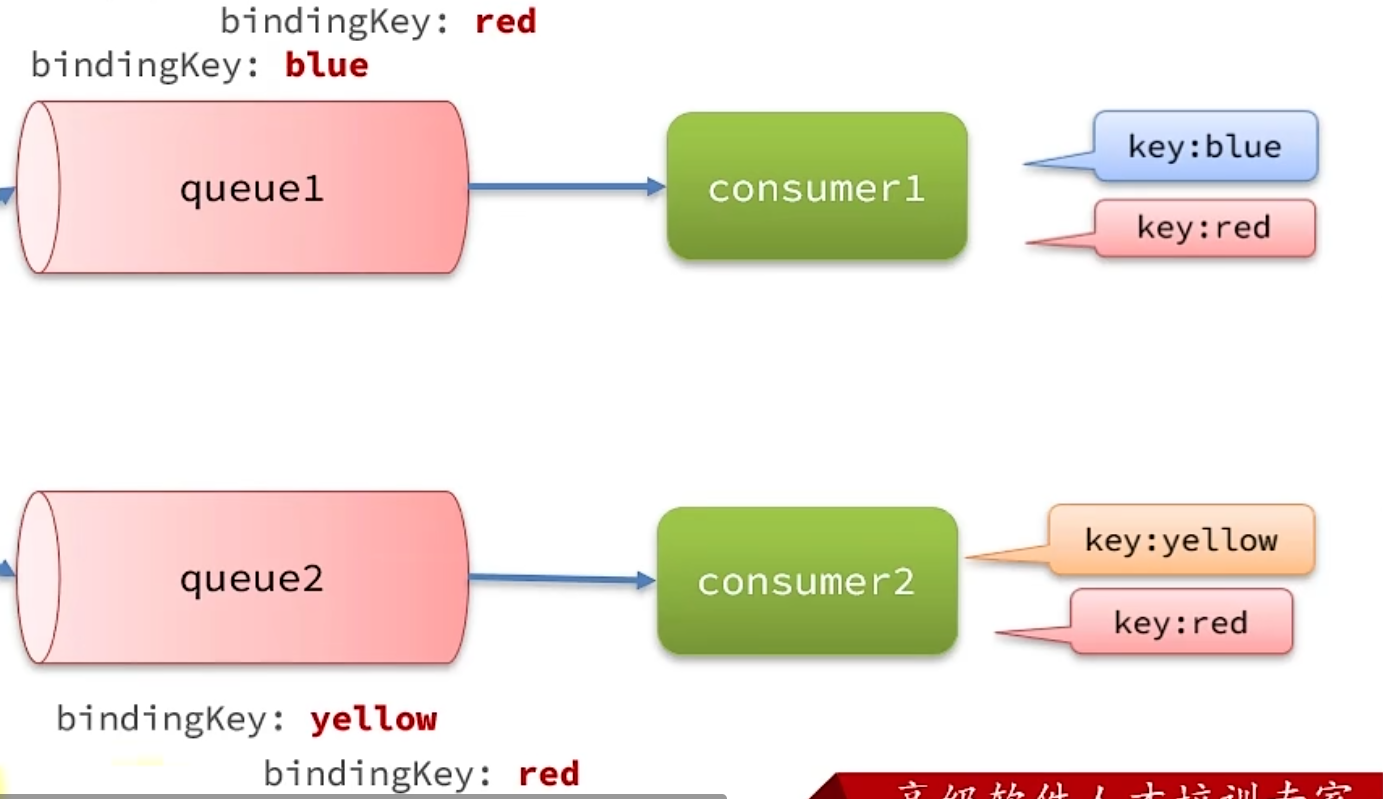
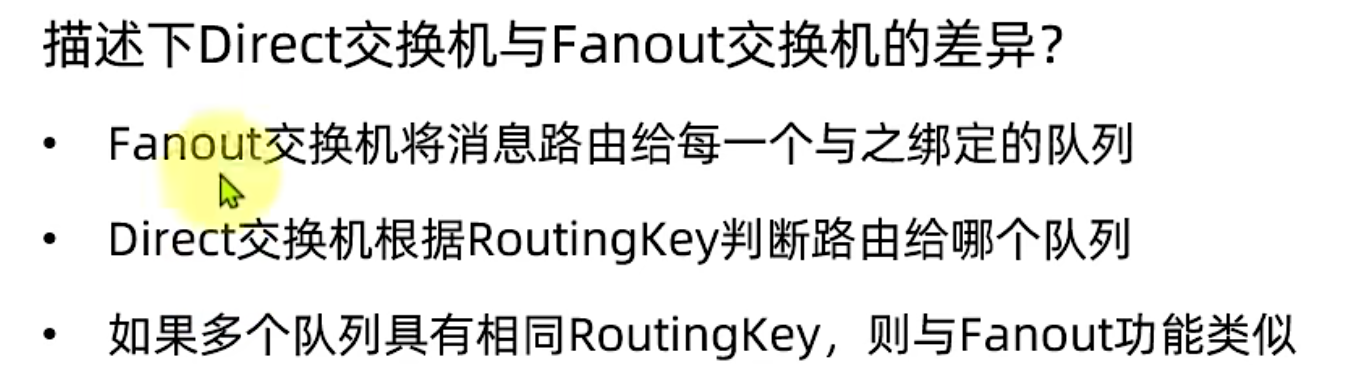
Direct交换机:
案例:
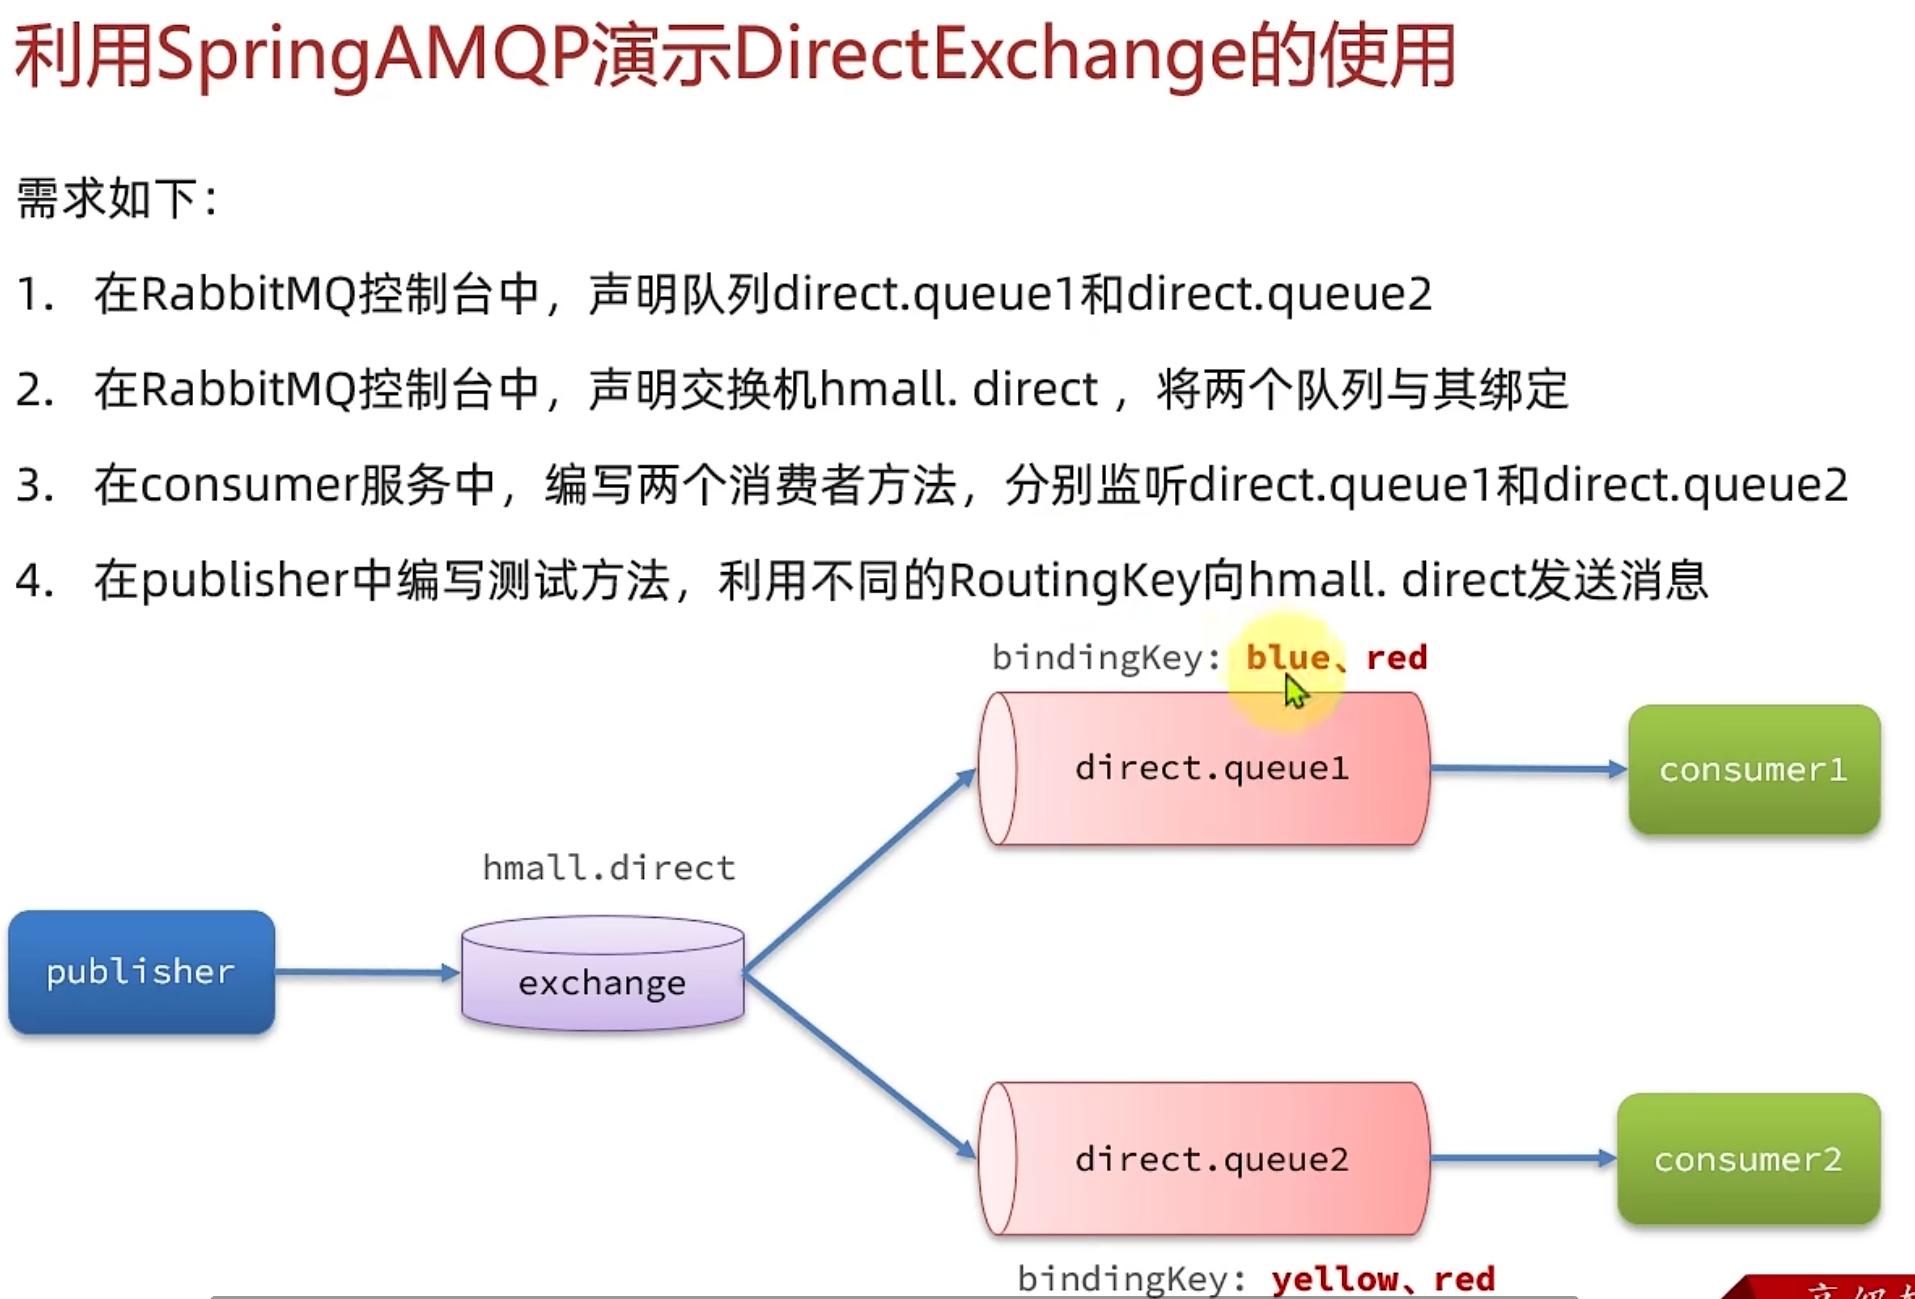
java
    @RabbitListener(queues = "direct.queue1")
    public void listenDirectQueue1(String message){
        log.info("消费者1监听到direct.queue1的消息:{}",message);
    }

    @RabbitListener(queues = "direct.queue2")
    public void listenDirectQueue2(String message){
        log.info("消费者2监听到 direct.queue2的消息:{}",message);
    }
java
    @Test
    public void testDirectQueue(){
        //1.交换机名
        String exName="hmall.direct";
        //2.消息
        String message="hello.yellow!";
        //3.发送消息
        rabbitTemplate.convertAndSend(exName,"yellow",message);
    }
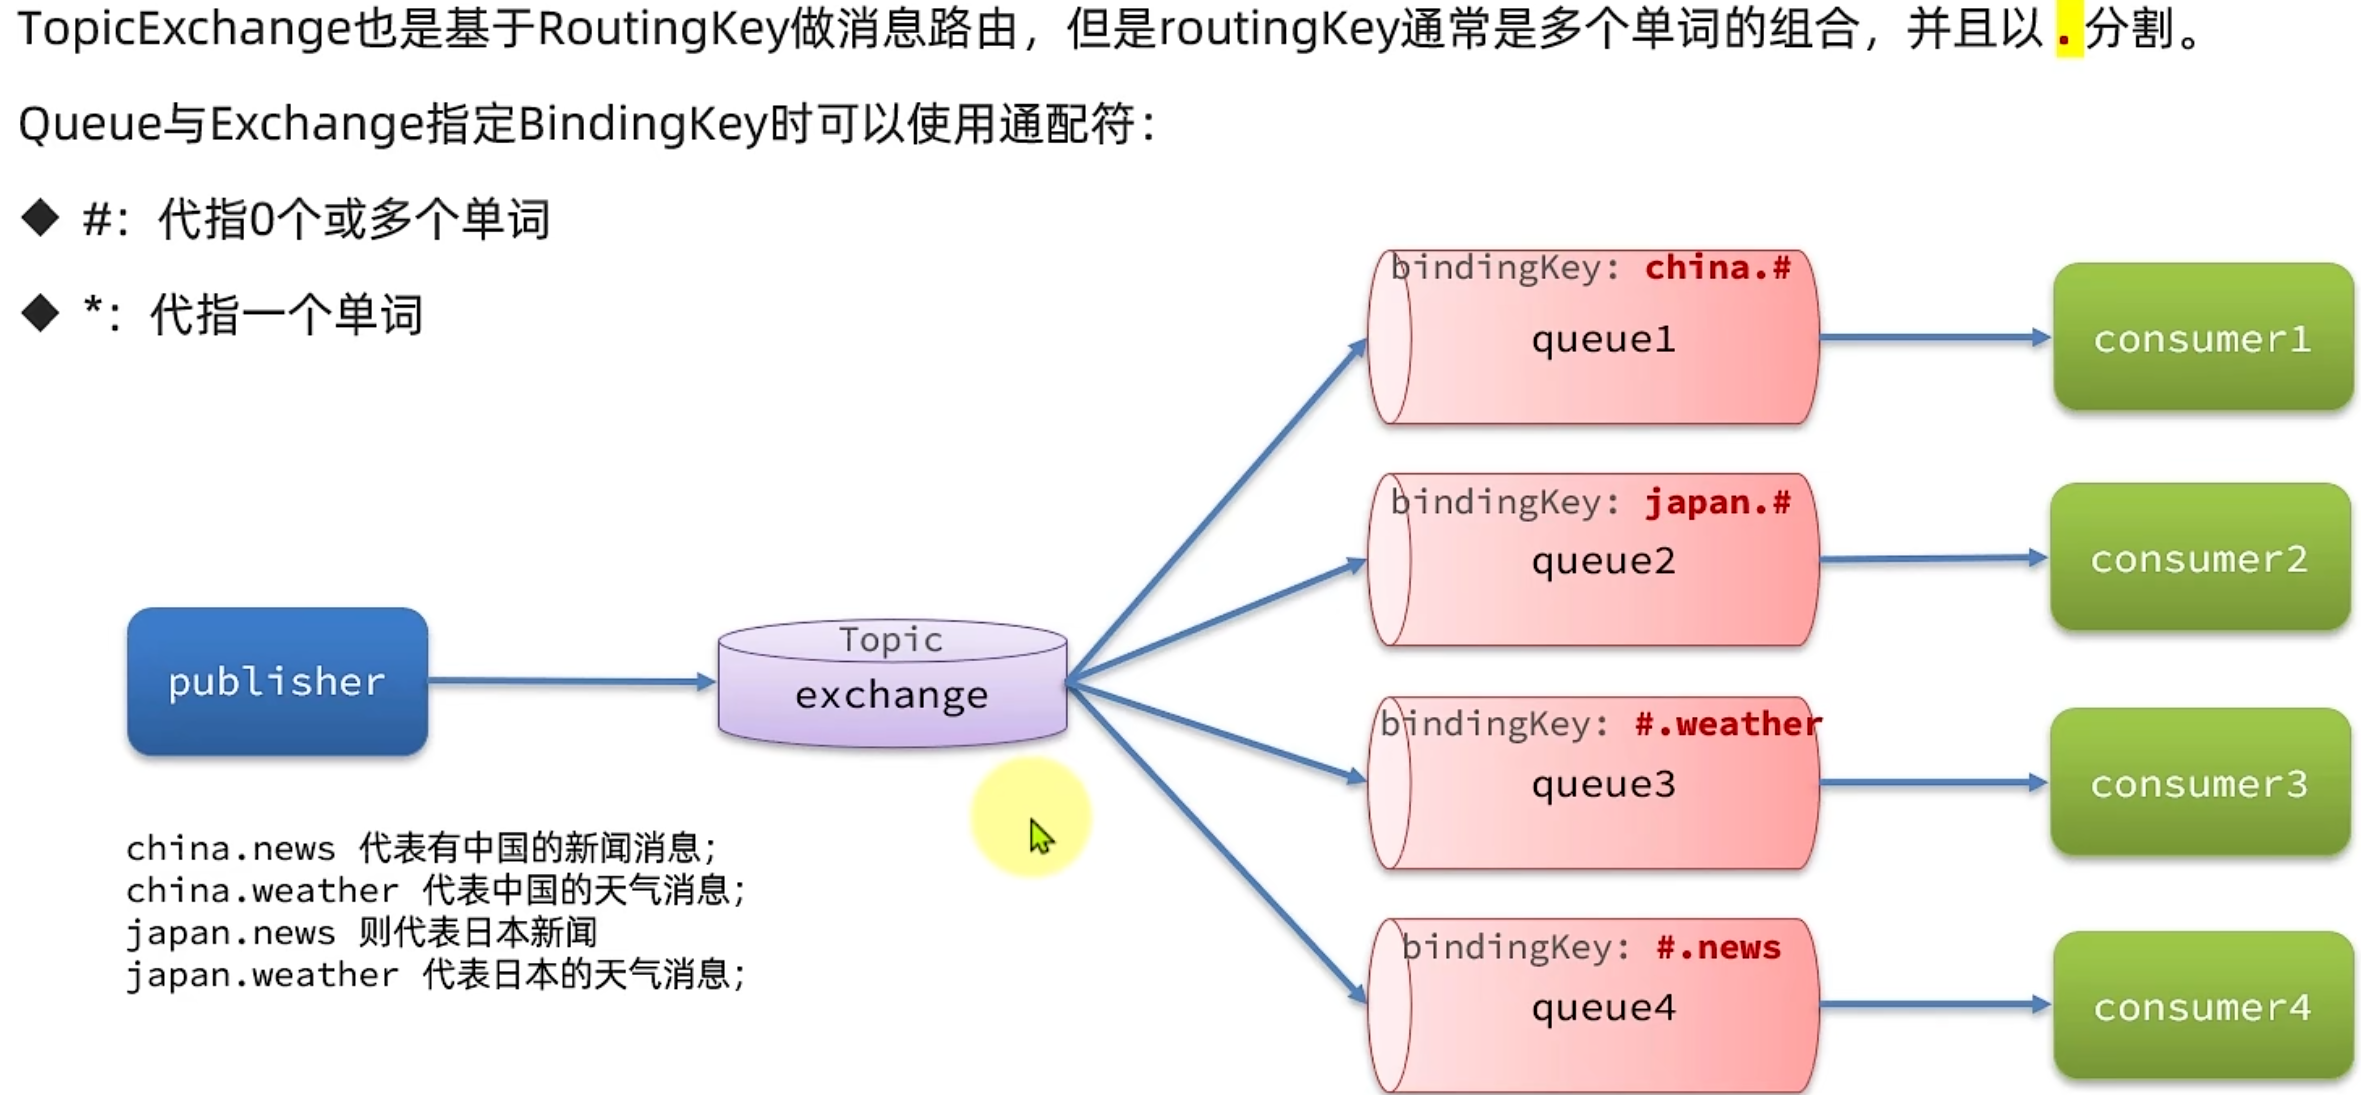
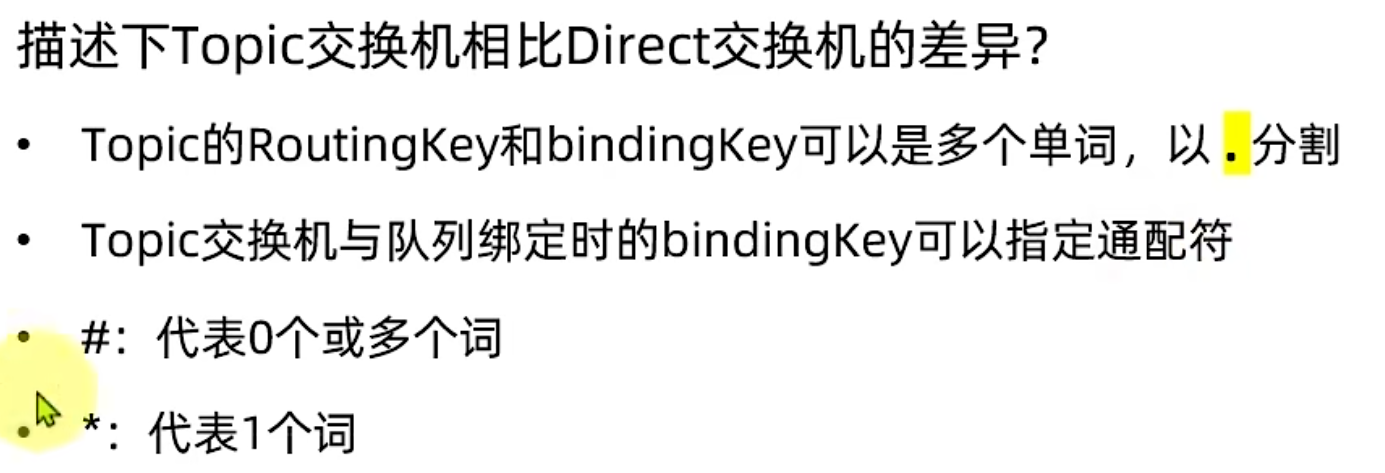
Topic交换机:
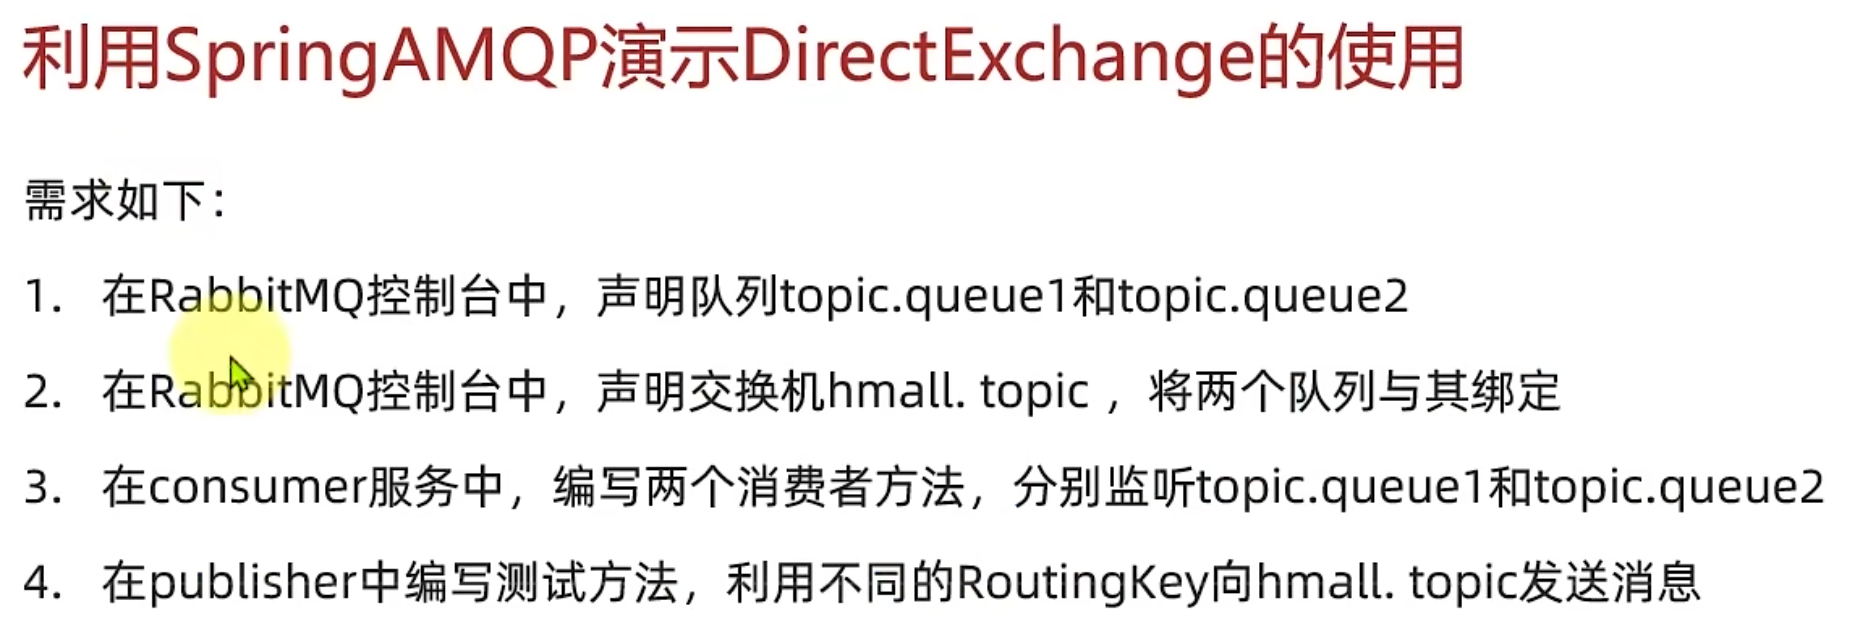
案例:
java
    @Test
    public void testTopicQueue(){
        //1.交换机名
        String exName="hmall.topic";
        //2.消息
        String message="天气不错";
        //3.发送消息
        rabbitTemplate.convertAndSend(exName,"china.weather",message);
    }
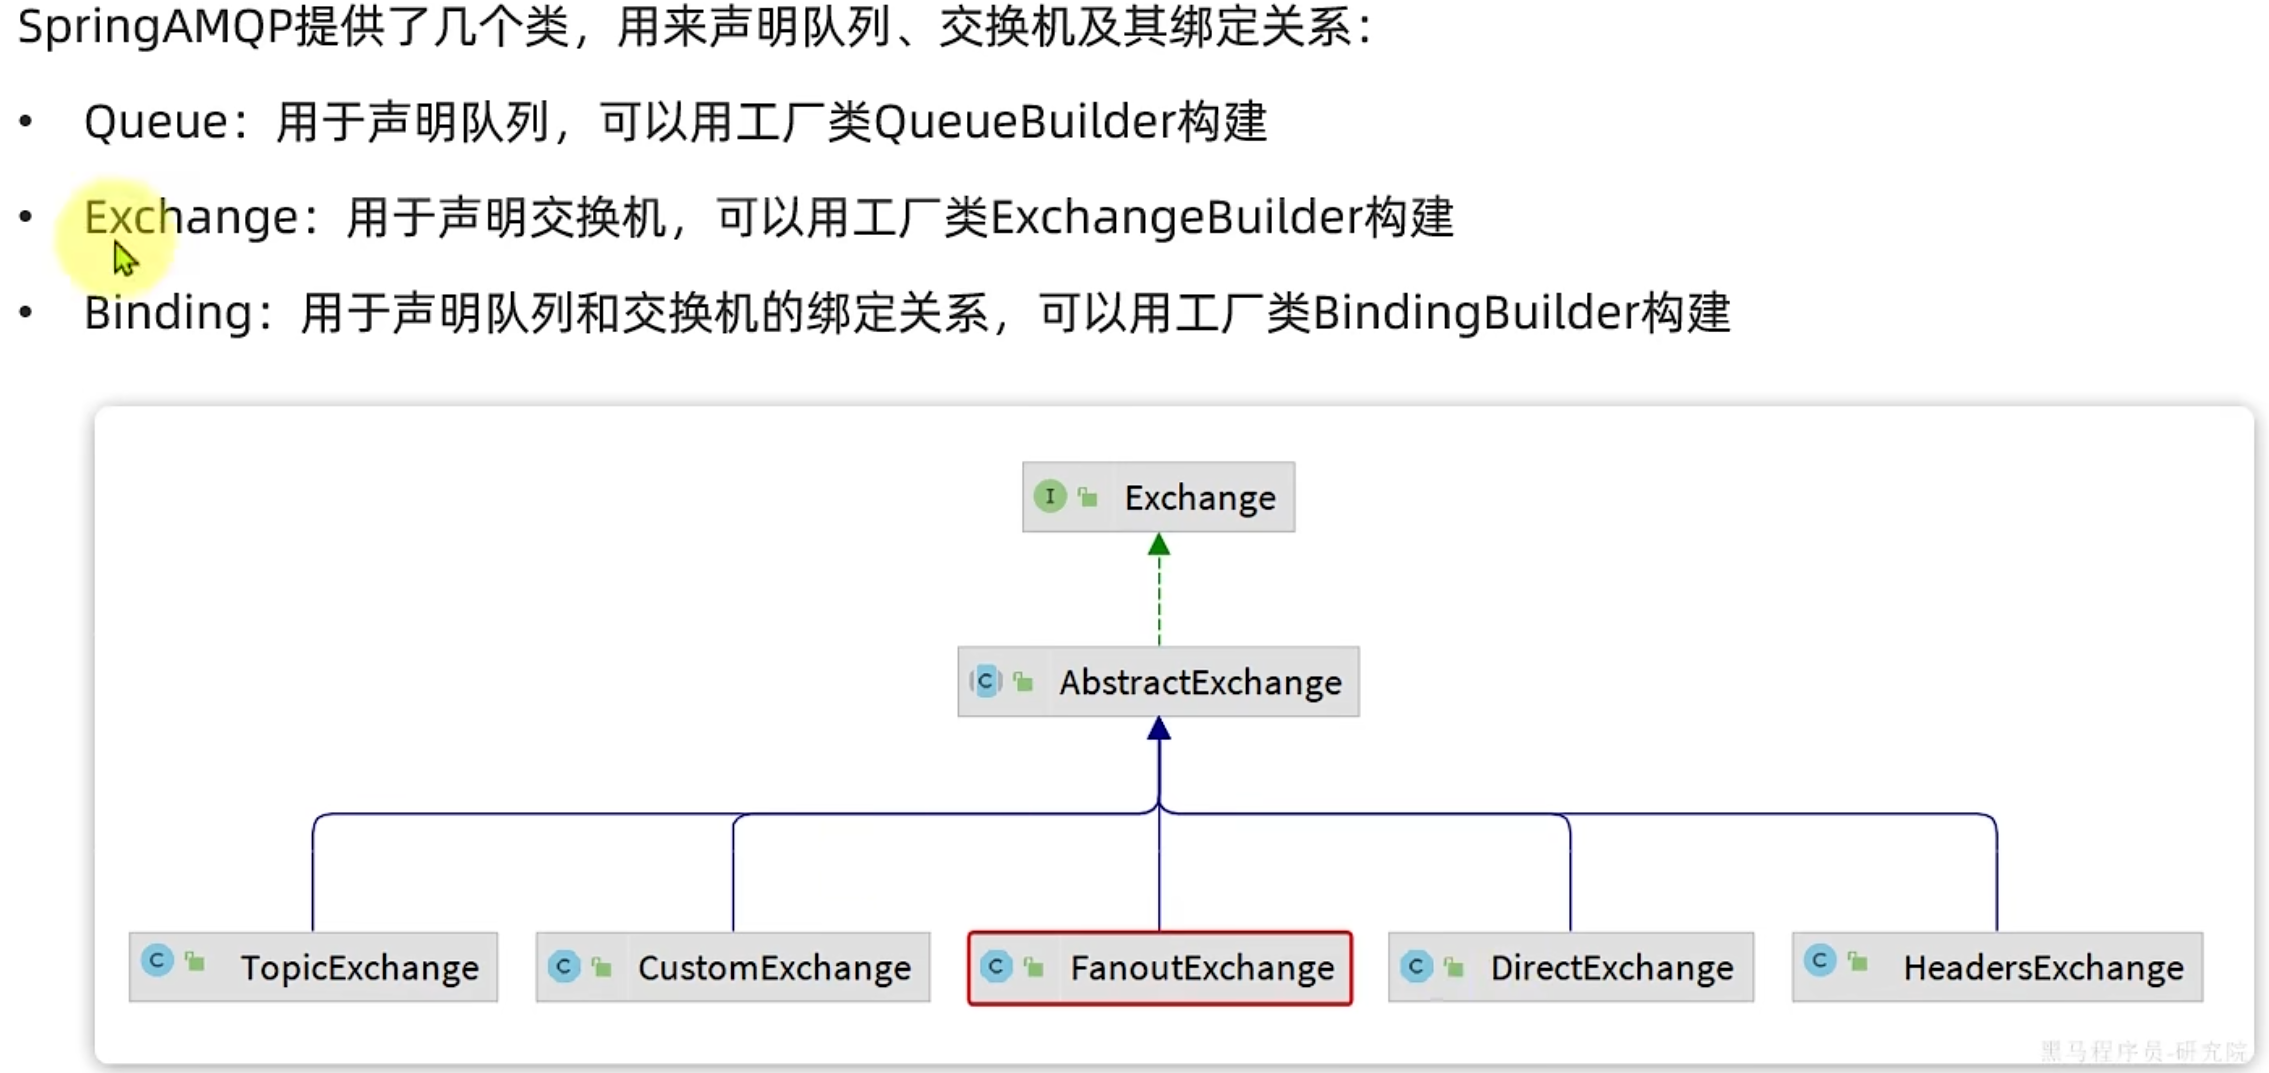
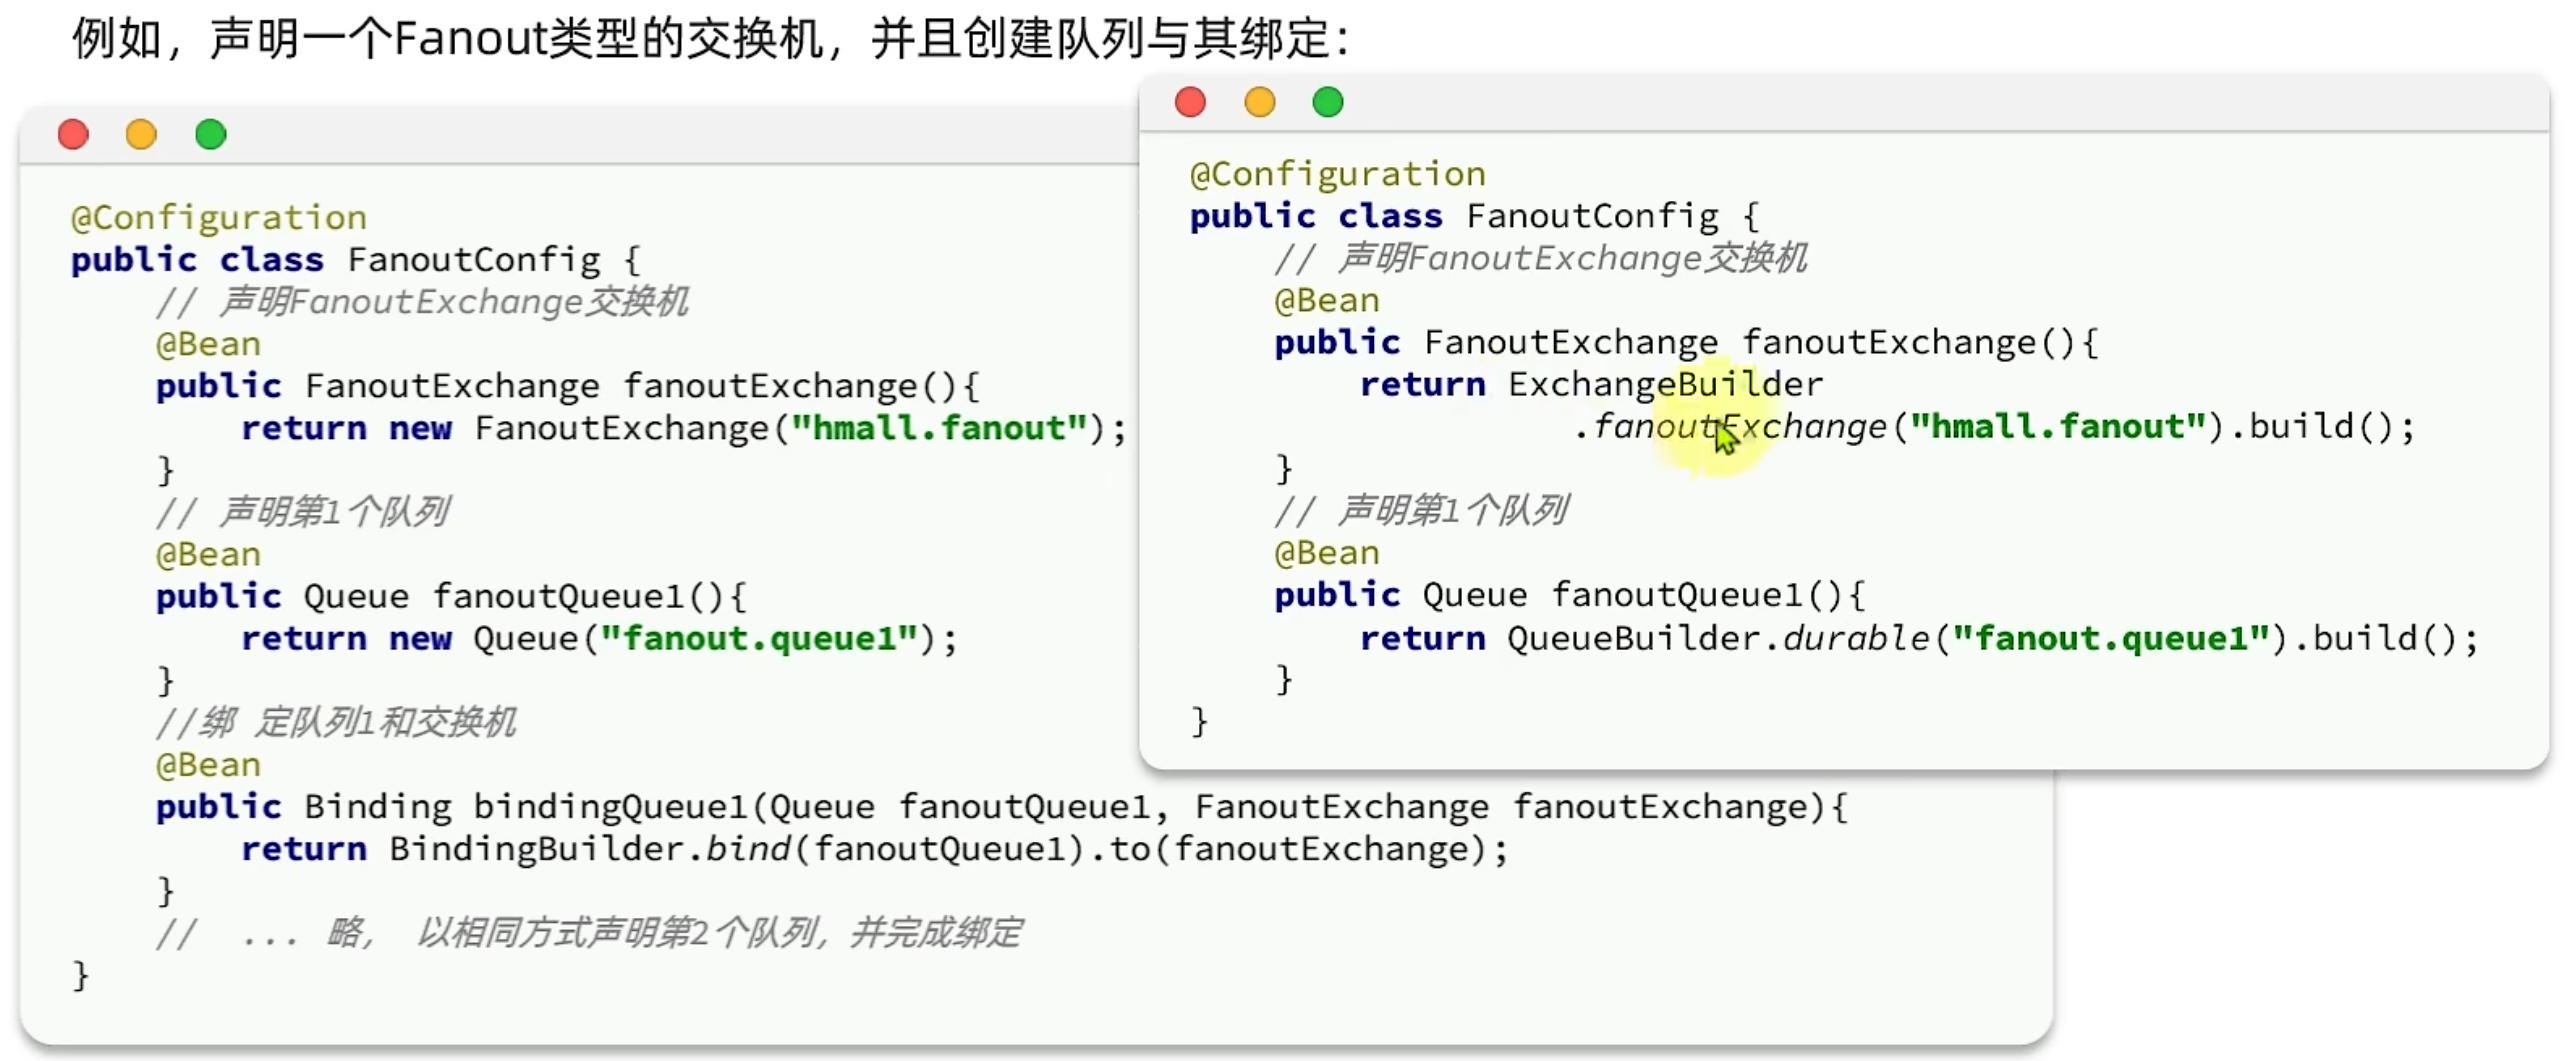
声明队列交换机:
java
package com.itheima.consumer.Config;

import com.rabbitmq.client.AMQP;
import org.springframework.amqp.core.*;
import org.springframework.context.annotation.Bean;
import org.springframework.context.annotation.Configuration;

@Configuration
public class FanoutConfiguration {
    @Bean
    public FanoutExchange fanoutExchange(){
        return new FanoutExchange("hmall.fanout");
       /* return ExchangeBuilder.fanoutExchange("hamll.fanout").build();*/
    }
    @Bean
    public Queue fanoutQueue1(){
        return QueueBuilder.durable("fanout.queue1").build();
        /*return new Queue("fanout.queue1");*/
    }

    @Bean
    public Binding fanoutQueue1Binding(Queue fanoutQueue1,FanoutExchange fanoutExchange){
        return BindingBuilder.bind(fanoutQueue1).to(fanoutExchange);
    }

    @Bean
    public Queue fanoutQueue2(){
        return QueueBuilder.durable("fanout.queue2").build();
    }

    @Bean
    public Binding fanoutQueue2Binding(Queue fanoutQueue2,FanoutExchange fanoutExchange){
        return BindingBuilder.bind(fanoutQueue2).to(fanoutExchange);
    }

}
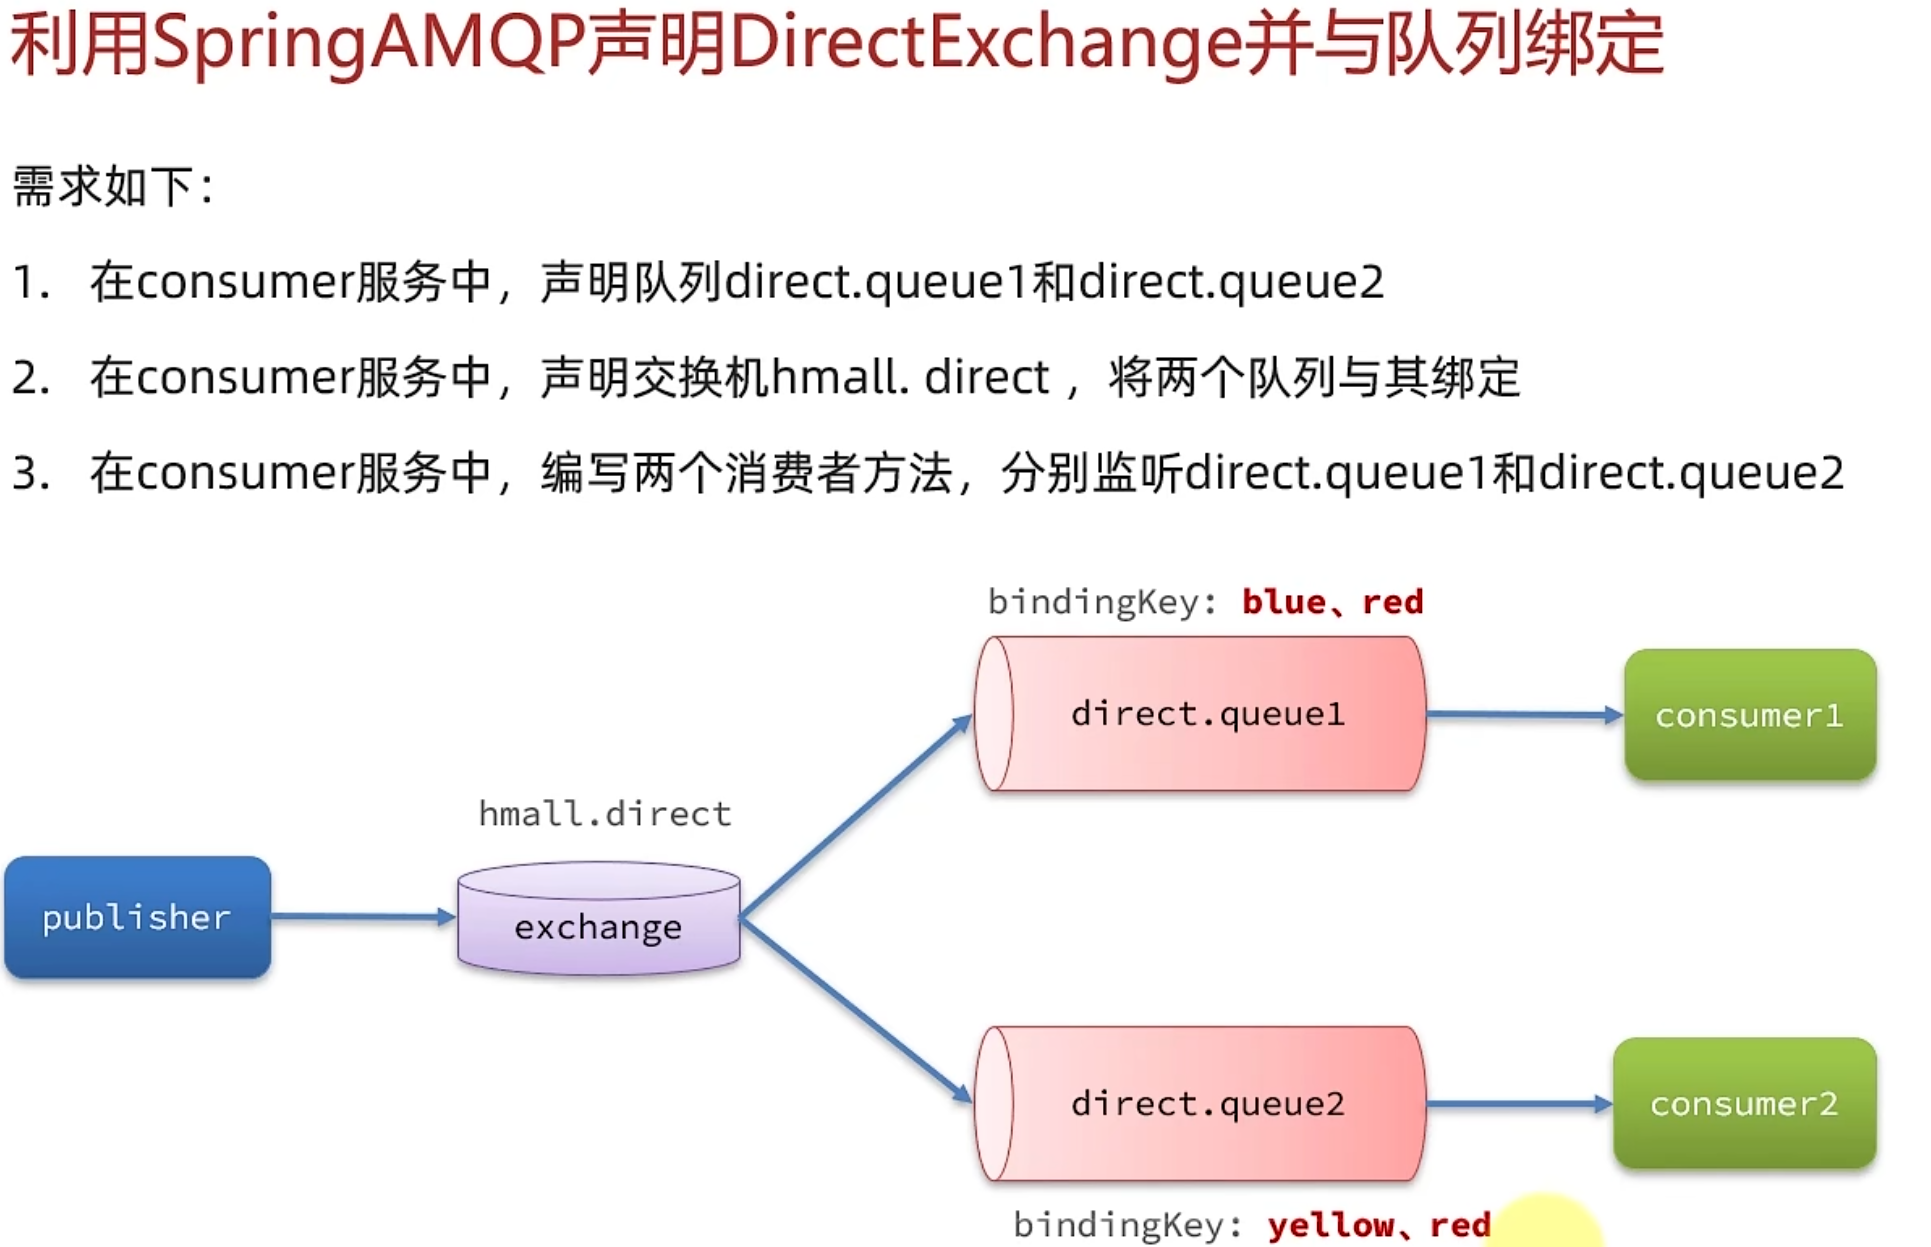
案例:
法一:
java
package com.itheima.consumer.Config;

import org.springframework.amqp.core.*;
import org.springframework.context.annotation.Bean;
import org.springframework.context.annotation.Configuration;

@Configuration
public class DirectConfiguration {
    @Bean
    public DirectExchange directExchange(){
        return new DirectExchange("hmall.direct");
       /* return ExchangeBuilder.fanoutExchange("hamll.direct").build();*/
    }
    @Bean
    public Queue directQueue1(){
        return QueueBuilder.durable("direct.queue1").build();
        /*return new Queue("direct.queue1");*/
    }

    //Direct交换机的Key每次只能绑定一个Key
    @Bean
    public Binding directQueue1BindingRed(Queue directQueue1,DirectExchange directExchange){
        return BindingBuilder.bind(directQueue1).to(directExchange).with("red");
    }
    @Bean
    public Binding directQueue1BindingBlue(Queue directQueue1,DirectExchange directExchange){
        return BindingBuilder.bind(directQueue1).to(directExchange).with("blue");
    }

    @Bean
    public Queue directQueue2(){
        return QueueBuilder.durable("direct.queue2").build();
        /*return new Queue("direct.queue1");*/
    }

    //Direct交换机的Key每次只能绑定一个Key
    @Bean
    public Binding directQueue2BindingRed(Queue directQueue2,DirectExchange directExchange){
        return BindingBuilder.bind(directQueue2).to(directExchange).with("red");
    }
    @Bean
    public Binding directQueue2BindingYellow(Queue directQueue2,DirectExchange directExchange){
        return BindingBuilder.bind(directQueue2).to(directExchange).with("yellow");
    }
}
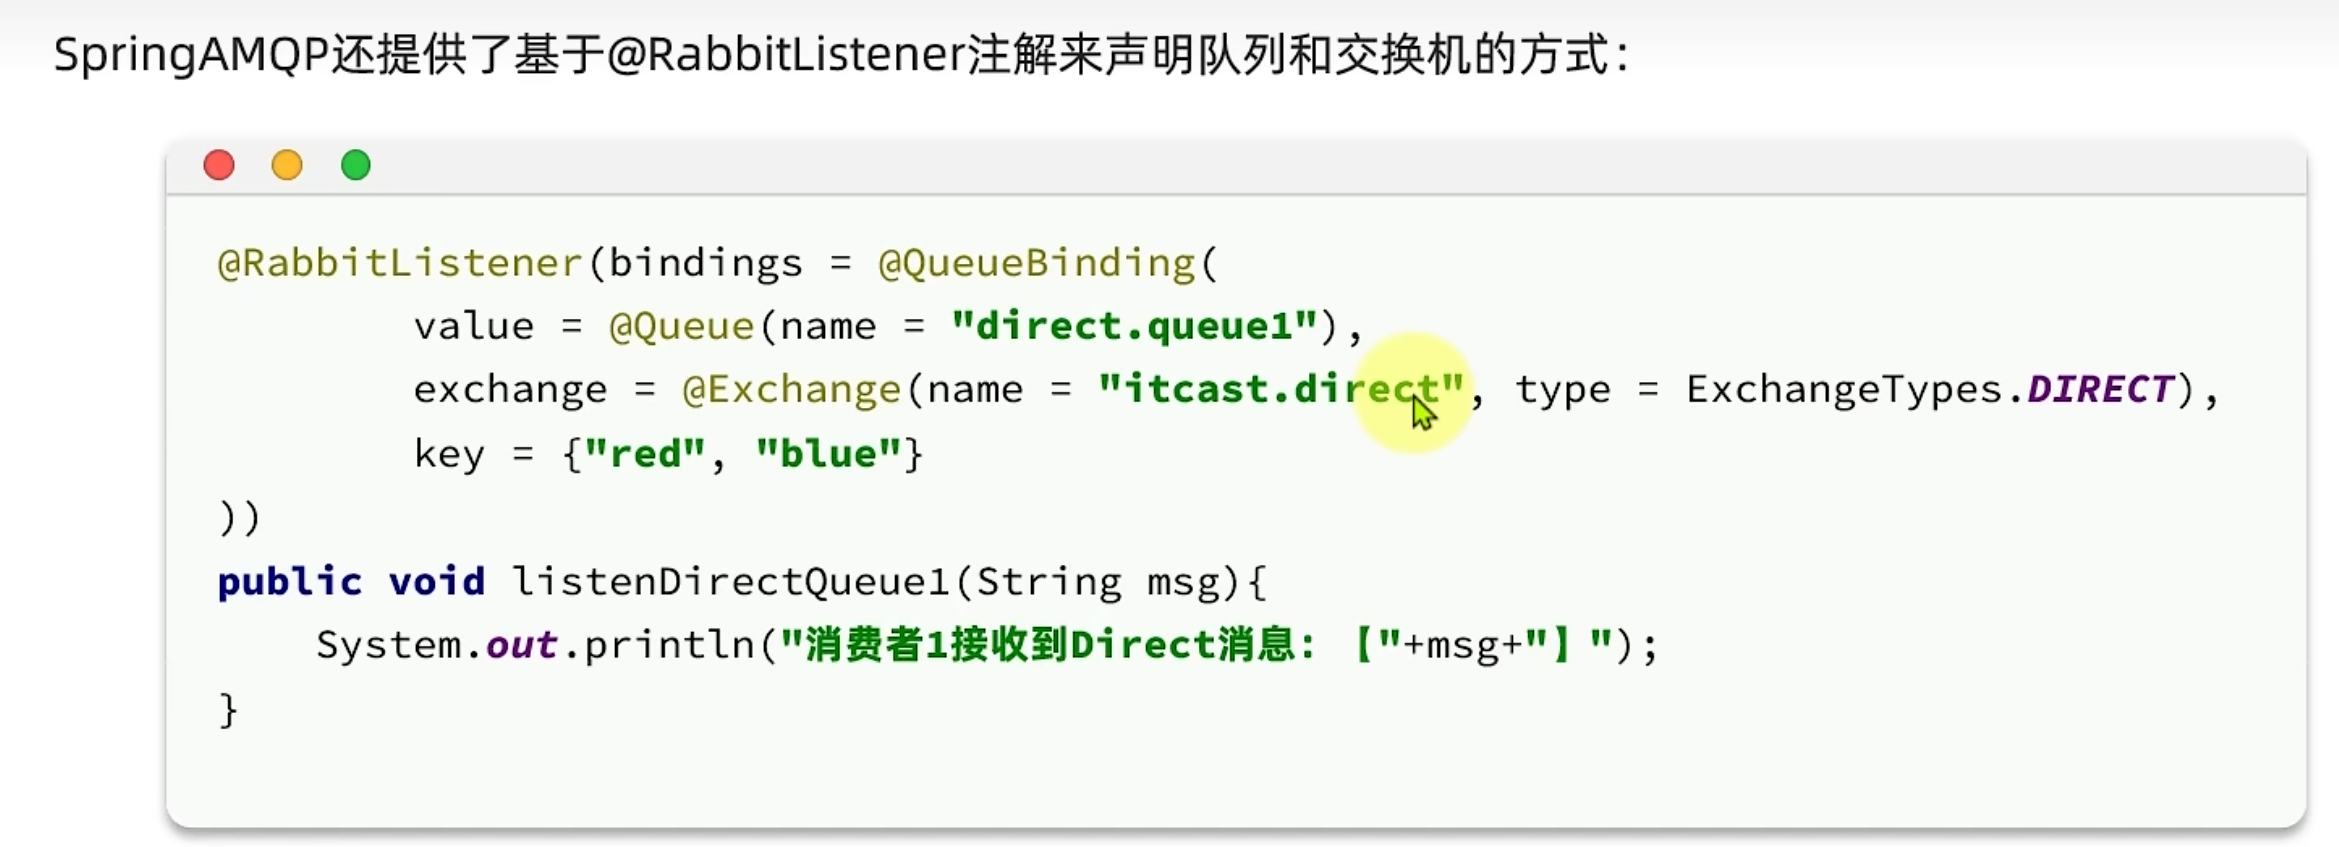
法二(基于注解):
java
    @RabbitListener(bindings = @QueueBinding(
            value = @Queue(name = "direct.queue1",durable = "true"),
            exchange = @Exchange(name = "hmall.direct",type = ExchangeTypes.DIRECT),
            key = {"red","blue"}
    ))
    /*@RabbitListener(queues = "direct.queue1")*/
    public void listenDirectQueue1(String message){
        log.info("消费者1监听到direct.queue1的消息:{}",message);
    }

    @RabbitListener(bindings = @QueueBinding(
            value = @Queue(name = "direct.queue2",durable = "true"),
            exchange = @Exchange(name = "hmall.direct",type = ExchangeTypes.DIRECT),
            key = {"red","yellow"}
    ))
    /*@RabbitListener(queues = "direct.queue2")*/
    public void listenDirectQueue2(String message){
        log.info("消费者2监听到 direct.queue2的消息:{}",message);
    }
消息转换器:
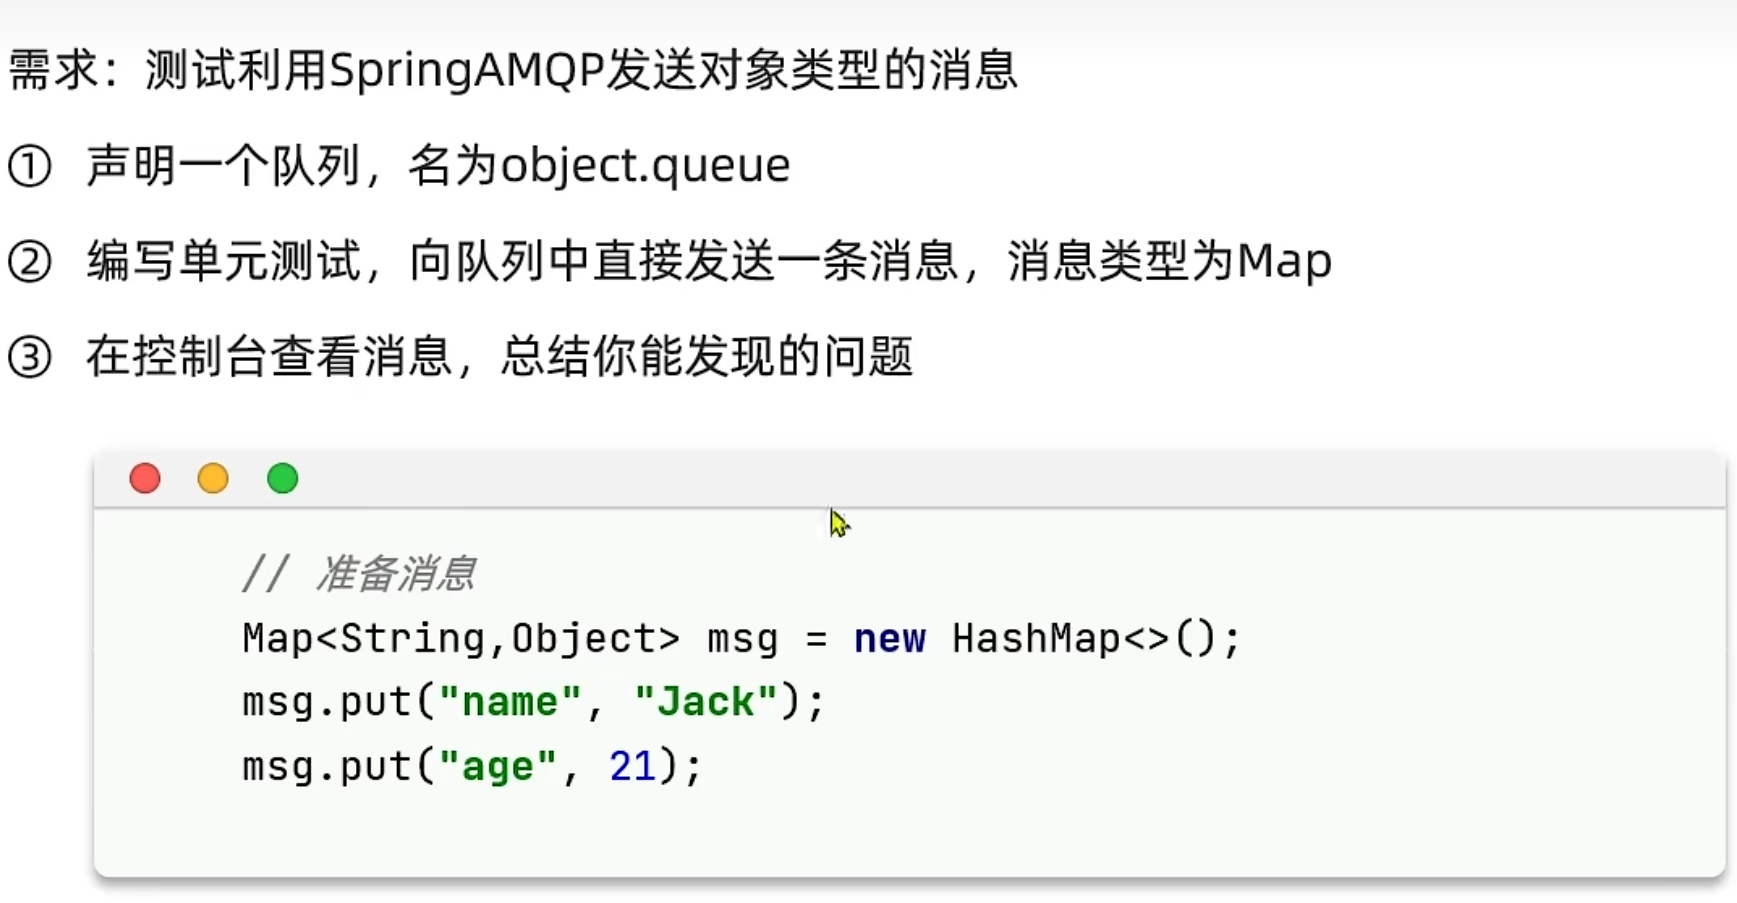
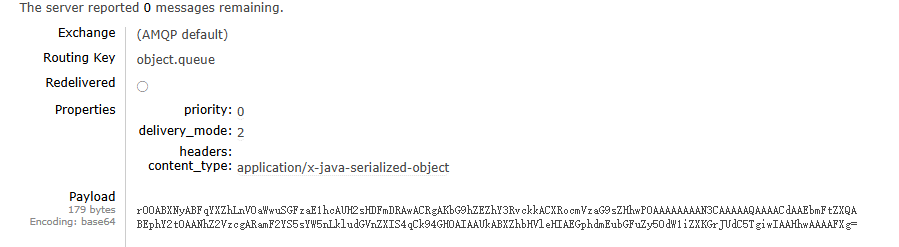
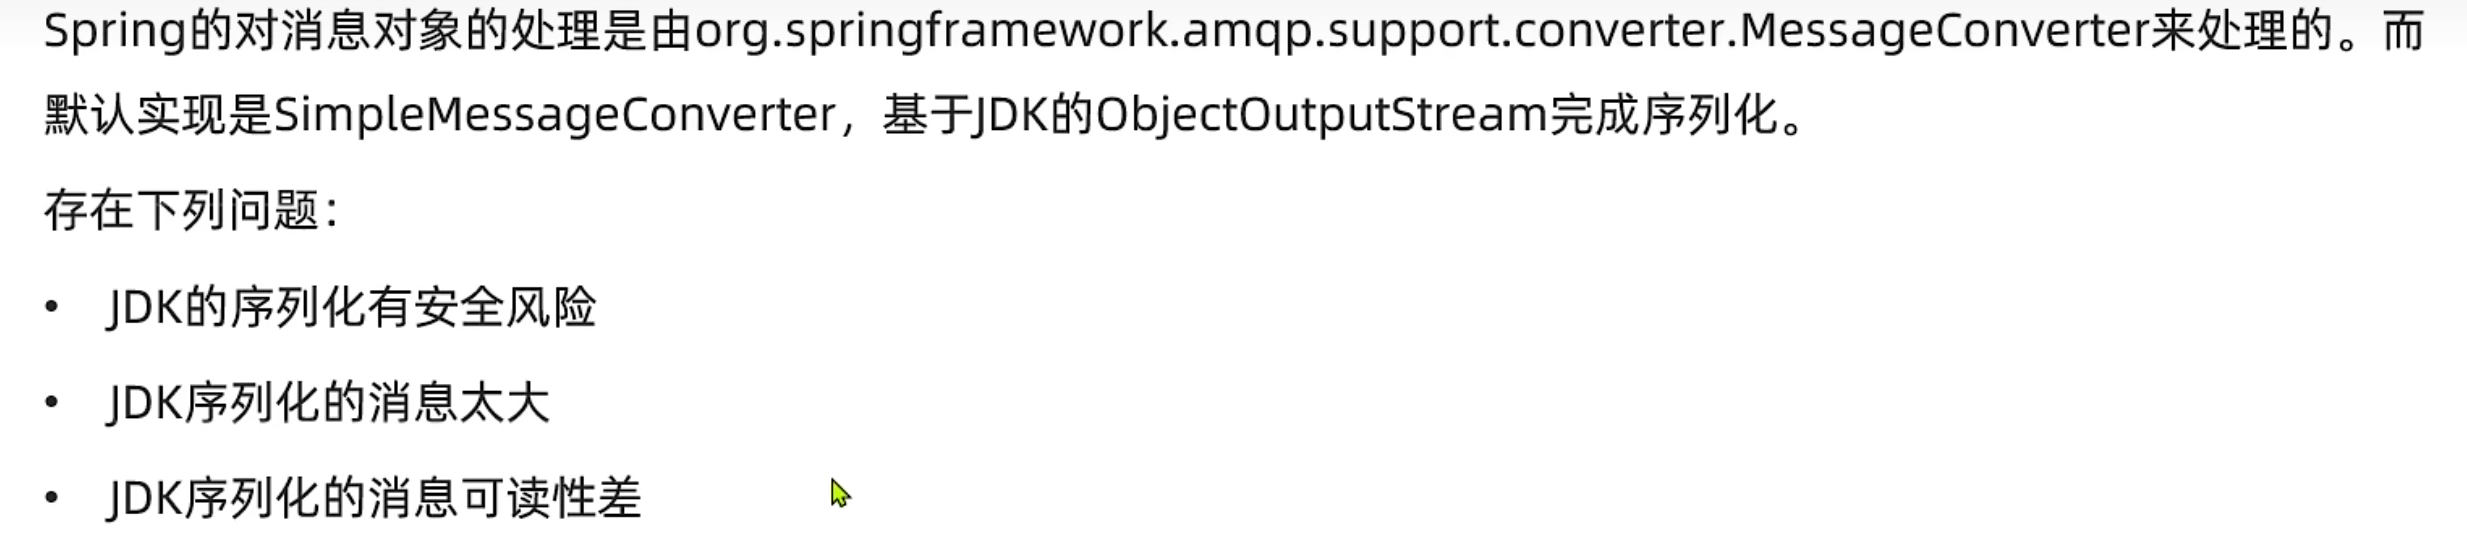
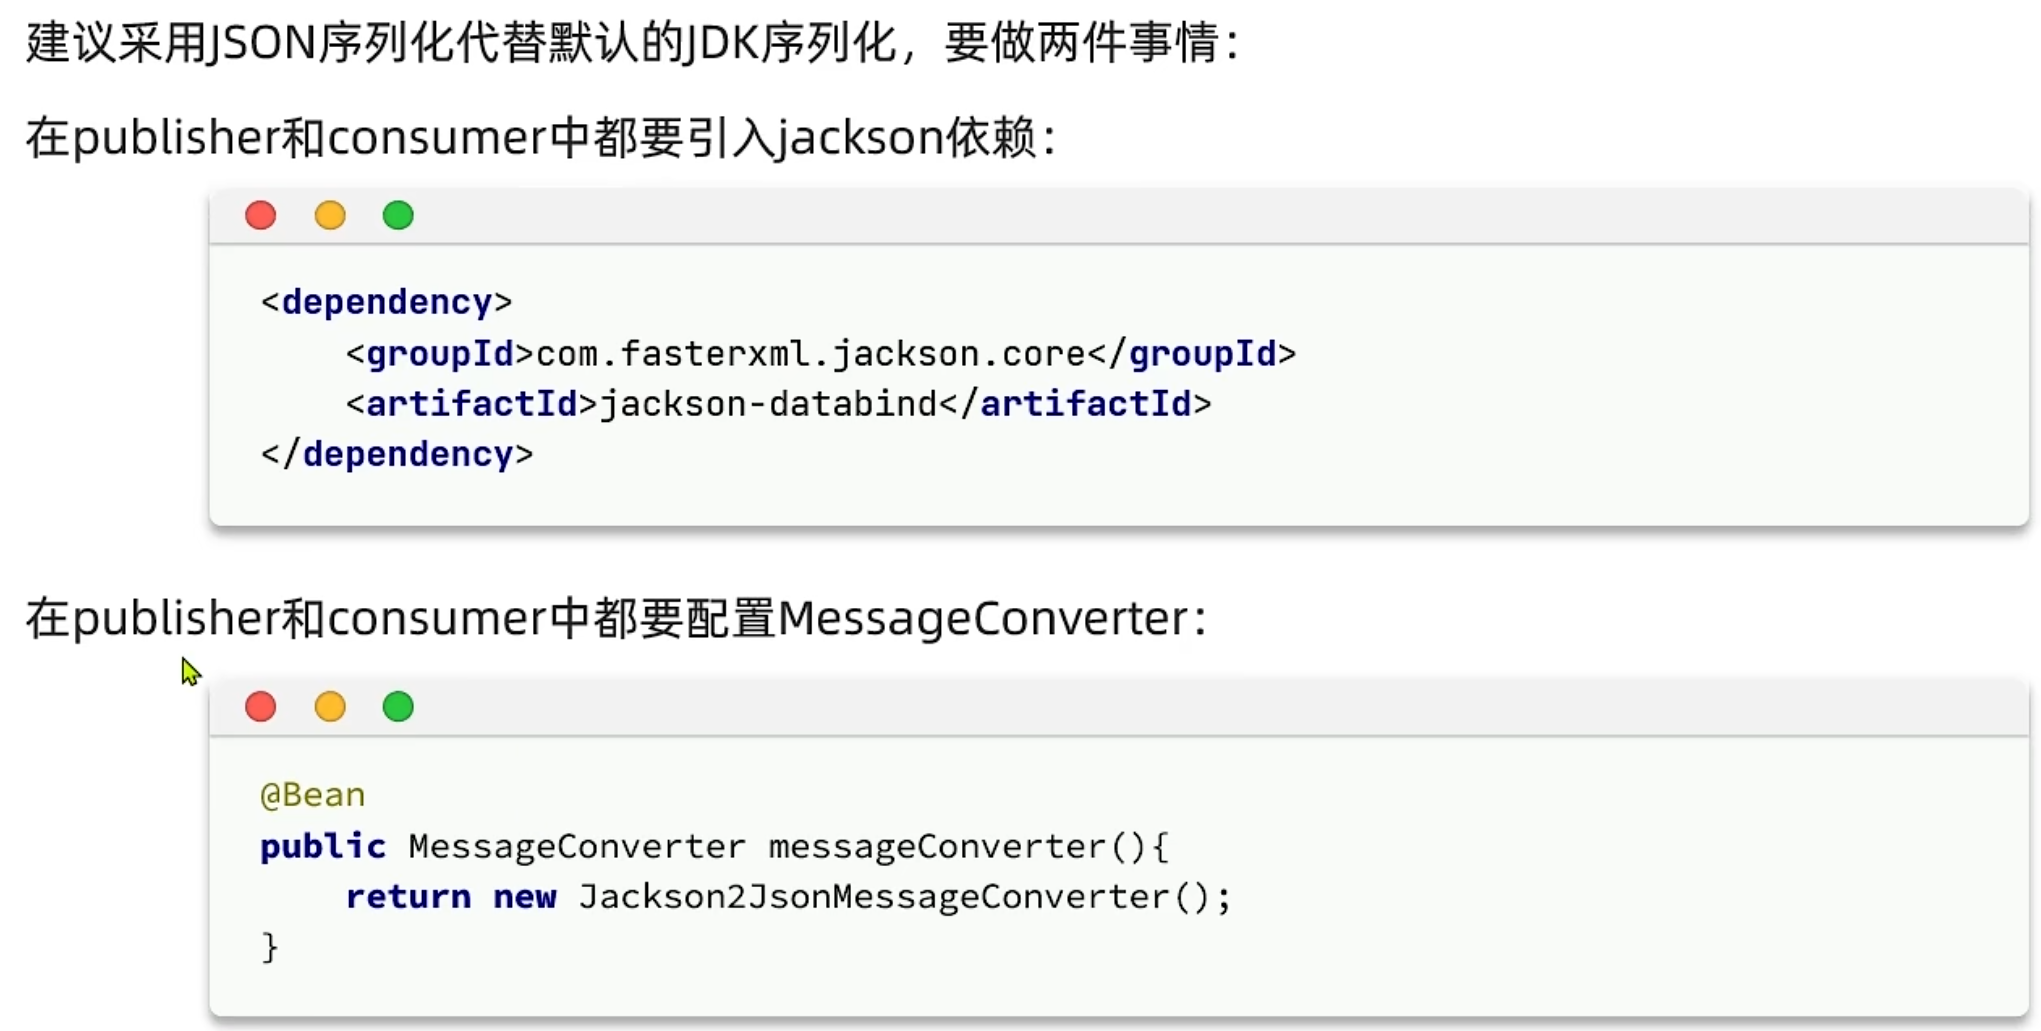
案例:
java
package com.itheima.publisher.config;

import org.springframework.amqp.support.converter.Jackson2JsonMessageConverter;
import org.springframework.amqp.support.converter.MessageConverter;
import org.springframework.context.annotation.Bean;
import org.springframework.context.annotation.Configuration;

@Configuration
public class MessageConverterConfiguration {

    @Bean
    public MessageConverter messageConverter(){
        return new Jackson2JsonMessageConverter();
    }
}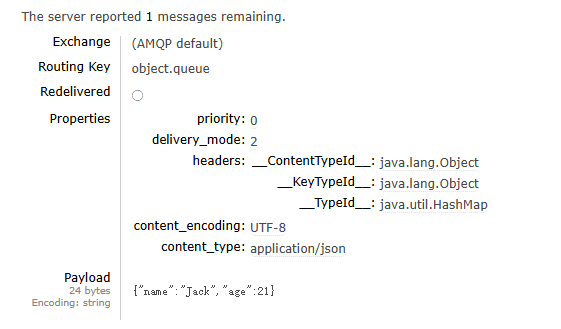
java
    @RabbitListener(queues = "object.queue")
    public void listenObjectQueue(Map<String,Object> message){
        log.info("消费者2监听到 direct.queue2的消息:{}",message);
    }
四、业务改造
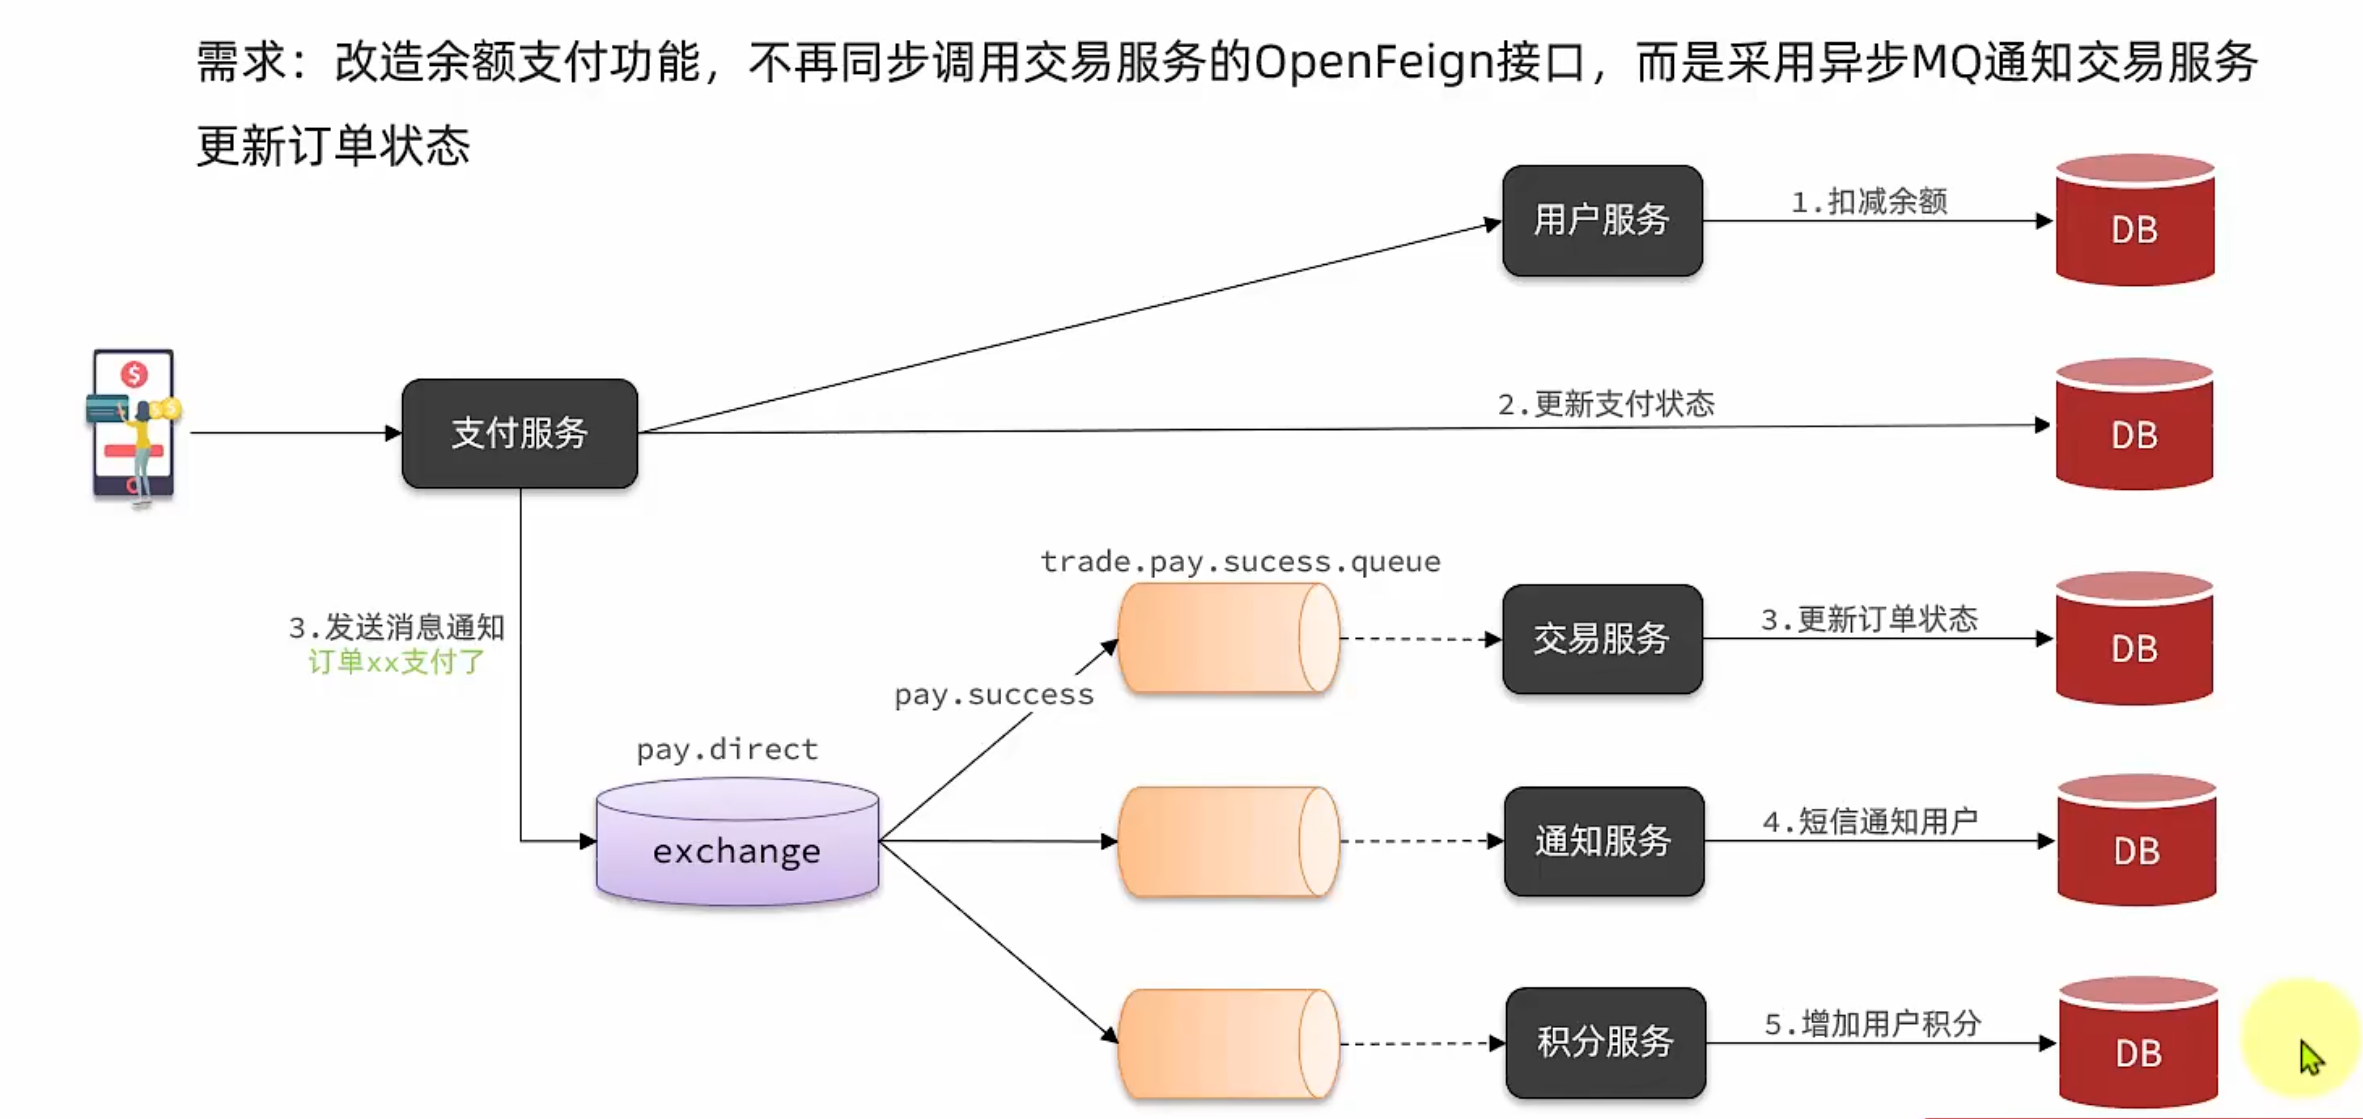
配置依赖:
java
        <!--amqp-->
        <dependency>
            <groupId>org.springframework.boot</groupId>
            <artifactId>spring-boot-starter-amqp</artifactId>
        </dependency>
配置yaml文件:
bash
spring:
  rabbitmq:
    host: 192.168.50.129 # 你的虚拟机IP
    port: 5672 # 端口
    virtual-host: /hmall # 虚拟主机
    username: hmall # 用户名
    password: 123 # 密码
在Common中配置一个Json消息转换器:
java
package com.hmall.common.config;

import org.springframework.amqp.support.converter.Jackson2JsonMessageConverter;
import org.springframework.amqp.support.converter.MessageConverter;
import org.springframework.context.annotation.Bean;
import org.springframework.context.annotation.Configuration;

@Configuration
public class MqConfig {
    @Bean
    public MessageConverter messageConverter(){
        return new Jackson2JsonMessageConverter();
    }
}
交易微服务中置消费者 Consumer--Listener(监听):
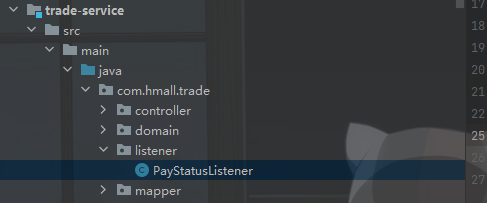
java
package com.hmall.trade.listener;

import com.hmall.trade.service.IOrderService;
import lombok.RequiredArgsConstructor;
import org.springframework.amqp.core.ExchangeTypes;
import org.springframework.amqp.rabbit.annotation.Exchange;
import org.springframework.amqp.rabbit.annotation.Queue;
import org.springframework.amqp.rabbit.annotation.QueueBinding;
import org.springframework.amqp.rabbit.annotation.RabbitListener;
import org.springframework.stereotype.Component;

@Component
@RequiredArgsConstructor
public class PayStatusListener {

    private final IOrderService orderService;
    @RabbitListener(bindings = @QueueBinding(
            value = @Queue(name = "trade.pay.success.queue",durable = "true"),
            exchange = @Exchange(name = "pay.direct",type = ExchangeTypes.DIRECT),
            key = {"pay.success"}
    ))
    public void listenPaySuccess(Long orderId){
        orderService.markOrderPaySuccess(orderId);
    }

}
支付微服务中设置Publisher--基于MQ发送消息:
注入 RabbitTemplate 来实现
java
    private final RabbitTemplate rabbitTemplate;

    @Override
    @Transactional
    public void tryPayOrderByBalance(PayOrderFormDTO payOrderFormDTO) {
        // 1.查询支付单
        PayOrder po = getById(payOrderFormDTO.getId());
        // 2.判断状态
        if(!PayStatus.WAIT_BUYER_PAY.equalsValue(po.getStatus())){
            // 订单不是未支付,状态异常
            throw new BizIllegalException("交易已支付或关闭!");
        }
        // 3.尝试扣减余额
        /*userService.deductMoney(payOrderFormDTO.getPw(), po.getAmount());*/
        userClient.deductMoney(payOrderFormDTO.getPw(), po.getAmount());
        // 4.修改支付单状态
        boolean success = markPayOrderSuccess(payOrderFormDTO.getId(), LocalDateTime.now());
        if (!success) {
            throw new BizIllegalException("交易已支付或关闭!");
        }
        //5.修改订单状态

        //异步通知
        try {
            rabbitTemplate.convertAndSend("pay.direct","pay.success",po.getBizOrderNo());
        } catch (Exception e) {
            log.error("发送支付状态通知失败,订单id:{}",po.getBizOrderNo(),e);
            //兜底方案
        }
    }