django-plotly-dash 的使用文档:https://django-plotly-dash.readthedocs.io/en/stable/introduction.html 以下内容大部分保留原文档的内容,添加实际的步骤和必要的说明。
django-plotly-dash安装及使用
- 1.安装配置
-
- [1.1 安装](#1.1 安装)
- [1.2 注册组件](#1.2 注册组件)
- [1.3 配置框架](#1.3 配置框架)
- [1.4 注册路由](#1.4 注册路由)
- [1.5 更新数据库](#1.5 更新数据库)
- [1.6 Note](#1.6 Note)
- [2.Simple usage](#2.Simple usage)
- 3.效果
1.安装配置
The package requires version 3.2 or greater of Django, and a minimum Python version needed of 3.8. 这句话很重要,Django 的版本不能低于3.2 Python 的版本不能低于 3.8。这就导致之前的 Dockerfile无法使用了:
dockerfile
FROM python:3.7-slim-stretch
WORKDIR /app
COPY requirements.txt ./
RUN pip install -r requirements.txt -i https://mirrors.aliyun.com/pypi/simple/
COPY . .
EXPOSE 8086
CMD python manage.py runserver 0.0.0.0:8086
1.1 安装
Use pip to install the package, preferably to a local virtualenv:
bash
pip install django_plotly_dash实测使用 conda无法进行安装,之前安装过 Django 在安装 django_plotly_dash 时卸载了旧版本,安装了新版本:
bash
Installing collected packages: dpd-components, Django, channels, dash-bootstrap-components, django_plotly_dash
  Attempting uninstall: Django
    Found existing installation: Django 3.2.12
    Uninstalling Django-3.2.12:
      Successfully uninstalled Django-3.2.12
Successfully installed Django-4.2.20 channels-4.2.2 dash-bootstrap-components-1.7.1 django_plotly_dash-2.4.5 dpd-components-0.1.0
项目的 repuirements.txt文件修改为:
bash
django==4.2.20
django_plotly_dash==2.4.5
ngender==0.1.1
networkx==2.4.0
1.2 注册组件
Then, add django_plotly_dash to INSTALLED_APPS in the Django settings.py file:
python
INSTALLED_APPS = [
    ...
    'django_plotly_dash.apps.DjangoPlotlyDashConfig',
...
]
python
INSTALLED_APPS = [
    'django.contrib.admin',
    'django.contrib.auth',
    'django.contrib.contenttypes',
    'django.contrib.sessions',
    'django.contrib.messages',
    'django.contrib.staticfiles',
    'django_plotly_dash.apps.DjangoPlotlyDashConfig'
]
The project directory name django_plotly_dash can also be used on its own if preferred, but this will stop the use of readable application names in the Django admin interface.
1.3 配置框架
Also, enable the use of frames within HTML documents by also adding to the settings.py file:
python
X_FRAME_OPTIONS = 'SAMEORIGIN'Further, if the header and footer tags are in use then django_plotly_dash.middleware.BaseMiddleware should be added to MIDDLEWARE in the same file. This can be safely added now even if not used.
此外,如果使用了页眉和页脚标签,那么django_plotly_dash.middleware。BaseMiddleware应该在同一个文件中添加到MIDDLEWARE中。即使不使用,现在也可以安全地添加。
If assets are being served locally through the use of the global serve_locally or on a per-app basis, then django_plotly_dash.middleware.ExternalRedirectionMiddleware should be added, along with the whitenoise package whose middleware should also be added as per the instructions for that package. In addition, dpd_static_support should be added to the INSTALLED_APPS setting.
如果资产是通过使用全局server_local或基于每个应用在本地提供的,那么django_plotly_dash.middleware。应该添加ExternalRedirectionMiddleware,以及whitenoise包,该包的中间件也应该按照该包的说明添加。此外,应该将dpd_static_support添加到INSTALLED_APPS设置中。
Django 也只是入门会用,所以这部分我是不太懂的。
1.4 注册路由
The application's routes need to be registered within the routing structure by an appropriate include statement in a urls.py file:
python
urlpatterns = [
    ...
    path('django_plotly_dash/', include('django_plotly_dash.urls')),
]
The name within the URL is not important and can be changed.
1.5 更新数据库
For the final installation step, a migration is needed to update the database:
bash
./manage.py migrate
bash
Operations to perform:
  Apply all migrations: admin, auth, contenttypes, django_dash_demo, django_plotly_dash, sessions
Running migrations:
  Applying django_plotly_dash.0001_initial... OK
  Applying django_plotly_dash.0002_add_examples... OK
数据库会添加两张表:
- django_plotly_dash_dashapp
- django_plotly_dash_statelessapp
It is important to ensure that any applications are registered using the DjangoDash class. This means that any python module containing the registration code has to be known to Django and loaded at the appropriate time.
确保所有应用程序都是使用django类注册的,这一点很重要。这意味着Django必须知道任何包含注册码的python模块,并在适当的时候加载。
1.6 Note
An easy way to register the Plotly app is to import it into
views.pyorurls.pyas in the following example, which assumes theplotly_appmodule (plotly_app.py) is located in the same folder asviews.py:
plain
``from . import plotly_app``Once your Plotly app is registered, plotly_app tag in the plotly_dash tag library can then be used to render it as a dash component. See Simple usage for a simple example.
安装步骤的 Extra steps for live state和 Further configuration用到的时候再进行说明。
2.Simple usage
To use existing dash applications, first register them using the DjangoDash class. This replaces the Dash class from the dash package.
使用 django_plotly_dash 要使用 DjangoDash 类来注册实例。
Taking a simple example inspired by the excellent getting started guide:
python
import dash
from dash import dcc, html

from django_plotly_dash import DjangoDash

app = DjangoDash('SimpleExample')   # replaces dash.Dash

app.layout = html.Div([
    dcc.RadioItems(
        id='dropdown-color',
        options=[{'label': c, 'value': c.lower()} for c in ['Red', 'Green', 'Blue']],
        value='red'
    ),
    html.Div(id='output-color'),
    dcc.RadioItems(
        id='dropdown-size',
        options=[{'label': i,
                  'value': j} for i, j in [('L','large'), ('M','medium'), ('S','small')]],
        value='medium'
    ),
    html.Div(id='output-size')

])

@app.callback(
    dash.dependencies.Output('output-color', 'children'),
    [dash.dependencies.Input('dropdown-color', 'value')])
def callback_color(dropdown_value):
    return "The selected color is %s." % dropdown_value

@app.callback(
    dash.dependencies.Output('output-size', 'children'),
    [dash.dependencies.Input('dropdown-color', 'value'),
     dash.dependencies.Input('dropdown-size', 'value')])
def callback_size(dropdown_color, dropdown_size):
    return "The chosen T-shirt is a %s %s one." %(dropdown_size,
                                                  dropdown_color)
我们看一个菜鸟上的实例,使用的是 dash.Dash进行实例化的:
python
import dash
from dash import dcc, html  # dcc 是 Dash 核心组件库,html 是 HTML 组件库

# 创建一个 Dash 应用实例
app = dash.Dash(__name__)

# 定义应用的布局
app.layout = html.Div(children=[
    # 添加一个标题
    html.H1(children='你好,Dash!'),

    # 添加一段描述文字
    html.Div(children='''
        Dash:一个用于 Python 的 Web 应用框架。
    '''),

    # 添加一个图表
    dcc.Graph(
        id='example-graph',  # 图表的 ID,用于回调函数
        figure={
            'data': [  # 图表的数据
                {'x': [1, 2, 3], 'y': [4, 1, 2], 'type': 'bar', 'name': '上海'},
                {'x': [1, 2, 3], 'y': [2, 4, 5], 'type': 'bar', 'name': '北京'},
            ],
            'layout': {  # 图表的布局
                'title': 'Dash 数据可视化示例'  # 图表的标题
            }
        }
    )
])

# 运行应用
if __name__ == '__main__':
    app.run_server(debug=True)  # 启动应用,debug=True 表示开启调试模式
Note that the DjangoDash constructor requires a name to be specified. This name is then used to identify the dash app in templates:
plain
{%load plotly_dash%}

{%plotly_app name="SimpleExample"%}
Direct use in this manner, without any application state or use of live updating, is equivalent to inserting an iframe containing the URL of a Dash application.
Note
The registration code needs to be in a location that will be imported into the Django process before any model or template tag attempts to use it. The example Django application in the demo subdirectory achieves this through an import in the main urls.py file, but any views.py would also be sufficient.
3.效果
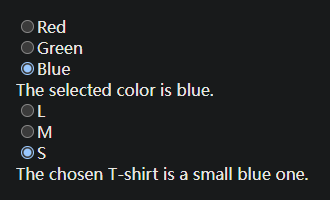
点击 Blue 和 S 显示:
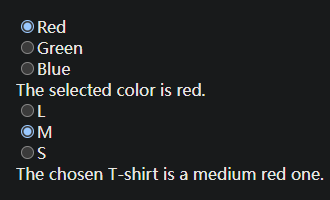
点击 Red 和 M 显示: