前面说了配送 和地址页面
当地址页面为空或需要添加地址时,需要添加地址。
我的地址页面有个按钮 就是添加地址
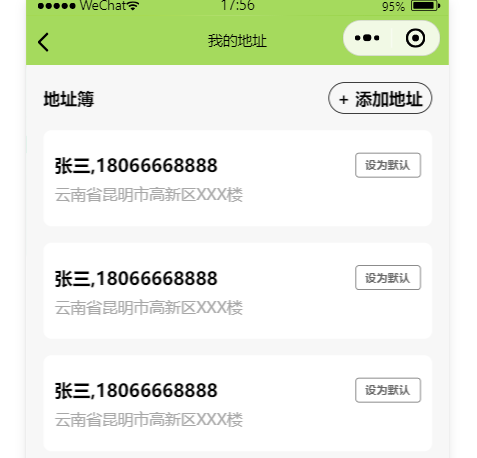
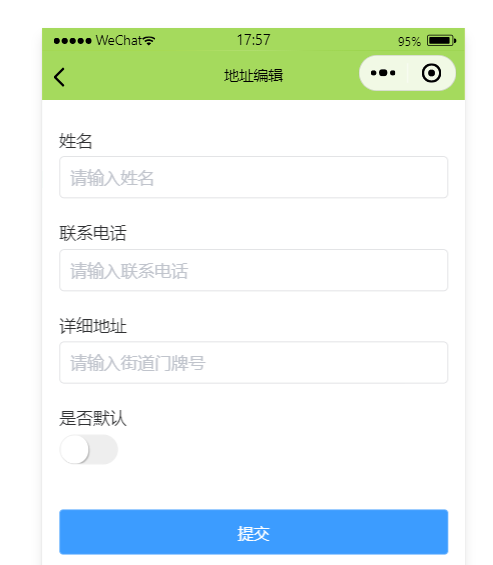
点击 添加地址 按钮 后,就会跳转到地址添加的页面
1、添加地址页面
2、添加地址文件夹以及文件的创建
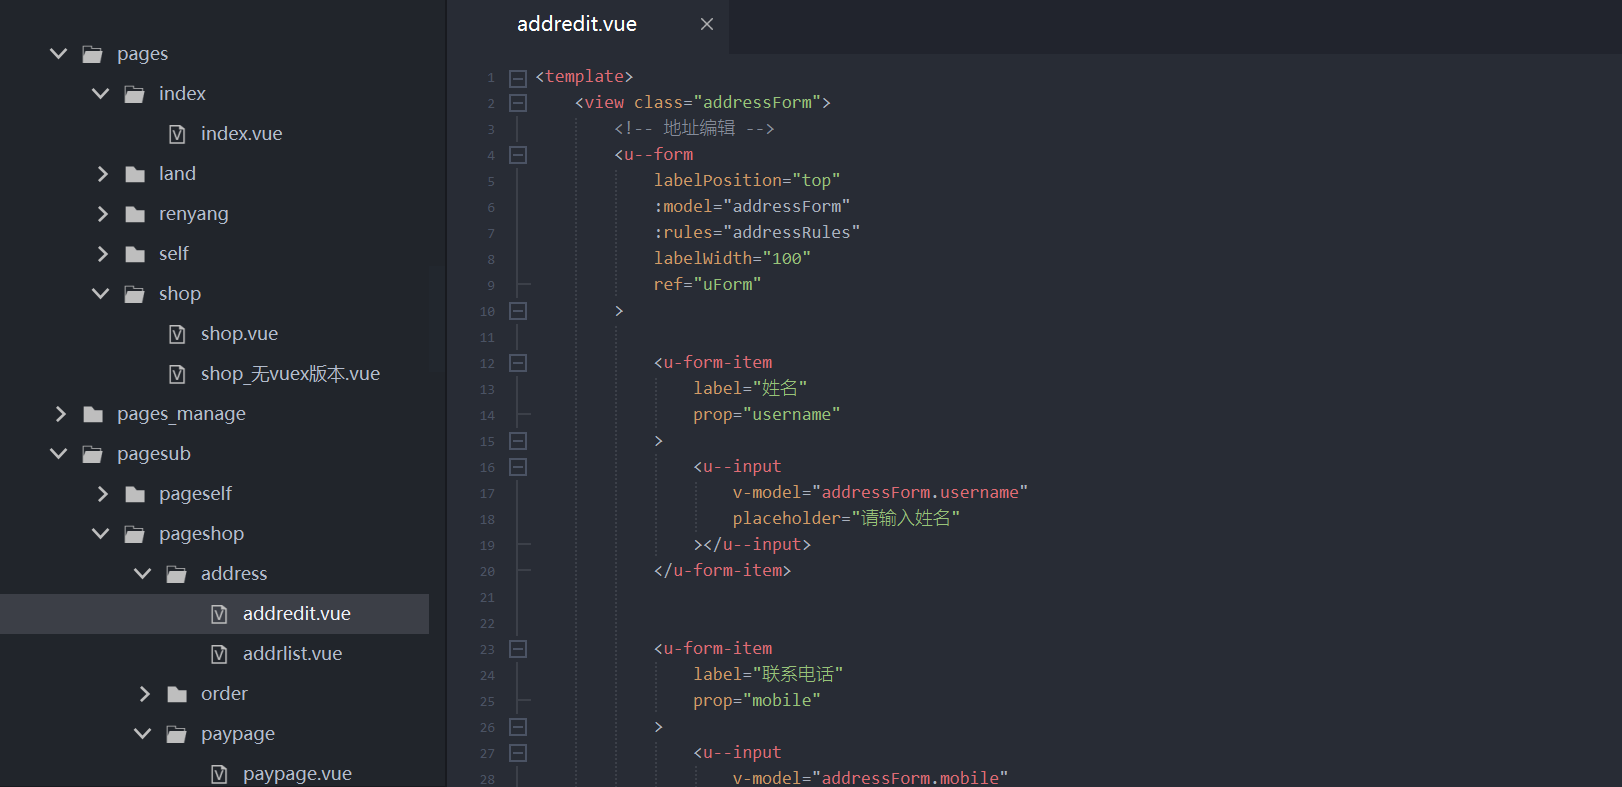
3、添加地址的代码
html
<template>
	<view class="addressForm">
		<!-- 地址编辑 -->
		<u--form
			labelPosition="top"
			:model="addressForm"
			:rules="addressRules"
			labelWidth="100"
			ref="uForm"
		>

			<u-form-item
				label="姓名"
				prop="username"
			>
				<u--input
					v-model="addressForm.username"
					placeholder="请输入姓名"
				></u--input>
			</u-form-item>


			<u-form-item
				label="联系电话"
				prop="mobile"
			>
				<u--input
					v-model="addressForm.mobile"
					placeholder="请输入联系电话"
				></u--input>
			</u-form-item>

			<u-form-item
				label="详细地址"
				prop="address"
			>
				<u--input
					v-model="addressForm.address"
					placeholder="请输入街道门牌号"
				></u--input>
			</u-form-item>

			<u-form-item label="是否默认">
				<u-switch v-model="addressForm.selected"
					inactiveColor="#eee"
				></u-switch>
			</u-form-item>

			<u-form-item></u-form-item>

			<u-form-item>
				<u-button type="primary" @click="onSubmit">提交</u-button>
			</u-form-item>

		</u--form>
	</view>
</template>

<script>
	export default {
		data() {
			return {
				addressForm:{
					username:"",
					mobile:"",
					address:"",
					selected:false
				},
				addressRules:{
					username:[
						{
							required: true,
							message: '姓名是必填的',
							trigger: ['blur', 'change']
						},{
							min: 2,
							max: 8,
							message: '长度在2-8个字符之间',
							trigger: ['blur', 'change']
						}
					],
					mobile:[
						{
							required: true,
							message: '电话是必填的',
							trigger: ['blur', 'change']
						},{
							validator: (rule, value, callback) => {
								return uni.$u.test.mobile(value);
							},
							message: '手机号码不正确',
							trigger: ['change','blur']
						}
					],
					address:[
						{
							required: true,
							message: '地址是必填的',
							trigger: ['blur', 'change']
						}
					]
				}
			};
		},

		methods:{
			onSubmit(){
				this.$refs.uForm.validate().then(res => {
					uni.$u.toast('校验通过')
				}).catch(errors => {
					uni.$u.toast('校验失败')
				})
			}
		}
	}
</script>

<style lang="scss">
.addressForm{
	padding:30rpx;
}
</style>
4、添加地址页面解析
4.1 使用u--form 整体
Form 表单 | uView 2.0 - 全面兼容 nvue 的 uni-app 生态框架 - uni-app UI 框架
注意:
由于在nvue下,u-form名称被uni-app官方占用,在nvue页面中请使用u--form名称,在vue页面中使用u--form或者u-form均可。
html
    <u--form
   			labelPosition="top"
			:model="addressForm"
			:rules="addressRules"
			labelWidth="100"
			ref="uForm"
		>
    </u--form>
ref 后面使用的表单名字
labelwidth 标签宽度 就是 表头占位的长度
rules 校验规则
model 表单内容
lableposition 表单布局 左右还是上下
Form Props
| 参数 | 说明 | 类型 | 默认值 | 可选值 |
|---|---|---|---|---|
| model | 表单数据对象 | Object | - | - |
| rules | 通过ref设置,如果rules中有自定义方法等,需要使用setRules方法设置规则,见上方说明 |
Object|Function|Array | - | - |
| errorType | 错误的提示方式,见上方说明 | String | message | none|toast|border-bottom|none |
| borderBottom | 是否显示表单域的下划线边框 | Boolean | true | - |
| labelPosition | 表单域提示文字的位置,left-左侧,top-上方 |
String | left | top |
| labelWidth | 提示文字的宽度,单位px | String | Number | 45 | 数值 / auto |
| labelAlign | lable字体的对齐方式 | String | left | center / right |
| labelStyle | lable的样式,对象形式 | Object | - | - |
4.2 表单每一条内容布局
都需要放到 u--form 具体看代码
html
			<u-form-item
				label="姓名"
				prop="username"
			>
				<u--input
					v-model="addressForm.username"
					placeholder="请输入姓名"
				></u--input>
			</u-form-item>
4.3 设置默认的按钮
依然要放到u--from 中的 u-from-item中
html
			<u-form-item label="是否默认">
				<u-switch v-model="addressForm.selected"
					inactiveColor="#eee"
				></u-switch>
			</u-form-item>
4.4 提交按钮
依然要放到u--from 中的 u-from-item中
html
            <u-form-item>
				<u-button type="primary" @click="onSubmit">提交</u-button>
			</u-form-item>
方法实现:
html
methods:{
			onSubmit(){
				this.$refs.uForm.validate().then(res => {
					uni.$u.toast('校验通过')
				}).catch(errors => {
					uni.$u.toast('校验失败')
				})
			}
		}
4.5 数据内容
包含基本的数据以及校验规则
校验规则 就是u-view的api
实现很多校验 包含电话,邮箱等字符串的校验
test 规则校验 | uView 2.0 - 全面兼容 nvue 的 uni-app 生态框架 - uni-app UI 框架
html
addressForm:{
					username:"",
					mobile:"",
					address:"",
					selected:false
				},
				addressRules:{
					username:[
						{
							required: true,
							message: '姓名是必填的',
							trigger: ['blur', 'change']
						},{
							min: 2,
							max: 8,
							message: '长度在2-8个字符之间',
							trigger: ['blur', 'change']
						}
					],
					mobile:[
						{
							required: true,
							message: '电话是必填的',
							trigger: ['blur', 'change']
						},{
							validator: (rule, value, callback) => {
								return uni.$u.test.mobile(value);
							},
							message: '手机号码不正确',
							trigger: ['change','blur']
						}
					],
					address:[
						{
							required: true,
							message: '地址是必填的',
							trigger: ['blur', 'change']
						}
					]
				}