一、概述
本篇基于上一节 Python 实现的双通道搜索服务(聚合 SearxNG + 本地知识库),构建一个完整的 HarmonyOS ArkTS 前端页面。用户可在输入框中输入关键词,实时查询本地服务 http://localhost:5001/search?q=...,返回结果自动渲染在页面中,支持中文和英文关键词的综合查询体验。
二、目标说明
- 使用 ArkTS 开发搜索界面组件
- 输入关键词并发起 HTTP 请求
- 支持异步加载并实时显示搜索结果
- 解析标准结构体
{ results: [{ title, content, url }] }并渲染结果列表
三、目录结构
SearchApp/
├── src/main/ets/
│   ├── pages/
│   │   └── Index.ets                # 主页面:包含输入框、按钮和结果列表
│   ├── components/
│   │   └── SearchDisplay.ets        # 每条搜索结果的显示组件
│   ├── services/
│   │   └── SearchService.ets        # 封装 HTTP 调用和 JSON 解析
│   ├── utils/
│   │   └── HttpClient.ets           # 通用的 httpRequestText 实现
│   ├── types/
│   │   └── SearchTypes.ets          # SearchResponse 和 SearchResultList 类型定义
│   └── configs/
│       └── Config.ets               # 搜索 API URL 配置项
四、关键代码实现
1. 配置文件(Config.ets)
ts
export const config = {
  searchApiUrl: "http://192.168.1.103:5001/search"
}
2. 类型定义(SearchTypes.ets)
ts
// src/main/ets/types/SearchTypes.ets

/**
 * 单条搜索结果
 */
export interface SearchResponse {
  title: string
  content: string
  url: string
}

/**
 * 后端返回的结果结构
 */
export interface SearchResultList {
  results: SearchResponse[]
}
3. 搜索服务(SearchService.ets)
ts
// src/main/ets/services/SearchService.ets

import { httpRequestText } from '../utils/HttpClient'
import { http } from '@kit.NetworkKit'
import { SearchResponse, SearchResultList } from '../types/SearchTypes'

export class SearchService {
  private apiUrl: string

  constructor(apiUrl: string) {
    this.apiUrl = apiUrl
  }

  public async search(
    query: string,
    onItem?: (item: SearchResponse) => void
  ): Promise<SearchResponse[]> {
    const url: string = `${this.apiUrl}?q=${encodeURIComponent(query)}`
    let buffer: string = ''

    try {
      await httpRequestText(
        url,
        http.RequestMethod.GET,
        '',
        60000,
        (chunk: string) => {
          buffer += chunk
        }
      )
    } catch {
      console.error('SearchService 网络请求失败')
      throw new Error('Search 请求失败')
    }

    let list: SearchResponse[]
    try {
      // 使用已定义的接口类型,而非内联对象字面量
      const parsed = JSON.parse(buffer) as SearchResultList
      list = parsed.results
    } catch {
      console.error('SearchService JSON 解析失败,buffer=', buffer)
      throw new Error('返回数据格式错误')
    }

    list.forEach((item: SearchResponse) => {
      if (onItem) {
        onItem(item)
      }
    })
    return list
  }
}
4. 单条结果展示组件(SearchDisplay.ets)
ts
// src/main/ets/components/SearchDisplay.ets

import { SearchResponse } from '../types/SearchTypes';

@Component
export struct SearchDisplay {
  private item!: SearchResponse;

  build() {
    Column() {
      Text(this.item.title)
        .fontSize(18)
        .fontWeight('bold')
        .margin({ bottom: 4 });

      Text(this.item.content)
        .fontSize(14)
        .margin({ bottom: 4 });

      Text(this.item.url)
        .fontSize(12)
        .fontColor('#888');    // 使用 fontColor 设置文本颜色
    }
    .padding(10)
    .backgroundColor('#F5F5F5')
    .margin({ bottom: 10 });
  }
}
5. 主页面实现(Index.ets)
ts
// src/main/ets/pages/Index.ets
import { SearchDisplay } from '../components/SearchDisplay'
import { config } from '../configs/Config'
import { SearchService } from '../services/SearchService'
import { SearchResponse } from '../types/SearchTypes'
@Entry
@Component
export struct Index {
@State query: string = 'HarmonyOS'
@State results: SearchResponse[] = []
public async fetchData(): Promise<void> {
this.results = []
try {
const res: SearchResponse[] = await new SearchService(config.searchApiUrl)
.search(this.query)
this.results = res
} catch {
console.error('搜索失败')
}
}
public build(): void {
Column() {
TextInput({ text: this.query, placeholder: '输入搜索关键词,如 ChatGPT' })
.onChange((value: string): void => {
this.query = value
})
.width('match_parent')
.height(50)
.width(300)
.margin({ bottom: 12 })
Button('搜索')
.width('match_parent')
.height(50)
.onClick((): void => {
this.fetchData()
})
.margin({ bottom: 20 })
ForEach(this.results, (item: SearchResponse): void => {
SearchDisplay({ item })
})
}
.padding({ left: 20, right: 20, top: 20 })
}
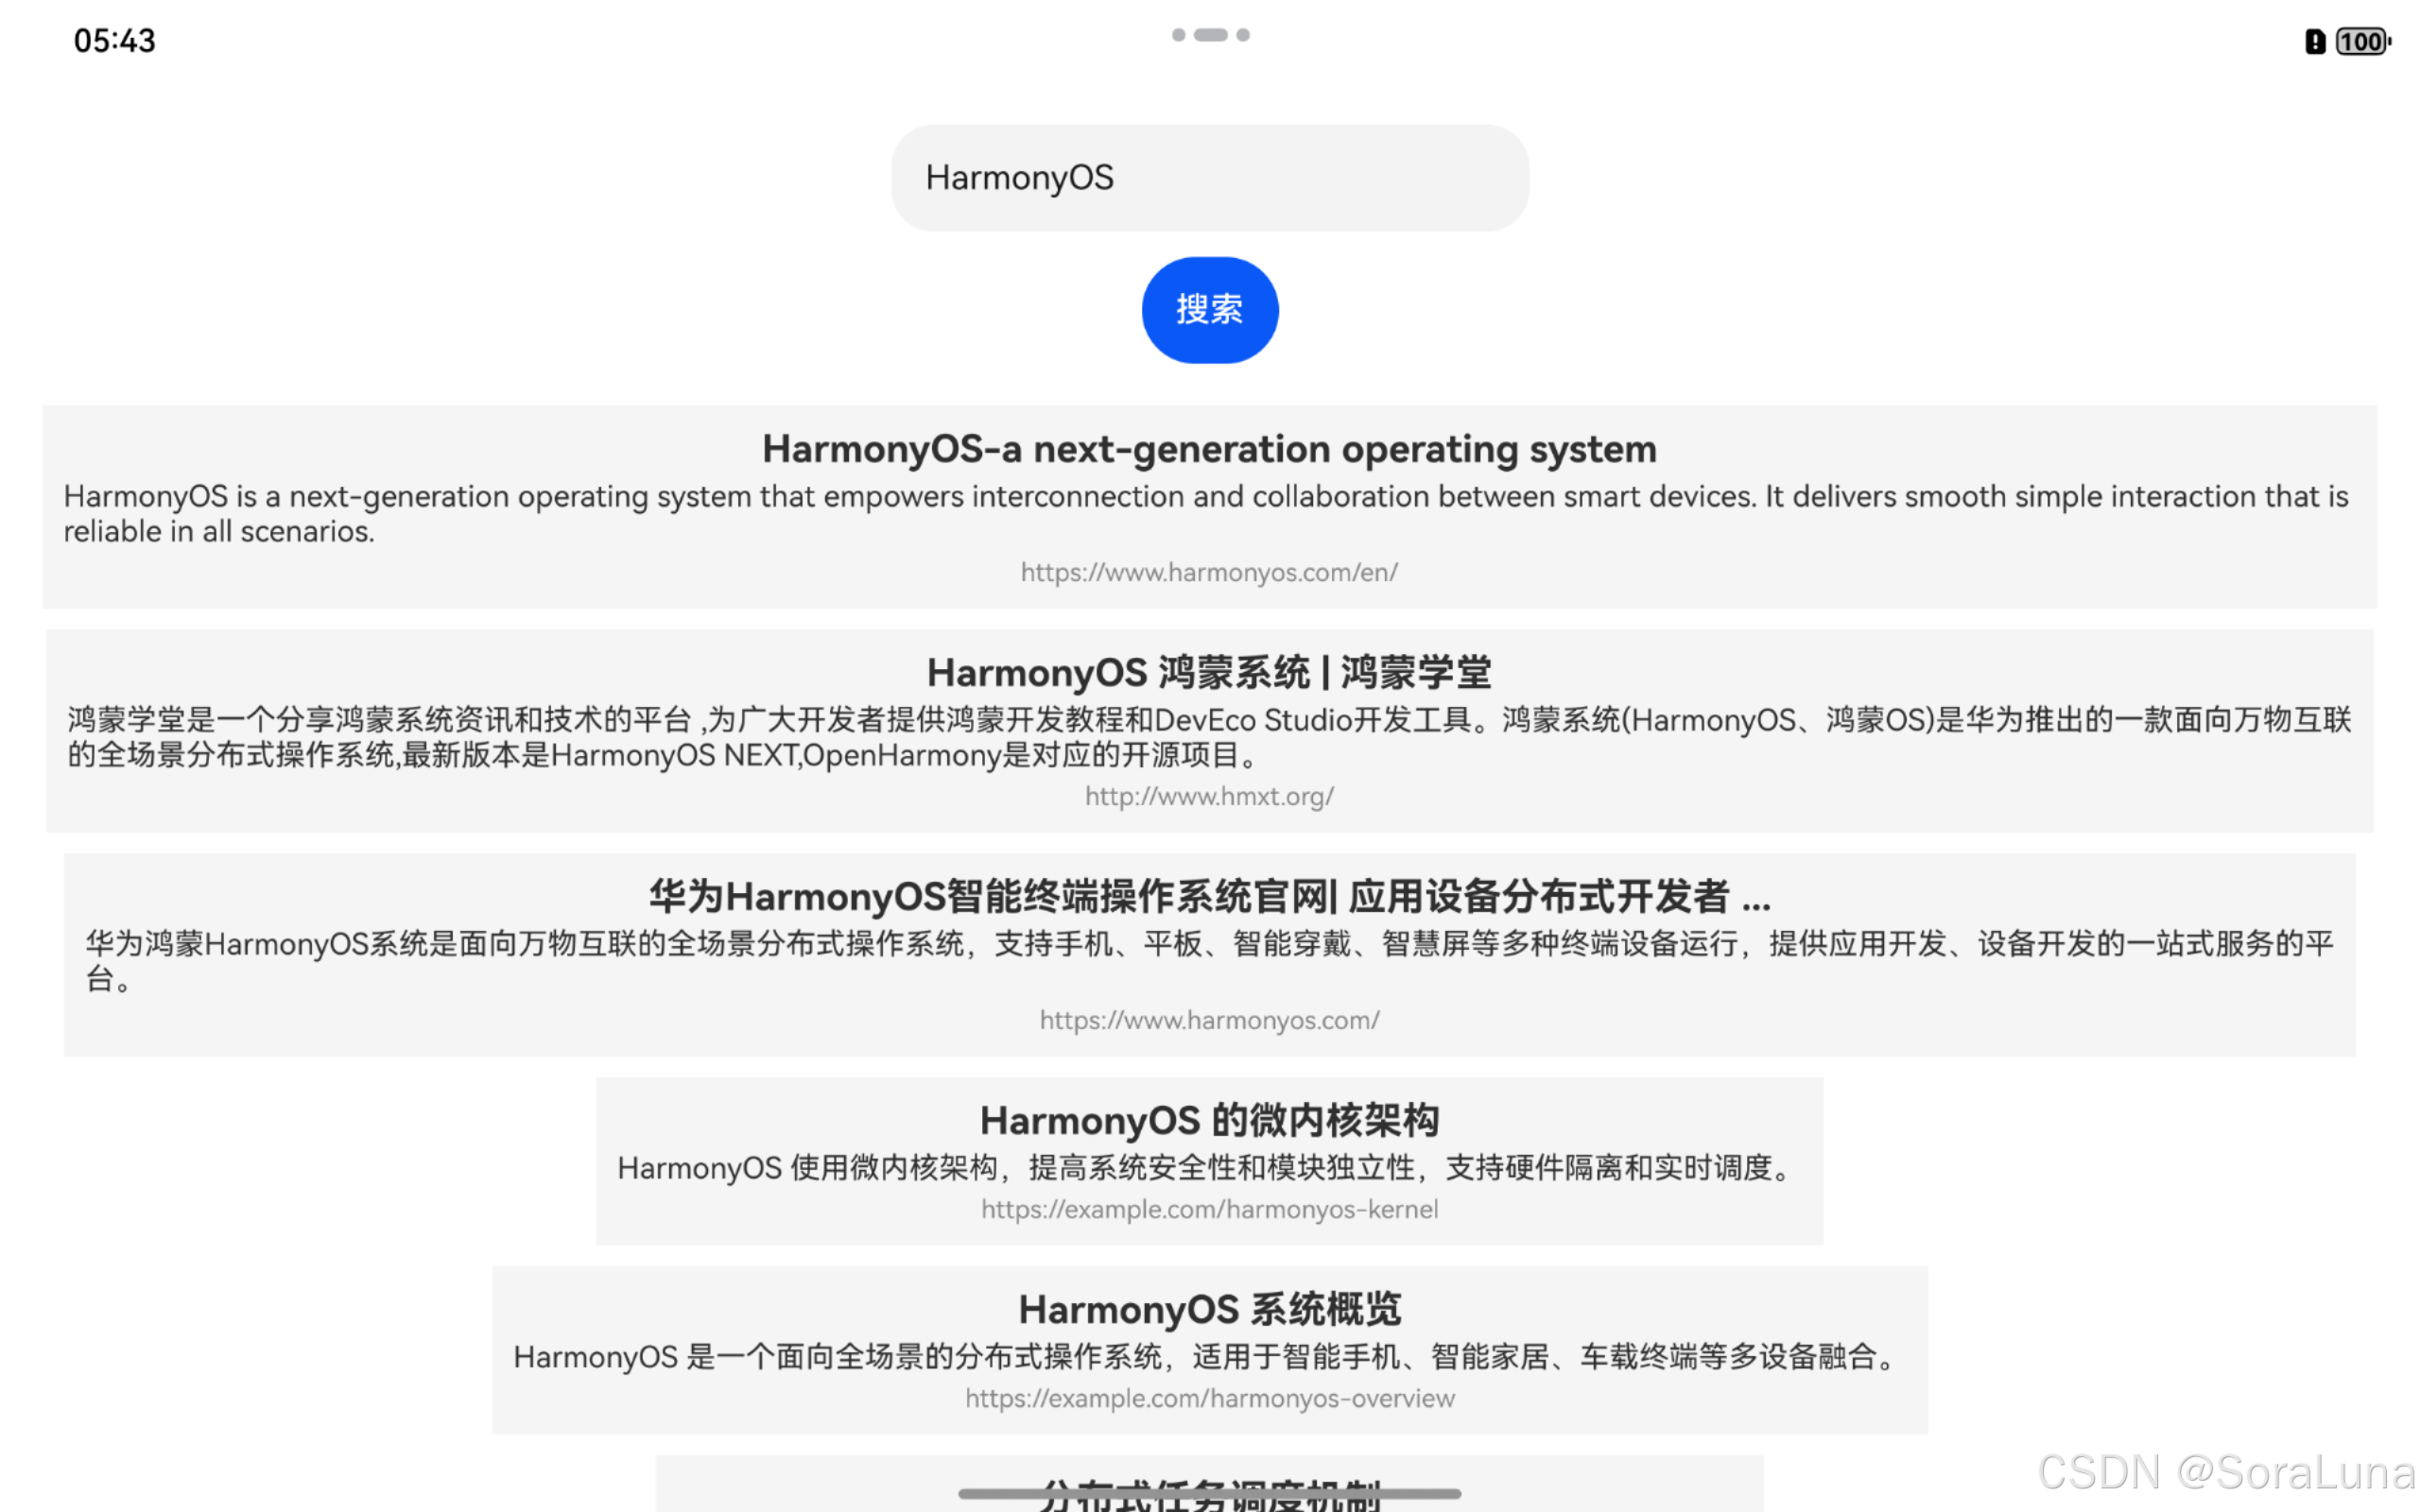
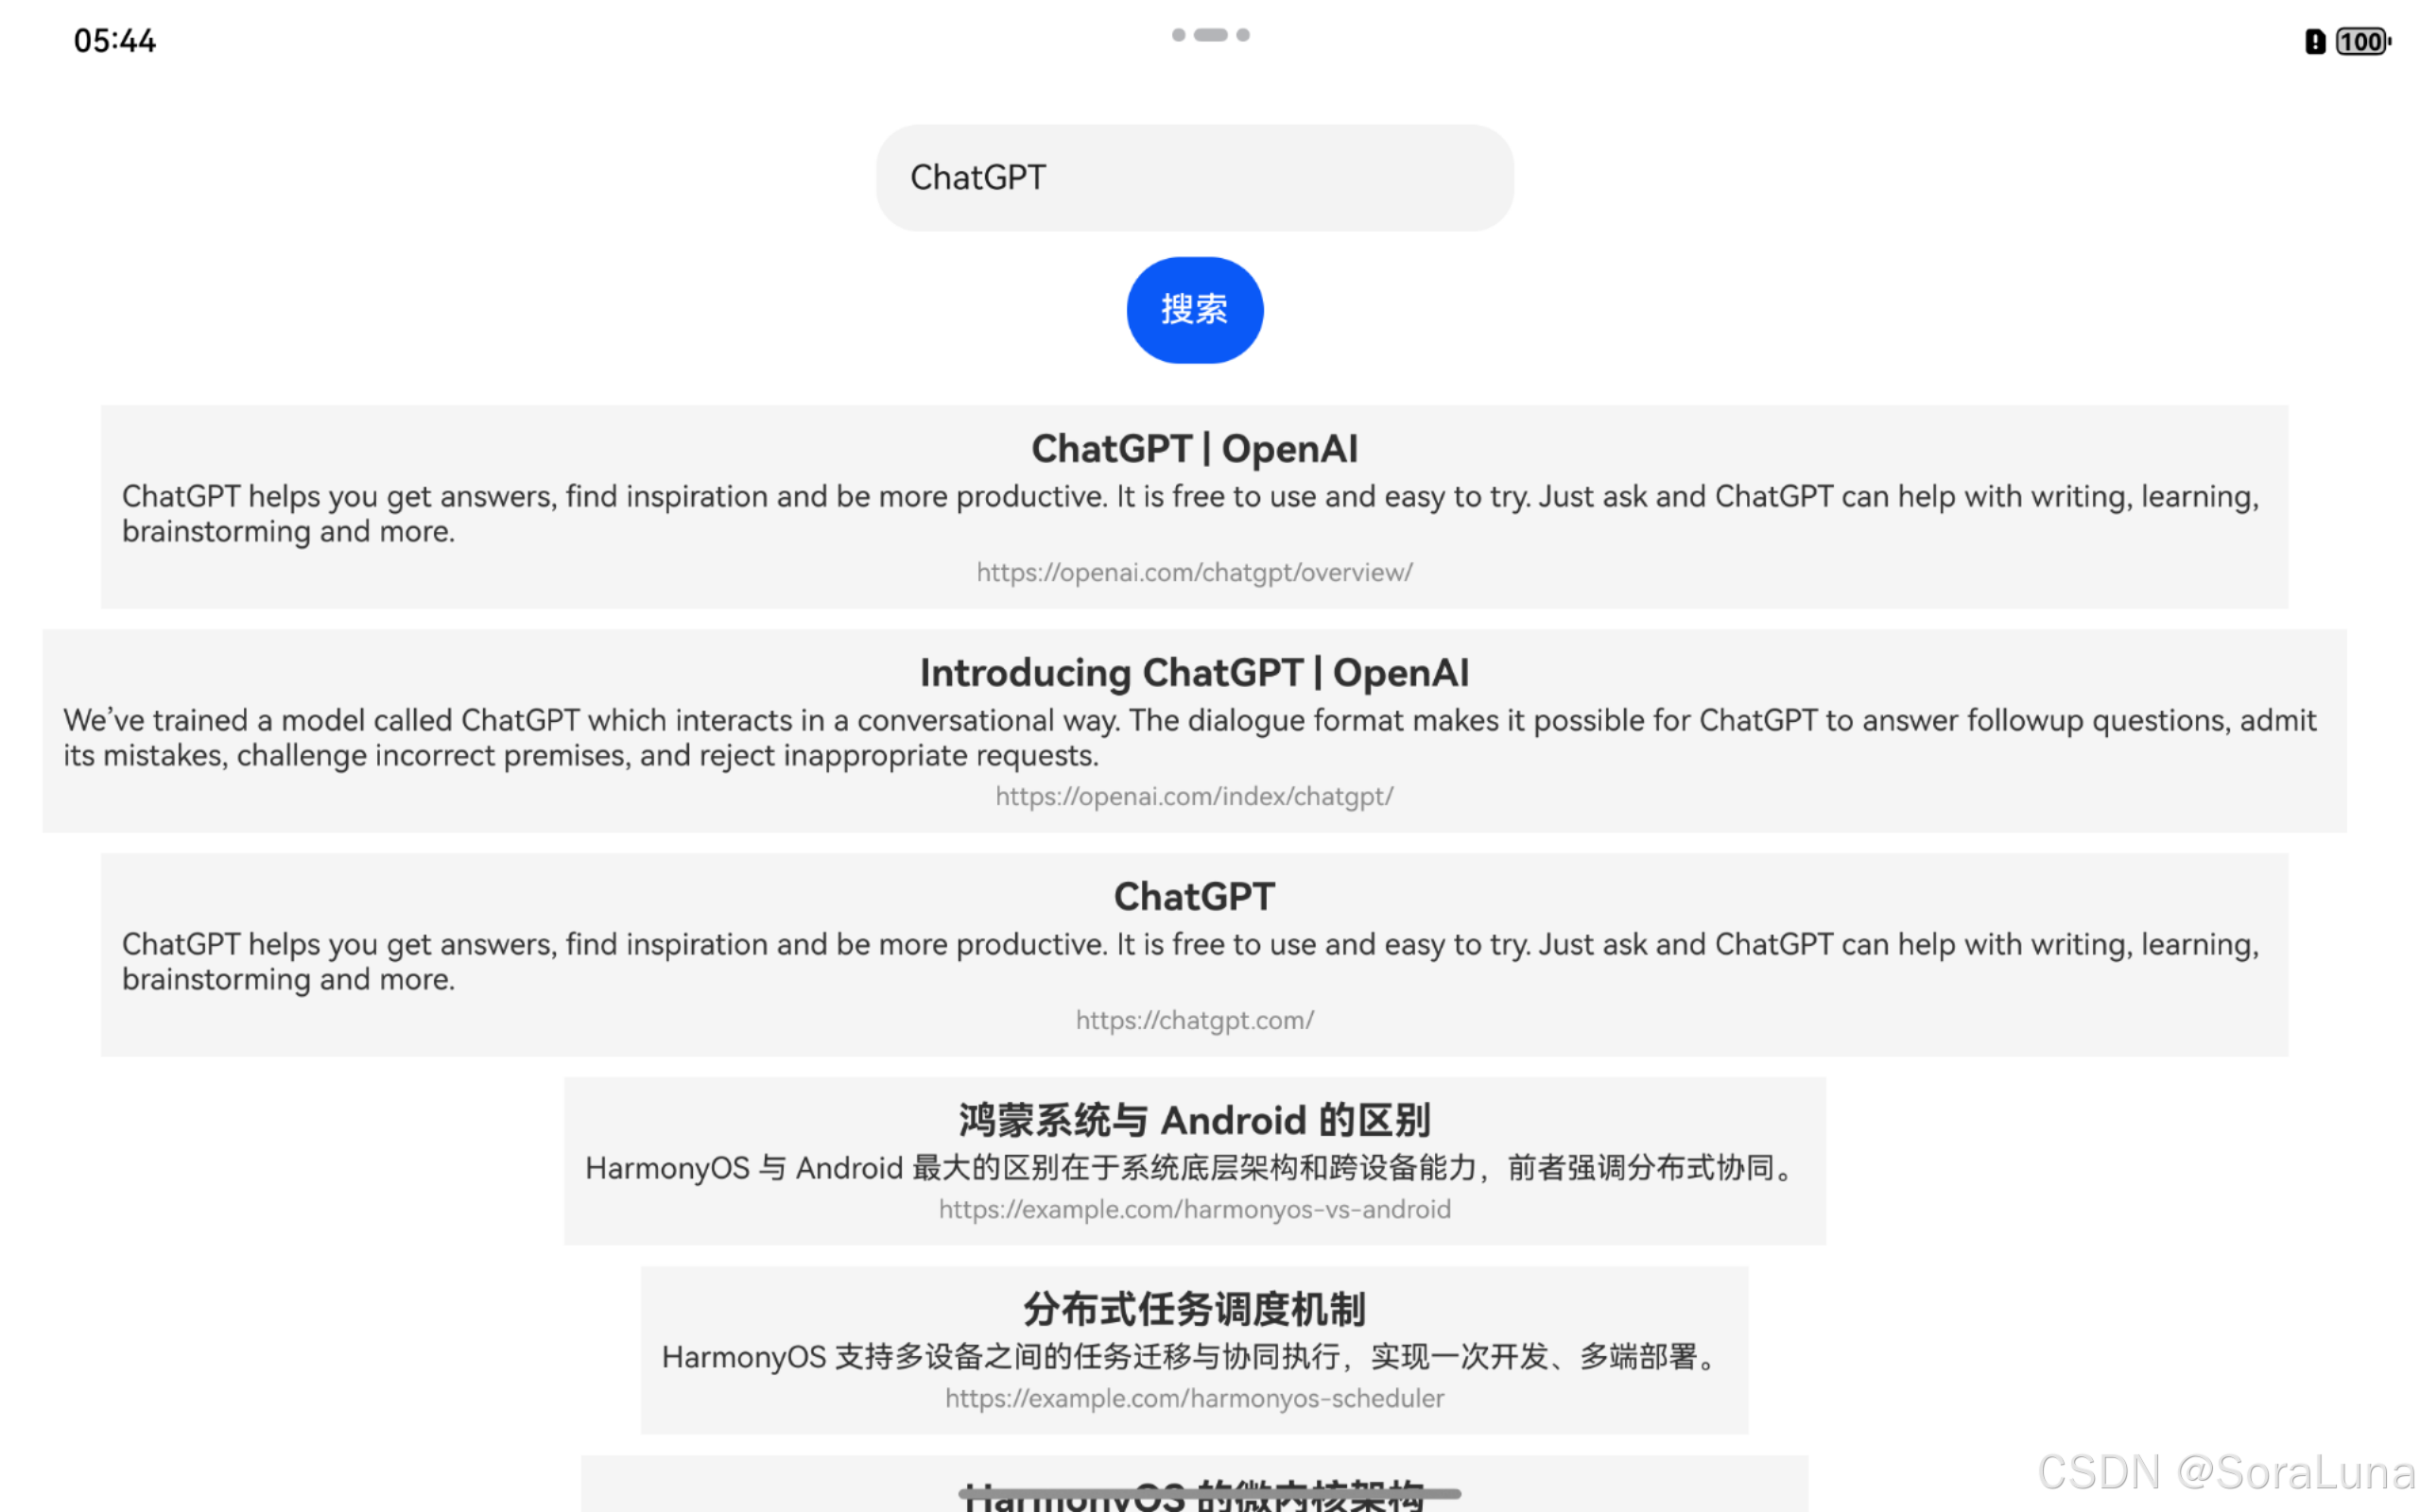
}五、运行效果示例
如图所示,输入 "HarmonyOS" 或 "ChatGPT" 后,前端立即展示聚合搜索结果:
六、总结
本篇在第40篇的 Python 搜索服务基础上,构建了 HarmonyOS 的前端页面。整个流程完整覆盖:
- 构建
TextInput、按钮、结果展示组件 - 使用
HttpClient.ets封装请求 - 实现 JSON 结构的严格类型解析与响应式渲染
通过该示例,开发人员可以快速将本地服务能力集成进 HarmonyOS App,用于搭建多模态查询工具、Dify Agent 插件原型或独立智能体前端。下一步可考虑引入分页、加载动画或语音输入等多模态交互能力。