一、准备docker容器
启动两个mysql的docker容器
docker run -v /root/mysql_volume/data:/var/lib/mysql -v /root/mysql_volume/conf:/etc/mysql/conf.d -v /root/mysql_volume/my.cnf:/etc/my.cnf -p 3306:3306 --name mysql --restart=always --privileged=true -e MYSQL_ROOT_PASSWORD=aaaa1143134686 -d mysql:8.0.30 --lower_case_table_names=1


 docker run -v /root/mysql_volume_child1/data:/var/lib/mysql -v /root/mysql_volume_child1/conf:/etc/mysql/conf.d -v /root/mysql_volume_child1/my.cnf:/etc/my.cnf -p 3307:3306 --name mysql-child1 --restart=always --privileged=true -e MYSQL_ROOT_PASSWORD=aaaa1143134686 -d mysql:8.0.30 --lower_case_table_names=1
主节点的my.cnf配置
# For advice on how to change settings please see
# http://dev.mysql.com/doc/refman/8.0/en/server-configuration-defaults.html

[mysqld]
#
# Remove leading # and set to the amount of RAM for the most important data
# cache in MySQL. Start at 70% of total RAM for dedicated server, else 10%.
# innodb_buffer_pool_size = 128M
#
# Remove leading # to turn on a very important data integrity option: logging
# changes to the binary log between backups.
# log_bin
#
# Remove leading # to set options mainly useful for reporting servers.
# The server defaults are faster for transactions and fast SELECTs.
# Adjust sizes as needed, experiment to find the optimal values.
# join_buffer_size = 128M
# sort_buffer_size = 2M
# read_rnd_buffer_size = 2M

# Remove leading # to revert to previous value for default_authentication_plugin,
# this will increase compatibility with older clients. For background, see:
# https://dev.mysql.com/doc/refman/8.0/en/server-system-variables.html#sysvar_default_authentication_plugin
# default-authentication-plugin=mysql_native_password
skip-host-cache
skip-name-resolve
datadir=/var/lib/mysql
socket=/var/run/mysqld/mysqld.sock
secure-file-priv=/var/lib/mysql-files
user=mysql
lower_case_table_names = 1
# my.cnf 配置
server-id=1
log-bin=mysql-bin
binlog_format=ROW


pid-file=/var/run/mysqld/mysqld.pid
[client]
socket=/var/run/mysqld/mysqld.sock

!includedir /etc/mysql/conf.d/
从节点的my.cnf配置
# For advice on how to change settings please see
# http://dev.mysql.com/doc/refman/8.0/en/server-configuration-defaults.html

[mysqld]
#
# Remove leading # and set to the amount of RAM for the most important data
# cache in MySQL. Start at 70% of total RAM for dedicated server, else 10%.
# innodb_buffer_pool_size = 128M
#
# Remove leading # to turn on a very important data integrity option: logging
# changes to the binary log between backups.
# log_bin
#
# Remove leading # to set options mainly useful for reporting servers.
# The server defaults are faster for transactions and fast SELECTs.
# Adjust sizes as needed, experiment to find the optimal values.
# join_buffer_size = 128M
# sort_buffer_size = 2M
# read_rnd_buffer_size = 2M

# Remove leading # to revert to previous value for default_authentication_plugin,
# this will increase compatibility with older clients. For background, see:
# https://dev.mysql.com/doc/refman/8.0/en/server-system-variables.html#sysvar_default_authentication_plugin
# default-authentication-plugin=mysql_native_password
skip-host-cache
skip-name-resolve
datadir=/var/lib/mysql
socket=/var/run/mysqld/mysqld.sock
secure-file-priv=/var/lib/mysql-files
user=mysql
lower_case_table_names = 1

server-id=2   # 每个从库要唯一
relay-log=relay-log
read_only=1


pid-file=/var/run/mysqld/mysqld.pid
[client]
socket=/var/run/mysqld/mysqld.sock

!includedir /etc/mysql/conf.d/
重启主节点和从节点的mysql的docker容器后,在主节点下查看binlog位置
SHOW MASTER STATUS;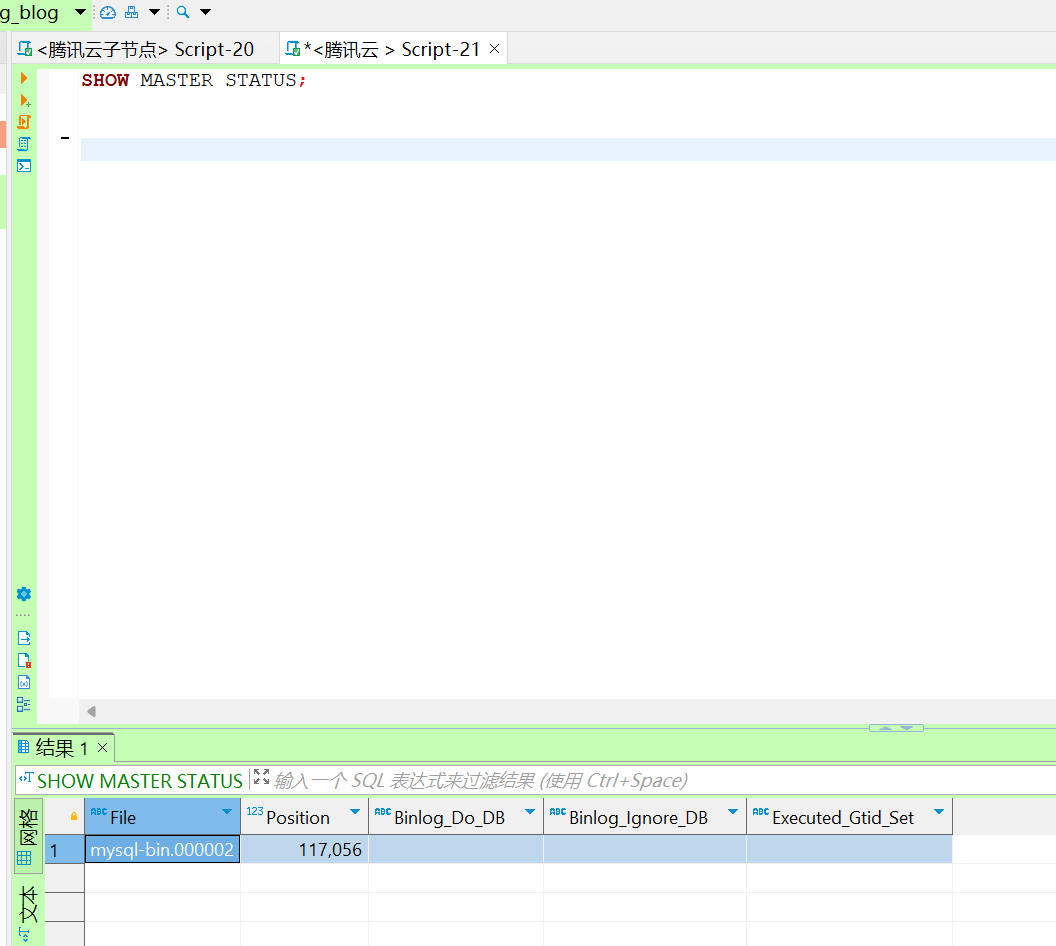
在子节点配置主节点信息
CHANGE MASTER TO
  MASTER_HOST='ip',
  MASTER_USER='root',
  MASTER_PASSWORD='mima',
  MASTER_LOG_FILE='mysql-bin.000002',
  MASTER_LOG_POS=117056;

START SLAVE;

SHOW SLAVE STATUS;
二、配置shardingspheres
pom文件引入
        <!-- ShardingSphere JDBC Core -->
        <dependency>
            <groupId>org.apache.shardingsphere</groupId>
            <artifactId>shardingsphere-jdbc-core-spring-boot-starter</artifactId>
            <version>5.1.1</version>
        </dependency>
配置文件引入
spring:
  application:
    name: 可变羽翼核心
  shardingsphere:
    datasource:
      # 定义多个数据源
      names: master, slave1

      master:
        type: com.zaxxer.hikari.HikariDataSource
        driver-class-name: com.mysql.cj.jdbc.Driver
        jdbc-url: jdbc:mysql://ip:3306/wing_blog?serverTimezone=UTC
        username: root
        password: passwd

      slave1:
        type: com.zaxxer.hikari.HikariDataSource
        driver-class-name: com.mysql.cj.jdbc.Driver
        jdbc-url: jdbc:mysql://ip:3307/wing_blog?serverTimezone=UTC
        username: root
        password: passwd
    rules:
      readwrite-splitting:
        data-sources:
          myds:
            type: Static
            props:
              write-data-source-name: master
              read-data-source-names: slave1