在Qt中高效显示大量点(点云),可以使用QOpenGLWidget结合现代OpenGL技术。
一、基本实现步骤
1. 创建QOpenGLWidget子类
#include <QOpenGLWidget>
#include <QOpenGLFunctions_4_5_Core>
#include <QOpenGLShaderProgram>
#include <QOpenGLBuffer>

class PointCloudViewer : public QOpenGLWidget, protected QOpenGLFunctions_4_5_Core
{
    Q_OBJECT
public:
    explicit PointCloudViewer(QWidget *parent = nullptr);
    ~PointCloudViewer();

    void setPointCloud(const QVector<QVector3D> &points, const QVector<QVector3D> &colors = {});

protected:
    void initializeGL() override;
    void resizeGL(int w, int h) override;
    void paintGL() override;

private:
    QOpenGLShaderProgram *m_program;
    QOpenGLBuffer m_vbo;
    QMatrix4x4 m_projection;

    QVector<QVector3D> m_points;
    QVector<QVector3D> m_colors;
    int m_pointCount;
};
2. 实现类方法
PointCloudViewer::PointCloudViewer(QWidget *parent)
    : QOpenGLWidget(parent), m_program(nullptr), m_pointCount(0)
{
    QSurfaceFormat format;
    format.setSamples(4);
    format.setVersion(3, 3);
    format.setProfile(QSurfaceFormat::CoreProfile);
    setFormat(format);
}

PointCloudViewer::~PointCloudViewer()
{
    makeCurrent();
    m_vbo.destroy();
    delete m_program;
    doneCurrent();
}

void PointCloudViewer::setPointCloud(const QVector<QVector3D> &points, const QVector<QVector3D> &colors)
{
    m_points = points;
    m_colors = colors.isEmpty() ? QVector<QVector3D>(points.size(), QVector3D(1,1,1)) : colors;
    m_pointCount = points.size();

    if (isValid()) {
        makeCurrent();

        // 将数据上传到GPU
        m_vbo.bind();
        m_vbo.allocate(m_pointCount * (3 + 3) * sizeof(float));

        float *data = static_cast<float*>(m_vbo.map(QOpenGLBuffer::WriteOnly));
        for (int i = 0; i < m_pointCount; ++i) {
            data[i*6 + 0] = m_points[i].x();
            data[i*6 + 1] = m_points[i].y();
            data[i*6 + 2] = m_points[i].z();
            data[i*6 + 3] = m_colors[i].x();
            data[i*6 + 4] = m_colors[i].y();
            data[i*6 + 5] = m_colors[i].z();
        }
        m_vbo.unmap();
        m_vbo.release();

        doneCurrent();
        update();
    }
}

void PointCloudViewer::initializeGL()
{
    initializeOpenGLFunctions();
    glClearColor(0.1f, 0.1f, 0.1f, 1.0f);

    // 创建着色器程序
    m_program = new QOpenGLShaderProgram(this);
    m_program->addShaderFromSourceCode(QOpenGLShader::Vertex,
        "#version 330 core\n"
        "layout(location = 0) in vec3 position;\n"
        "layout(location = 1) in vec3 color;\n"
        "uniform mat4 projection;\n"
        "out vec3 fragColor;\n"
        "void main() {\n"
        "    gl_Position = projection * vec4(position, 1.0);\n"
        "    fragColor = color;\n"
        "}");

    m_program->addShaderFromSourceCode(QOpenGLShader::Fragment,
        "#version 330 core\n"
        "in vec3 fragColor;\n"
        "out vec4 outColor;\n"
        "void main() {\n"
        "    outColor = vec4(fragColor, 1.0);\n"
        "}");

    m_program->link();

    // 创建VBO
    m_vbo.create();
    m_vbo.setUsagePattern(QOpenGLBuffer::StaticDraw);

    if (!m_points.isEmpty()) {
        setPointCloud(m_points, m_colors);
    }
}

void PointCloudViewer::resizeGL(int w, int h)
{
    m_projection.setToIdentity();
    m_projection.perspective(45.0f, GLfloat(w) / h, 0.01f, 100.0f);
}

void PointCloudViewer::paintGL()
{
    glClear(GL_COLOR_BUFFER_BIT | GL_DEPTH_BUFFER_BIT);

    if (m_pointCount == 0) return;

    m_program->bind();
    m_program->setUniformValue("projection", m_projection);

    m_vbo.bind();

    glEnableVertexAttribArray(0);
    glVertexAttribPointer(0, 3, GL_FLOAT, GL_FALSE, 6 * sizeof(float), (void*)0);

    glEnableVertexAttribArray(1);
    glVertexAttribPointer(1, 3, GL_FLOAT, GL_FALSE, 6 * sizeof(float), (void*)(3 * sizeof(float)));

    glPointSize(2.0f);
    glDrawArrays(GL_POINTS, 0, m_pointCount);

    m_vbo.release();
    m_program->release();
}
二、优化大量点云显示
对于非常大的点云(数十万或数百万点),可以考虑以下优化:
1. 使用顶点缓冲对象(VBO)和顶点数组对象(VAO)
cpp
// 在类定义中添加
QOpenGLVertexArrayObject m_vao;

// 在initializeGL中初始化VAO
m_vao.create();
m_vao.bind();

// 在paintGL中使用VAO
m_vao.bind();
glDrawArrays(GL_POINTS, 0, m_pointCount);
m_vao.release();
2. 使用几何着色器调整点大小(可选)
cpp
// 添加几何着色器
m_program->addShaderFromSourceCode(QOpenGLShader::Geometry,
    "#version 330 core\n"
    "layout(points) in;\n"
    "layout(triangle_strip, max_vertices = 4) out;\n"
    "uniform mat4 projection;\n"
    "uniform float pointSize;\n"
    "in vec3 fragColor[];\n"
    "out vec3 gColor;\n"
    "void main() {\n"
    "    gColor = fragColor[0];\n"
    "    vec4 pos = gl_in[0].gl_Position;\n"
    "    gl_Position = pos + vec4(-pointSize, -pointSize, 0, 0);\n"
    "    EmitVertex();\n"
    "    gl_Position = pos + vec4(pointSize, -pointSize, 0, 0);\n"
    "    EmitVertex();\n"
    "    gl_Position = pos + vec4(-pointSize, pointSize, 0, 0);\n"
    "    EmitVertex();\n"
    "    gl_Position = pos + vec4(pointSize, pointSize, 0, 0);\n"
    "    EmitVertex();\n"
    "    EndPrimitive();\n"
    "}");
3. 实现LOD(细节层次)渲染
对于极大点云,可以根据视距动态调整显示的点的密度:
cpp
void PointCloudViewer::paintGL()
{
    // ...其他代码...

    // 根据距离计算采样率
    float lodFactor = calculateLODFactor(); // 实现此函数根据相机距离返回0-1值

    if (lodFactor < 0.3f) {
        // 高细节:显示所有点
        glDrawArrays(GL_POINTS, 0, m_pointCount);
    } else {
        // 低细节:每N个点显示一个
        int step = static_cast<int>(1.0f + lodFactor * 10);
        glDrawArrays(GL_POINTS, 0, m_pointCount / step);
    }

    // ...其他代码...
}
4. 使用计算着色器进行点云处理(OpenGL 4.3+)
对于高级应用,可以使用计算着色器在GPU上进行点云处理。
5. 使用顶点缓冲对象(VBO)和顶点数组对象(VAO)实现代码
PointCloudViewer.h
#ifndef POINTCLOUDVIEWER_H
#define POINTCLOUDVIEWER_H

#include <QOpenGLWidget>
#include <QOpenGLFunctions_4_5_Core>
#include <QOpenGLShaderProgram>
#include <QOpenGLBuffer>
#include <QOpenGLVertexArrayObject>

class PointCloudViewer : public QOpenGLWidget, protected QOpenGLFunctions_4_5_Core
{
    Q_OBJECT
public:
    explicit PointCloudViewer(QWidget *parent = nullptr);
    ~PointCloudViewer();

    void setPointCloud(const QVector<QVector3D> &points, const QVector<QVector3D> &colors = {});

protected:
    void initializeGL() override;
    void resizeGL(int w, int h) override;
    void paintGL() override;

private:
    QOpenGLShaderProgram *m_program;
    QOpenGLVertexArrayObject m_vao;
    QOpenGLBuffer m_vbo;
    QMatrix4x4 m_projection;

    QVector<QVector3D> m_points;
    QVector<QVector3D> m_colors;
    int m_pointCount;
    bool m_dataUploaded;
};

#endif // POINTCLOUDVIEWER_H
PointCloudViewer.cpp
#include "pointcloudviewer.h"
#include <QDebug>

PointCloudViewer::PointCloudViewer(QWidget *parent)
    : QOpenGLWidget(parent), m_program(nullptr), m_pointCount(0)
{
    /*
    QSurfaceFormat format;
    format.setSamples(4);
    format.setVersion(3, 3);
    // 移除下面这行或改为CompatibilityProfile
    format.setProfile(QSurfaceFormat::CoreProfile);
    //format.setProfile(QSurfaceFormat::CompatibilityProfile);
    setFormat(format);
    */
    m_dataUploaded = false;
    m_projection.setToIdentity();
}

PointCloudViewer::~PointCloudViewer()
{
    makeCurrent();
    m_vbo.destroy();
    delete m_program;
    doneCurrent();
}

void PointCloudViewer::setPointCloud(const QVector<QVector3D> &points, const QVector<QVector3D> &colors)
{
    m_points = points;
    m_colors = colors.isEmpty() ? QVector<QVector3D>(points.size(), QVector3D(1,1,1)) : colors;
    m_pointCount = points.size();
    m_dataUploaded = false;

    if (isValid()) {
        makeCurrent();

        // 将数据上传到GPU
        m_vao.bind();
        m_vbo.bind();
        m_vbo.allocate(m_pointCount * (3 + 3) * sizeof(float));

        float *data = static_cast<float*>(m_vbo.map(QOpenGLBuffer::WriteOnly));
        for (int i = 0; i < m_pointCount; ++i) {
            data[i*6 + 0] = m_points[i].x();
            data[i*6 + 1] = m_points[i].y();
            data[i*6 + 2] = m_points[i].z();
            data[i*6 + 3] = m_colors[i].x();
            data[i*6 + 4] = m_colors[i].y();
            data[i*6 + 5] = m_colors[i].z();
        }
        m_vbo.unmap();
        m_vbo.release();
        m_vao.release();

        m_dataUploaded = true;
        doneCurrent();
        update();
    }
}

void PointCloudViewer::initializeGL()
{
    initializeOpenGLFunctions();
    glClearColor(0.1f, 0.1f, 0.1f, 1.0f);
    glEnable(GL_DEPTH_TEST);
    glEnable(GL_PROGRAM_POINT_SIZE);

    // 创建VAO
    m_vao.create();
    m_vao.bind();

    // 创建VBO
    m_vbo.create();
    m_vbo.setUsagePattern(QOpenGLBuffer::StaticDraw);
    m_vbo.bind();

    // 设置顶点属性
    glEnableVertexAttribArray(0);
    glVertexAttribPointer(0, 3, GL_FLOAT, GL_FALSE, 6 * sizeof(float), (void*)0);
    glEnableVertexAttribArray(1);
    glVertexAttribPointer(1, 3, GL_FLOAT, GL_FALSE, 6 * sizeof(float), (void*)(3 * sizeof(float)));

    m_vbo.release();
    m_vao.release();

    // 创建着色器程序
    m_program = new QOpenGLShaderProgram(this);
    m_program->addShaderFromSourceCode(QOpenGLShader::Vertex,
                                       "#version 450 core\n"
                                       "layout (location=0) in vec3 position;\n"
                                       "layout (location=1) in vec3 color;\n"
                                       "uniform mat4 projection;\n"
                                       "out vec3 fragSetColor;\n"
                                       "void main() {\n"
                                       "    gl_Position = projection * vec4(position, 1.0);\n"
                                       "    fragSetColor = color;\n"
                                       "    gl_PointSize = 2.0;\n"  // 直接在着色器中设置点大小
                                       "}");

    m_program->addShaderFromSourceCode(QOpenGLShader::Fragment,
                                       "#version 150 core\n"
                                       "in vec3 fragSetColor;\n"
                                       "out vec4 FragColor;\n"
                                       "void main() {\n"
                                       "    FragColor = vec4(fragSetColor, 1.0);\n"
                                       "}");

    if(!m_program->link()) {
        qDebug() << "Shader link error:" << m_program->log();
    }

    if (!m_points.isEmpty()) {
        setPointCloud(m_points, m_colors);
    }
}

void PointCloudViewer::resizeGL(int w, int h)
{
    m_projection.setToIdentity();
    m_projection.perspective(45.0f, GLfloat(w) / h, 0.01f, 100.0f);
}

void PointCloudViewer::paintGL()
{
    glClear(GL_COLOR_BUFFER_BIT | GL_DEPTH_BUFFER_BIT);

    if (!m_dataUploaded || m_pointCount == 0) return;

    m_program->bind();
    m_program->setUniformValue("projection", m_projection);

    m_vao.bind();
    glDrawArrays(GL_POINTS, 0, m_pointCount);
    m_vao.release();

    m_program->release();
}
三、使用方法
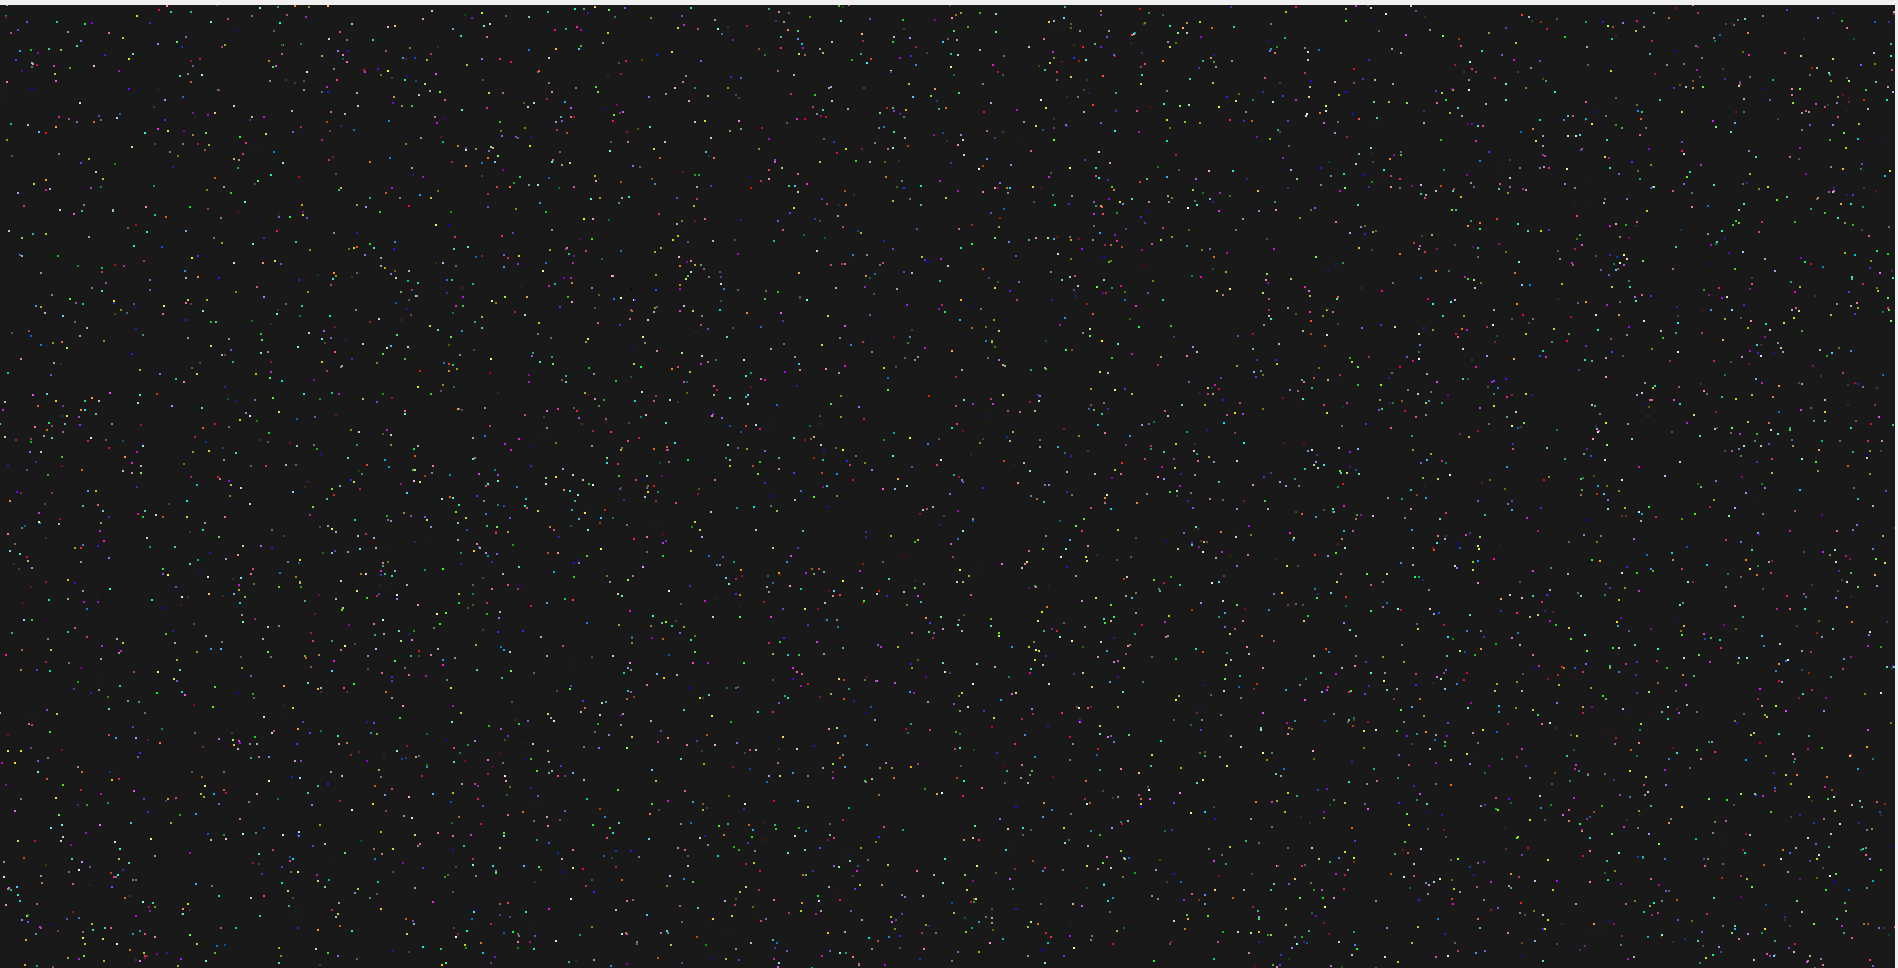
cpp
// 在主窗口中使用
MainWindow::MainWindow(QWidget *parent) :
    QMainWindow(parent)
{
    PointCloudViewer *viewer = new PointCloudViewer(this);
    setCentralWidget(viewer);

    // 生成示例点云
    QVector<QVector3D> points;
    QVector<QVector3D> colors;

    for (int i = 0; i < 100000; ++i) {
        points.append(QVector3D(
            (float)rand()/RAND_MAX * 2 - 1,
            (float)rand()/RAND_MAX * 2 - 1,
            (float)rand()/RAND_MAX * 2 - 1
        ));
        colors.append(QVector3D(
            (float)rand()/RAND_MAX,
            (float)rand()/RAND_MAX,
            (float)rand()/RAND_MAX
        ));
    }

    viewer->setPointCloud(points, colors);
}
四、注意事项
-
对于极大点云(>1百万点),考虑使用点云库如PCL进行预处理
-
确保OpenGL上下文版本足够高(至少3.3)
-
在渲染前检查点数量,避免空渲染
-
考虑添加相机控制和交互功能
-
对于专业应用,可能需要实现点云拾取、着色等功能