阿里云轻量服务器Ubuntu 24.04.2 LTS + freeswitch 1.10.12-release
说明:freeswitch是模块化的,如果编译的过程中报错,可以预先注释跳过。
源码下载
将代码统一下载到
/opt目录下
shell
# 下载FreeSWITCH源码
git clone -b v1.10 https://github.com/signalwire/freeswitch freeswitch
# 下载sofia-sip源码
git clone https://github.com/freeswitch/sofia-sip
# 下载spandsp源码
git clone https://github.com/freeswitch/spandsp

# 下载libks源码(不需要signalwire这个的话,这个也可以不装)
git clone https://github.com/signalwire/libks
# 下载signalwire-c源码(不需要可以不安装)
git clone https://github.com/signalwire/signalwire-c
安装必要依赖
有些可能也不需要
bash
sudo apt-get install -y \
    build-essential cmake automake autoconf libtool libtool-bin pkg-config \
    libssl-dev zlib1g-dev libdb-dev unixodbc-dev libncurses5-dev libexpat1-dev libgdbm-dev bison erlang-dev libtpl-dev libtiff5-dev uuid-dev \
    libpcre3-dev libedit-dev libsqlite3-dev libcurl4-openssl-dev nasm \
    libogg-dev libspeex-dev libspeexdsp-dev \
    libldns-dev \
    python3-dev \
    libavformat-dev libswscale-dev libavresample-dev \
    liblua5.2-dev \
    libopus-dev \
    libpq-dev \
    libshout3-dev libmpg123-dev libmp3lame-dev \
    libsndfile1-dev libflac-dev libogg-dev libvorbis-dev
安装sofia-sip
bash
cd sofia-sip
./bootstrap.sh
./configure CFLAGS="-g -ggdb" --with-pic --with-glib=no --without-doxygen --disable-stun --prefix=/usr
make -j`nproc --all`
sudo make install
cd ..
安装spandsp
bash
cd spandsp
./bootstrap.sh
./configure CFLAGS="-g -ggdb" --with-pic --prefix=/usr
make -j`nproc --all`
sudo make install
cd ..
安装libks(可选)
bash
cd libks
cmake . -DCMAKE_INSTALL_PREFIX=/usr -DWITH_LIBBACKTRACE=1
sudo make install
cd ..
安装signalwire-c(可选)
bash
cd signalwire-c
PKG_CONFIG_PATH=/usr/lib/pkgconfig cmake . -DCMAKE_INSTALL_PREFIX=/usr
sudo make install
cd ..
编译安装freeswitch
如果没有安装
signalwire-c,可以在执行./configure后,注释modules.conf中的applications/mod_signalwire在安装过程中提示
libavformat报错,分析发现与mod_av模块相关,注释modules.conf中的applications/mod_av跳过报错
bash
cd freeswitch
./bootstrap.sh -j
./configure
make -j`nproc`
sudo make install
启动FreeSWITCH服务
执行以上步骤后,FreeSWITCH已经被安装到
/usr/local/freeswitch目录下了。
bash
cd /usr/local/freeswitch
# 前台启动服务
bin/freeswitch
# 后台启动服务
bin/freeswitch -nc
使用linphone进行测试
不介绍linphone软件上的配置
拨打9196可以接通,但是听不到回音
开放端口
之前只在阿里云的安全规则中放行了
5060端口,所以可以接通。需要在安全规则中添加16384-32768端口的UDP放行规则
| 端口范围 | 协议 | 备注 |
|---|---|---|
| 5060 | TCP&UDP | 用于 SIP 信令 |
| 16384-32768 | UDP | 用于 SIP、交换以及其他协议的语音或视频的数据传输 |
注:5060端口可以在
/usr/local/freeswitch/conf/vars.xml中修改<X-PRE-PROCESS cmd="set" data="internal_sip_port=5060"/>
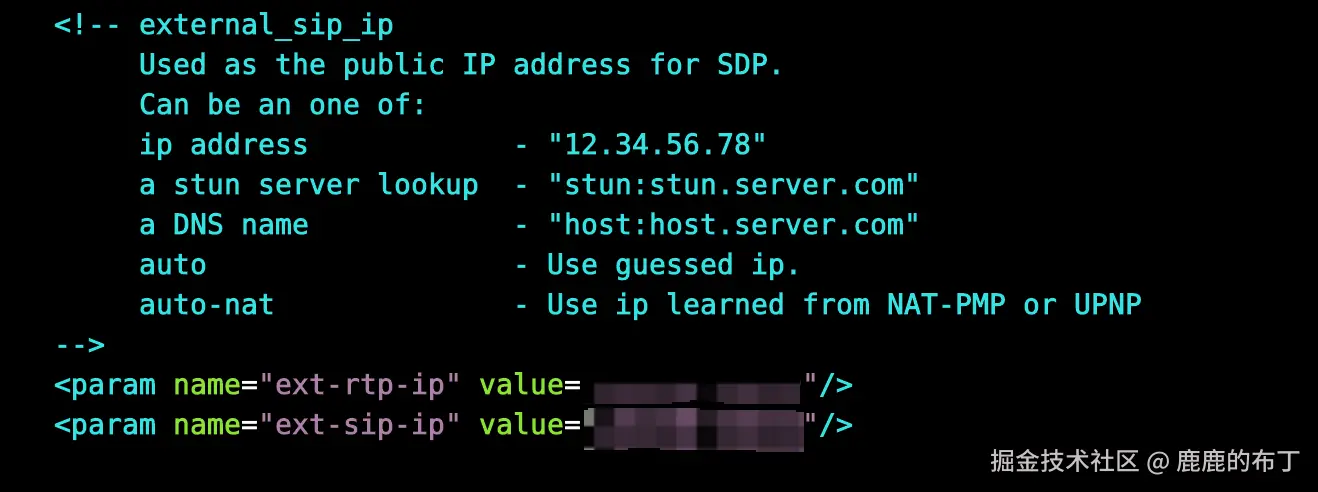
修改internal.xml
因为是跨网络,打通以后需要设置统一的sip网络
/usr/local/freeswitch/conf/sip_profiles/internal.xml将ext-rtp-ip和ext-sip-ip设置为公网地址
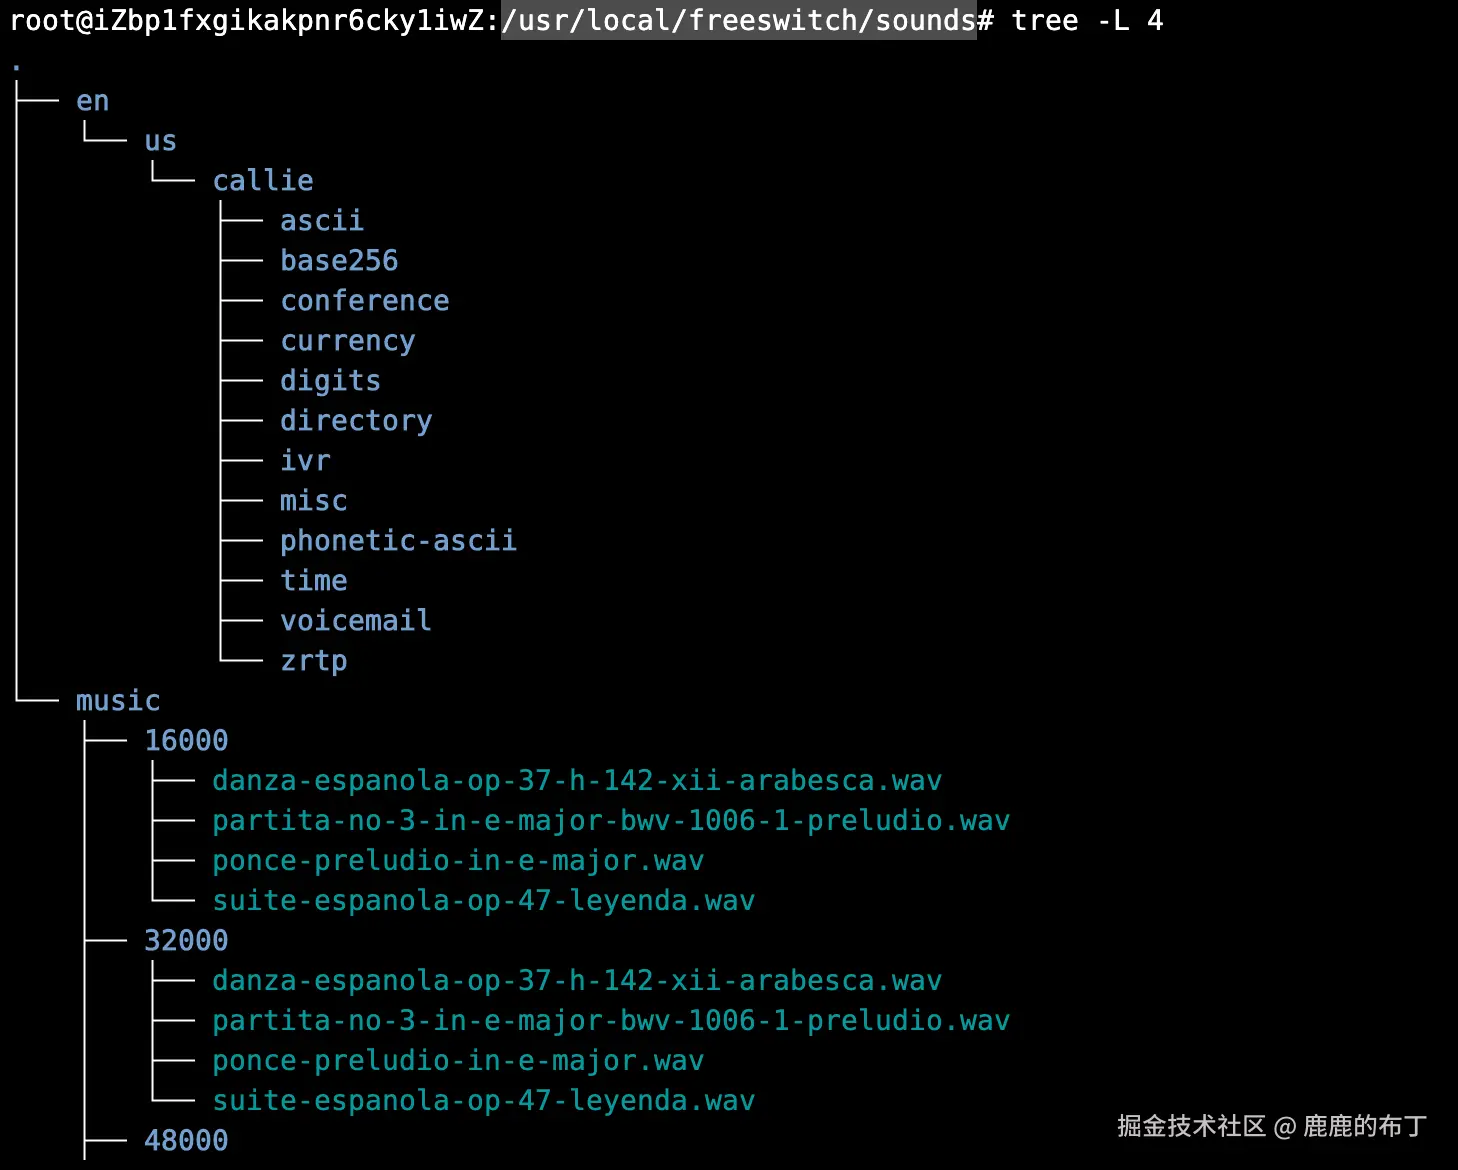
拨打9664不播放音乐
检查
/usr/local/freeswitch/sounds没有下载音乐包
进入/opt/freeswitch文件夹,下载声音文件。执行其中一种就可以
bash
# cd 音质声音文件
make cd-sounds-install
make cd-moh-install
#超高清声音文件
make uhd-sounds-install
make uhd-moh-install
#高清声音文件
make hd-sounds-install
make hd-moh-install
#标准声音文件
make sounds-install
make moh-install执行完成后在/usr/local/freeswitch/sounds执行tree -L 4,效果如下图: