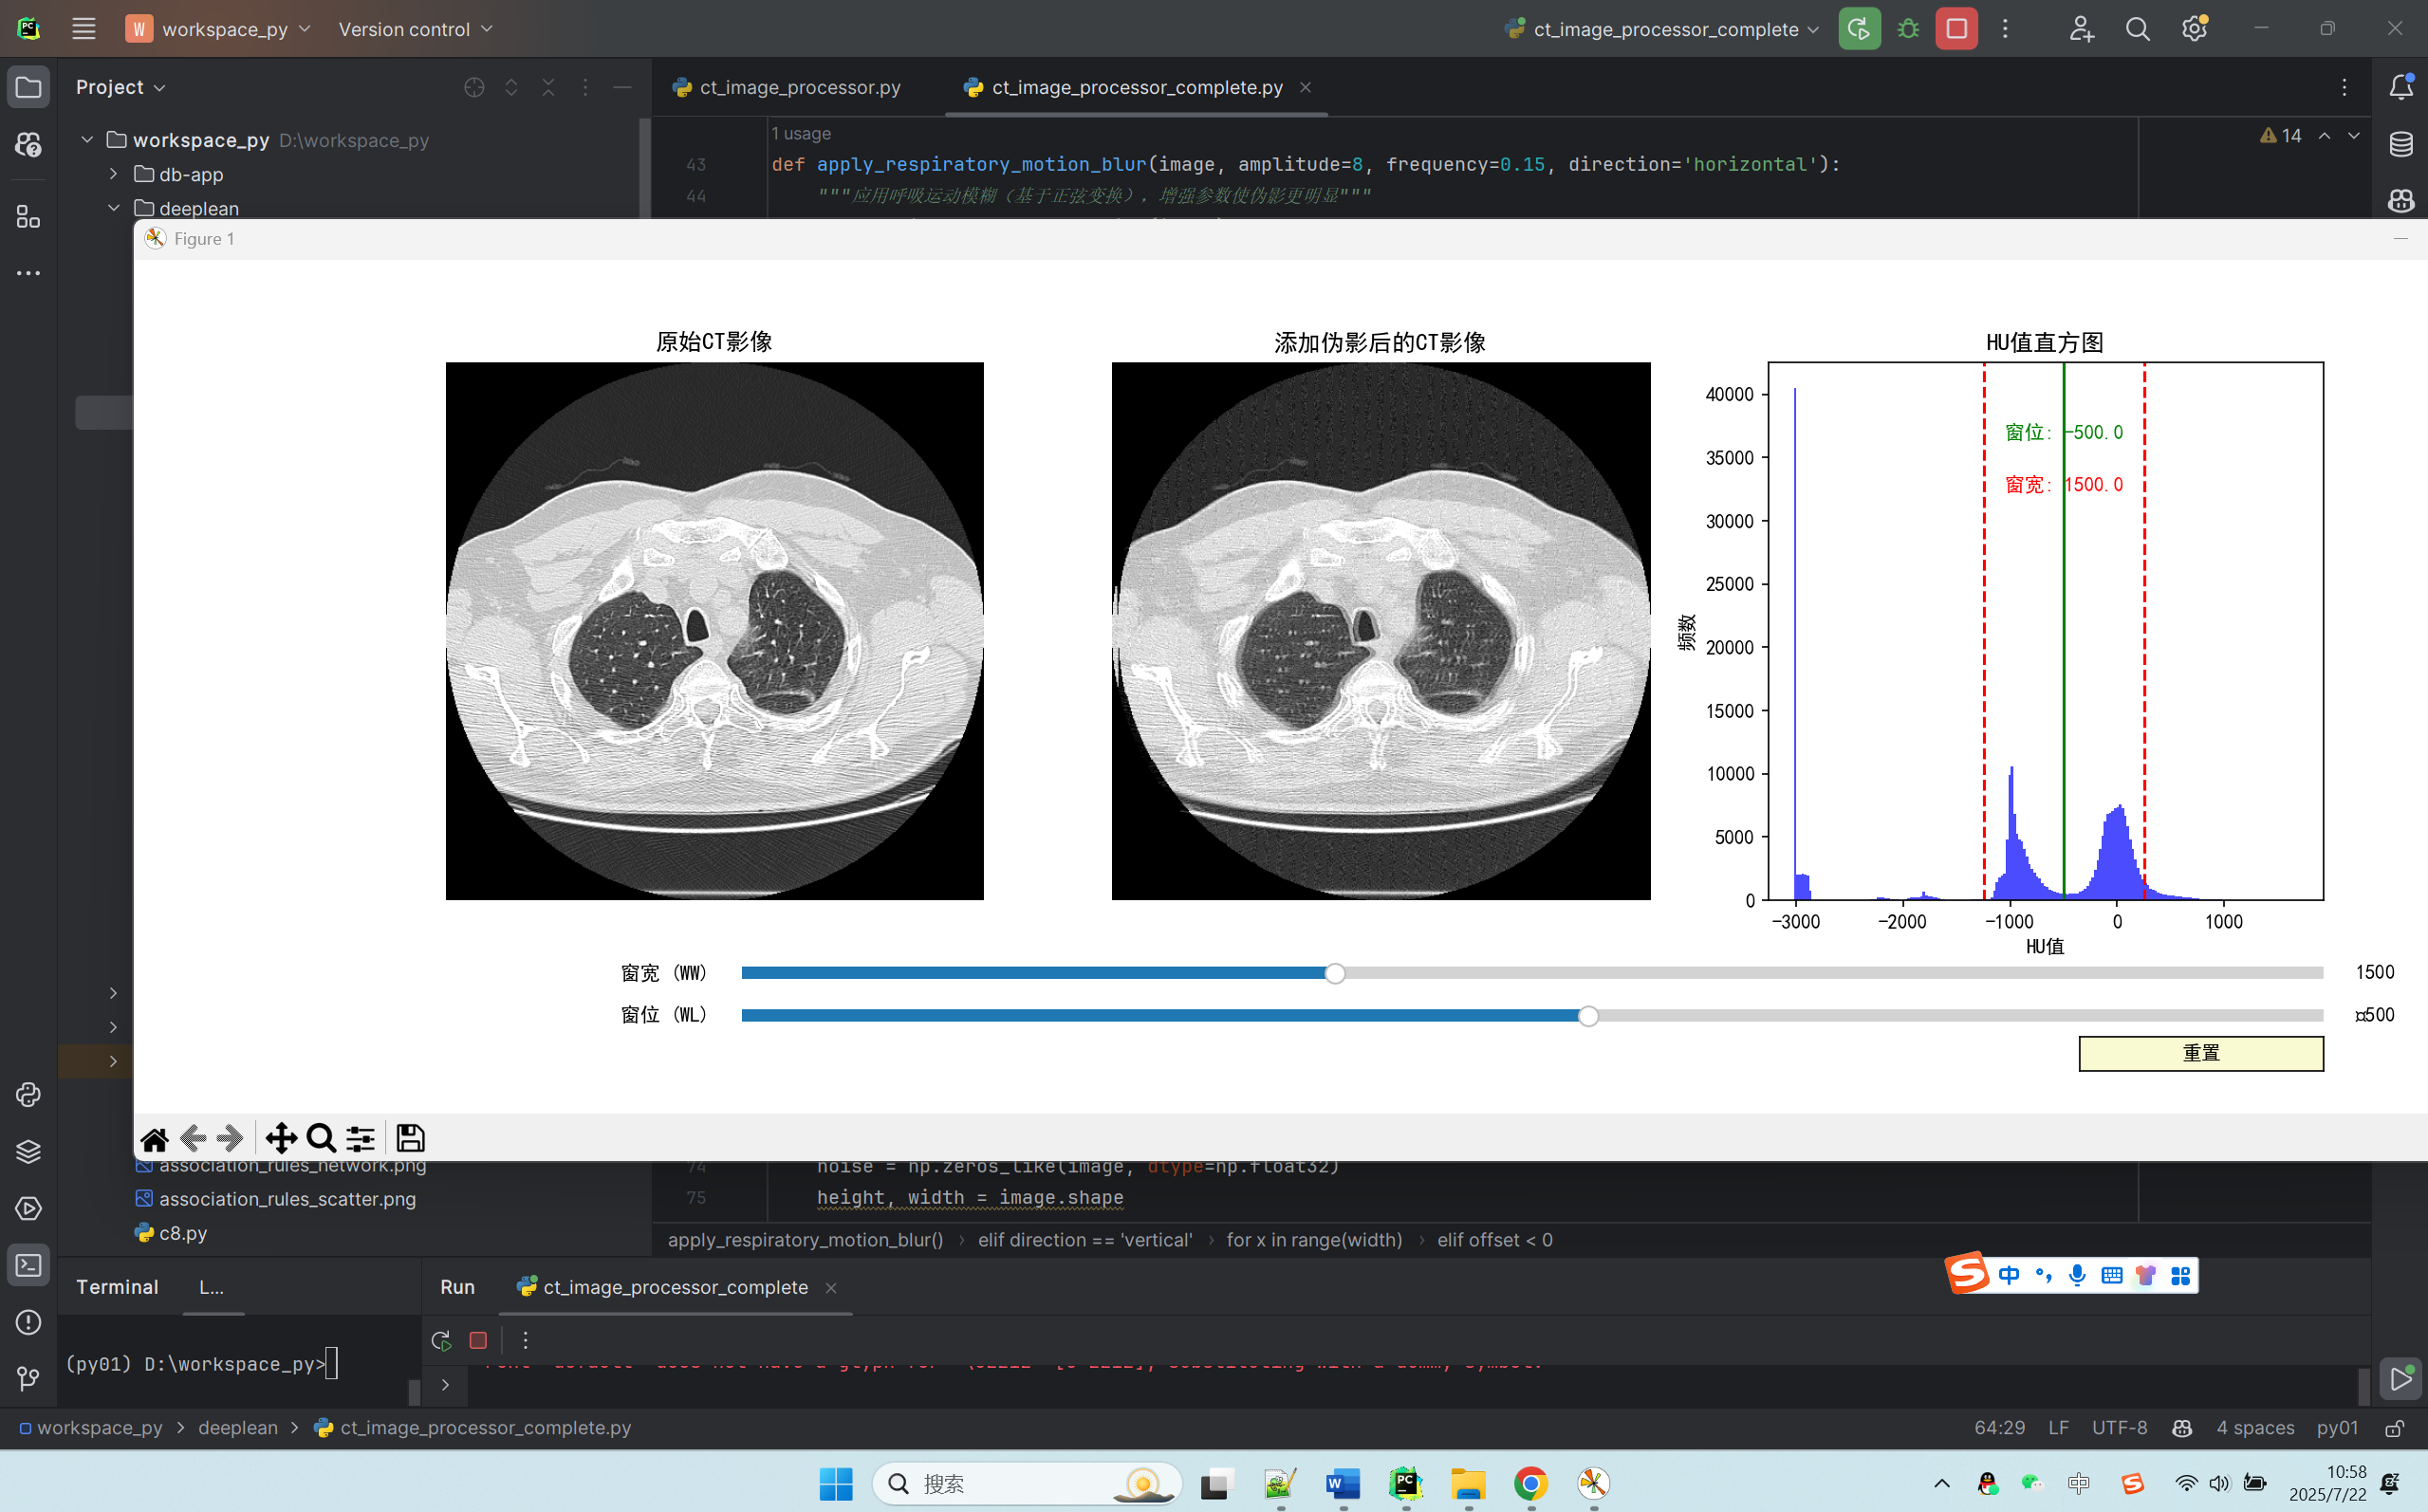
先看运行效果:
完整代码如下:
python
import pydicom
import numpy as np
import matplotlib.pyplot as plt
from matplotlib.widgets import Slider
import os
from pydicom.uid import generate_uid, ImplicitVRLittleEndian

# 强制设置交互后端(解决PyCharm交互问题的关键)
import matplotlib
matplotlib.use('TkAgg')  # 使用Tkinter交互后端,确保支持滑动条操作

# 设置中文字体
plt.rcParams['font.sans-serif'] = ['SimHei']  # 使用 SimHei 字体
plt.rcParams['axes.unicode_minus'] = False    # 解决负号显示问题
plt.rcParams['font.size'] = 10  # 设置全局字体大小


def load_ct_image(dicom_path):
    """加载CT的DICOM文件,转换为HU值数组"""
    try:
        ds = pydicom.dcmread(dicom_path)
        pixel_array = ds.pixel_array
        # 转换为HU值(CT特有的密度单位)
        if hasattr(ds, 'RescaleSlope') and hasattr(ds, 'RescaleIntercept'):
            hu_array = pixel_array * ds.RescaleSlope + ds.RescaleIntercept
        else:
            hu_array = pixel_array
        return hu_array, ds
    except Exception as e:
        print(f"读取失败: {e}")
        return None, None


def apply_window_level(image, window_width, window_level):
    """应用窗宽窗位调整,转换为可显示的图像"""
    window_min = window_level - window_width / 2
    window_max = window_level + window_width / 2
    windowed_image = np.clip(image, window_min, window_max)
    normalized = ((windowed_image - window_min) / (window_max - window_min)) * 255
    return normalized.astype(np.uint8)


def apply_respiratory_motion_blur(image, amplitude=8, frequency=0.15, direction='horizontal'):
    """应用呼吸运动模糊(基于正弦变换),增强参数使伪影更明显"""
    blurred_image = np.zeros_like(image)
    height, width = image.shape
    t = np.linspace(0, 2 * np.pi, num=height if direction == 'vertical' else width)

    if direction == 'horizontal':
        for y in range(height):
            offset = int(amplitude * np.sin(frequency * t[y]))
            shifted_row = np.roll(image[y, :], offset)
            if offset > 0:
                shifted_row[:offset] = 0
            elif offset < 0:
                shifted_row[offset:] = 0
            blurred_image[y, :] = shifted_row
    elif direction == 'vertical':
        for x in range(width):
            offset = int(amplitude * np.sin(frequency * t[x]))
            shifted_col = np.roll(image[:, x], offset)
            if offset > 0:
                shifted_col[:offset] = 0
            elif offset < 0:
                shifted_col[offset:] = 0
            blurred_image[:, x] = shifted_col

    return 0.6 * image + 0.4 * blurred_image  # 增加模糊图像的权重


def add_stripe_noise(image, intensity=200, stripe_width=5, stripe_spacing=10, direction='vertical'):
    """添加条纹噪声到图像,显著增强参数使竖纹更明显"""
    # 根据HU值范围调整噪声强度(CT的HU值通常在-1000到1000之间)
    noise = np.zeros_like(image, dtype=np.float32)
    height, width = image.shape

    if direction == 'vertical':
        for x in range(0, width, stripe_spacing):
            start = x
            end = min(x + stripe_width, width)
            # 生成更强的条带状噪声
            noise[:, start:end] = intensity * (np.random.rand(height, end - start) - 0.5)
    elif direction == 'horizontal':
        for y in range(0, height, stripe_spacing):
            start = y
            end = min(y + stripe_width, height)
            noise[start:end, :] = intensity * (np.random.rand(end - start, width) - 0.5)

    noisy_image = image + noise
    return np.clip(noisy_image, np.min(image), np.max(image))  # 限制在原始HU值范围内


def save_as_dicom(image, original_ds, output_path):
    """将处理后的图像保存为DICOM文件"""
    # 创建新的DICOM数据集
    ds = pydicom.Dataset()

    # 复制原始DICOM的元数据(排除冲突标签)
    for elem in original_ds:
        if elem.tag not in [0x7FE00010, 0x00080018, 0x00080016]:  # 排除像素数据和UID相关标签
            ds.add(elem)

    # 关键修复:设置字节序和VR编码方式
    if hasattr(original_ds, 'file_meta') and hasattr(original_ds.file_meta, 'TransferSyntaxUID'):
        ds.file_meta = original_ds.file_meta.copy()
    else:
        # 手动创建文件元数据并设置默认传输语法
        ds.file_meta = pydicom.dataset.FileMetaDataset()
        ds.file_meta.TransferSyntaxUID = ImplicitVRLittleEndian  # 默认小端隐式VR

    # 从传输语法中提取字节序和VR编码方式
    ds.is_little_endian = ds.file_meta.TransferSyntaxUID.is_little_endian  # 字节序
    ds.is_implicit_VR = ds.file_meta.TransferSyntaxUID.is_implicit_VR  # VR编码

    # 设置新的唯一标识符
    ds.SOPInstanceUID = generate_uid()  # 新实例UID
    ds.SeriesInstanceUID = generate_uid()  # 新系列UID

    # 根据原始数据类型转换像素数据
    if original_ds.BitsAllocated == 16:
        if original_ds.PixelRepresentation == 0:  # 无符号16位
            pixel_data = image.astype(np.uint16)
        else:  # 有符号16位
            pixel_data = image.astype(np.int16)
    else:  # 默认为16位无符号
        pixel_data = image.astype(np.uint16)
        ds.BitsAllocated = 16
        ds.BitsStored = 16
        ds.HighBit = 15
        ds.PixelRepresentation = 0

    # 设置像素数据和尺寸
    ds.PixelData = pixel_data.tobytes()
    ds.Rows, ds.Columns = pixel_data.shape

    # 保存DICOM文件
    ds.save_as(output_path)
    print(f"已保存DICOM文件: {output_path}")


def process_dicom_image(input_path, output_dir):
    """处理DICOM图像并添加伪影,输出为DICOM文件"""
    # 1. 加载DICOM文件
    hu_image, ds = load_ct_image(input_path)
    if hu_image is None:
        return None, None, None, None
    print(f"已加载DICOM图像: {input_path}")
    print(f"图像尺寸: {hu_image.shape}, 数据类型: {hu_image.dtype}")

    # 2. 应用呼吸运动模糊(增强参数使伪影更明显)
    print("应用呼吸运动模糊...")
    motion_blurred = apply_respiratory_motion_blur(
        hu_image, amplitude=10, frequency=0.2, direction='horizontal'
    )

    # 3. 添加条纹噪声(增强参数使竖纹更明显)
    print("添加条纹噪声...")
    final_image = add_stripe_noise(
        motion_blurred, intensity=300, stripe_width=6, stripe_spacing=12, direction='vertical'
    )

    # 4. 保存结果
    filename = os.path.basename(input_path).replace('.dcm', '')
    os.makedirs(output_dir, exist_ok=True)

    # 保存DICOM文件
    output_dcm = os.path.join(output_dir, f"{filename}_processed.dcm")
    save_as_dicom(final_image, ds, output_dcm)

    return hu_image, final_image, ds, None


def plot_histogram_and_image(original_image, processed_image, window_width, window_level, ax_original, ax_processed, ax_hist):
    """绘制原始图像、处理后图像和对应的直方图"""
    # 应用窗宽窗位
    original_windowed = apply_window_level(original_image, window_width, window_level)
    processed_windowed = apply_window_level(processed_image, window_width, window_level)

    # 绘制原始CT图像
    ax_original.imshow(original_windowed, cmap='gray')
    ax_original.set_title("原始CT影像")
    ax_original.axis('off')

    # 绘制处理后CT图像
    ax_processed.imshow(processed_windowed, cmap='gray')
    ax_processed.set_title("添加伪影后的CT影像")
    ax_processed.axis('off')

    # 绘制直方图
    ax_hist.hist(processed_image.flatten(), bins=200, color='blue', alpha=0.7)
    ax_hist.axvline(x=window_level - window_width / 2, color='red', linestyle='--')
    ax_hist.axvline(x=window_level + window_width / 2, color='red', linestyle='--')
    ax_hist.axvline(x=window_level, color='green', linestyle='-')
    ax_hist.set_title(f'窗宽={window_width}, 窗位={window_level}')
    ax_hist.set_xlabel('HU值')
    ax_hist.set_ylabel('频数')
    ax_hist.tick_params(axis='both', labelsize=8)  # 缩小刻度文字


def create_interactive_adjustment(original_image, processed_image, default_width=1500, default_level=-600):
    """交互式调整窗宽窗位的界面,设置适合观察伪影的初始窗宽窗位"""
    # 开启交互模式
    plt.ion()

    fig, (ax_original, ax_processed, ax_hist) = plt.subplots(1, 3, figsize=(18, 6))
    plt.subplots_adjust(bottom=0.25)

    # 初始图像
    original_display = apply_window_level(original_image, default_width, default_level)
    processed_display = apply_window_level(processed_image, default_width, default_level)
    img_original = ax_original.imshow(original_display, cmap='gray')
    img_processed = ax_processed.imshow(processed_display, cmap='gray')
    ax_original.set_title("原始CT影像")
    ax_original.axis('off')
    ax_processed.set_title("添加伪影后的CT影像")
    ax_processed.axis('off')

    # 直方图
    hist, bins = np.histogram(processed_image.flatten(), bins=200)
    ax_hist.hist(processed_image.flatten(), bins=200, color='blue', alpha=0.7)
    min_hu, max_hu = np.min(processed_image), np.max(processed_image)
    ww_line_min = ax_hist.axvline(default_level - default_width / 2, color='red', linestyle='--')
    ww_line_max = ax_hist.axvline(default_level + default_width / 2, color='red', linestyle='--')
    wl_line = ax_hist.axvline(default_level, color='green', linestyle='-')
    wl_text = ax_hist.text(default_level, np.max(hist) * 0.9, f'窗位: {default_level}', color='green', ha='center')
    ww_text = ax_hist.text(default_level, np.max(hist) * 0.8, f'窗宽: {default_width}', color='red', ha='center')
    ax_hist.set_title("HU值直方图")
    ax_hist.set_xlabel("HU值")
    ax_hist.set_ylabel("频数")

    # 滑动条
    ax_width = plt.axes([0.25, 0.15, 0.65, 0.03])
    ax_level = plt.axes([0.25, 0.10, 0.65, 0.03])
    width_slider = Slider(ax=ax_width, label='窗宽 (WW)', valmin=1, valmax=4000, valinit=default_width, valstep=1)
    level_slider = Slider(ax=ax_level, label='窗位 (WL)', valmin=min_hu, valmax=max_hu, valinit=default_level,
                          valstep=1)

    # 更新函数
    def update(val):
        ww, wl = width_slider.val, level_slider.val
        # 计算调整后的图像
        original_windowed = apply_window_level(original_image, ww, wl)
        processed_windowed = apply_window_level(processed_image, ww, wl)
        img_original.set_data(original_windowed)
        img_processed.set_data(processed_windowed)
        # 更新直方图标记
        ww_line_min.set_xdata([wl - ww / 2])
        ww_line_max.set_xdata([wl + ww / 2])
        wl_line.set_xdata([wl])
        # 更新文本标注
        wl_text.set_position((wl, np.max(hist) * 0.9))
        wl_text.set_text(f'窗位: {int(wl)}')
        ww_text.set_position(((wl - ww / 2 + wl + ww / 2) / 2, np.max(hist) * 0.8))
        ww_text.set_text(f'窗宽: {int(ww)}')
        # 强制刷新画布
        fig.canvas.draw_idle()
        fig.canvas.flush_events()

    # 注册滑动条事件
    width_slider.on_changed(update)
    level_slider.on_changed(update)

    # 重置按钮
    reset_ax = plt.axes([0.8, 0.05, 0.1, 0.04])
    reset_button = plt.Button(reset_ax, '重置', color='lightgoldenrodyellow')

    def reset(event):
        width_slider.reset()
        level_slider.reset()

    reset_button.on_clicked(reset)

    # 启动事件循环
    plt.show(block=True)
    # 关闭交互模式
    plt.ioff()


def plot_preset_windows(image, ds, title_suffix=""):
    """绘制预设窗宽窗位下的CT影像效果对比,设置适合观察伪影的窗宽窗位"""
    # 获取默认窗宽窗位
    if hasattr(ds, 'WindowWidth') and hasattr(ds, 'WindowCenter'):
        default_width = float(ds.WindowWidth)
        default_level = float(ds.WindowCenter)
    else:
        default_width, default_level = 1500, -600  # 适合观察肺窗伪影的经验值

    # 预设窗宽窗位
    presets = {
        "肺窗(适合看伪影)": (1500, -600),
        "软组织窗": (400, 40),
        "骨窗": (2000, 400),
        "脑窗": (80, 40),
        "腹部窗": (350, 50),
        "纵隔窗": (350, 50)
    }

    # 创建图像和直方图的子图(2行6列:上6个图像,下6个直方图)
    fig, axes = plt.subplots(2, 6, figsize=(18, 10))  # 2行6列布局
    fig.suptitle(f"不同窗宽窗位下的CT影像效果对比{title_suffix}", fontsize=16)

    # 循环绘制每个预设的图像和直方图
    for i, (title, (width, level)) in enumerate(presets.items()):
        ax_img = axes[0, i]  # 第1行放图像
        ax_hist = axes[1, i]  # 第2行放对应直方图

        # 应用窗宽窗位
        windowed_image = apply_window_level(image, width, level)

        # 绘制CT图像
        ax_img.imshow(windowed_image, cmap='gray')
        ax_img.set_title(title)
        ax_img.axis('off')

        # 绘制直方图
        ax_hist.hist(image.flatten(), bins=200, color='blue', alpha=0.7)
        ax_hist.axvline(x=level - width / 2, color='red', linestyle='--')
        ax_hist.axvline(x=level + width / 2, color='red', linestyle='--')
        ax_hist.axvline(x=level, color='green', linestyle='-')
        ax_hist.set_title(f'窗宽={width}, 窗位={level}')
        ax_hist.set_xlabel('HU值')
        ax_hist.set_ylabel('频数')
        ax_hist.tick_params(axis='both', labelsize=8)  # 缩小刻度文字

    plt.tight_layout(rect=[0, 0, 1, 0.96])  # 调整布局,避免标题重叠
    plt.show()


def main():
    # 加载CT图像
    dicom_path = "Anonymized_20250720/series-00002/image-00043.dcm"
    original_image, processed_image, ds, _ = process_dicom_image(dicom_path, "processed_images")

    if original_image is None:
        print("无法加载CT图像,程序终止")
        return

    # 绘制预设窗宽窗位下的原始图像对比
    print("显示原始CT图像在不同窗宽窗位下的效果...")
    plot_preset_windows(original_image, ds, "(原始图像)")

    # 绘制预设窗宽窗位下的处理后图像对比
    print("显示添加伪影后的CT图像在不同窗宽窗位下的效果...")
    plot_preset_windows(processed_image, ds, "(含伪影图像)")

    # 获取默认窗宽窗位(使用肺窗参数以便更好地观察伪影)
    if hasattr(ds, 'WindowWidth') and hasattr(ds, 'WindowCenter'):
        default_width = float(ds.WindowWidth)
        default_level = float(ds.WindowCenter)
    else:
        default_width, default_level = 1500, -600  # 肺窗参数更适合观察伪影

    # 启动交互式调整界面
    print("启动交互式窗宽窗位调整界面...")
    create_interactive_adjustment(original_image, processed_image, default_width, default_level)

    print("程序执行完毕")


if __name__ == "__main__":
    main()
总体说明
这段代码是用于处理 CT 图像的 Python 程序,主要功能是加载 CT 的 DICOM 文件,对图像进行处理(添加呼吸运动模糊和条纹噪声等伪影),并通过交互式界面调整窗宽窗位来观察图像效果。以下是对代码的说明:
1. 导入必要的库
|--------------------------------------------------------------------------------------------------------------------------------------------------------------------------------------------------------------------------------------------|
| import pydicom import numpy as np import matplotlib.pyplot as plt from matplotlib.widgets import Slider import os from pydicom.uid import generate_uid, ImplicitVRLittleEndian import matplotlib matplotlib.use('TkAgg') # 使用 Tkinter 交互后端 |
- pydicom:用于读取和处理 DICOM 格式的医学图像文件。
- numpy:用于进行数值计算和数组操作。
- matplotlib:用于绘制图像和交互式界面。
- os:用于文件和目录操作。
- generate_uid 和 ImplicitVRLittleEndian:用于生成唯一标识符和设置 DICOM 文件的传输语法。
2. 设置中文字体
|---------------------------------------------------------------------------------------------------------------------------------------------------------------------|
| plt.rcParams'font.sans-serif' = 'SimHei' # 使用 SimHei 字体 plt.rcParams'axes.unicode_minus' = False # 解决负号显示问题 plt.rcParams'font.size' = 10 # 设置全局字体大小 |
- 这些设置是为了确保在图表中能够正确显示中文和负号。
3. 加载 CT 图像
|-----------------------------------------------------------------------------------------------------------------------------------------------------------------------------------------------------------------------------------------------------------------------------------------------------------------------------------------------------|
| def load_ct_image(dicom_path): try: ds = pydicom.dcmread(dicom_path) pixel_array = ds.pixel_array if hasattr(ds, 'RescaleSlope') and hasattr(ds, 'RescaleIntercept'): hu_array = pixel_array * ds.RescaleSlope + ds.RescaleIntercept else: hu_array = pixel_array return hu_array, ds except Exception as e: print(f"读取失败: {e}") return None, None |
- 该函数用于加载 DICOM 格式的 CT 图像文件,并将其转换为 Hounsfield 单位(HU)值数组。HU 是 CT 图像中用于表示组织密度的单位。
4. 应用窗宽窗位调整
|---------------------------------------------------------------------------------------------------------------------------------------------------------------------------------------------------------------------------------------------------------------------------------------------------------------------------------|
| def apply_window_level(image, window_width, window_level): window_min = window_level - window_width / 2 window_max = window_level + window_width / 2 windowed_image = np.clip(image, window_min, window_max) normalized = ((windowed_image - window_min) / (window_max - window_min)) * 255 return normalized.astype(np.uint8) |
- 窗宽(Window Width)和窗位(Window Level)是 CT 图像显示中的重要参数。窗宽决定了图像中显示的 HU 值范围,窗位决定了这个范围的中心。该函数根据给定的窗宽和窗位对图像进行调整,以便更好地显示特定组织的细节。
5. 应用呼吸运动模糊
|------------------------------------------------------------------------------------------------------------------------------------------------------------------------------------------------------------------------------------------------------------------------------------------------------------------------------------------------------------------------------------------------------------------------------------------------------------------------------------------------------------------------------------------------------------------------------------------------------------------------------------------------------------------------------------------------------------------------------------------------------------------------------------------------------------------------------------------------------------------------|
| def apply_respiratory_motion_blur(image, amplitude=8, frequency=0.15, direction='horizontal'): blurred_image = np.zeros_like(image) height, width = image.shape t = np.linspace(0, 2 * np.pi, num=height if direction == 'vertical' else width) if direction == 'horizontal': for y in range(height): offset = int(amplitude * np.sin(frequency * ty)) shifted_row = np.roll(imagey, :, offset) if offset > 0: shifted_row:offset = 0 elif offset < 0: shifted_rowoffset: = 0 blurred_imagey, : = shifted_row elif direction == 'vertical': for x in range(width): offset = int(amplitude * np.sin(frequency * tx)) shifted_col = np.roll(image:, x, offset) if offset > 0: shifted_col:offset = 0 elif offset < 0: shifted_coloffset: = 0 blurred_image:, x = shifted_col return 0.6 * image + 0.4 * blurred_image |
- 该函数模拟呼吸运动对 CT 图像造成的模糊效果。通过对图像的行或列进行周期性的偏移来实现。
6. 添加条纹噪声
|------------------------------------------------------------------------------------------------------------------------------------------------------------------------------------------------------------------------------------------------------------------------------------------------------------------------------------------------------------------------------------------------------------------------------------------------------------------------------------------------------------------------------------------------------------------------------------------------------------------------------------------------------------------------------------|
| def add_stripe_noise(image, intensity=200, stripe_width=5, stripe_spacing=10, direction='vertical'): noise = np.zeros_like(image, dtype=np.float32) height, width = image.shape if direction == 'vertical': for x in range(0, width, stripe_spacing): start = x end = min(x + stripe_width, width) noise:, start:end = intensity * (np.random.rand(height, end - start) - 0.5) elif direction == 'horizontal': for y in range(0, height, stripe_spacing): start = y end = min(y + stripe_width, height) noisestart:end, : = intensity * (np.random.rand(end - start, width) - 0.5) noisy_image = image + noise return np.clip(noisy_image, np.min(image), np.max(image)) |
- 该函数向图像中添加条纹噪声,模拟 CT 图像中可能出现的伪影。噪声可以是垂直或水平方向的。
7. 保存为 DICOM 文件
|-----------------------------------------------------------------------------------------------------------------------------------------------------------------------------------------------------------------------------------------------------------------------------------------------------------------------------------------------------------------------------------------------------------------------------------------------------------------------------------------------------------------------------------------------------------------------------------------------------------------------------------------------------------------------------------------------------------------------------------------------------------------------------------------------------------------------------------------------------------------------------------------------------------------------------------------------------------------------------------------------------------------------------------------------------------------------------------------|
| def save_as_dicom(image, original_ds, output_path): ds = pydicom.Dataset() for elem in original_ds: if elem.tag not in 0x7FE00010, 0x00080018, 0x00080016: ds.add(elem) if hasattr(original_ds, 'file_meta') and hasattr(original_ds.file_meta, 'TransferSyntaxUID'): ds.file_meta = original_ds.file_meta.copy() else: ds.file_meta = pydicom.dataset.FileMetaDataset() ds.file_meta.TransferSyntaxUID = ImplicitVRLittleEndian ds.is_little_endian = ds.file_meta.TransferSyntaxUID.is_little_endian ds.is_implicit_VR = ds.file_meta.TransferSyntaxUID.is_implicit_VR ds.SOPInstanceUID = generate_uid() ds.SeriesInstanceUID = generate_uid() if original_ds.BitsAllocated == 16: if original_ds.PixelRepresentation == 0: pixel_data = image.astype(np.uint16) else: pixel_data = image.astype(np.int16) else: pixel_data = image.astype(np.uint16) ds.BitsAllocated = 16 ds.BitsStored = 16 ds.HighBit = 15 ds.PixelRepresentation = 0 ds.PixelData = pixel_data.tobytes() ds.Rows, ds.Columns = pixel_data.shape ds.save_as(output_path) print(f"已保存DICOM文件: {output_path}") |
- 该函数将处理后的图像保存为 DICOM 格式文件,同时保留原始 DICOM 文件的元数据。
8. 处理 DICOM 图像
|-------------------------------------------------------------------------------------------------------------------------------------------------------------------------------------------------------------------------------------------------------------------------------------------------------------------------------------------------------------------------------------------------------------------------------------------------------------------------------------------------------------------------------------------------------------------------------------------------------------------------------------------|
| def process_dicom_image(input_path, output_dir): hu_image, ds = load_ct_image(input_path) if hu_image is None: return None, None, None, None motion_blurred = apply_respiratory_motion_blur(hu_image, amplitude=10, frequency=0.2, direction='horizontal') final_image = add_stripe_noise(motion_blurred, intensity=300, stripe_width=6, stripe_spacing=12, direction='vertical') filename = os.path.basename(input_path).replace('.dcm', '') os.makedirs(output_dir, exist_ok=True) output_dcm = os.path.join(output_dir, f"{filename}_processed.dcm") save_as_dicom(final_image, ds, output_dcm) return hu_image, final_image, ds, None |
- 该函数对加载的 CT 图像进行处理,依次应用呼吸运动模糊和条纹噪声,并将处理后的图像保存为新的 DICOM 文件。
9. 绘制图像和直方图
|-----------------------------------------------------------------------------------------------------------------------------------------------------------------------------------------------------------------------------------------------------------------------------------------------------------------------------------------------------------------------------------------------------------------------------------------------------------------------------------------------------------------------------------------------------------------------------------------------------------------------------------------------------------------------------------------------------------------------------------------------------------------------------------------------------------------------------------------------------------------------------------------------------------------------------------------------------------------------------------------------------------|
| def plot_histogram_and_image(original_image, processed_image, window_width, window_level, ax_original, ax_processed, ax_hist): original_windowed = apply_window_level(original_image, window_width, window_level) processed_windowed = apply_window_level(processed_image, window_width, window_level) ax_original.imshow(original_windowed, cmap='gray') ax_original.set_title("原始CT影像") ax_original.axis('off') ax_processed.imshow(processed_windowed, cmap='gray') ax_processed.set_title("添加伪影后的CT影像") ax_processed.axis('off') ax_hist.hist(processed_image.flatten(), bins=200, color='blue', alpha=0.7) ax_hist.axvline(x=window_level - window_width / 2, color='red', linestyle='--') ax_hist.axvline(x=window_level + window_width / 2, color='red', linestyle='--') ax_hist.axvline(x=window_level, color='green', linestyle='-') ax_hist.set_title(f'窗宽={window_width}, 窗位={window_level}') ax_hist.set_xlabel('HU值') ax_hist.set_ylabel('频数') ax_hist.tick_params(axis='both', labelsize=8) |
- 该函数用于绘制原始图像、处理后图像以及对应的直方图,以便直观地比较和分析图像的变化。
10. 交互式调整窗宽窗位
|----------------------------------------------------------------------------------------------------------------------------------------------------------------------------------------------------------------------------------------------------------------------------------------------------------------------------------------------------------------------------------------------------------------------------------------------------------------------------------------------------------------------------------------------------------------------------------------------------------------------------------------------------------------------------------------------------------------------------------------------------------------------------------------------------------------------------------------------------------------------------------------------------------------------------------------------------------------------------------------------------------------------------------------------------------------------------------------------------------------------------------------------------------------------------------------------------------------------------------------------------------------------------------------------------------------------------------------------------------------------------------------------------------------------------------------------------------------------------------------------------------------------------------------------------------------------------------------------------------------------------------------------------------------------------------------------------------------------------------------------------------------------------------------------------------------------------------------------------------------------------------------------------------------------------------------------------------------------------------------------------------------------------------------------------------------------------------------------------------------------------------------------------------------------------------------------------------------------------------------------------------------------------------------------------------------------------------------------------------------------------------------------------------------------------------------------------------------------------------------------------------------------------------------------------------------------------------------------------------------------------------------------------------------------------------------------------------------------------------------------------------------------|
| def create_interactive_adjustment(original_image, processed_image, default_width=1500, default_level=-600): plt.ion() fig, (ax_original, ax_processed, ax_hist) = plt.subplots(1, 3, figsize=(18, 6)) plt.subplots_adjust(bottom=0.25) original_display = apply_window_level(original_image, default_width, default_level) processed_display = apply_window_level(processed_image, default_width, default_level) img_original = ax_original.imshow(original_display, cmap='gray') img_processed = ax_processed.imshow(processed_display, cmap='gray') ax_original.set_title("原始CT影像") ax_original.axis('off') ax_processed.set_title("添加伪影后的CT影像") ax_processed.axis('off') hist, bins = np.histogram(processed_image.flatten(), bins=200) ax_hist.hist(processed_image.flatten(), bins=200, color='blue', alpha=0.7) min_hu, max_hu = np.min(processed_image), np.max(processed_image) ww_line_min = ax_hist.axvline(default_level - default_width / 2, color='red', linestyle='--') ww_line_max = ax_hist.axvline(default_level + default_width / 2, color='red', linestyle='--') wl_line = ax_hist.axvline(default_level, color='green', linestyle='-') wl_text = ax_hist.text(default_level, np.max(hist) * 0.9, f'窗位: {default_level}', color='green', ha='center') ww_text = ax_hist.text(default_level, np.max(hist) * 0.8, f'窗宽: {default_width}', color='red', ha='center') ax_hist.set_title("HU值直方图") ax_hist.set_xlabel("HU值") ax_hist.set_ylabel("频数") ax_width = plt.axes(0.25, 0.15, 0.65, 0.03) ax_level = plt.axes(0.25, 0.10, 0.65, 0.03) width_slider = Slider(ax=ax_width, label='窗宽 (WW)', valmin=1, valmax=4000, valinit=default_width, valstep=1) level_slider = Slider(ax=ax_level, label='窗位 (WL)', valmin=min_hu, valmax=max_hu, valinit=default_level, valstep=1) def update(val): ww, wl = width_slider.val, level_slider.val original_windowed = apply_window_level(original_image, ww, wl) processed_windowed = apply_window_level(processed_image, ww, wl) img_original.set_data(original_windowed) img_processed.set_data(processed_windowed) ww_line_min.set_xdata(wl - ww / 2) ww_line_max.set_xdata(wl + ww / 2) wl_line.set_xdata(wl) wl_text.set_position((wl, np.max(hist) * 0.9)) wl_text.set_text(f'窗位: {int(wl)}') ww_text.set_position(((wl - ww / 2 + wl + ww / 2) / 2, np.max(hist) * 0.8)) ww_text.set_text(f'窗宽: {int(ww)}') fig.canvas.draw_idle() fig.canvas.flush_events() width_slider.on_changed(update) level_slider.on_changed(update) reset_ax = plt.axes(0.8, 0.05, 0.1, 0.04) reset_button = plt.Button(reset_ax, '重置', color='lightgoldenrodyellow') def reset(event): width_slider.reset() level_slider.reset() reset_button.on_clicked(reset) plt.show(block=True) plt.ioff() |
- 该函数创建一个交互式界面,允许用户通过滑动条调整窗宽和窗位,实时观察图像的变化。
11. 绘制预设窗宽窗位下的图像
|--------------------------------------------------------------------------------------------------------------------------------------------------------------------------------------------------------------------------------------------------------------------------------------------------------------------------------------------------------------------------------------------------------------------------------------------------------------------------------------------------------------------------------------------------------------------------------------------------------------------------------------------------------------------------------------------------------------------------------------------------------------------------------------------------------------------------------------------------------------------------------------------------------------------------------------------------------------------------------------------------------------------------------------------------------------------------------------------------------------------------------------------------------------------------------------------------------------------------|
| def plot_preset_windows(image, ds, title_suffix=""): if hasattr(ds, 'WindowWidth') and hasattr(ds, 'WindowCenter'): default_width = float(ds.WindowWidth) default_level = float(ds.WindowCenter) else: default_width, default_level = 1500, -600 presets = { "肺窗(适合看伪影)": (1500, -600), "软组织窗": (400, 40), "骨窗": (2000, 400), "脑窗": (80, 40), "腹部窗": (350, 50), "纵隔窗": (350, 50) } fig, axes = plt.subplots(2, 6, figsize=(18, 10)) fig.suptitle(f"不同窗宽窗位下的CT影像效果对比{title_suffix}", fontsize=16) for i, (title, (width, level)) in enumerate(presets.items()): ax_img = axes0, i ax_hist = axes1, i windowed_image = apply_window_level(image, width, level) ax_img.imshow(windowed_image, cmap='gray') ax_img.set_title(title) ax_img.axis('off') ax_hist.hist(image.flatten(), bins=200, color='blue', alpha=0.7) ax_hist.axvline(x=level - width / 2, color='red', linestyle='--') ax_hist.axvline(x=level + width / 2, color='red', linestyle='--') ax_hist.axvline(x=level, color='green', linestyle='-') ax_hist.set_title(f'窗宽={width}, 窗位={level}') ax_hist.set_xlabel('HU值') ax_hist.set_ylabel('频数') ax_hist.tick_params(axis='both', labelsize=8) plt.tight_layout(rect=0, 0, 1, 0.96) plt.show() |
- 该函数绘制在不同预设窗宽窗位下的图像和直方图,以便快速比较不同设置下的图像效果。
12. 主函数
|-----------------------------------------------------------------------------------------------------------------------------------------------------------------------------------------------------------------------------------------------------------------------------------------------------------------------------------------------|
| def main(): dicom_path = "Anonymized_20250720/series-00002/image-00043.dcm" original_image, processed_image, ds, _ = process_dicom_image(dicom_path, "processed_images") if original_image is None: print("无法加载CT图像,程序终止") return print("显示原始CT图像在不同窗宽窗位下的效果...") plot_preset_windows(original_image, ds, "(原始图像)") print("显示添加伪影后的CT图像在不同窗宽窗 |
实现 CT 图像呼吸运动模糊效果
python
def apply_respiratory_motion_blur(image, amplitude=8, frequency=0.15, direction='horizontal'):

    blurred_image = np.zeros_like(image)

    height, width = image.shape

    t = np.linspace(0, 2 * np.pi, num=height if direction == 'vertical' else width)

    if direction == 'horizontal':

        for y in range(height):

            offset = int(amplitude * np.sin(frequency * t[y]))

            shifted_row = np.roll(image[y, :], offset)

            if offset > 0:

                shifted_row[:offset] = 0

            elif offset < 0:

                shifted_row[offset:] = 0

            blurred_image[y, :] = shifted_row

    elif direction == 'vertical':

        for x in range(width):

            offset = int(amplitude * np.sin(frequency * t[x]))

            shifted_col = np.roll(image[:, x], offset)

            if offset > 0:

                shifted_col[:offset] = 0

            elif offset < 0:

                shifted_col[offset:] = 0

            blurred_image[:, x] = shifted_col

    return 0.6 * image + 0.4 * blurred_image
这个函数的作用是给 CT 图像添加 "呼吸运动模糊" 效果,模拟病人呼吸时身体移动导致的图像模糊。下面用简单易懂的方式解释:
原理
呼吸时人体会有规律地上下或左右移动,这种移动会让 CT 图像产生模糊。这个函数通过模拟周期性的位移来实现这种效果:
- 用正弦函数(np.sin)模拟呼吸的周期性运动(吸气 - 呼气 - 吸气的循环)
- 让图像的每行或每列按照这个周期规律轻微偏移
- 最后混合原始图像和偏移后的图像,产生模糊感
实现步骤(以水平方向为例)
- 准备工作:
|----------------------------------------------------------------------------------------------------------------------------------------------------------------------------------|
| blurred_image = np.zeros_like(image) # 创建一个和原图一样大的空图像 height, width = image.shape # 获取图像的高度和宽度 # 生成0到2π的均匀数据(刚好一个完整的正弦周期) t = np.linspace(0, 2 * np.pi, num=width) # 水平方向用宽度做周期 |
- 逐行处理(水平方向模糊):
|-----------------------------------------------------------------------------------------------------------------------------------------------------------------------------------------------------------------------------------------------------------------------------------------------------------------------------------------------------------------------------------------------------------------|
| for y in range(height): # 遍历每一行 # 计算当前行的偏移量:用正弦函数生成周期性偏移 # amplitude控制偏移幅度(越大越模糊),frequency控制呼吸频率 offset = int(amplitude * np.sin(frequency * ty)) # 把当前行按照偏移量滚动(类似平移) shifted_row = np.roll(imagey, :, offset) # 处理偏移后出现的空白(用0填充,让模糊更自然) if offset > 0: shifted_row:offset = 0 # 左边空白填0 elif offset < 0: shifted_rowoffset: = 0 # 右边空白填0 # 保存处理后的行到新图像 blurred_imagey, : = shifted_row |
- 混合图像:
|--------------------------------------------------------------------|
| return 0.6 * image + 0.4 * blurred_image # 60%原图 + 40%偏移图,产生模糊效果 |
参数说明
- amplitude:偏移幅度(默认 8),值越大,模糊越明显(呼吸幅度大)
- frequency:频率(默认 0.15),值越大,呼吸越快(周期越短)
- direction:方向(默认horizontal水平),可选vertical垂直(模拟上下呼吸)
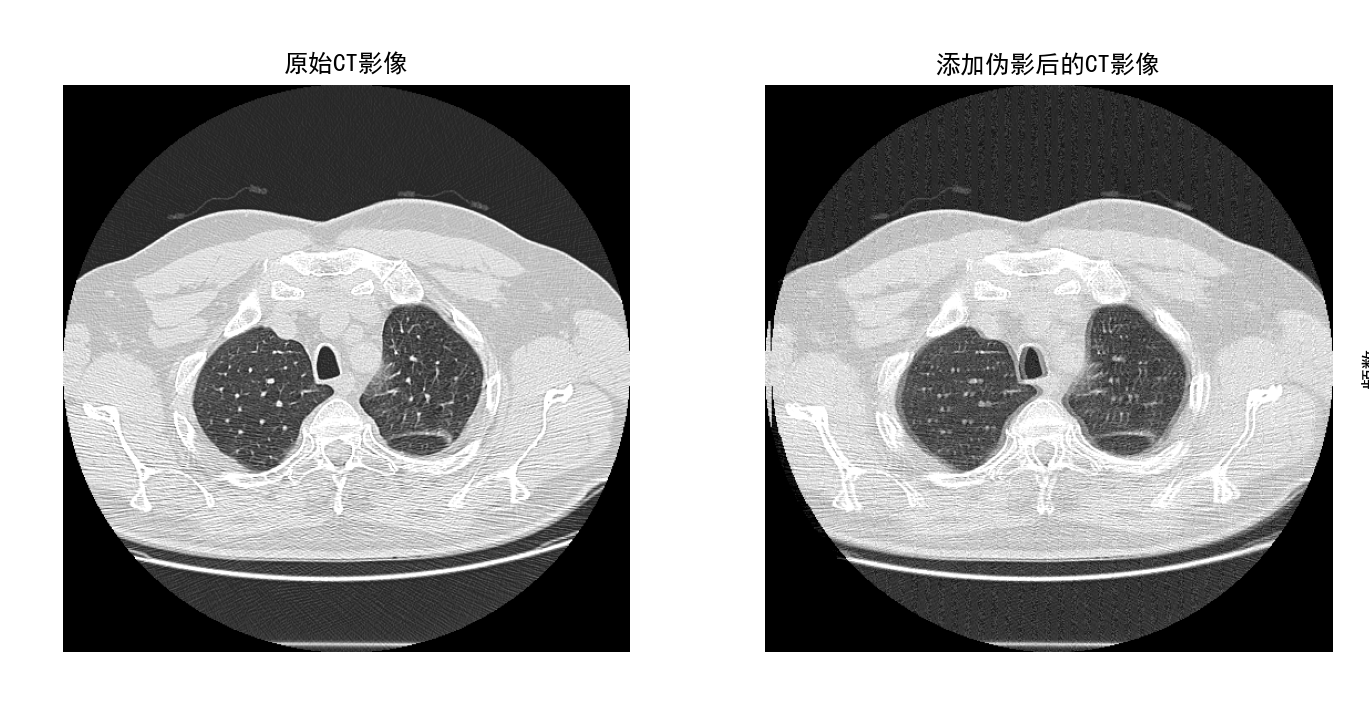
效果展示
- 原始图像:清晰的 CT 结构
- 处理后:图像中会出现水平(或垂直)方向的轻微拖影,类似病人呼吸时身体移动导致的模糊
- 举例:肺部 CT 图像添加后,会模拟呼吸时肺部上下移动造成的模糊效果
简单说,这个函数通过 "有规律地轻微平移图像的每行 / 每列,再混合原图",来模拟呼吸运动导致的 CT 图像模糊,让图像更接近真实检查中可能出现的伪影。
后文会对伪影模拟专题说明