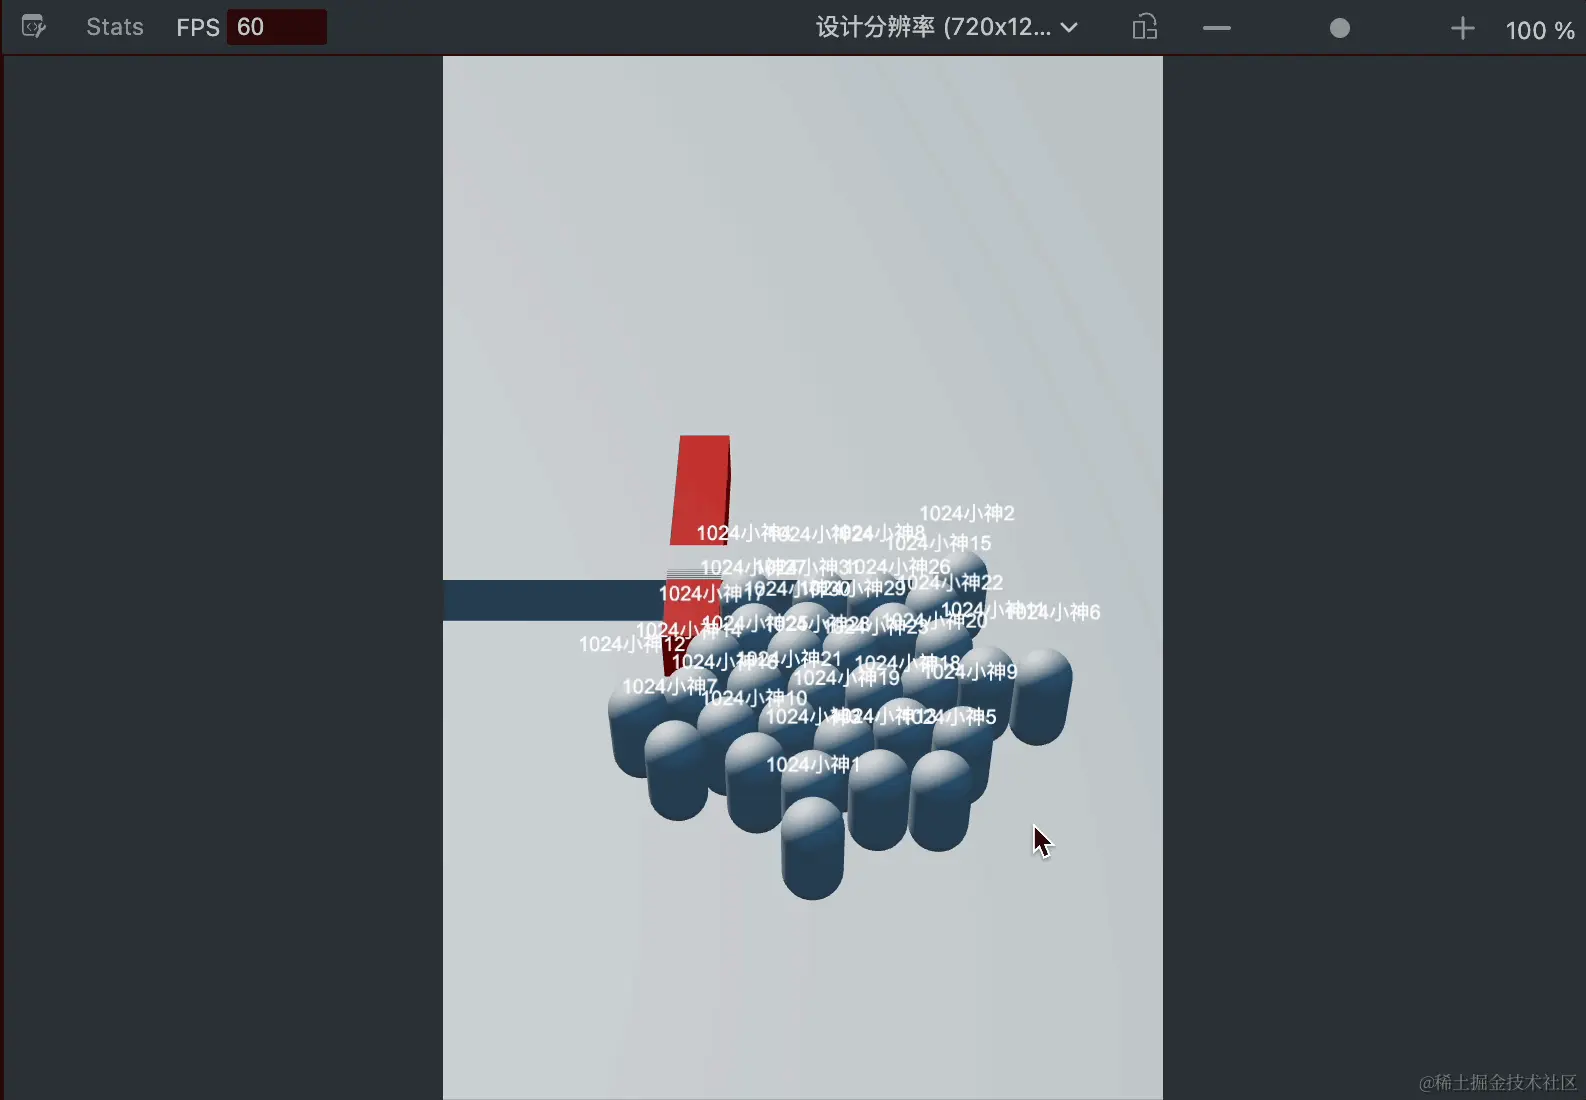
玩家昵称跟随的实现过程在上一篇文章有讲,但是如何实现多玩家多昵称跟随?我在开发过程中使用了一种走捷径的思维,就是将玩家和昵称放在一个空节点下面,然后存储为一个预制体,然后再通过脚本动态创建预制体实例,结果就是:昵称有重影,每多创建一个玩家昵称就会多一层重影......后来研究发现,原来是因为昵称放在玩家节点下面后,就会导致每一个玩家节点下都有一个canvas节点和label节点+Camera节点。
如果每个玩家的 Label 都在自己的 Canvas 下,并且这些 Canvas 都被主摄像机渲染,所有 Label 会被叠加渲染,造成昵称"重影"效果。
重影解决办法:
场景中只保留一个 Canvas(一般是全局 UI),所有玩家的昵称 Label 都作为这个 Canvas 的子节点。玩家预制体中不要再带 Canvas 节点,只保留 Label。
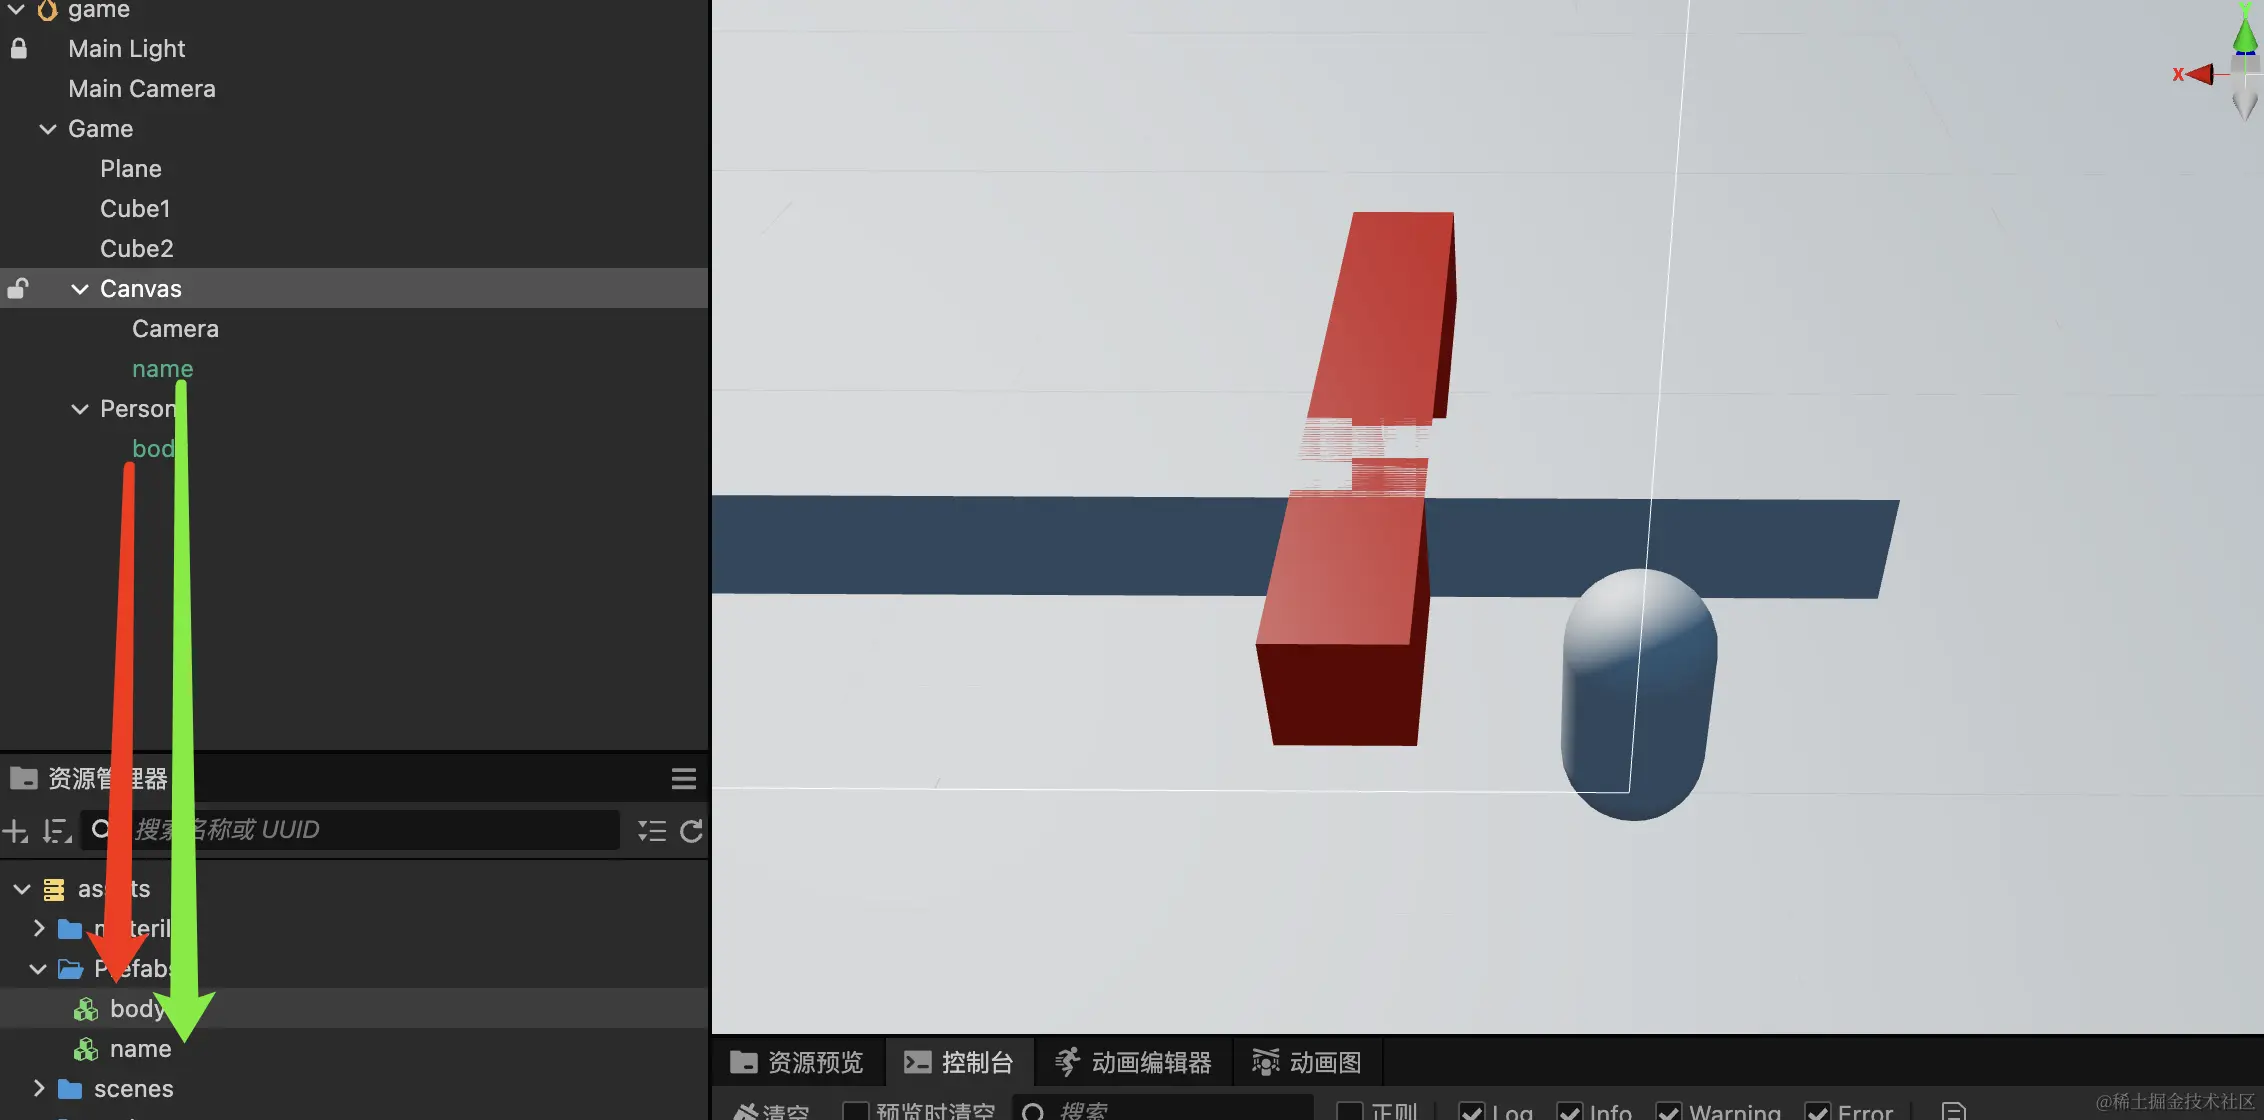
然后将玩家Body和name单独存储为预制体,再通过脚本来动态生成玩家对象和昵称对象,将玩家对象和昵称对象单独放在各自的节点下面,比如玩家放在Person这个节点下,昵称放在Canvas这个节点下。
总控制脚本
再Game上绑定游戏总控制脚本,总控制脚本中绑定玩家预制体和昵称预制体,还有总摄象机
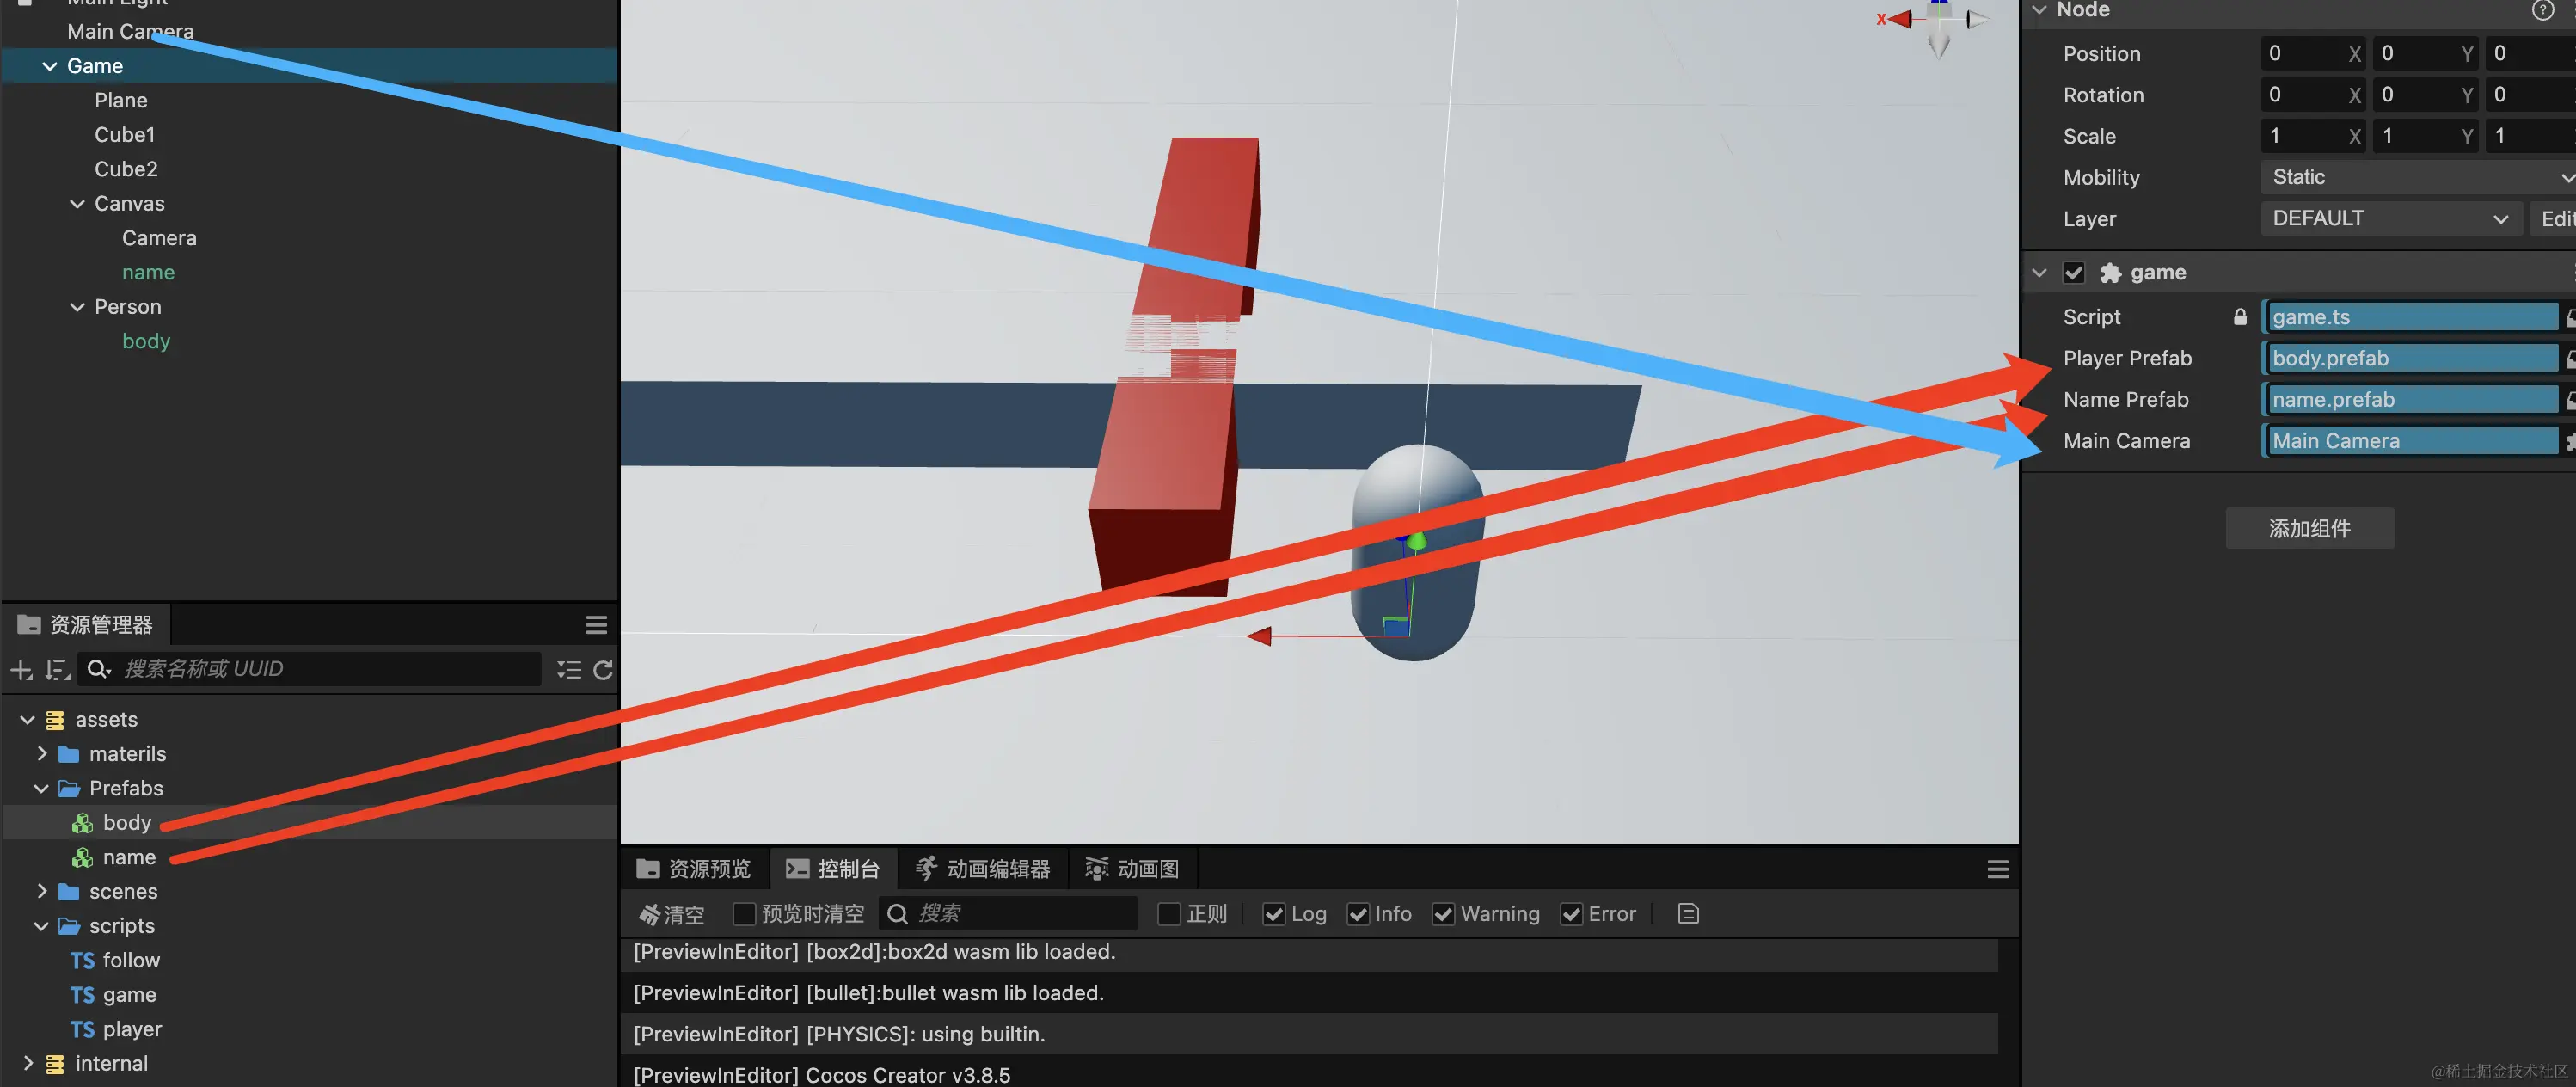
然后在脚本中动态创建玩家和昵称,然后放在各自的节点下:
javascript
import {
    _decorator,
    Camera,
    Component,
    EventKeyboard,
    Input,
    input,
    instantiate,
    KeyCode,
    Label,
    Prefab,
} from 'cc'
import { follow } from './follow'
const { ccclass, property } = _decorator

@ccclass('game')
export class game extends Component {
    // 玩家预制体
    @property(Prefab)
    public playerPrefab: Prefab = null

    // 玩家昵称预制体
    @property(Prefab)
    public namePrefab: Prefab = null

    @property({ type: Camera })
    mainCamera: Camera = null // 3D摄像机

    // 玩家序号
    private playerIndex = 0

    start() {
        // 监听按键输入
        input.on(Input.EventType.KEY_UP, this.onKeyUp, this)
    }

    onKeyUp(event: EventKeyboard) {
        switch (event.keyCode) {
            case KeyCode.KEY_P:
                console.log('P key pressed')
                this.createPlayer()
                break
        }
    }

    // 创建玩家
    createPlayer() {
        // 创建玩家
        const playerNode = instantiate(this.playerPrefab)
        // 创建玩家昵称
        const nameNode = instantiate(this.namePrefab)
        // 获取follow组件
        const followComp = nameNode.getComponent(follow)
        // 设置玩家节点
        followComp.setPlayerNode(playerNode)
        // 设置3D摄像机
        followComp.setMainCamera(this.mainCamera)
        // 设置玩家昵称
        this.playerIndex++
        const nameLabel = nameNode.getComponent(Label)
        nameLabel.string = `1024小神${this.playerIndex}`
        // 将玩家昵称添加到canvas节点
        const canvasNode = this.node.getChildByName('Canvas')
        nameNode.setParent(canvasNode)

        // 将玩家添加到Person节点
        const personNode = this.node.getChildByName('Person')
        playerNode.setParent(personNode)
        // 设置玩家位置
        playerNode.setPosition(0, 1, 0)
    }

    update(deltaTime: number) {}
}
昵称跟随脚本
在昵称跟随脚本中,添加动态配置玩家和摄像机的函数,然后在总控制脚本中就可以获取到这个组件来设置(ts脚本也是组件,可以通过getComponent来获取到实例,并调用ts脚本中的函数)
javascript
import {
    _decorator,
    Camera,
    Component,
    Node,
    UITransform,
    Vec3,
} from 'cc'
const { ccclass, property } = _decorator

@ccclass('follow')
export class follow extends Component {
    // @property({ type: Node })
    playerNode: Node = null

    // @property({ type: Camera })
    mainCamera: Camera = null // 3D摄像机

    // @property({ type: Node })
    canvasNode: Node = null // Canvas节点

    // 头顶偏移
    private _offset: Vec3 = new Vec3(0, 2, 0)

    // 动态设置玩家节点
    public setPlayerNode(playerNode: Node) {
        if (this.playerNode) return
        this.playerNode = playerNode
    }

    // 动态设置3D摄像机
    public setMainCamera(mainCamera: Camera) {
        if (this.mainCamera) return
        this.mainCamera = mainCamera
    }

    start() {
        this.canvasNode = this.node.parent
    }

    // update
    update(dt: number) {
        if (!this.playerNode || !this.mainCamera || !this.canvasNode) return

        // 1. 计算头顶世界坐标
        const headWorldPos = this.playerNode
            .getWorldPosition()
            .add(this._offset)

        // 2. 世界坐标转屏幕坐标
        const screenPos = new Vec3()
        this.mainCamera.worldToScreen(headWorldPos, screenPos)
        // console.log('screenPos', screenPos)

        // 3. 屏幕坐标转UI坐标
        const canvasUITrans = this.canvasNode.getComponent(UITransform)
        const widgetPos = canvasUITrans.convertToNodeSpaceAR(
            new Vec3(screenPos.x, screenPos.y, 0)
        )

        // console.log('widgetPos', widgetPos)
        // 4. 设置UI节点位置
        this.node.setPosition(widgetPos)
    }
}