如果没有在 linux 环境下安装 flink ,先看我的上一篇文章:如何搭建Linux环境下的flink本地集群-CSDN博客
使用工具:IntelliJ IDEA 2021,Maven 3.6.1
第一步,创建一个空的 Maven 项目,导入依赖
XML
<?xml version="1.0" encoding="UTF-8"?>
<project xmlns="http://maven.apache.org/POM/4.0.0"
         xmlns:xsi="http://www.w3.org/2001/XMLSchema-instance"
         xsi:schemaLocation="http://maven.apache.org/POM/4.0.0 http://maven.apache.org/xsd/maven-4.0.0.xsd">
    <modelVersion>4.0.0</modelVersion>

    <groupId>org.example</groupId>
    <artifactId>flinkLearn</artifactId>
    <version>1.0-SNAPSHOT</version>

    <dependencies>
        <dependency>
            <groupId>org.apache.flink</groupId>
            <artifactId>flink-runtime-web</artifactId>
            <version>${flink.version}</version>
        </dependency>
        <dependency>
            <groupId>ch.qos.logback</groupId>
            <artifactId>logback-classic</artifactId>
            <version>1.2.11</version>
        </dependency>
        <dependency>
            <groupId>org.apache.flink</groupId>
            <artifactId>flink-streaming-java</artifactId>
            <version>${flink.version}</version>
        </dependency>

        <dependency>
            <groupId>org.apache.flink</groupId>
            <artifactId>flink-clients</artifactId>
            <version>${flink.version}</version>
        </dependency>
    </dependencies>


    <properties>
        <maven.compiler.source>8</maven.compiler.source>
        <maven.compiler.target>8</maven.compiler.target>
        <flink.version>1.17.0</flink.version>
    </properties>

    <build>
        <plugins>
            <plugin>
                <groupId>org.apache.maven.plugins</groupId>
                <artifactId>maven-shade-plugin</artifactId>
                <version>3.2.4</version>
                <executions>
                    <execution>
                        <phase>package</phase>
                        <goals>
                            <goal>shade</goal>
                        </goals>
                        <configuration>
                            <artifactSet>
                                <excludes>
                                    <exclude>com.google.code.findbugs:jsr305</exclude>
                                    <exclude>org.slf4j:*</exclude>
                                    <exclude>log4j:*</exclude>
                                </excludes>
                            </artifactSet>
                            <filters>
                                <filter>
                                    <!-- Do not copy the signatures in the META-INF folder.
                                    Otherwise, this might cause SecurityExceptions when using the JAR. -->
                                    <artifact>*:*</artifact>
                                    <excludes>
                                        <exclude>META-INF/*.SF</exclude>
                                        <exclude>META-INF/*.DSA</exclude>
                                        <exclude>META-INF/*.RSA</exclude>
                                    </excludes>
                                </filter>
                            </filters>
                            <transformers combine.children="append">
                                <transformer
                                        implementation="org.apache.maven.plugins.shade.resource.ServicesResourceTransformer">
                                </transformer>
                            </transformers>
                        </configuration>
                    </execution>
                </executions>
            </plugin>
        </plugins>
    </build>


</project>
等等依赖下载完毕
第二步,编写分词处理无界流代码
此刻先不要运行,因为还没有数据源
java
import org.apache.flink.api.common.typeinfo.Types;
import org.apache.flink.api.java.tuple.Tuple2;
import org.apache.flink.streaming.api.datastream.DataStreamSource;
import org.apache.flink.streaming.api.datastream.SingleOutputStreamOperator;
import org.apache.flink.streaming.api.environment.StreamExecutionEnvironment;
import org.apache.flink.util.Collector;

public class StreamNoBundedWordCount {
    public static void main(String[] args) throws Exception{

        //拿到执行环境
        StreamExecutionEnvironment evn = StreamExecutionEnvironment.getExecutionEnvironment();
        //数据源 source
        //注:加 returns 是因为 lambda 表达式无法识别二元组中的类型,故手动指定以避免报错
        DataStreamSource<String> source = evn.socketTextStream("localhost", 8888);
        SingleOutputStreamOperator<Tuple2<String, Integer>> sum = source.flatMap((String value, Collector<Tuple2<String, Integer>> out) -> {
            String[] words = value.split(" ");
            for (String word : words) {
                out.collect(Tuple2.of(word, 1));
            }
        })
        .returns(Types.TUPLE(Types.STRING,Types.INT))
        .keyBy((Tuple2<String, Integer> value) -> value.f0)
        .sum(1);
        //写入,sink
        sum.print();
        //执行
        evn.execute();

    }


}
第三步,进入 linux 环境,安装 netcat 模拟数据源发送数据
安装 netcat
bash
sudo apt update
sudo apt install netcat
验证安装情况
bash
nc --version模拟数据源,监听 8888 端口
bash
nc -lk 8888第四步,启动程序
点击 绿色按钮 启动 Main 程序后
在 netcat 中发送数据比如 hello world

可以看到程序可以正常运行
第五步,打包并上传到 linux 中的 flink 集群中
点开右侧的 Maven 选项,找到生命周期,先 clean 一下,将多余文件清除
再 packge
成功后会生成一个 target 文件夹,找到其中的 jar 包,会生成两个
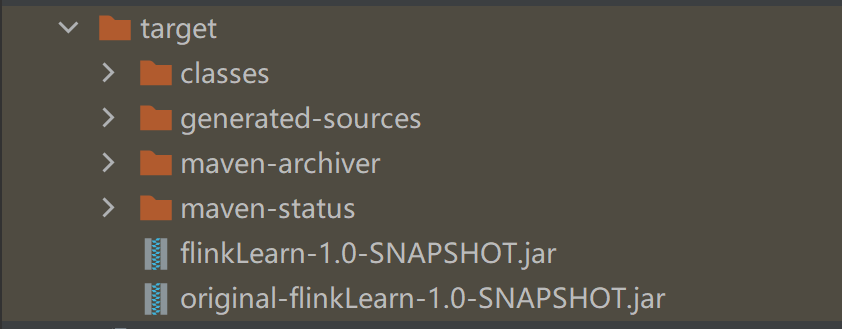
两个都能用,上面那个东西要少一些
然后我们将 jar 包上传到 flink 的 web UI 上
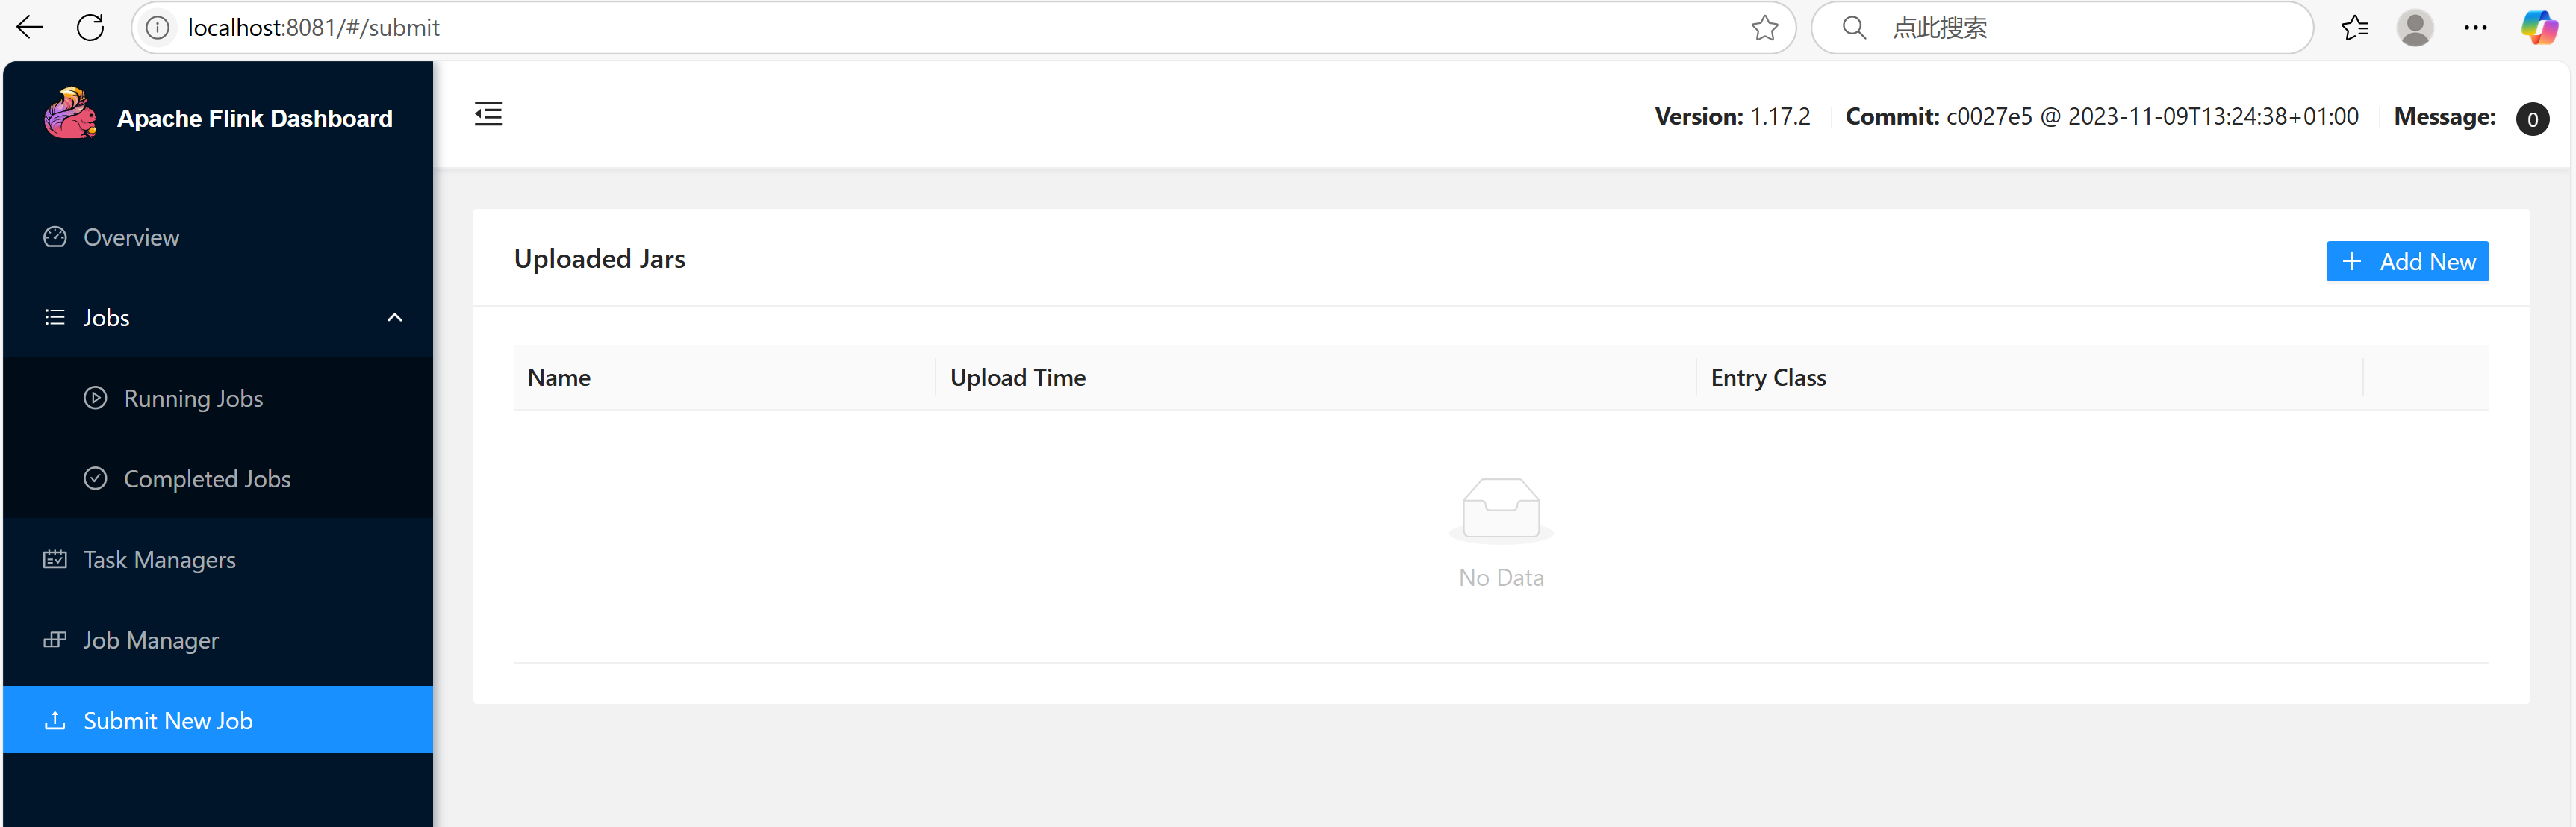
点击 add new
找到我们刚刚生成的 jar 包 并点击 "打开" 上传

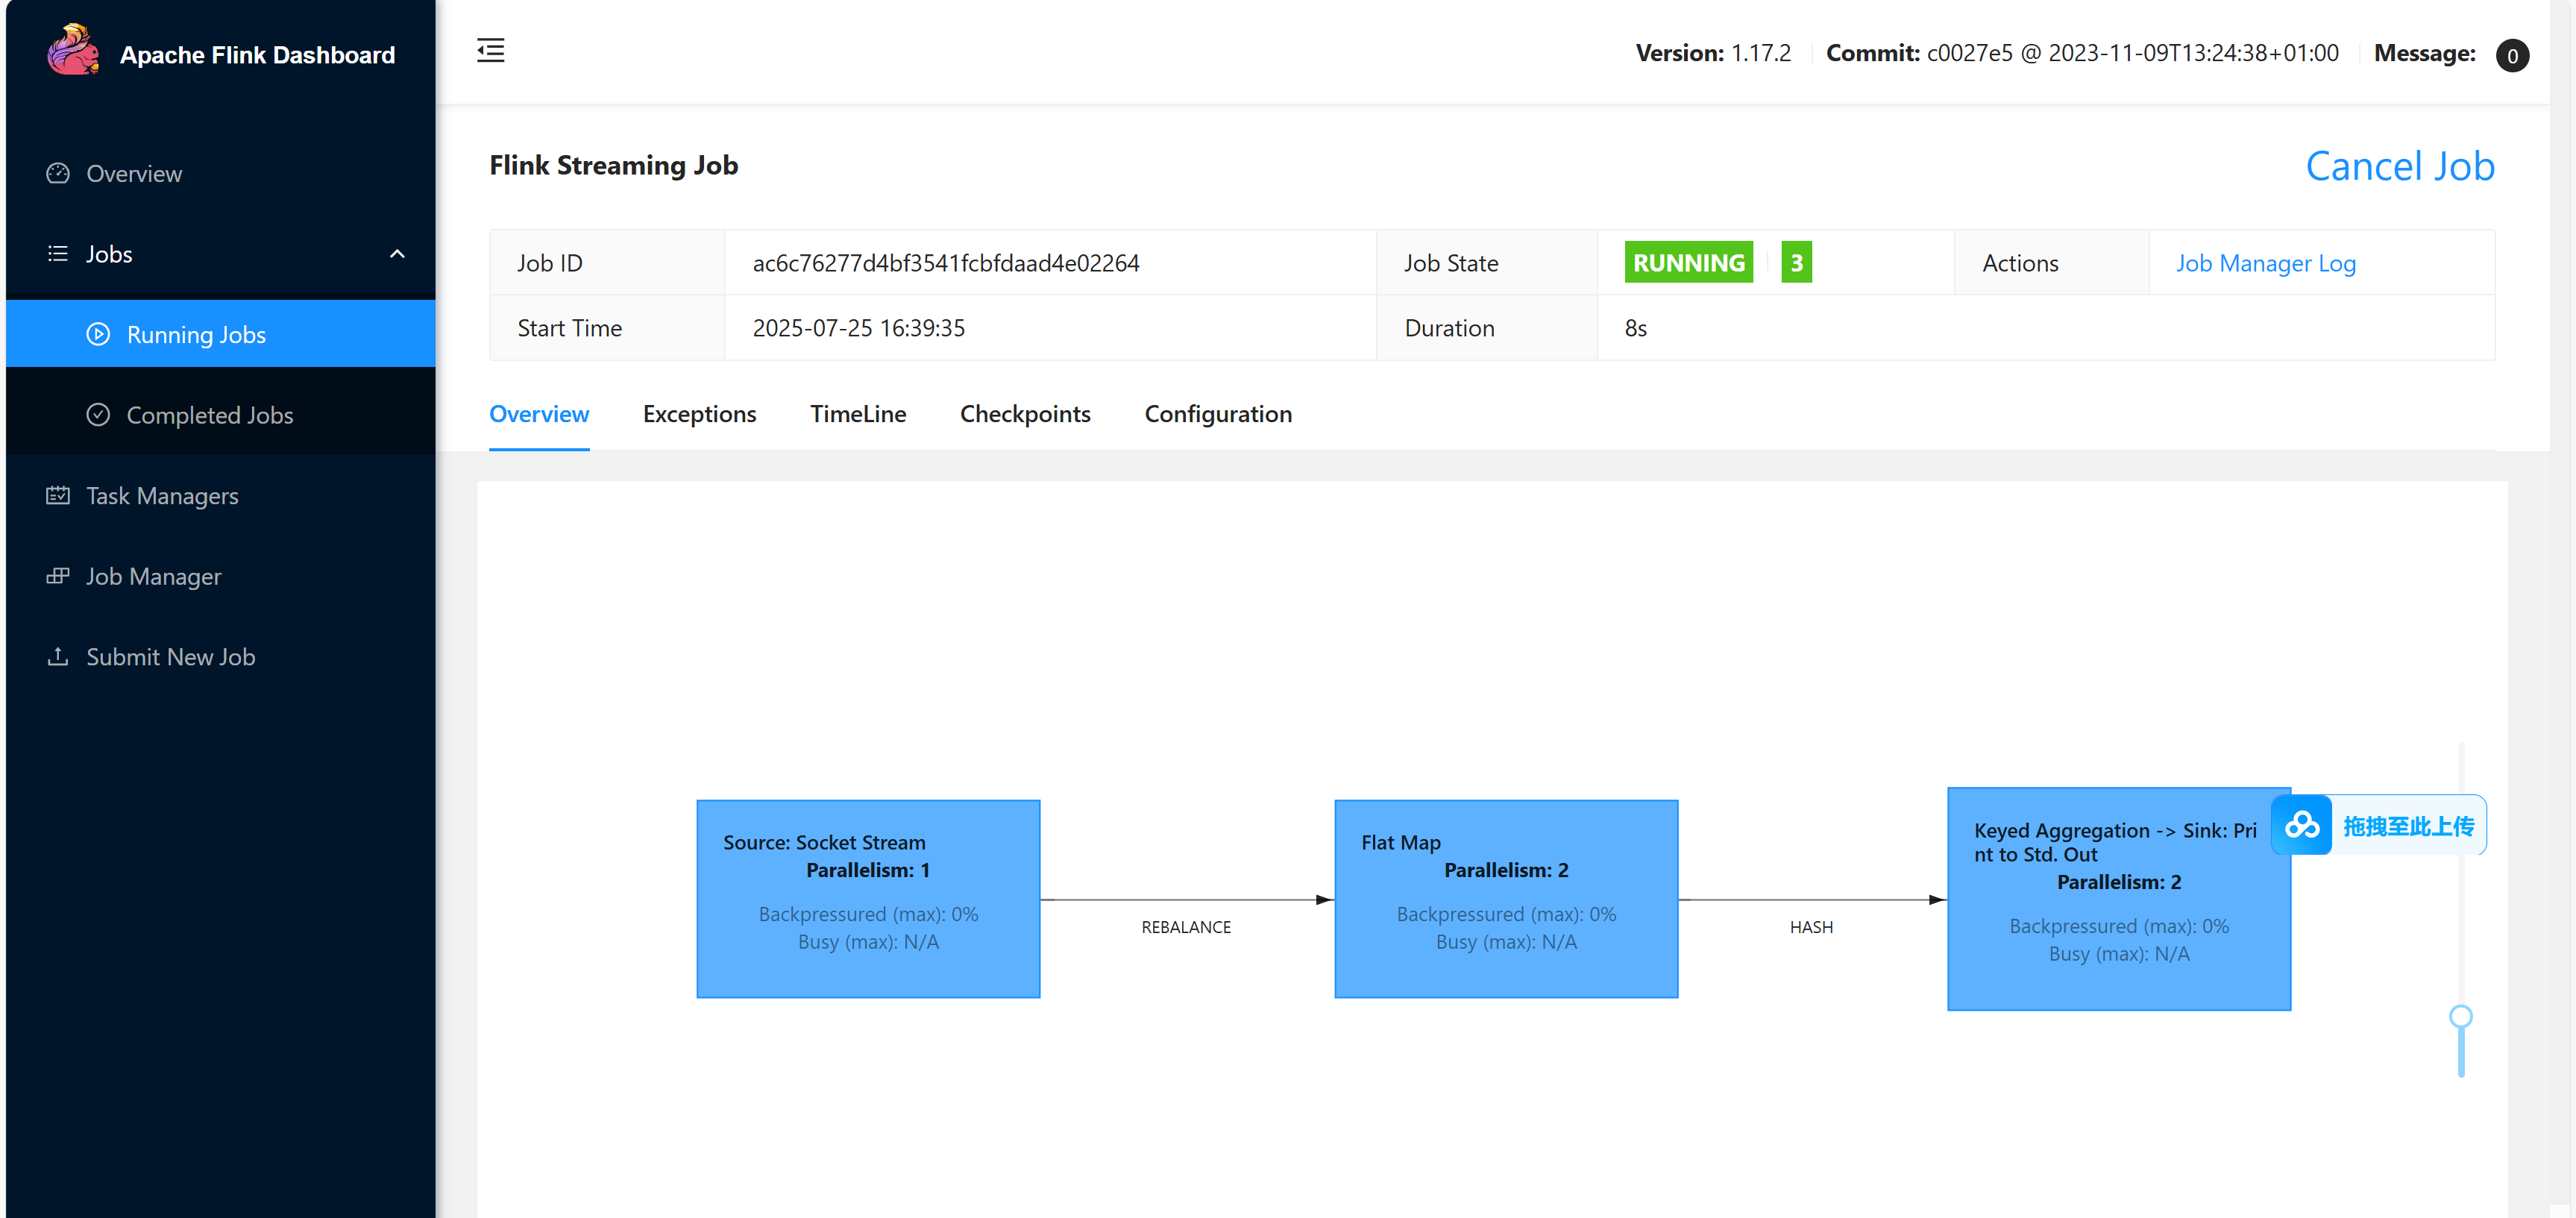
点击 jar 包,为其指定启动类,指定并行度,这里我写的 2
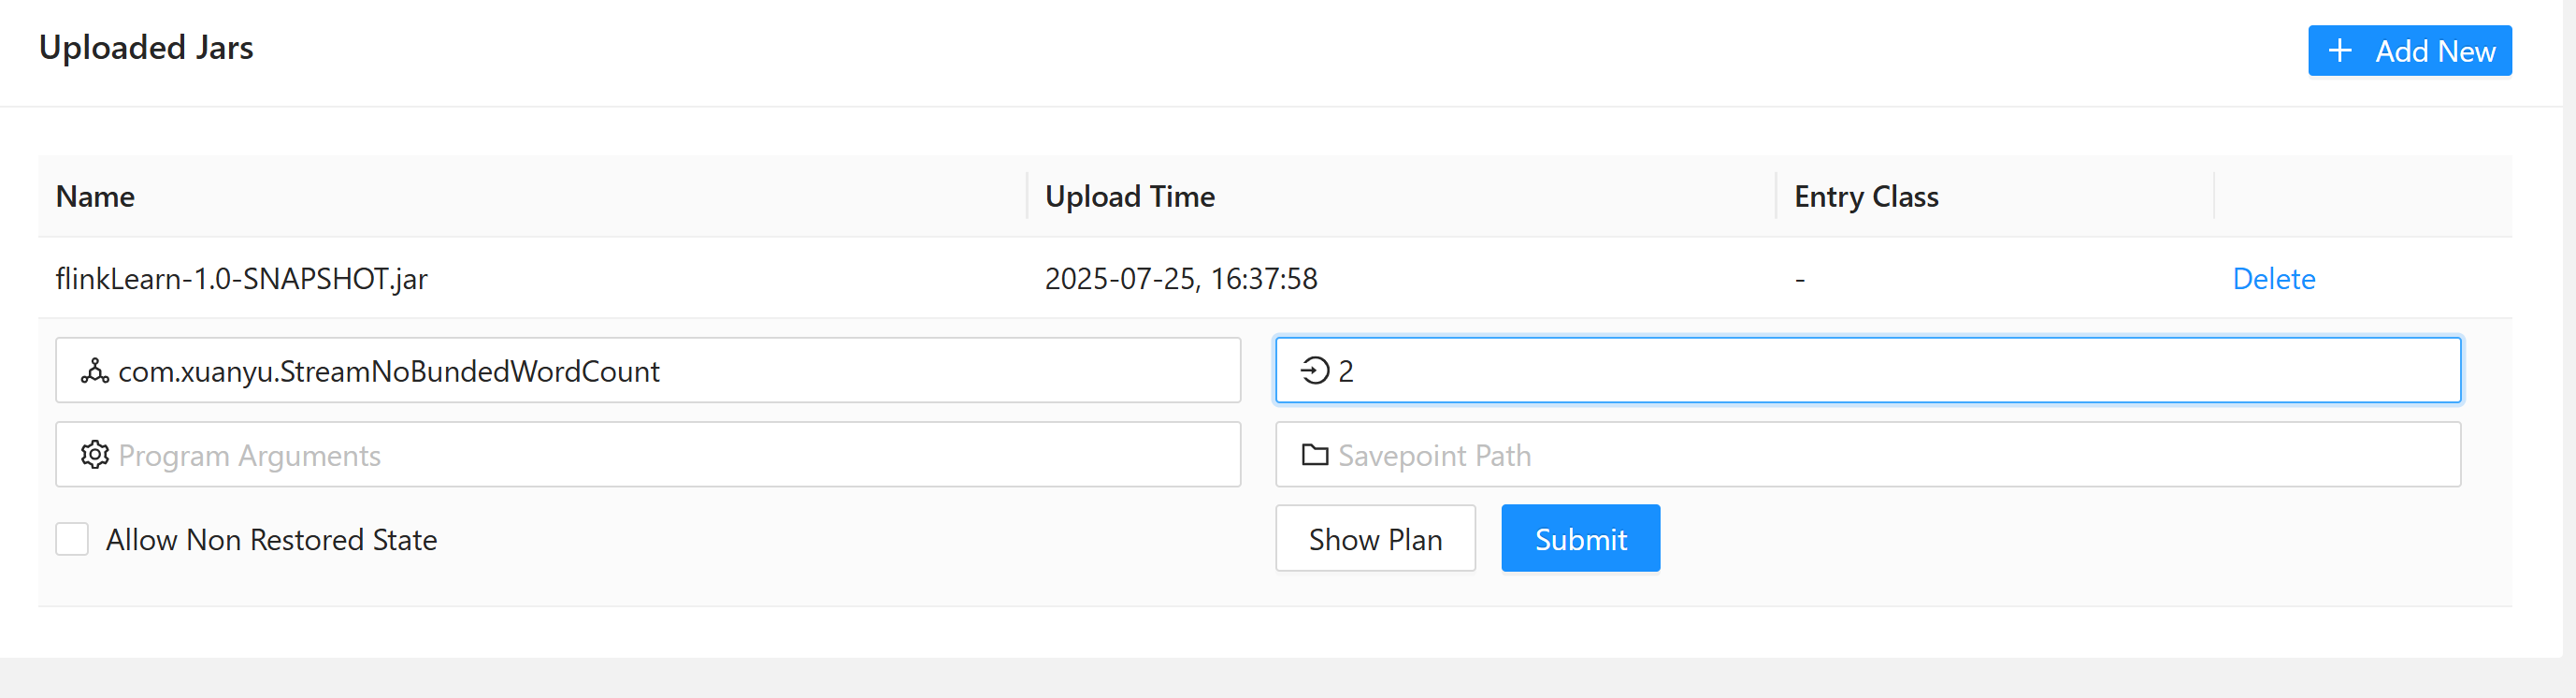 可以看到 作业启动成功
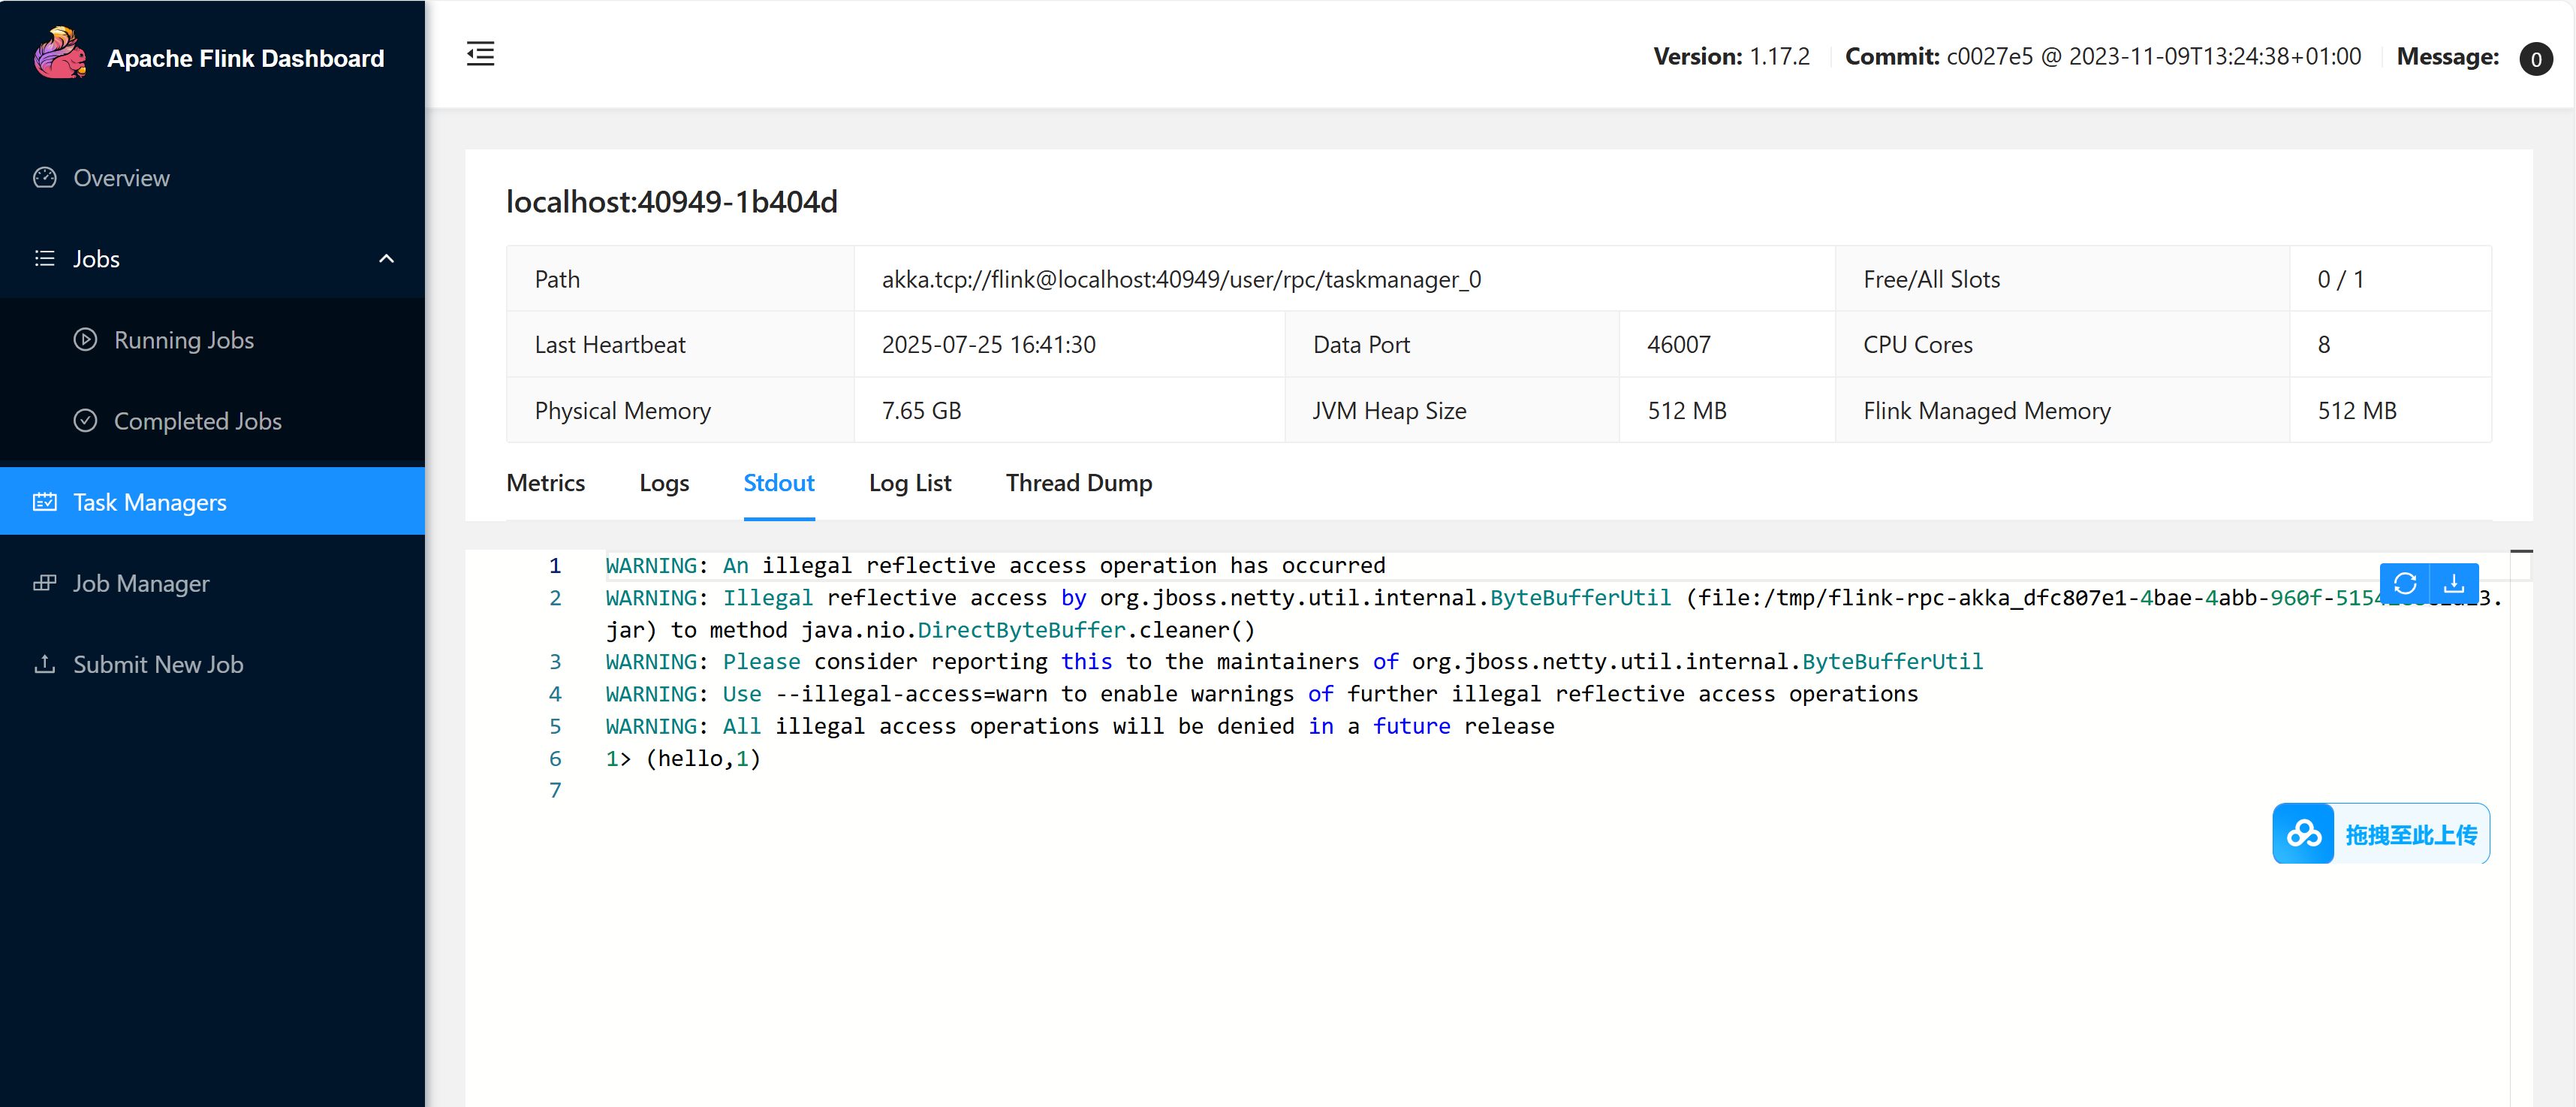
接下来,我们再 netcat 中发送数据 hello
可以看到, 集群中的 task Managers 成功接收到了数据并进行词频统计