前言
前面介绍了Hugging Face平台及核心API的使用方式,在前面的基础上,尝试创建一个Hugging Face文本生成应用,主要使用Hugging Face的Gradio模板,对代码 做了进一步优化和拆解,对往期内容感兴趣的小伙伴也可以看往期:
- 【Hugging Face】Hugging Face数据集的基本使用
- 【Hugging Face】Hugging face模型的基本使用
- 【Hugging Face】Hugging Face Transformers的使用方式
- 【Hugging Face】Hugging Face Diffusers的使用方式
- 【Gradio】初识Gradio
创建Space应用
首先在Hugging Face上创建一个Gradio模版应用,详细创建流程可以查看之前这篇文章:【Hugging Face】Hugging Face Space空间的基本使用方式
创建完成后将项目克隆到本地,我们将拥有一个类似的项目结构:

搭建文本生成应用
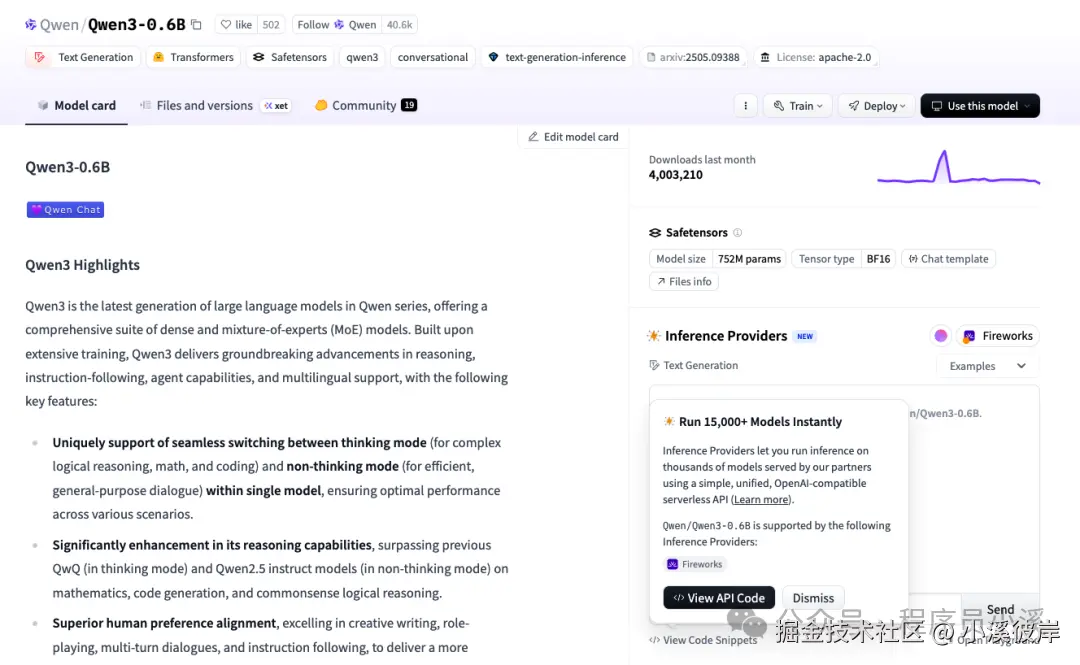
本示例以Qwen/Qwen3-0.6B模型为例搭建文本生成应用
Qwen/Qwen3-0.6B模型官网地址:huggingface.co/Qwen/Qwen3-...
搭建文本生成应用UI
搭建文本生成应用,需要包含常见的 提示词、生成文本长度、温度、Top P 等文本生成参数
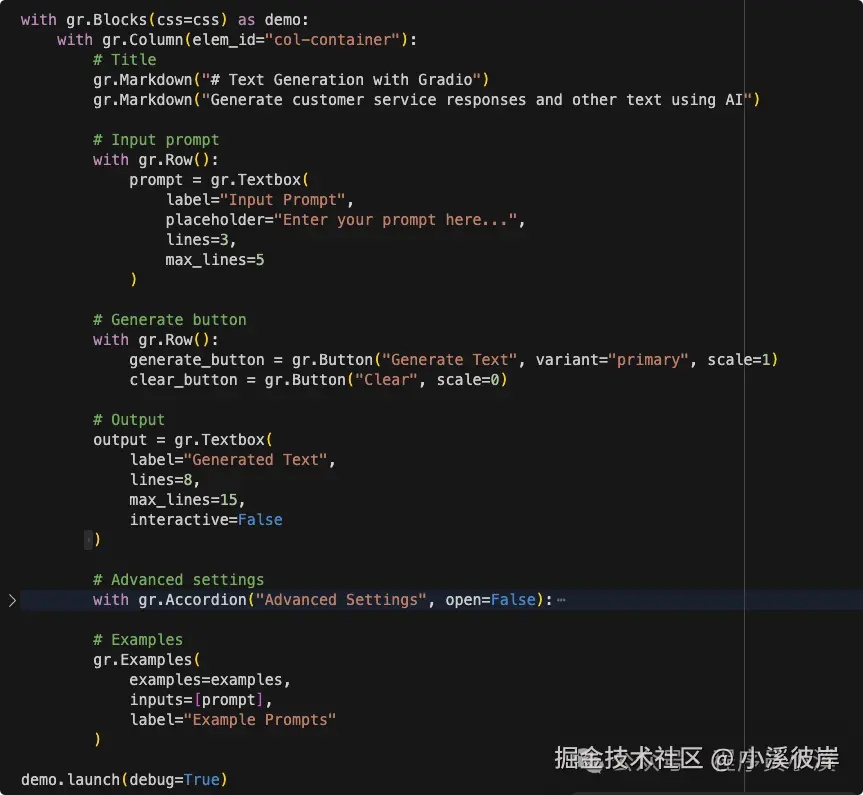
输入Gradio UI布局代码
ini
import gradio as gr
# Example prompts
examples = [
    "Dear Bumblebee, I am sorry to hear that your order was mixed up.",
    "Once upon a time in a distant galaxy,",
    "The future of artificial intelligence is",
    "In today's business environment,",
]
with gr.Blocks() as demo:
    with gr.Column(elem_id="col-container"):
        # Title
        gr.Markdown("# Text Generation with Gradio")
        gr.Markdown("Generate customer service responses and other text using AI")
        # Input prompt
        with gr.Row():
            prompt = gr.Textbox(
                label="Input Prompt",
                placeholder="Enter your prompt here...",
                lines=3,
                max_lines=5
            )
        # Generate button
        with gr.Row():
            generate_button = gr.Button("Generate Text", variant="primary", scale=1)
            clear_button = gr.Button("Clear", scale=0)
        # Output
        output = gr.Textbox(
            label="Generated Text",
            lines=8,
            max_lines=15,
            interactive=False
        )
        # Advanced settings
        with gr.Accordion("Advanced Settings", open=False):
            with gr.Row():
                max_length = gr.Slider(
                    label="Max Length",
                    minimum=50,
                    maximum=500,
                    step=10,
                    value=200
                )
                temperature = gr.Slider(
                    label="Temperature",
                    minimum=0.1,
                    maximum=2.0,
                    step=0.1,
                    value=0.7
                )
            with gr.Row():
                top_p = gr.Slider(
                    label="Top P",
                    minimum=0.1,
                    maximum=1.0,
                    step=0.05,
                    value=0.9
                )
                num_return_sequences = gr.Slider(
                    label="Number of Responses",
                    minimum=1,
                    maximum=3,
                    step=1,
                    value=1
                )
        # Examples
        gr.Examples(
            examples=examples,
            inputs=[prompt],
            label="Example Prompts"
        )
demo.launch(debug=True)
文本生成应用整体布局结构如下
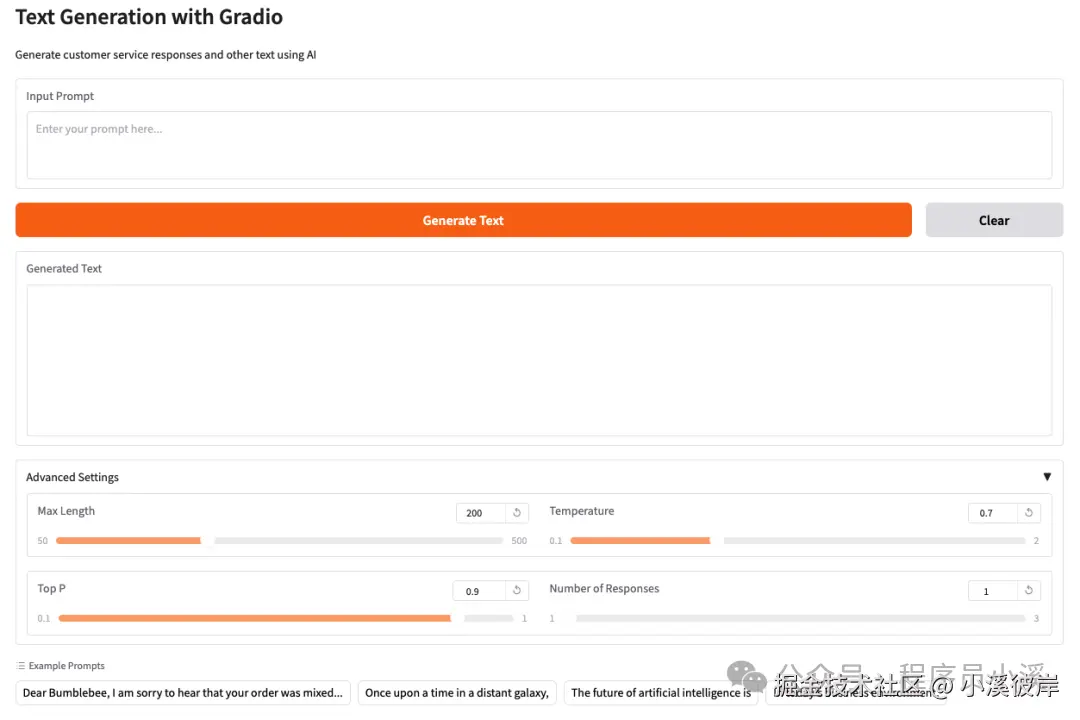
运行 python man.py 启动服务,打开浏览器查看效果如下
文本生成逻辑实现
加载Qwen/Qwen3-0.6B模型,使用Pipeline实现
ini
from transformers import pipeline
import torch
# Load text generation pipeline
pipeline = pipeline(
    "text-generation",
    model="Qwen/Qwen3-0.6B",
    model_kwargs={"torch_dtype": torch.bfloat16},
    device_map="auto"
)
创建一个文本生成函数用于接收和处理Gradio传递的参数
python
def generate_text(prompt, max_length, temperature, top_p, num_return_sequences):
    """Generate text based on the input prompt"""
    try:
        outputs = pipeline(
            prompt,
            max_length=max_length, # 返回tokens最大长度
            temperature=temperature, # 温度
            top_p=top_p, # top p
            num_return_sequences=num_return_sequences, # 生成文本序列数
            do_sample=True,
            pad_token_id=pipeline.tokenizer.eos_token_id
        )
        # Extract generated texts
        results = []
        for output in outputs:
            generated_text = output['generated_text']
            results.append(generated_text)
        return "\n\n".join(results)
    except Exception as e:
        return f"Error generating text: {str(e)}"
绑定Gradio按钮事件
ini
# Event handlers
generate_button.click(
fn=generate_text,
inputs=[prompt, max_length, temperature, top_p, num_return_sequences],
outputs=[output]
)
clear_button.click(
fn=lambda: ("", ""),
outputs=[prompt, output]
)
# Also trigger on Enter key
prompt.submit(
fn=generate_text,
inputs=[prompt, max_length, temperature, top_p, num_return_sequences],
outputs=[output]
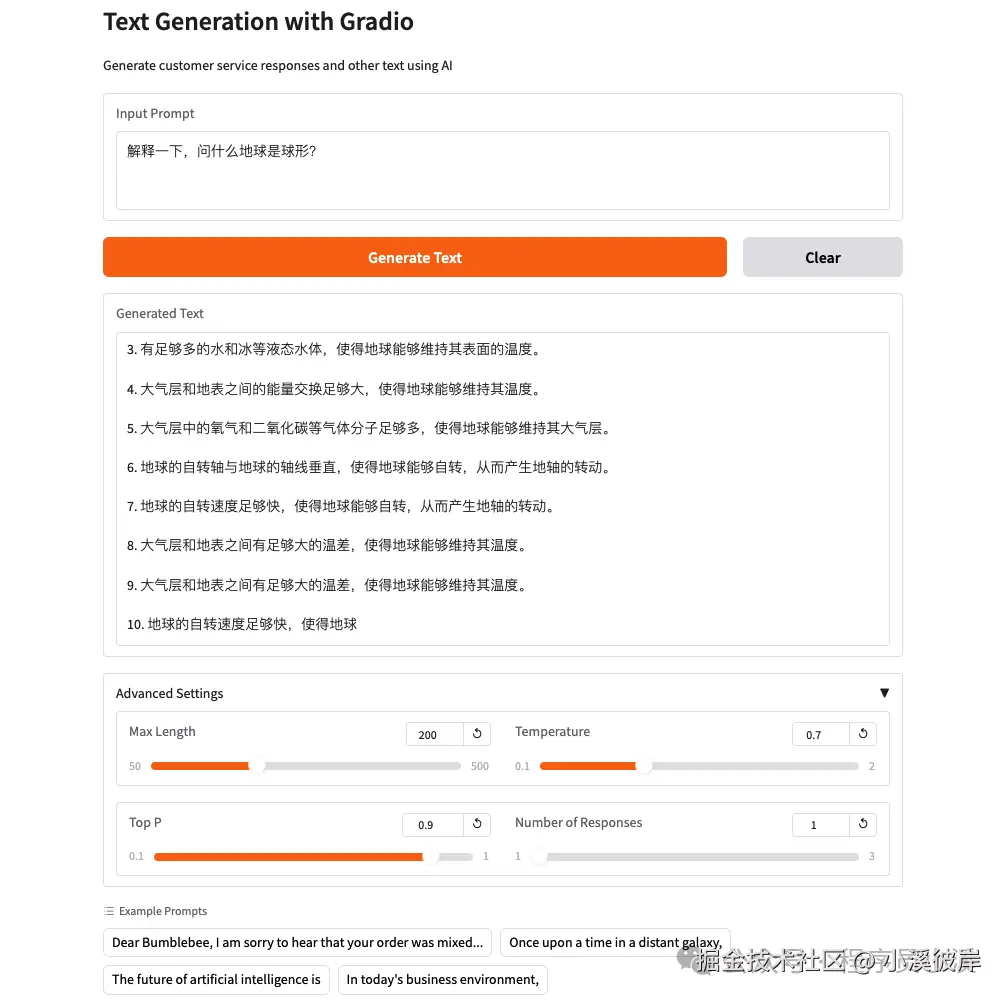
)重新运行服务,输入提示词,设置模型参数,点击【Generate Text】
使用Transformers实现
除了使用Pipeline实现,也可以使用Transformers实现并为模型添加历史上下文内容,首先创建一个 QwenChatbot 类,实现模型、分词加载、文本生成功能
ini
from transformers import AutoModelForCausalLM, AutoTokenizer
class QwenChatbot:
    def __init__(self, model_name="Qwen/Qwen3-0.6B"):
        # 加载分词器
        self.tokenizer = AutoTokenizer.from_pretrained(model_name)
        # 加载模型
        self.model = AutoModelForCausalLM.from_pretrained(
            model_name,
            torch_dtype="auto",
            device_map="auto"
        )
        # 历史上下文记录
        self.history = [
            {"role": "user", "assistant": "使用中文回答"}
        ]
    def generate_response(self, user_input, max_length=512, temperature=0.7, top_p=0.9, num_return_sequences=1):
        messages = self.history + [{"role": "user", "content": user_input}]
        # 将对话历史转换成模型期望的输入格式字符串
        text = self.tokenizer.apply_chat_template(
            messages,
            tokenize=False,
            add_generation_prompt=True
        )
        # 预处理数据
        inputs = self.tokenizer(
            text,
            return_tensors="pt"
        ).to(self.model.device)
        # 文本生成
        response_ids = self.model.generate(
            **inputs,
            max_new_tokens=max_length,
            temperature=temperature,
            top_p=top_p,
            num_return_sequences=num_return_sequences,
        )[0][len(inputs.input_ids[0]):].tolist()
        # 数据解码
        response = self.tokenizer.decode(response_ids, skip_special_tokens=True)
        # 更新历史上下文
        self.history.append({"role": "user", "content": user_input})
        self.history.append({"role": "assistant", "content": response})
        return response
修改 generate_text 函数,使用 QwenChatbot 生成文本
python
def generate_text(prompt, max_length, temperature, top_p, num_return_sequences):
"""Generate text based on the input prompt"""
chatbot = QwenChatbot()
response = chatbot.generate_response(prompt, max_length, temperature, top_p, num_return_sequences)
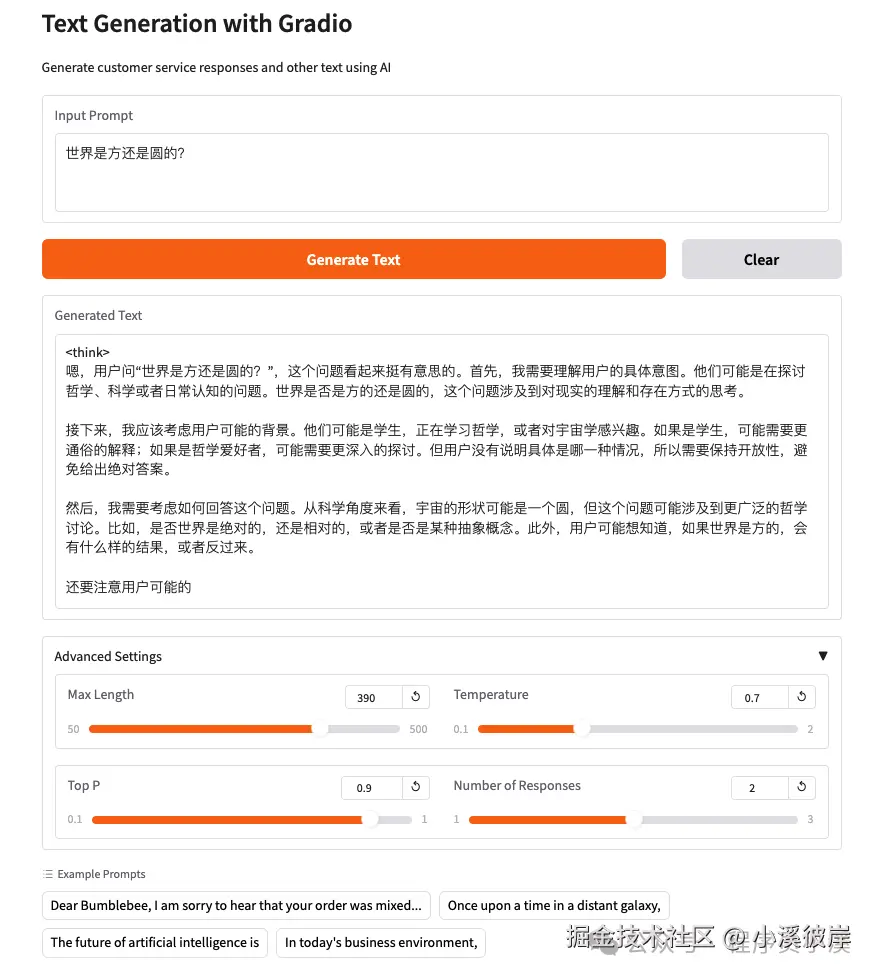
return response重新运行服务,输入提示词,设置模型参数,点击【Generate Text】,可以看到模型默认开启了思考模式,设置的最大tokens太短了,思考过程就被终止了,现在有两种方式来处理该问题,第一种是修改最大tokens长度,第二种方式是禁用思考输出
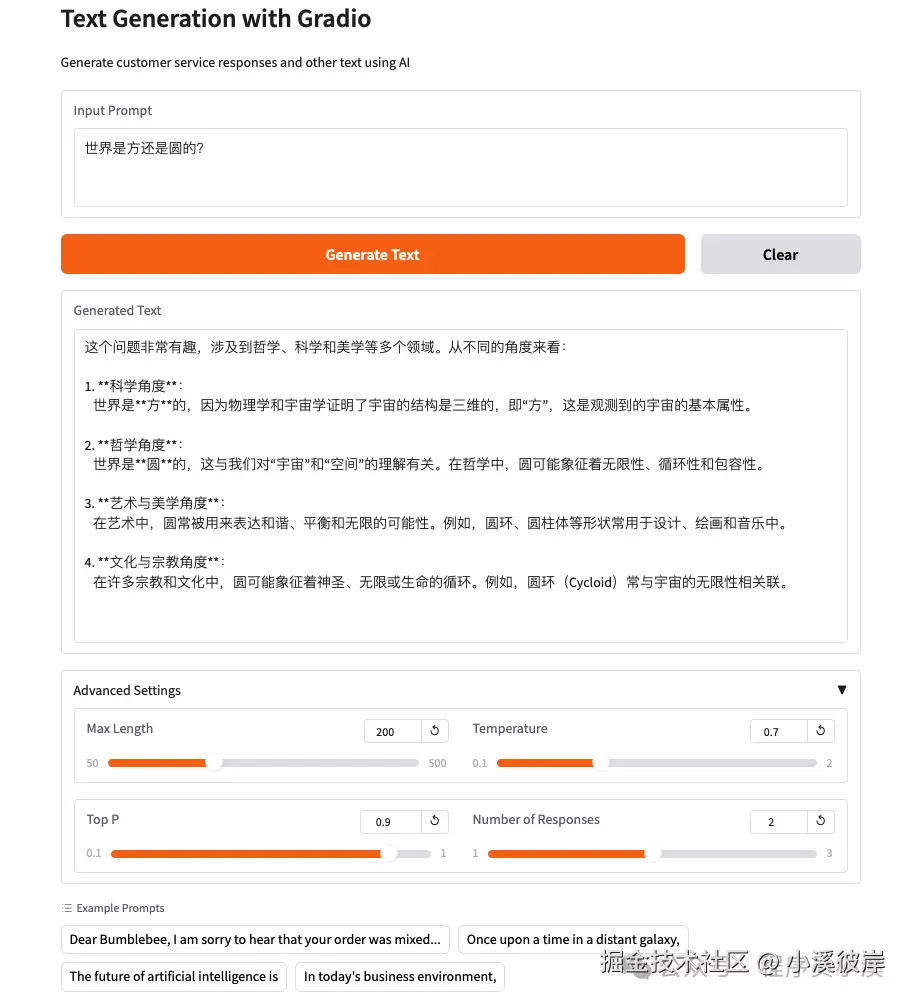
以禁用思考为例,添加如下代码
ini
ext = self.tokenizer.apply_chat_template(
    messages,
    tokenize=False,
    add_generation_prompt=True,
    enable_thinking=False, # 在思考模式和非思考模式之间切换。默认为 True
)
再次重启服务,效果如下
在线体验
在线体验地址:huggingface.co/spaces/zhou...
友情提示
见原文:【Hugging Face实战】创建一个文本生成应用
本文同步自微信公众号 "程序员小溪" ,这里只是同步,想看及时消息请移步我的公众号,不定时更新我的学习经验。