前言
前面我们尝试创建了Hugging Face文本生成以及使用训练模型创建情感分析应用,今天继续尝试创建一个文生图应用,对往期内容感兴趣的小伙伴也可以看往期:
- 【Hugging Face】Hugging face模型的基本使用
- 【Hugging Face】Hugging Face Transformers的使用方式
- 【Hugging Face】Hugging Face Diffusers的使用方式
- 【Hugging Face实战】创建一个文本生成应用
- 【Hugging Face实战】创建一个情感分析应用
创建Space应用
首先在Hugging Face上创建一个Gradio模版应用,详细创建流程可以查看之前这篇文章:
【Hugging Face】Hugging Face Space空间的基本使用方式
创建完成后将项目克隆到本地,我们将拥有一个类似的项目结构:
搭建文生图应用
这里我们使用模型官方API,使用Hugging Face Inference会产生费用
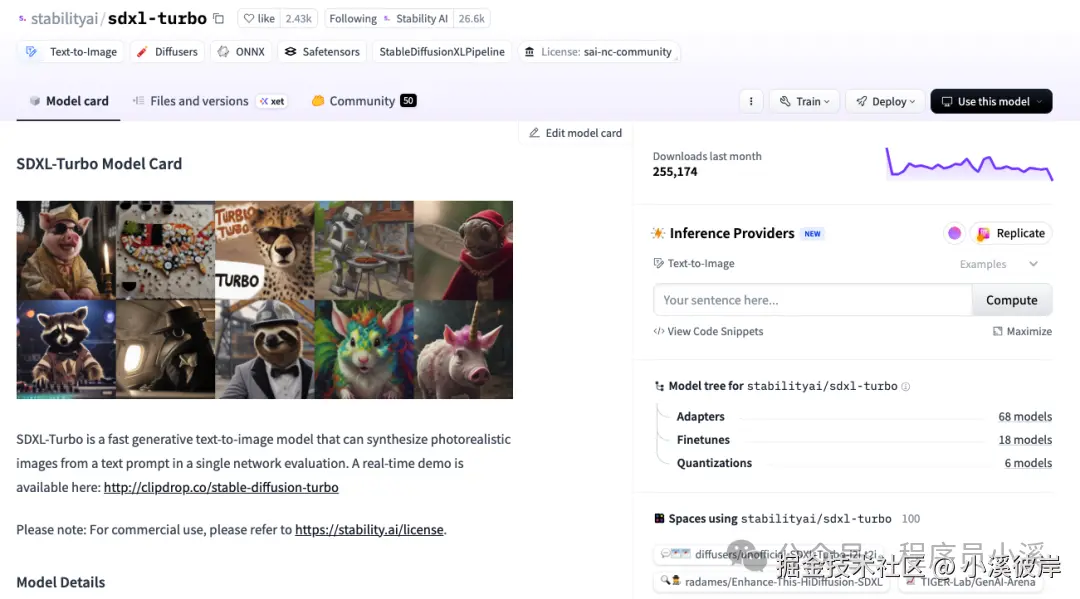
本示例以 stabilityai/sdxl-turbo 模型为例创建一个简单的文生图应用,模型信息如下:
stabilityai/sdxl-turbo官网地址:huggingface.co/stabilityai...
搭建文生图UI
首先我们需要使用Gradio搭建一个文生图的UI界面,包含文生图需要的基本参数,如 提示词、反向提示词、引导系数、迭代步数、随机种子 等。
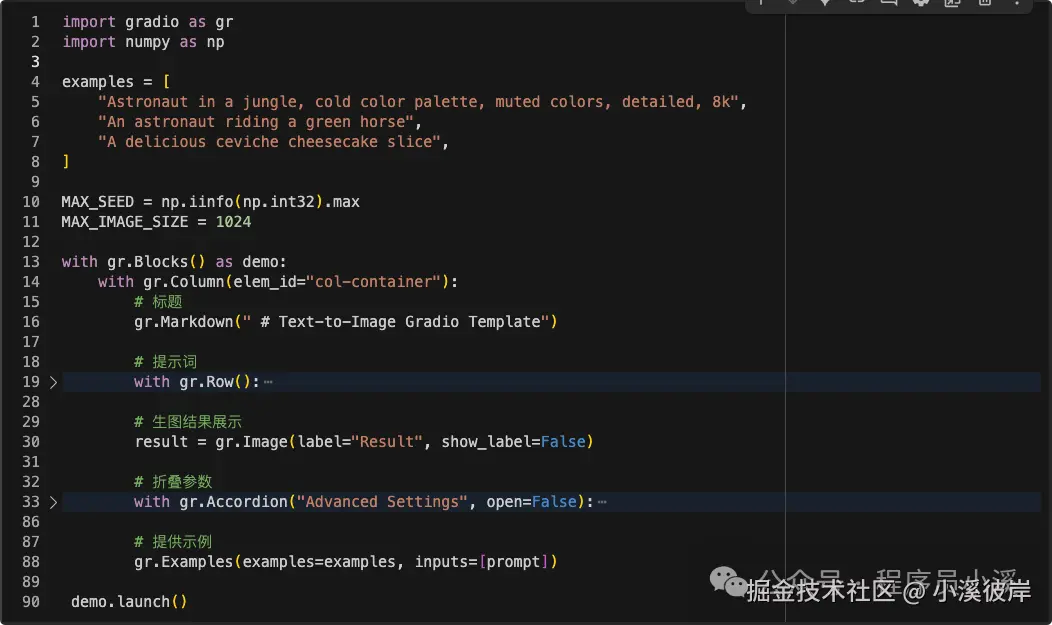
输入Gradio UI布局代码
ini
import gradio as gr
import numpy as np
examples = [
"Astronaut in a jungle, cold color palette, muted colors, detailed, 8k",
"An astronaut riding a green horse",
"A delicious ceviche cheesecake slice",
]
MAX_SEED = np.iinfo(np.int32).max
MAX_IMAGE_SIZE = 1024
with gr.Blocks() as demo:
with gr.Column(elem_id="col-container"):
# 标题
gr.Markdown(" # Text-to-Image Gradio Template")
# 提示词
with gr.Row():
prompt = gr.Text(
label="Prompt",
show_label=False,
max_lines=1,
placeholder="Enter your prompt",
container=False,
)
run_button = gr.Button("Run", scale=0, variant="primary")
# 生图结果展示
result = gr.Image(label="Result", show_label=False)
# 折叠参数
with gr.Accordion("Advanced Settings", open=False):
# 负向提示
negative_prompt = gr.Text(
label="Negative prompt",
max_lines=1,
placeholder="Enter a negative prompt",
visible=False,
)
# 随机种子
seed = gr.Slider(
label="Seed",
minimum=0,
maximum=MAX_SEED,
step=1,
value=0,
)
randomize_seed = gr.Checkbox(label="Randomize seed", value=True)
with gr.Row():
# 生图宽
width = gr.Slider(
label="Width",
minimum=256,
maximum=MAX_IMAGE_SIZE,
step=32,
value=1024, # Replace with defaults that work for your model
)
# 生图高
height = gr.Slider(
label="Height",
minimum=256,
maximum=MAX_IMAGE_SIZE,
step=32,
value=1024, # Replace with defaults that work for your model
)
with gr.Row():
# 引导系数
guidance_scale = gr.Slider(
label="Guidance scale",
minimum=0.0,
maximum=10.0,
step=0.1,
value=0.0, # Replace with defaults that work for your model
)
# 迭代步数
num_inference_steps = gr.Slider(
label="Number of inference steps",
minimum=1,
maximum=50,
step=1,
value=2, # Replace with defaults that work for your model
)
# 提供示例
gr.Examples(examples=examples, inputs=[prompt])
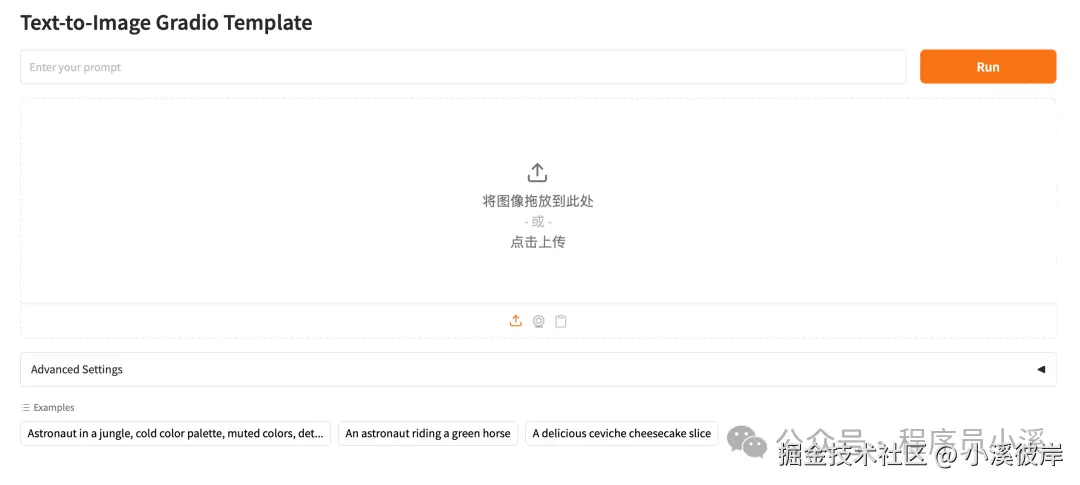
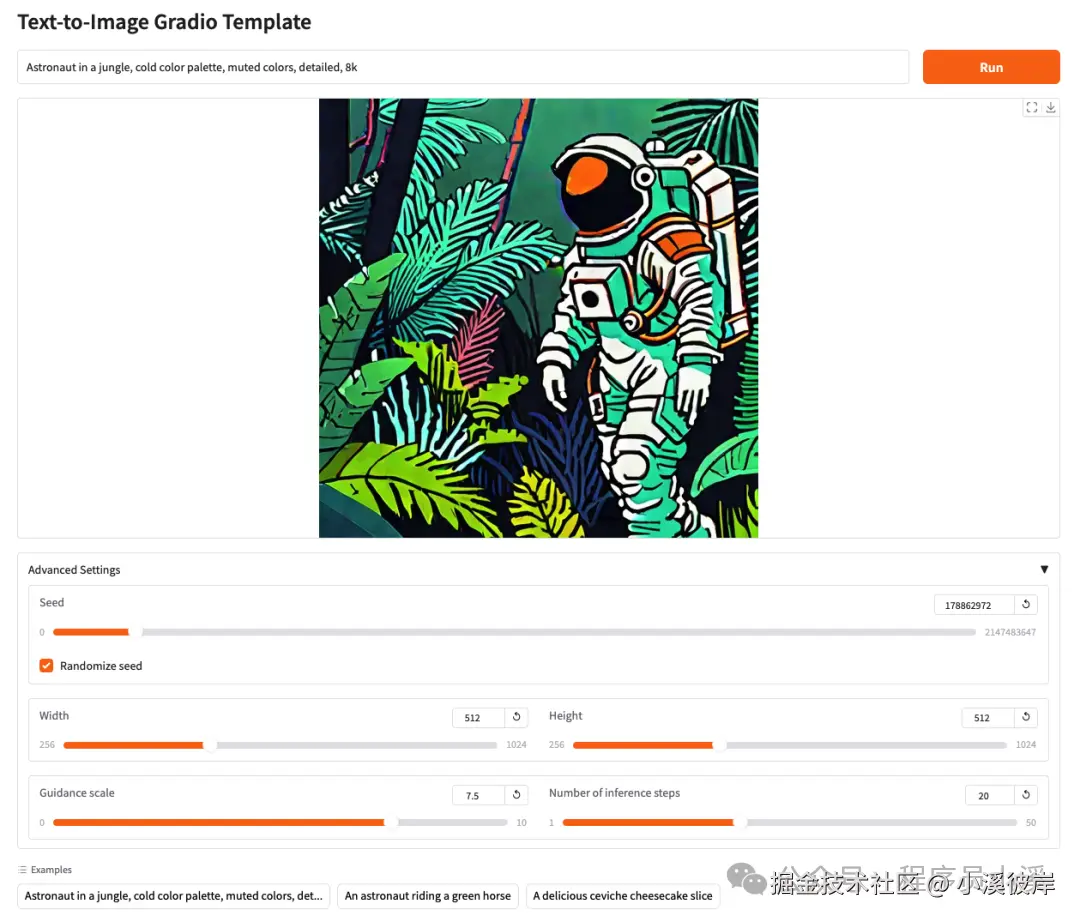
demo.launch()整体页面大致布局结构如下
执行 python main.py 启动服务,在浏览器打开效果如下:
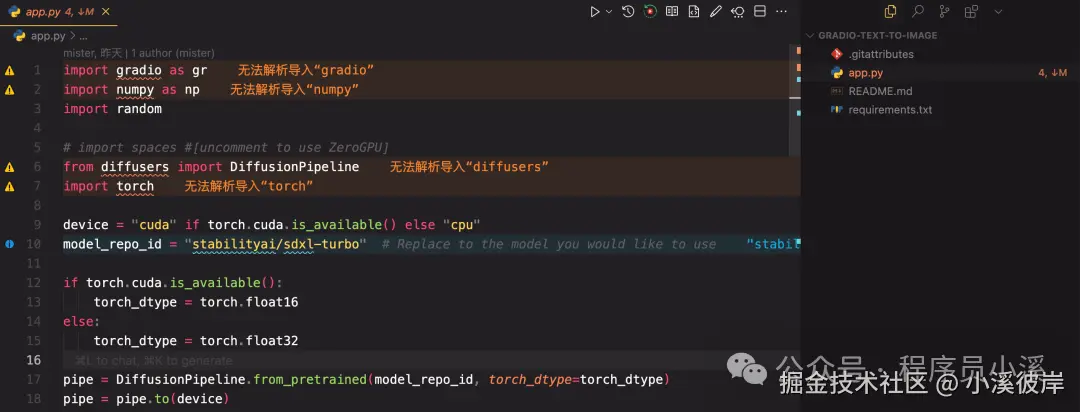
文生图逻辑实现
加载 stabilityai/sdxl-turbo 模型
ini
import random
from diffusers import DiffusionPipeline
import torch
# 配置device
device = "cuda" if torch.cuda.is_available() else "cpu"
model_repo_id = "stabilityai/sdxl-turbo"  # Replace to the model you would like to use
# GPU设置精度为float16加速生图过程
if torch.cuda.is_available():
    torch_dtype = torch.float16
else:
    torch_dtype = torch.float32
# 加载模型
pipeline = DiffusionPipeline.from_pretrained(model_repo_id, torch_dtype=torch_dtype, use_safetensors=True)
# 将模型加载到CPU或GPU上提高运算速度
pipeline.to(device)
定一个函数用于接收和处理提交的生图参数
ini
def infer(
    prompt,
    negative_prompt,
    seed,
    randomize_seed,
    width,
    height,
    guidance_scale,
    num_inference_steps,
    progress=gr.Progress(track_tqdm=True),
):
    if randomize_seed:
        seed = random.randint(0, MAX_SEED)
    # 生成器
    generator = torch.Generator(device).manual_seed(seed)
    image = pipeline(
        prompt=prompt,
        negative_prompt=negative_prompt, # 反向提示词
        guidance_scale=guidance_scale, # 引导系数
        num_inference_steps=num_inference_steps, # 迭代步数
        width=width, # 生图宽度
        height=height, # 生图高度
        generator=generator, # 随机数生成器
    ).images[0]
    return image, seed
为Gradio提交事件绑定函数
ini
gr.on(
    triggers=[run_button.click, prompt.submit],
    fn=infer,
    inputs=[
        prompt,
        negative_prompt,
        seed,
        randomize_seed,
        width,
        height,
        guidance_scale,
        num_inference_steps,
    ],
    outputs=[result, seed],
)
最后重启服务,输入提示词及参数查看效果
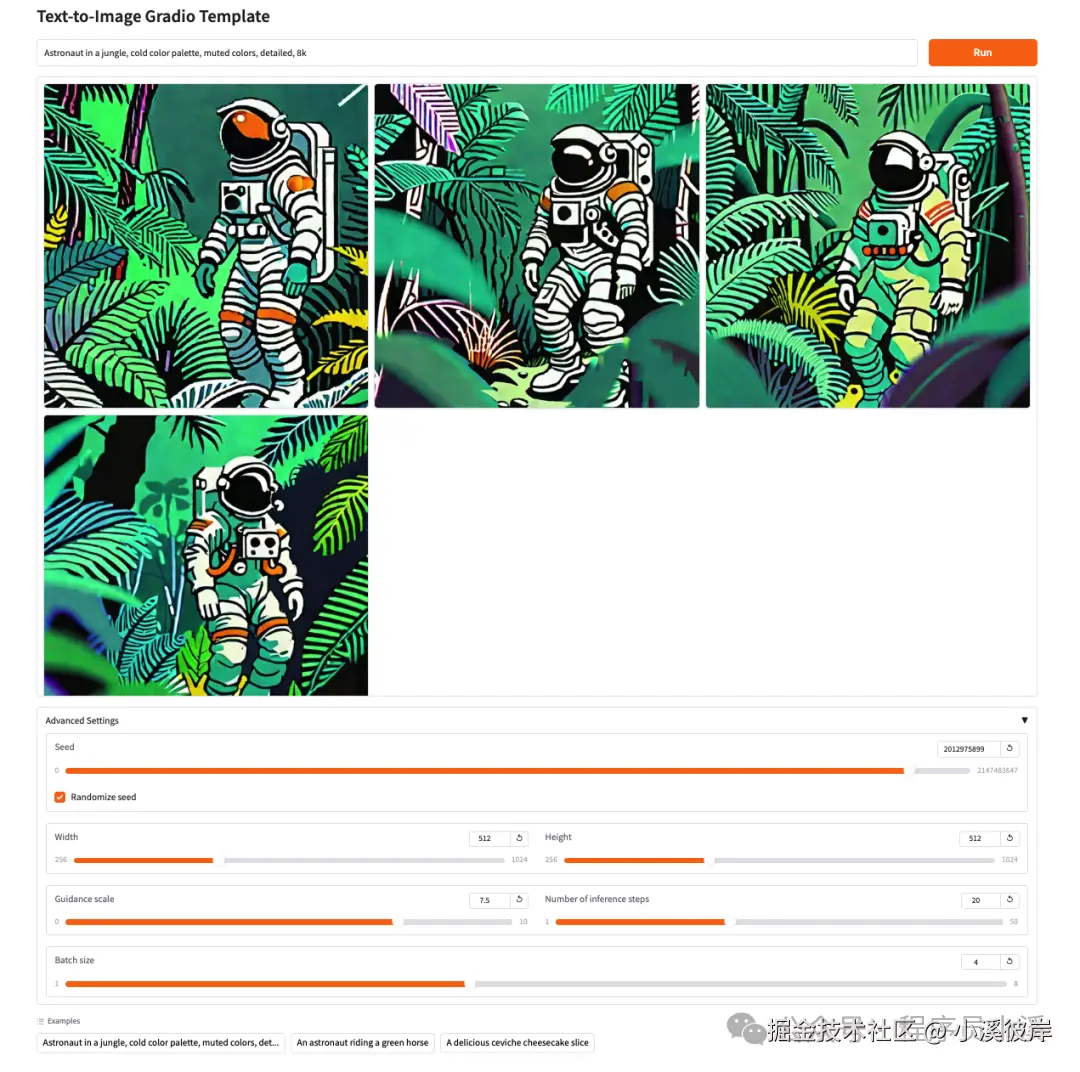
批次生图
如果觉得每次生成一张图片太少,每次都要重新生成,我们也可以把文生图改为批次生成,即一次生成多张图片。
首先为Pipeline开启 enable_attention_slicing
bash
# 开启enable_attention_slicing节省内存
pipeline.enable_attention_slicing()
修改提示词生图数量
ini
def infer(
    prompt,
    negative_prompt,
    seed,
    randomize_seed,
    width,
    height,
    guidance_scale,
    num_inference_steps,
    batch_size,          # << 新增参数
    progress=gr.Progress(track_tqdm=True),
):
    if randomize_seed:
        seed = random.randint(0, MAX_SEED)
    # 用同一个 seed 产生 batch_size 张图
    generator = torch.Generator(device).manual_seed(seed)
    images = pipeline(
        prompt=prompt,
        negative_prompt=negative_prompt,
        guidance_scale=guidance_scale,
        num_inference_steps=num_inference_steps,
        width=width,
        height=height,
        generator=generator,
        num_images_per_prompt=batch_size,  # << 一次出 batch_size 张
    ).images
    # 返回 (图像列表, 种子) 给 Gallery
    return images, seed
修改图片展示及生图数量组件
ini
# 把单图 Image 换成 Gallery
result = gr.Gallery(label="Results", show_label=False, columns=3, rows=2)
# 在 Advanced Settings 里加一个 batch_size Slider
batch_size = gr.Slider(
    label="Batch size",
    minimum=1,
    maximum=8,
    step=1,
    value=4,
)
最后更改生图事件绑定传参
ini
gr.on(
    triggers=[run_button.click, prompt.submit],
    fn=infer,
    inputs=[
        prompt,
        negative_prompt,
        seed,
        randomize_seed,
        width,
        height,
        guidance_scale,
        num_inference_steps,
        batch_size,      # << 新增
    ],
    outputs=[result, seed],
)
最后重启服务,运行效果如下:
在线体验
在线体验地址:huggingface.co/spaces/zhou...
Hugging Face上使用的是免费CPU,配置比较低生图过程会比较慢,需要耐心等待。
友情提示
见原文:【Hugging Face实战】使用Gradio创建一个文生图应用
本文同步自微信公众号 "程序员小溪" ,这里只是同步,想看及时消息请移步我的公众号,不定时更新我的学习经验。