一、核心逻辑
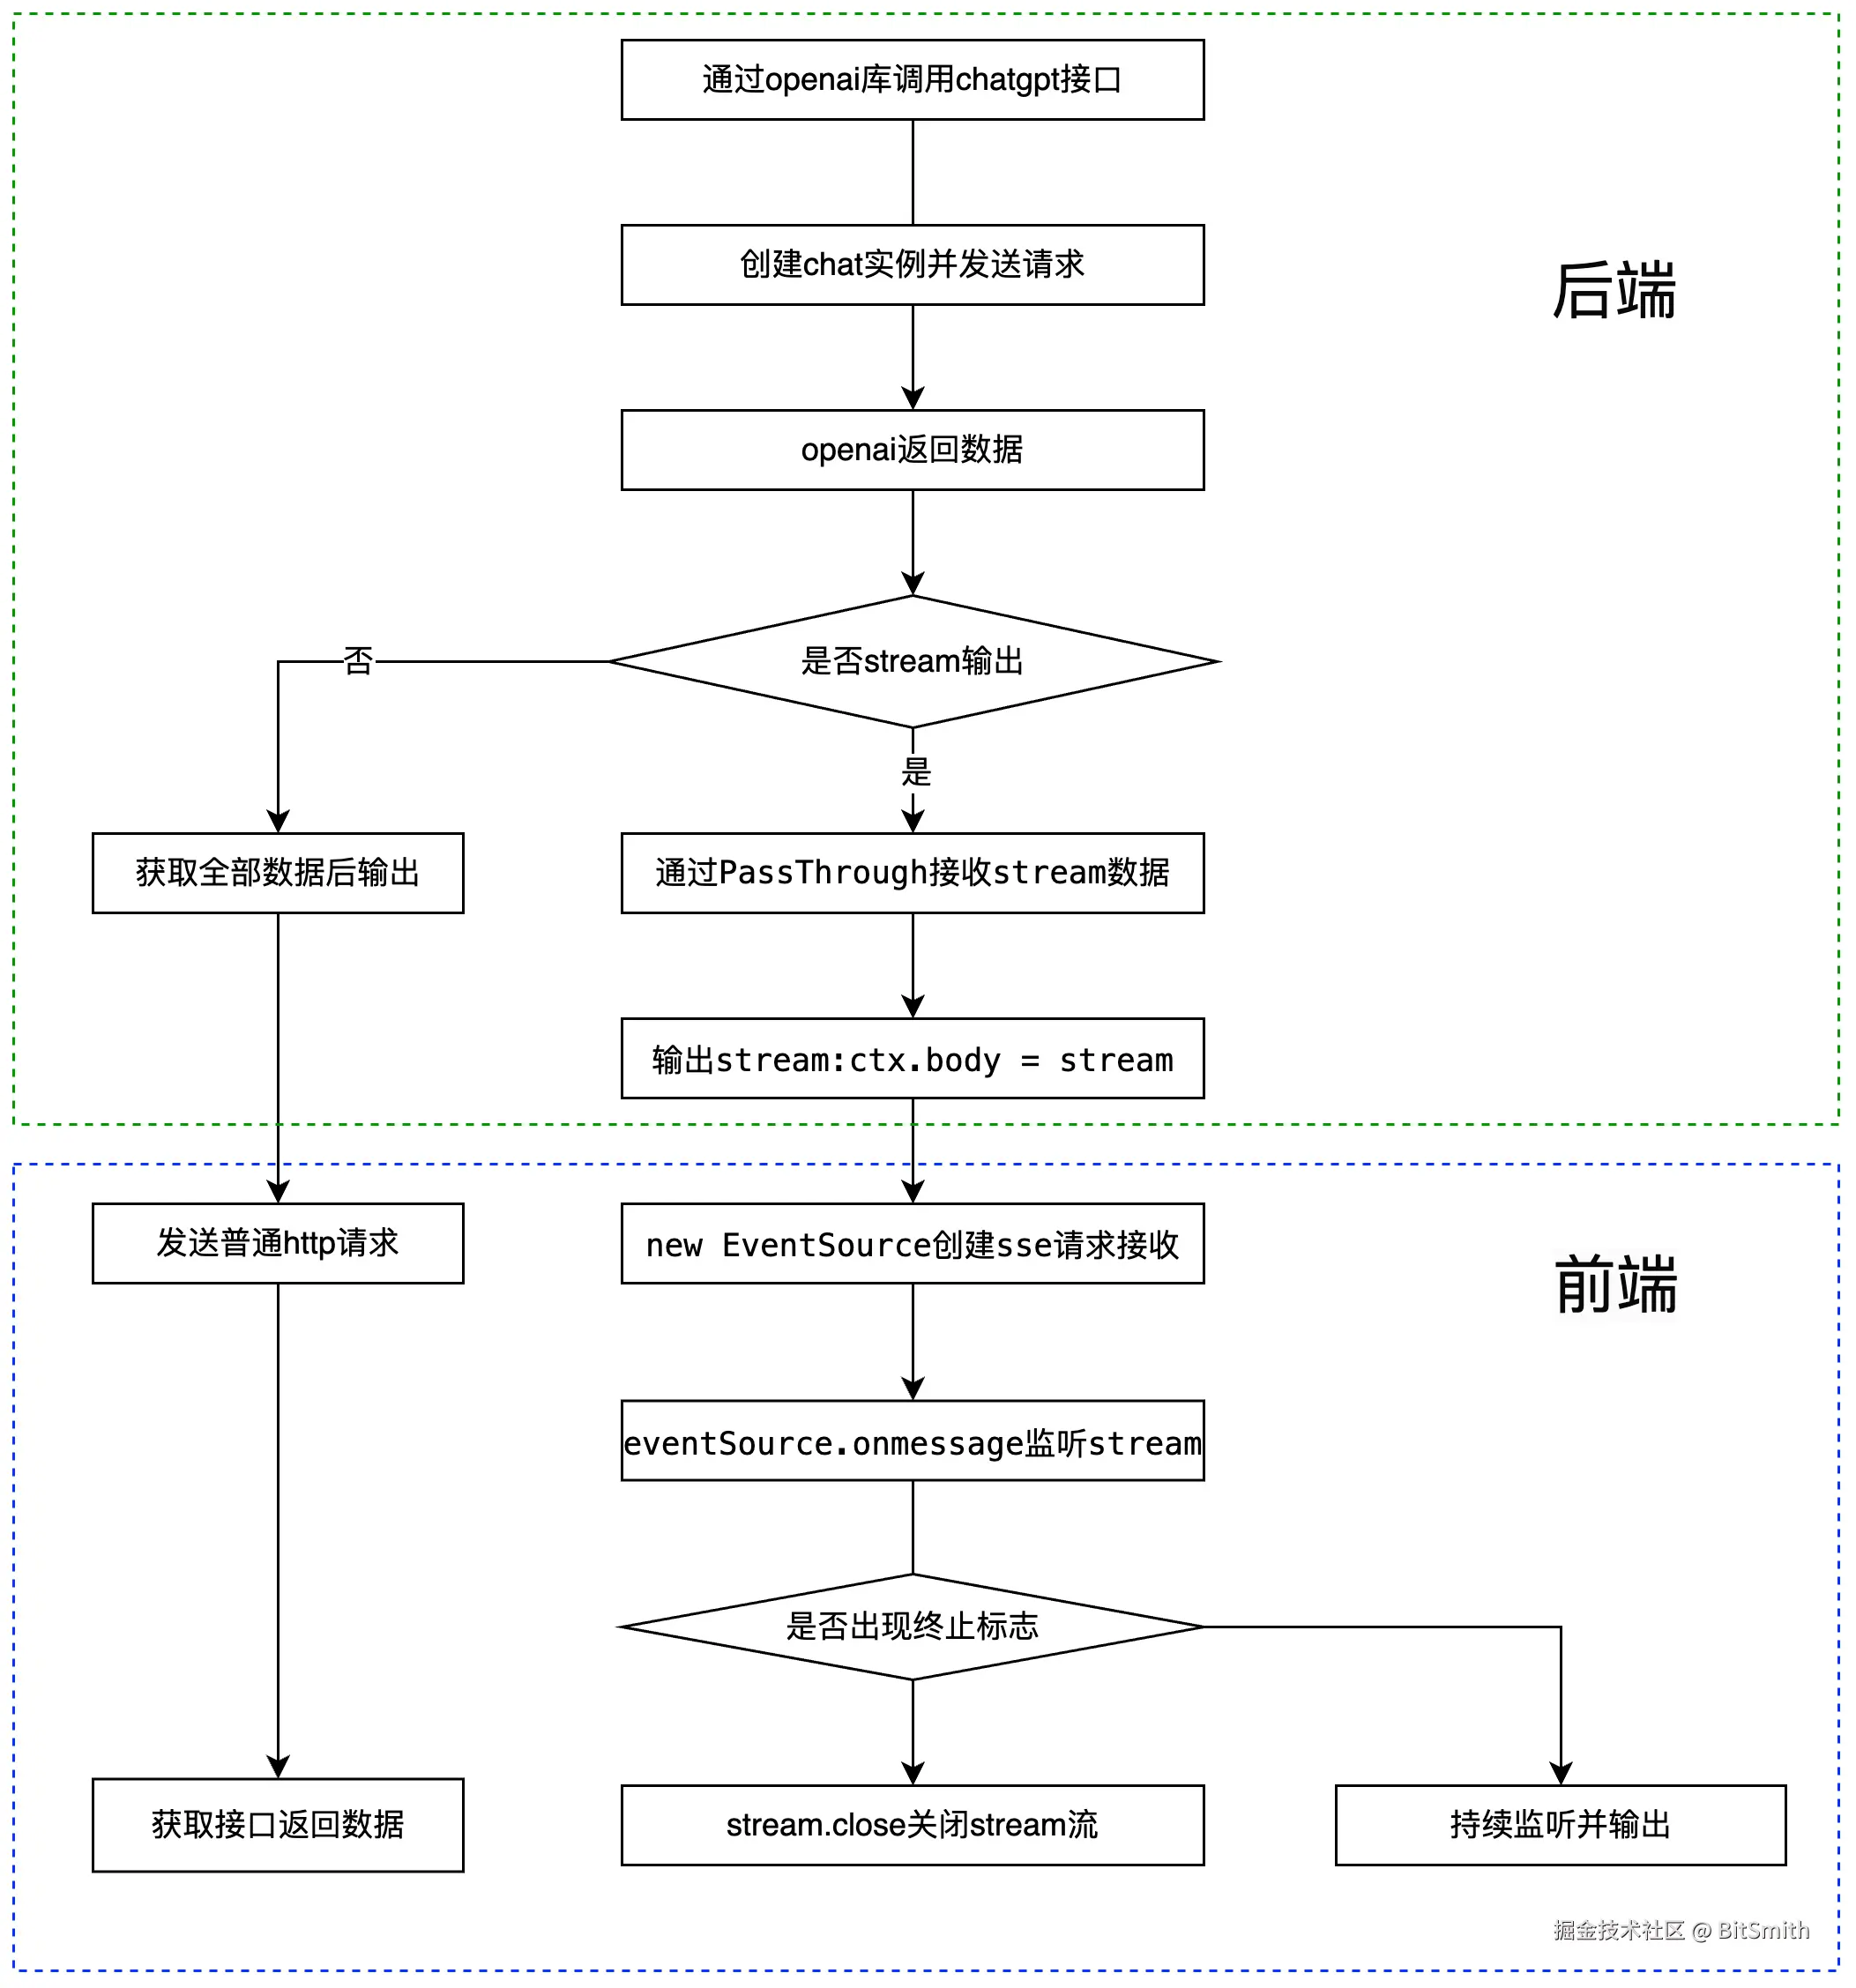
实现openAI接口调用并流式输出的核心逻辑如下:
二、后端实现
2.1. openai接口调用
openAI中文文档:openai.xiniushu.com/docs/librar... 进入openAI github网站申请获得免费的key(github账号需要注册超过7天)
js
const openAI = require("openai");

const openAIClient = new openAI({
    apiKey: OPEN_AI_API_KEY, // 上述申请的key
    baseURL: "https://api.chatanywhere.tech/v1",
});

const chatCompletion = await openAIClient.chat.completions.create({
    messages: [{ role: "user", content }],
    model: "gpt-3.5-turbo"
});
console.log(chatCompletion.data.choices[0].message); // 输出结果
2.2. Stream输出
2.2.1. openai支持流式输出
创建chat实例的时候新增参数 stream 即可,openAI可能使用fetch发送请求,因此最好引入node-fetch库,并将fetch传入(fetch是浏览器的API,在node端不是自带的,需要引入封装好的库)。
node-fetch版本:^2.xx;高版本的node-fetch使用ES Module,在node端无法通过CommonJS方式引入,还需要额外配置ES Module。
js
const openAI = require("openai");
const fetch = require("node-fetch");
const { OPEN_AI_API_KEY } = require("../utils/const");

const openAIClient = new openAI({
    apiKey: OPEN_AI_API_KEY,
    fetch,
    baseURL: "https://api.chatanywhere.tech/v1",
});

async function chatService(stream, content) {
    const chatCompletion = await openAIClient.chat.completions.create({
        messages: [{ role: "user", content }],
        model: "gpt-3.5-turbo",
        stream: true,
    });

    for await (const chunk of chatCompletion) {
        stream.write(`data: ${chunk?.choices[0]?.delta?.content || ""}\n\n`);
    }
    stream.write(`data: [DONE] \n\n`);
}
module.exports.chatService = chatService;
2.2.2. node接口返回支持流式输出
Node接口返回的响应头Content-Type设置为text/event-stream即可。同时,使用PassThrough流式接收openai返回的数据并流式输出
js
const { chatService } = require("../services/ai");
const { PassThrough } = require("stream");

async function chatControll(ctx) {
    const stream = new PassThrough();
    ctx.req.socket.setNoDelay(true);
    ctx.req.socket.setKeepAlive(true);
    ctx.set({
        "Content-Type": "text/event-stream",
        "Cache-Control": "no-cache",
        "Access-Control-Allow-Origin": "*",
        Connection: "keep-alive",
    });
    ctx.body = stream;
    ctx.status = 200;

    if (ctx.query.q) {
        chatService(stream, ctx.query.q);
    }
}
module.exports.chatControll = chatControll;
三、前端实现
3.1. SSE简述
SSE(Server-Sent Events, 服务器推送事件) 通过 HTTP 协议实现服务器到客户端的 单向通信 的一种方式, 服务端向客户端推送流数据, 客户端与服务端建立起一个长链接,接收客户端推送的流数据。
服务端发送的不是一次性的数据包,而是一个数据流,会连续不断地发送过来;这时,客户端不会关闭连接, 会一直等着服务器发过来的新的数据流, 有点类似视频播放、直播数据推送;本质上,这种通信就是以流信息的方式,实现服务端和客户端长时间的单向通信。
SSE 与 WebSocket 作用相似, 都是建立浏览器与服务器之间的通信渠道, 然后服务器向浏览器推送信息; 但是呢 WebSocket 更强大和灵活,因为它是全双工通道,可以双向通信;SSE 是单向通道,只能服务器向浏览器发送,因为流信息本质上就是下载;SSE 很适合用于实现日志推送、数据大屏数据推送等场景。
3.2. 创建SSE请求接收输出数据
3.2.1. 使用EventSource对象建立SSE连接
前端通过 EventSource 对象来建立 SSE 连接, 如下代码: 当我们执行 new EventSource(url) 创建对象时, 将会与 url 对应的服务建立长连接。
js
const eventSource = new EventSource(`http://localhost:3000/api?q=${encodeURIComponent(message)}`);

eventSource.onmessage = (event) => console.log(event.data); // 监听返回的数据
eventSource.close(); // 关闭SSE链接
eventSource.onerror = () => {}; // 监听错误事件
3.2.2. 使用fetch请求建立SSE连接
目前大部分浏览器都已支持在 Fetch 中处理流数据:
js
const handle = async () => {
  // 1. 请求接口
  const response = await fetch('http://ai.baidu.com/api', {
    method: 'POST',
    headers: {},
    body: JSON.stringify({ q: '你好' }),
  });
  const reader = response.body.getReader(); // 获取reader
  const decoder = new TextDecoder(); // 文本解码器

  // 2. 循环取值
  while (true) {
    const { value, done } = await reader.read(); // 取值, value 是后端返回流信息, done 表示后端结束流的输出
    if (done) break;
    console.log('推送数据', decoder.decode(value)); // 打印值: 对 value 进行解码
  }
};

handle();
四、完整实例
4.1. 后端示例
后端使用koa2框架,采用分层架构,包括:业务层、操作层、路由层和入口文件。
js
/**
 * chat application config api
 */
const openAI = require("openai");
const fetch = require("node-fetch");
const { OPEN_AI_API_KEY } = require("../utils/const");

const openAIClient = new openAI({
    apiKey: OPEN_AI_API_KEY,
    fetch,
    baseURL: "https://api.chatanywhere.tech/v1",
});

async function chatService(stream, content) {
    const chatCompletion = await openAIClient.chat.completions.create({
        messages: [{ role: "user", content }],
        model: "gpt-3.5-turbo",
        stream: true,
    });

    for await (const chunk of chatCompletion) {
        stream.write(`data: ${chunk?.choices[0]?.delta?.content || ""}\n\n`);
    }
    stream.write(`data: [DONE] \n\n`);
}
module.exports.chatService = chatService;
js
const { chatService } = require("../services/ai");
const { PassThrough } = require("stream");

async function chatControll(ctx) {
    const stream = new PassThrough();
    ctx.req.socket.setNoDelay(true);
    ctx.req.socket.setKeepAlive(true);
    ctx.set({
        "Content-Type": "text/event-stream",
        "Cache-Control": "no-cache",
        "Access-Control-Allow-Origin": "*",
        Connection: "keep-alive",
    });
    ctx.body = stream;
    ctx.status = 200;

    if (ctx.query.q) {
        chatService(stream, ctx.query.q);
    }
}
module.exports.chatControll = chatControll;
js
const Router = require('koa-router');
const router = new Router();
const { chatControll } = require('../controllers/ai');

const routers = router
    .get('/chat', chatControll);

module.exports = routers;
js
const Koa = require('koa');
const routers = require('./routers/index');
const config = require('./../config');

const app = new Koa();

// 初始化路由中间件
app.use(routers.routes()).use(routers.allowedMethods());

// 监听启动端口
app.listen( config.port )
console.log(`the server is start at port ${config.port}`)
4.2. 前端示例
前端通过EventSource建立SSE连接并实现一个简单的chat页面,核心逻辑如下:
js
const eventSource = new EventSource(`http://localhost:3000?q=${encodeURIComponent(message)}`);

let fullResponse = '';
eventSource.onmessage = (event) => {
    const content = event.data; // 响应内容
    // 终止标识
    if (content.includes('[DONE]')) {
        eventSource.close();
        return;
    }
    fullResponse += content;
}
参考文档
openAI中文文档:openai.xiniushu.com/docs/guides...;
openAI npm库地址:www.npmjs.com/package/ope...;