目录
一、前言:为何需要这个工具?
在人工智能,特别是计算机视觉领域,流传着一句金科玉律:"Garbage In, Garbage Out "(垃圾进,垃圾出)。这句话精准地指出了数据质量对于模型性能的决定性作用。在工业质检领域,启动一个AI检测项目前,我们面临的首要挑战并非是选择哪个高深的算法,而是如何高效、准确地构建一个高质量的训练数据集。
传统的数据采集方式,往往是先拍摄大量包含良品与次品的巨幅图像,然后再由算法工程师或标注员手动从中截取出一个个包含待检测特征的独立样本(ROI,Region of Interest)。这个过程不仅重复、枯燥,而且极易出错,严重影响了整个项目的研发效率。
为了解决这一痛点,本文将完整地分享一个实用小工具的开发过程。这个工具旨在极大简化从大图中批量提取训练样本的工作流,它允许用户:
- 载入一张高分辨率的工业图像。
- 通过鼠标在图像上直观地框选出目标区域。
- 一键将框选区域裁剪并保存为独立的 JPG 图片。
- 自动对保存的图片进行递增编号(1.jpg, 2.jpg, ...),便于管理。
这篇博客将带领您,用 Qt 5.14 和 QML 技术,从零开始打造这款属于我们自己的"AI 质检数据准备利器"。
二、工具目标与功能
我们的目标是创建一个简洁、直观、高效的桌面应用,其核心功能如下:
- 加载图像:支持从本地文件系统加载任意尺寸的 JPG, PNG, BMP 图像。
- 框选区域:允许用户在显示的图像上,通过鼠标拖拽的方式,自由绘制矩形选框。
- 一键裁剪保存:提供一个"裁剪并保存"按钮,点击后立即截取选框内的图像。
- 自动命名 :将截取的图像以
1.jpg,2.jpg,3.jpg... 的序列自动命名,并保存在程序运行目录下的output文件夹中。 - 用户反馈:在成功保存后,向用户提供清晰的反馈,例如显示"已保存为: 10.jpg"。
三、技术架构
我们将采用稳定且解耦的前后端分离架构:
- 前端 (QML):负责所有用户交互界面。使用 QML 来实现图像的显示、加载按钮、保存按钮以及鼠标的矩形绘制逻辑。
- 后端 (C++):负责所有的核心业务逻辑。它将处理图像的加载、根据 QML 传来的坐标进行精确裁剪、管理自增序号以及执行文件保存操作。
Qt版本 :Qt 5.14
编译器 :VS 2017 64bit
编译工具:qmake
四、详细实现步骤
使用qt创建一个名为croptool的qt quick application项目。
4.1. C++ 后端 (ImageCropper) 搭建
首先,我们需要一个专门负责裁剪和保存逻辑的 C++ 类。
imagecropper.h
cpp
#ifndef IMAGECROPPER_H
#define IMAGECROPPER_H

#include <QObject>
#include <QImage>
#include <QRect>
#include <QSize>
#include <QUrl>
#include <QString>

class ImageCropper : public QObject
{
    Q_OBJECT
public:
    explicit ImageCropper(QObject *parent = nullptr);

signals:
    // 定义一个信号,用于在保存成功后通知 QML,并传递保存的文件名
    void saveSuccess(const QString &filename);

public slots:
    // QML 将调用此槽函数来执行裁剪和保存操作
    void cropAndSaveImage(const QUrl &imageUrl, const QRect &viewRect, const QSize &containerSize);

private:
    int m_saveCounter; // 用于保存自增的文件序号
};

#endif // IMAGECROPPER_H
imagecropper.cpp
cpp
#include "imagecropper.h"
#include <QDebug>
#include <QDir>

ImageCropper::ImageCropper(QObject *parent) : QObject(parent), m_saveCounter(1)
{
    // 在构造函数中,检查并创建用于存放结果的 output 文件夹
    QDir dir;
    if (!dir.exists("output")) {
        dir.mkpath("output");
    }
}

void ImageCropper::cropAndSaveImage(const QUrl &imageUrl, const QRect &viewRect, const QSize &containerSize)
{
    if (!imageUrl.isLocalFile() || !viewRect.isValid()) {
        qWarning() << "Invalid image URL or selection rectangle.";
        return;
    }

    QImage image(imageUrl.toLocalFile());
    if (image.isNull()) {
        qWarning() << "Failed to load image.";
        return;
    }

    // --- 坐标系映射逻辑  ---
    QSize sourceSize = image.size();
    QSize scaledSize = sourceSize;
    scaledSize.scale(containerSize, Qt::KeepAspectRatio);

    double offsetX = (containerSize.width() - scaledSize.width()) / 2.0;
    double offsetY = (containerSize.height() - scaledSize.height()) / 2.0;
    double scaleFactor = (double)sourceSize.width() / (double)scaledSize.width();

    QRect sourceRect(
        static_cast<int>((viewRect.x() - offsetX) * scaleFactor),
        static_cast<int>((viewRect.y() - offsetY) * scaleFactor),
        static_cast<int>(viewRect.width() * scaleFactor),
        static_cast<int>(viewRect.height() * scaleFactor)
    );
    sourceRect = sourceRect.intersected(image.rect());

    if (!sourceRect.isValid()) {
        qWarning() << "Calculated source rectangle is invalid.";
        return;
    }

    // --- 核心裁剪与保存逻辑 ---
    QImage croppedImage = image.copy(sourceRect);

    // 构造保存路径和文件名
    QString savePath = QString("output/%1.jpg").arg(m_saveCounter);

    // 保存图片,可以指定 JPG 格式的压缩质量 (范围 0-100, -1 为默认)
    if (croppedImage.save(savePath, "JPG", 80)) {
        qDebug() << "Successfully saved to" << savePath;
        // 发送成功信号
        emit saveSuccess(savePath);
        // 文件序号自增
        m_saveCounter++;
    } else {
        qWarning() << "Failed to save image to" << savePath;
    }
}
4.2. 项目配置 (main.cpp 和 .pro)
main.cpp
在 main.cpp 中,我们实例化 ImageCropper 并将其暴露给 QML。
cpp
#include <QGuiApplication>
#include <QQmlApplicationEngine>
#include <QQmlContext>
#include "imagecropper.h" // 包含我们的新类

int main(int argc, char *argv[])
{
    QCoreApplication::setAttribute(Qt::AA_EnableHighDpiScaling);
    QGuiApplication app(argc, argv);

    QQmlApplicationEngine engine;

    ImageCropper imageCropper;
    engine.rootContext()->setContextProperty("imageCropper", &imageCropper);

    const QUrl url(QStringLiteral("qrc:/main.qml"));
    engine.load(url);

    return app.exec();
}
.pro 文件
确保 imagecropper.h 和 imagecropper.cpp 被添加到了项目文件中。
pro
# ...
HEADERS += \
    imagecropper.h

SOURCES += \
    main.cpp \
    imagecropper.cpp
# ...
4.3. QML 前端界面 (main.qml)
前端界面力求简洁,核心就是一个图像显示区和几个操作按钮。
cpp
import QtQuick 2.14
import QtQuick.Controls 2.14
import QtQuick.Dialogs 1.2
ApplicationWindow {
id: window
visible: true
width: 1024
height: 768
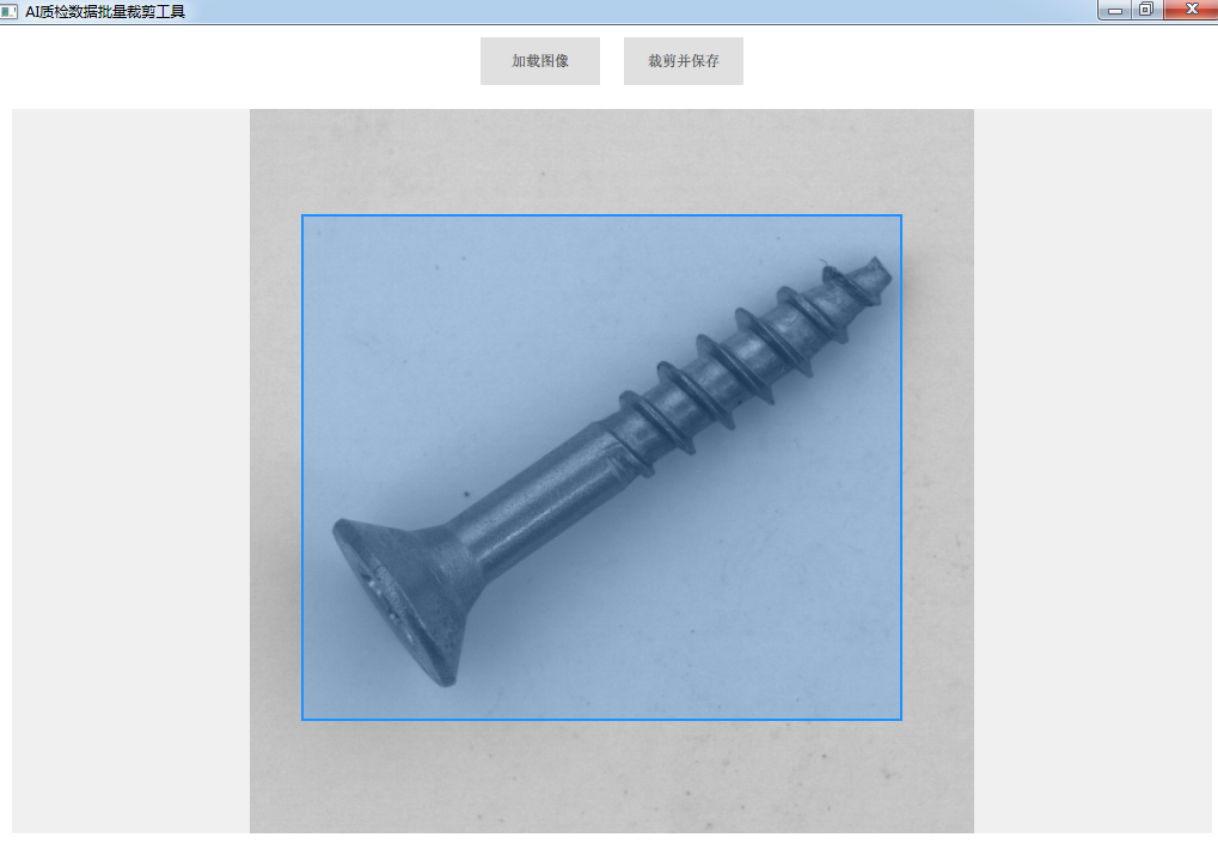
title: qsTr("AI质检数据批量裁剪工具")
// 用于显示保存成功后的提示信息
property string statusText: ""
Connections {
target: imageCropper
function onSaveSuccess(filename) {
statusText = `已保存: ${filename}`
// 让提示信息在2秒后自动消失
statusClearTimer.start()
}
}
Timer {
id: statusClearTimer
interval: 2000
onTriggered: statusText = ""
}
// 主布局
Column {
anchors.fill: parent
spacing: 10
// 顶部工具栏
Row {
anchors.horizontalCenter: parent.horizontalCenter
spacing: 20
padding: 10
Button {
text: "加载图像"
onClicked: fileDialog.open()
}
Button {
id: saveButton
text: "裁剪并保存"
enabled: selectionRect.visible && selectionRect.width > 0 && selectionRect.height > 0
onClicked: {
imageCropper.cropAndSaveImage(
mainImage.source,
Qt.rect(selectionRect.x, selectionRect.y, selectionRect.width, selectionRect.height),
Qt.size(imageContainer.width, imageContainer.height)
)
}
}
}
// 状态栏,用于显示反馈信息
Label {
anchors.horizontalCenter: parent.horizontalCenter
text: statusText
font.bold: true
color: "green"
}
// 图像显示和交互区域
Item {
id: imageContainer
width: parent.width - 20
height: parent.height - 100
anchors.horizontalCenter: parent.horizontalCenter
clip: true
Rectangle { /* ... 纯色背景 ... */ }
Image { id: mainImage; /* ... */ }
Rectangle { id: selectionRect; /* ... 用户绘制的选框 ... */ }
// MouseArea
MouseArea {
anchors.fill: parent
property var startPoint: Qt.point(0, 0)
onPressed: (mouse) => {
startPoint = Qt.point(mouse.x, mouse.y);
selectionRect.x = mouse.x;
selectionRect.y = mouse.y;
selectionRect.width = 0;
selectionRect.height = 0;
selectionRect.visible = true;
}
onPositionChanged: (mouse) => {
selectionRect.width = mouse.x - startPoint.x;
selectionRect.height = mouse.y - startPoint.y;
}
}
}
}
// 文件选择对话框
FileDialog {
id: fileDialog
title: "请选择一张图片"
folder: shortcuts.pictures
nameFilters: ["Image files (*.jpg *.png *.bmp)"]
onAccepted: {
mainImage.source = fileDialog.fileUrl
window.detectedPoints = [] // 加载新图片时清空旧结果
}
}
}五、使用流程
- 启动程序:打开我们编译好的应用。
- 加载图像:点击"加载图像"按钮,选择一张包含多个待检测目标的工业大图。
- 框选目标:在图像上,按住鼠标左键并拖动,精确地框住第一个您想要提取的样本。
- 保存样本:点击"裁剪并保存"按钮。程序界面会提示"已保存: output/1.jpg"。
- 继续操作:接着框选第二个目标,再次点击"裁剪并保存",程序会提示"已保存: output/2.jpg"。
- 重复此过程,直到您将图像上所有需要的样本都提取出来。最终,
output文件夹中就存放了您亲手制作、高质量、已编号的训练数据集!
六、总结与展望
通过这个简单的实战项目,我们构建了一个在 AI 视觉项目中极其实用的数据预处理工具。它将原本繁琐的手动截图、重命名工作,简化为"框选-点击"的流畅操作,极大地提升了数据集的制作效率。
这个工具仅仅是一个起点,基于这个坚实的框架,我们还可以畅想更多强大的功能:
- 快捷键操作 :例如按
Enter键代替点击"保存"按钮。 - 批量加载:支持一次性加载文件夹中的所有图片,通过"上一张/下一张"按钮快速切换。
- 格式导出 :在保存 JPG 的同时,可以生成符合 YOLO 或 Pascal VOC 格式的
.txt或.xml标注文件,实现真正的"一次框选,双重产出"。
希望这个小工具的开发过程,能为奋斗在工业质检领域的同行们带来启发,让我们用代码为 AI 的落地扫清障碍。