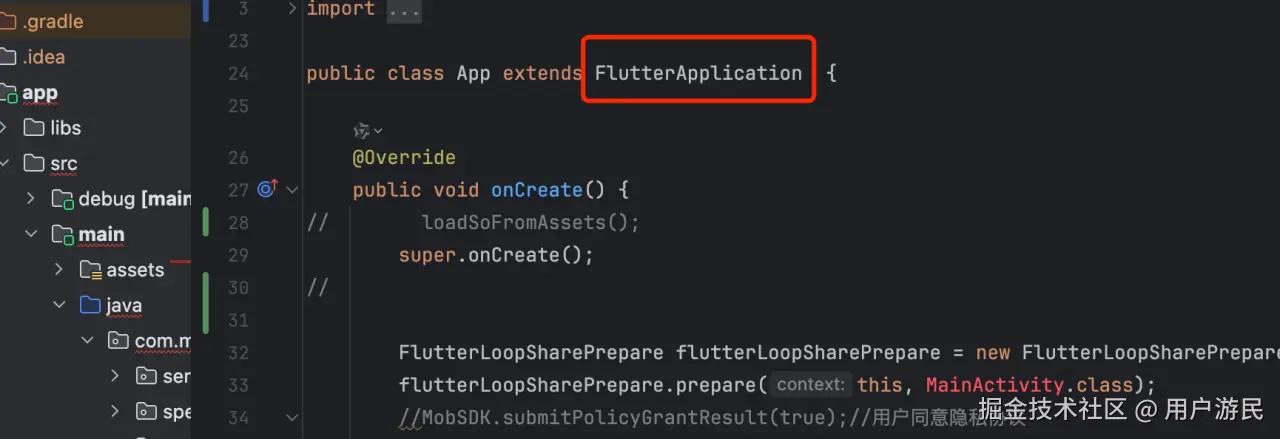
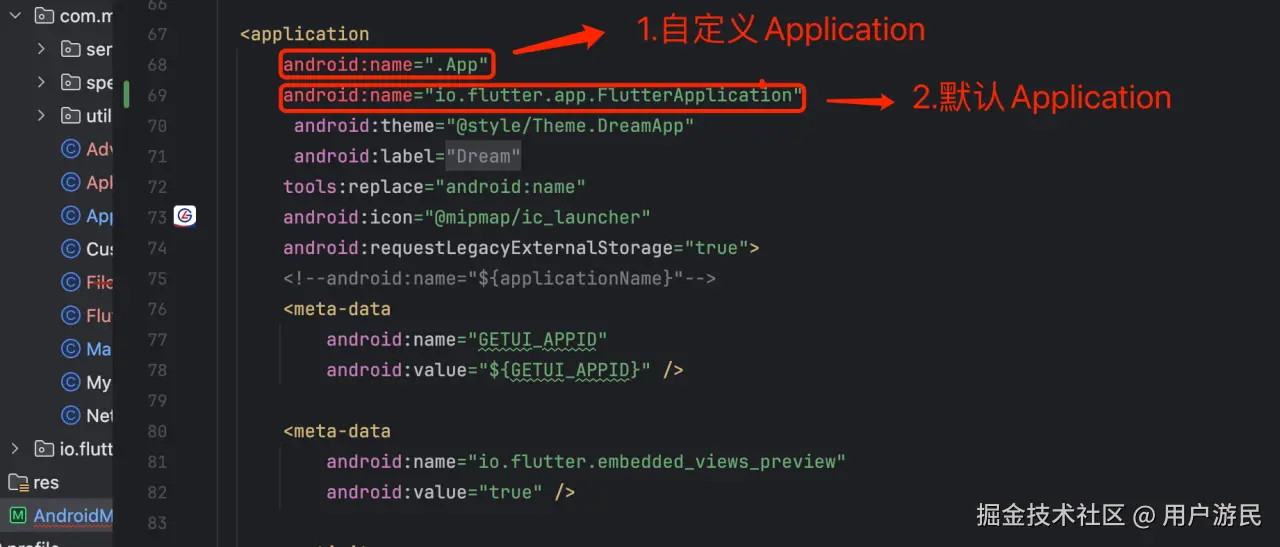
1. FlutterApplication
Android应用的启动会先初始化Application,再加载默认的MainActivity。Flutter项目中,Android端的Application默认指定为FlutterApplication或自定义的Application。
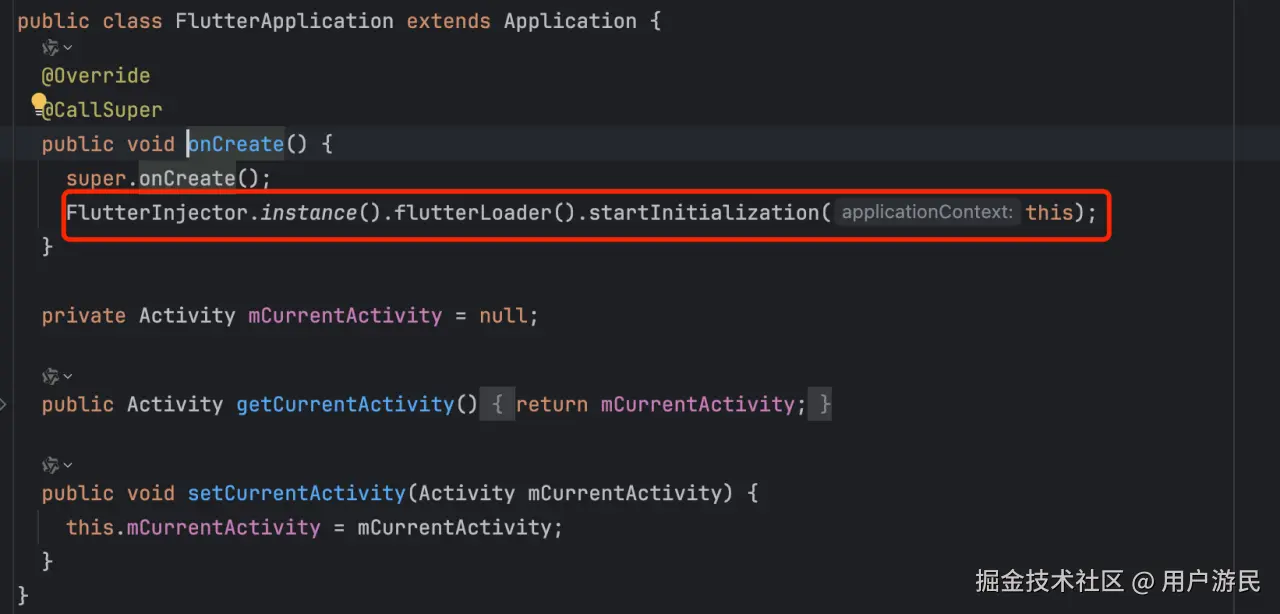
1.1 FlutterInjector.instance().flutterLoader().startInitialization(this)
ini
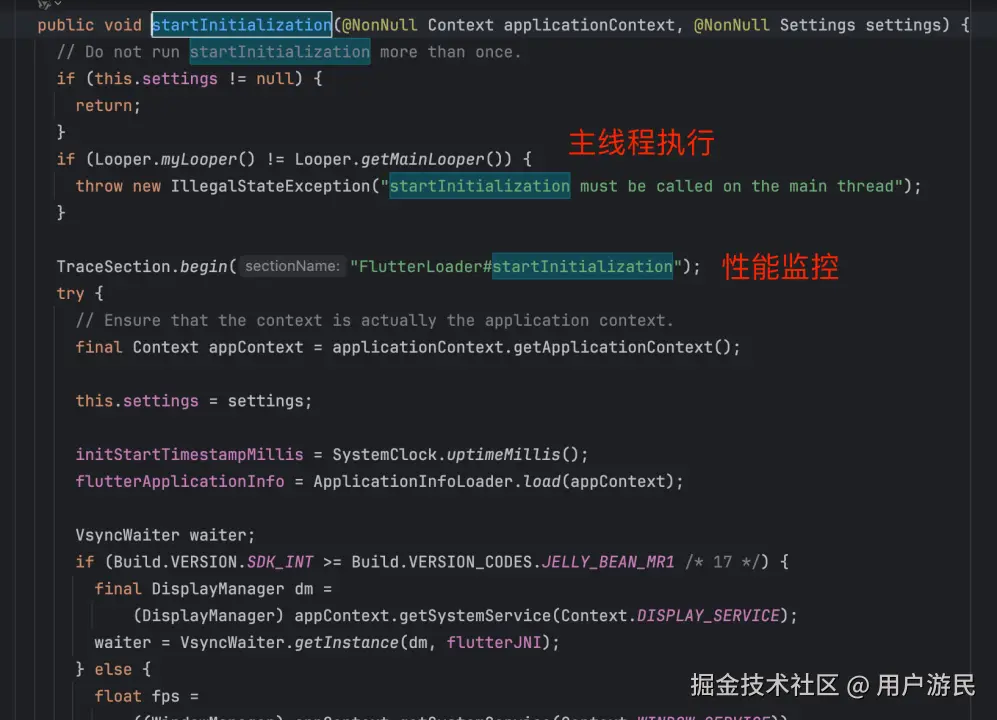
public void startInitialization(@NonNull Context applicationContext, @NonNull Settings settings) {
    if (this.settings != null) {
        return;
    }
    if (Looper.myLooper() != Looper.getMainLooper()) {
        throw new IllegalStateException("startInitialization must be called on the main thread");
    }

    TraceSection.begin("FlutterLoader#startInitialization");
    try {
        final Context appContext = applicationContext.getApplicationContext();
        this.settings = settings;
        initStartTimestampMillis = SystemClock.uptimeMillis();
        flutterApplicationInfo = ApplicationInfoLoader.load(appContext);

        VsyncWaiter waiter;
        if (Build.VERSION.SDK_INT >= Build.VERSION_CODES.JELLY_BEAN_MR1) {
            DisplayManager dm = (DisplayManager) appContext.getSystemService(Context.DISPLAY_SERVICE);
            waiter = VsyncWaiter.getInstance(dm, flutterJNI);
        } else {
            float fps = ((WindowManager) appContext.getSystemService(Context.WINDOW_SERVICE))
                    .getDefaultDisplay()
                    .getRefreshRate();
            waiter = VsyncWaiter.getInstance(fps, flutterJNI);
        }
        waiter.init();

        Callable<InitResult> initTask = new Callable<InitResult>() {
            @Override
            public InitResult call() {
                TraceSection.begin("FlutterLoader initTask");
                try {
                    ResourceExtractor resourceExtractor = initResources(appContext);
                    flutterJNI.loadLibrary();
                    flutterJNI.updateRefreshRate();
                    executorService.execute(() -> flutterJNI.prefetchDefaultFontManager());
                    if (resourceExtractor != null) {
                        resourceExtractor.waitForCompletion();
                    }
                    return new InitResult(
                        PathUtils.getFilesDir(appContext),
                        PathUtils.getCacheDirectory(appContext),
                        PathUtils.getDataDirectory(appContext)
                    );
                } finally {
                    TraceSection.end();
                }
            }
        };
        initResultFuture = executorService.submit(initTask);
    } finally {
        TraceSection.end();
    }
}
上述代码是Flutter引擎初始化的核心部分,主要完成以下工作:
- 获取应用上下文和配置信息
- 初始化
VsyncWaiter用于帧同步 - 在后台线程中执行资源提取、库加载等耗时操作

关键步骤说明:
ResourceExtractor resourceExtractor = initResources(appContext);
从APK中提取Flutter所需的资源文件(如Dart代码、字体、图片等),供引擎使用。flutterJNI.loadLibrary();
加载Flutter的C++原生库(libflutter.so),包含Skia渲染引擎、Dart VM等核心组件。flutterJNI.updateRefreshRate();
将屏幕刷新率信息传递给原生层,确保Flutter渲染帧率与设备刷新率匹配。
2. MainActivity
Android端默认启动的第一个Activity是MainActivity,Flutter项目中自动生成的代码如下:
less
@Override
public void configureFlutterEngine(@NonNull FlutterEngine flutterEngine) {
    GeneratedPluginRegistrant.registerWith(flutterEngine);
}
核心代码:
GeneratedPluginRegistrant.registerWith(this);
该方法是自动生成的,用于注册所有支持Android平台的Flutter插件。
3. FlutterActivity
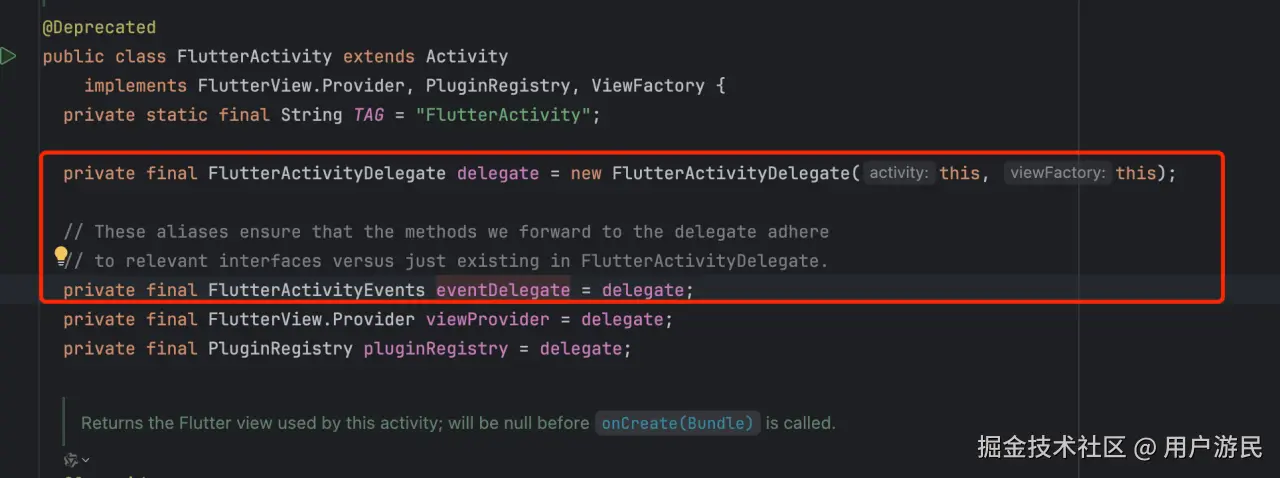
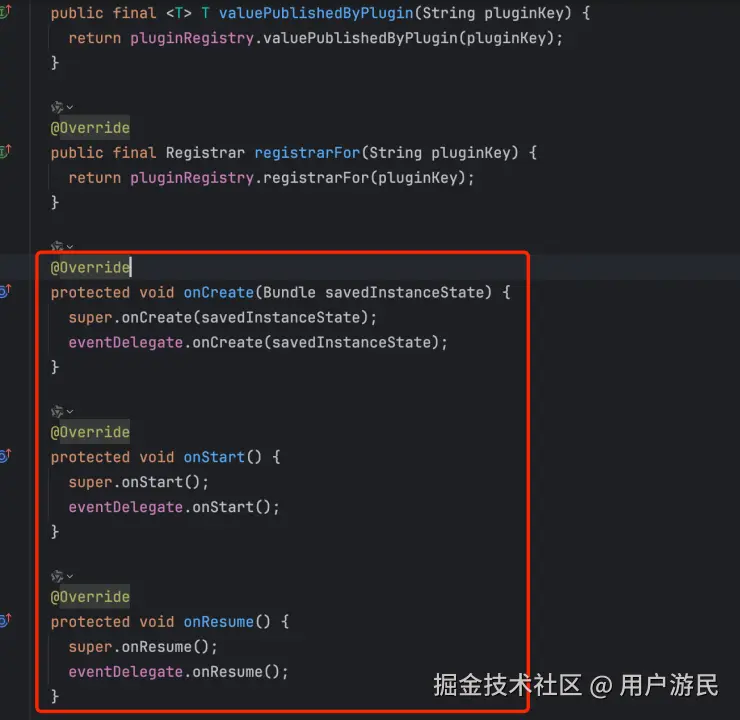
FlutterActivity本身是一个代理类,实际功能由FlutterActivityDelegate实现。所有与Flutter核心操作相关的Android Activity方法都应转发给FlutterActivityDelegate。
4. FlutterActivityDelegate
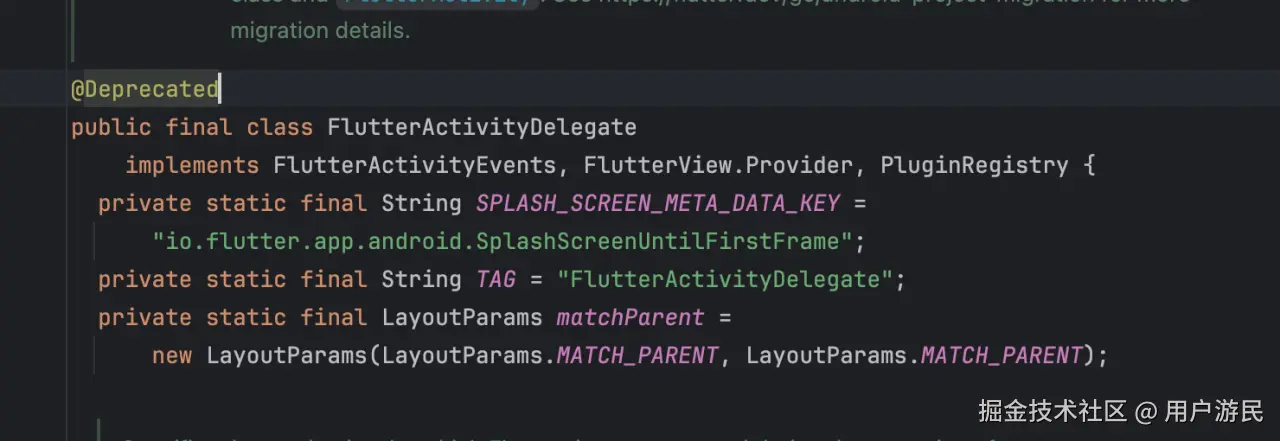 该类为
该类为final类,不可继承,实现了三个接口。 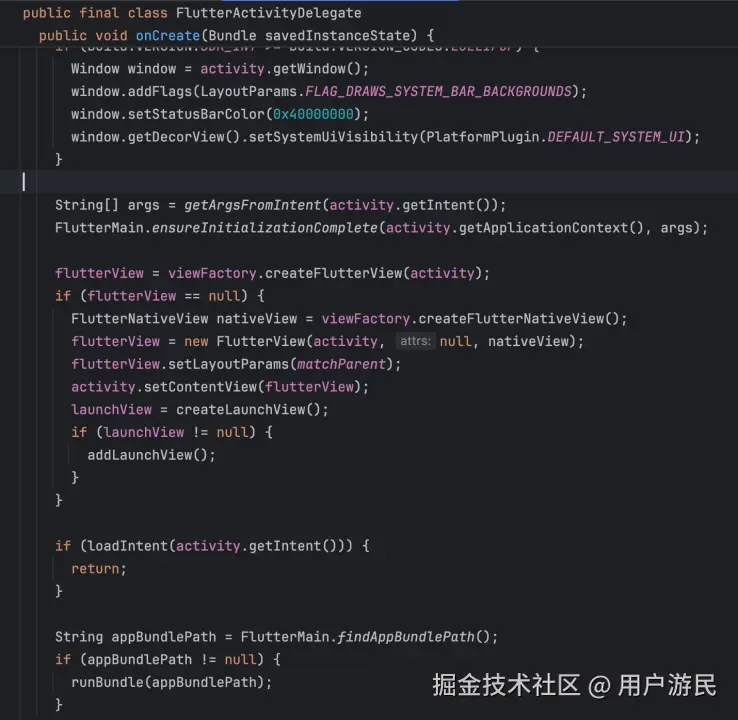
onCreate方法
- 设置沉浸式状态栏
- 从Intent中获取参数
- 调用
FlutterMain.ensureInitializationComplete确保资源初始化完成 - 创建
FlutterNativeView和FlutterView实例 - 设置Activity的布局为
flutterView - 调用
runBundle加载Dart代码
4.1 FlutterMain.ensureInitializationComplete
java
· public void ensureInitializationComplete(
    @NonNull Context applicationContext, @Nullable String[] args) {
  if (initialized) {
    return;
  }
  if (Looper.myLooper() != Looper.getMainLooper()) {
    throw new IllegalStateException(
        "ensureInitializationComplete must be called on the main thread");
  }
  if (settings == null) {
    throw new IllegalStateException(
        "ensureInitializationComplete must be called after startInitialization");
  }

  TraceSection.begin("FlutterLoader#ensureInitializationComplete");
  try {
    InitResult result = initResultFuture.get();

    List<String> shellArgs = new ArrayList<>();
    shellArgs.add("--icu-symbol-prefix=_binary_icudtl_dat");

    shellArgs.add(
        "--icu-native-lib-path="
            + flutterApplicationInfo.nativeLibraryDir
            + File.separator
            + DEFAULT_LIBRARY);
    if (args != null) {
      Collections.addAll(shellArgs, args);
    }

    String kernelPath = null;
    if (BuildConfig.DEBUG || BuildConfig.JIT_RELEASE) {
      String snapshotAssetPath =
          result.dataDirPath + File.separator + flutterApplicationInfo.flutterAssetsDir;
      kernelPath = snapshotAssetPath + File.separator + DEFAULT_KERNEL_BLOB;
      shellArgs.add("--" + SNAPSHOT_ASSET_PATH_KEY + "=" + snapshotAssetPath);
      shellArgs.add("--" + VM_SNAPSHOT_DATA_KEY + "=" + flutterApplicationInfo.vmSnapshotData);
      shellArgs.add(
          "--" + ISOLATE_SNAPSHOT_DATA_KEY + "=" + flutterApplicationInfo.isolateSnapshotData);
    } else {
      shellArgs.add(
          "--" + AOT_SHARED_LIBRARY_NAME + "=" + flutterApplicationInfo.aotSharedLibraryName);

      // Most devices can load the AOT shared library based on the library name
      // with no directory path.  Provide a fully qualified path to the library
      // as a workaround for devices where that fails.
      shellArgs.add(
          "--"
              + AOT_SHARED_LIBRARY_NAME
              + "="
              + flutterApplicationInfo.nativeLibraryDir
              + File.separator
              + flutterApplicationInfo.aotSharedLibraryName);

      // In profile mode, provide a separate library containing a snapshot for
      // launching the Dart VM service isolate.
      if (BuildConfig.PROFILE) {
        shellArgs.add(
            "--" + AOT_VMSERVICE_SHARED_LIBRARY_NAME + "=" + VMSERVICE_SNAPSHOT_LIBRARY);
      }
    }

    shellArgs.add("--cache-dir-path=" + result.engineCachesPath);
    if (flutterApplicationInfo.domainNetworkPolicy != null) {
      shellArgs.add("--domain-network-policy=" + flutterApplicationInfo.domainNetworkPolicy);
    }
    if (settings.getLogTag() != null) {
      shellArgs.add("--log-tag=" + settings.getLogTag());
    }

    ApplicationInfo applicationInfo =
        applicationContext
            .getPackageManager()
            .getApplicationInfo(
                applicationContext.getPackageName(), PackageManager.GET_META_DATA);
    Bundle metaData = applicationInfo.metaData;
    int oldGenHeapSizeMegaBytes =
        metaData != null ? metaData.getInt(OLD_GEN_HEAP_SIZE_META_DATA_KEY) : 0;
    if (oldGenHeapSizeMegaBytes == 0) {
      // default to half of total memory.
      ActivityManager activityManager =
          (ActivityManager) applicationContext.getSystemService(Context.ACTIVITY_SERVICE);
      ActivityManager.MemoryInfo memInfo = new ActivityManager.MemoryInfo();
      activityManager.getMemoryInfo(memInfo);
      oldGenHeapSizeMegaBytes = (int) (memInfo.totalMem / 1e6 / 2);
    }
    shellArgs.add("--old-gen-heap-size=" + oldGenHeapSizeMegaBytes);

    DisplayMetrics displayMetrics = applicationContext.getResources().getDisplayMetrics();
    int screenWidth = displayMetrics.widthPixels;
    int screenHeight = displayMetrics.heightPixels;
    // This is the formula Android uses.
    // https://android.googlesource.com/platform/frameworks/base/+/39ae5bac216757bc201490f4c7b8c0f63006c6cd/libs/hwui/renderthread/CacheManager.cpp#45
    int resourceCacheMaxBytesThreshold = screenWidth * screenHeight * 12 * 4;
    shellArgs.add("--resource-cache-max-bytes-threshold=" + resourceCacheMaxBytesThreshold);

    shellArgs.add("--prefetched-default-font-manager");

    boolean enableSkParagraph =
        metaData == null || metaData.getBoolean(ENABLE_SKPARAGRAPH_META_DATA_KEY, true);
    shellArgs.add("--enable-skparagraph=" + enableSkParagraph);

    if (metaData != null && metaData.getBoolean(ENABLE_IMPELLER_META_DATA_KEY, false)) {
      shellArgs.add("--enable-impeller");
    }

    final String leakVM = isLeakVM(metaData) ? "true" : "false";
    shellArgs.add("--leak-vm=" + leakVM);

    long initTimeMillis = SystemClock.uptimeMillis() - initStartTimestampMillis;

    flutterJNI.init(
        applicationContext,
        shellArgs.toArray(new String[0]),
        kernelPath,
        result.appStoragePath,
        result.engineCachesPath,
        initTimeMillis);

    initialized = true;
  } catch (Exception e) {
    Log.e(TAG, "Flutter initialization failed.", e);
    throw new RuntimeException(e);
  } finally {
    TraceSection.end();
  }
}
该方法是Debug/Release模式下的关键初始化步骤
- 确保在主线程执行
- 检查资源是否提取完成
- 构建并传递配置参数给底层
- 通过
FlutterJNI完成Dart VM的初始化
4.2 FlutterView创建
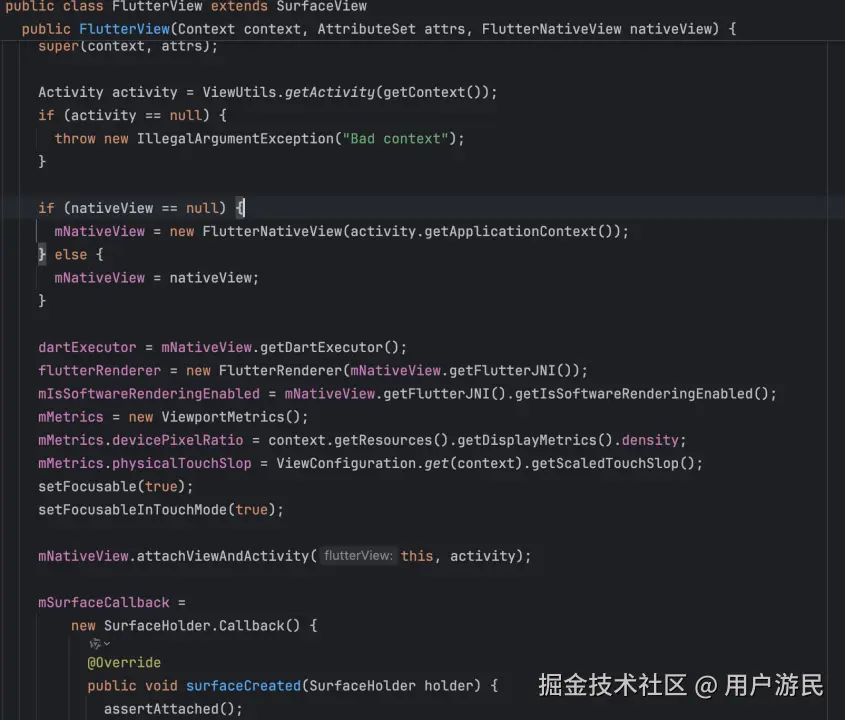
FlutterView继承SurfaceView,实现BinaryMessenger和TextureRegistry接口,主要功能包括:
- 创建
FlutterNativeView - 设置Surface回调
- 创建平台通道并传递给Dart端
4.3 FlutterNativeView初始化
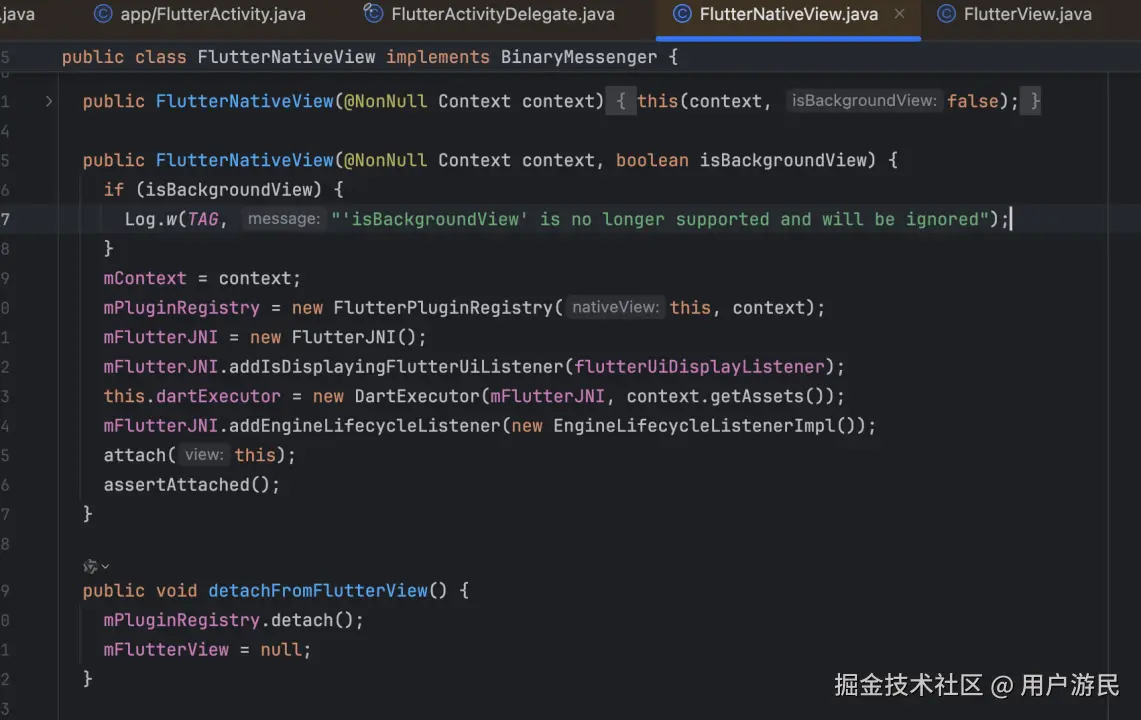
- 初始化
FlutterPluginRegistry、FlutterJNI、DartExecutor等对象 - 设置引擎生命周期监听器
- 执行
attach方法,将FlutterJNI附加到原生引擎
scss
private void attach(FlutterNativeView view) {
    mFlutterJNI.attachToNative();
    dartExecutor.onAttachedToJNI();
}
4.4 runBundle
ini
private void runBundle(String appBundlePath) {
    if (!flutterView.getFlutterNativeView().isApplicationRunning()) {
        FlutterRunArguments args = new FlutterRunArguments();
        args.bundlePath = appBundlePath;
        args.entrypoint = "main";
        flutterView.runFromBundle(args);
    }
}
java
scss
public void runFromBundle(FlutterRunArguments args) {
    assertAttached();
    preRun();
    mNativeView.runFromBundle(args);
    postRun();
}
php
public void runFromBundle(FlutterRunArguments args) {
    if (args.entrypoint == null) {
        throw new AssertionError("An entrypoint must be specified");
    }
    assertAttached();
    if (applicationIsRunning) {
        throw new AssertionError("This Flutter engine instance is already running an application");
    }
    mFlutterJNI.runBundleAndSnapshotFromLibrary(
        args.bundlePath,
        args.entrypoint,
        args.libraryPath,
        mContext.getResources().getAssets(),
        null
    );
    applicationIsRunning = true;
}
流程说明:
- 创建
FlutterRunArguments对象,指定入口函数为"main" - 调用
FlutterView.runFromBundle,进一步调用JNI层方法 - 底层方法最终执行到Dart的
main函数,启动Flutter应用
总结
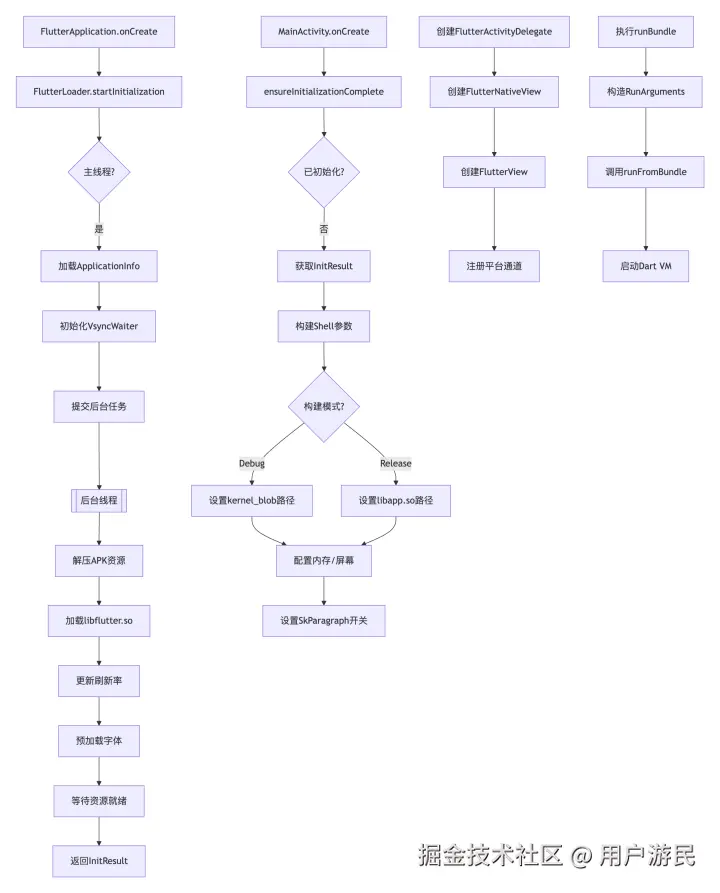
Flutter Android端的启动流程主要包括:
- Application初始化:加载资源、库文件,配置渲染环境
- Activity启动 :通过
FlutterActivity和FlutterActivityDelegate代理处理 - 引擎初始化 :通过
FlutterJNI与底层交互,初始化Dart VM - Dart代码执行 :通过
runBundle最终调用Dart的main函数
整个过程涉及多线程协作、资源提取、JNI调用等复杂机制,但Flutter框架已封装大部分细节,开发者只需关注业务逻辑即可。