📌 资源服务器的作用:
资源服务器负责保护你的 API 接口 ,只允许携带有效 JWT Token 的请求访问。它不负责登录或发放 Token,而是验证 Token 的有效性(比如签名、过期时间、颁发者等)。
当你的微服务项目引入了OAuth2 Resource Server的依赖,框架会为应用做两件事
- 创建一个JwtDecoder。
- 自动为你配置一个过滤器链,在过滤器链中增加了
BearerTokenAuthenticationFilter用来验证token的有效性。
xml
<!-- OAuth2 Resource Server -->
<dependency>
    <groupId>org.springframework.boot</groupId>
    <artifactId>spring-boot-starter-oauth2-resource-server</artifactId>
</dependency>应用也可以选择自己暴露一个SecurityFilterChain bean,否则框架就会采用默认的配置。
scss
/**
 * 资源服务器配置
 * If the application doesn't expose a SecurityFilterChain bean, then Spring Boot will expose the above default one.
 *
 * @param http
 * @return
 * @throws Exception
 */
@Bean
public SecurityFilterChain filterChain(HttpSecurity http) throws Exception {
    http
            .authorizeHttpRequests(authorize -> authorize
                    .anyRequest().authenticated()
            )
            .oauth2ResourceServer((oauth2) -> oauth2.jwt(Customizer.withDefaults()));
    return http.build();
}
🔍 一、JwtDecoder 是什么?
java
@FunctionalInterface
public interface JwtDecoder {

   /**
    * Decodes the JWT from it's compact claims representation format and returns a
    * {@link Jwt}.
    * @param token the JWT value
    * @return a {@link Jwt}
    * @throws JwtException if an error occurs while attempting to decode the JWT
    */
   Jwt decode(String token) throws JwtException;

}
JwtDecoder 是 Spring Security 提供的一个接口,它的核心作用是:
✅ 接收一个 JWT 字符串(比如
eyJhbGciOiJIUzI1Ni...),验证它的签名和有效期,并把它解析成一个Jwt对象(包含 header、payload、claims 等信息)。
所以资源服务器要想知道如何去验证解析客户端带来的token,只能依托给JwtDecoderjwt解析器。
当你在资源服务器中启用了jwt,但是却没有在容器中配置JwtDecoder的Bean,服务启动的时候就会报错,提示让我们配置一个JwtDecoder来解析即将到来的token
启用jwt:
java
http.oauth2ResourceServer((oauth2) -> oauth2.jwt(Customizer.withDefaults()));控制台报错信息: Method filterChain in com.emrubik.system.security.config.ResourceServerConfig required a bean of type 'org.springframework.security.oauth2.jwt.JwtDecoder' that could not be found.
🛠️ SpringBoot 如何创建 JwtDecoder?(常见方式)
Yaml
spring:
  security:
    oauth2:
      resourceserver:
        jwt:
jwk-set-uri: ${gateway.endpoint}/youlai-auth/oauth2/jwks只要在属性中配置了jwk-set-uri,容器就会自动创建这个bean,这源于自动配置,发现spring.security.oauth2.resourceserver.jwt.jwk-set-uri属性,配置会生效。框架为我们创建JwtDecoder实例。
less
@Configuration(proxyBeanMethods = false)
@ConditionalOnMissingBean(JwtDecoder.class)
static class JwtDecoderConfiguration {


@Bean
@ConditionalOnProperty(name = "spring.security.oauth2.resourceserver.jwt.jwk-set-uri")
JwtDecoder jwtDecoderByJwkKeySetUri(ObjectProvider<JwkSetUriJwtDecoderBuilderCustomizer> customizers) {
       JwkSetUriJwtDecoderBuilder builder = NimbusJwtDecoder.withJwkSetUri(this.properties.getJwkSetUri())
          .jwsAlgorithms(this::jwsAlgorithms);
       customizers.orderedStream().forEach((customizer) -> customizer.customize(builder));
       NimbusJwtDecoder nimbusJwtDecoder = builder.build();
       String issuerUri = this.properties.getIssuerUri();
       OAuth2TokenValidator<Jwt> defaultValidator = (issuerUri != null)
             ? JwtValidators.createDefaultWithIssuer(issuerUri) : JwtValidators.createDefault();
       nimbusJwtDecoder.setJwtValidator(getValidators(defaultValidator));
       return nimbusJwtDecoder;
    }
  }
👉 这段代码的意思是:
"如果用户没有自己定义
JwtDecoder,并且配置了jwk-set-uri,那我就自动帮你创建一个基于 JWK 的JwtDecoder。"
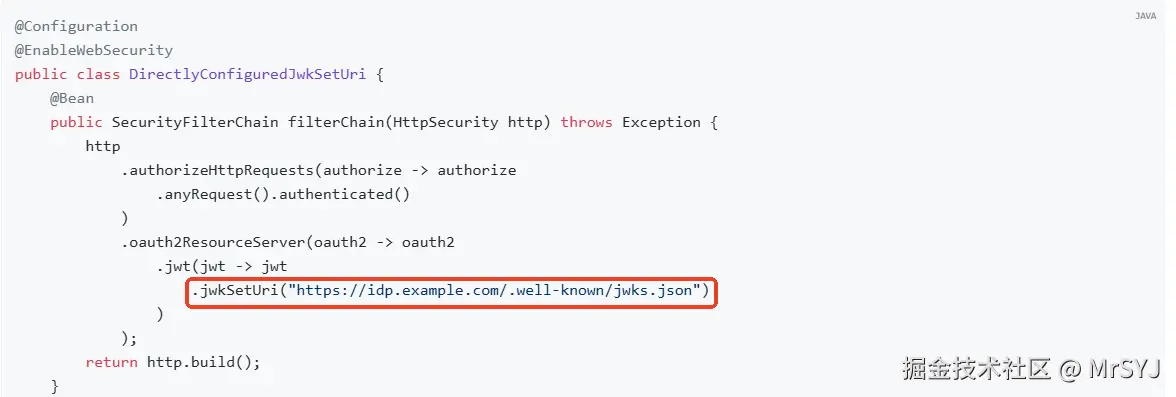
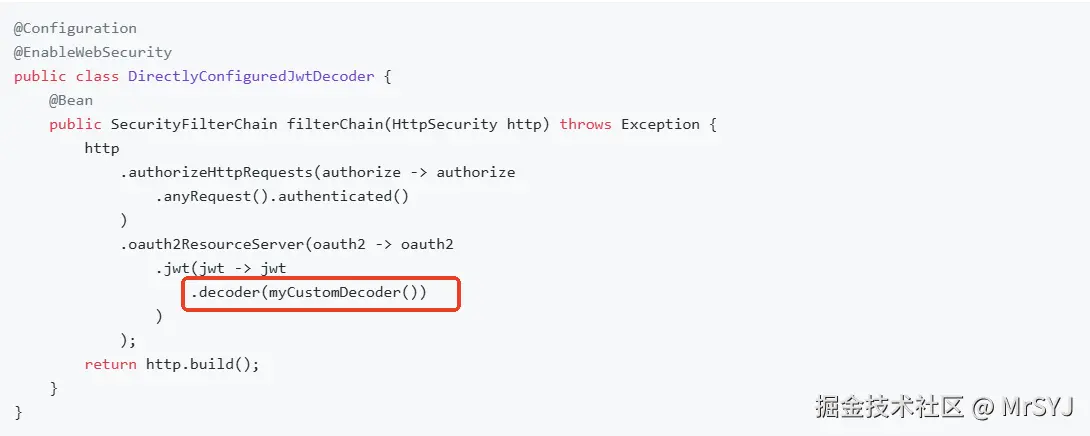
当然你也可以通过DSL自主配置,通过JwtConfigurer的decoder或者是jwkSetUri方法
kotlin
public JwtConfigurer decoder(JwtDecoder decoder) {
   this.decoder = decoder;
   return this;
}

public JwtConfigurer jwkSetUri(String uri) {
   this.decoder = NimbusJwtDecoder.withJwkSetUri(uri).build();
   return this;
}

上面之所以我们主动配置了就生效,是因为在配置JwtAuthenticationProvider的时候,JwtDecoder是通过调用JwtConfigurer的getJwtDecoder方法来使用的。
getJwtDecoder的逻辑就是先判断this.decoder是否为空 如果为空说明我们没有自己主动配置,那么就会从容器中获取。
kotlin
JwtDecoder getJwtDecoder() {
   if (this.decoder == null) {
      return this.context.getBean(JwtDecoder.class);
   }
   return this.decoder;
}

AuthenticationProvider getAuthenticationProvider() {
   if (this.authenticationManager != null) {
      return null;
   }
   JwtDecoder decoder = getJwtDecoder();
   Converter<Jwt, ? extends AbstractAuthenticationToken> jwtAuthenticationConverter = getJwtAuthenticationConverter();
   JwtAuthenticationProvider provider = new JwtAuthenticationProvider(decoder);
   provider.setJwtAuthenticationConverter(jwtAuthenticationConverter);
   return postProcess(provider);
}
🔐 简单说: .jwt() 是开启 JWT 支持的关键配置,没有它,资源服务器无法解析 JWT。
JwtAuthenticationProvider
JwtAuthenticationProvider具体来说,它的核心职责和工作流程如下:
-
接收和解析 JWT:
- 当客户端向资源服务器发起一个受保护的请求时,通常会在 HTTP 请求头的
Authorization字段中携带一个 JWT(例如:Bearer eyJhbGciOiJIUzI1Ni...)。 - Spring Security 的过滤器链(特别是
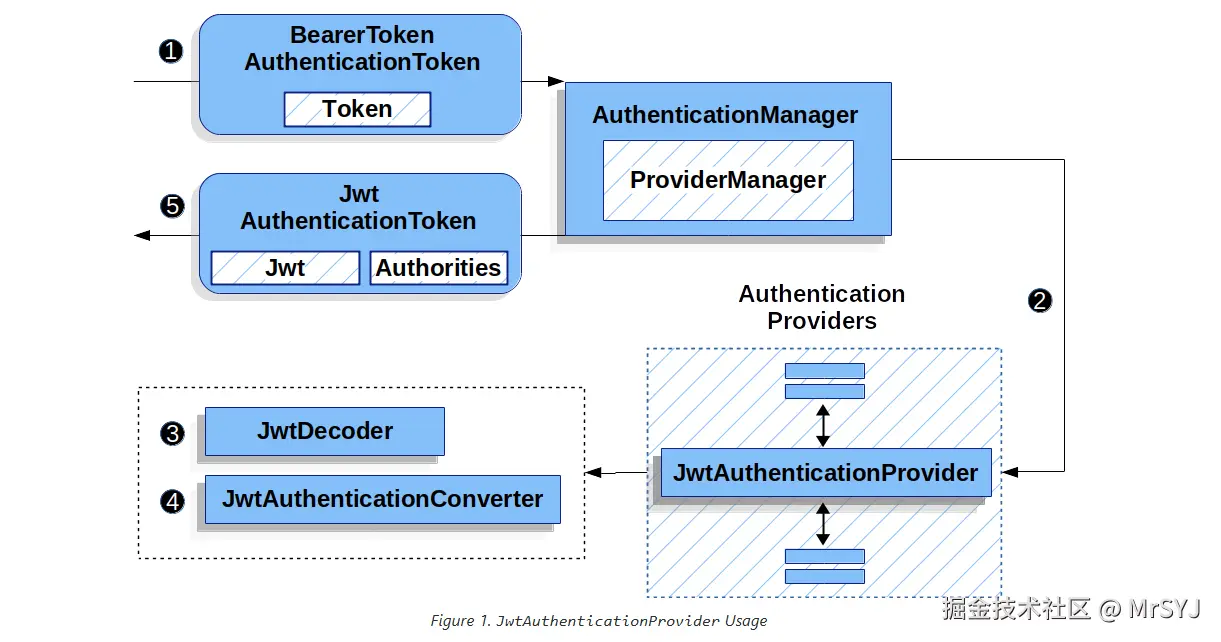
BearerTokenAuthenticationFilter)会拦截这个请求,提取出 JWT 字符串。 JwtAuthenticationProvider被调用,负责接收这个原始的 JWT 字符串,它会被包装成BearerTokenAuthenticationToken
- 当客户端向资源服务器发起一个受保护的请求时,通常会在 HTTP 请求头的
java
   BearerTokenAuthenticationToken authenticationRequest = new BearerTokenAuthenticationToken(token);

   AuthenticationManager authenticationManager = this.authenticationManagerResolver.resolve(request);

    Authentication authenticationResult = authenticationManager.authenticate(authenticationRequest);
下图来自官网

java
public final class JwtAuthenticationProvider implements AuthenticationProvider {


   private final JwtDecoder jwtDecoder;

   private Converter<Jwt, ? extends AbstractAuthenticationToken> jwtAuthenticationConverter = new JwtAuthenticationConverter();

   public JwtAuthenticationProvider(JwtDecoder jwtDecoder) {
      Assert.notNull(jwtDecoder, "jwtDecoder cannot be null");
      this.jwtDecoder = jwtDecoder;
   }

   /**
    * @param authentication the authentication request object.
    * @return A successful authentication
    * @throws AuthenticationException if authentication failed for some reason
    */
   @Override
   public Authentication authenticate(Authentication authentication) throws AuthenticationException {
      BearerTokenAuthenticationToken bearer = (BearerTokenAuthenticationToken) authentication;
      Jwt jwt = getJwt(bearer);
      AbstractAuthenticationToken token = this.jwtAuthenticationConverter.convert(jwt);
      if (token.getDetails() == null) {
         token.setDetails(bearer.getDetails());
      }
      this.logger.debug("Authenticated token");
      return token;
   }

   private Jwt getJwt(BearerTokenAuthenticationToken bearer) {
      try {
         return this.jwtDecoder.decode(bearer.getToken());
      }
      catch (BadJwtException failed) {
         this.logger.debug("Failed to authenticate since the JWT was invalid");
         throw new InvalidBearerTokenException(failed.getMessage(), failed);
      }
      catch (JwtException failed) {
         throw new AuthenticationServiceException(failed.getMessage(), failed);
      }
}从上面的源码我们可以看出JwtAuthenticationProvider验证的整个流程:
- 首先通过
jwtDecoder解码器解析校验token,底层的实现类是NimbusJwtDecoder - 校验通过返回的是
Jwt对象,但是这个jwt需要转换成springsecurity的认证令牌 - 利用
jwtAuthenticationConverter进行转换
🧩 JwtAuthenticationConverter 是什么?
它是 Spring Security 提供的默认转换器,作用是:
把一个
Jwt对象(解析后的 JWT)转换成AbstractAuthenticationToken(Spring Security 的认证令牌)
最常见的结果是:JwtAuthenticationToken
java
@FunctionalInterface
public interface Converter<S, T> {

   /**
    * Convert the source object of type {@code S} to target type {@code T}.
    * @param source the source object to convert, which must be an instance of {@code S} (never {@code null})
    * @return the converted object, which must be an instance of {@code T} (potentially {@code null})
    * @throws IllegalArgumentException if the source cannot be converted to the desired target type
    */
   @Nullable
   T convert(S source);
}
JwtAuthenticationConverter实现了Converter接口,所以JwtAuthenticationConverter是为了将: Jwt转成AbstractAuthenticationToken
java
JwtAuthenticationConverter implements Converter<Jwt, AbstractAuthenticationToken>但是我们通过源码发现JwtAuthenticationConverter内部持有一个JwtGrantedAuthoritiesConverter,
typescript
public class JwtAuthenticationConverter implements Converter<Jwt, AbstractAuthenticationToken> {
private Converter<Jwt, Collection<GrantedAuthority>> jwtGrantedAuthoritiesConverter = new JwtGrantedAuthoritiesConverter();
private String principalClaimName = JwtClaimNames.SUB;
@Override
public final AbstractAuthenticationToken convert(Jwt jwt) {
Collection<GrantedAuthority> authorities = this.jwtGrantedAuthoritiesConverter.convert(jwt);
String principalClaimValue = jwt.getClaimAsString(this.principalClaimName);
return new JwtAuthenticationToken(jwt, authorities, principalClaimValue);
}
/**
* Sets the {@link Converter Converter<Jwt, Collection<GrantedAuthority>>}
* to use. Defaults to {@link JwtGrantedAuthoritiesConverter}.
* @param jwtGrantedAuthoritiesConverter The converter
* @since 5.2
* @see JwtGrantedAuthoritiesConverter
*/
public void setJwtGrantedAuthoritiesConverter(
Converter<Jwt, Collection<GrantedAuthority>> jwtGrantedAuthoritiesConverter) {
Assert.notNull(jwtGrantedAuthoritiesConverter, "jwtGrantedAuthoritiesConverter cannot be null");
this.jwtGrantedAuthoritiesConverter = jwtGrantedAuthoritiesConverter;
}🔐 JwtGrantedAuthoritiesConverter 是干嘛的?
它的职责非常专一:
从
Jwt中提取出Collection<GrantedAuthority>(用户的权限集合)
比如:
scope=read write→SCOPE_read,SCOPE_writeroles=ADMIN,USER→ROLE_ADMIN,ROLE_USER
也就是说JwtGrantedAuthoritiesConverter也是种转换器,专门用来从jwt中提取权限的,
JwtGrantedAuthoritiesConverter实现了Converter接口,但是泛型明显不同,它专门是为了转换权限点GrantedAuthority的
java
public final class JwtGrantedAuthoritiesConverter implements Converter<Jwt, Collection<GrantedAuthority>> {

   private final Log logger = LogFactory.getLog(getClass());

   private static final String DEFAULT_AUTHORITY_PREFIX = "SCOPE_";

   private static final String DEFAULT_AUTHORITIES_CLAIM_DELIMITER = " ";

   private static final Collection<String> WELL_KNOWN_AUTHORITIES_CLAIM_NAMES = Arrays.asList("scope", "scp");

   private String authorityPrefix = DEFAULT_AUTHORITY_PREFIX;

   private String authoritiesClaimDelimiter = DEFAULT_AUTHORITIES_CLAIM_DELIMITER;

   private String authoritiesClaimName;

   /**
    * Extract {@link GrantedAuthority}s from the given {@link Jwt}.
    * @param jwt The {@link Jwt} token
    * @return The {@link GrantedAuthority authorities} read from the token scopes
    */
   @Override
   public Collection<GrantedAuthority> convert(Jwt jwt) {
      Collection<GrantedAuthority> grantedAuthorities = new ArrayList<>();
      for (String authority : getAuthorities(jwt)) {
         grantedAuthorities.add(new SimpleGrantedAuthority(this.authorityPrefix + authority));
      }
      return grantedAuthorities;
   }
最后返回一个经过验证的JwtAuthenticationToken
new JwtAuthenticationToken(jwt, authorities, principalClaimValue);
定制化JwtGrantedAuthoritiesConverter
场景:比如你的 JWT 用 permissions 字段传权限
json
{
  "sub": "123456",
  "permissions": ["user:read", "order:write"]
}
但是JwtGrantedAuthoritiesConverter默认使用的是scope scp字段
arduino
private static final Collection<String> WELL_KNOWN_AUTHORITIES_CLAIM_NAMES = Arrays.asList("scope", "scp");我们可以使用authoritiesConverter.setAuthoritiesClaimName("permissions") 覆盖默认配置
java
JwtGrantedAuthoritiesConverter authoritiesConverter = new JwtGrantedAuthoritiesConverter();
authoritiesConverter.setAuthorityPrefix(""); // 不要默认的 "SCOPE_"
authoritiesConverter.setAuthoritiesClaimName("permissions"); // 改查 permissions 字段

JwtAuthenticationConverter jwtConverter = new JwtAuthenticationConverter();
jwtConverter.setJwtGrantedAuthoritiesConverter(authoritiesConverter); // 替换!
因为框架在提取的时候会先判断用户是否设置了authoritiesClaimName,如果设置了就用用户自己设置的,否则就用默认的: WELL_KNOWN_AUTHORITIES_CLAIM_NAMES
kotlin
private String getAuthoritiesClaimName(Jwt jwt) {
   if (this.authoritiesClaimName != null) {
      return this.authoritiesClaimName;
   }
   for (String claimName : WELL_KNOWN_AUTHORITIES_CLAIM_NAMES) {
      if (jwt.hasClaim(claimName)) {
         return claimName;
      }
   }
   return null;
}
总结
| 方法 | 说明 |
|---|---|
setAuthorityPrefix("ROLE_") |
权限前缀(默认 SCOPE_) |
setAuthoritiesClaimName("roles") |
指定从哪个 claim 读权限(默认 scope 或 scp) |
setAuthorityPrefix("") |
去掉前缀 |
使用方式如下:
ini
@Bean
public Converter<Jwt, ? extends AbstractAuthenticationToken> jwtAuthenticationConverter() {
    JwtGrantedAuthoritiesConverter jwtGrantedAuthoritiesConverter = new JwtGrantedAuthoritiesConverter();
    jwtGrantedAuthoritiesConverter.setAuthorityPrefix(Strings.EMPTY);
    jwtGrantedAuthoritiesConverter.setAuthoritiesClaimName("authorities");

    JwtAuthenticationConverter jwtAuthenticationConverter = new JwtAuthenticationConverter();
    jwtAuthenticationConverter.setJwtGrantedAuthoritiesConverter(jwtGrantedAuthoritiesConverter);
    return jwtAuthenticationConverter;
}
less
@Bean
public SecurityFilterChain filterChain(HttpSecurity http) throws Exception {
    http
            .authorizeHttpRequests(authorize -> authorize
                    .anyRequest().authenticated()
            )
            .oauth2ResourceServer((oauth2) -> oauth2.jwt((jwtConfigurer -> jwtConfigurer.jwtAuthenticationConverter(jwtAuthenticationConverter()))));
    return http.build();
}