bypy 是一个基于百度网盘 API 的 命令行 Python 工具,可用于在本地与百度网盘之间上传、下载、同步文件等操作。
1. 安装
bash
$ pip install bypy
Looking in indexes: https://mirror.baidu.com/pypi/simple/, http://mirrors.aliyun.com/pypi/simple/, https://pypi.tuna.tsinghua.edu.cn/simple/
Collecting bypy
  Downloading https://pypi.tuna.tsinghua.edu.cn/packages/c1/f0/2613c462fc24d8ea922ac63bbc8159700a6243a321b97992e9d13f93e990/bypy-1.8.9-py2.py3-none-any.whl (243 kB)
...
Installing collected packages: bypy
Successfully installed bypy-1.8.9
2. 首次授权
首次使用需授权:
bypy info 终端会提示访问一个 URL,打开后登录百度账号并复制授权码,粘贴回终端完成授权
bash
$ bypy info
$ bypy info
Please visit:
https://openapi.baidu.com/oauth/2.0/authorize?client_id=q8WE4EpCsau1oS0MplgMKNBn&response_type=code&redirect_uri=oob&scope=basic+netdisk
And authorize this app
Paste the Authorization Code here within 10 minutes.
Press [Enter] when you are done
e3e20dcee83027cdb0f39691xxxxxx
Authorizing, please be patient, it may take upto 300 seconds...
Quota: 2.007TB
Used: 1.853TB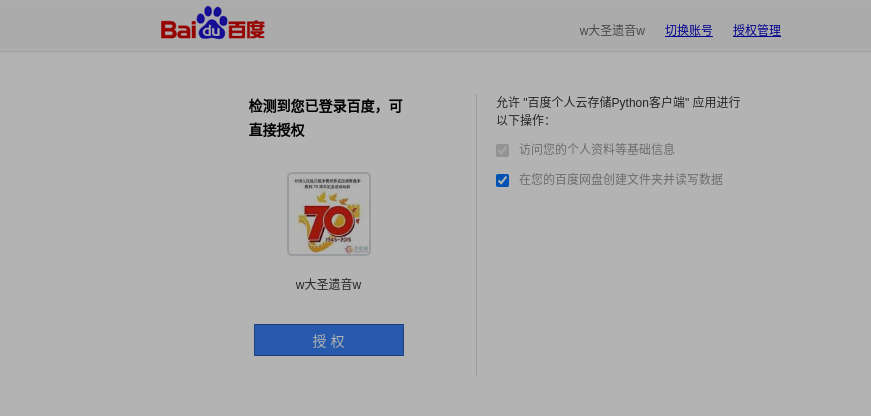
点击授权

复制授权码到
bash
Please visit:
https://openapi.baidu.com/oauth/2.0/authorize?client_id=q8WE4EpCsau1oS0MplgMKNBn&response_type=code&redirect_uri=oob&scope=basic+netdisk
And authorize this app
Paste the Authorization Code here within 10 minutes.
Press [Enter] when you are done
授权码
3. 使用命令
3.1 基本命令
| 操作类型 | 命令示例 |
|---|---|
| 查看网盘信息 | bypy info |
| 查看配额 | bypy quota |
| 列目录 | bypy list |
| 创建目录 | bypy mkdir /test |
| 上传文件 | bypy upload local.txt /remote/path/ |
| 上传目录 | bypy upload ./folder /remote/folder/ |
| 下载文件 | bypy downfile /remote/file.txt ./local/ |
| 下载目录 | bypy downdir /remote/folder ./local/ |
| 同步本地到云端 | bypy syncup ./local /remote |
| 同步云端到本地 | bypy syncdown /remote ./local |
| 删除文件 | bypy remove /remote/file.txt |
| 移动/重命名 | bypy move /old/path /new/path |
查看网盘大小
bash
$ bypy quota
Quota: 2.007TB
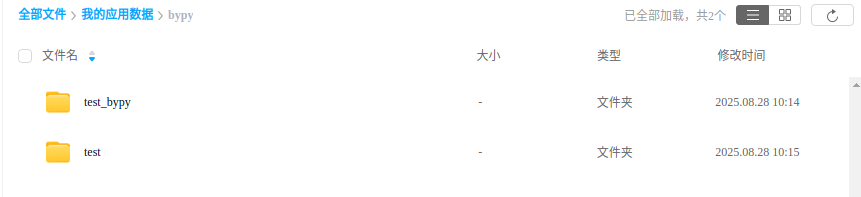
Used: 1.853TB创建目录
bash
$ bypy mkdir test_bypy
$ bypy mkdir test
百度云网盘如图所示:
上传文件
bash
$ bypy upload test.txt /test_bypy
powershell
$ zip -r FreedomIntelligence___medical-o1-reasoning-sft.zip FreedomIntelligence___medical-o1-reasoning-sft/

$ bypy -t 8 upload FreedomIntelligence___medical-o1-reasoning-sft.zip /test
[====================] 100% (107.1MB/107.1MB) ETA:  (144kB/s, 12m39s gone) Combining the following MD5 slices:
ae30ce749b996654c9921ee79f2d9d95
8765d8ec4b5d89bdae815ee8e738ac76
65c88363afb473abee27dcf2134475dd
56894e574ccce026a49b044cb6cf68e5
b4ef13be501216ed0ebcbacc5aa3c407
276cac6bed6e018e1ab4d66c45a94c35
下载文件
bash
$ bypy downfile /test/深度学习测 试题.pdf .
<I> [10:36:41] ./深度学习测试题.pdf <- /apps/bypy/test/深度学习测试题.pdf
<E> [10:39:36] Waiting 10 seconds before retrying...
<E> [10:39:46] Request Try #2 / 5
<E> [10:48:11] Waiting 20 seconds before retrying...
<E> [10:48:31] Request Try #3 / 5
<E> [10:51:51] Waiting 30 seconds before retrying...
<E> [10:52:21] Request Try #4 / 5
<E> [10:58:02] Waiting 40 seconds before retrying...
<E> [10:58:42] Request Try #5 / 5
[====================] 100% (4.5MB/4.5MB) ETA:  (3kB/s, 22m59s gone)
删除文件
bash
bypy remove /test_bypy/test.txt3.2 高级命令
3.2.1 极速上传 / 下载:多线程 + 断点续传
bash
# 8 线程并发、每块 50 MB,断网后继续跑
bypy -t 8 --slice 50M upload big.iso /Backup
bypy --chunk 50M --no-resume-download downdir /Videos .--slice上传分块大小,越大并发越高(视内存而定)。--chunk下载分块大小;配合--no-resume-download可强制重下。-t/--timeout设长一点,防止大文件超时失败。
3.2.2 非会员跑满带宽:把 aria2 拉来做苦力
bash
# 先装 aria2
sudo apt install aria2
# 让 bypy 把真实下载地址丢给 aria2
bypy --downloader aria2 --downloader-arguments "-x16 -s16" downdir /Movies .
aria2 的 16 线程能把单文件带宽吃满,比 bypy 原生下载快数倍。
3.2.3 只传增量:真正的"同步"
bash
# 本地 → 云端(本地删的远程也删,省空间)
bypy syncup ./Project /Project --deleteremote

# 云端 → 本地(镜像)
bypy syncdown /Project ./Project --deletelocal
--deleteremote / --deletelocal 是增量同步的灵魂,避免每次全量拷贝。
3.2.4 通配符 & 正则批量操作
bash
# 上传当前目录所有 pdf 到 /Docs
bypy upload *.pdf /Docs

# 只上传 2024-08-?? 的日志,用正则
bypy --include-regex '2024-08-\d+\.log' upload ./logs /Logs
--include-regex 对"只同步某类文件"极其好用。
3.2.5 一键比较:快速找出差异
bash
bypy compare ./local /remote输出示例
Different: 3
Only in local: 2
Only in remote: 1
比 list 再肉眼对比省时得多。
3.2.6 把常用参数写进配置文件
编辑 ~/.bypy.json(第一次运行后会自动生成):
json
{
  "timeout": 120,
  "max_retry": 5,
  "slice": "50M",
  "chunk": "50M",
  "verify": true
}
以后敲 bypy upload ... 就会自动带这些高级设置。
3.2.7调试 & 日志:定位失败原因
bash
# 普通调试
bypy -d list
# 连 HTTP 报文都打印(慎用,刷屏)
bypy -ddd upload ...
出问题先加 -d,99 % 的网络/权限错误都能直接看到。
3.2.8无人值守:crontab + screen
bash
# 每天凌晨 2 点增量备份
0 2 * * * /usr/bin/bypy syncup /data /Backup > /var/log/bypy.log 2>&1
长任务再包一层 screen,SSH 断了也继续跑:
bash
screen -S bypy
bypy syncup ...
# Ctrl+A D 脱离
screen -r bypy   # 随时回来查看进度
3.2.9 彻底注销授权
bash
bypy -c换号或令牌失效时,先清掉旧授权再 bypy info 重新走流程。
4. Python 调用
python
from bypy import ByPy
bp = ByPy()

# 一行搞定上传
bp.upload('local_path', '/remote_path')

# 实时进度条
bp.upload('local_path', '/remote_path', callback=lambda p: print(f'{p:.1f}%'))
适合在定时任务或 CI/CD 流水线里集成。