这一次,我们深入探讨:交互系统设计、动画控制理论、第一人称视角数学模型,以及3D 标签架构!
在前两篇中,我们构建了基础的三维场景框架。但现代数字孪生系统的核心价值在于数据驱动的交互能力 和实时业务逻辑处理。
本篇将从计算机图形学理论 、人机交互设计 、实时渲染优化等多个维度,结合具体的隧道监控场景,深入剖析交互系统的设计与实现。
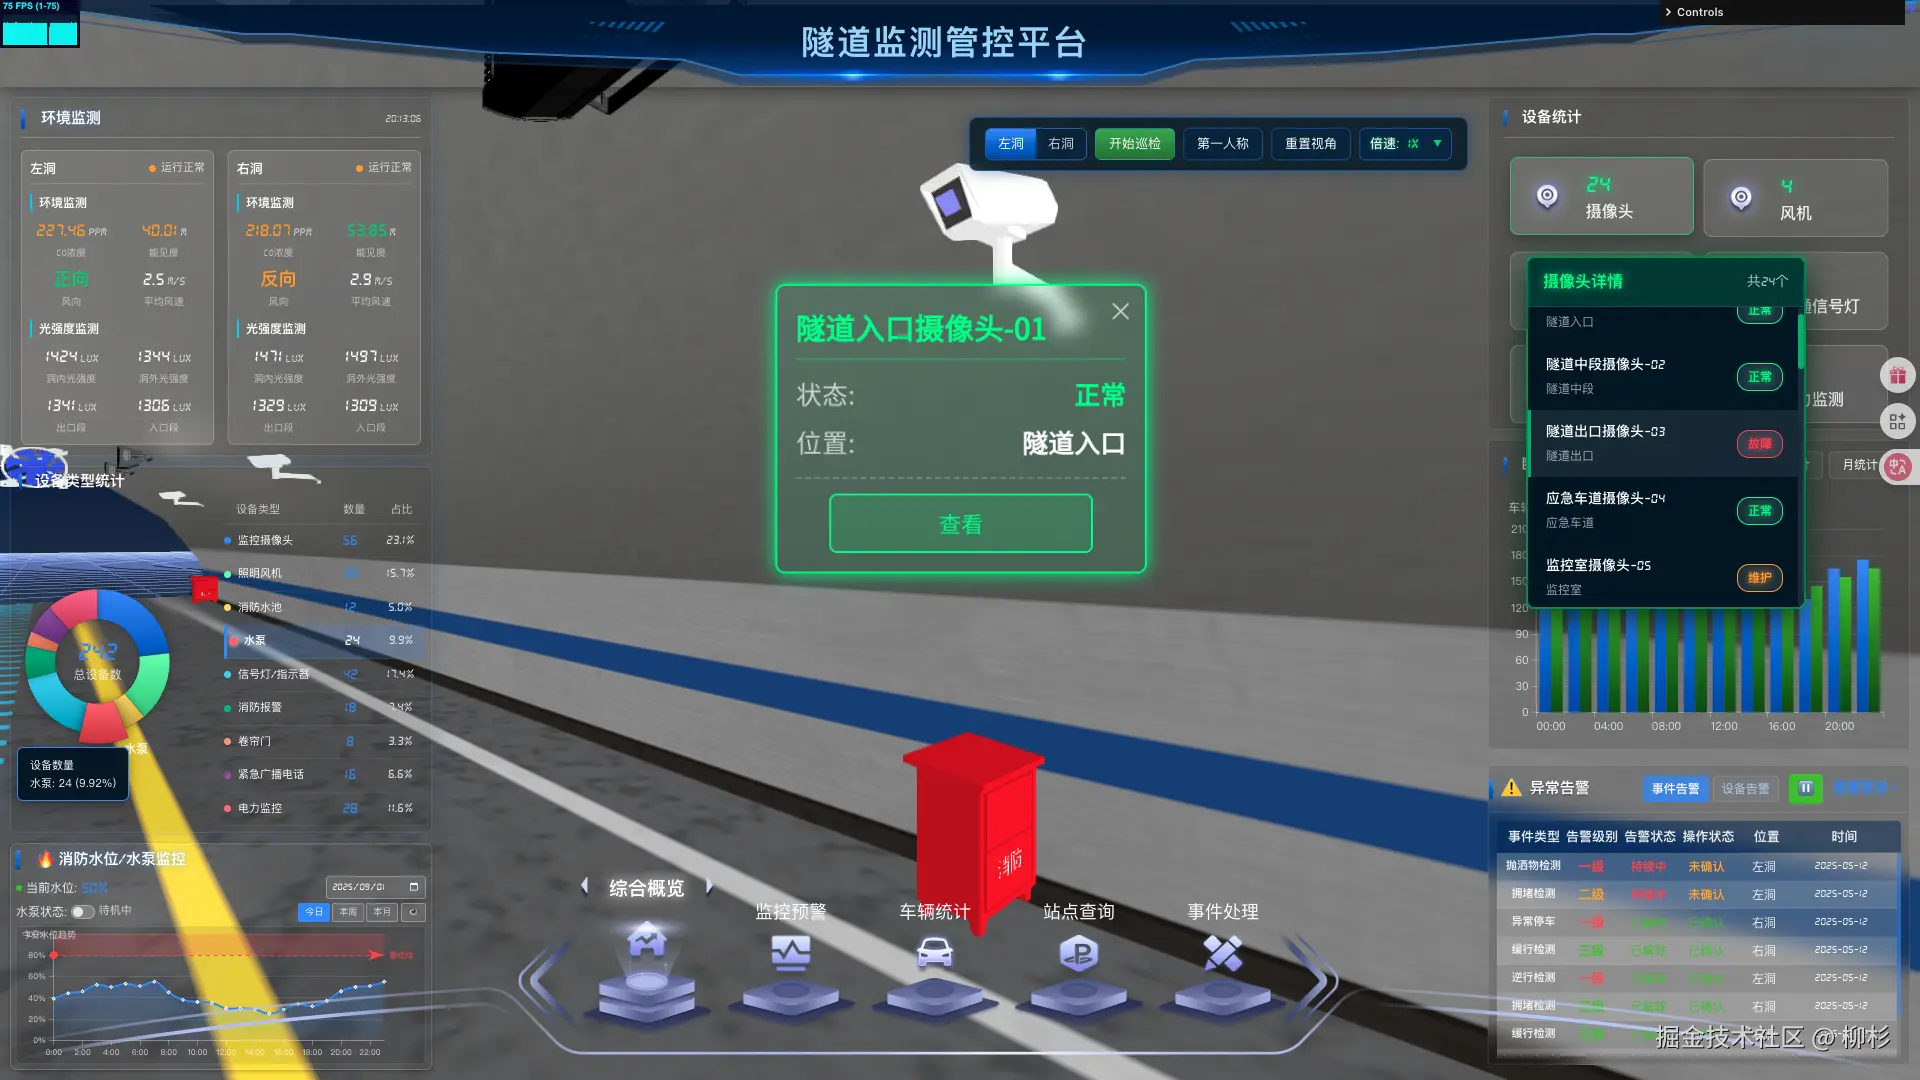
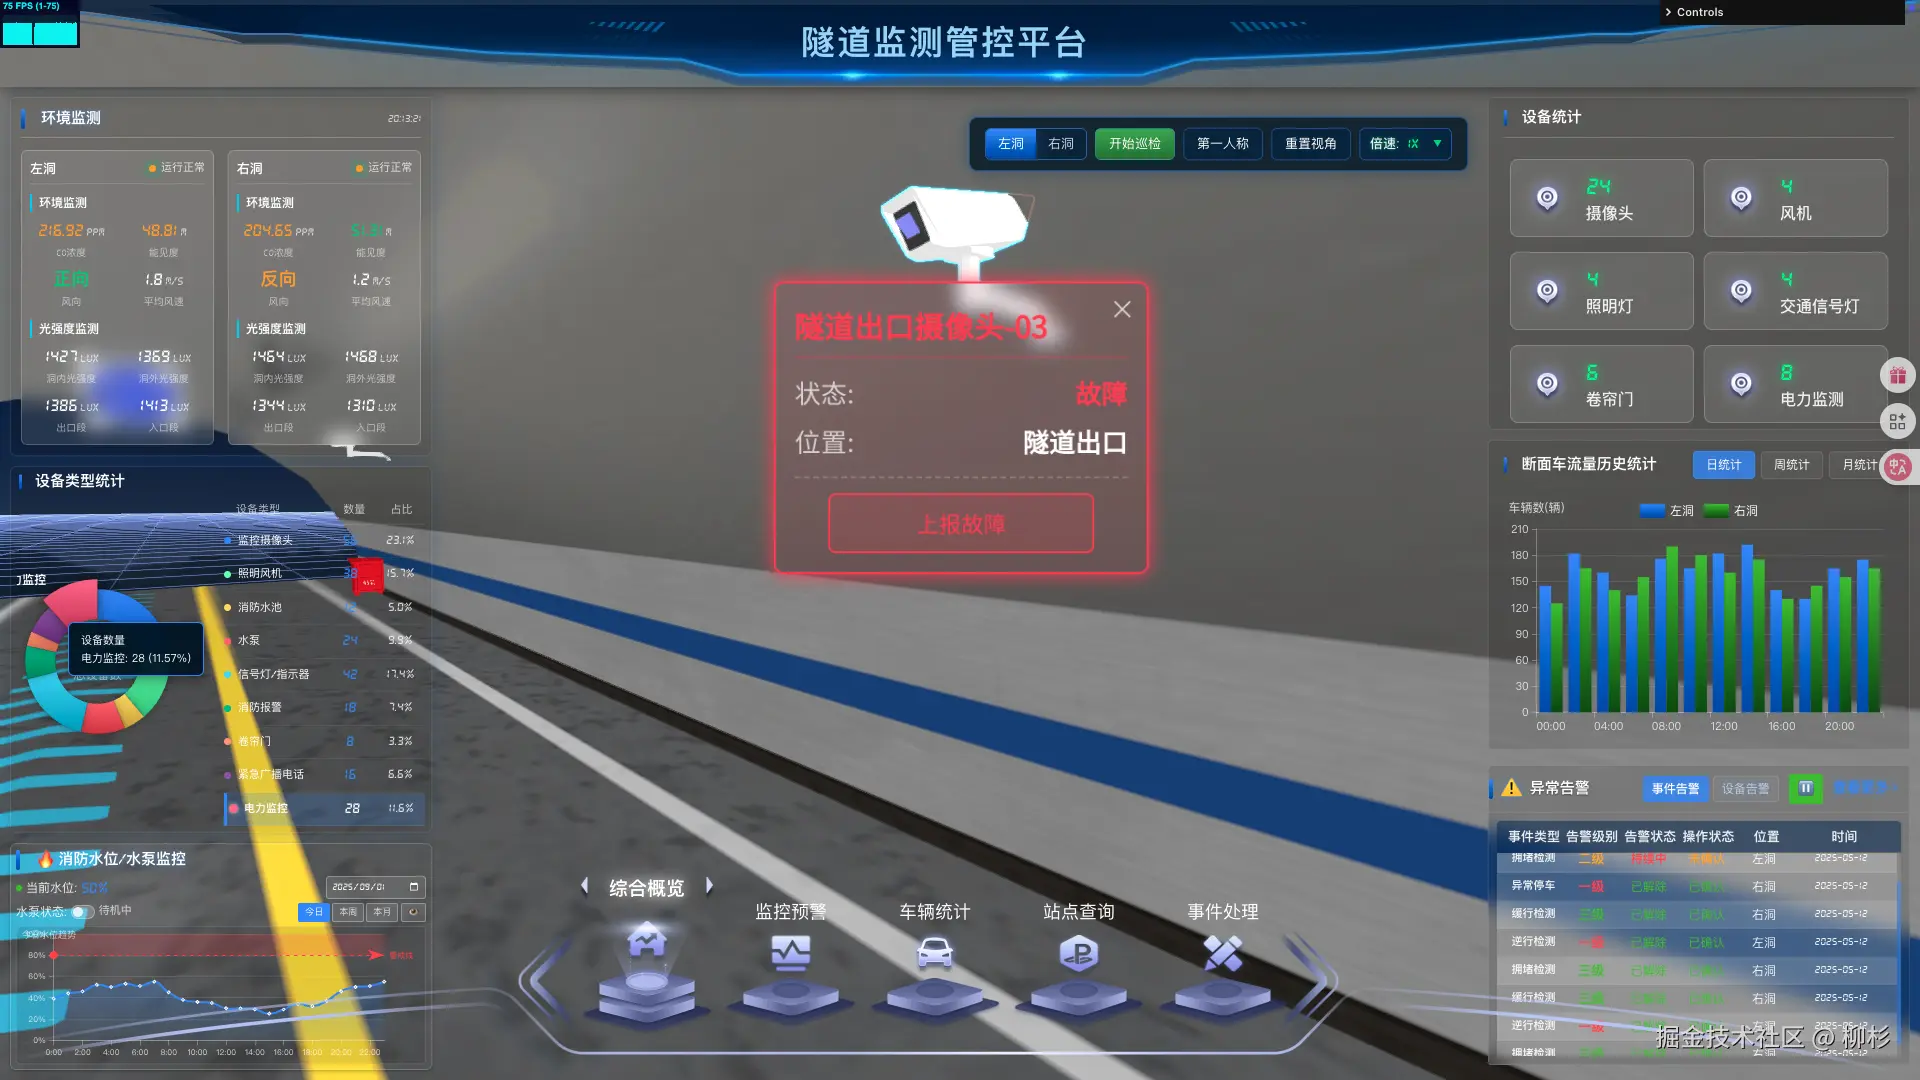
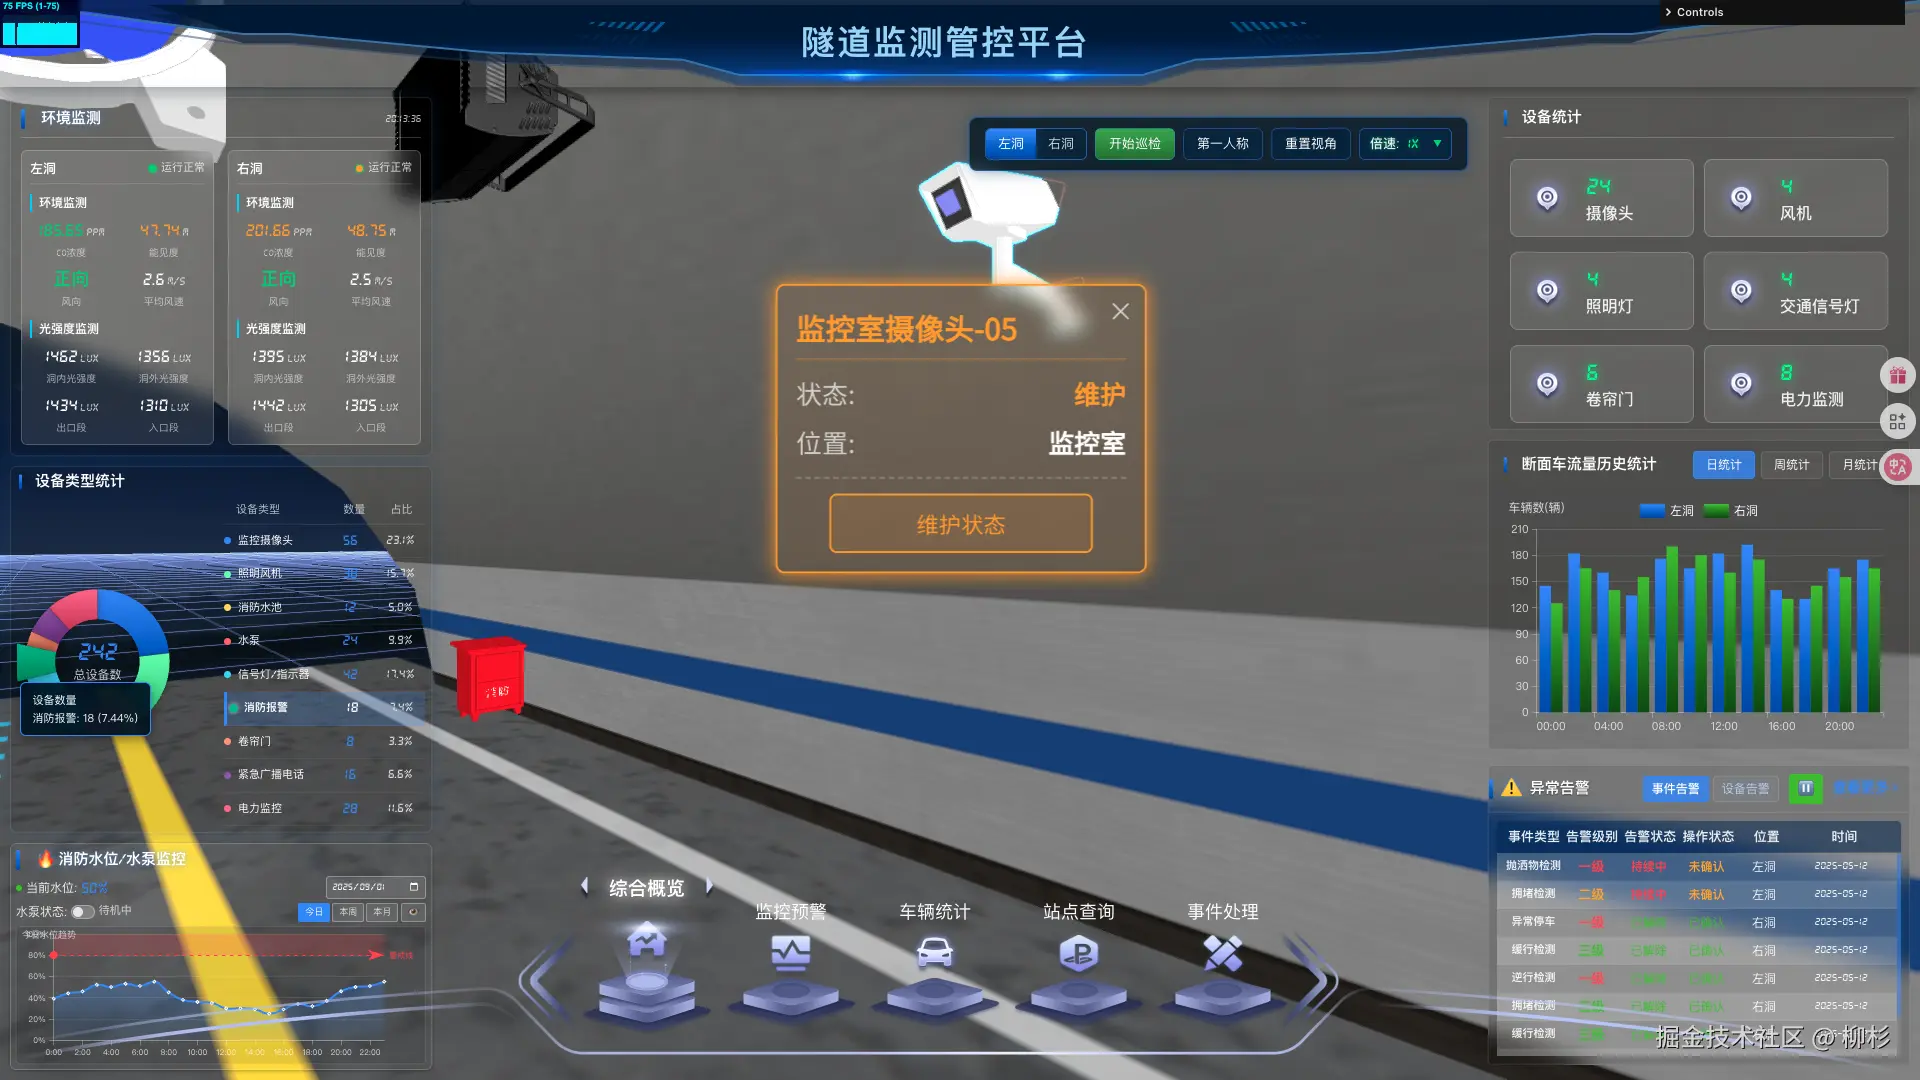
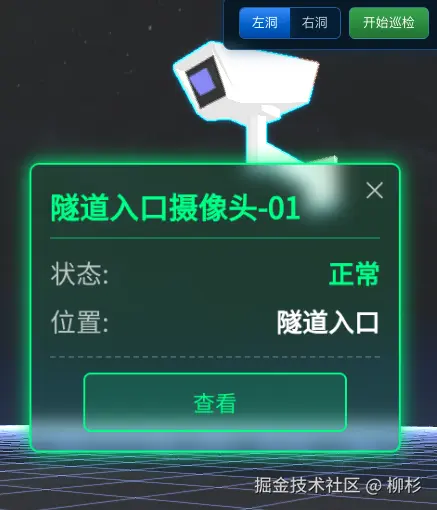
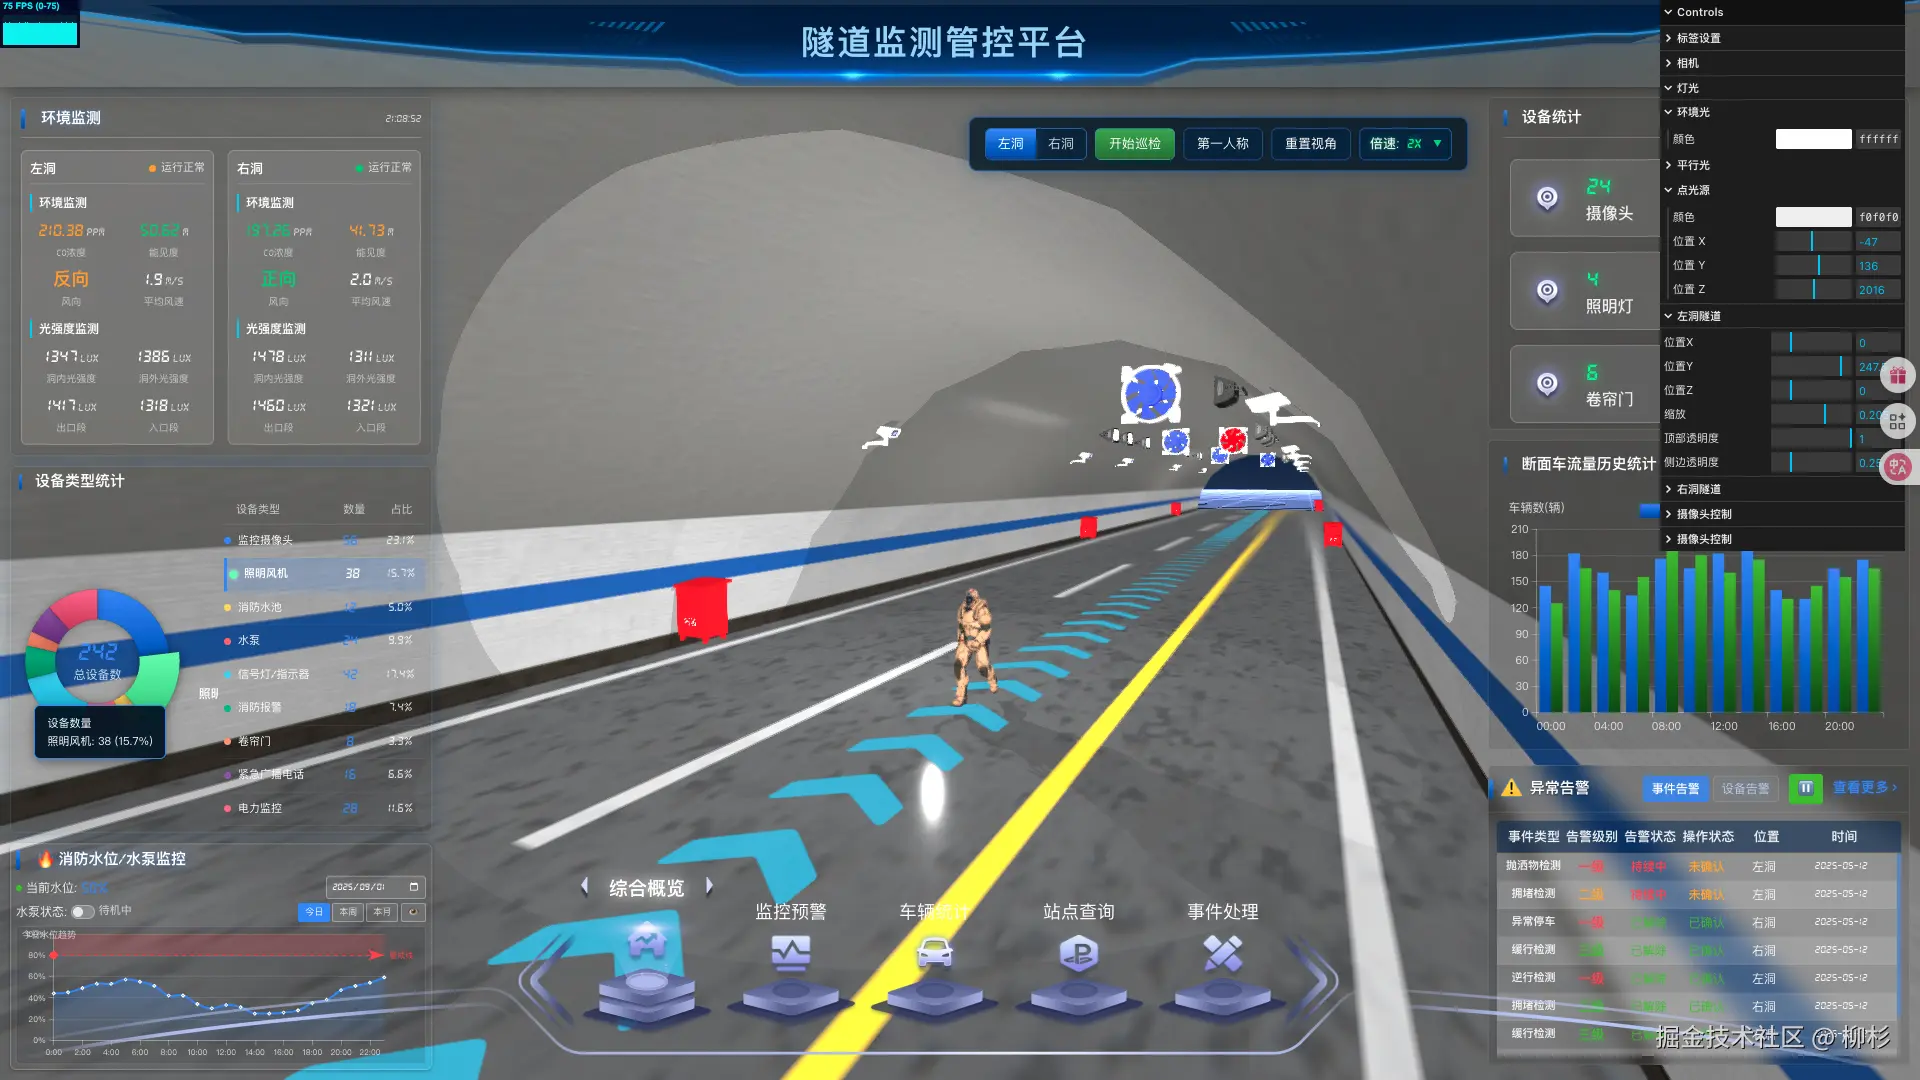
01 CSS3D 标签系统:让隧道设备"开口说话"
1.1 业务场景分析
在实际的隧道监控系统中,我们需要在 3D 场景中展示各种设备的实时状态:
- 摄像机:在线状态、视频流地址、分辨率信息
- 传感器:温度、湿度、CO浓度等环境数据
- 照明设备:功率、亮度、故障状态
- 通风设备:转速、风量、运行时间
1.2 技术方案选择与原理
在 Three.js 中,有三种主要的文本渲染方案:
| 方案 | 渲染原理 | 性能特征 | 适用场景 |
|---|---|---|---|
| Canvas2D 纹理 | 将文本绘制到 Canvas,作为纹理贴到 Plane | 高性能,GPU 渲染 | 静态文本,大量简单标签 |
| WebGL 文字渲染 | SDF 字体,GPU Shader 渲染 | 中等性能,可缩放 | 游戏 UI,实时文字效果 |
| CSS3D 混合渲染 | DOM 元素通过 CSS Transform 定位 | 低性能,高灵活性 | 复杂 UI,丰富交互 |
对于隧道监控这种需要显示复杂业务数据、支持按钮交互的场景,我们选择 CSS3DSprite:
javascript
// 设备标签管理器
class DeviceLabelManager {
  constructor(scene, camera, renderer) {
    this.scene = scene;
    this.camera = camera;
    this.renderer = renderer;
    this.labels = new Map(); // deviceId -> labelInfo
    this.css3DRenderer = new CSS3DRenderer();
    this.css3DScene = new THREE.Scene();

    // 设置 CSS3D 渲染器
    this.css3DRenderer.setSize(window.innerWidth, window.innerHeight);
    this.css3DRenderer.domElement.style.position = 'absolute';
    this.css3DRenderer.domElement.style.top = '0';
    this.css3DRenderer.domElement.style.pointerEvents = 'none';
    document.body.appendChild(this.css3DRenderer.domElement);
  }

  // 创建设备标签
  createDeviceLabel(deviceData, position) {
    const { id, type, name, status, data } = deviceData;

    // 创建 DOM 元素
    const labelElement = document.createElement('div');
    labelElement.className = 'device-label';
    labelElement.style.pointerEvents = 'auto'; // 允许交互

    // 根据设备状态设置样式
    const statusColor = this.getStatusColor(status);
    labelElement.innerHTML = `
      <div class="label-header" style="border-color: ${statusColor}">
        <div class="device-icon ${type}"></div>
        <div class="device-name">${name}</div>
        <div class="device-status" style="color: ${statusColor}">
          ${this.getStatusText(status)}
        </div>
      </div>
      <div class="label-content">
        ${this.renderDeviceData(type, data)}
      </div>
      <div class="label-actions">
        <button onclick="this.handleDeviceAction('${id}', 'detail')">详情</button>
        ${status === 'error' ?
          `<button onclick="this.handleDeviceAction('${id}', 'repair')">报修</button>` :
          ''}
      </div>
    `;

    // 创建 CSS3D 对象
    const labelObject = new CSS3DSprite(labelElement);
    labelObject.position.copy(position);
    labelObject.position.y += 50; // 标签显示在设备上方

    // 添加到场景
    this.css3DScene.add(labelObject);

    // 存储引用
    this.labels.set(id, {
      element: labelElement,
      object: labelObject,
      deviceData,
      lastUpdate: Date.now()
    });

    return labelObject;
  }

  // 根据设备类型渲染数据
  renderDeviceData(type, data) {
    switch (type) {
      case 'camera':
        return `
          <div class="data-item">分辨率: ${data.resolution}</div>
          <div class="data-item">帧率: ${data.fps}fps</div>
          <div class="data-item">码率: ${data.bitrate}kbps</div>
        `;
      case 'sensor':
        return `
          <div class="data-item">温度: ${data.temperature}°C</div>
          <div class="data-item">湿度: ${data.humidity}%</div>
          <div class="data-item">CO浓度: ${data.co}ppm</div>
        `;
      case 'light':
        return `
          <div class="data-item">功率: ${data.power}W</div>
          <div class="data-item">亮度: ${data.brightness}%</div>
          <div class="data-item">运行时间: ${data.runtime}h</div>
        `;
      default:
        return '<div class="data-item">暂无数据</div>';
    }
  }

  // 批量更新标签(性能优化)
  updateLabels(deltaTime) {
    const now = Date.now();
    this.labels.forEach((labelInfo, deviceId) => {
      // 节流更新:每500ms更新一次
      if (now - labelInfo.lastUpdate > 500) {
        this.updateLabelContent(labelInfo);
        labelInfo.lastUpdate = now;
      }
    });
  }

  // 渲染标签
  render() {
    this.css3DRenderer.render(this.css3DScene, this.camera);
  }
}
1.3 坐标变换的数学原理
CSS3DRenderer 的核心是将 3D 世界坐标转换为屏幕上的 DOM 元素位置。这个过程涉及完整的图形学变换管线:
javascript
// Three.js 内部的坐标变换过程
function worldToScreen(worldPosition, camera) {
  // 1. 世界坐标 → 相机坐标(视图变换)
  const viewMatrix = camera.matrixWorldInverse;
  const cameraPosition = worldPosition.clone().applyMatrix4(viewMatrix);

  // 2. 相机坐标 → 裁剪坐标(投影变换)
  const projectionMatrix = camera.projectionMatrix;
  const clipPosition = cameraPosition.clone().applyMatrix4(projectionMatrix);

  // 3. 透视除法:裁剪坐标 → 标准化设备坐标 (NDC)
  const ndc = new THREE.Vector3(
    clipPosition.x / clipPosition.w,
    clipPosition.y / clipPosition.w,
    clipPosition.z / clipPosition.w
  );

  // 4. NDC → 屏幕坐标
  const screenX = (ndc.x + 1) * 0.5 * window.innerWidth;
  const screenY = (1 - ndc.y) * 0.5 * window.innerHeight;

  return { x: screenX, y: screenY, z: ndc.z };
}关键概念解析:
- 齐次坐标:使用 4D 向量 (x, y, z, w) 表示 3D 点,支持透视投影
- 透视除法:通过 w 分量实现近大远小的视觉效果
- NDC 空间:标准化的 -1, 1 立方体,便于后续屏幕映射
1.4 实际应用示例
在隧道场景中,我们为不同类型的设备创建标签:
javascript
// 在隧道初始化时创建设备标签
function initTunnelDevices() {
  const labelManager = new DeviceLabelManager(scene, camera, renderer);

  // 摄像机设备
  const cameraDevices = [
    {
      id: 'cam_001',
      type: 'camera',
      name: '入口监控',
      status: 'online',
      position: new THREE.Vector3(-100, 200, 1 resolution: '1920x1080', fps: 25, bitrate: 2048 }
    },
    {
      id: 'cam_002',
      type: 'camera',
      name: '出口监控',
      status: 'offline',
      position: new THREE.Vector3(100, 200, - resolution: '1920x1080', fps: 0, bitrate: 0 }
    }
  ];

  // 环境传感器
  const sensorDevices = [
    {
      id: 'sensor_001',
      type: 'sensor',
      name: '环境监测点1',
      status: 'online',
      position: new THREE.Vector3(-50, 150, 500 23.5, humidity: 65, co: 12 }
    }
  ];

  // 创建标签
  [...cameraDevices, ...sensorDevices].forEach(device => {
    labelManager.createDeviceLabel(device, device.position);
  });

  // 在渲染循环中更新
  function animate() {
    labelManager.updateLabels();
    labelManager.render();
    requestAnimationFrame(animate);
  }
}
02 射线投射交互:精确的设备点击检测
2.1 隧道监控的交互需求
在隧道监控场景中,用户需要能够:
- 点击摄像机查看实时视频流
- 点击传感器查看历史数据趋势
- 点击故障设备进行报修操作
- 支持多选设备进行批量操作
这就需要一个精确、高效的 3D 对象选择系统。
2.2 射线投射的数学原理与实现
射线投射(Ray Casting)是解决"鼠标点击了哪个 3D 对象"问题的标准算法:
javascript
class TunnelInteractionManager {
constructor(scene, camera, renderer) {
this.scene = scene;
this.camera = camera;
this.renderer = renderer;
this.raycaster = new THREE.Raycaster();
this.mouse = new THREE.Vector2();
// 分层管理可交互对象
this.interactableObjects = {
cameras: new Map(), // 摄像机对象
sensors: new Map(), // 传感器对象
lights: new Map(), // 照明设备
infrastructure: new Map() // 基础设施
};
this.selectedObjects = new Set();
this.hoveredObject = null;
this.initEventListeners();
}
initEventListeners() {
const canvas = this.renderer.domElement;
canvas.addEventListener('click', (event) => this.onMouseClick(event));
canvas.addEventListener('mousemove', (event) => this.onMouseMove(event));
canvas.addEventListener('dblclick', (event) => this.onMouseDoubleClick(event));
}
// 更新鼠标位置(屏幕坐标 → NDC)
updateMousePosition(event) {
const rect = this.renderer.domElement.getBoundingClientRect();
this.mouse.x = ((event.clientX - rect.left) / rect.width) * 2 - 1;
this.mouse.y = -((event.clientY - rect.top) / rect.height) * 2 + 1;
}
// 鼠标点击处理
onMouseClick(event) {
this.updateMousePosition(event);
this.raycaster.setFromCamera(this.mouse, this.camera);
// 按优先级检测交互对象
const intersectionResult = this.detectIntersections();
if (intersectionResult) {
const { object, deviceType, deviceData } = intersectionResult;
if (event.ctrlKey) {
// Ctrl+点击:多选模式
this.toggleSelection(object);
} else {
// 单击:选择单个对象
this.selectObject(object);
this.handleDeviceInteraction(deviceType, deviceData);
}
} else {
// 点击空白区域:清除选择
this.clearSelection();
}
}
// 检测射线与对象的交集
detectIntersections() {
// 按优先级顺序检测不同类型的设备
const layerPriority = ['cameras', 'sensors', 'lights', 'infrastructure'];
for (const layerName of layerPriority) {
const objects = Array.from(this.interactableObjects[layerName].keys());
const intersects = this.raycaster.intersectObjects(objects, true);
if (intersects.length > 0) {
const intersectedObject = intersects[0].object;
const deviceData = this.interactableObjects[layerName].get(intersectedObject);
return {
object: intersectedObject,
deviceType: layerName,
deviceData: deviceData,
intersection: intersects[0]
};
}
}
return null;
}
// 处理不同类型设备的交互
handleDeviceInteraction(deviceType, deviceData) {
switch (deviceType) {
case 'cameras':
this.handleCameraInteraction(deviceData);
break;
case 'sensors':
this.handleSensorInteraction(deviceData);
break;
case 'lights':
this.handleLightInteraction(deviceData);
break;
default:
this.handleGenericInteraction(deviceData);
}
}
// 摄像机交互:显示视频流
handleCameraInteraction(cameraData) {
if (cameraData.status === 'online') {
this.showVideoModal(cameraData);
} else {
this.showDeviceErrorDialog(cameraData);
}
// 添加视觉反馈
this.highlightObject(cameraData.object, '#00ff00');
}
// 显示视频弹窗
showVideoModal(cameraData) {
const modal = document.createElement('div');
modal.className = 'video-modal';
modal.innerHTML = `
<div class="modal-content">
<div class="modal-header">
<h3>${cameraData.name} - 实时视频</h3>
<button class="close-btn" onclick="this.closeModal()">×</button>
</div>
<div class="modal-body">
<video controls autoplay>
<source src="${cameraData.streamUrl}" type="video/mp4">
您的浏览器不支持视频播放
</video>
<div class="video-info">
<p>分辨率: ${cameraData.data.resolution}</p>
<p>帧率: ${cameraData.data.fps} fps</p>
<p>码率: ${cameraData.data.bitrate} kbps</p>
</div>
</div>
</div>
`;
document.body.appendChild(modal);
}
// 对象高亮效果
highlightObject(object, color = '#ffff00') {
// 使用 OutlinePass 或修改材质实现高亮
if (this.outlinePass) {
this.outlinePass.selectedObjects = [object];
} else {
// 备用方案:修改材质颜色
const originalMaterial = object.material;
object.material = originalMaterial.clone();
object.material.emissive.setHex(color);
// 3秒后恢复原始材质
setTimeout(() => {
object.material = originalMaterial;
}, 3000);
}
}
}2.3 射线-三角形相交检测算法
Three.js 内部使用高效的 Möller-Trumbore 算法 进行射线与三角形的相交检测:
javascript
// Möller-Trumbore 射线-三角形相交算法
function rayTriangleIntersect(rayOrigin, rayDirection, triangle) {
  const { a, b, c } = triangle; // 三角形三个顶点
  const EPSILON = 0.0000001;

  // 计算三角形的两条边
  const edge1 = b.clone().sub(a);
  const edge2 = c.clone().sub(a);

  // 计算射线方向与 edge2 的叉积
  const h = rayDirection.clone().cross(edge2);
  const det = edge1.dot(h);

  // 如果行列式接近0,射线与三角形平行
  if (det > -EPSILON && det < EPSILON) {
    return null;
  }

  const invDet = 1.0 / det;
  const s = rayOrigin.clone().sub(a);
  const u = invDet * s.dot(h);

  // 检查重心坐标 u
  if (u < 0.0 || u > 1.0) {
    return null;
  }

  const q = s.cross(edge1);
  const v = invDet * rayDirection.dot(q);

  // 检查重心坐标 v
  if (v < 0.0 || u + v > 1.0) {
    return null;
  }

  // 计算交点参数 t
  const t = invDet * edge2.dot(q);

  if (t > EPSILON) {
    // 射线与三角形相交
    const intersectionPoint = rayOrigin.clone().add(
      rayDirection.clone().multiplyScalar(t)
    );
    return {
      point: intersectionPoint,
      distance: t,
      u: u,
      v: v
    };
  }

  return null; // 线段相交,但射线不相交
}
2.4 性能优化策略
对于复杂的隧道场景,我们需要优化射线检测性能:
javascript
// 使用 BVH 加速结构优化射线检测
import { MeshBVH, acceleratedRaycast } from 'three-mesh-bvh';

class OptimizedInteractionManager extends TunnelInteractionManager {
  constructor(scene, camera, renderer) {
    super(scene, camera, renderer);
    this.setupBVHAcceleration();
  }

  // 为复杂模型设置 BVH 加速结构
  setupBVHAcceleration() {
    this.scene.traverse((object) => {
      if (object.isMesh && object.geometry.attributes.position.count > 1000) {
        // 为顶点数较多的模型构建 BVH
        object.geometry.boundsTree = new MeshBVH(object.geometry);
        object.raycast = acceleratedRaycast;
      }
    });
  }

  // 使用空间分割优化大场景检测
  detectIntersections() {
    // 首先进行粗略的包围盒检测
    const candidates = this.getCandidateObjects();

    if (candidates.length === 0) return null;

    // 对候选对象进行精确的射线检测
    const intersects = this.raycaster.intersectObjects(candidates, true);

    if (intersects.length > 0) {
      return this.processIntersection(intersects[0]);
    }

    return null;
  }

  // 获取候选对象(空间裁剪)
  getCandidateObjects() {
    const candidates = [];
    const frustum = new THREE.Frustum();
    const cameraMatrix = new THREE.Matrix4().multiplyMatrices(
      this.camera.projectionMatrix,
      this.camera.matrixWorldInverse
    );
    frustum.setFromProjectionMatrix(cameraMatrix);

    // 只检测在视锥体内的对象
    for (const [layerName, objectMap] of Object.entries(this.interactableObjects)) {
      for (const [object, data] of objectMap) {
        if (frustum.intersectsObject(object)) {
          candidates.push(object);
        }
      }
    }

    return candidates;
  }
}
03 机器人巡检动画:基于样条曲线的智能路径规划
3.1 隧道巡检的实际需求
在真实的隧道监控系统中,巡检机器人需要:
- 沿着预定路径自动巡检
- 在关键节点停留检测
- 遇到障碍物时自动避让
- 支持远程控制和路径调整
- 实时回传巡检数据
3.2 路径规划的数学建模
我们使用 Catmull-Rom 样条曲线 来构建平滑的巡检路径:
javascript
class TunnelPatrolSystem {
  constructor(scene) {
    this.scene = scene;
    this.robot = null;
    this.patrolPath = null;
    this.currentProgress = 0;
    this.patrolSpeed = 0.001; // 巡检速度
    this.isPatrolling = false;
    this.patrolDirection = 1; // 1: 正向, -1: 反向

    // 巡检关键点
    this.waypoints = [
      new THREE.Vector3(-1500, 20, 0),   // 起点
      new THREE.Vector3(-1000, 20, 0),   // 检查点1
      new THREE.Vector3(-500, 20, 0),    // 检查点2
      new THREE.Vector3(0, 20, 0),       // 中心点
      new THREE.Vector3(500, 20, 0),     // 检查点3
      new THREE.Vector3(1000, 20, 0),    // 检查点4
      new THREE.Vector3(1500, 20, 0)     // 终点
    ];

    this.initPatrolPath();
    this.loadRobotModel();
  }

  // 初始化巡检路径
  initPatrolPath() {
    // 创建 Catmull-Rom 曲线
    this.patrolPath = new THREE.CatmullRomCurve3(this.waypoints);
    this.patrolPath.closed = false; // 非闭合路径
    this.patrolPath.curveType = 'catmullrom';
    this.patrolPath.tension = 0.5; // 曲线张力

    // 可视化路径(调试用)
    this.visualizePath();
  }

  // 可视化巡检路径
  visualizePath() {
    const points = this.patrolPath.getPoints(100);
    const geometry = new THREE.BufferGeometry().setFromPoints(points);
    const material = new THREE.LineBasicMaterial({
      color: 0x00ff00,
      transparent: true,
      opacity: 0.6
    });
    const pathLine = new THREE.Line(geometry, material);
    this.scene.add(pathLine);

    // 添加路径点标记
    this.waypoints.forEach((point, index) => {
      const markerGeometry = new THREE.SphereGeometry(10, 8, 8);
      const markerMaterial = new THREE.MeshBasicMaterial({ color: 0xff0000 });
      const marker = new THREE.Mesh(markerGeometry, markerMaterial);
      marker.position.copy(point);
      this.scene.add(marker);
    });
  }

  // 加载机器人模型
  async loadRobotModel() {
    const loader = new GLTFLoader();
    try {
      const gltf = await loader.loadAsync('/models/patrol_robot.gltf');
      this.robot = gltf.scene;
      this.robot.scale.setScalar(10);

      // 设置初始位置
      const startPosition = this.patrolPath.getPoint(0);
      this.robot.position.copy(startPosition);

      // 初始化动画混合器
      if (gltf.animations.length > 0) {
        this.animationMixer = new THREE.AnimationMixer(this.robot);
        this.walkAction = this.animationMixer.clipAction(gltf.animations[0]);
        this.walkAction.play();
      }

      this.scene.add(this.robot);
      console.log('巡检机器人加载完成');
    } catch (error) {
      console.error('机器人模型加载失败:', error);
      this.createFallbackRobot();
    }
  }

  // 创建备用机器人模型
  createFallbackRobot() {
    const robotGroup = new THREE.Group();

    // 机器人主体
    const bodyGeometry = new THREE.BoxGeometry(30, 40, 60);
    const bodyMaterial = new THREE.MeshLambertMaterial({ color: 0x4169E1 });
    const body = new THREE.Mesh(bodyGeometry, bodyMaterial);
    body.position.y = 20;

```javascript
  // 机器人头部(传感器)
    const headGeometry = new THREE.SphereGeometry(15);
    const headMaterial = new THREE.MeshLambertMaterial({ color: 0x00ff00 });
    const head = new THREE.Mesh(headGeometry, headMaterial);
    head.position.y = 50;

    // 机器人轮子
    const wheelGeometry = new THREE.CylinderGeometry(8, 8, 5);
    const wheelMaterial = new THREE.MeshLambertMaterial({ color: 0x333333 });

    const wheels = [];
    const wheelPositions = [
      { x: -15, y: -10, z: 20 },
      { x: 15, y: -10, z: 20 },
      { x: -15, y: -10, z: -20 },
      { x: 15, y: -10, z: -20 }
    ];

    wheelPositions.forEach(pos => {
      const wheel = new THREE.Mesh(wheelGeometry, wheelMaterial);
      wheel.position.set(pos.x, pos.y, pos.z);
      wheel.rotation.z = Math.PI / 2;
      wheels.push(wheel);
      robotGroup.add(wheel);
    });

    robotGroup.add(body);
    robotGroup.add(head);

    this.robot = robotGroup;
    this.robot.wheels = wheels; // 保存轮子引用用于动画

    const startPosition = this.patrolPath.getPoint(0);
    this.robot.position.copy(startPosition);
    this.scene.add(this.robot);
  }

  // 开始巡检
  startPatrol() {
    this.isPatrolling = true;
    console.log('开始自动巡检');
  }

  // 停止巡检
  stopPatrol() {
    this.isPatrolling = false;
    console.log('停止巡检');
  }

  // 更新巡检动画
  updatePatrol(deltaTime) {
    if (!this.isPatrolling || !this.robot) return;

    // 更新进度
    this.currentProgress += this.patrolSpeed * this.patrolDirection * deltaTime;

    // 检查边界并反向
    if (this.currentProgress >= 1) {
      this.currentProgress = 1;
      this.patrolDirection = -1;
      this.onReachWaypoint('end');
    } else if (this.currentProgress <= 0) {
      this.currentProgress = 0;
      this.patrolDirection = 1;
      this.onReachWaypoint('start');
    }

    // 获取当前位置和切线方向
    const currentPosition = this.patrolPath.getPoint(this.currentProgress);
    const tangent = this.patrolPath.getTangent(this.currentProgress);

    // 更新机器人位置
    this.robot.position.copy(currentPosition);

    // 更新机器人朝向
    const lookAtPosition = currentPosition.clone().add(tangent);
    this.robot.lookAt(lookAtPosition);

    // 轮子旋转动画
    if (this.robot.wheels) {
      const rotationSpeed = this.patrolSpeed * deltaTime * 100;
      this.robot.wheels.forEach(wheel => {
        wheel.rotation.x += rotationSpeed * this.patrolDirection;
      });
    }

    // 更新骨骼动画
    if (this.animationMixer) {
      this.animationMixer.update(deltaTime);
    }

    // 检查是否到达关键检测点
    this.checkWaypoints();
  }

  // 检查关键点
  checkWaypoints() {
    const tolerance = 0.05; // 容差范围
    this.waypoints.forEach((waypoint, index) => {
      const waypointProgress = index / (this.waypoints.length - 1);
      if (Math.abs(this.currentProgress - waypointProgress) < tolerance) {
        this.onReachWaypoint(index);
      }
    });
  }

  // 到达关键点的处理
  onReachWaypoint(waypointIndex) {
    console.log(`机器人到达检查点: ${waypointIndex}`);

    // 模拟数据采集
    this.collectSensorData(waypointIndex);

    // 可以在这里添加暂停逻辑
    // this.pauseAtWaypoint(waypointIndex);
  }

  // 模拟传感器数据采集
  collectSensorData(waypointIndex) {
    const sensorData = {
      timestamp: new Date().toISOString(),
      position: this.robot.position.clone(),
      waypoint: waypointIndex,
      temperature: 20 + Math.random() * 10,
      humidity: 50 + Math.random() * 30,
      airQuality: Math.random() * 100
    };

    console.log('采集传感器数据:', sensorData);

    // 发送数据到服务器
    this.sendPatrolData(sensorData);
  }

  // 发送巡检数据
  async sendPatrolData(data) {
    try {
      // 模拟 WebSocket 或 HTTP 请求
      // await fetch('/api/patrol-data', {
      //   method: 'POST',
      //   headers: { 'Content-Type': 'application/json' },
      //   body: JSON.stringify(data)
      // });

      console.log('巡检数据已上传');
    } catch (error) {
      console.error('数据上传失败:', error);
    }
  }
}
3.3 样条曲线的数学原理
Catmull-Rom 样条曲线的数学表达式为:
javascript
// Catmull-Rom 样条插值公式
function catmullRomInterpolation(p0, p1, p2, p3, t) {
  const t2 = t * t;
  const t3 = t2 * t;

  // Catmull-Rom 基函数
  const v0 = -0.5 * t3 + t2 - 0.5 * t;
  const v1 = 1.5 * t3 - 2.5 * t2 + 1;
  const v2 = -1.5 * t3 + 2 * t2 + 0.5 * t;
  const v3 = 0.5 * t3 - 0.5 * t2;

  return p0.clone().multiplyScalar(v0)
    .add(p1.clone().multiplyScalar(v1))
    .add(p2.clone().multiplyScalar(v2))
    .add(p3.clone().multiplyScalar(v3));
}优势:
- C1 连续性:曲线在连接点处切线连续
- 局部控制:修改一个控制点只影响附近的曲线段
- 插值特性:曲线通过所有控制点
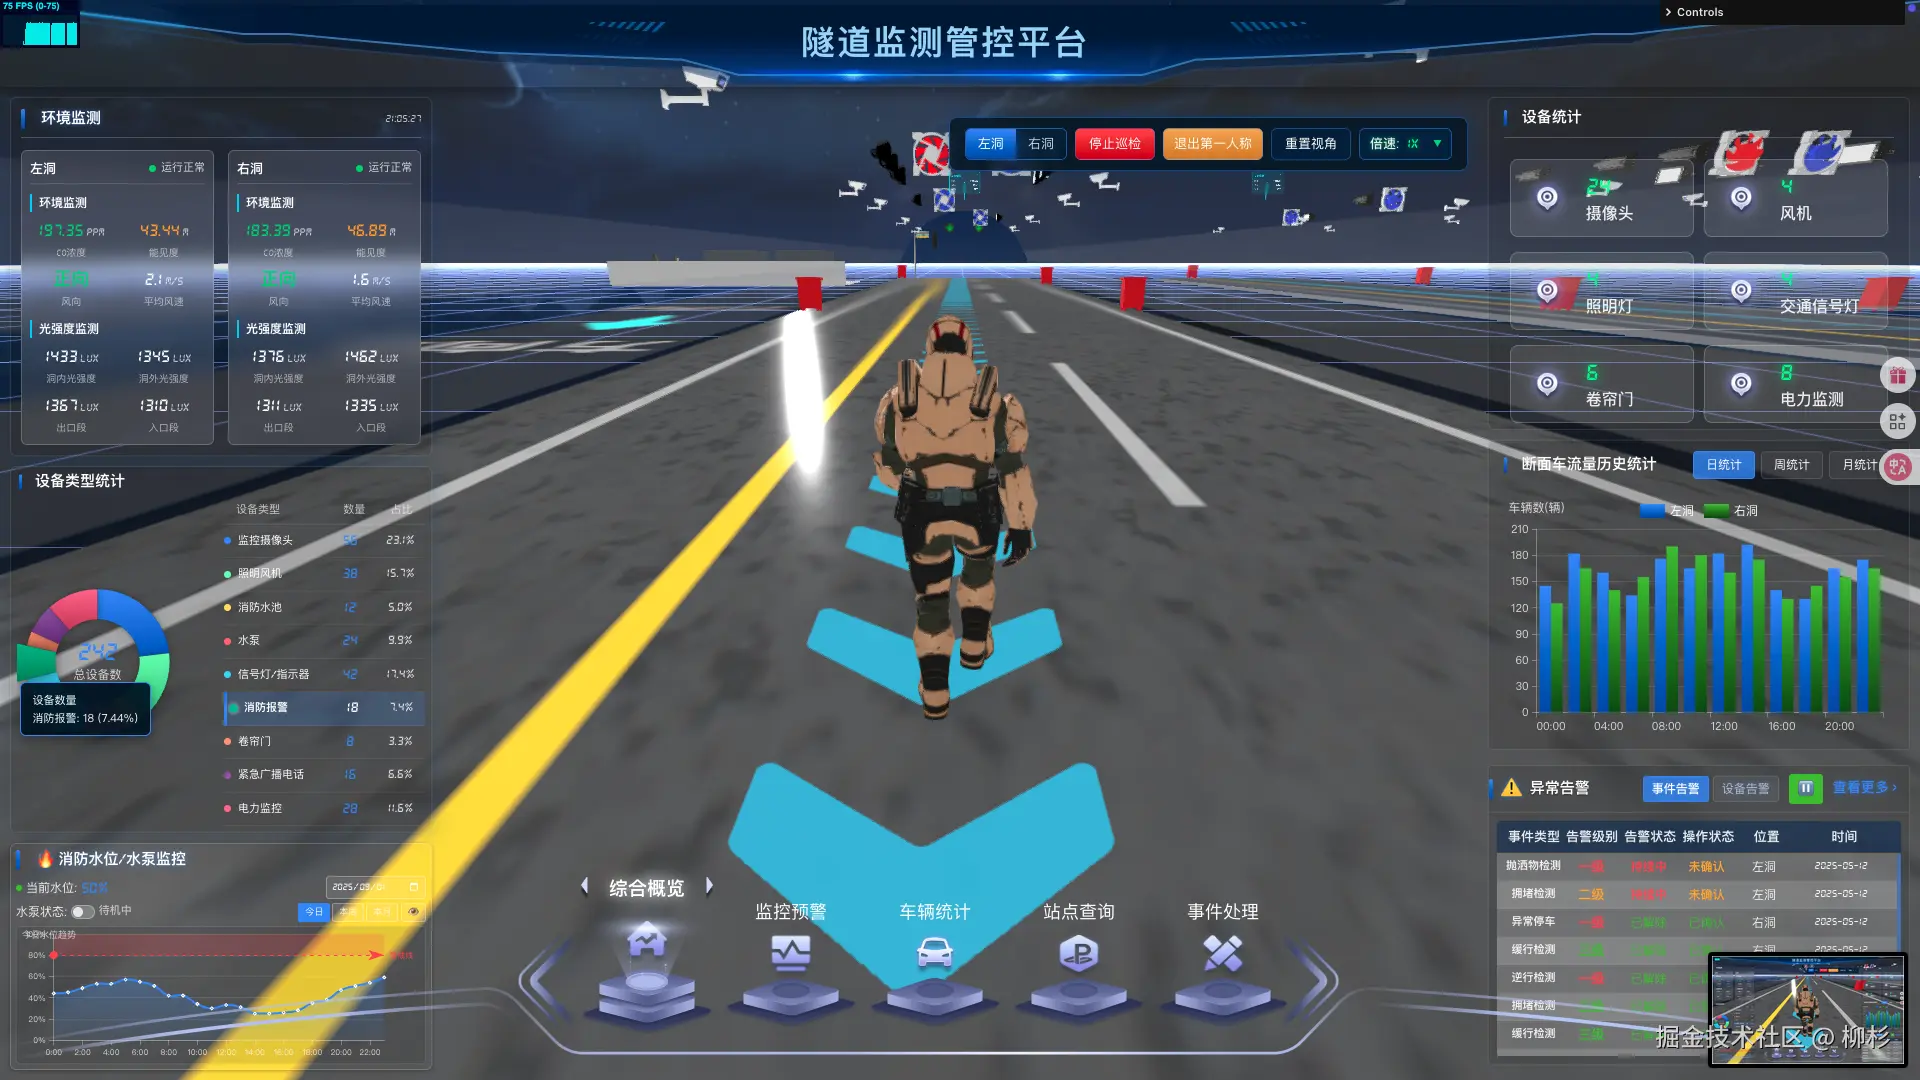
04 第一人称视角系统:沉浸式巡检体验
4.1 多视角切换的设计理念
现代数字孪生系统需要支持多种视角模式:
- 自由视角:全局观察,适合总体监控
- 跟随视角:第三人称跟随机器人
- 第一人称:机器人视角,沉浸式体验
- 固定监控点:模拟真实摄像机视角
4.2 第一人称视角的数学模型
javascript
class CameraControlSystem {
  constructor(camera, controls) {
    this.camera = camera;
    this.orbitControls = controls;
    this.viewMode = 'free'; // 'free', 'follow', 'firstPerson', 'fixed'
    this.target = null;

    // 第一人称参数
    this.fpvOffset = new THREE.Vector3(0, 40, 10); // 相对于机器人的偏移
    this.fpvLookAhead = 100; // 前视距离

    // 跟随视角参数
    this.followOffset = new THREE.Vector3(0, 100, 200);
    this.followSmoothing = 0.1;

    // 固定监控点
    this.monitoringPoints = [
      { position: new THREE.Vector3(-1000, 200, 0), target: new THREE.Vector3(-500, 0, 0) },
      { position: new THREE.Vector3(0, 200, 500), target: new THREE.Vector3(0, 0, 0) },
      { position: new THREE.Vector3(1000, 200, 0), target: new THREE.Vector3(500, 0, 0) }
    ];
    this.currentMonitorIndex = 0;
  }

  // 设置视角模式
  setViewMode(mode, target = null) {
    this.viewMode = mode;
    this.target = target;

    switch (mode) {
      case 'free':
        this.enableOrbitControls();
        break;
      case 'follow':
        this.disableOrbitControls();
        break;
      case 'firstPerson':
        this.disableOrbitControls();
        break;
      case 'fixed':
        this.disableOrbitControls();
        this.setFixedView();
        break;
    }

    console.log(`切换到${mode}视角模式`);
  }

  // 更新相机
  update(deltaTime) {
    switch (this.viewMode) {
      case 'follow':
        this.updateFollowCamera(deltaTime);
        break;
      case 'firstPerson':
        this.updateFirstPersonCamera(deltaTime);
        break;
      case 'fixed':
        this.updateFixedCamera(deltaTime);
        break;
    }
  }

  // 更新第一人称视角
  updateFirstPersonCamera(deltaTime) {
    if (!this.target) return;

    // 获取机器人的世界坐标和旋转
    const robotWorldPos = this.target.getWorldPosition(new THREE.Vector3());
    const robotWorldQuat = this.target.getWorldQuaternion(new THREE.Quaternion());

    // 计算相机位置(机器人眼睛位置)
    const eyePosition = this.fpvOffset.clone()
      .applyQuaternion(robotWorldQuat)
      .add(robotWorldPos);

    // 计算前视方向
    const forwardDirection = new THREE.Vector3(0, 0, -1)
      .applyQuaternion(robotWorldQuat);

    const lookAtPosition = eyePosition.clone()
      .add(forwardDirection.multiplyScalar(this.fpvLookAhead));

    // 平滑插值更新相机
    this.camera.position.lerp(eyePosition, 0.2);

    // 使用 lookAt 而不是直接设置旋转,避免万向锁
    this.camera.lookAt(lookAtPosition);

    // 可选:添加轻微的摇摆效果模拟行走
    const walkSway = Math.sin(Date.now() * 0.01) * 0.5;
    this.camera.rotation.z = walkSway * 0.01;
  }

  // 更新跟随视角
  updateFollowCamera(deltaTime) {
    if (!this.target) return;

    const targetPos = this.target.getWorldPosition(new THREE.Vector3());
    const targetQuat = this.target.getWorldQuaternion(new THREE.Quaternion());

    // 计算跟随位置
    const followPos = this.followOffset.clone()
      .applyQuaternion(targetQuat)
      .add(targetPos);

    // 平滑跟随
    this.camera.position.lerp(followPos, this.followSmoothing);
    this.camera.lookAt(targetPos);
  }

  // 更新固定监控视角
  updateFixedCamera(deltaTime) {
    const currentPoint = this.monitoringPoints[this.currentMonitorIndex];
    if (currentPoint) {
      this.camera.position.lerp(currentPoint.position, 0.05);

      // 如果有目标,跟踪目标;否则看向预设点
      const lookTarget = this.target ?
        this.target.getWorldPosition(new THREE.Vector3()) :
        currentPoint.target;

      this.camera.lookAt(lookTarget);
    }
  }

  // 切换监控点
  switchMonitoringPoint(index) {
    if (index >= 0 && index < this.monitoringPoints.length) {
      this.currentMonitorIndex = index;
      console.log(`切换到监控点 ${index + 1}`);
    }
  }

  // 启用轨道控制
  enableOrbitControls() {
    if (this.orbitControls) {
      this.orbitControls.enabled = true;
    }
  }

  // 禁用轨道控制
  disableOrbitControls() {
    if (this.orbitControls) {
      this.orbitControls.enabled = false;
    }
  }

  // 设置固定视角
  setFixedView() {
    const currentPoint = this.monitoringPoints[this.currentMonitorIndex];
    if (currentPoint) {
      this.camera.position.copy(currentPoint.position);
      this.camera.lookAt(currentPoint.target);
    }
  }
}
4.3 视角切换的用户界面
javascript
// 创建视角控制面板
class ViewControlPanel {
  constructor(cameraSystem) {
    this.cameraSystem = cameraSystem;
    this.createUI();
  }

  createUI() {
    const panel = document.createElement('div');
    panel.className = 'view-control-panel';
    panel.innerHTML = `
      <div class="panel-header">视角控制</div>
      <div class="view-buttons">
        <button data-mode="free" class="view-btn active">自由视角</button>
        <button data-mode="follow" class="view-btn">跟随视角</button>
        <button data-mode="firstPerson" class="view-btn">第一人称</button>
        <button data-mode="fixed" class="view-btn">监控视角</button>
      </div>
      <div class="monitor-points" style="display: none;">
        <label>监控点:</label>
        <select id="monitorSelect">
          <option value="0">入口监控</option>
          <option value="1">中段监控</option>
          <option value="2">出口监控</option>
        </select>
      </div>
      <div class="view-info">
        <div class="info-item">
          <span>当前模式:</span>
          <span id="currentMode">自由视角</span>
        </div>
        <div class="info-item">
          <span>目标:</span>
          <span id="currentTarget">无</span>
        </div>
      </div>
    `;

    // 添加事件监听
    panel.querySelectorAll('.view-btn').forEach(btn => {
      btn.addEventListener('click', (e) => {
        const mode = e.target.dataset.mode;
        this.switchViewMode(mode);
      });
    });

    document.getElementById('monitorSelect').addEventListener('change', (e) => {
      const index = parseInt(e.target.value);
      this.cameraSystem.switchMonitoringPoint(index);
    });

    document.body.appendChild(panel);
  }

  switchViewMode(mode) {
    // 更新按钮状态
    document.querySelectorAll('.view-btn').forEach(btn => {
      btn.classList.remove('active');
    });
    document.querySelector(`[data-mode="${mode}"]`).classList.add('active');

    // 显示/隐藏监控点选择
    const monitorPoints = document.querySelector('.monitor-points');
    monitorPoints.style.display = mode === 'fixed' ? 'block' : 'none';

    // 切换视角
    const target = ['follow', 'firstPerson'].includes(mode) ?
      window.patrolSystem?.robot : null;

    this.cameraSystem.setViewMode(mode, target);

    // 更新信息显示
    document.getElementById('currentMode').textContent = this.getModeDisplayName(mode);
    document.getElementById('currentTarget').textContent = target ? '巡检机器人' : '无';
  }

  getModeDisplayName(mode) {
    const names = {
      'free': '自由视角',
      'follow': '跟随视角',
      'firstPerson': '第一人称',
      'fixed': '监控视角'
    };
    return names[mode] || mode;
  }
}
4.4 视角切换的数学原理
四元数旋转避免万向锁:
javascript
// 使用四元数进行平滑旋转插值
function smoothRotation(currentQuat, targetQuat, factor) {
  return currentQuat.slerp(targetQuat, factor);
}

// 从方向向量计算四元数
function directionToQuaternion(direction, up = new THREE.Vector3(0, 1, 0)) {
  const matrix = new THREE.Matrix4();
  matrix.lookAt(new THREE.Vector3(), direction, up);
  return new THREE.Quaternion().setFromRotationMatrix(matrix);
}位置插值的数学表达:
javascript
// 线性插值 (LERP)
P(t) = (1-t) * P0 + t * P1

// 球面线性插值 (SLERP) - 用于旋转
Q(t) = Q0 * (Q0^-1 * Q1)^t
05 资源管理与性能优化:企业级系统的稳定性保障
5.1 内存泄漏的根本原因
WebGL 应用中的内存泄漏主要来源于:
- GPU 资源未释放:几何体、纹理、着色器程序
- JavaScript 引用循环:对象间的相互引用
- 事件监听器残留:DOM 事件、动画回调
- 定时器未清理:setInterval、setTimeout
5.2 系统级资源管理器
javascript
class ResourceManager {
  constructor() {
    this.resources = {
      geometries: new Set(),
      materials: new Set(),
      textures: new Set(),
      animations: new Set(),
      eventListeners: new Map(),
      timers: new Set()
    };

    this.disposed = false;
  }

  // 注册资源
  registerGeometry(geometry) {
    this.resources.geometries.add(geometry);
    return geometry;
  }

  registerMaterial(material) {
    this.resources.materials.add(material);
    return material;
  }

  registerTexture(texture) {
    this.resources.textures.add(texture);
    return texture;
  }

  registerAnimation(mixer, action) {
    this.resources.animations.add({ mixer, action });
    return action;
  }

  // 注册事件监听器
  registerEventListener(element, event, handler) {
    const key = `${element.constructor.name}_${event}`;
    if (!this.resources.eventListeners.has(key)) {
      this.resources.eventListeners.set(key, []);
    }
    this.resources.eventListeners.get(key).push({ element, event, handler });
    element.addEventListener(event, handler);
  }

  // 注册定时器
  registerTimer(timerId) {
    this.resources.timers.add(timerId);
    return timerId;
  }

  // 深度清理对象
  disposeObject(object) {
    if (!object) return;

    // 递归清理子对象
    if (object.children) {
      while (object.children.length > 0) {
        this.disposeObject(object.children[0]);
        object.remove(object.children[0]);
      }
    }

    // 清理几何体
    if (object.geometry) {
      object.geometry.dispose();
      this.resources.geometries.delete(object.geometry);
    }

    // 清理材质
    if (object.material) {
      const materials = Array.isArray(object.material) ?
        object.material : [object.material];

      materials.forEach(material => {
        // 清理材质中的纹理
        Object.keys(material).forEach(key => {
          const value = material[key];
          if (value && value.isTexture) {
            value.dispose();
            this.resources.textures.delete(value);
          }
        });

        material.dispose();
        this.resources.materials.delete(material);
      });
    }

    // 清理纹理
    if (object.texture) {
      object.texture.dispose();
      this.resources.textures.delete(object.texture);
    }

    // 从父对象移除
    if (object.parent) {
      object.parent.remove(object);
    }
  }

  // 清理所有资源
  disposeAll() {
    if (this.disposed) return;

    console.log('开始清理所有资源...');

    // 清理几何体
    this.resources.geometries.forEach(geometry => {
      try {
        geometry.dispose();
      } catch (error) {
        console.warn('几何体清理失败:', error);
      }
    });

    // 清理材质
    this.resources.materials.forEach(material => {
      try {
        material.dispose();
      } catch (error) {
        console.warn('材质清理失败:', error);
      }
    });

    // 清理纹理
    this.resources.textures.forEach(texture => {
      try {
        texture.dispose();
      } catch (error) {
        console.warn('纹理清理失败:', error);
      }
    });

    // 停止动画
    this.resources.animations.forEach(({ mixer, action }) => {
      try {
        action.stop();
        mixer.uncacheAction(action);
      } catch (error) {
        console.warn('动画清理失败:', error);
      }
    });

    // 移除事件监听器
    this.resources.eventListeners.forEach((listeners, key) => {
      listeners.forEach(({ element, event, handler }) => {
        try {
          element.removeEventListener(event, handler);
        } catch (error) {
          console.warn('事件监听器清理失败:', error);
        }
      });
    });

    // 清理定时器
    this.resources.timers.forEach(timerId => {
      try {
        clearInterval(timerId);
        clearTimeout(timerId);
      } catch (error) {
        console.warn('定时器清理失败:', error);
      }
    });

    // 清空资源集合
    Object.values(this.resources).forEach(collection => {
      if (collection.clear) collection.clear();
    });

    this.disposed = true;
    console.log('资源清理完成');
  }

  // 获取资源使用情况
  getResourceStats() {
    return {
      geometries: this.resources.geometries.size,
      materials: this.resources.materials.size,
      textures: this.resources.textures.size,
      animations: this.resources.animations.size,
      eventListeners: Array.from(this.resources.eventListeners.values())
        .reduce((sum, arr) => sum + arr.length, 0),
      timers: this.resources.timers.size
    };
  }
}
5.3 隧道监控系统的完整生命周期管理
javascript
class TunnelMonitoringSystem {
  constructor(container) {
    this.container = container;
    this.resourceManager = new ResourceManager();
    this.scene = null;
    this.camera = null;
    this.renderer = null;
    this.animationId = null;

    this.init();
  }

  async init() {
    try {
      // 初始化基础组件
      this.initScene();
      this.initCamera();
      this.initRenderer();
      this.initLights();

      // 初始化业务组件
      await this.initTunnel();
      this.initDeviceLabels();
      this.initInteraction();
      this.initPatrolSystem();
      this.initCameraControl();

      // 开始渲染循环
      this.startRenderLoop();

      console.log('隧道监控系统初始化完成');
    } catch (error) {
      console.error('系统初始化失败:', error);
      this.dispose();
    }
  }

  initScene() {
    this.scene = new THREE.Scene();
    this.scene.background = new THREE.Color(0x000011);
  }

  initCamera() {
    this.camera = new THREE.PerspectiveCamera(
      75,
      window.innerWidth / window.innerHeight,
      1,
      10000
    );
    this.camera.position.set(0, 500, 1000);
  }

  initRenderer() {
    this.renderer = new THREE.WebGLRenderer({
      antialias: true,
      logarithmicDepthBuffer: true
    });
    this.renderer.setSize(window.innerWidth, window.innerHeight);
    this.renderer.shadowMap.enabled = true;
    this.renderer.shadowMap.type = THREE.PCFSoftShadowMap;
    this.container.appendChild(this.renderer.domElement);

    // 注册窗口大小变化事件
    this.resourceManager.registerEventListener(
      window,
      'resize',
      () => this.onWindowResize()
    );
  }

  startRenderLoop() {
    const animate = (time) => {
      this.animationId = requestAnimationFrame(animate);

      const deltaTime = this.clock.getDelta();

      // 更新各个系统
      if (this.patrolSystem) {
        this.patrolSystem.updatePatrol(deltaTime);
      }

      if (this.cameraSystem) {
        this.cameraSystem.update(deltaTime);
      }

      if (this.labelManager) {
        this.labelManager.updateLabels(deltaTime);
      }

      // 渲染
      this.renderer.render(this.scene, this.camera);

      if (this.labelManager) {
        this.labelManager.render();
      }
    };

    this.clock = new THREE.Clock();
    animate();
  }

  onWindowResize() {
    this.camera.aspect = window.innerWidth / window.innerHeight;
    this.camera.updateProjectionMatrix();
    this.renderer.setSize(window.innerWidth, window.innerHeight);
  }

  // 系统销毁
  dispose() {
    console.log('开始销毁隧道监控系统...');

    // 停止渲染循环
    if (this.animationId) {
      cancelAnimationFrame(this.animationId);
    }

    // 停止巡检
    if (this.patrolSystem) {
      this.patrolSystem.stopPatrol();
    }

    // 清理场景对象
    if (this.scene) {
      this.resourceManager.disposeObject(this.scene);
    }

    // 清理渲染器
    if (this.renderer) {
      this.renderer.dispose();
      if (this.renderer.domElement.parentNode) {
        this.renderer.domElement.parentNode.removeChild(this.renderer.domElement);
      }
    }

    // 清理所有资源
    this.resourceManager.disposeAll();

    console.log('隧道监控系统销毁完成');
  }
}

// 使用示例
let tunnelSystem = null;

// 初始化系统
function initTunnelSystem() {
  const container = document.getElementById('tunnel-container');
  tunnelSystem = new TunnelMonitoringSystem(container);
}

// 页面卸载时清理
window.addEventListener('beforeunload', () => {
  if (tunnelSystem) {
    tunnelSystem.dispose();
  }
});

// React/Vue 组件卸载时清理
// useEffect(() => {
//   return () => {
//     if (tunnelSystem) {
//       tunnelSystem.dispose();
//     }
//   };
// }, []);
5.4 性能监控与优化
javascript
class PerformanceMonitor {
  constructor() {
    this.stats = {
      fps: 0,
      frameTime: 0,
      memoryUsage: 0,
      drawCalls: 0,
      triangles: 0
    };

    this.frameCount = 0;
    this.lastTime = performance.now();
  }

  update(renderer) {
    const currentTime = performance.now();
    const deltaTime = currentTime - this.lastTime;

    this.frameCount++;

    // 每秒更新一次统计
    if (deltaTime >= 1000) {
      this.stats.fps = Math.round((this.frameCount * 1000) / deltaTime);
      this.stats.frameTime = deltaTime / this.frameCount;

      // WebGL 渲染信息
      const info = renderer.info;
      this.stats.drawCalls = info.render.calls;
      this.stats.triangles = info.render.triangles;

      // 内存使用情况
      if (performance.memory) {
        this.stats.memoryUsage = Math.round(
          performance.memory.usedJSHeapSize / 1048576
        );
      }

      this.frameCount = 0;
      this.lastTime = currentTime;

      // 输出性能信息
      console.log('性能统计:', this.stats);


      // 性能警告
      if (this.stats.fps < 30) {
        console.warn('帧率过低,建议优化渲染性能');
      }

      if (this.stats.memoryUsage > 500) {
        console.warn('内存使用过高,建议检查资源泄漏');
      }

      if (this.stats.drawCalls > 1000) {
        console.warn('绘制调用过多,建议使用实例化渲染或合并几何体');
      }
    }
  }

  // 创建性能监控面板
  createMonitorPanel() {
    const panel = document.createElement('div');
    panel.className = 'performance-monitor';
    panel.innerHTML = `
      <div class="monitor-header">性能监控</div>
      <div class="monitor-stats">
        <div class="stat-item">
          <span class="stat-label">FPS:</span>
          <span class="stat-value" id="fps-value">0</span>
        </div>
        <div class="stat-item">
          <span class="stat-label">帧时间:</span>
          <span class="stat-value" id="frametime-value">0ms</span>
        </div>
        <div class="stat-item">
          <span class="stat-label">内存:</span>
          <span class="stat-value" id="memory-value">0MB</span>
        </div>
        <div class="stat-item">
          <span class="stat-label">绘制调用:</span>
          <span class="stat-value" id="drawcalls-value">0</span>
        </div>
        <div class="stat-item">
          <span class="stat-label">三角形:</span>
          <span class="stat-value" id="triangles-value">0</span>
        </div>
      </div>
    `;

    document.body.appendChild(panel);

    // 定期更新显示
    setInterval(() => {
      document.getElementById('fps-value').textContent = this.stats.fps;
      document.getElementById('frametime-value').textContent =
        `${this.stats.frameTime.toFixed(2)}ms`;
      document.getElementById('memory-value').textContent =
        `${this.stats.memoryUsage}MB`;
      document.getElementById('drawcalls-value').textContent = this.stats.drawCalls;
      document.getElementById('triangles-value').textContent = this.stats.triangles;
    }, 1000);
  }
}
5.5 LOD(细节层次)优化策略
javascript
class LODManager {
  constructor(camera) {
    this.camera = camera;
    this.lodObjects = new Map(); // object -> {high, medium, low}
    this.updateInterval = 100; // 100ms 更新一次 LOD
    this.lastUpdate = 0;
  }

  // 注册 LOD 对象
  registerLODObject(object, lodLevels) {
    this.lodObjects.set(object, {
      high: lodLevels.high,     // 高精度模型(近距离)
      medium: lodLevels.medium, // 中精度模型(中距离)
      low: lodLevels.low,       // 低精度模型(远距离)
      current: 'high',
      distances: {
        medium: 500,  // 切换到中精度的距离
        low: 1000     // 切换到低精度的距离
      }
    });
  }

  // 更新 LOD
  update(currentTime) {
    if (currentTime - this.lastUpdate < this.updateInterval) return;

    const cameraPosition = this.camera.position;

    this.lodObjects.forEach((lodData, object) => {
      const distance = cameraPosition.distanceTo(object.position);
      let targetLOD = 'high';

      if (distance > lodData.distances.low) {
        targetLOD = 'low';
      } else if (distance > lodData.distances.medium) {
        targetLOD = 'medium';
      }

      // 切换 LOD
      if (targetLOD !== lodData.current) {
        this.switchLOD(object, lodData, targetLOD);
        lodData.current = targetLOD;
      }
    });

    this.lastUpdate = currentTime;
  }

  // 切换 LOD 级别
  switchLOD(object, lodData, targetLOD) {
    // 隐藏当前模型
    const currentModel = lodData[lodData.current];
    if (currentModel) {
      currentModel.visible = false;
    }

    // 显示目标模型
    const targetModel = lodData[targetLOD];
    if (targetModel) {
      targetModel.visible = true;
    }

    console.log(`对象 LOD 切换: ${lodData.current} -> ${targetLOD}`);
  }
}
5.6 实例化渲染优化
对于隧道中的重复元素(如路灯、标识牌等),使用实例化渲染可以大幅提升性能:
javascript
class InstancedRenderingManager {
  constructor(scene) {
    this.scene = scene;
    this.instancedMeshes = new Map();
  }

  // 创建实例化网格
  createInstancedMesh(geometry, material, count, name) {
    const instancedMesh = new THREE.InstancedMesh(geometry, material, count);
    instancedMesh.name = name;

    // 设置实例变换矩阵
    const matrix = new THREE.Matrix4();
    const position = new THREE.Vector3();
    const rotation = new THREE.Euler();
    const scale = new THREE.Vector3(1, 1, 1);

    for (let i = 0; i < count; i++) {
      // 根据业务逻辑设置每个实例的位置
      position.set(
        (i - count / 2) * 200, // 沿隧道分布
        0,
        Math.random() * 100 - 50
      );

      rotation.set(0, Math.random() * Math.PI * 2, 0);

      matrix.compose(position, new THREE.Quaternion().setFromEuler(rotation), scale);
      instancedMesh.setMatrixAt(i, matrix);
    }

    instancedMesh.instanceMatrix.needsUpdate = true;
    this.scene.add(instancedMesh);
    this.instancedMeshes.set(name, instancedMesh);

    return instancedMesh;
  }

  // 更新实例
  updateInstance(meshName, instanceId, position, rotation, scale) {
    const mesh = this.instancedMeshes.get(meshName);
    if (!mesh) return;

    const matrix = new THREE.Matrix4();
    const quaternion = new THREE.Quaternion().setFromEuler(rotation);
    matrix.compose(position, quaternion, scale);

    mesh.setMatrixAt(instanceId, matrix);
    mesh.instanceMatrix.needsUpdate = true;
  }

  // 批量更新实例(性能优化)
  batchUpdateInstances(meshName, updates) {
    const mesh = this.instancedMeshes.get(meshName);
    if (!mesh) return;

    updates.forEach(({ instanceId, position, rotation, scale }) => {
      const matrix = new THREE.Matrix4();
      const quaternion = new THREE.Quaternion().setFromEuler(rotation);
      matrix.compose(position, quaternion, scale);
      mesh.setMatrixAt(instanceId, matrix);
    });

    mesh.instanceMatrix.needsUpdate = true;
  }
}

// 使用示例:创建隧道路灯
function createTunnelLights(scene) {
  const instanceManager = new InstancedRenderingManager(scene);

  // 路灯几何体和材质
  const lightGeometry = new THREE.CylinderGeometry(5, 5, 100);
  const lightMaterial = new THREE.MeshLambertMaterial({ color: 0xcccccc });

  // 创建100个路灯实例
  const lightCount = 100;
  instanceManager.createInstancedMesh(
    lightGeometry,
    lightMaterial,
    lightCount,
    'tunnelLights'
  );

  return instanceManager;
}
📌 本篇总结
通过本篇文章,我们深入探讨了隧道监控系统中的核心交互技术:
技术成果
- CSS3D 标签系统:实现了业务数据与 3D 模型的无缝融合,支持复杂的 UI 交互
- 精确射线投射:基于 Möller-Trumbore 算法的高效 3D 对象选择系统
- 智能路径动画:使用 Catmull-Rom 样条曲线实现平滑的机器人巡检路径
- 多视角相机系统:支持自由、跟随、第一人称、固定监控等多种视角模式
- 企业级资源管理:完整的生命周期管理,确保系统长期稳定运行
性能优化策略
- LOD 细节层次:根据距离动态调整模型精度
- 实例化渲染:大幅提升重复元素的渲染性能
- 视锥体裁剪:只处理可见区域的对象
- 批量更新:减少 DOM 操作和 GPU 状态切换
数学理论应用
- 坐标变换管线:世界坐标 → 相机坐标 → 裁剪坐标 → 屏幕坐标
- 四元数旋转:避免万向锁,实现平滑的相机旋转
- 样条曲线插值:保证路径的 C1 连续性和局部控制特性