Shape类
2、Ellipse
3、Rectangle
4、Line
5、Polyline
6、Polygon
7、Path
|-------------------|----------|-----------------------------------------------------------------------------------|
| 名称 | | |
| LineGeometry | 简单几何 | 作用类似于Shape中的Line |
| RectangleGeometry | 简单几何 | 作用类似于Shape中的Rectangle |
| EllipseGeometry | 简单几何 | 作用类似于Shape中的Ellipse |
| GeometryGroup | 用于创建复合几何 | 为单个路径添加任意多个Geometry对象,使用EvenOdd或NonZero填充规则来确定要填充的区域。 |
| CombinedGeometry | 用于创建复合几何 | 将两个几何图形合并为一个形状。可使用CombineMode属性选择如何组合两个几何图形。 |
| PathGeometry | 路径几何 | 代表更复杂的弧线、曲线以及直线构成的图形,并且既可以是闭合的,也可以是不闭合的。 |
| StreamGeometry | 路径几何 | 相当于PathGeometry的只读轻量级。StreamGeometry图形可节省内存,因为它不在内存中同时保存路径的所有分段。并且这类图形一旦被创建就不能再修改 |
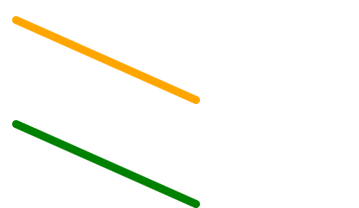
LineGeometry
XML
<Line X1="10" Y1="10" X2="100" Y2="50" Stroke="Orange" StrokeThickness="4" StrokeStartLineCap="Round" StrokeEndLineCap="Round"></Line>
<Path Stroke="Green" StrokeStartLineCap="Round" StrokeThickness="4" StrokeEndLineCap="Round">
<Path.Data>
<LineGeometry StartPoint="10,10" EndPoint="100,50"></LineGeometry>
</Path.Data>
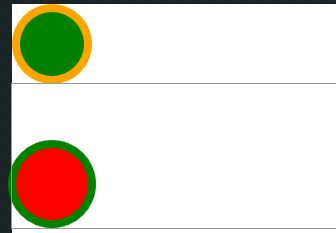
</Path>EllipseGeometry
RectangGeometry
XML
<Ellipse Height="40" Width="40" Stroke="Orange" StrokeThickness="4" Fill="Green" HorizontalAlignment="Left"></Ellipse>
<Path Stroke="Green" StrokeThickness="4" Fill="Red">
    <Path.Data>
        <EllipseGeometry Center="20,50" RadiusX="20" RadiusY="20"></EllipseGeometry>
    </Path.Data>
</Path> 
XML
 <Path Fill="Orange">
     <Path.Data>
         <RectangleGeometry Rect="10 5 100 50"></RectangleGeometry>
     </Path.Data>
 </Path>
ArcGeometry
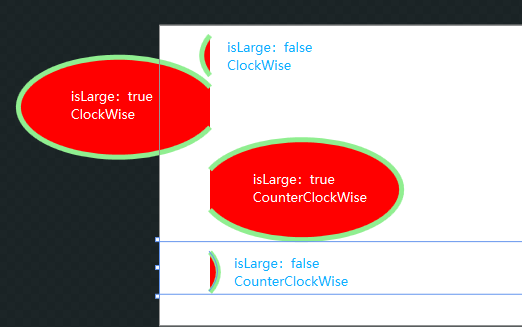
IsLargeArc,SweepDirection属性介绍
IsLargeArc 为true选择大的那个圆弧,否则选择小的
SweepDirection="Clockwise" 选择顺时针的路线,为CounterClockwise则是逆时针
XML
<Path Stroke="LightGreen" Fill="Red" StrokeThickness="5">
    <Path.Data>
        <PathGeometry>
            <PathGeometry.Figures>
                <PathFigure StartPoint="50,50">
                    <PathFigure.Segments>
                        <ArcSegment Size="100,50" IsLargeArc="False" RotationAngle="0" SweepDirection="Clockwise" Point="50,10" />
                    </PathFigure.Segments>
                </PathFigure>
            </PathGeometry.Figures>
        </PathGeometry>
    </Path.Data>
</Path>

<Path Stroke="LightGreen" Fill="Red" StrokeThickness="5">
    <Path.Data>
        <PathGeometry>
            <PathGeometry.Figures>
                <PathFigure StartPoint="50,50">
                    <PathFigure.Segments>
                        <ArcSegment Size="100,50" IsLargeArc="True" RotationAngle="0" SweepDirection="Clockwise" Point="50,10" />
                    </PathFigure.Segments>
                </PathFigure>
            </PathGeometry.Figures>
        </PathGeometry>
    </Path.Data>
</Path>
<Path Stroke="LightGreen" Fill="Red" StrokeThickness="5">
    <Path.Data>
        <PathGeometry>
            <PathGeometry.Figures>
                <PathFigure StartPoint="50,50">
                    <PathFigure.Segments>
                        <ArcSegment Size="100,50" IsLargeArc="True" RotationAngle="0" SweepDirection="Counterclockwise" Point="50,10" />
                    </PathFigure.Segments>
                </PathFigure>
            </PathGeometry.Figures>
        </PathGeometry>
    </Path.Data>
</Path>
<Path Stroke="LightGreen" Fill="Red" StrokeThickness="5">
    <Path.Data>
        <PathGeometry>
            <PathGeometry.Figures>
                <PathFigure StartPoint="50,50">
                    <PathFigure.Segments>
                        <ArcSegment Size="100,50" IsLargeArc="False" RotationAngle="0" SweepDirection="Counterclockwise" Point="50,10" />
                    </PathFigure.Segments>
                </PathFigure>
            </PathGeometry.Figures>
        </PathGeometry>
    </Path.Data>
</Path>
RotationAngle
沿着切口面顺时针旋转,效果如下
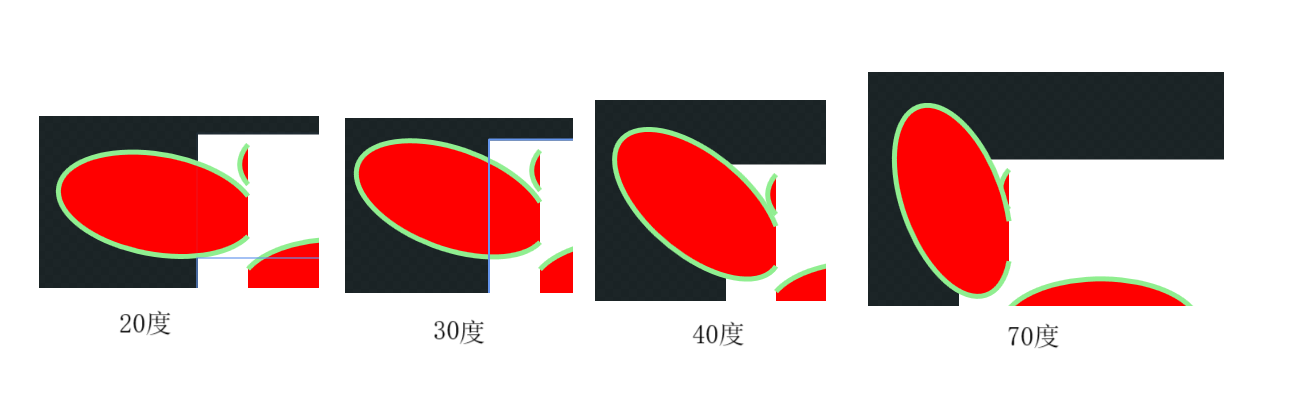
这几个属性对以后画 圆环进度条非常有帮助,后面的有空再写