Flutter SafeArea 组件总结
目录
概述
SafeArea 是 Flutter 中的一个重要布局组件,用于确保其子组件在屏幕的可视区域内显示,避免被设备的系统UI(如状态栏、导航栏、刘海屏、圆角屏幕等)遮挡。它通过自动添加适当的内边距(padding),使内容在各种设备上都能正确显示。
原理说明
核心机制
SafeArea 的实现依赖于以下几个关键点:
- MediaQuery依赖 : 通过
MediaQuery.of(context).padding获取设备的安全区域信息 - 填充计算: 根据系统UI占用的空间计算需要的内边距
- 数据传递: 修改传递给子组件的MediaQuery数据,避免重复填充
实现原理
dart
// SafeArea的核心实现逻辑
Widget build(BuildContext context) {
  final MediaQueryData data = MediaQuery.of(context);

  // 计算需要的内边距
  EdgeInsets padding = data.padding;

  // 根据配置决定是否应用各方向的填充
  if (!left) padding = padding.copyWith(left: 0.0);
  if (!top) padding = padding.copyWith(top: 0.0);
  if (!right) padding = padding.copyWith(right: 0.0);
  if (!bottom) padding = padding.copyWith(bottom: 0.0);

  // 应用最小填充
  padding = EdgeInsets.fromLTRB(
    math.max(padding.left, minimum.left),
    math.max(padding.top, minimum.top),
    math.max(padding.right, minimum.right),
    math.max(padding.bottom, minimum.bottom),
  );

  // 返回包装后的组件
  return Padding(
    padding: padding,
    child: MediaQuery.removePadding(
      context: context,
      removeLeft: left,
      removeTop: top,
      removeRight: right,
      removeBottom: bottom,
      child: child,
    ),
  );
}
实现方式
构造函数参数
dart
const SafeArea({
  Key? key,
  bool left = true,              // 是否在左侧添加填充
  bool top = true,               // 是否在顶部添加填充
  bool right = true,             // 是否在右侧添加填充
  bool bottom = true,            // 是否在底部添加填充
  EdgeInsets minimum = EdgeInsets.zero,  // 最小填充值
  bool maintainBottomViewPadding = false, // 保持底部视图填充
  required Widget child,         // 子组件
})
参数说明
- left/top/right/bottom: 控制是否在对应方向添加安全区域填充
- minimum: 设置最小填充值,即使系统安全区域为0也会应用
- maintainBottomViewPadding: 当软键盘弹出时是否保持底部填充
- 默认值:false
- 主要功能:
- 控制在软键盘弹出时,SafeArea 是否继续保持底部的安全区域填充
- 当设置为 true 时,即使软键盘弹出改变了视口,SafeArea 仍会保持原有的底部填充
- 当设置为 false 时(默认),软键盘弹出时底部填充会相应调整
- 使用场景:
- 输入界面:在包含文本输入框的界面中,当您希望在软键盘弹出时保持原有的底部安全区域
- 固定布局:当您需要保持界面底部的固定间距,不受软键盘影响时
- child: 需要保护的子组件
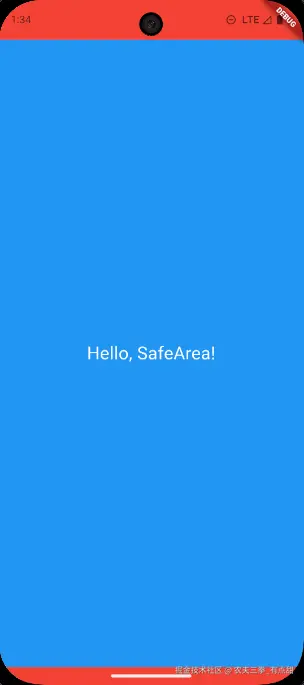
基本用法
简单示例
dart
import 'package:flutter/material.dart';

void main() => runApp(const MyApp());

class MyApp extends StatelessWidget {
  const MyApp({Key? key}) : super(key: key);

  @override
  Widget build(BuildContext context) {
    return MaterialApp(
      title: 'SafeArea 示例',
      home: const SafeAreaDemo(),
    );
  }
}

class SafeAreaDemo extends StatelessWidget {
  const SafeAreaDemo({Key? key}) : super(key: key);

  @override
  Widget build(BuildContext context) {
    return Scaffold(
      backgroundColor: Colors.red,
      body: SafeArea(
        child: Container(
          color: Colors.blue,
          constraints: const BoxConstraints.expand(),
          child: const Center(
            child: Text(
              'Hello, SafeArea!',
              style: TextStyle(
                fontSize: 24,
                color: Colors.white,
              ),
            ),
          ),
        ),
      ),
    );
  }
}
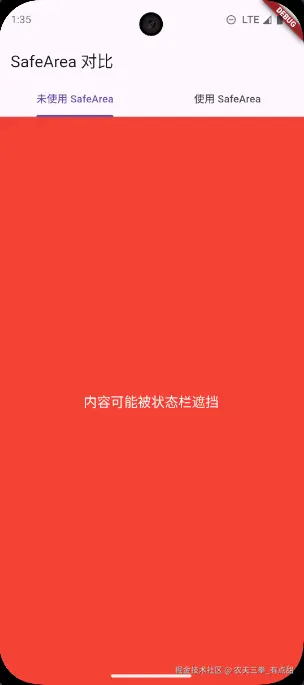
对比效果
dart
class SafeAreaComparison extends StatelessWidget {
  const SafeAreaComparison({Key? key}) : super(key: key);

  @override
  Widget build(BuildContext context) {
    return MaterialApp(
      home: DefaultTabController(
        length: 2,
        child: Scaffold(
          appBar: AppBar(
            title: const Text('SafeArea 对比'),
            bottom: const TabBar(
              tabs: [
                Tab(text: '未使用 SafeArea'),
                Tab(text: '使用 SafeArea'),
              ],
            ),
          ),
          body: TabBarView(
            children: [
              // 未使用 SafeArea
              Container(
                color: Colors.red,
                child: const Center(
                  child: Text(
                    '内容可能被状态栏遮挡',
                    style: TextStyle(color: Colors.white, fontSize: 18),
                  ),
                ),
              ),
              // 使用 SafeArea
              SafeArea(
                child: Container(
                  color: Colors.green,
                  child: const Center(
                    child: Text(
                      '内容在安全区域内',
                      style: TextStyle(color: Colors.white, fontSize: 18),
                    ),
                  ),
                ),
              ),
            ],
          ),
        ),
      ),
    );
  }
}

高级用法
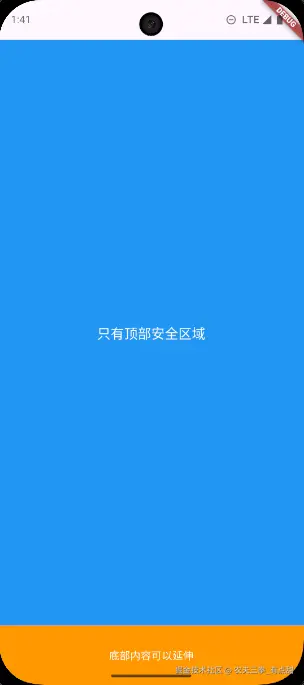
1. 选择性填充
dart
class SelectivePaddingDemo extends StatelessWidget {
  const SelectivePaddingDemo({Key? key}) : super(key: key);

  @override
  Widget build(BuildContext context) {
    return Scaffold(
      body: Column(
        children: [
          // 只保护顶部,允许内容延伸到底部
          Expanded(
            child: SafeArea(
              top: true,
              bottom: false,
              child: Container(
                color: Colors.blue,
                child: const Center(
                  child: Text(
                    '只有顶部安全区域',
                    style: TextStyle(color: Colors.white, fontSize: 18),
                  ),
                ),
              ),
            ),
          ),
          // 底部导航栏区域
          Container(
            height: 80,
            color: Colors.orange,
            child: const Center(
              child: Text(
                '底部内容可以延伸',
                style: TextStyle(color: Colors.white),
              ),
            ),
          ),
        ],
      ),
    );
  }
}
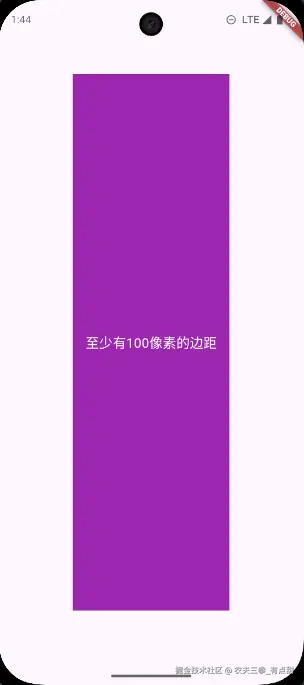
2. 设置最小填充
dart
class MinimumPaddingDemo extends StatelessWidget {
  const MinimumPaddingDemo({Key? key}) : super(key: key);

  @override
  Widget build(BuildContext context) {
    return Scaffold(
      body: SafeArea(
        minimum: const EdgeInsets.all(16.0), // 最小16像素填充
        child: Container(
          color: Colors.purple,
          child: const Center(
            child: Text(
              '至少有16像素的边距',
              style: TextStyle(color: Colors.white, fontSize: 18),
            ),
          ),
        ),
      ),
    );
  }
}
3. 处理软键盘
dart
class KeyboardHandlingDemo extends StatelessWidget {
  const KeyboardHandlingDemo({Key? key}) : super(key: key);

  @override
  Widget build(BuildContext context) {
    return Scaffold(
      resizeToAvoidBottomInset: true,
      body: SafeArea(
        maintainBottomViewPadding: true, // 保持底部视图填充
        child: Padding(
          padding: const EdgeInsets.all(16.0),
          child: Column(
            children: [
              const Spacer(),
              const TextField(
                decoration: InputDecoration(
                  labelText: '输入内容',
                  border: OutlineInputBorder(),
                ),
              ),
              const SizedBox(height: 16),
              ElevatedButton(
                onPressed: () {},
                child: const Text('提交'),
              ),
              const Spacer(),
            ],
          ),
        ),
      ),
    );
  }
}
实际开发案例
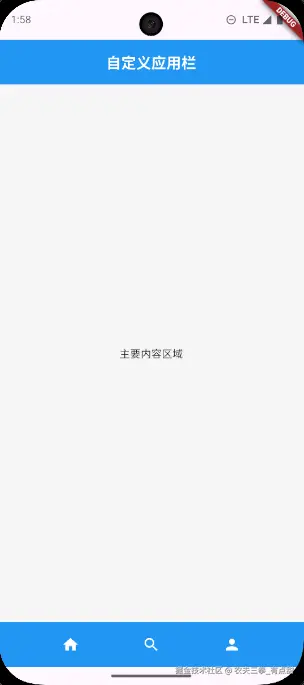
1. 全屏应用布局
dart
class FullScreenApp extends StatelessWidget {
  const FullScreenApp({Key? key}) : super(key: key);

  @override
  Widget build(BuildContext context) {
    return MaterialApp(
      home: Scaffold(
        body: SafeArea(
          child: Column(
            children: [
              // 自定义应用栏
              Container(
                height: 60,
                color: Colors.blue,
                child: const Center(
                  child: Text(
                    '自定义应用栏',
                    style: TextStyle(
                      color: Colors.white,
                      fontSize: 20,
                      fontWeight: FontWeight.bold,
                    ),
                  ),
                ),
              ),
              // 主要内容区域
              Expanded(
                child: Container(
                  color: Colors.grey[100],
                  child: const Center(
                    child: Text('主要内容区域'),
                  ),
                ),
              ),
              // 底部导航
              Container(
                height: 60,
                color: Colors.blue,
                child: Row(
                  mainAxisAlignment: MainAxisAlignment.spaceEvenly,
                  children: const [
                    Icon(Icons.home, color: Colors.white),
                    Icon(Icons.search, color: Colors.white),
                    Icon(Icons.person, color: Colors.white),
                  ],
                ),
              ),
            ],
          ),
        ),
      ),
    );
  }
}
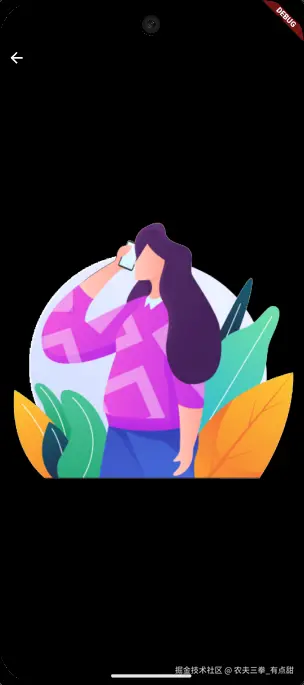
2. 图片查看器
dart
class ImageViewerDemo extends StatelessWidget {
  const ImageViewerDemo({Key? key}) : super(key: key);

  @override
  Widget build(BuildContext context) {
    return Scaffold(
      backgroundColor: Colors.black,
      body: SafeArea(
        top: false, // 允许图片延伸到状态栏
        child: Stack(
          children: [
            // 全屏图片
            Center(
              child: Image.asset(
                'assets/sample_image.jpg',
                fit: BoxFit.contain,
              ),
            ),
            // 返回按钮(需要安全区域保护)
            SafeArea(
              child: Positioned(
                top: 16,
                left: 16,
                child: IconButton(
                  icon: const Icon(
                    Icons.arrow_back,
                    color: Colors.white,
                  ),
                  onPressed: () => Navigator.of(context).pop(),
                ),
              ),
            ),
          ],
        ),
      ),
    );
  }
}
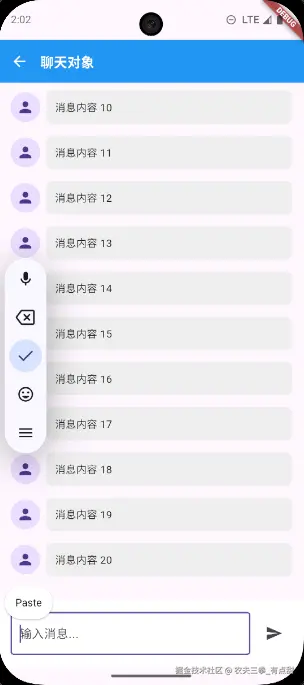
3. 聊天界面
dart
class ChatInterfaceDemo extends StatelessWidget {
  const ChatInterfaceDemo({Key? key}) : super(key: key);

  @override
  Widget build(BuildContext context) {
    return Scaffold(
      body: SafeArea(
        bottom: false, // 输入框需要特殊处理
        child: Column(
          children: [
            // 聊天头部
            Container(
              padding: const EdgeInsets.all(16),
              color: Colors.blue,
              child: const Row(
                children: [
                  Icon(Icons.arrow_back, color: Colors.white),
                  SizedBox(width: 16),
                  Text(
                    '聊天对象',
                    style: TextStyle(
                      color: Colors.white,
                      fontSize: 18,
                      fontWeight: FontWeight.bold,
                    ),
                  ),
                ],
              ),
            ),
            // 消息列表
            Expanded(
              child: ListView.builder(
                padding: const EdgeInsets.all(16),
                itemCount: 20,
                itemBuilder: (context, index) {
                  return Container(
                    margin: const EdgeInsets.only(bottom: 16),
                    child: Row(
                      children: [
                        const CircleAvatar(
                          child: Icon(Icons.person),
                        ),
                        const SizedBox(width: 8),
                        Expanded(
                          child: Container(
                            padding: const EdgeInsets.all(12),
                            decoration: BoxDecoration(
                              color: Colors.grey[200],
                              borderRadius: BorderRadius.circular(8),
                            ),
                            child: Text('消息内容 ${index + 1}'),
                          ),
                        ),
                      ],
                    ),
                  );
                },
              ),
            ),
            // 输入框区域(单独处理安全区域)
            SafeArea(
              top: false,
              child: Container(
                padding: const EdgeInsets.all(16),
                color: Colors.white,
                child: Row(
                  children: [
                    const Expanded(
                      child: TextField(
                        decoration: InputDecoration(
                          hintText: '输入消息...',
                          border: OutlineInputBorder(),
                        ),
                      ),
                    ),
                    const SizedBox(width: 8),
                    IconButton(
                      icon: const Icon(Icons.send),
                      onPressed: () {},
                    ),
                  ],
                ),
              ),
            ),
          ],
        ),
      ),
    );
  }
}
最佳实践
1. 合理使用位置
dart
// ✅ 好的做法:在 Scaffold 的 body 中使用
Scaffold(
  appBar: AppBar(title: Text('标题')),
  body: SafeArea(
    child: YourContentWidget(),
  ),
)

// ❌ 不推荐:包装整个 Scaffold
SafeArea(
  child: Scaffold(
    appBar: AppBar(title: Text('标题')),
    body: YourContentWidget(),
  ),
)
2. 避免重复嵌套
dart
// ❌ 避免重复嵌套
SafeArea(
  child: Container(
    child: SafeArea( // 重复嵌套
      child: YourWidget(),
    ),
  ),
)

// ✅ 单层使用
SafeArea(
  child: YourWidget(),
)
3. 根据需求选择性使用
dart
// 顶部需要避开状态栏,底部需要延伸到底部
SafeArea(
top: true,
bottom: false,
child: YourWidget(),
)
// 全屏沉浸式体验
SafeArea(
top: false,
bottom: false,
child: Stack(
children: [
FullScreenContent(),
SafeArea(
child: Positioned(
top: 16,
left: 16,
child: BackButton(),
),
),
],
),
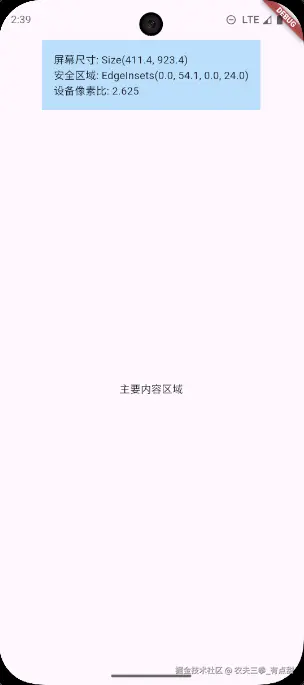
)4. 与MediaQuery配合使用
dart
class AdaptiveLayout extends StatelessWidget {
  const AdaptiveLayout({Key? key}) : super(key: key);

  @override
  Widget build(BuildContext context) {
    final mediaQuery = MediaQuery.of(context);
    final safePadding = mediaQuery.padding;

    return Scaffold(
      body: SafeArea(
        child: Column(
          children: [
            // 显示安全区域信息
            Container(
              padding: const EdgeInsets.all(16),
              color: Colors.blue[100],
              child: Column(
                crossAxisAlignment: CrossAxisAlignment.start,
                children: [
                  Text('屏幕尺寸: ${mediaQuery.size}'),
                  Text('安全区域: $safePadding'),
                  Text('设备像素比: ${mediaQuery.devicePixelRatio}'),
                ],
              ),
            ),
            // 其他内容
            const Expanded(
              child: Center(
                child: Text('主要内容区域'),
              ),
            ),
          ],
        ),
      ),
    );
  }
}
注意事项
1. 性能考虑
SafeArea的计算是轻量级的,不会对性能造成显著影响- 避免在频繁重建的组件中不必要地使用
SafeArea
2. 兼容性
SafeArea在所有平台上都可用,但主要作用体现在移动设备上- 在桌面平台上,安全区域通常为零
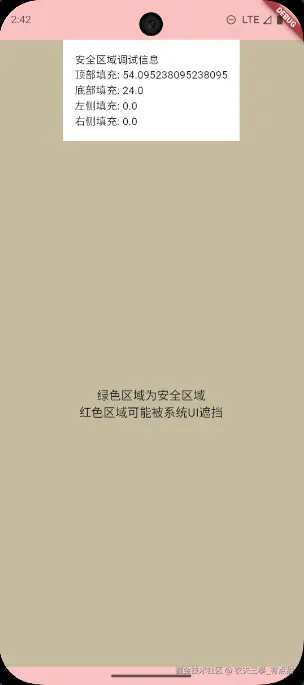
3. 调试技巧
dart
class SafeAreaDebugger extends StatelessWidget {
  const SafeAreaDebugger({Key? key}) : super(key: key);

  @override
  Widget build(BuildContext context) {
    final mediaQuery = MediaQuery.of(context);

    return Scaffold(
      body: Stack(
        children: [
          // 显示完整屏幕区域
          Container(
            color: Colors.red.withOpacity(0.3),
            child: const SizedBox.expand(),
          ),
          // 显示安全区域
          SafeArea(
            child: Container(
              color: Colors.green.withOpacity(0.3),
              child: Column(
                children: [
                  Container(
                    padding: const EdgeInsets.all(16),
                    color: Colors.white,
                    child: Column(
                      crossAxisAlignment: CrossAxisAlignment.start,
                      children: [
                        Text('安全区域调试信息'),
                        Text('顶部填充: ${mediaQuery.padding.top}'),
                        Text('底部填充: ${mediaQuery.padding.bottom}'),
                        Text('左侧填充: ${mediaQuery.padding.left}'),
                        Text('右侧填充: ${mediaQuery.padding.right}'),
                      ],
                    ),
                  ),
                  const Expanded(
                    child: Center(
                      child: Text(
                        '绿色区域为安全区域\n红色区域可能被系统UI遮挡',
                        textAlign: TextAlign.center,
                        style: TextStyle(fontSize: 16),
                      ),
                    ),
                  ),
                ],
              ),
            ),
          ),
        ],
      ),
    );
  }
}
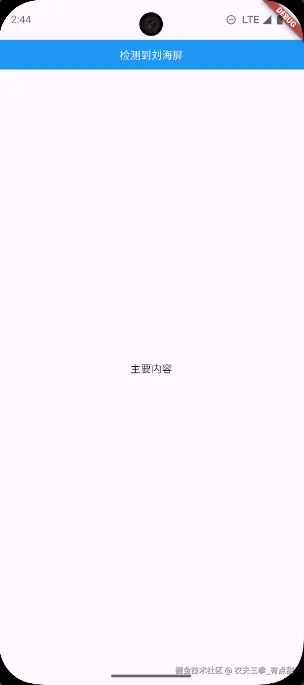
4. 特殊场景处理
dart
// 处理刘海屏和圆角屏
class NotchHandling extends StatelessWidget {
  const NotchHandling({Key? key}) : super(key: key);

  @override
  Widget build(BuildContext context) {
    final mediaQuery = MediaQuery.of(context);
    final hasNotch = mediaQuery.padding.top > 24; // 简单判断是否有刘海

    return Scaffold(
      body: SafeArea(
        child: Column(
          children: [
            if (hasNotch)
              Container(
                height: 40,
                color: Colors.blue,
                child: const Center(
                  child: Text(
                    '检测到刘海屏',
                    style: TextStyle(color: Colors.white),
                  ),
                ),
              ),
            const Expanded(
              child: Center(
                child: Text('主要内容'),
              ),
            ),
          ],
        ),
      ),
    );
  }
}
总结
SafeArea 是 Flutter 中确保内容正确显示的重要组件,它通过以下方式保证用户界面的正确性:
核心价值
- 适配性: 自动适配各种设备的屏幕特性
- 易用性: 简单的API,易于理解和使用
- 灵活性: 提供多种配置选项,满足不同场景需求
技术特点
- 依赖MediaQuery: 基于系统提供的屏幕信息
- 自动计算: 无需手动计算安全区域
- 数据传递: 智能修改子组件的MediaQuery数据
使用建议
- 合理定位: 在合适的位置使用,避免过度嵌套
- 按需配置: 根据具体需求选择是否在各方向应用填充
- 性能友好: 轻量级实现,不会影响应用性能
通过正确使用 SafeArea,可以确保 Flutter 应用在各种设备上都能提供一致且优秀的用户体验。