接下来我来介绍整个仿真软件最重要,最核心的部分,驱动引擎
🤔设计思路
第一步:自主研发的萌芽 在刚开始开发仿真引擎时,我原本是想找一个现有的JS离散事件仿真库,但最后发现要么有的库已经长时间不再更新,无法满足现有需求,要么就是功能不完善,无法实现工厂流水线式的仿真,经过思考后,选择自主研发一个离散时间仿真库
第二步:初稿确立 关于如何确定项目结构,以及仿真引擎采用什么样的数据结构,这个我问询了GPT,他给了我一个初版
先确定产品整个的加工流程,然后将流程导入到产品类中,开始仿真的时候,产品就可以根据这个流程一步一步加工
这样第一个问题就来了,我们是离散事件,不可能确定产品下一步是在哪个设备上进行加工的,只能动态的去判断,所以面临这个问题时,第一个初版就要被推翻,重新设计
第三步:流程的优化 如果要想知道产品下一步流入到哪个设备中,就需要建立一条完整的仿真链路,让设备与设备之间相互关联,类似于数据结构中的链表
首先是我给每台设备附加了一个状态属性(status),用来指示当前设备处于什么状态
- 'processing':正在加工状态
- 'idle' :空闲状态
- 'ready' :准备接收产品状态
- 'block' :堵塞状态,当产品加工完毕时,就会处于堵塞状态
- 'clearance' :需要进行清理状态,比如产品发生了不良
- 'fault':故障状态
我可以通过这些状态来判断当前设备是否可以接收产品,是否可以派发产品
接下来我给设备附加了一个下一站的属性数据(nextStations),这是一个列表结构,因为设备下一站不仅仅有一台设备,当产品加工完毕时,就需要循环遍历下一站的列表,判断哪个设备处于空闲状态,就将产品派发给他
这样就会产生第二个问题
设备A【堵塞状态】 --> 设备B【正在加工】
当设备A加工完毕,正准备把产品送给设备B时,设备B处于正在加工,不能接收产品,那么设备A就会一直处于堵塞,当设备B加工完毕后,就会转为空闲状态,但是并不会主动向设备A请求产品,这就是问题所在,除非把设备之间的单向通信改为双向通信
第四步:最终版 经过思考后,决定在设备上再次附加一个属性,类似于nextStations,这次是上一站的属性数据(prevStations ),也是一个列表结构,到此,我们的整个仿真链路已经形成,本质就是双向链表
就拿上面的案例来说,当设备B加工完毕时,设备B转为空闲,此时就会向设备A索要产品,如果设备A处于堵塞状态,就会将产品派发给设备B,如果处于其他状态,将拒绝产品派发。
那接下来我们看一下项目结构
📋项目结构
如图一图二所示,这是整个仿真引擎的整体架构
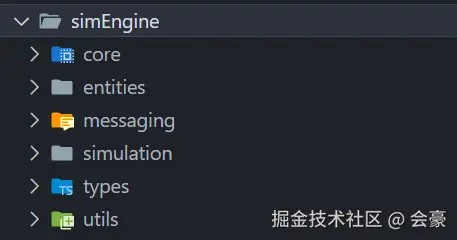
图一
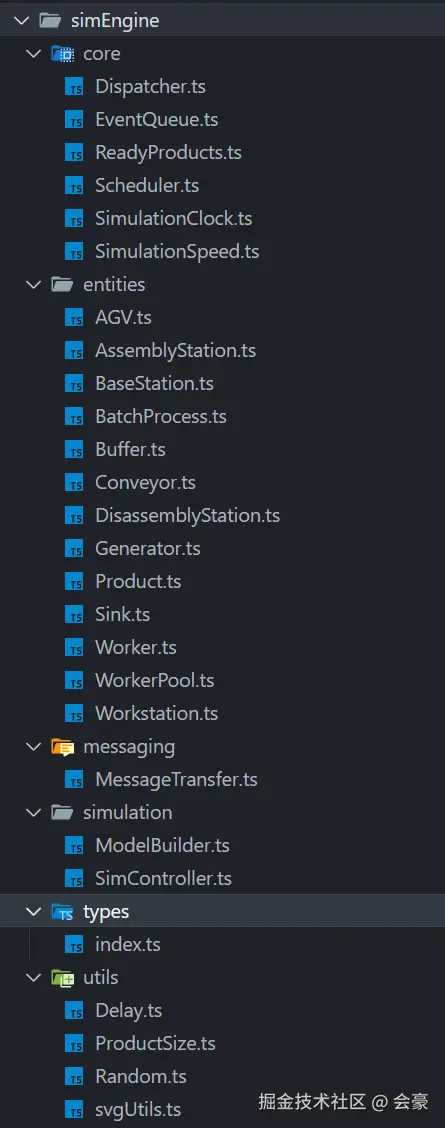
图二
下面我详细说明一下每个文件夹,每个文件的含义
- core //仿真核心部件
- Dispatcher //设备调度器
- EventQueue //事件队列
- ReadyProducts //就绪产品队列
- Scheduler //事件单元
- SimulationClock // 当前仿真的时间
- SimulationSpeed //当前仿真的速度
- entities //仿真实体类【在这篇文章中主要讲解发生器,吸收器,加Buffer工站】
- AGV //搬运流实体类
- AssemblyStation //装配站实体类
- BaseStation //基类
- BatchProcess //批处理设备实体类
- Buffer //缓冲区实体类
- Conveyor //传送带实体类
- DisassemblyStation //拆卸站实体类
- Generator //发生器实体类
- Product //产品实体类
- Sink //吸收器实体类
- Worker //工人实体类
- WorkerPool //工人池实体类
- Workstation //加工站实体类
- messaging
- MessageTransfer //仿真数据传递给画布的代理方法
- simulation
- ModelBuilder //仿真建模
- SimController //仿真控制器
- types //各种类型断言
- utils //工具包
💫设计模式
由于我们的仿真引擎是一个比较复杂的系统,所以在设计阶段就必须采用一个合适的设计模式,我们可以联想到,无论是加工站,发生器,吸收器,还是缓冲区,传送带,他们都有一个本质上的相同点,都是接收产品,然后加工一段时间,再将产品派发出去
那么我们就可以提取这些共同点,将他们剥离出来,形成一个父类,这些实体类继承这个父类,这就是工厂模式
下面是工厂模式的简介
1. 简单工厂模式(Simple Factory)
- 不是标准的GOF 23种设计模式,但非常常用,是工厂方法模式的简化。
- 核心:定义一个工厂类,它根据传入的参数,动态决定创建哪一种产品类的实例。
- 比喻:有一个"万能充电器"(工厂),你给它参数(比如苹果口、Type-C口),它就给你对应的充电线(产品)。
- 优点:客户端与具体产品解耦,职责清晰。
- 缺点:违反"开闭原则"(对扩展开放,对修改关闭)。如果要增加新产品,必须修改工厂类的逻辑。
2. 工厂方法模式(Factory Method)
- 核心:定义一个用于创建对象的接口(工厂接口),但让子类决定实例化哪一个产品类。工厂方法使一个类的实例化延迟到其子类。
- 比喻:有一个"充电器店"的抽象概念(工厂接口)。具体的"苹果专卖店"(具体工厂)只卖苹果充电线(具体产品), "小米专卖店"(具体工厂)只卖Type-C充电线(具体产品)。你想买什么线,就去对应的店。
- 优点:完全遵循"开闭原则"。需要增加新产品时,只需新建一个产品类和对应的工厂子类,无需修改已有代码。
- 缺点:类的数量会增多,系统变得更复杂。
3. 抽象工厂模式(Abstract Factory)
- 核心:提供一个创建一系列相关或相互依赖对象的接口,而无需指定它们具体的类。
- 比喻:这是一个"家电生态工厂"的概念。有"小米生态工厂"(具体工厂),它能生产小米手机、小米电视、小米空调(一系列相关产品)。也有"苹果生态工厂"(具体工厂),它能生产苹果手机、苹果电脑、苹果手表(另一系列相关产品)。客户端选择一个品牌(工厂),就能得到该品牌的整套产品。
- 优点:能确保客户端始终只使用同一个产品族中的对象。
- 缺点:难以支持新种类的产品。例如,如果要在抽象工厂里增加一个"智能汽车"产品,那么所有具体工厂(小米、苹果)都需要修改。
💻代码
接下来我们来看实体类所继承的父类,也就是
BaseStation.ts
ts
import { currentTime } from '../core/SimulationClock'
import Product from './Product'
import { getReadyProduct } from '../core/ReadyProducts'
import { StationStatus } from '../types'
import { dispatcher } from '../core/Dispatcher'

abstract class BaseStation {
  id: string
  name: string
  x: number
  y: number
  width: number
  height: number
  prevStations: BaseStation[] = []
  nextStations: BaseStation[] = []
  status: StationStatus = 'idle'
  readyProduct: null | string = null

  constructor(id: string, name: string, x: number, y: number, width = 100, height = 100) {
    this.id = id
    this.name = name
    this.x = x
    this.y = y
    this.width = width
    this.height = height
  }

  //设置下游设备
  setNextStations(stations: BaseStation[]) {
    this.nextStations = stations
  }

  //设置上游设备
  setPrevStations(stations: BaseStation[]) {
    this.prevStations = stations
  }

  //接受就绪产品
  receiveReadyProduct(productId: string): void {
    if (this.status === 'idle') {
      this.readyProduct = productId
      this.setStatus('ready')

      const product = getReadyProduct(productId)
      if (!product) {
        this.setStatus('idle')
        console.log(`[${currentTime}] ❌ ${productId} 没有发现该产品`)
        return
      }
      console.log(`[${currentTime}] ${product.id} 已到达 --> ${this.name}`)
      product.setFrom(this.id)
      this.onProductReceived(product)
    } else {
      console.log(`[${currentTime}] ${this.id} 不在空闲状态, 无法接受产品 ${productId}`)
    }
  }

  // 子类必须实现
  public abstract canReceiveProduct(id: string, product: Product): boolean
  protected abstract onProductReceived(product: Product): void
  public abstract tryDispatchCurrentProduct(): void

  protected setStatus(newStatus: StationStatus) {
    if (this.status !== newStatus) {
      this.status = newStatus
      dispatcher.notifyStatusChange(this, newStatus)
    }
  }

  /**
   * 外部调用本部事件,需要通过一个事件总线来通知
   */
  public eventWindow(eventType: 'status' | 'rework' | 'delProduct', param: any): void {
    return
  }
}

export default BaseStation
这里面有几个重要的属性和方法需要说明一下
- id: string //实体类唯一ID
- name: string //实体类名称
- x: number //实体类位置
- y: number
- width: number //实体类尺寸
- height: number
- prevStations: BaseStation\[\] = \[\] //上一站
- nextStations: BaseStation\[\] = \[\] //下一站
- status: StationStatus = 'idle' //当前状态
方法
- canReceiveProduct():当前设备是否可以接收产品,
- receiveReadyProduct():当可以接收产品后,上一站就会派发产品,通过这个方法来接收就绪的产品
- onProductReceived():真正获取到产品,receiveReadyProduct方法只是拿到就绪的产品,因为上一站派发产品时,会将产品移交到就绪产品队列中,receiveReadyProduct方法会从就绪产品队列里面拿到产品,然后移交到onProductReceived方法
- tryDispatchCurrentProduct():派发产品方法
- setStatus():状态改变
接下来我们拿加工站实体类来举例
Workstation.ts
ts
import { addReadyProduct } from '../core/ReadyProducts'
import { schedule } from '../core/Scheduler'
import { currentTime } from '../core/SimulationClock'
import { messageTransfer } from '../messaging/MessageTransfer'
import BaseStation from './BaseStation'
import Product from './Product'

class Workstation extends BaseStation {
  //加工时间
  processTime: number | string
  //不良品率
  defectRate: number
  //当前正在加工的产品
  currentProduct: Product | null = null
  //故障率
  faultRate: number = 0

  constructor(
    id: string,
    name: string,
    x: number,
    y: number,
    width = 100,
    height = 100,
    processTime: number | string,
    defectRate: number = 0,
    faultRate: number = 0
  ) {
    super(id, name, x, y, width, height)
    this.processTime = processTime
    this.defectRate = defectRate
    this.faultRate = faultRate
  }

  public canReceiveProduct(): boolean {
    return this.status === 'idle'
  }

  //接收到产品,进行加工前的准备工作
  onProductReceived(product: Product): void {
    messageTransfer('product', 'move', { targetId: this.id, productId: product.id })
    messageTransfer('product', 'startProcessing', { targetId: this.id, productId: product.id })
    this.tryProcess(product)
  }

  tryProcess(product: Product, retry = false): void {
    this.currentProduct = product
    this.setStatus('processing')
    if (Math.random() < this.faultRate && !retry) {
      messageTransfer('style', null, {
        targetId: this.id,
        style: {
          backgroundColor: '#FFB1B16B'
        }
      })
      messageTransfer('product', 'finishProcessing', { targetId: this.id, productId: product.id })
      this.setStatus('fault')
      return
    }

    let time = 0
    if (typeof this.processTime === 'string') {
      time = new Function(this.processTime)()
    } else {
      time = this.processTime
    }
    console.log(`[${currentTime}] ${this.name} 开始加工 ${product.id},预计需要时间 ${time}`)
    schedule(time, () => this.finishProcessing(product), `${this.id} process finish ${product.id}`)
  }

  finishProcessing(product: Product): void {
    if (Math.random() < this.defectRate) {
      console.log(`[${currentTime}] ❌ ${this.name} 报废产品 ${product.id}`)
      messageTransfer('style', null, {
        targetId: this.id,
        style: {
          backgroundColor: '#FFDEB16B'
        }
      })
      messageTransfer('product', 'finishProcessing', { targetId: this.id, productId: product.id })
      this.setStatus('clearance')
      return
    }
    messageTransfer('product', 'finishProcessing', { targetId: this.id, productId: product.id })
    //产品加工完毕,尝试派发产品
    this.setStatus('block')
  }

  //向下游派发产品
  public tryDispatchCurrentProduct(): void {
    if (!this.currentProduct) return
    console.log(`[${currentTime}] ${this.name} 尝试派发产品 ${this.currentProduct.id}`)
    const productId = this.currentProduct.id
    for (const next of this.nextStations) {
      if (next.canReceiveProduct(this.id, this.currentProduct)) {
        //当前产品添加到就绪产品队列中
        addReadyProduct(this.currentProduct)
        this.currentProduct = null

        next.receiveReadyProduct(productId)
        this.setStatus('idle')
        break
      }
    }
  }

  public eventWindow(eventType: 'status' | 'rework' | 'delProduct', param: any): void {
    if (eventType === 'status') {
      this.setStatus(param)
    } else if (eventType === 'rework' && this.currentProduct) {
      messageTransfer('product', 'startProcessing', {
        targetId: this.id,
        productId: this.currentProduct.id
      })
      this.tryProcess(this.currentProduct, true)
    } else if (eventType === 'delProduct' && this.currentProduct) {
      messageTransfer('product', 'recycle', {
        targetId: this.id,
        productId: this.currentProduct.id
      })
    }
  }
}

export default Workstation
可以看到,加工站继承了BaseStation,同时重写抽象方法
并且有自己独立的数据处理方法
- tryProcess
- finishProcessing
-
从加工站实体类我们就可以看出,当canReceiveProduct方法被调用时,会根据自身是否参与空闲状态来返回Boolean值
-
然后接收到产品后,会调用tryProcess方法进行加工
-
tryProcess()会将加工事件移交到事件队列里面,Scheduler后面我们会讲到
-
加工完毕后,我们会调用finishProcessing方法,完成加工,然后在调用产品派发方法
-
在产品派发方法里面,我们会循环遍历下一站,通过canReceiveProduct ()判断下一站哪一个处于空闲状态,如果有,就将产品通过receiveReadyProduct()派发给他,然后改变设备状态
这时我们就发现了,我们在设备加工完毕后,只是将产品派发给了下一站,并没有向上一站索要产品,那么就引出了我们的设备调度器Dispatcher.ts
在我们的基类里面,我们可以看到我们的状态改变后,会调用调度器的notifyStatusChange方法
ts
  protected setStatus(newStatus: StationStatus) {
    if (this.status !== newStatus) {
      this.status = newStatus
      dispatcher.notifyStatusChange(this, newStatus)
    }
  }
Dispatcher.ts
ts
import BaseStation from '../entities/BaseStation'
import WorkerPool from '../entities/WorkerPool'
import workerPool from '../entities/WorkerPool'
import { StationStatus } from '../types'

class Dispatcher {
  //空闲设备
  public idleStations = new Set<BaseStation>()
  //阻塞设备
  private blockedStations = new Set<BaseStation>()
  //特殊设备
  private specialStations = new Set<BaseStation>()
  //清理状态设备
  private clearStations = new Set<BaseStation>()
  //故障设备
  private faultStations = new Set<BaseStation>()
  //工人池
  public workerPoolList = new Set<workerPool>()

  registerStation(station: BaseStation) {
    // 可选:记录拓扑、分组、类别等
  }

  // 注册空闲基站
  registerIdleStation(stations: BaseStation[]) {
    // 遍历基站数组
    stations.forEach((station) => {
      // 将基站添加到空闲基站集合中
      this.idleStations.add(station)
    })
  }

  // 注册特殊基站
  registerSpecialStation(station: BaseStation) {
    this.specialStations.add(station)
  }

  // 注册工人池
  registerWorkerPool(workerPool: workerPool) {
    this.workerPoolList.add(workerPool)
  }

  /**
   * 有设备状态发生改变时,通知调度器
   * @param station
   * @param status
   */
  notifyStatusChange(station: BaseStation, status: StationStatus) {
    this.removeFromAllSets(station)

    if (status === 'idle') this.idleStations.add(station)
    if (status === 'block') this.blockedStations.add(station)
    if (status === 'clearance') this.clearStations.add(station)
    if (status === 'fault') this.faultStations.add(station)

    this.tryResolve()
  }

  /**
   * 尝试解决堵塞和空闲设备
   */
  tryResolve() {
    /**
     * 解决堵塞设备,将产品流入到下一站
     */
    for (const producer of this.blockedStations) {
      if (producer.nextStations) {
        for (const consumer of producer.nextStations) {
          if (this.idleStations.has(consumer) || this.specialStations.has(consumer)) {
            producer.tryDispatchCurrentProduct()
            break
          }
        }
      }
    }

    /**
     * 解决空闲设备,向上游索要产品
     */
    for (const consumer of this.idleStations) {
      if (consumer.prevStations) {
        for (const supplier of consumer.prevStations) {
          if (this.blockedStations.has(supplier) || this.specialStations.has(supplier)) {
            supplier.tryDispatchCurrentProduct()
            break
          }
        }
      }
    }

    /**
     * 解决需要清理的设备,向工人池发送请求
     */
    for (const alarm of this.clearStations) {
      let workerPool = null as null | WorkerPool
      for (const pool of this.workerPoolList) {
        if (pool.isDeviceInMap(alarm.id)) {
          workerPool = pool
          break
        }
      }
      if (workerPool) {
        workerPool.receiveTask('clean', alarm)
      }
    }

    /**
     * 解决故障设备,向工人池发送请求
     */
    for (const fault of this.faultStations) {
      let workerPool = null as null | WorkerPool
      for (const pool of this.workerPoolList) {
        if (pool.isDeviceInMap(fault.id)) {
          workerPool = pool
          break
        }
      }
      if (workerPool) {
        workerPool.receiveTask('maintenance', fault)
      }
    }
  }

  //把某台设备从状态集合中删除
  private removeFromAllSets(station: BaseStation) {
    this.idleStations.delete(station)
    this.blockedStations.delete(station)
    this.clearStations.delete(station)
    this.faultStations.delete(station)
  }

  //清除某台设备的负面状态
  clearNegativeStatus(station: BaseStation) {
    this.clearStations.delete(station)
    this.faultStations.delete(station)
  }

  //清空所有数据
  clear() {
    this.idleStations.clear()
    this.blockedStations.clear()
    this.clearStations.clear()
    this.faultStations.clear()
    this.specialStations.clear()
  }

  //判断某个设备是否在堵塞站里面或者在特殊站里面
  isDeviceInBlockOrSpecial(station: BaseStation) {
    return this.blockedStations.has(station) || this.specialStations.has(station)
  }
}

export const dispatcher = new Dispatcher()
调度器的 tryResolve() 很重要,它会遍历所有的堵塞状态的设备,然后再遍历他们的下一站,并将产品传递给下一站,同时也会遍历所有的空闲状态的设备,然后再遍历他们的上一站,如果上一站处于堵塞状态,那么就会触发上一站产品派发
那接下来我们来看我们的事件队列,是怎么安排每个事件的执行顺序的
EventQueue.ts
ts
import { MinPriorityQueue } from '@datastructures-js/priority-queue'

type Action = () => void

export class Event {
  constructor(
    public time: number,
    public action: Action,
    public description: string = ''
  ) {}
}

export const eventQueue = new MinPriorityQueue<Event>({
  compare: (a, b) => a.time - b.time
})- time:执行时间
- action:执行事件
- description:描述
Scheduler.ts
ts
import { Event, eventQueue } from './EventQueue'
import { currentTime } from './SimulationClock'

type Action = () => void

export const schedule = (timeOffset: number, action: Action, description: string): void => {
  eventQueue.enqueue(new Event(currentTime + timeOffset, action, description))
}
在Workstation里面,我们会去调用schedule方法,去添加事件,在这个方法内部,会将这个事件添加到eventQueue队列里面,我们在new 出 eventQueue时,已经将这个事件进行来排序,根据时间来排序
那么接下,我们已经有了仿真的队列,怎么去执行这个队列里面的事件呢,这就要说到我们的仿真控制器
SimController.ts
ts
// SimulationController.ts
import { eventQueue } from '../core/EventQueue'
import { setCurrentTime } from '../core/SimulationClock'
import { delay } from '../utils/Delay'
import SimulationSpeed from '../core/SimulationSpeed'
import { modeling } from './ModelBuilder'
import { dispatcher } from '../core/Dispatcher'
import { clearReadyProducts } from '../core/ReadyProducts'
import { messageTransfer } from '../messaging/MessageTransfer'

type SimStatus = 'idle' | 'running' | 'paused' | 'stopped'

class SimulationController {
  private status: SimStatus = 'idle'
  private pausedResolver: (() => void) | null = null
  private shouldStop: boolean = false

  public setStatus(status: 'running' | 'paused' | 'stopped' | 'resume'): void {
    if (status === 'running') {
      this.start()
    } else if (status === 'paused') {
      this.pause()
    } else if (status === 'stopped') {
      this.stop()
    } else if (status === 'resume') {
      this.resume()
    }
  }
  public changeSpeed(speed: number): void {
    SimulationSpeed.setSpeed = Number(speed)
  }

  getStatus(): SimStatus {
    return this.status
  }

  async start(): Promise<void> {
    //清空一下数据
    this.clearAll()
    if (this.status !== 'idle' && this.status !== 'stopped') return

    console.log('[Sim] ✅ 开始仿真')
    this.status = 'running'
    this.shouldStop = false
    let lastEventTime = 0
    modeling() // 初始化模型(只运行一次)
    while (!eventQueue.isEmpty()) {
      if (this.shouldStop) break
      if (this.status === ('paused' as SimStatus)) {
        await this.waitUntilResume()
      }

      const event = eventQueue.dequeue()
      if (event) {
        const simDelay = event.time - lastEventTime
        lastEventTime = event.time
        const waitMs = (simDelay * 1000) / SimulationSpeed.getSpeed
        await delay(waitMs)
        //发送仿真时间
        messageTransfer('simTime', null, event.time)
        setCurrentTime(event.time)
        event.action()
      }
    }

    if (this.status !== ('paused' as SimStatus)) {
      this.status = 'stopped'
      console.log('[Sim] 🛑 仿真完成或已停止')
    }
  }

  pause(): void {
    if (this.status === 'running') {
      this.status = 'paused'
      console.log('[Sim] ⏸️ 暂停')
    }
  }

  resume(): void {
    if (this.status === 'paused') {
      this.status = 'running'
      console.log('[Sim] ▶️ 重启')
      this.pausedResolver?.()
      this.pausedResolver = null
    }
  }

  stop(): void {
    this.shouldStop = true
    this.status = 'stopped'
    this.clearAll()
    console.log('[Sim] ❌ 仿真停止')
  }

  private waitUntilResume(): Promise<void> {
    return new Promise((resolve) => {
      this.pausedResolver = resolve
    })
  }

  private clearAll(): void {
    //清空队列
    eventQueue.clear()
    //重置时间
    setCurrentTime(0)
    //重置速度
    SimulationSpeed.setSpeed = 1
    //重置模型状态
    dispatcher.clear()
    //清空就绪产品队列
    clearReadyProducts()
  }
}

export const simController = new SimulationController()
我们主要看仿真控制器的这一段代码
ts
while (!eventQueue.isEmpty()) {
  if (this.shouldStop) break
  if (this.status === ('paused' as SimStatus)) {
    await this.waitUntilResume()
  }

  const event = eventQueue.dequeue()
  if (event) {
    const simDelay = event.time - lastEventTime
    lastEventTime = event.time
    const waitMs = (simDelay * 1000) / SimulationSpeed.getSpeed
    await delay(waitMs)
    //发送仿真时间
    messageTransfer('simTime', null, event.time)
    setCurrentTime(event.time)
    event.action()
  }
}
首先他会循环遍历eventQueue队列,直到他为空
然后提取到里面的时间,并结合仿真速度,进行delay
最后执行对应的事件
一个基本的仿真流程就执行完毕了,由于篇幅过长,后续内容我会放到后面来讲,谢谢大家观看