在Mac电脑上运行Nginx,最简便且推荐的方法是使用 Homebrew 安装和管理。以下是详细步骤指南:
✅ 一、安装 Homebrew(如已安装可跳过)
打开终端(Terminal),执行以下命令安装 Homebrew(Mac 上最常用的包管理工具):
bash
/bin/bash -c "$(curl -fsSL https://raw.githubusercontent.com/Homebrew/install/HEAD/install.sh)"安装完成后,执行:
bash
brew --version
✅ 二、使用 Homebrew 安装 Nginx
bash
brew install nginx安装完成后,可查看版本确认:
bash
nginx -v
默认安装路径为:
- 配置文件:
/usr/local/etc/nginx/nginx.conf(Apple Silicon 为/opt/homebrew/etc/nginx/nginx.conf) - 网页根目录:
/usr/local/var/www(或/opt/homebrew/var/www)
✅ 三、启动 Nginx
bash
brew services start nginx或手动启动:
bash
nginx打开浏览器访问:
shell
http://localhost:8080如果看到 "Welcome to nginx!" 页面,说明运行成功。
✅ 四、常用命令
| 操作 | 命令 |
|---|---|
| 启动 | nginx 或 brew services start nginx |
| 重启 | brew services restart nginx |
| 停止 | brew services stop nginx |
| 重新加载配置 | nginx -s reload |
| 测试配置 | nginx -t |
✅ 五、修改配置示例
编辑配置文件:
shell
nano /usr/local/etc/nginx/nginx.conf添加一个简单的虚拟主机:
nginx
server {
    listen 8080;
    server_name localhost;

    location / {
        root /usr/local/var/www;
        index index.html;
    }
}
保存后执行:
shell
nginx -s reload✅ 六、设置开机自启(可选)
shell
brew services start nginxHomebrew 会自动将其注册为 launchd 服务,实现开机自启。
✅ 七、卸载(如需要)
bash
brew uninstall nginx本次项目需要做的实操事情
如何把安装好的Nginx静态资源替换成宿主机本地绝对路径,省得记相对规则:
shell
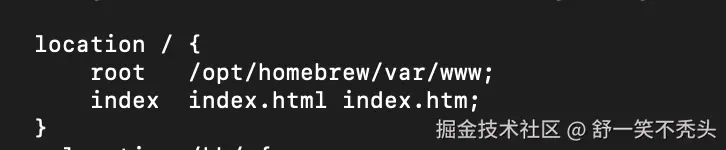
location / {
    root   /opt/homebrew/var/www;
    index  index.html index.htm;
}
使用nginx命令启动之后
shell
nginx -t      # 语法检查
nginx -s reload
静态资源如何存放
将前端静态资源直接打包成dist文件夹,然后使用下述命令,复制的是"dist 里面的文件",而不是 dist 文件夹本身
shell
# 进入 dist
cd dist
# 把内部所有文件复制到 nginx 根目录
cp -r * /opt/homebrew/var/www/
Nginx如何添加自定义请求头
shell
server {
    listen       8080;
    server_name  localhost;

    location / {
        root   /opt/homebrew/var/www;
        index  index.html index.htm;
    }

    location /kb/ {
        proxy_pass http://localhost:10003;
        proxy_set_header Host $host;
        proxy_set_header X-Real-IP $remote_addr;
        proxy_set_header X-Forwarded-For $proxy_add_x_forwarded_for;
        proxy_set_header X-Forwarded-Proto $scheme;
        proxy_set_header X-Custom-Header custom-value;  # 添加自定义头
    }

    location /user/ {
        proxy_pass http://localhost:10003;
        proxy_set_header Host $host;
        proxy_set_header X-Real-IP $remote_addr;
        proxy_set_header X-Forwarded-For $proxy_add_x_forwarded_for;
        proxy_set_header X-Forwarded-Proto $scheme;
        proxy_set_header X-Custom-Header custom-value;  # 添加自定义头
    }

    location /assistant/ {
        proxy_pass http://localhost:10003;
        proxy_set_header Host $host;
        proxy_set_header X-Real-IP $remote_addr;
        proxy_set_header X-Forwarded-For $proxy_add_x_forwarded_for;
        proxy_set_header X-Forwarded-Proto $scheme;
        proxy_set_header X-Custom-Header custom-value;  # 添加自定义头
    }

    location /kl/ {
        proxy_pass http://localhost:10003;
        proxy_set_header Host $host;
        proxy_set_header X-Real-IP $remote_addr;
        proxy_set_header X-Forwarded-For $proxy_add_x_forwarded_for;
        proxy_set_header X-Forwarded-Proto $scheme;
        proxy_set_header X-Custom-Header custom-value;  # 添加自定义头
    }

    location /platform/ {
        proxy_pass http://localhost:10003;
        proxy_set_header Host $host;
        proxy_set_header X-Real-IP $remote_addr;
        proxy_set_header X-Forwarded-For $proxy_add_x_forwarded_for;
        proxy_set_header X-Forwarded-Proto $scheme;
        proxy_set_header X-Custom-Header custom-value;  # 添加自定义头
    }
}