一、Docker镜像创建-Dockerfile
Dockerfile是一个文本文件,里面包含了一系列的指令。通过这些指令,可以基于基础镜像自动化的构建出新Docker镜像。
简单理解,Dockerfile将环境搭建和应用部署的过程代码化了,实现了基础设施即代码(Infrastructure as Code)。
1、Dockerfile常用指令
- FROM:指定基础镜像,后续的所有操作都是基于这个基础镜像。每个Dockerfile都必须以FROM指令开头;
- RUN:在镜像构建过程中指定需要执行的命令。常用于安装所需软件包;
- COPY:将宿主机上的文件或目录复制到镜像内的指定路径;
- ADD:与COPY类似,通常用于将宿主机上的压缩包复制并解压到镜像内指定路径;
- ENV:设置环境变量,这个环境变量在构造阶段和容器运行阶段都会生效;
- CMD:指定该镜像创建的容器启动时默认执行的命令(一个Dockerfile只能有一条CMD指领,如果有多条仅最后一条会生效)。
2、镜像构建命令
构建镜像,首先需要介绍下docker buildx。
docker buildx时Docker的下一代构建工具。它完全兼容传统的docker build命令,但是提供了更多强大的功能。
buildx基于Buildkit,但相对旧的构造器,它具有更高效的缓存机制和并行构建能力,能够显著加快构造速度。另外支持跨平台构建。支持在单一的x86_64架构机器上,轻松构建适用于其他平台(如arm64、risc-v)的Docker镜像。
在ubuntu 20.04上,docker默认未安装docker buildx,可以使用以下命令安装:
shell
sudo apt install docker-buildx查看docker buildx版本:
shell
$ docker buildx version
github.com/docker/buildx 0.14.1 0.14.1-0ubuntu1~20.04.1
构建命令:
shell
docker buildx build -t <image_name>:<image_tag> -f <dockerfile> .- "-t":指定构建的镜像名和tag名;
- "-f":指定用于构建的Dockerfile文件名,默认为当前目录的Dockerfile文件;
- "."表示构建上下文为当前目录,构建时Docker只能访问(如COPY)构建上下文内的文件。
3、一些特殊镜像
(1)支持systemd
- 基于ubuntu 24.04支持systemd的Dockerfile
docker
# ubuntu_systemd_2404.dockerfile
FROM ubuntu:24.04 as ubuntu_systemd_2404

RUN apt-get update
RUN apt-get -y upgrade

RUN apt-get -y install systemd
RUN ln -s /lib/systemd/systemd /usr/sbin/init

# 容器启动后首先执行/usr/sbin/init
CMD ["/usr/sbin/init"]- 生成镜像
shell
docker buildx build -t ubuntu_systemd:24.04 -f ubuntu_systemd_2404.dockerfile .- 创建和访问容器
shell
# create container
docker run -itd --name ubuntu_systemd_2404 --privileged ubuntu_systemd:24.04
# enter container
docker exec -it ubuntu_systemd_2404 /bin/bash
注:容器需要特权模式,--privileged参数是必须的。
(2)支持ssh
- 基于ubuntu 24.04支持ssh的Dockerfile
docker
# ubuntu_ssh_2404.dockerfile
FROM ubuntu:24.04 as ubuntu_ssh_2404

RUN apt-get update
RUN apt-get -y upgrade

RUN apt-get -y install openssh-server
RUN mkdir /var/run/sshd

 # 容器启动后启动sshd并后台运行
CMD ["/usr/sbin/sshd", "-D"]- 生成镜像
shell
docker buildx build -t ubuntu_ssh:24.04 -f ubuntu_ssh_2404.dockerfile .- 创建和访问容器
shell
# create container
docker run -itd --name ubuntu_ssh_2404 \
    -p 10022:22 \
    -v ${HOME}/.ssh:/home/ubuntu/.ssh \
    -v ${HOME}/.gitconfig:/home/ubuntu/.gitconfig \
    ubuntu_ssh:24.04
注1:-p映射端口方便直接使用ssh登录到容器内部;
注2:-v挂载.ssh和.gitconfig,方便容器内使用主机的ssh和git配置。
二、Docker容器管理-compose.yaml
Docker Compose文档:https://docs.docker.com/compose/
Dockerfile,实现了代码化的管理Docker镜像,而Docker Compose是Docker官方提供的容器编排工具,实现代码化的定义和运行多容器的Docker应用程序。通过一个单独的YAML文件来配置应用的所有服务(容器实例),然后使用一条命令即可启动和管理整个应用栈(应用/项目)。
1、常用配置项
Docker compose.yaml配置项:https://docs.docker.com/reference/compose-file/
| 配置 | 描述 |
|---|---|
| name | 设置默认的项目/应用名 |
| services.<service_name>.image | 指定用于创建容器的image名字及tag |
| services.<service_name>.build.context | 设置构建镜像的上下文目录 |
| services.<service_name>.build.dockerfile | 设置构建镜像的Dockerfile文件 |
| services.<service_name>.build.target | 指定使用Dockerfile中的指定target |
| services.<service_name>.container_name | 指定所创建容器的名字 |
| services.<service_name>.tty | bool类型,相当于命令行中的-t |
| services.<service_name>.stdin_open | bool类型,相当于命令行中的-i |
| services.<service_name>.command | 覆盖镜像中默认的 CMD 指令,指定容器启动时执行的命令 |
| services.<service_name>.restart | 定义容器退出时的自动重启策略,通常为unless-stopped:除非手动停止,否则总是重启 |
2、管理命令
在ubuntu 20.04上,docker默认未安装docker compose,可以使用以下命令安装:
shell
sudo apt install docker-compose-v2注:有docker-compose和docker-compose-v2两个版本,建议直接使用docker-compose-v2。
查看docker compose版本:
shell
$ docker compose version
Docker Compose version 2.27.1+ds1-0ubuntu1~20.04.1
常用命令:
shell
# 启动定义的所有服务
docker-compose up
# 启动定义的所有服务并后台运行
docker-compose up -d
# 停止定义的所有服务并移除容器
docker-compose down

# 启动指定的服务
docker-compose start <service_name>
# 停止指定的服务
docker-compose stop <service_name>
# 移除指定的服务容器
docker-compose rm <service_name>

# 查看所有运行的服务
docker-compose ps
# 构建或重新构建服务
docker-compose build
# 查看服务的日志输出
docker-compose logs
3、一个简单的demo
(1)创建一个Dockerfile文件
docker
# Dockerfile
FROM ubuntu:24.04 as ubuntu_2404

RUN apt-get update
RUN apt-get -y install net-tools
RUN apt-get -y install iproute2
RUN apt-get -y install inetutils-ping

CMD ["/bin/bash"]

FROM ubuntu:22.04 as ubuntu_2204

RUN apt-get update
RUN apt-get -y install net-tools
RUN apt-get -y install iproute2
RUN apt-get -y install inetutils-ping

CMD ["/bin/bash"]
(2)创建compose.yaml文件
yaml
name: test
services:
  container1:
    image: ubuntu:20.04
    container_name: Container1
    tty: true
    stdin_open: true
    command: /bin/bash
    restart: unless-stopped

  container2:
    build:
      context: .
      dockerfile: Dockerfile
      target: ubuntu_2204
    container_name: Container2
    tty: true
    stdin_open: true
    command: /bin/bash
    restart: unless-stopped

  container3:
    build:
      context: .
      dockerfile: Dockerfile
      target: ubuntu_2404
    container_name: Container3
    tty: true
    stdin_open: true
    command: /bin/bash
    restart: unless-stopped
(3)管理这些容器(服务)
当前文件结构:
shell
$ tree
.
├── compose.yaml
└── Dockerfile- 启动应用(项目)
shell
docker compose up- 启动应用(项目)并后台运行
shell
docker compose up -d- 管理应用(项目)
shell
docker compose down三、基于Docker容器开发-devcontainer.json
什么是基于容器的开发环境?简单的说,它是一种将你的整个开发环境(代码编辑器、编程语言运行时、依赖库、工具链、插件等)封装到一个Docker容器中的开发模式。
而devcontainer.json是定义这个开发容器的"蓝图"或"说明书",通过这个文件各种工具(如VSCode的DevContainer插件)可以构建和配置所需的开发容器,实现开发环境的代码化管理。
通常会在项目根目录创建.devcontainer的文件夹,并在下面放置devcontainer.json文件,及所使用的Dockerfile文件和compose.yaml文件(可选)。
1、插件安装(VSCode环境)
基于VSCode的devcontainer介绍:https://code.visualstudio.com/docs/devcontainers/containers
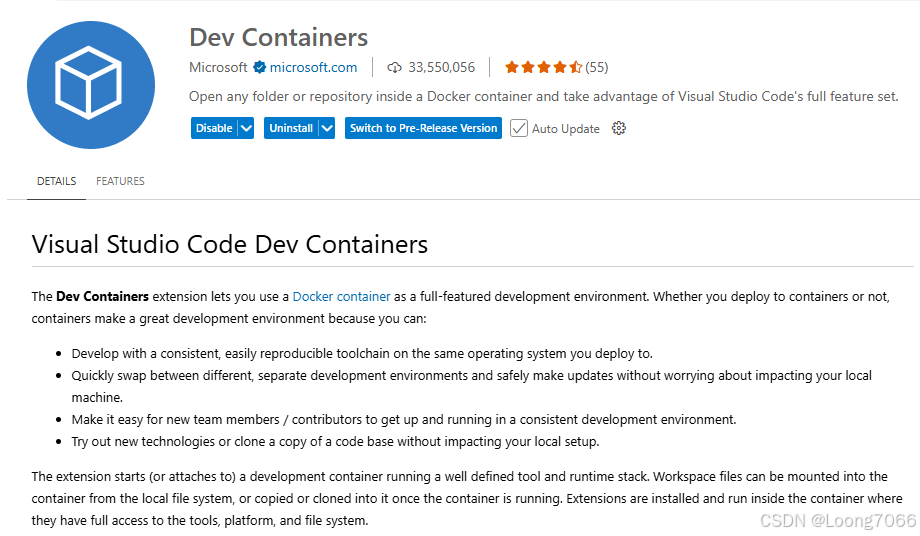
在插件市场搜索"Dev Containers",并安装。
2、常用配置项
Development Containers Specification: https://containers.dev/implementors/json_reference/
| 配置 | 描述 |
|---|---|
| name | 设置在UI(比如VSCode)上显示的devcontainer名字(注意不是docker container的名字) |
| image | 支持创建容器时所使用的Docker镜像名及tag |
| build.dockerfile | 使用Dockerfile创建镜像时,指定所使用的Dockerfile文件名 |
| build.context | 使用Dockerfile创建镜像时,指定构建镜像时的上下文 |
| build.target | 使用Dockerfile创建镜像时,Dockerfile中含有多个target时指定所使用的target |
| mounts | 将宿主机的目录映射到Docker容器内 |
| remoteUser | 指定进入容器时使用的账号信息(可以规避使用root产生的文件访问权限问题) |
| runArgs | 可以指定Docker CLI支持的一些参数,比如设置创建的容器名 |
| customizations | 与编译器/IDE的相关配置项,比如可以配置VSCode的一些设置,在容器内默认安装的插件信息 |
3、一个C/C++开发环境的demo
(1)定义Dockerfile文件
docker
# Dockerfile
FROM ubuntu:24.04

RUN apt-get update

RUN apt-get -y install gcc g++ gdb
RUN apt-get -y install clang llvm
RUN apt-get -y install cmake git vim

CMD ["/bin/bash"]
(2)创建devcontainer.json文件
json
{
    "name": "demo",
    "build": {
        "dockerfile": "Dockerfile"
    },
    "mounts": [
        {
            "source": "${localEnv:HOME}/.ssh",
            "target": "/home/ubuntu/.ssh",
            "type": "bind"
        },
        {
            "source": "${localEnv:HOME}/.gitconfig",
            "target": "/home/ubuntu/.gitconfig",
            "type": "bind"
        }
    ],
    "remoteUser": "ubuntu",
    "runArgs": [
        "--name",
        "dev_container"
    ],
    "customizations": {
        "vscode": {
            "settings": {},
            "extensions": [
                "ms-vscode.cpptools-extension-pack"
            ]
        }
    }
}
注:remoteUser使用ubuntu,可以避免文件访问权限问题。
(3)进入基于container的开发环境
当前工程文件结构:
shell
$ tree -a
.
└── .devcontainer
├── devcontainer.json
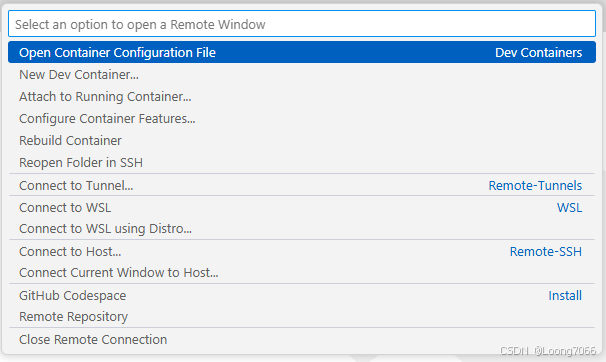
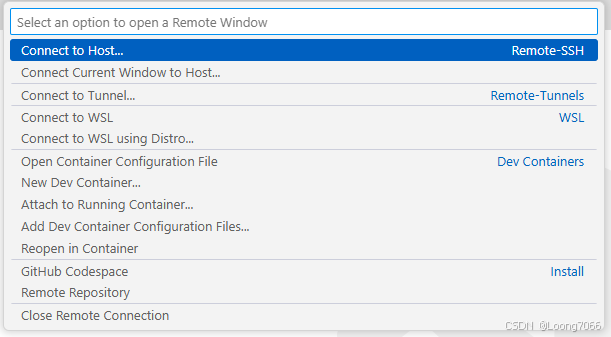
└── Dockerfile点击VSCode的左下角,打开配置项,选择"Reopen in container":
等待环境创建完成(等待时间主要与镜像构建速度和VSCode插件的安装时长有关);
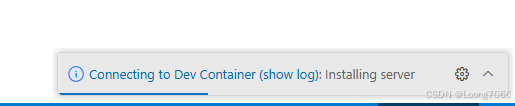
当container环境创建完成后,可以在VSCode的左下角看到Dev Container的信息:
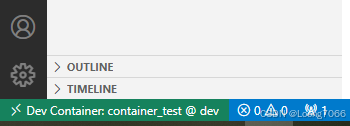
当修改Dockerfile或者devcontainer.json文件,也可以点击这里,选择"Rebuild Container"重新构建容器。