文章目录
环境
- 阿里云ECS服务器:CentOS 8.5 64位 UEFI版
- Apache 2.4.37
背景
域名 chinatt.org.cn 已经绑定到了一个阿里云ECS服务器上,可以通过 http://chinatt.org.cn 来访问网站。
出于安全性的考虑,现在希望添加https支持,应该怎么弄?
步骤
获取SSL证书
有多种方式可以获取SSL证书,本例中,使用的是阿里云的免费证书。其有效期是3个月,到期后可以再次申请。
参考这篇文档: https://developer.aliyun.com/article/1650540
首先登录阿里云数字证书管理服务页面: https://yundun.console.aliyun.com/?spm=a2c6h.12873639.article-detail.5.392262cdIPJYNj&userCode=r3yteowb&p=cas#/overview/cn-hangzhou
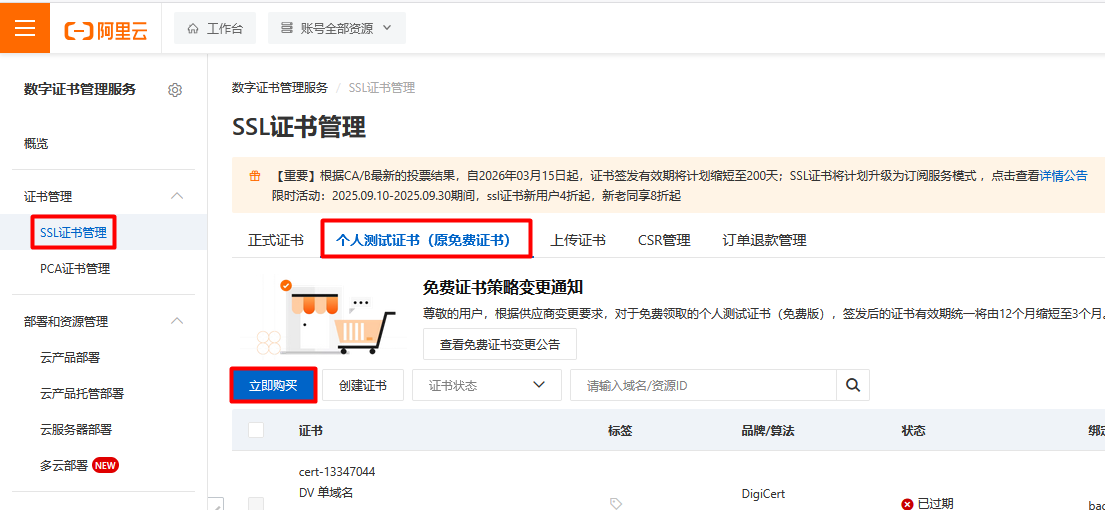
按照官方文档指引,在页面左边选择 SSL证书管理 ,然后在右边选择 个人测试证书(原免费证书) ,然后点击下方的 立即购买 按钮:
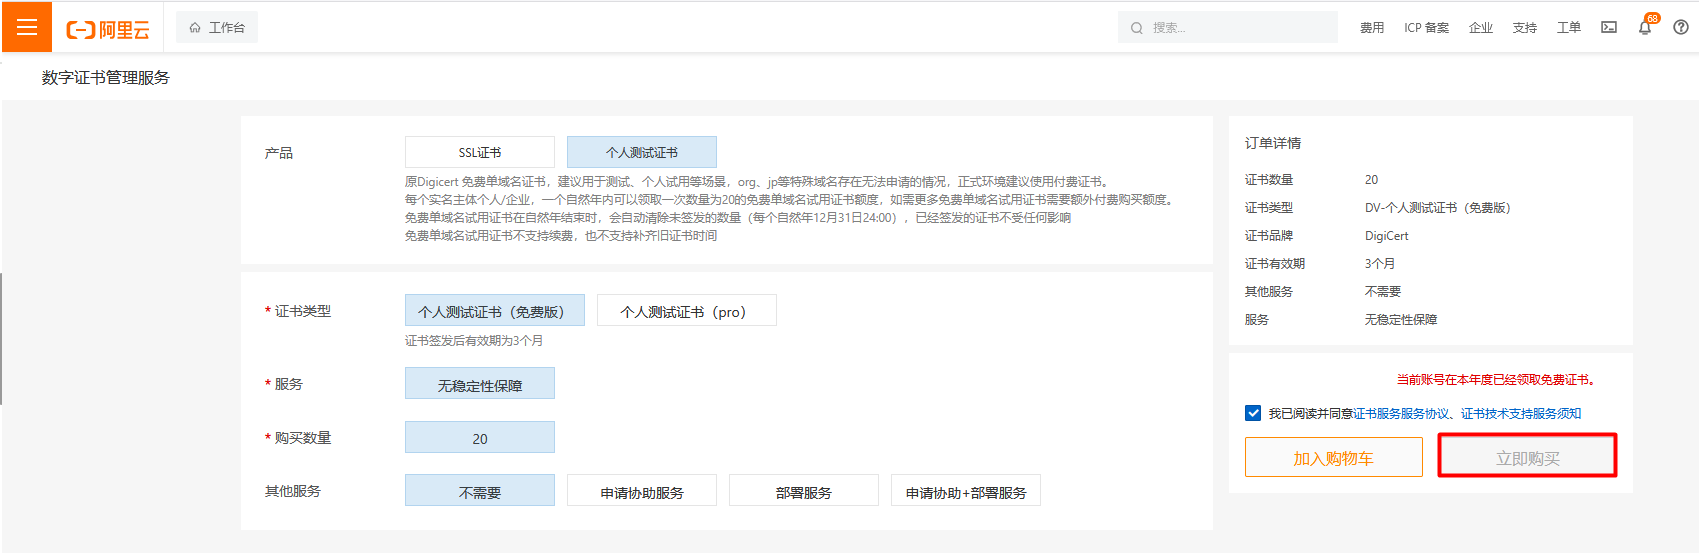
在接下来的页面里,无需修改任何选项,确保选择的是 个人测试证书(免费版) ,然后勾选"我已阅读并同意",并点击"立即购买"按钮:
接下来,回到SSL证书管理页面,点击 创建证书 按钮:
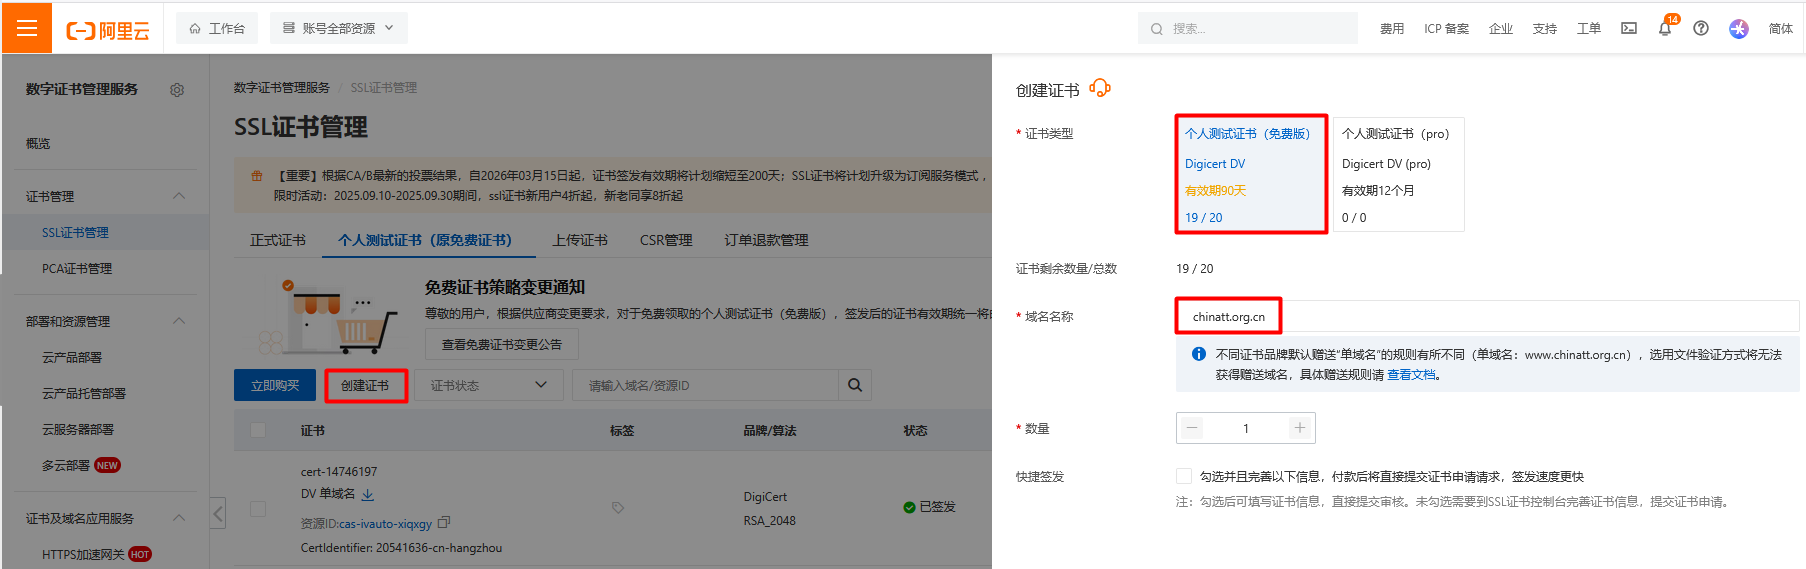
在右边选择 个人测试证书(免费版) ,并输入域名名称,然后选中 快捷签发 选项:
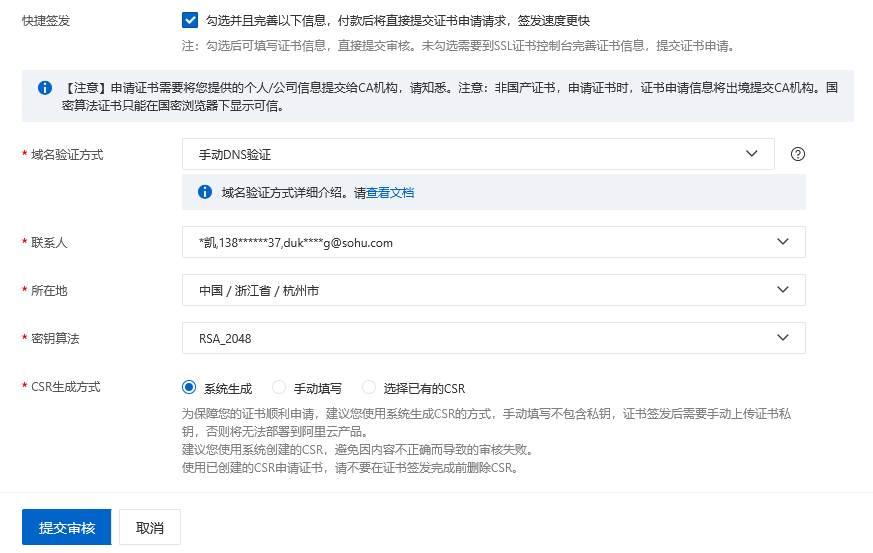
把联系人和所在地添加一下,其它配置我用的都是默认设置。
DNS验证
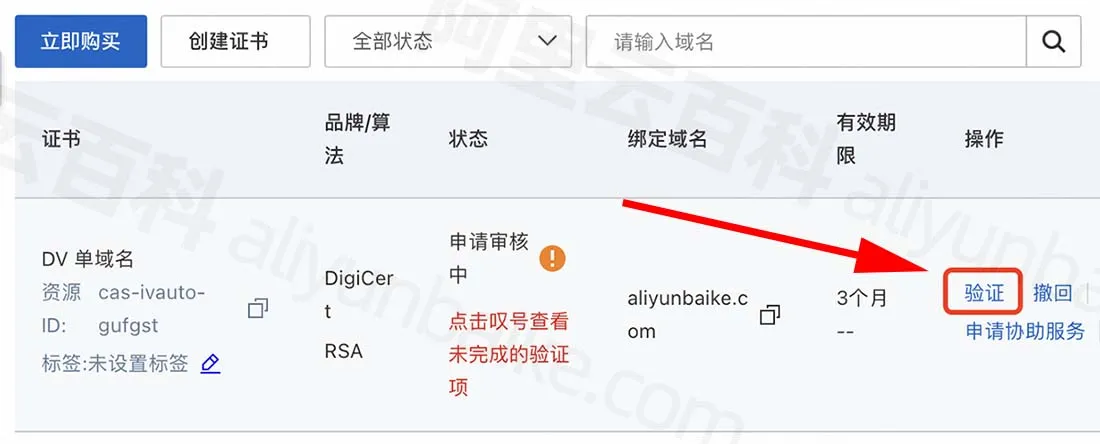
提交审核后,在SSL证书管理页面,找到证书,并点击右侧的 验证 :
在接下来的页面里会有 TXT/CNAME 类型的 主机记录 和 记录值 :
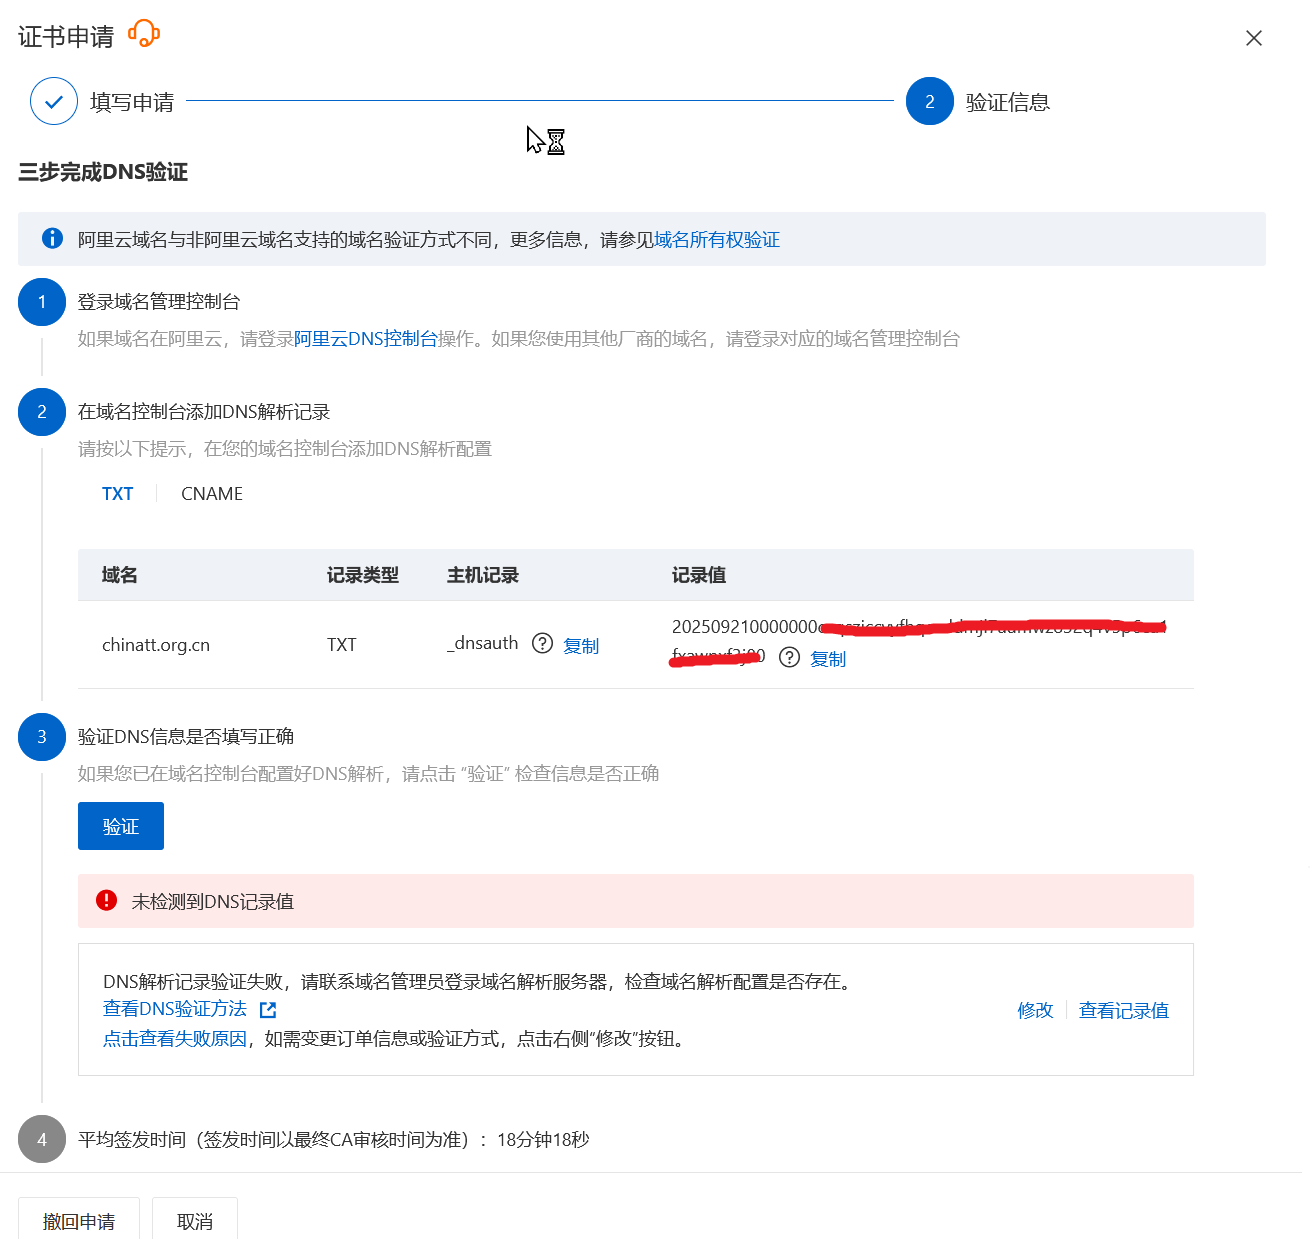
在域名管理控制台(可能不是阿里云的域名,图略),配置好主机记录和记录值(生效可能需要几分钟时间),然后回到该页面,点击 验证 按钮,确保验证成功。
验证成功后,就可以下载证书了。
在证书右侧,点击 更多 :

然后在接下来的页面里,点击 下载 页签,然后找到适合的服务器类型,点击 下载 :
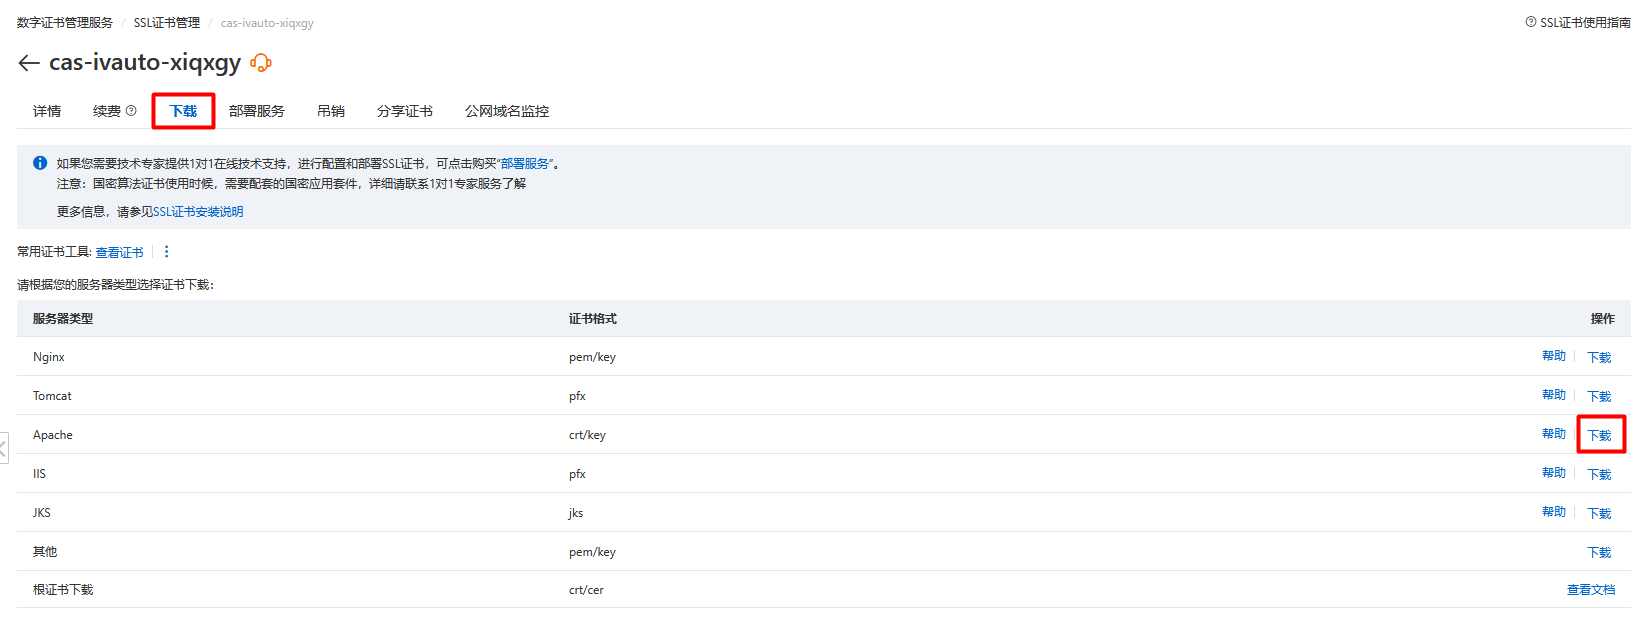
我用的是Apache,所以下载的是Apache类型的证书。
实际下载的是一个名为 20541636_chinatt.org.cn_apache.zip 的文件,将其解压后,生成3个文件:
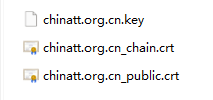
chinatt.org.cn.key:私钥文件chinatt.org.cn_public.crt:域名证书文件chinatt.org.cn_chain.crt:证书链文件
Apache配置
把上述3个文件上传到ECS服务器的 /etc/httpd/ssl 目录(若不存在该目录则手工创建),
接下来,检查配置文件中是否已加载SSL模块。我在Apache的配置里( /etc/httpd/conf/httpd.conf 和 /etc/httpd/conf.d/*.conf )没找到SSL相关的配置,所以,得先安装 mod_ssl 包:
bash
sudo yum install mod_ssl安装完成后,就会自动生成 /etc/httpd/conf.d/ssl.conf 文件。
备份该文件(备份时注意后缀名要修改一下,比如叫 ssl.conf.bak ),然后修改文件如下:
powershell
Listen 443 https

SSLPassPhraseDialog exec:/usr/libexec/httpd-ssl-pass-dialog

SSLSessionCache         shmcb:/run/httpd/sslcache(512000)
SSLSessionCacheTimeout  300

SSLCryptoDevice builtin

<VirtualHost *:443>
    ServerAdmin webmaster@localhost
    DocumentRoot "/var/www/html/match_export/frontend"
    ServerName chinatt.org.cn
    ServerAlias www.chinatt.org.cn

    # SSL 基本配置
    SSLEngine on
    SSLCertificateFile /etc/httpd/ssl/chinatt.org.cn_public.crt
    SSLCertificateKeyFile /etc/httpd/ssl/chinatt.org.cn.key
    SSLCertificateChainFile /etc/httpd/ssl/chinatt.org.cn_chain.crt

    # SSL 安全优化
    SSLProtocol All -SSLv2 -SSLv3 -TLSv1 -TLSv1.1
    SSLCipherSuite ECDHE-ECDSA-AES128-GCM-SHA256:ECDHE-RSA-AES128-GCM-SHA256:ECDHE-ECDSA-AES256-GCM-SHA384:ECDHE-RSA-AES256-GCM-SHA384:ECDHE-ECDSA-CHACHA20-POLY1305:ECDHE-RSA-CHACHA20-POLY1305:DHE-RSA-AES128-GCM-SHA256:DHE-RSA-AES256-GCM-SHA384
    SSLHonorCipherOrder on

    # 前端静态文件目录配置
    <Directory "/var/www/html/match_export/frontend">
        Options Indexes FollowSymLinks
        AllowOverride All
        Require all granted
        DirectoryIndex index.html
    </Directory>

    # API路由配置:将所有/api/请求转发到ThinkPHP后端
    Alias /api "/var/www/html/match_export/backend/public"
    <Directory "/var/www/html/match_export/backend/public">
        Options FollowSymLinks
        AllowOverride All
        Require all granted
        DirectoryIndex index.php

        # ThinkPHP重写规则
        RewriteEngine On
        RewriteCond %{REQUEST_FILENAME} !-d
        RewriteCond %{REQUEST_FILENAME} !-f
        RewriteRule ^(.*)$ index.php [L,E=PATH_INFO:$1]
    </Directory>

    # 错误日志和访问日志路径
    ErrorLog /var/log/httpd/match_export_ssl_error.log
    CustomLog /var/log/httpd/match_export_ssl_access.log combined

    # PHP处理配置(与HTTP版本保持一致)
    <FilesMatch \.php$>
        SetHandler "proxy:unix:/run/php-fpm/www.sock|fcgi://localhost"
    </FilesMatch>
</VirtualHost>
注:原来有很多注释,我都删除了。
注意: ssl.conf 文件内容一定要好好看一下,里面有一部分内容照搬就行,有一部分内容是需要根据实际项目情况而定的。
修改完成后,使用 sudo httpd -t 检查一下,如果出现 Syntax OK 的字样,就说明没有语法问题。
最后,别忘了重启Apache:
bash
sudo systemctl restart httpd注意:HTTPS默认使用的端口是443,而ECS服务器的443端口默认是没有开放的,需要开放一下。
登录到阿里云ECS控制台,点击实例,选择 安全组 ,点击 管理规则 :
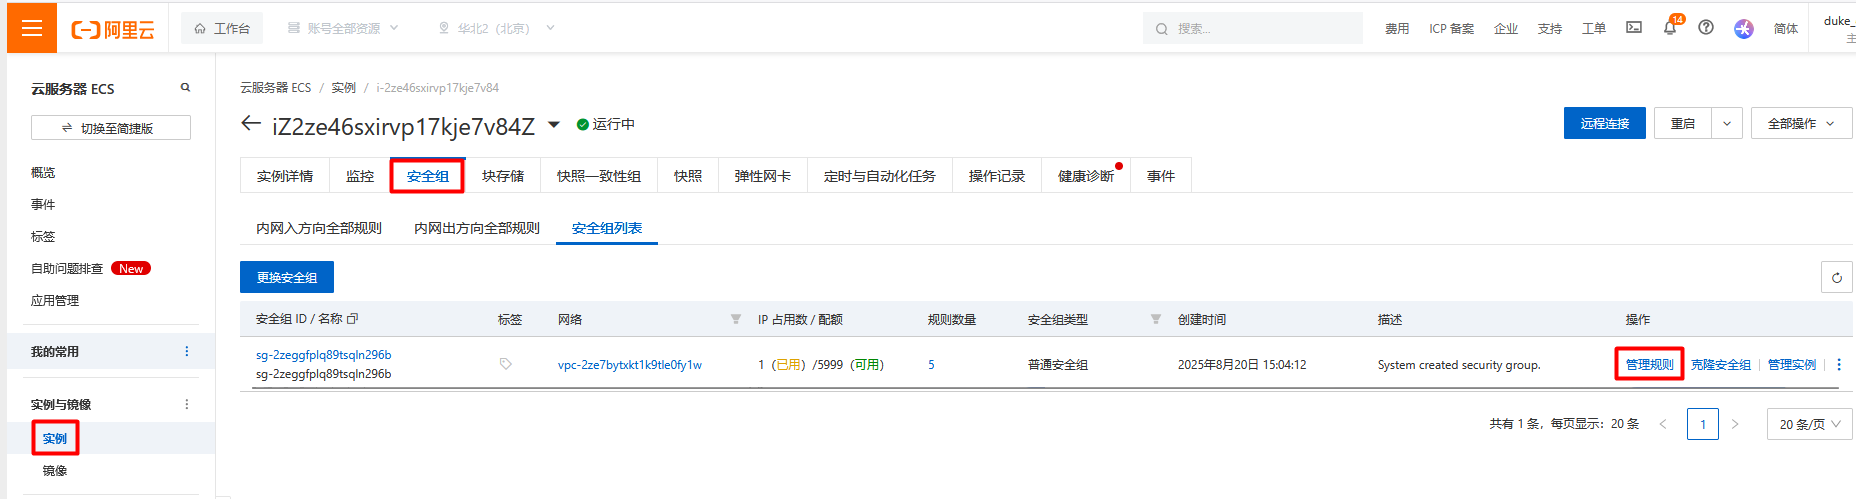
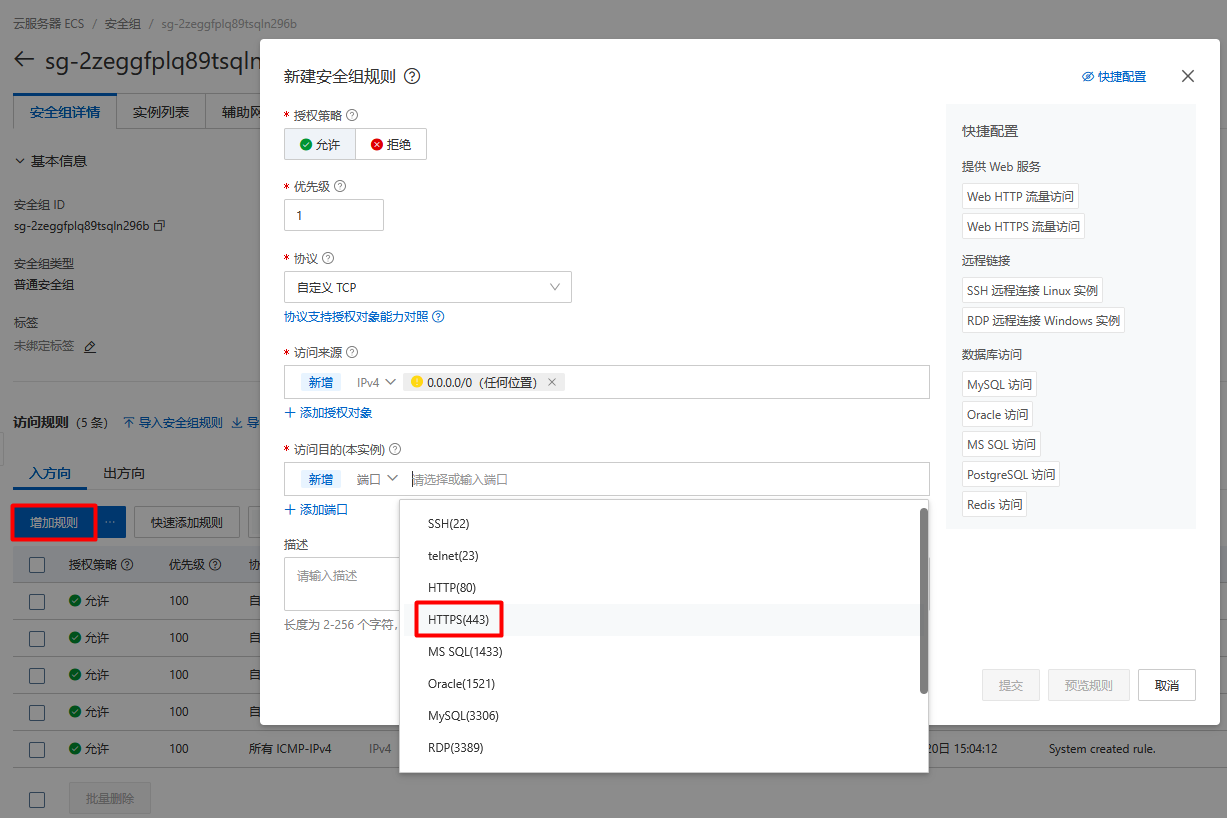
在接下来的页面里,点击 增加规则 按钮,并选择 HTTP(443) ,如下图:
注:如果不这么做,而是直接在服务器上通过 iptables 命令来打开443端口,是否也行呢?我不是很确定。
bash
sudo iptables -A INPUT -p tcp --dport 443 -j ACCEPT测试一下443端口的连通性:在PowerShell里,运行:
powershell
PS C:\Users\duke_> ncat -zv 47.93.146.192 443
Ncat: Version 7.98 ( https://nmap.org/ncat )
Ncat: Connected to 47.93.146.192:443.
Ncat: 0 bytes sent, 0 bytes received in 0.17 seconds.
注: ncat 是用 choco install nmap 命令安装的(需要以管理员身份运行PowerShell)。
测试HTTPS访问
一切OK,就可以测试效果了。
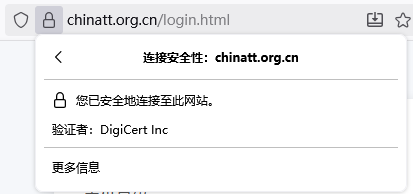
打开浏览器,访问 https://chinatt.org.cn :
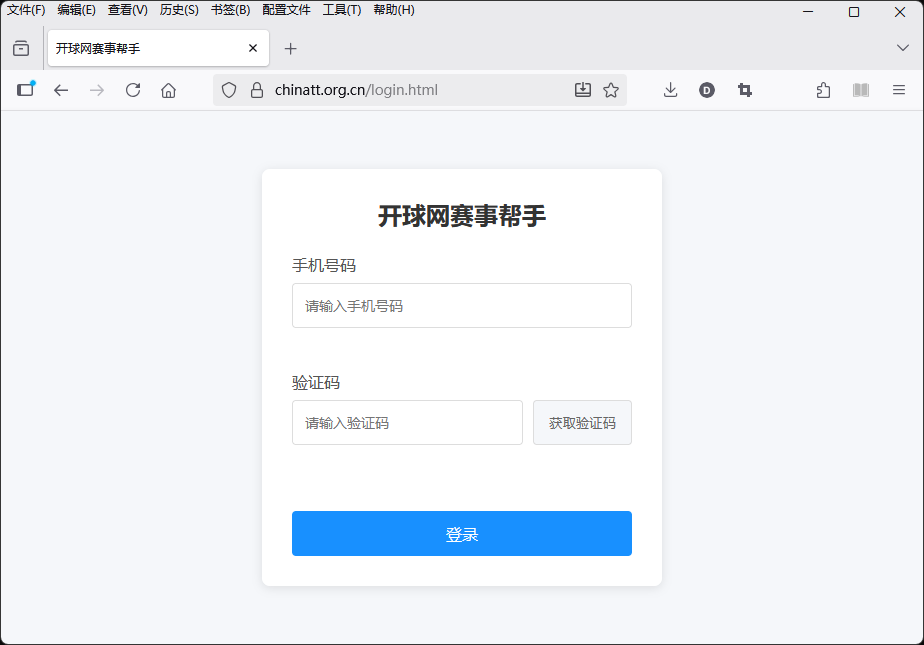
可见,URL栏左侧有个锁的图标,表示这是SSL安全连接。
注:URL栏显示 chinatt.org.cn/login.html ,是因为网站的默认页面是 index.html ,然后因为没有登录,所以自动跳转到了 login.html 页面。这是网站的逻辑,和SSL以及Apache无关。
点击小锁,然后点击 安全连接 :
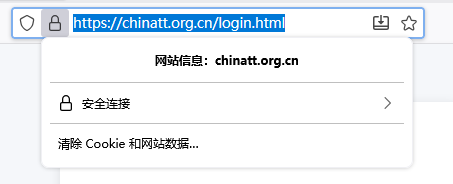
如下,显示 您已安全地连接至此网站 :
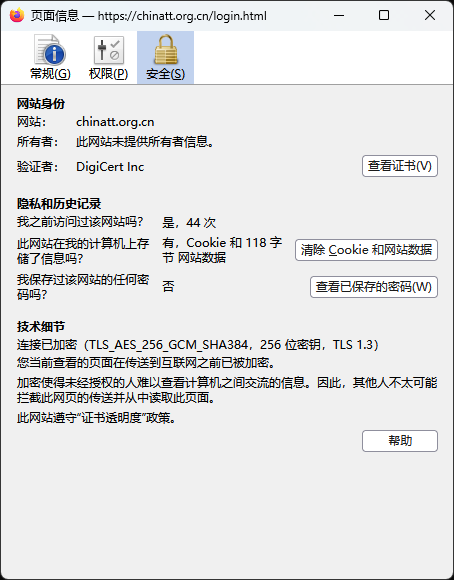
点击 更多信息 ,如下:
设置HTTP重定向到HTTPS
现在,使用HTTP和HTTPS都能访问网站,为了安全起见,我们可以强制使用HTTPS,把HTTP请求重定向到HTTPS。
之前是用 /etc/httpd/conf.d/match_export.conf 文件配置的。内容如下:
powershell
<VirtualHost *:80>
    ServerAdmin webmaster@localhost

    DocumentRoot "/var/www/html/match_export/frontend"

    ServerName 47.93.146.192

    <Directory "/var/www/html/match_export/frontend">
        Options Indexes FollowSymLinks
        AllowOverride All
        Require all granted
        DirectoryIndex index.html
    </Directory>

    # API路由配置:将所有/api/请求转发到ThinkPHP后端
    Alias /api "/var/www/html/match_export/backend/public"
    <Directory "/var/www/html/match_export/backend/public">
        Options FollowSymLinks
        AllowOverride All
        Require all granted
        DirectoryIndex index.php

        # ThinkPHP重写规则
        RewriteEngine On
        RewriteCond %{REQUEST_FILENAME} !-d
        RewriteCond %{REQUEST_FILENAME} !-f
        RewriteRule ^(.*)$ index.php [L,E=PATH_INFO:$1]
    </Directory>

    # 错误日志和访问日志路径,方便排查问题
    ErrorLog /var/log/httpd/match_export_error.log
    CustomLog /var/log/httpd/match_export_access.log combined

    # 确保Apache能正确处理PHP文件(如果全局已配置则可省略)
    <FilesMatch \.php$>
        SetHandler "proxy:unix:/run/php-fpm/www.sock|fcgi://localhost"
        # SetHandler "proxy:fcgi://127.0.0.1:9000"
    </FilesMatch>
</VirtualHost>
备份该文件(注意备份时换个后缀名),然后修改文件如下:
powershell
<VirtualHost *:80>
    ServerName chinatt.org.cn
    ServerAlias www.chinatt.org.cn
    # 永久重定向到HTTPS
    Redirect permanent / https://chinatt.org.cn/

</VirtualHost>

<VirtualHost 47.93.146.192:80>
    ServerAdmin webmaster@localhost

    DocumentRoot "/var/www/html/match_export/frontend"

    <Directory "/var/www/html/match_export/frontend">
        Options Indexes FollowSymLinks
        AllowOverride All
        Require all granted
        DirectoryIndex index.html
    </Directory>

    # API路由配置:将所有/api/请求转发到ThinkPHP后端
    Alias /api "/var/www/html/match_export/backend/public"
    <Directory "/var/www/html/match_export/backend/public">
        Options FollowSymLinks
        AllowOverride All
        Require all granted
        DirectoryIndex index.php

        # ThinkPHP重写规则
        RewriteEngine On
        RewriteCond %{REQUEST_FILENAME} !-d
        RewriteCond %{REQUEST_FILENAME} !-f
        RewriteRule ^(.*)$ index.php [L,E=PATH_INFO:$1]
    </Directory>

    # 错误日志和访问日志路径,方便排查问题
    ErrorLog /var/log/httpd/match_export_error.log
    CustomLog /var/log/httpd/match_export_access.log combined

    # 确保Apache能正确处理PHP文件(如果全局已配置则可省略)
    <FilesMatch \.php$>
        SetHandler "proxy:unix:/run/php-fpm/www.sock|fcgi://localhost"
        # SetHandler "proxy:fcgi://127.0.0.1:9000"
    </FilesMatch>
</VirtualHost>
请自行比较这两个文件。
修改完成后,使用 httpd -t 检查配置,确保没有语法错误。
最后,重启Apache服务:
bash
systemctl restart httpd现在,访问 http://chinatt.org.cn ,就会自动跳转到 https://chinatt.org.cn/login.html 。
参考
https://developer.aliyun.com/article/1650540