前言
PersistenceV2是V2状态管理,本博客展示.connect方法存储数据,用于页面间的持久化数据共享,需要配合使用@ObservedV2@Trace使用。
参考文档
核心思路
- 将@ObservedV2@Trace修饰的类,通过PersistenceV2.connect绑定到具体的实例上。
- 只要修改这个实例的值,UI会更新,持久化也会更新。
运行效果

任一页面点击姓名或年龄,即可全部页面都修改
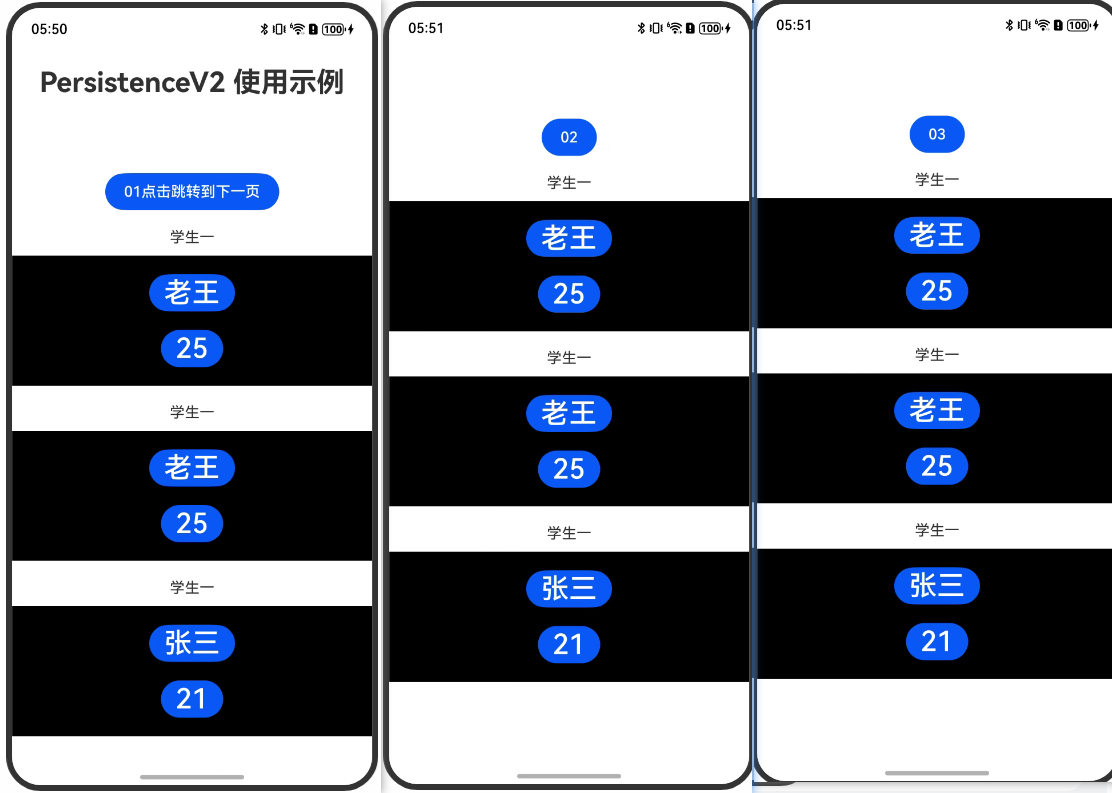
并且重新运行,依然和最后一次的数据一样,保持不变。
完整代码
1、Index01.ets
import { student, Student, student02, student03 } from './StudentClass';


@Entry
@ComponentV2
struct Index01 {
  @Builder
  studentBuilder(title: string, student: Student) {
    Column({ space: 10 }) {
      Text(title)
      Column({ space: 20 }) {
        Button(student.name)
          .fontColor(Color.White)

          .fontSize(30)
          .onClick(() => {
            const name = ["老王", "张三", "王五", "赵六", "小王", "小张",]
            student.name = name[Math.floor(Math.random() * name.length)]

          })
        Button(student.age?.toString())
          .fontSize(30)
          .fontColor(Color.White)
          .onClick(() => {
            student.age = student.age! + 1
          })
      }
      .padding(20)
      .width("100%")

      .backgroundColor(Color.Black)
    }
  }

  build() {
    Column({ space: 20 }) {
      Text("PersistenceV2 使用示例")
        .fontSize(30)
        .fontWeight(FontWeight.Bold)
        .padding({ bottom: 60 })
      Button(" 01点击跳转到下一页 ")
        .onClick(() => {
          this.getUIContext().getRouter().pushUrl({ url: "pages/Index02" })
        })
      this.studentBuilder("学生一", student,)
      this.studentBuilder("学生一", student02,)
      this.studentBuilder("学生一", student03,)


    }
    .justifyContent(FlexAlign.Center)
    .height("100%")
    .width("100%")
  }
}
2、Indext02.ets
import { student, Student, student02, student03 } from './StudentClass';


@Entry
@ComponentV2
struct Index02 {
  @Builder
  studentBuilder(title: string, student: Student) {
    Column({ space: 10 }) {
      Text(title)
      Column({ space: 20 }) {
        Button(student.name)
          .fontColor(Color.White)

          .fontSize(30)
          .onClick(() => {
            const name = ["老王", "张三", "王五", "赵六", "小王", "小张",]
            student.name = name[Math.floor(Math.random() * name.length)]

          })
        Button(student.age?.toString())
          .fontSize(30)
          .fontColor(Color.White)
          .onClick(() => {
            student.age = student.age! + 1
          })
      }
      .padding(20)
      .width("100%")

      .backgroundColor(Color.Black)
    }
  }

  build() {
    Column({ space: 20 }) {
      Button(" 02 ")
        .onClick(() => {
          this.getUIContext().getRouter().pushUrl({ url: "pages/Index03" })
        })
      this.studentBuilder("学生一", student,)
      this.studentBuilder("学生一", student02,)
      this.studentBuilder("学生一", student03,)


    }
    .justifyContent(FlexAlign.Center)
    .height("100%")
    .width("100%")
  }
}
3、Index03.ets
import { student, Student, student02, student03 } from './StudentClass';


@Entry
@ComponentV2
struct Index03 {
  @Builder
  studentBuilder(title: string, student: Student) {
    Column({ space: 10 }) {
      Text(title)
      Column({ space: 20 }) {
        Button(student.name)
          .fontColor(Color.White)

          .fontSize(30)
          .onClick(() => {
            const name = ["老王", "张三", "王五", "赵六", "小王", "小张",]
            student.name = name[Math.floor(Math.random() * name.length)]

          })
        Button(student.age?.toString())
          .fontSize(30)
          .fontColor(Color.White)
          .onClick(() => {
            student.age = student.age! + 1
          })
      }
      .padding(20)
      .width("100%")

      .backgroundColor(Color.Black)
    }
  }

  build() {
    Column({ space: 20 }) {
      Button(" 03 ")
        .onClick(() => {
          this.getUIContext().getRouter().pushUrl({ url: "pages/Index04" })
        })
      this.studentBuilder("学生一", student,)
      this.studentBuilder("学生一", student02,)
      this.studentBuilder("学生一", student03,)


    }
    .justifyContent(FlexAlign.Center)
    .height("100%")
    .width("100%")
  }
}
4、StudentClass.ets
import { PersistenceV2 } from "@kit.ArkUI";

@ObservedV2
export class Student {
  @Trace
  name?: string;
  @Trace
  age?: number;

  constructor() {
    this.name = "李华";
    this.age = 21;
  }
}

export const student: Student = PersistenceV2.connect(Student, "student01", () => new Student())!;

export const student02: Student = PersistenceV2.connect(Student, "student02", () => new Student())!;

export const student03: Student = PersistenceV2.connect(Student, "student03", () => new Student())!;
觉得有用可以点赞或收藏