
本篇主要介绍多线程,以及线程的封装,线程控制的相关介绍在【Linux】线程控制
1.创建和等待多线程
我们可以一次创建十个线程,创建的时候直接用for循环创建,参数就传这些线程的名字,然后把这些线程的ID保存在vector里,ID的类型pthread_t其实就是long int类型。

cpp
#include <iostream>
#include <stdio.h>
#include <unistd.h>
#include <pthread.h>
#include <vector>
#include <string>
const int num = 10;
void* ThreadFunc(void* args)
{
std::string name = static_cast<const char*>(args);
while(true)
{
std::cout << name << "运行中..." << std::endl;
sleep(1);
}
return nullptr;
}
int main()
{
std::vector<long long> tids;
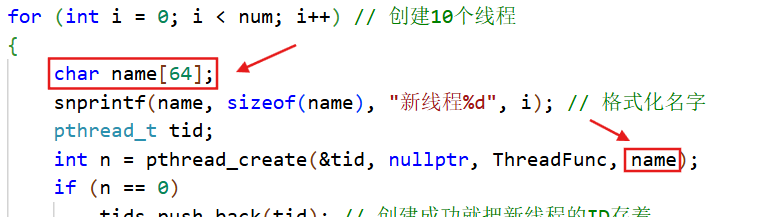
for(int i = 0; i < num; i++) //创建10个线程
{
char name[64];
snprintf(name, sizeof(name), "新线程%d", i); //格式化名字
pthread_t tid;
int n = pthread_create(&tid, nullptr, ThreadFunc, name);
if(n == 0)
tids.push_back(tid); //创建成功就把新线程的ID存着
else
continue;
sleep(1);
}
return 0;
}然后用监控脚本看一下线程。
cpp
while :; do ps -aL ; sleep 1; done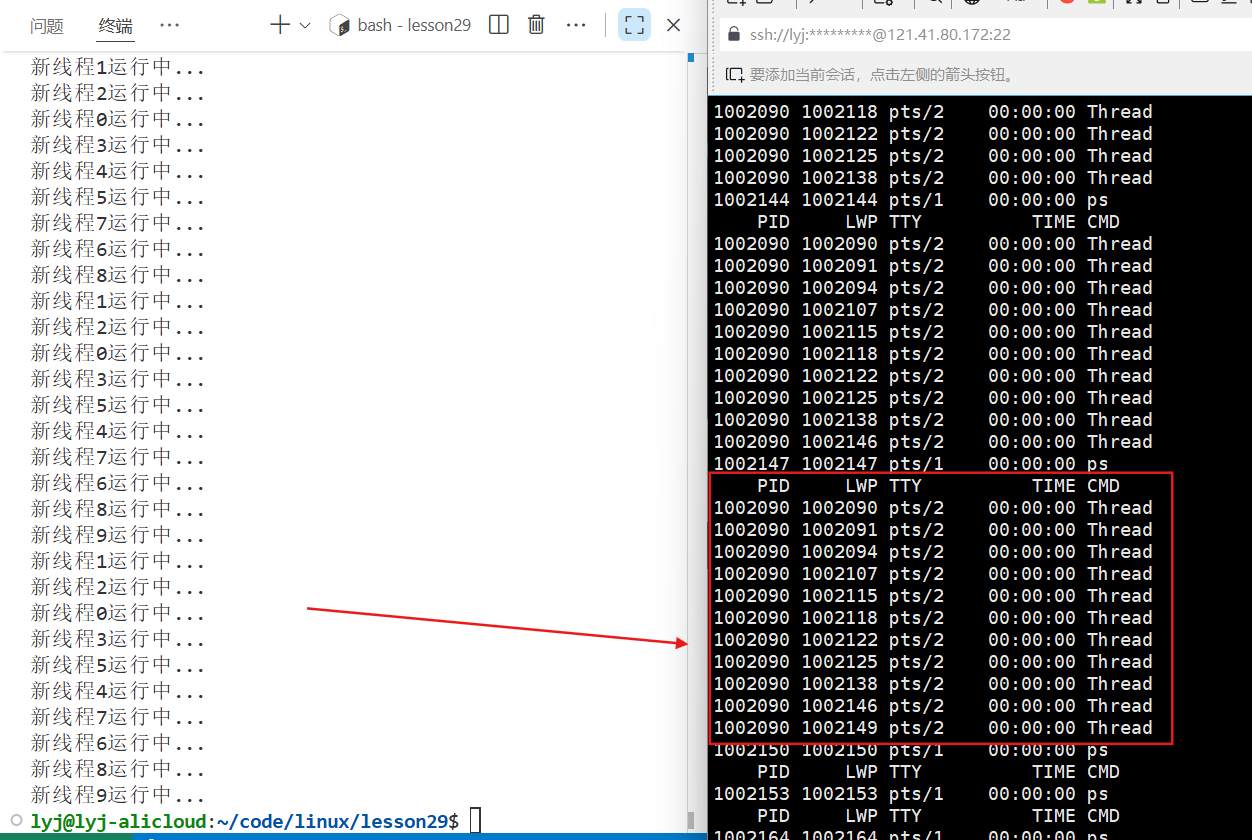
在等待的时候,通过我们保存在vector里的线程ID一个一个等待。
cpp
#include <iostream>
#include <stdio.h>
#include <unistd.h>
#include <pthread.h>
#include <vector>
#include <string>
const int num = 10;
void *ThreadFunc(void *args)
{
std::string name = static_cast<const char *>(args);
int cnt = 5;
while (cnt--)
{
std::cout << name << "运行中..." << std::endl;
sleep(1);
}
return nullptr;
}
int main()
{
std::vector<long long> tids;
for (int i = 0; i < num; i++) // 创建10个线程
{
char name[64];
snprintf(name, sizeof(name), "新线程%d", i); // 格式化名字
pthread_t tid;
int n = pthread_create(&tid, nullptr, ThreadFunc, name);
if (n == 0)
tids.push_back(tid); // 创建成功就把新线程的ID存着
else
continue;
sleep(1);
}
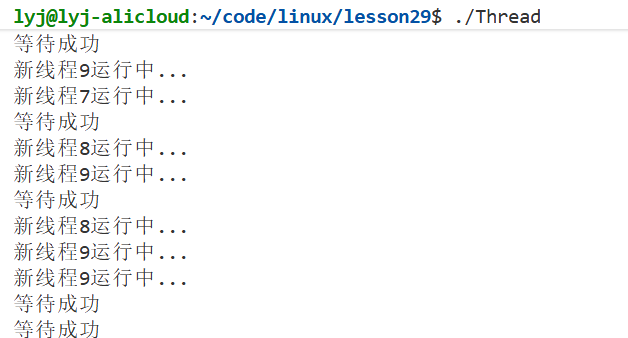
for (int i = 0; i < num; i++) //一个一个等待
{
int n = pthread_join(tids[i], nullptr);
if (n == 0)
std::cout << "等待成功" << std::endl;
else
std::cout << "等待失败" << std::endl;
}
return 0;
}
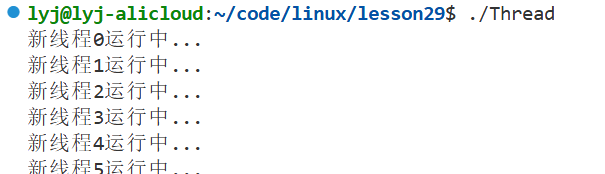
但是我们如果在创建线程时for循环里不加sleep,而在ThreadFunc函数最开始加上sleep,会出现如下结果,只有新线程9。
cpp
const int num = 10;

void *ThreadFunc(void *args)
{
    sleep(1);
    std::string name = static_cast<const char *>(args);
    int cnt = 5;
    while (cnt--)
    {
        std::cout << name << "运行中..." << std::endl;
        sleep(1);
    }
    return nullptr;
}

int main()
{
    std::vector<long long> tids;

    for (int i = 0; i < num; i++) // 创建10个线程
    {
        char name[64];
        snprintf(name, sizeof(name), "新线程%d", i); // 格式化名字
        pthread_t tid;
        int n = pthread_create(&tid, nullptr, ThreadFunc, name);
        if (n == 0)
            tids.push_back(tid); // 创建成功就把新线程的ID存着
        else
            continue;
        //sleep(1);
    }

    return 0;
}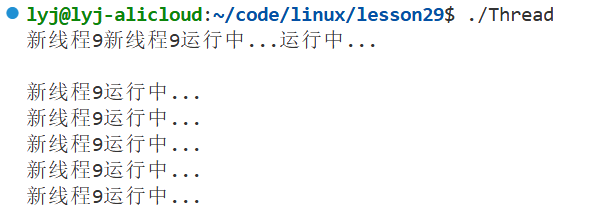
因为name是for循环里的一个临时数组,创建线程的时候传递过去的name是这个数组的起始地址,每一次for循环,编译器都会在同一个栈帧的固定偏移量位置上开辟name的空间,就导致每次for循环不停的开辟、释放、开辟、释放...但是每次开辟到的都是同一个位置,所以给pthread_create传过去的name起始地址就是同样的。
ThreadFunc函数拿到这个值之后sleep一秒才将ThreadFunc里的name改动。
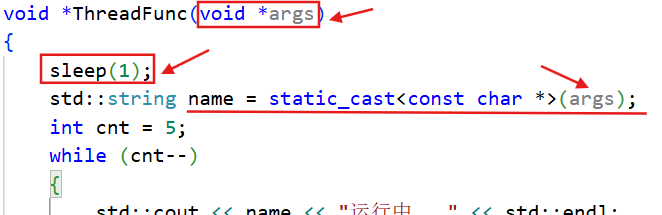
所以就发生了ThreadFunc里的name还没来得及改动,创建线程的for循环就进入下一个循环了,里面的name的内容就被修改了,意思就是指针没变,但是指针指向的内容已经改了。
所以这里我们要做如下改动,在堆区给name开辟空间,这样每个线程得到的name就不是一样的了。
cpp
#include "Thread.hpp"

const int num = 10;

void *ThreadFunc(void *args)
{
    sleep(1);
    std::string name = static_cast<const char *>(args);
    int cnt = 5;
    while (cnt--)
    {
        std::cout << name << "运行中..." << std::endl;
        sleep(1);
    }
    return nullptr;
}

int main()
{
    std::vector<long long> tids;

    for (int i = 0; i < num; i++) // 创建10个线程
    {
        //char name[64]; //错误写法
        char* name = new char[64]; //正确写法,堆区开辟空间
        snprintf(name, 64, "新线程%d", i); // 格式化名字
        pthread_t tid;
        int n = pthread_create(&tid, nullptr, ThreadFunc, name);
        if (n == 0)
            tids.push_back(tid); // 创建成功就把新线程的ID存着
        else
            continue;
    }

    for (int i = 0; i < num; i++) //一个一个等待
    {
        int n = pthread_join(tids[i], nullptr);
        if (n == 0)
            std::cout << "等待成功" << std::endl;
        else
            std::cout << "等待失败" << std::endl;
    }

    return 0;
}
2.线程封装
先做一下准备工作。
cpp
//Thread.hpp文件
#ifndef _THREAD_H_
#define _THREAD_H_

#include <iostream>
#include <stdio.h>
#include <unistd.h>
#include <pthread.h>
#include <vector>
#include <string>

namespace MyThread
{
    class Thread
    {
    public:
    private:
    };
}

#endif
cpp
//Main.cc文件
#include "Thread.hpp"

int main()
{
    return 0;
}
bash
//Makefile
thread:Main.cc
	g++ -o $@ $^ -lpthread

.PHONY:clean
clean:
	rm -f thread
我们需要设计一下线程的名字,用一个变量代表被创建的线程编号,类成员变量如下。
cpp
namespace MyThread
{
    static int num = 1;
    class Thread
    {
    public:
        Thread()
            : _tid(0),
              _isdetach(false), /*默认不分离*/
              _isrunning(false)
        {
            _name = "new thread-" + std::to_string(num++);
        }

    private:
        pthread_t _tid; //线程ID
        std::string _name; //线程的名字
        bool _isdetach; //线程是否设置分离状态
        bool _isrunning; //线程是否启动
    };
}
2.1 线程的启动和分离
设计一个Start接口,启动线程。
cpp
bool Start()
{
    int n = pthread_create(&_tid, nullptr, ThreadFunc, nullptr/*暂时先不传参数*/);
    if(n != 0) //创建失败
    {
        std::cerr << "create tread error: " << strerror(n) << std:: endl;
        return false;
    }
    //创建成功

}
这里还要考虑线程分离的情况,线程的分离状态可以在线程启动之前就设置,也可以是线程已经启动了,再设置成分离状态。
cpp
private:
    void SetRun()
    {
        _isrunning = true;
    }

public:
    void Detach()
    {
        if (_isdetach) // 如果已经分离了,直接返回
            return;
        if (_isrunning)           // 如果线程此时正在运行
            pthread_detach(_tid); // 分离线程
        // 如果此时还没运行,就只设置标志位,Start函数内会调用Detach
        SetDetach();
    }
    void SetDetach()
    {
        std::cout << "线程被分离" << std::endl;
        _isdetach = true;
    }
    bool Start()
    {
        int n = pthread_create(&_tid, nullptr, ThreadFunc /*暂时未实现*/, nullptr /*暂时先不传参数*/);
        if (n != 0) // 创建失败
        {
            std::cerr << "create tread error: " << strerror(n) << std::endl;
            return false;
        }
        // 线程启动前设置分离
        if (_isdetach)
            Detach();
        SetRun(); // 设置状态为run
    }
Detach这样实现就可以保证不管是启动前分离还是启动之后再分离都可以,启动前调用Detach函数,两个if都不满足,就只会设置_isdetach 标志位为false,启动后调用Detach,线程分离并且修改标志位。
2.2 线程停止和等待
取消一个线程就是要确保他是在运行的,取消进程之后,标志位也要更新。
cpp
    bool Stop()
    {
        if (_isrunning)
        {
            int n = pthread_cancel(_tid);
            if (n != 0)
            {
                std::cerr << "cancel tread error: " << strerror(n) << std::endl;
                return false;
            }
            else
            {
                _isrunning = false;
                std::cout << _name << "stop success" << std::endl;
            }
        }
        return true;
    }
等待进程不管是不是在运行都可以等待,但是如果被分离了就不用等待了,线程等待的结果我们也可以获取一下。
cpp
    bool Join()
    {
        if (_isdetach)
        {
            std::cout << "线程已经被分离,join失败" << std::endl;
            return false;
        }
        int n = pthread_join(_tid, &_ret);
        if (n != 0)
        {
            std::cerr << "join tread error: " << strerror(n) << std::endl;
            return false;
        }
        else
        {
            std::cout << "join success" << std::endl;
        }
        return true;
    }
private:
    pthread_t _tid;    // 线程ID
    std::string _name; // 线程的名字
    bool _isdetach;    // 线程是否设置分离状态
    bool _isrunning;   // 线程是否启动
    void *_ret;        // 线程等待的结果
2.3 新线程入口函数
我们新线程的入口函数不能在类内实现,因为含函数要求参数为void*,但是在类内部的函数第一个参数是隐藏的this指针!!所以这个ThreadFunc函数其实是传了两个参数。

解决方法有很多,这里我选择将ThreadFunc函数设为static,这样就没有this指针了。
cpp
static void* ThreadFunc(void* args)
{

}但是我们并不是为了让线程只执行类内的ThreadFunc,我们创建线程是为了给线程指派任务的,所以任务必须是类外提供的方法。
cpp
#include <functional>

class Thread
{
    using func_t = std::function<void()>; //返回值为void,参数为空
    //...
}意思就是定义一个函数类型func_t,让线程未来执行我所指定的方法,所以这里类成员变量还要添加一个。
cpp
class Thread
{
    using func_t = std::function<void()>; // 返回值为void,参数为空

public:
    Thread(func_t func)
        : _tid(0),
          _isdetach(false), /*默认不分离*/
          _isrunning(false),
          _ret(nullptr),
          _func(func)
    {
        _name = "new thread-" + std::to_string(num++);
    }

    //...

private:
    pthread_t _tid;    // 线程ID
    std::string _name; // 线程的名字
    bool _isdetach;    // 线程是否设置分离状态
    bool _isrunning;   // 线程是否启动
    void *_ret;        // 线程等待的结果
    func_t _func;      // 线程执行的方法
}
所以现在我们创建的线程不是为了执行对应的ThreadFunc函数的,而是让这个线程执行我给他指派的任务。此时我们的ThreadFunc函数里就要对_func进行回调。
cpp
    static void *ThreadFunc(void *args)
    {
        _func(); //回调处理
        return nullptr; // 返回值不关心
    }

    bool Start()
    {
        if (_isrunning)
            return false; // 线程已经启动了就不能重复启动
        int n = pthread_create(&_tid, nullptr, ThreadFunc, nullptr /*暂时先不传参数*/);
        if (n != 0) // 创建失败
        {
            std::cerr << "create tread error: " << strerror(n) << std::endl;
            return false;
        }
        // 线程启动前设置分离
        if (_isdetach)
            Detach();
        SetRun(); // 设置状态为run
        return true;
    }
但是!这样写是无法调用回调的,因为ThreadFunc函数此时是static的,没有this指针,也就无法访问当前类成员属性。所以这里ThreadFunc函数传参就要传this指针。
cpp
   static void *ThreadFunc(void *args)
    {
        Thread *self = static_cast<Thread *>(args);
        self->_func(); //回调处理
        return nullptr; // 返回值不关心
    }
    bool Start()
    {
        if (_isrunning)
            return false; // 线程已经启动了就不能重复启动
        int n = pthread_create(&_tid, nullptr, ThreadFunc, this);
        //...
    }
这样ThreadFunc函数就可以在类内访问回调方法了。
并且我们前面的分离和运行的标志位逻辑可以放在ThreadFunc函数,这样代码的可读性更好。
cpp
    static void *ThreadFunc(void *args)
    {
        Thread *self = static_cast<Thread *>(args);
        self->SetRun();      // 设置状态为run
        if (self->_isdetach) // 设置分离
            self->Detach();
        self->_func();  // 回调处理
        return nullptr; // 返回值不关心
    }
    bool Start()
    {
        if (_isrunning)
            return false; // 线程已经启动了就不能重复启动
        int n = pthread_create(&_tid, nullptr, ThreadFunc, this);
        if (n != 0) // 创建失败
        {
            std::cerr << "create tread error: " << strerror(n) << std::endl;
            return false;
        }
        else
        {
            std::cout << _name << "create success" << std::endl;
        }
        return true;
    }
2.4 测试
cpp
#include "Thread.hpp"
using namespace MyThread;

int main()
{
    Thread t();
    return 0;
}
t后面的括号里就要传要执行的方法,这里可以用Lambda表达式。
cpp
int main()
{
    Thread t([]()
             {
        while(true)
        {
            std::cout << "新线程运行中..." << std::endl;
            sleep(1);
        } }); // 返回值为void,参数为空

    return 0;
}
此时就由这个Lambda表达式来初始化_func,然后线程对象就被创建出来了。
cpp
int main()
{
Thread t([]()
{
while(true)
{
std::cout << "新线程运行中..." << std::endl;
sleep(1);
} }); // 返回值为void,参数为空
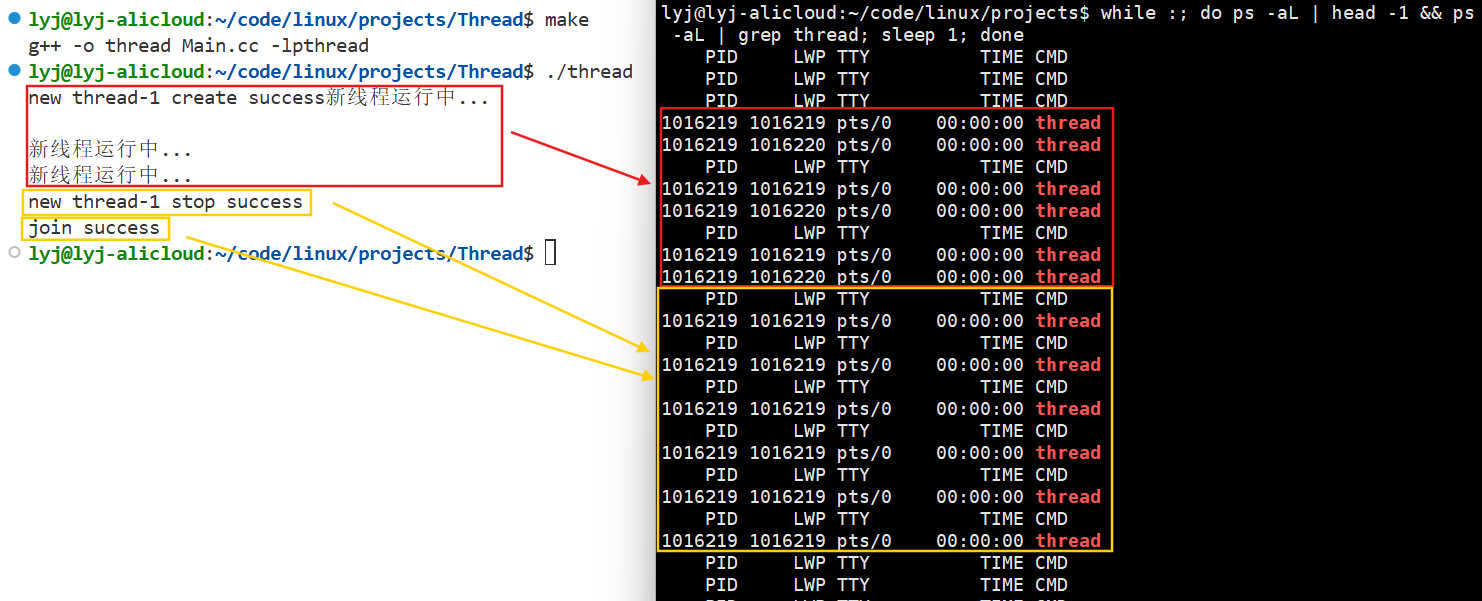
t.Start();
sleep(3);
t.Stop();
sleep(3);
t.Join();
sleep(3);
return 0;
}
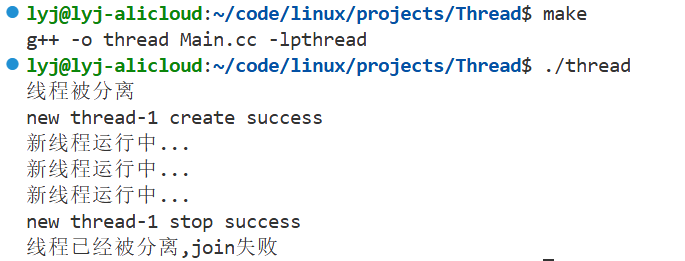
我们还可以设置Detach,先测试启动前分离。
cpp
int main()
{
    Thread t([]()
             {
        while(true)
        {
            std::cout << "新线程运行中..." << std::endl;
            sleep(1);
        } }); // 返回值为void,参数为空
    t.Detach();    // 设置分离状态
    t.Start();
    sleep(3);
    t.Stop();
    sleep(3);
    t.Join();
    sleep(3);
    return 0;
}
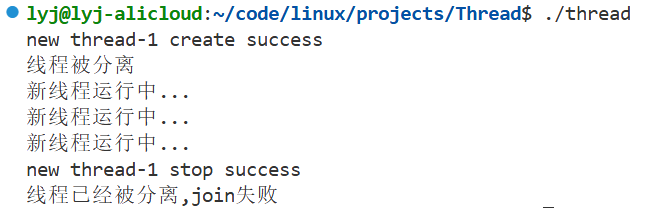
再测试一个启动后再分离线程。
cpp
int main()
{
    Thread t([]()
             {
        while(true)
        {
            std::cout << "新线程运行中..." << std::endl;
            sleep(1);
        } }); // 返回值为void,参数为空

    t.Start();
    t.Detach(); // 设置分离状态
    sleep(3);
    t.Stop();
    sleep(3);
    t.Join();
    sleep(3);
    return 0;
}
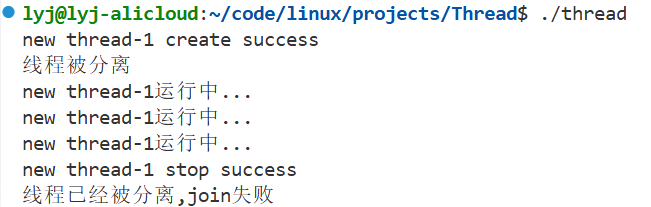
2.5 设置和获取线程名称
- pthread_setname_np 和 pthread_getname_np是两个⽤于设置和获取线程名称的⾮标准函数(_np 表⽰ "non-portable",即⾮可移植的)。它们通常在 Linux 和 其他⼀些类 Unix 系统中可⽤,⽤于调试和多线程程序的管理。

pthread_setname_np 就是传一个线程ID,给这个线程设置个名字,pthread_getname_np就是可以获取指定线程设置的名字。
cpp
static void *ThreadFunc(void *args)
{
    Thread *self = static_cast<Thread *>(args);
    self->SetRun();
    if (self->_isdetach)
        self->Detach();
    pthread_setname_np(self->_tid, self->_name.c_str()); //设置名字
    self->_func();
    return nullptr;
}
cpp
#include "Thread.hpp"
using namespace MyThread;

int main()
{
    Thread t([]()
             {
        while(true)
        {
            char buffer[64];
            pthread_getname_np(pthread_self(), buffer, sizeof(buffer)); //获取名字
            std::cout << buffer << "运行中..." << std::endl;
            sleep(1);
        } }); // 返回值为void,参数为空

    t.Start();
    t.Detach(); // 设置分离状态
    sleep(3);
    t.Stop();
    sleep(3);
    t.Join();
    sleep(3);
    return 0;
}
- 线程名称⻓度限制: 在 Linux 上,线程名称的最⼤⻓度为 16 个字符(包括结尾的 \0 ),如果名称超过这个⻓度,会被截断。
- 权限: 通常,只有线程⾃⾝可以设置⾃⼰的名称。尝试设置其他线程的名称可能会导致错误。
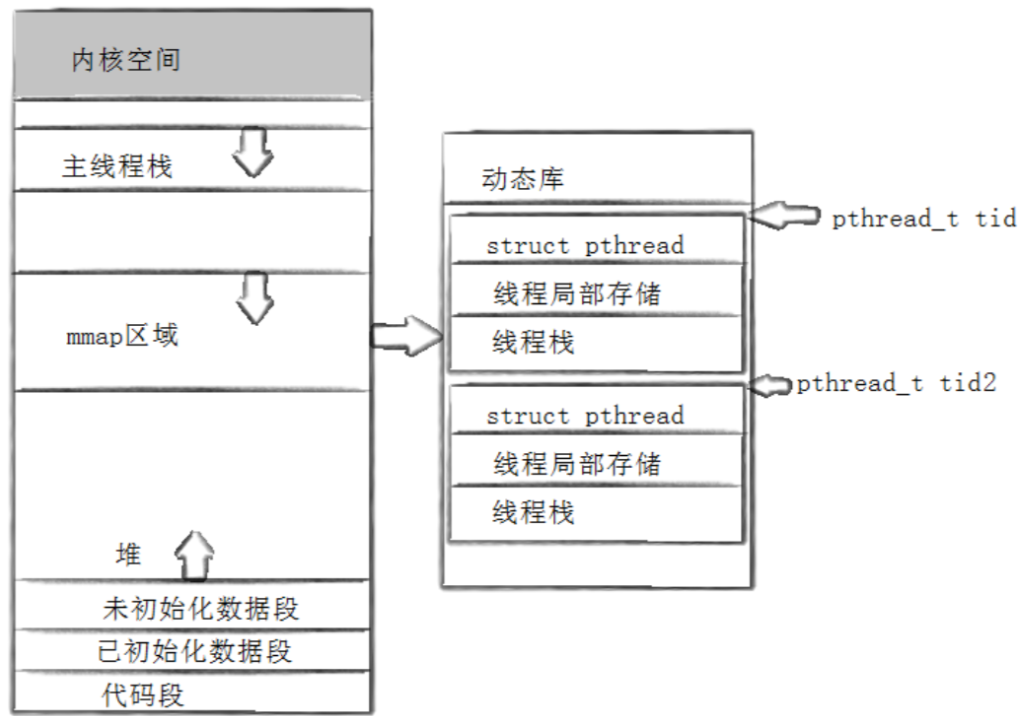
其实就是把pthread_setname_np设置的名字写入到了线程的局部存储,get的时候就从局部存储里取,局部存储只有线程自己能访问。
下面是Tread.hpp的代码。
cpp
#ifndef _THREAD_H_
#define _THREAD_H_

#include <iostream>
#include <stdio.h>
#include <unistd.h>
#include <pthread.h>
#include <vector>
#include <cstring> //strerror要包含的头文件
#include <string>
#include <functional>

namespace MyThread
{
    static int num = 1;
    class Thread
    {
        using func_t = std::function<void()>; // 返回值为void,参数为空

    private:
        void SetRun()
        {
            _isrunning = true;
        }

        void SetDetach()
        {
            std::cout << "线程被分离" << std::endl;
            _isdetach = true;
        }

        static void *ThreadFunc(void *args)
        {
            Thread *self = static_cast<Thread *>(args);
            self->SetRun();      // 设置状态为run
            if (self->_isdetach) // 设置分离
                self->Detach();
            pthread_setname_np(self->_tid, self->_name.c_str()); //设置名字
            self->_func();  // 回调处理
            return nullptr; // 返回值不关心
        }

    public:
        Thread(func_t func)
            : _tid(0),
              _isdetach(false), /*默认不分离*/
              _isrunning(false),
              _ret(nullptr),
              _func(func)
        {
            _name = "new thread-" + std::to_string(num++);
        }

        void Detach()
        {
            if (_isdetach) // 如果已经分离了,直接返回
                return;
            if (_isrunning)           // 如果线程此时正在运行
                pthread_detach(_tid); // 分离线程
            // 如果此时还没运行,就只设置标志位,Start函数内会调用Detach
            SetDetach();
        }

        bool Start()
        {
            if (_isrunning)
                return false; // 线程已经启动了就不能重复启动
            int n = pthread_create(&_tid, nullptr, ThreadFunc, this);
            if (n != 0) // 创建失败
            {
                std::cerr << "create tread error: " << strerror(n) << std::endl;
                return false;
            }
            else
            {
                std::cout << _name << " create success" << std::endl;
            }
            return true;
        }

        bool Stop()
        {
            if (_isrunning)
            {
                int n = pthread_cancel(_tid);
                if (n != 0)
                {
                    std::cerr << "cancel tread error: " << strerror(n) << std::endl;
                    return false;
                }
                else
                {
                    _isrunning = false;
                    std::cout << _name << " stop success" << std::endl;
                }
            }
            return true;
        }

        bool Join()
        {
            if (_isdetach)
            {
                std::cout << "线程已经被分离,join失败" << std::endl;
                return false;
            }
            int n = pthread_join(_tid, &_ret);
            if (n != 0)
            {
                std::cerr << "join tread error: " << strerror(n) << std::endl;
                return false;
            }
            else
            {
                std::cout << "join success" << std::endl;
            }
            return true;
        }

        ~Thread()
        {
        }

    private:
        pthread_t _tid;    // 线程ID
        std::string _name; // 线程的名字
        bool _isdetach;    // 线程是否设置分离状态
        bool _isrunning;   // 线程是否启动
        void *_ret;        // 线程等待的结果
        func_t _func;      // 线程执行的方法
    };
}

#endif
3.带模板参数的封装
cpp
namespace MyThread
{
static int num = 1;
template <typename T> // 模板
class Thread
{
using func_t = std::function<void(T)>; // 返回值为void,参数为类型为T
private:
//...
static void *ThreadFunc(void *args)
{
Thread<T> *self = static_cast<Thread<T> *>(args); //全部改为模板
self->SetRun();
if (self->_isdetach)
self->Detach();
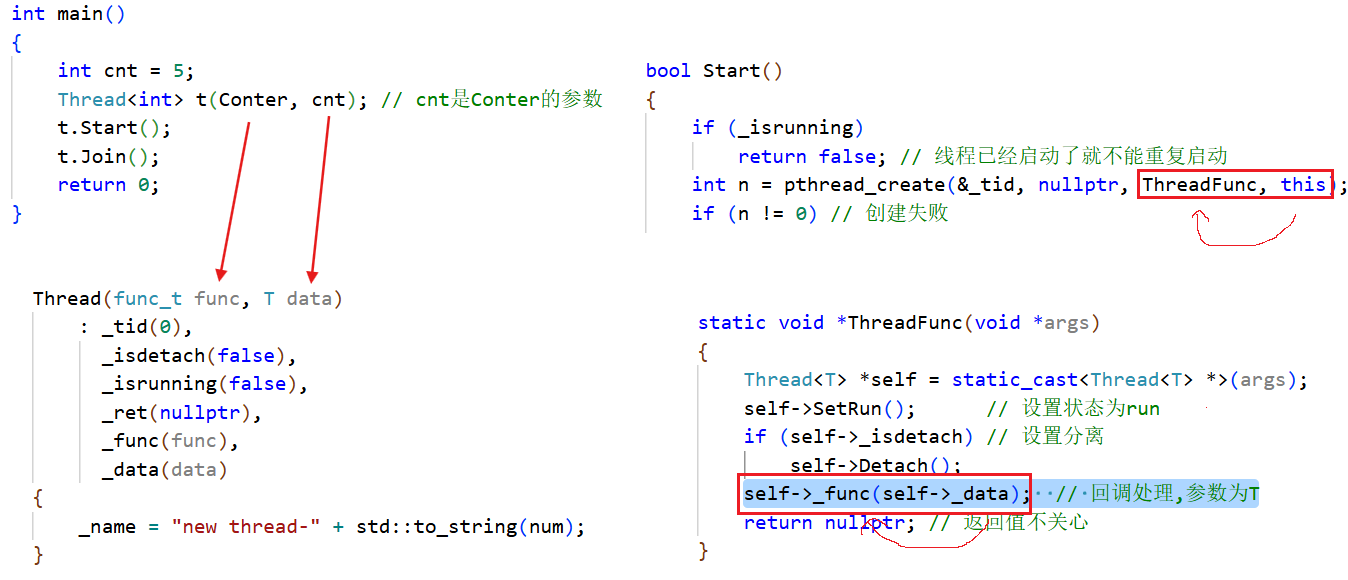
self->_func(self->_data); // 回调处理,参数为T
return nullptr;
}
public:
Thread(func_t func, T data)
: _tid(0),
_isdetach(false),
_isrunning(false),
_ret(nullptr),
_func(func),
_data(data) //这个参数就是回调函数的参数
{
_name = "new thread-" + std::to_string(num++);
}
//...
private:
pthread_t _tid; // 线程ID
std::string _name; // 线程的名字
bool _isdetach; // 线程是否设置分离状态
bool _isrunning; // 线程是否启动
void *_ret; // 线程等待的结果
func_t _func; // 线程执行的方法
T _data; // 传给执行方法的参数
};
}
#endif除了上面给出来的接口要做改变,其他接口都不变。
cpp
#include "Thread.hpp"
using namespace MyThread;

void Conter(int num)
{
    while (num--)
    {
        std::cout << "新进程运行中..., " << num << std::endl;
        sleep(1);
    }
}

int main()
{
    int cnt = 5;
    Thread<int> t(Conter, cnt); // cnt是Conter的参数
    t.Start();
    t.Join();
    return 0;
}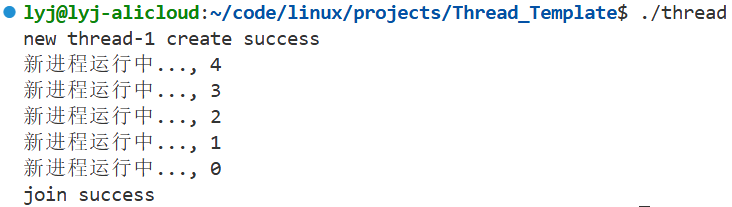
这里的cnt是Conter的参数,就类似于pthread_create函数的第四个参数是第三个参数的参数。
现在我们可以传int类型的参数 ,当然也可以传自定义类型,这里就不演示了。
4.多线程
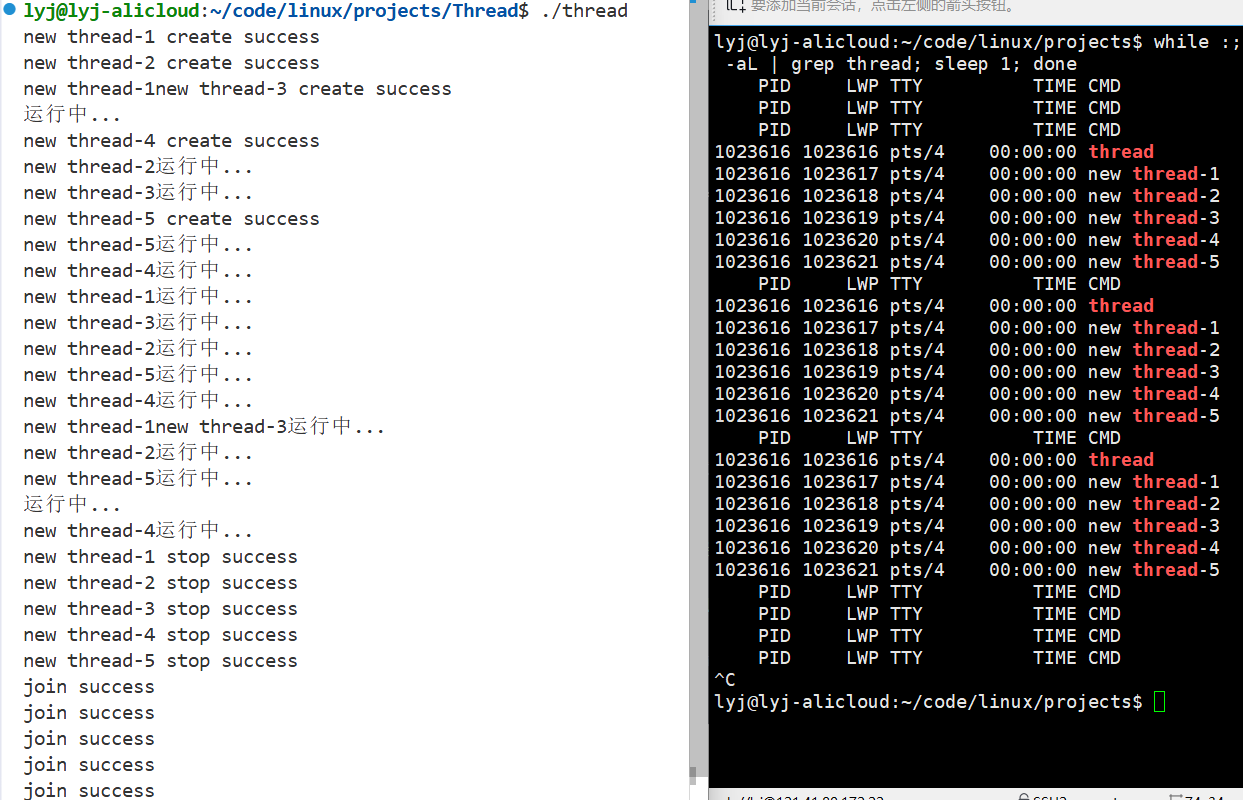
多线程很简单,代码都不用改,就是在Main.cc里直接for循环创建。
cpp
#include "Thread.hpp"
#include <vector>
using namespace MyThread;

int main()
{
    std::vector<Thread> threads;
    for (int i = 0; i < 5; i++)
    {
        Thread t([](){
        while(true)
        {
            char buffer[64];
            pthread_getname_np(pthread_self(), buffer, sizeof(buffer)); //获取名字
            std::cout << buffer << "运行中..." << std::endl;
            sleep(1);
        } }); // 返回值为void,参数为空
        threads.emplace_back(t);
    }

    for (auto &t : threads)
    {
        t.Start();
    }

    sleep(3); //3秒后全部停止并回收
    for (auto &t : threads)
    {
        t.Stop();
    }
    for (auto &t : threads)
    {
        t.Join();
    }

    return 0;
}
本篇分享就到这里了,我们下篇见~