在现在的scratch软件中,存在开启电脑内置摄像头的模块,但是无法开启网络摄像头这个功能,因此我来分享并记录一下我的一些经验。
开启网络摄像头
原有开启摄像头的实现
在正式开始之前先看一下原本开启电脑摄像头的逻辑是怎么写的。
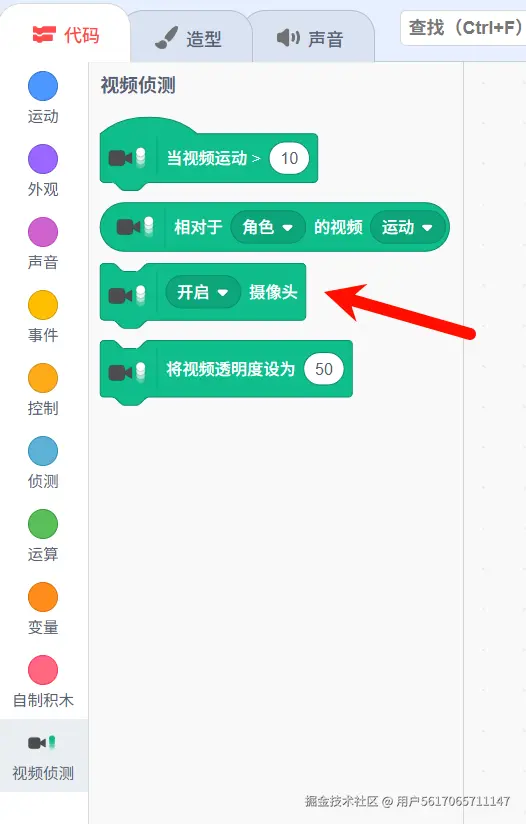
大家按照我的步骤可以很容易的找到开启摄像头这个块的执行逻辑,很显然这里调用了this.runtime.ioDevices.video这个的两个方法用来开启和关闭摄像头我们直接进入ioDevices后可以看到以下代码:
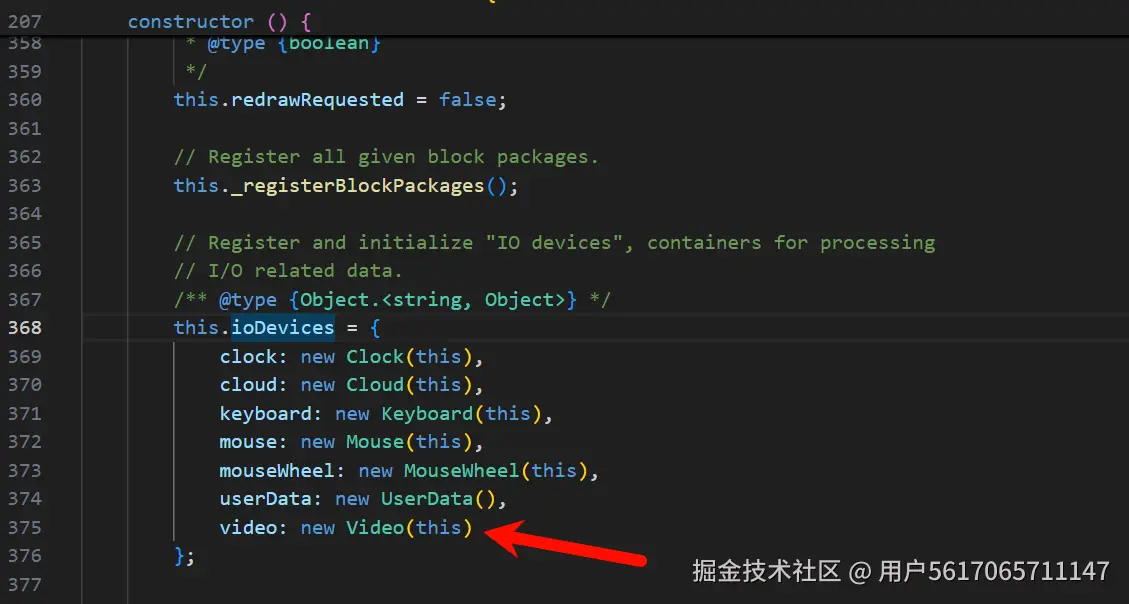 这里我们再进入Video类
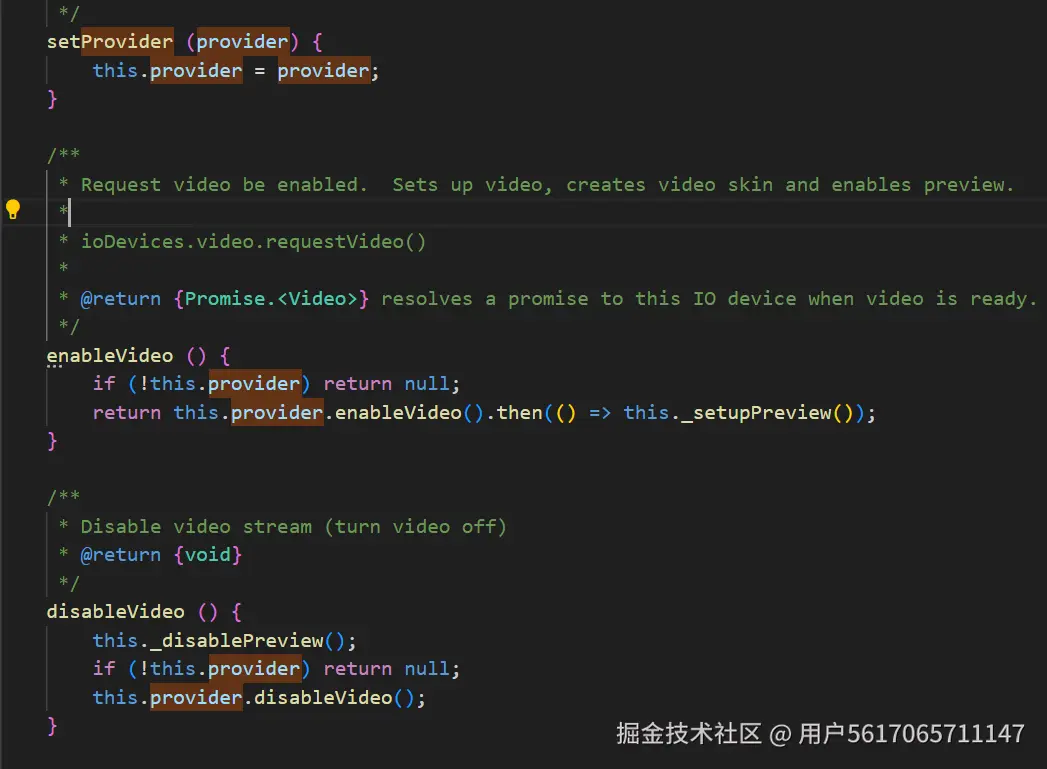
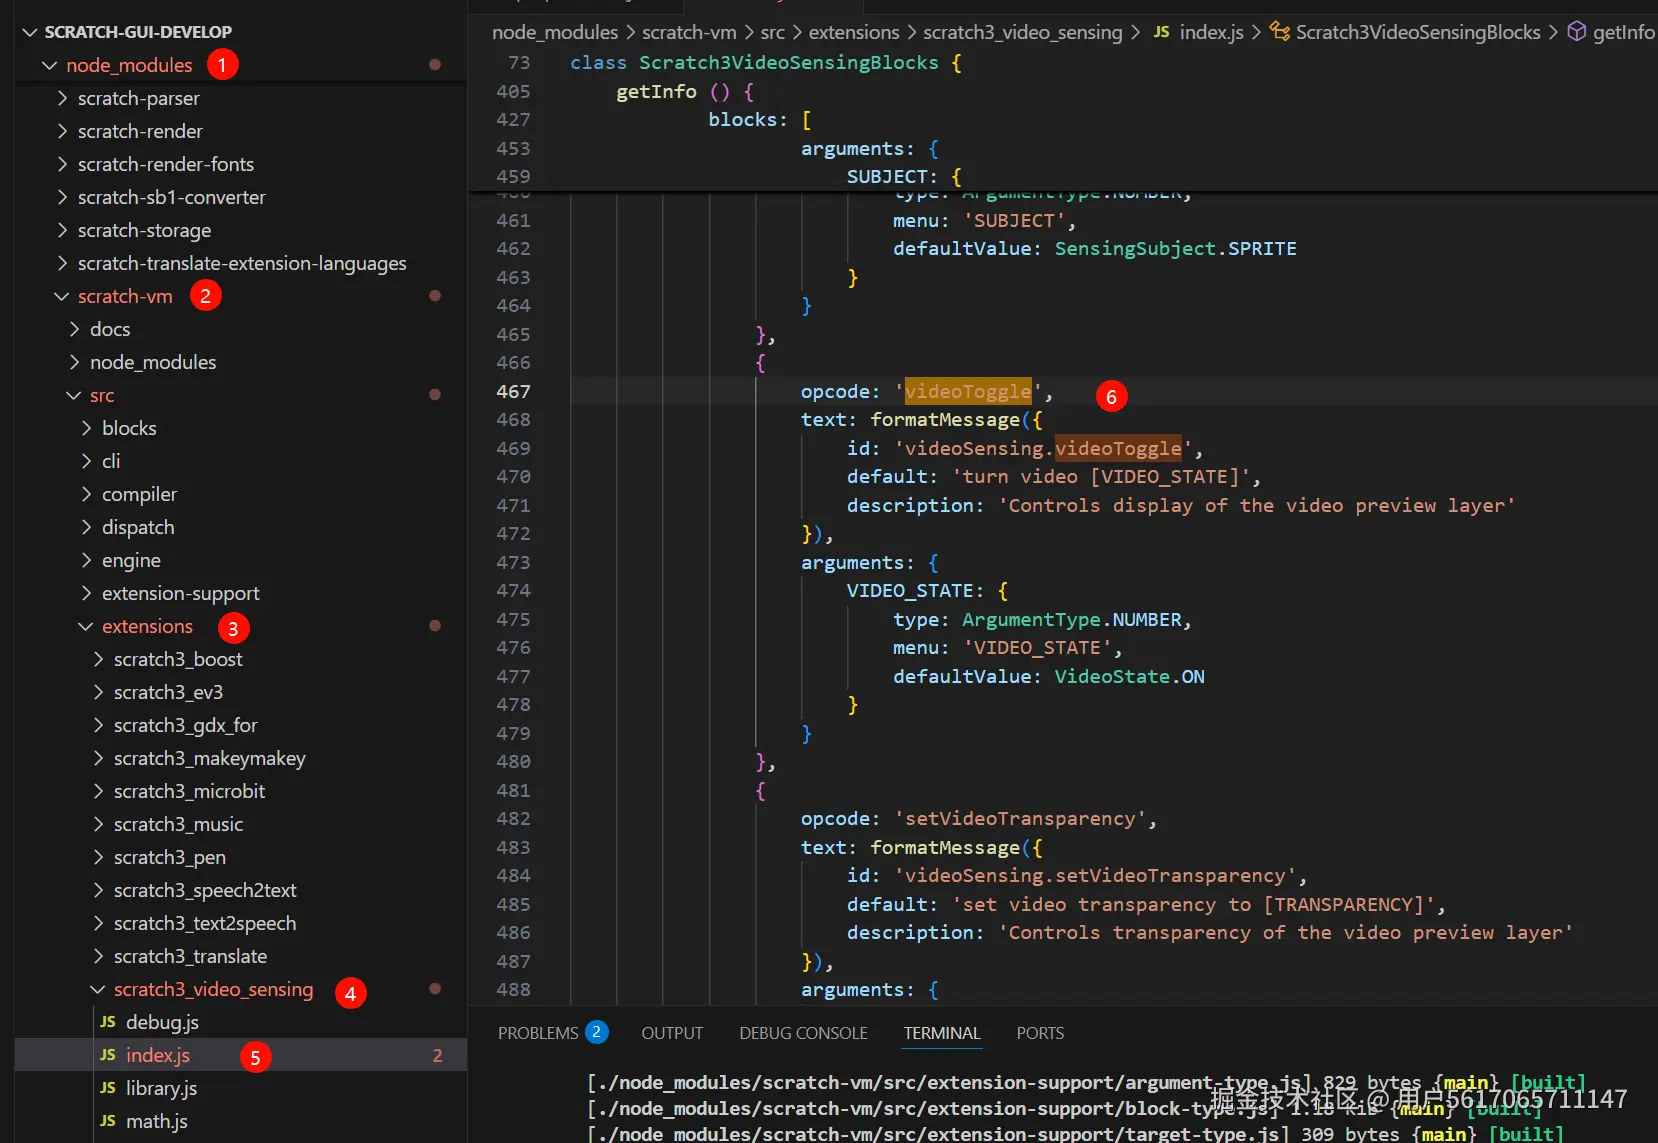
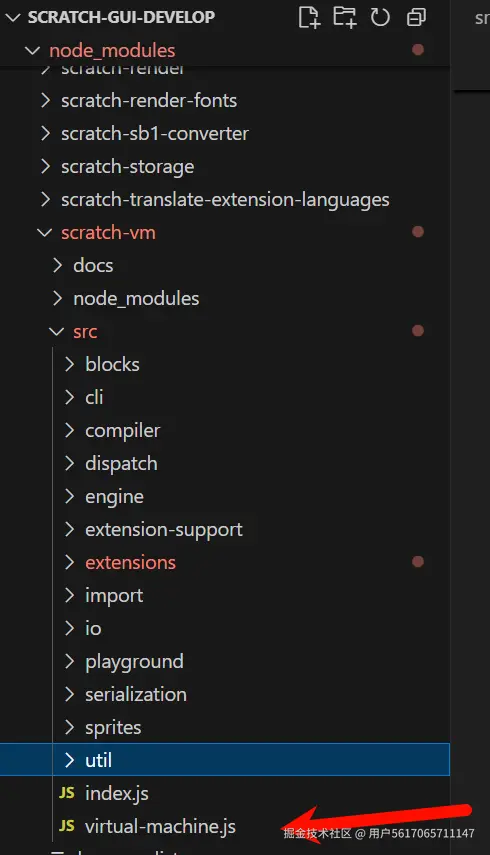
这三个函数是开启关闭摄像头的关键,想必大家也发现了,这里面用到了provider来开启摄像头,可是这个provider在哪里呢,这个文件里面provider默认为空,那肯定是在别的地方动态定义了他的具体内容,我们接着找,由于我开发过一段时间的scratch了,所以我第一反应可能是在以下目录中的文件有相关该内容的定义
我直接ctrl+f全局搜索provider果然找到了相关内容
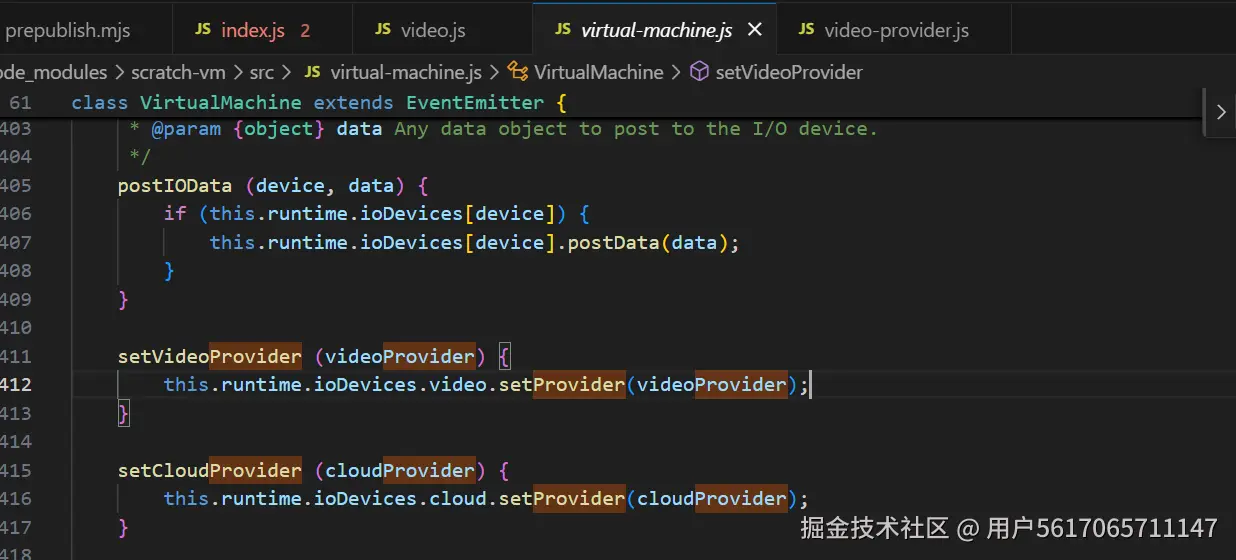
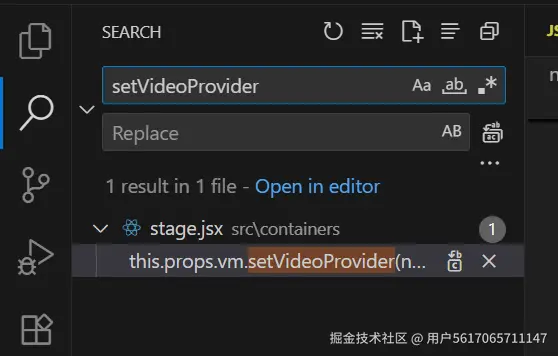
接下来直接使用vscode里面的全项目的搜索来搜索setVideoProvider函数的调用的地方
直接找到哈哈哈
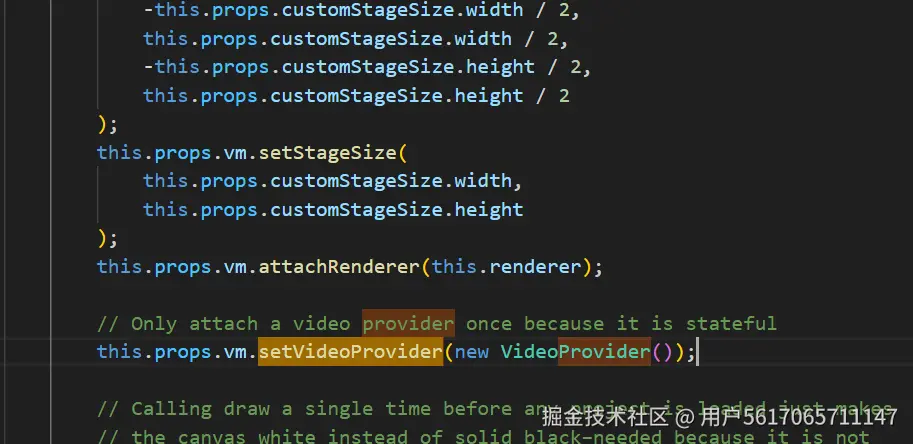
这里就很清晰了,把new出来的VideoProvider的对象设置到了原来那个video.js中的this.provider中,也就是默认的开启电脑摄像头的功能就是调用的VideoProvider里面的enableVideo方法,还是老办法,ctrl+点击进入VideoProvider类里面
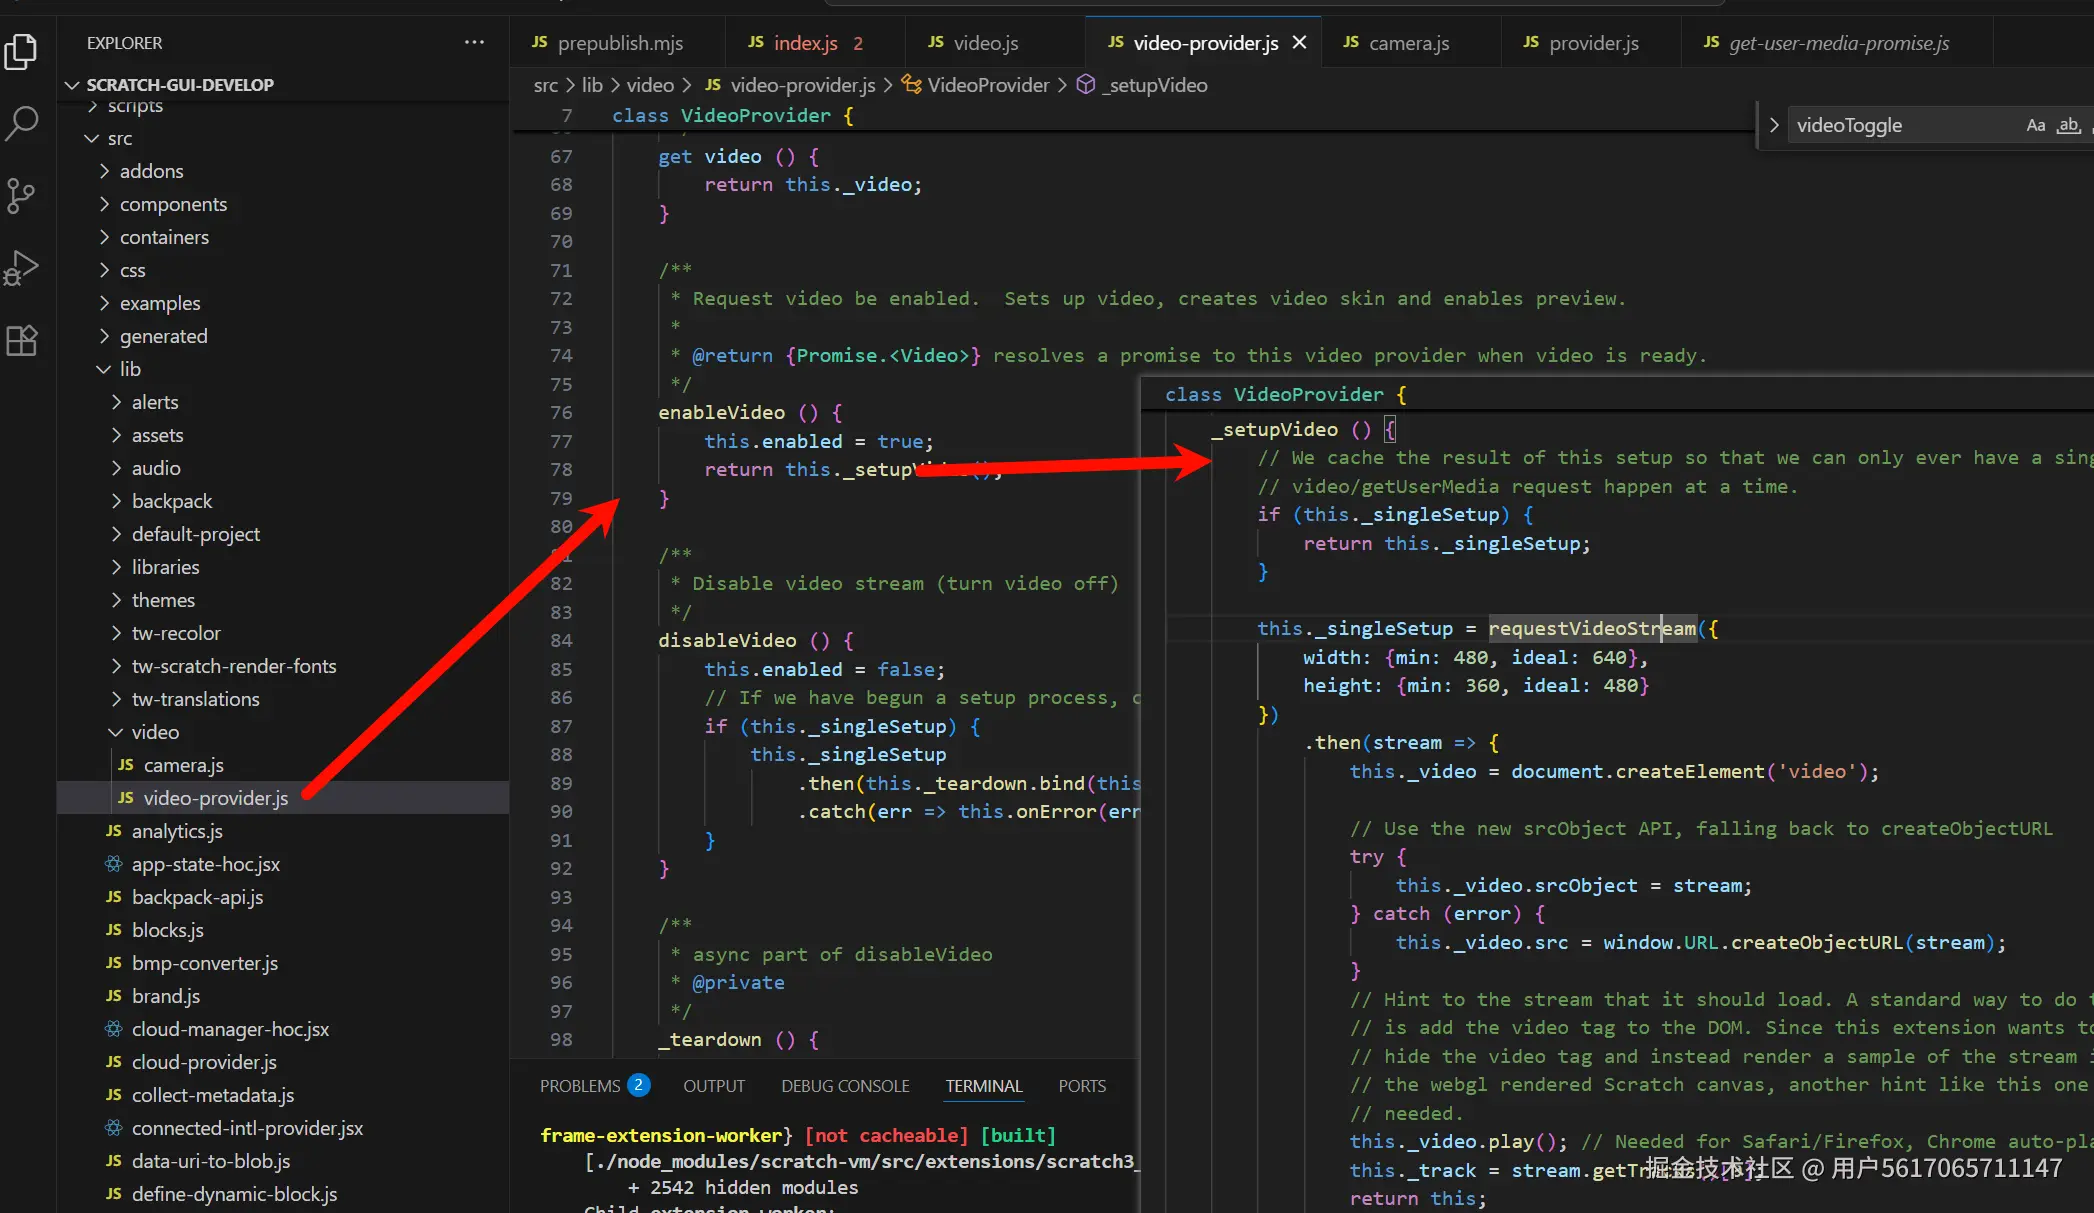
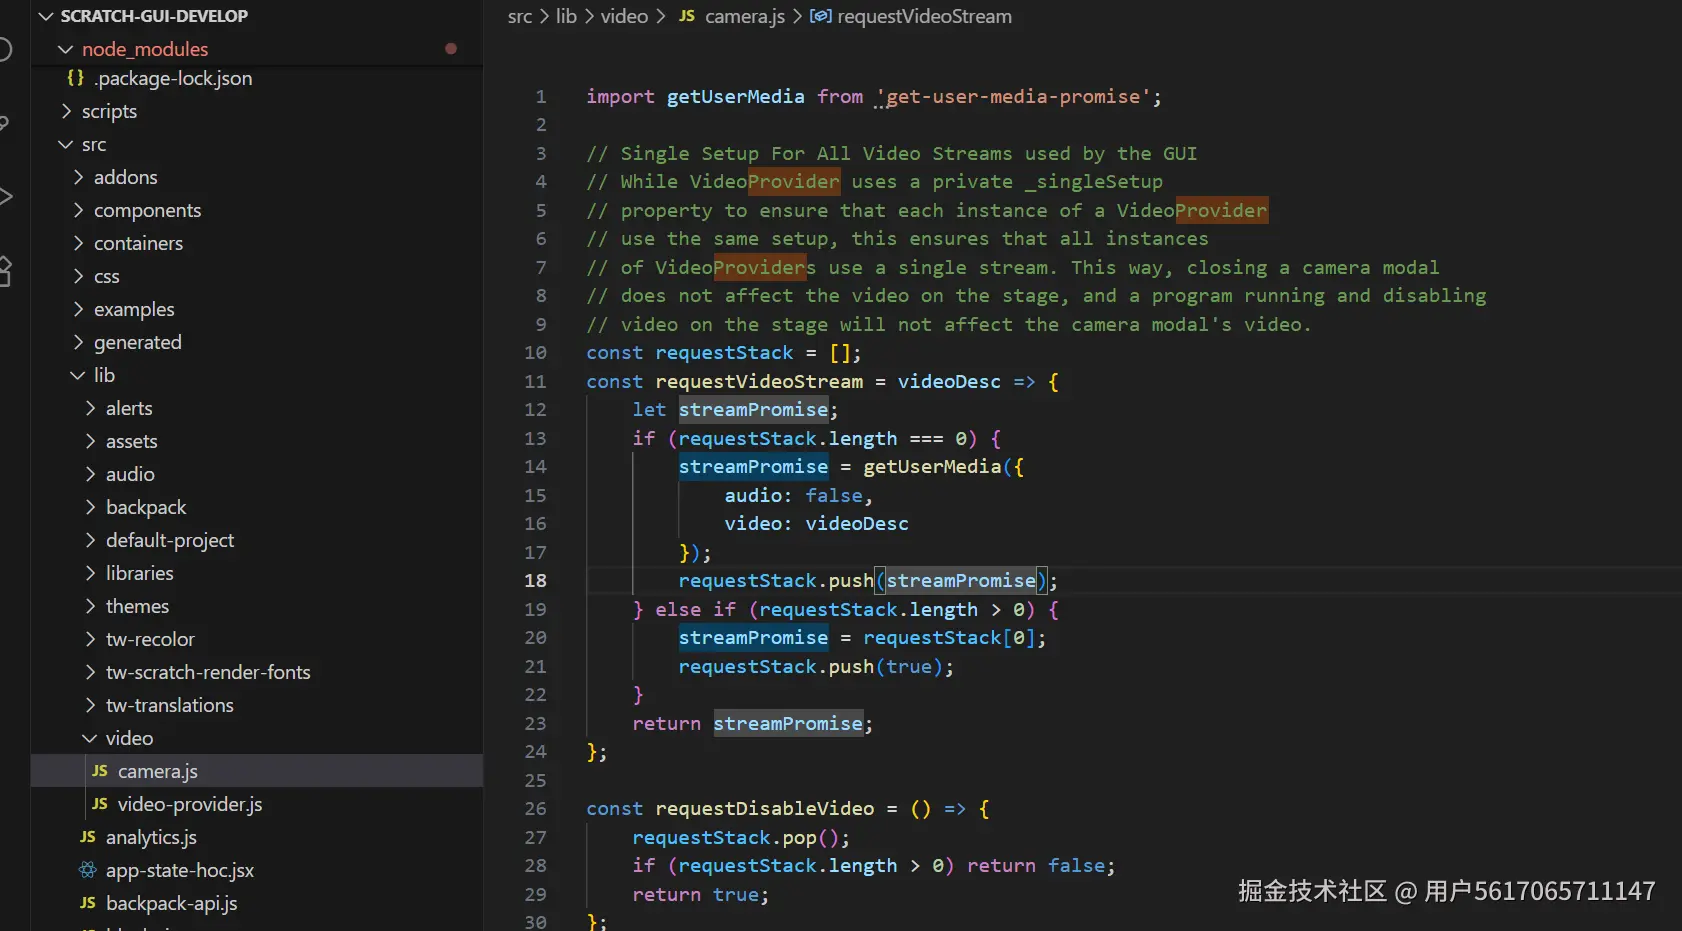
如果你也跟着我找到了这里,恭喜你,你已经了解了,scratch舞台区开启摄像头的流程,其实我们还可以继续往下找,可以看到又进入了当前目录下的camera.js目录,这里直接调用了getUserMedia用来开启摄像头。
开启网络摄像头
由于我这里的开启的网络摄像头是通过esp32开启摄像头模块后,将图像以图片的形式传输到esp32本地服务器上的形式,可以通过ip+端口的形式获取图像流,所以我要用img标签来接收。想必通过前面的流程大家一定猜到了我们第一步需要干啥,恭喜你!!!猜对了,就是写一个我们自己的provider,接下来,我将给大家提供一个provider模板,这个模板是在我的项目基础上进行删除精简之后得到的,删除了我的其他更复杂的逻辑,有一定可能会导致bug出现,不过不用担心,经过上面的介绍大家应该以及了解了开启摄像头的流程,不会出现很严重的bug,如果出现问题,大家可以随时在评论区与我交流
js
let lastHash = null;
let unchangedFrames = 0;
const MAX_UNCHANGED = 8;
/**
 * Video Manager for video extensions that handle image-based video streams.
 */
class Provider {
    constructor (ip) {
        /**
         * Default value for mirrored frames.
         * @type boolean
         */
        this.mirror = false;

        /**
         * Cache frames for this many ms.
         * @type number
         */
        this._frameCacheTimeout = 16;

        /**
         * Image element to hold the image stream
         * @private
         */
        this._img = null;

        /**
         * Canvas element to render frames
         * @private
         */
        this._canvas = null;

        /**
         * Context for the canvas
         * @private
         */
        this._context = null;

        /**
         * Stores the last update time for caching
         * @private
         */
        this._lastUpdate = 0;

        this.timer=null
        this._ip=ip
    }

    static get FORMAT_IMAGE_DATA () {
        return 'image-data';
    }

    static get FORMAT_CANVAS () {
        return 'canvas';
    }

    /**
     * Dimensions the image stream is analyzed at after being rendered to the canvas.
     * @type {Array.<number>}
     */
    static get DIMENSIONS () {
        return [480, 360];
    }

    /**
     * Order preview drawable is inserted at in the renderer.
     * @type {number}
     */
    static get ORDER () {
        return 1;
    }

    /**
     * Request video be enabled. Sets up image stream, creates video skin, and enables preview.
     *
     * @return {Promise.<VideoProvider>} resolves a promise to this video provider when video is ready.
     */
    enableVideo () {
        this.disableVideo()
        this.enabled = true;
        return this._setupImageStream();
    }

    /**
     * Disable the image stream (turn video off).
     */
    disableVideo () {
        console.log('disable')
        this.enabled = false;
        this._teardown();
    }

    /**
     * async part of disableVideo
     * @private
     */
    _teardown () {
        if (this._img) {
            this._img.src = ''; // Clear the image source to stop the stream
            this._img = null;
        }
        if (this._canvas) {
            this._canvas = null;
            this._context = null;
        }
    }

    /**
     * Return frame data from the image feed in a specified dimensions, format, and mirroring.
     *
     * @param {object} frameInfo A descriptor of the frame you would like to receive.
     * @param {Array.<number>} frameInfo.dimensions [width, height] array of numbers. Defaults to [480, 360]
     * @param {boolean} frameInfo.mirror If you specifically want a mirror/non-mirror frame, defaults to true
     * @param {string} frameInfo.format Requested video format, available formats are 'image-data' and 'canvas'.
     * @param {number} frameInfo.cacheTimeout Will reuse previous image data if the time since capture is less than
     *                                        the cacheTimeout. Defaults to 16ms.
     *
     * @return {ArrayBuffer|Canvas|string|null} Frame data in requested format, null when errors.
     */
    getFrame ({
        dimensions = Provider.DIMENSIONS,
        mirror = this.mirror,
        format = Provider.FORMAT_IMAGE_DATA,
        cacheTimeout = this._frameCacheTimeout
    }) {
        if (!this._img || !this.enabled) {
            return null;
        }
        if (this._img && this._img.complete && this._img.naturalWidth === 0) {
            return null;
        }
        try{
            const [width, height] = dimensions;
            const now = Date.now();

            // Check if the image needs to be redrawn or if it's within cacheTimeout
            if (this._lastUpdate + cacheTimeout < now) {
                this._lastUpdate = now;

                if (mirror) {
                    this._context.scale(-1, 1);
                    this._context.translate(width * -1, 0);
                }

                // Draw the image onto the canvas
                this._context.drawImage(this._img, 0, 0, this._img.width, this._img.height, 0, 0, width, height);
                this._context.setTransform(1, 0, 0, 1, 0, 0);
            }

            // console.log(this._canvas.toDataURL('image/png'))
            // Return frame in requested format
            if (format === Provider.FORMAT_IMAGE_DATA) {
                return this._context.getImageData(0, 0, width, height);
            } else if (format === Provider.FORMAT_CANVAS) {
                return this._canvas;
            }

            return null;
        }catch(e){
            return null
        }


    }

    /**
     * Method called when an error happens. Default implementation is just to log error.
     *
     * @abstract
     * @param {Error} error An error object from getUserMedia or other source of error.
     */
    onError (error) {
        console.log.error('Unhandled video io device error', error);
    }

    /**
     * Create an image stream using the provided URL.
     * @private
     * @return {Promise} Resolves when the image stream is set up.
     */


    async _setupImageStream () {
        // Create the img element and set its src to the network camera feed URL
        this._img = document.createElement('img');
        this._img.crossOrigin = "anonymous";  // 允许跨域访问

        // const timestamp = new Date().getTime();
        this._img.src = `http://${this._ip}:81/stream?ts=${Date.now()}`;  // Set the image feed URL here
        this.timer=setTimeout(() => {
                this._img.src = ''; // Clear the image source to stop the stream
                this._img = null;
                alert("加载超时,请检查网络或摄像头状态!");

        }, 6000);
        this._img.onload = () => {
            clearTimeout(this.timer)
            console.log('Image loaded, currentSrc:', this._img.currentSrc);
            console.log(this._img)
            // Create a canvas to render the image frames
            this._canvas = document.createElement('canvas');
            this._canvas.width = Provider.DIMENSIONS[0];
            this._canvas.height = Provider.DIMENSIONS[1];
            this._context = this._canvas.getContext('2d');

        };
        this._img.onerror = (error) => {
            console.error('Failed to load image feed:', error);
        };
        console.log(this._img.src)

        return new Promise((resolve, reject) => {
            if (!this._img) {
                this.channelLoad.postMessage(false)
                alert('图传加载失败,请检查后重试')
                reject('Failed to initialize image stream');
            } else {
                resolve(this);
            }
        });
    }

    /**
     * Start the image loop to continuously fetch the next frame from the image stream.
     * @private
     */
    _startImageLoop () {
        setInterval(() => {
            if (this._img) {
                // Reload the image to get the next frame
                this._img.src = `http://${this._ip}:81/stream?ts=${Date.now()}` // Adding timestamp to force reload
            }
        }, 100);  // Fetch a new image every 100ms (adjust based on your feed's speed)
    }

    get videoReady () {
        return this._img !== null && this.enabled;
    }
}

module.exports=Provider
在以上文件中需要修改的地方只有
js
this._img.src = `http://${this._ip}:81/stream?ts=${Date.now()}`;这个地方,网络摄像头的路径,ip可手动传入
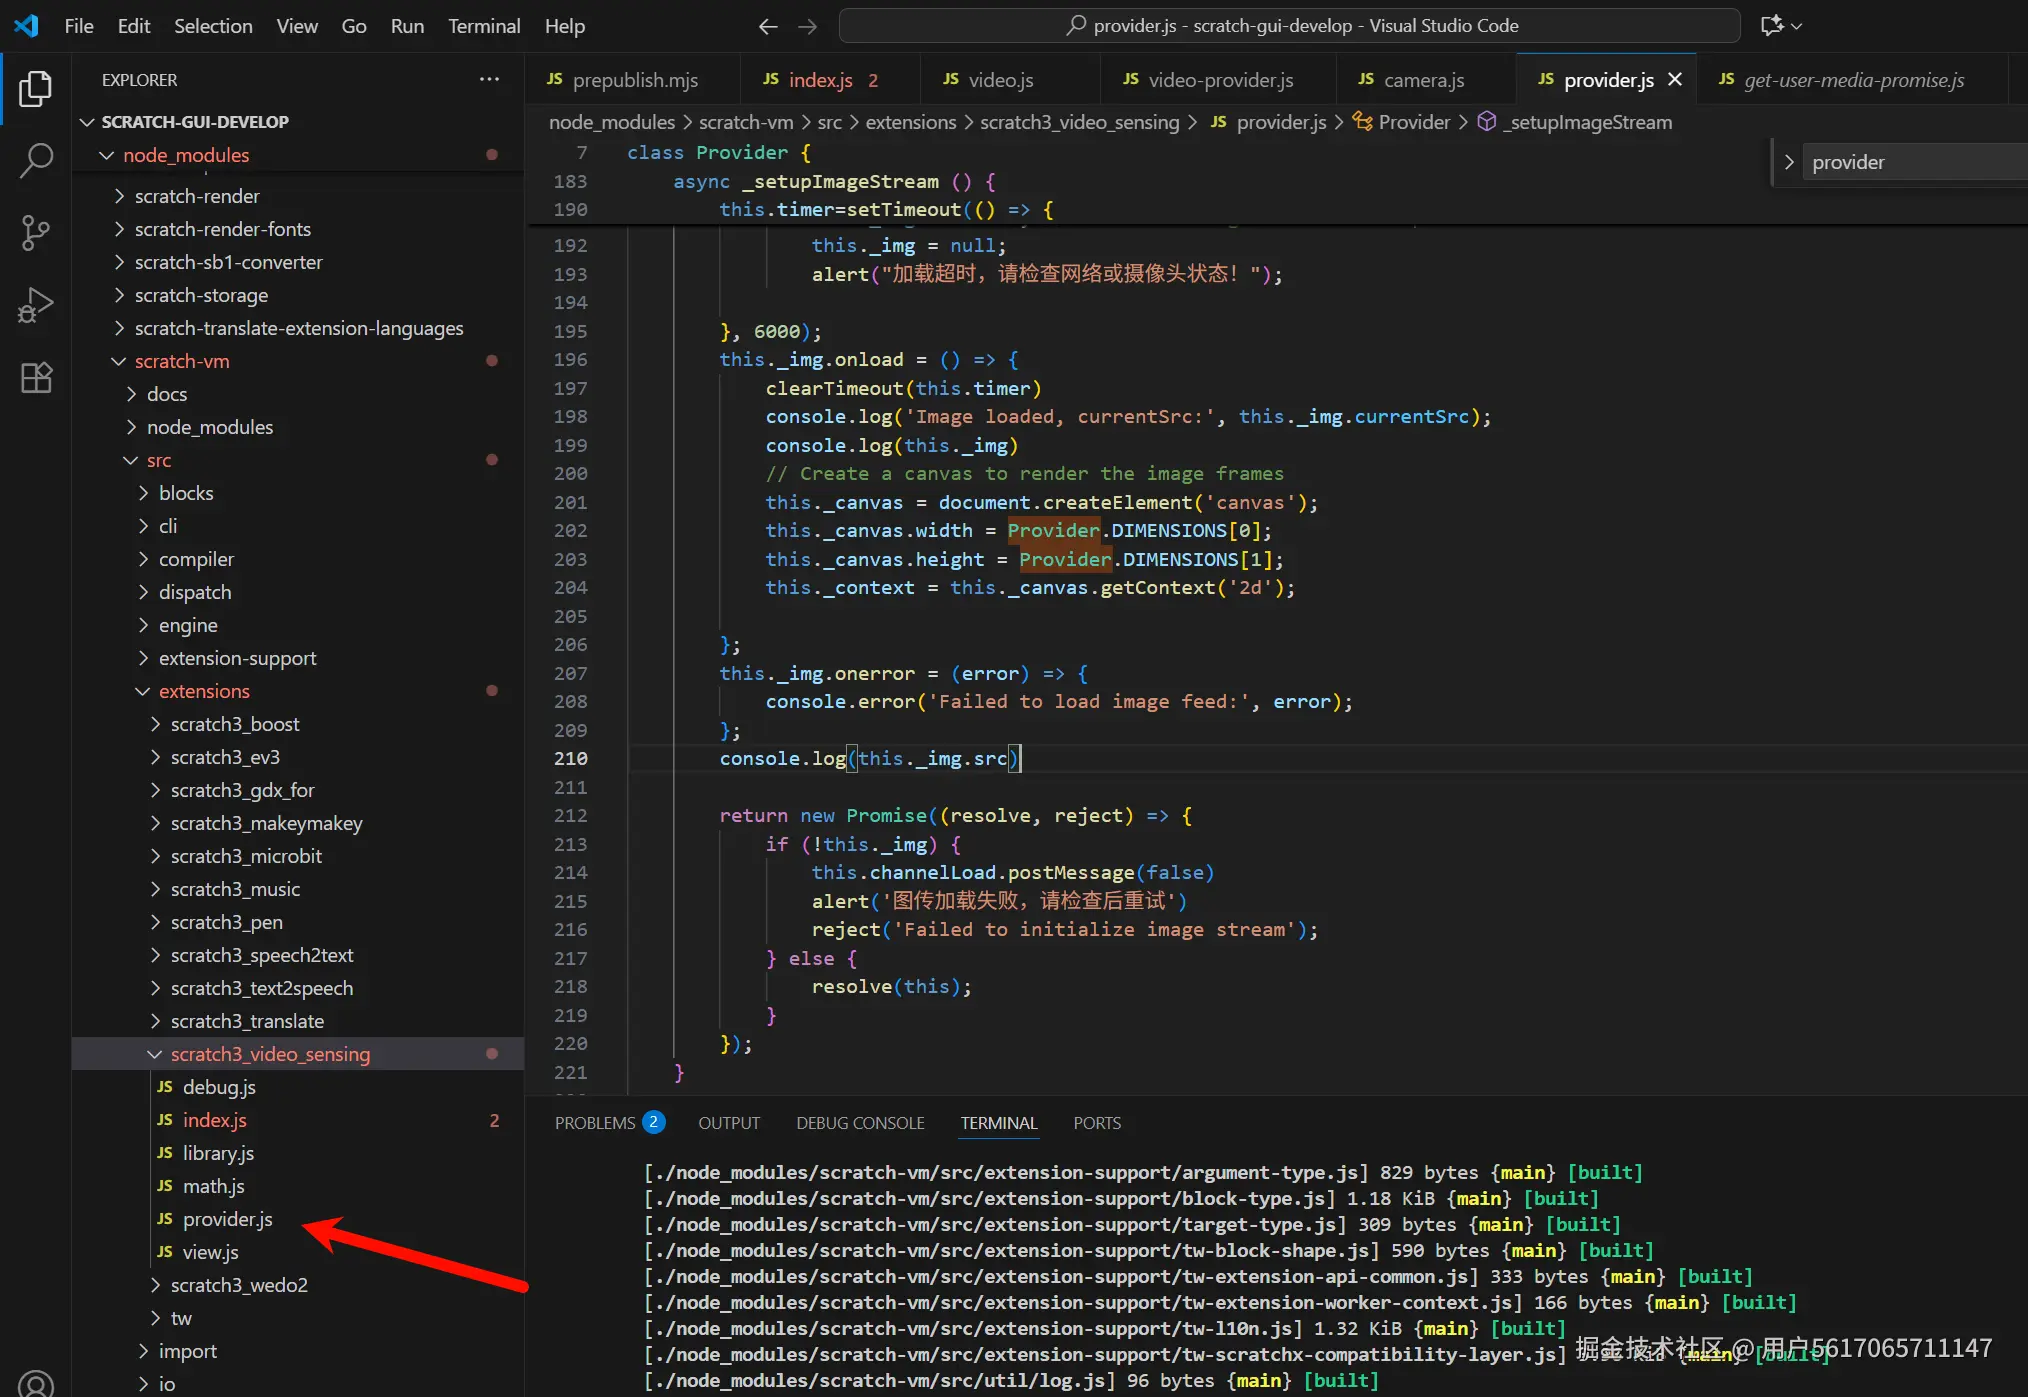
大家可以在上图所示位置新建一个provider.js文件,并将上述代码复制进去
接下来需要修改provider.js同级目录下的index.js文件,我会给出具体步骤:
js
const Provider = require('./provider') //导入provider
js
this.videoProvider=this.runtime.ioDevices.video.videoProvider; //用于记录默认的provider
js
//新建开启网络摄像头的模块,这里就不使用formatMessage国际化方法了,我们暂时不需要翻译
                {
                    opcode: 'videoNet',
                    text: '[VIDEO_STATE]网络摄像头',
                    arguments: {
                        VIDEO_STATE: {
                            type: ArgumentType.NUMBER,
                            menu: 'VIDEO_STATE',
                            defaultValue: VideoState.ON
                        }
                    }
                },
js
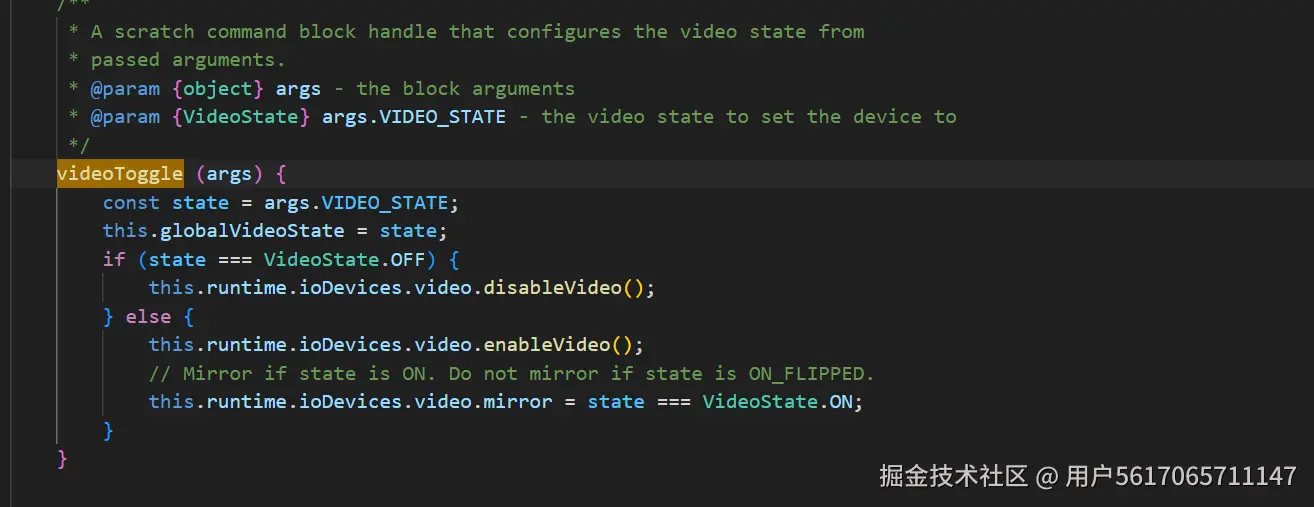
    videoToggle (args) {
        const state = args.VIDEO_STATE;
        this.globalVideoState = state;
        this.runtime.ioDevices.video.setProvider(this.videoProvider) //恢复原有的provider
        if (state === VideoState.OFF) {
            this.runtime.ioDevices.video.disableVideo();
        } else {
            this.runtime.ioDevices.video.enableVideo();
            // Mirror if state is ON. Do not mirror if state is ON_FLIPPED.
            this.runtime.ioDevices.video.mirror = state === VideoState.ON;
        }
    }

    //模块的执行逻辑,可以直接复制上面原有的方法然后稍作修改
    videoNet (args) {
        const state = args.VIDEO_STATE;
        this.globalVideoState = state;//我们也可以给网络摄像头添加一个类似的参数,来确保只能开启一个摄像头,这个就交给大家来完成了,很简单if..else就行了
        this.runtime.ioDevices.video.setProvider(new Provider('ip')) //将我们新建的provider赋值,并且传入ip,这个ip大家也可以在块里面让用户输入
        if (state === VideoState.OFF) {
            this.runtime.ioDevices.video.disableVideo();
        } else {
            this.runtime.ioDevices.video.enableVideo();
            // Mirror if state is ON. Do not mirror if state is ON_FLIPPED.
            this.runtime.ioDevices.video.mirror = state === VideoState.ON;
        }
    }
好了,完成以上操作,我们就大功告成了,运行起来软件,导入视频侦测的扩展后就会发现多了一个块
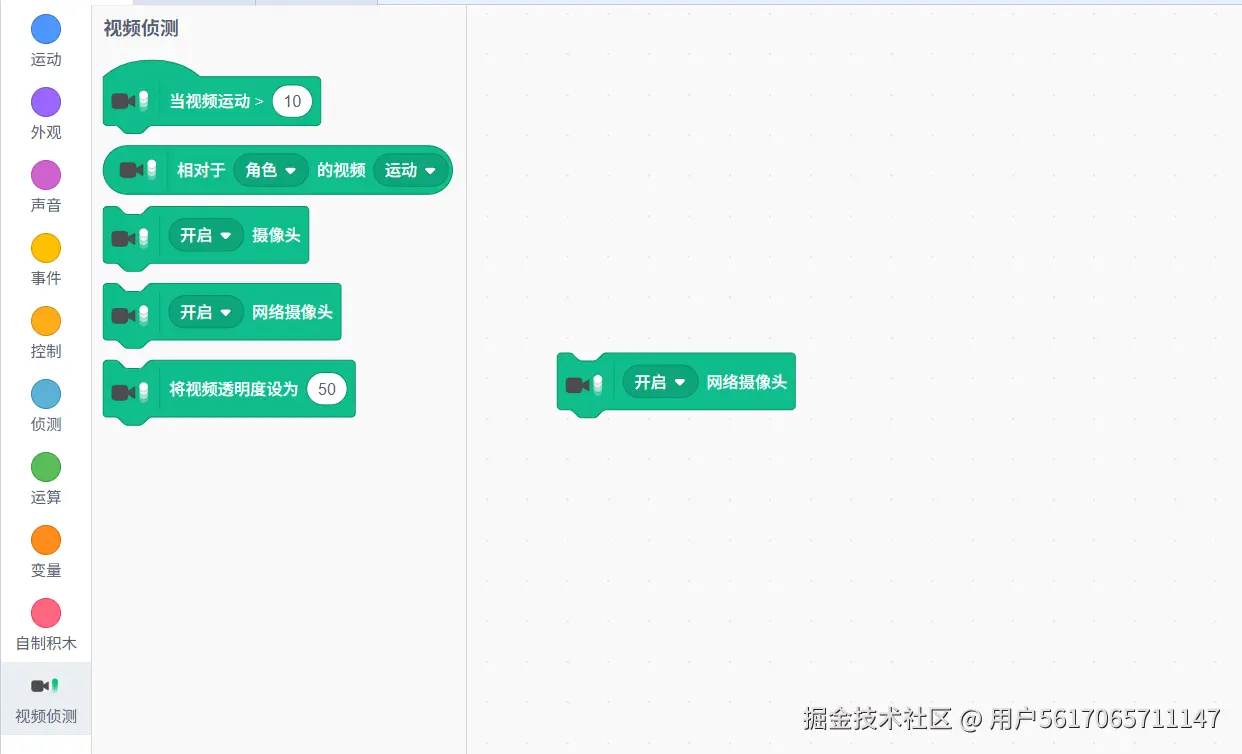
直接点击即可开启网络摄像头。
声明:
1.本帖的代码是在我原本的代码上精简而来的,我并没有来的及验证,可能会有些许问题,如有问题出现,大家及时在评论区留言。
2.在以上的代码修改中,仅作展示使用,属于不规范开发,还是要尽量避免对原有文件的修改,比如我们可以新加一个扩展用于开启管理网络摄像头,添加扩展的步骤可以看下面的博主,这个博主解释的很详细:scratch 3.0二次开发---插件添加_scratch3扩展
好了,该和大家说再见了,本次分享到此结束了,下一节将会分享如何选择开启usb摄像头还是电脑默认摄像头