一、 Spring Cloud Netfilx Ribbon简介
1.1 Ribbon 介绍
Spring Cloud Ribbon 是一个基于 HTTP 和 TCP 的客户端负载均衡工具,它基于 Netflix Ribbon 实现。通过 Spring Cloud 的封装,可以让我们轻松地将面向服务的 REST模 版请求自动转换成客户端负载均衡的服务调用。Spring Cloud Ribbon 虽然只是一个工具类框架,它不像服务注册中心、配置中心、API 网关那样需要独立部署,但是它几乎存在于每一个 Spring Cloud 构建的微服务和基础设施中。因为微服务间的调用,API 网关的请求转发等内容,实际上都是通过 Ribbon 来实现的,比如 OpenFeign,它也是基于 Ribbon 实现负载均衡的远程服务调用工具。
1.2 Ribbon 执行原理
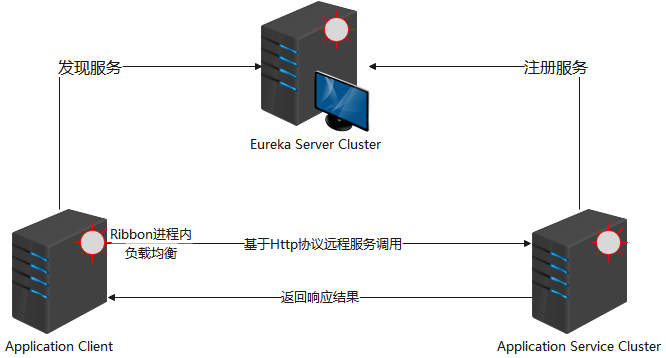
所有的微服务项目都会注册到 Eureka Server 中,Eureka Server 允许不同项目 的应用名称(即 spring.application.name )相同 。当应用名称相同时会认定这些项目是一个集群。所以当部署同一服务的集群时,该服务的所有实例需要设置相同的 spring.application.name。
Application Client 会从 Eureka Server 中根据 spring.application.name 加载 Application Service 的列表。根据设定的负载均衡算法 ,从列表中取出 一个合适的 URL ,到此 Ribbon 的事情结束了。剩下的事情由程序员自己进行技术选型,选择一个 HTTP 协议工具(如:OkHttp,RestTemplate,HttpClient 等),通过这个 URL 远程调用 Application Service服务。
只有 Application Client 从 Eureka Server 中发现服务后 进行负载均衡 算法的过程和 Ribbon有关系。
二、负载均衡解决方案分类及特性
业界主流的负载均衡解决方案有:集中式负载均衡和进程内负载均衡。
2.1 集中式负载均衡
即在客户端和服务端之间使用独立的负载均衡设施(可以是硬件,如 F5, 也可以是软件,如nginx ), 由该设施负责把访问请求通过某种策略转发至服务端。也叫做:服务器端负载均衡。

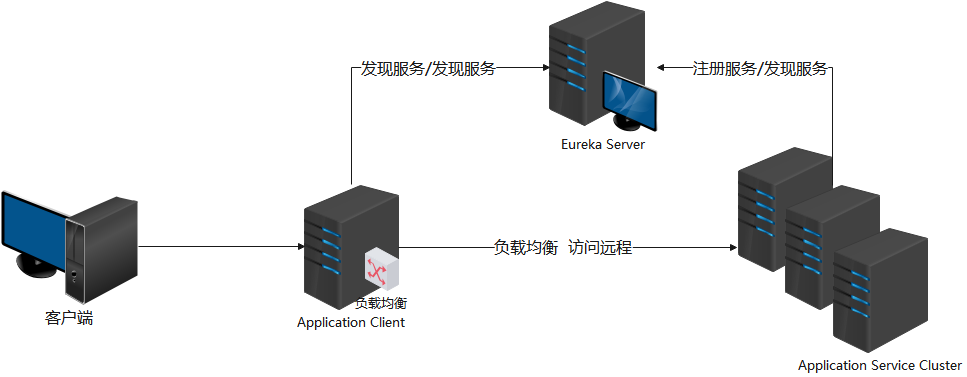
2.2 进程内负载均衡
将负载均衡逻辑集成到客户端组件中,客户端组件从服务注册中心获知有哪些地址可用,然后自己再从这些地址中选择出一个合适的服务端发起请求。Ribbon 就是一个进程内的负载均衡实现。也叫做:客户端负载均衡。
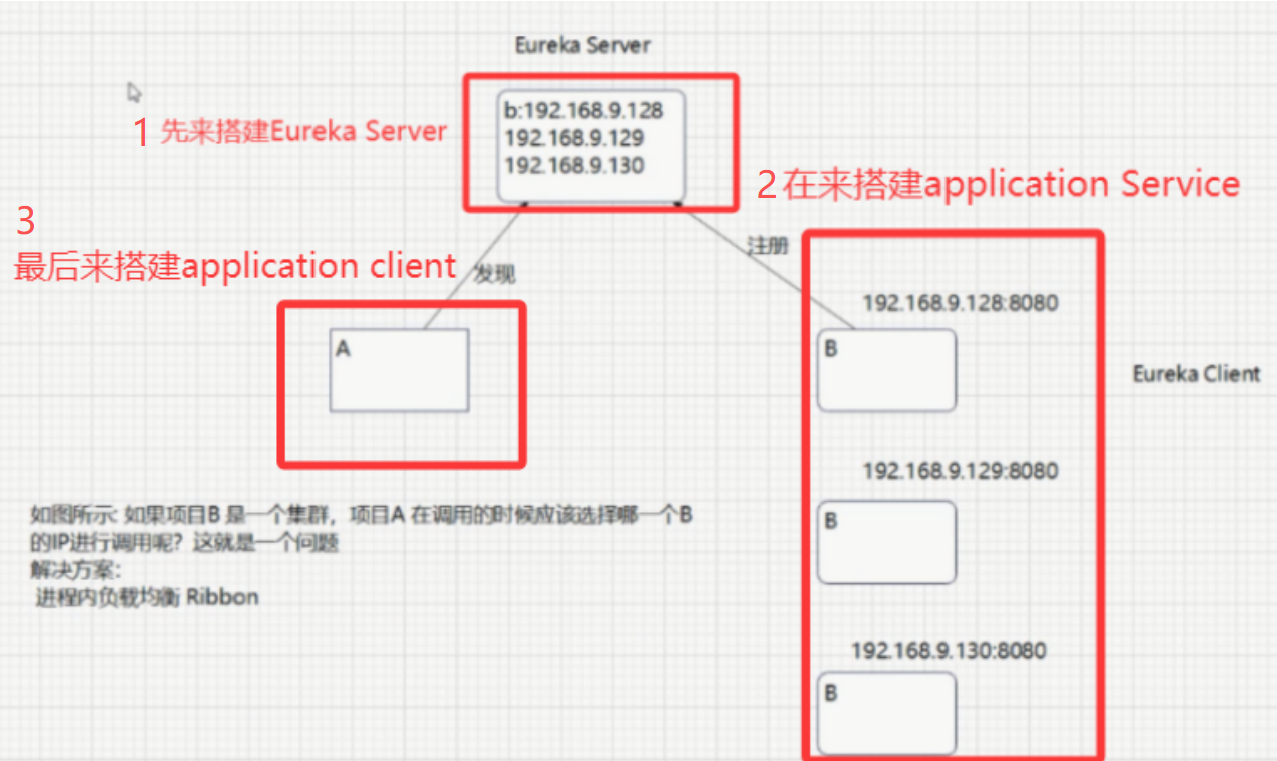
2.3 Ribbon 解决的问题:
面对多个 IP 时,给出一个方案,选择一个
三、搭建 Application Service 集群
前提:已经配置了单机版Eureka。且端口为8761(参考 ↓ 下面这篇文章的第6,7步),打开这两个项目(eurekaServer 02 和 eurekaClient 02 )微服务,Spring Cloud 和 Eureka:服务发现工具
3.1 新建项目 eurekaApplicationServiceB
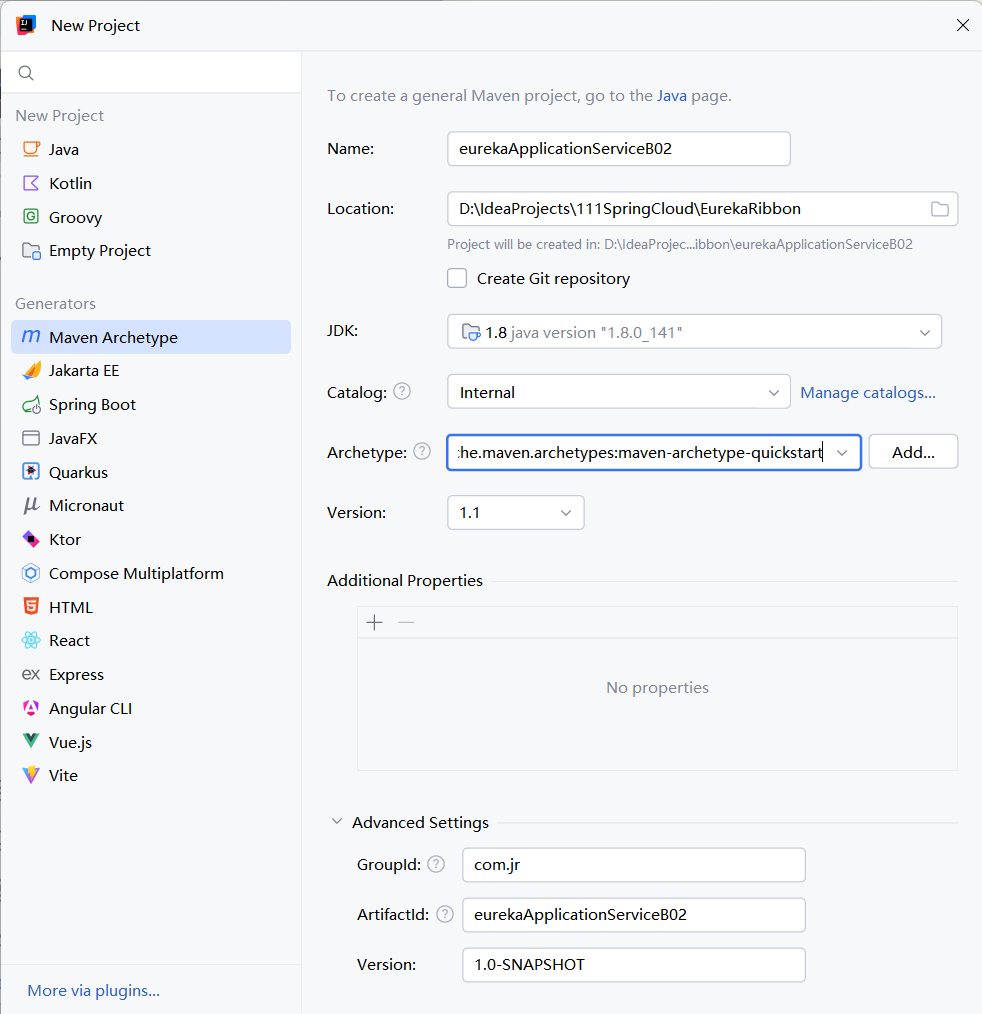
3.2 添加 pom 依赖
位置:(添加后记得刷新)
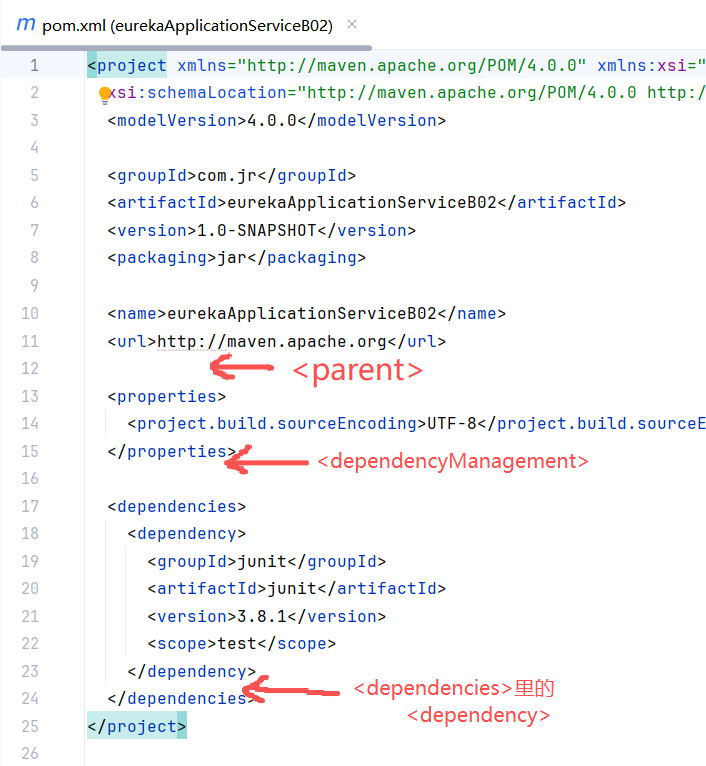
XML
<parent>
    <groupId>org.springframework.boot</groupId>
    <artifactId>spring-boot-starter-parent</artifactId>
    <version>2.3.12.RELEASE</version>
</parent>
XML
<dependencyManagement>
    <dependencies>
        <dependency>
            <groupId>org.springframework.cloud</groupId>
            <artifactId>spring-cloud-dependencies</artifactId>
            <version>Hoxton.SR12</version>
            <type>pom</type>
            <scope>import</scope>
        </dependency>
    </dependencies>
</dependencyManagement>
XML
<dependencies>
<dependency>
<groupId>org.springframework.boot</groupId>
<artifactId>spring-boot-starter-web</artifactId>
</dependency>
<dependency>
<groupId>org.springframework.cloud</groupId>
<artifactId>spring-cloud-starter-netflix-eureka-client</artifactId>
</dependency>
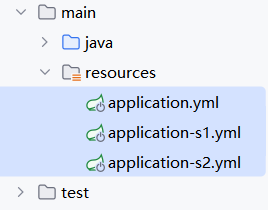
</dependencies>3.3 编写配置文件 application.yml
在 mian 下创建 resources 目录,创建 application.yml ;application-s1.yml ;application-s2.yml 一共3个文件,端口号分别为 8081;8082;8083
服务应用名称(服务名) name 可以换但是三个文件的服务名得是一样的,是运行后在 Eureka 平台页面上显示的名字

XML
spring:
  application:
    name: clientB
server:
  port: 8081

#端口号分别更换为8081 ;8082 ;8083
3.4 编写控制器 DemoController
编写 com.jr.controller.DemoController 类
java
@RestController
public class DemoController {
@RequestMapping("/ts")
public String str(){
return "进入 DemoController,获得B项目的数据";
}
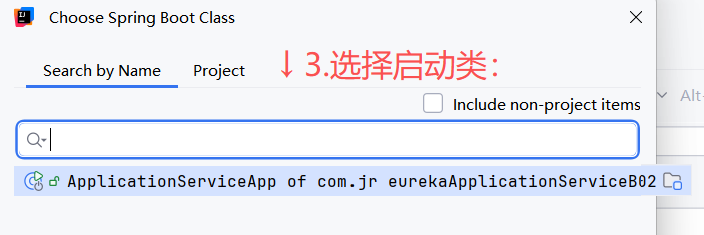
}3.5 编写启动类 ApplicationServiceApp
编写 com.jr.ApplicationServiceApp
java
@SpringBootApplication
public class ApplicationServiceApp {
public static void main(String[] args) {
SpringApplication.run(ApplicationServiceApp.class, args);
}
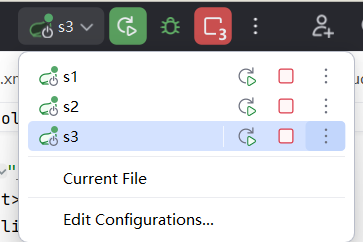
}3.5.1 添加 SpringBoot 运行配置 *3
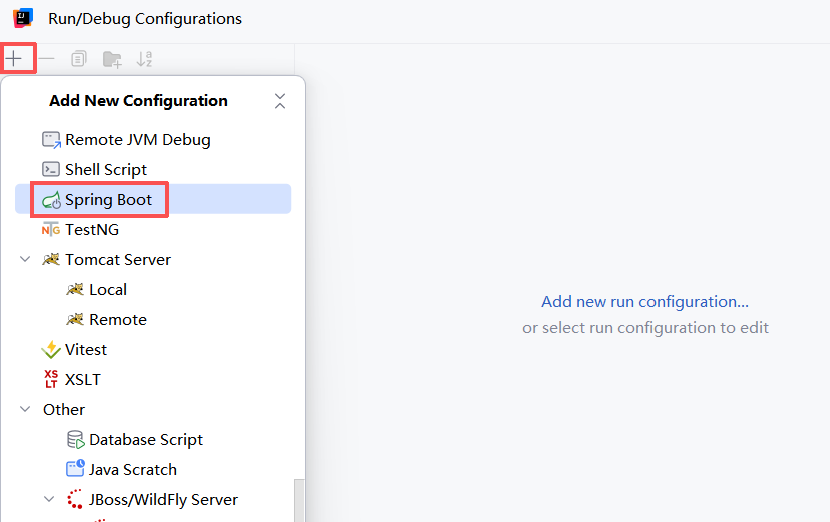
进入配置页面:点击项目上方的 Current File,点击Edit Configurations...
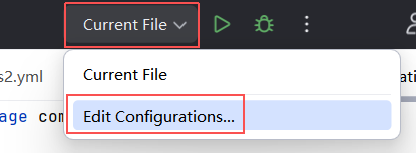
点击左上角的加号,寻找并添加 Spring Boot
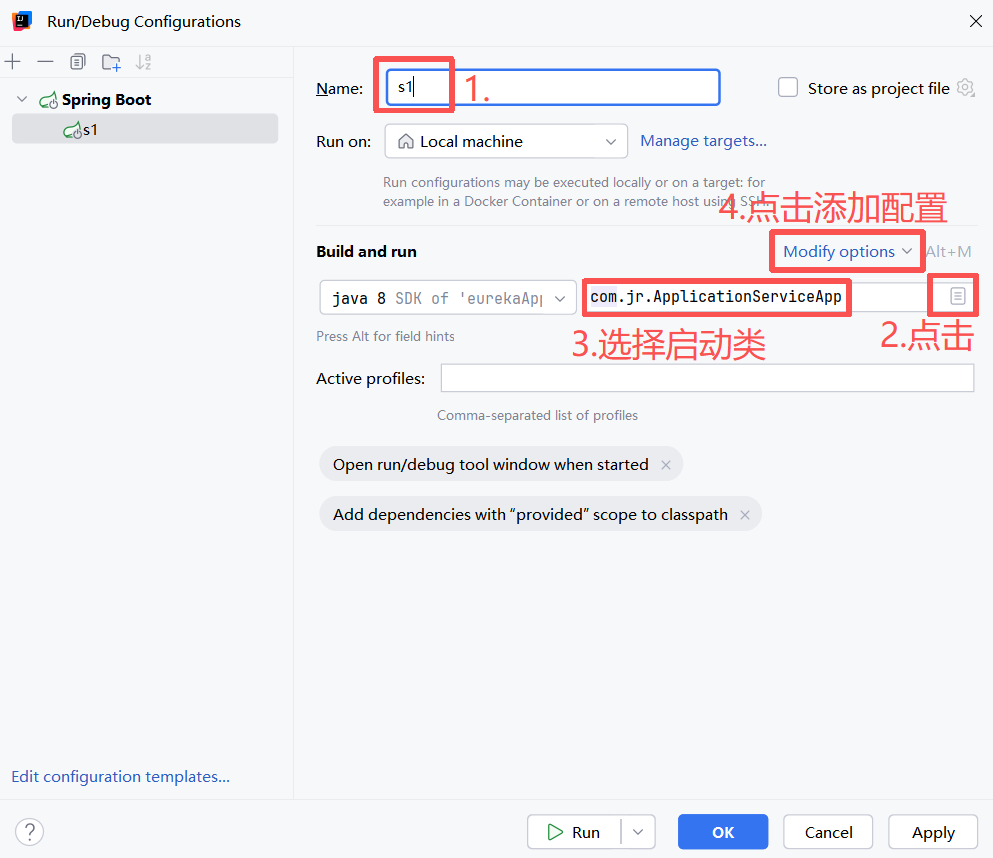
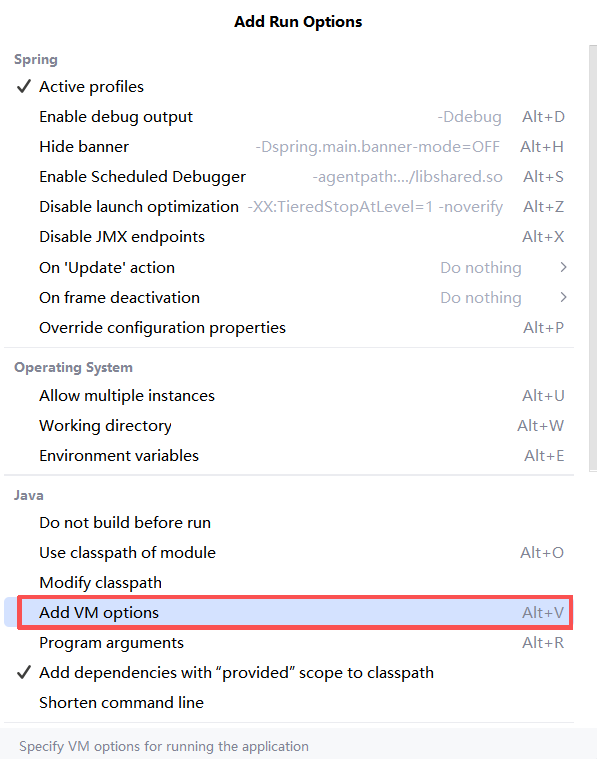
输入:-Dspring.profiles.active=环境
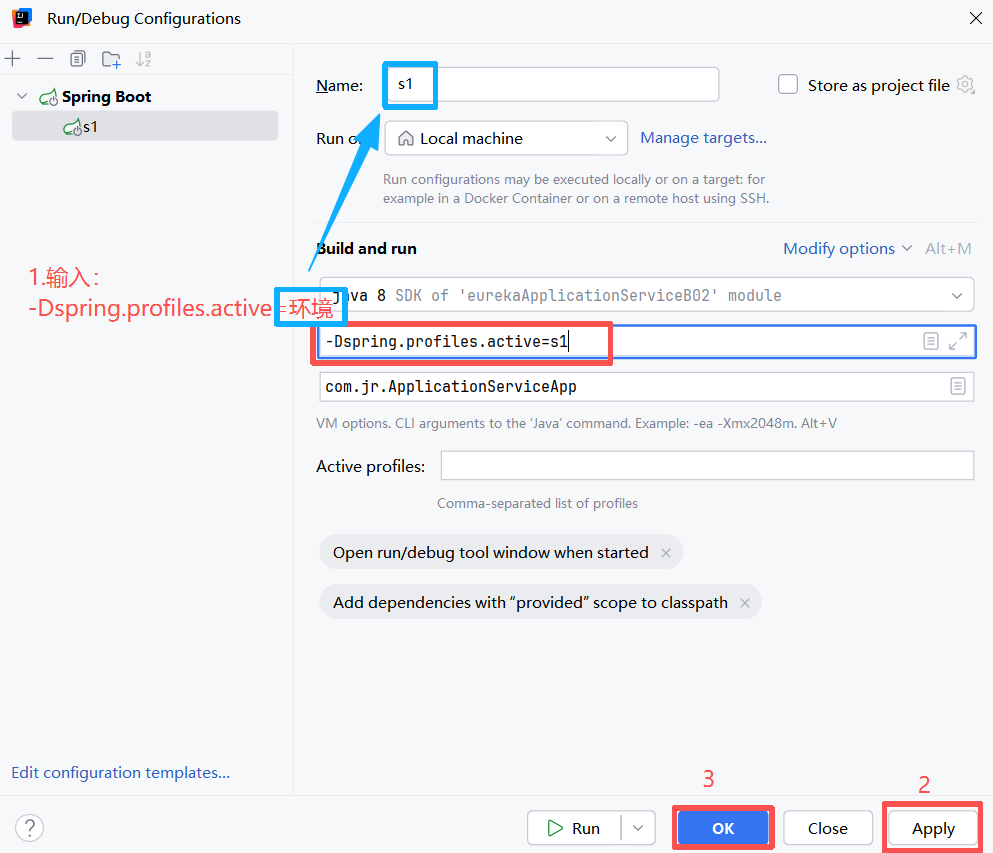
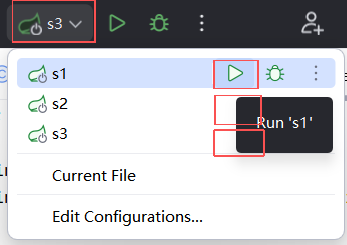
s1,s2,s3 一共添加三个
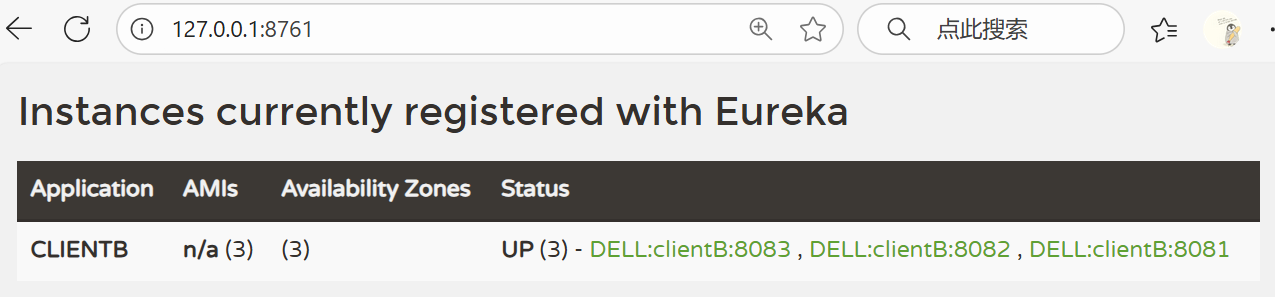
先启动服务器 eurekaServer02,再启动这三个项目
查看 Eureka 平台页面:127.0.0.1:8761
四、搭建 Application Client 工程
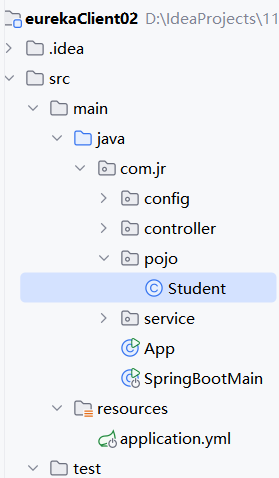
就在之前写的 eurekaClient02 的基础上写(创建项目,添加依赖,编写配置文件)
4.1 编写服务接口和实现
4.1.1 编写服务接口 com.jr.service.StudentService
java
public interface StudentService {
    int save();
}
4.1.2 编写服务实现 com.jr.service.impl.StudentServiceImpl
LoadBalancerClient 不要导错包了 ↓↓↓; "CLIENTB" 是 Eureka 平台页面上显示的服务名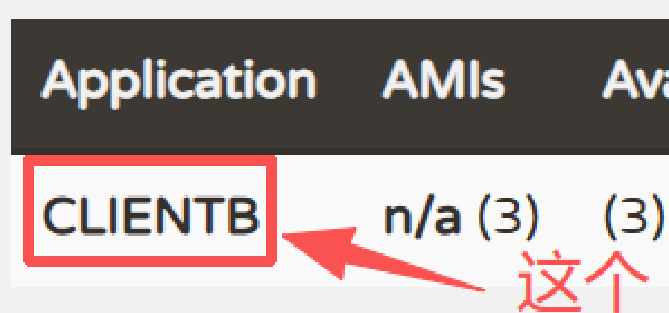
java
import org.springframework.cloud.client.loadbalancer.LoadBalancerClient;

@Service
public class StudentServiceImpl implements StudentService {

    @Autowired
    private LoadBalancerClient loadBalancerClient;

    @Override
    public int save() {
        //serviceID:注册列表中 地址的名称
        ServiceInstance clientb = loadBalancerClient.choose("CLIENTB");

        //经过负载均衡返回的地址
        System.out.println("clientb.getUri()"+clientb.getUri());
        return 0;
    }
}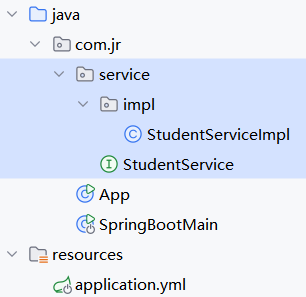
4.2 编写 StudentController
com.jr.controller.StudentController
java
@RestController
public class StudentController {

    @Autowired
    private StudentService studentService;

    @RequestMapping("/save")
    public int save(){
        return studentService.save();
    }

}
4.3 创建启动类
就是之前写的 SpringBootMain

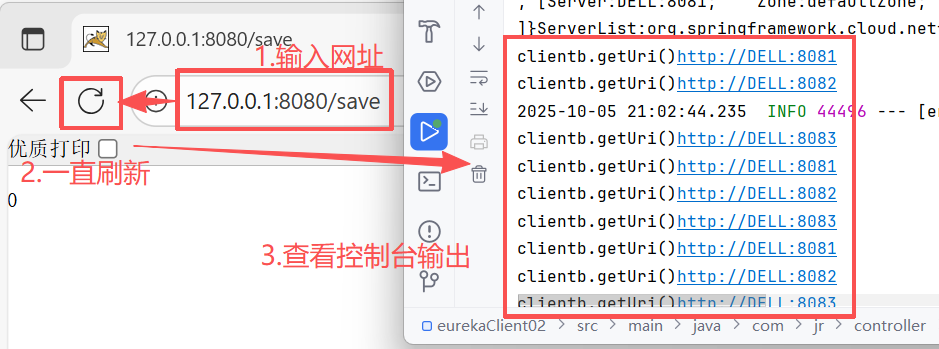
4.4测试
运行 eurekaClient02 的启动类,在浏览器输入网址:127.0.0.1:8080/save
点击刷新,查看 IDEA 控制台的输出:按顺序循环的
五、介绍负载均衡策略方案并更换方法
5.1 介绍:
Ribbon 的负载均衡策略是通过不同的类型来实现的(都是 IRule 接口的实现),下表详细介绍一些常用负载均衡策略及对应的 Ribbon 策略类。一共有 7 种方案,90%选择默认的轮询方案。
| 编号 | 策略名称 | 策略对应的类名 | 实现原理 |
|---|---|---|---|
| 1 | 轮询策略(默认) | RoundRobinRule | 轮询策略表示每次都按照顺序取下一个 application service,比如一共有5个 application service,第1次取第1个,第2次取第2个,第3次取第3个,以此类推 |
| 2 | 权重轮询策略(常用,中小型项目使用) | WeightedResponseTimeRule | 1. 根据每个 application service 的响应时间分配一个权重,响应时间越长,权重越小,被选中的可能性越低。 2. 原理:一开始为轮询策略,并开启一个计时器,每30秒收集一次每个 application service 的平均响应时间,当信息足够时,给每个 application service 附上一个权重,并按权重随机选择 application service,权重越高的 application service 会被高概率选中。 |
| 3 | 随机策略(不推荐,测试使用,开发使用) | RandomRule | 从 application service 列表中随机选择一个 |
| 4 | 最少并发数策略(应用在硬件软件环境一致的情况下,中小型项目使用) | BestAvailableRule | 选择正在请求中的并发数最小的 application service,除非这个 application service 在熔断中。 |
| 5 | 重试策略。在"选定的负载均衡策略"基础上进行重试机制 | RetryRule | 1. "选定的负载均衡策略"这个策略是轮询策略RoundRobinRule 2. 该重试策略先设定一个阈值时间段,如果在这个阈值时间段内当选择 application service 不成功,则一直尝试采用"选定的负载均衡策略:轮询策略"最后选择一个可用的 application service |
| 6 | 可用性敏感策略(一般在同区域内服务集群环境中使用) | AvailabilityFilteringRule | 过滤性能差的 application service,有2种: 第一种:过滤掉在 eureka 中处于一直连接失败 application service 第二种:过滤掉高并发的 application service |
| 7 | 区域敏感性策略(应用在大型的,物理隔离分布式环境中) | ZoneAvoidanceRule | 1. 以一个区域为单位考察可用性,对于不可用的区域整个丢弃,从剩下区域中选可用的 application service 2. 如果这个 ip 区域内有一个或多个实例不可达或响应变慢,都会降低该 ip 区域内其他 ip 被选中的权重。 |
5.2 更换:
在Application Client,也就是 eurekaClient02 项目,添加配置类 com.jr.config.RibbonConfig
更换为随机策略: 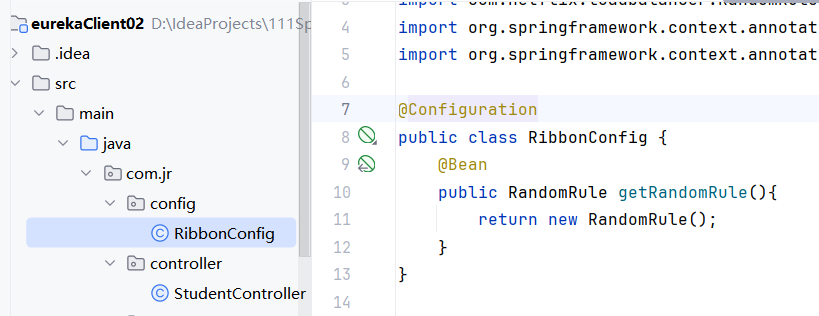
java
@Configuration
public class RibbonConfig {
    @Bean
    public RandomRule getRandomRule(){
        return new RandomRule();
    }
}
重启项目,随机访问 save: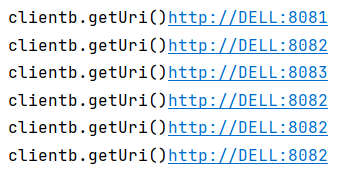
六、介绍 RestTemplate
RestTemplate 是 spring-web-xxx.jar 包中提供的Http协议实现类。也就是说导入 spring-boot-starter-web 的项目可以直接使用 RestTemplate。在该类中提供针对6类请求方式的模板方法。
6.1 在 applicationServer 创建 Controller
就是 eurekaApplicationService02 里的 DemoController,在 3.4 写的那个
6.2 在 applicationClient 创建测试类
在 eurekaClient02 的 test 的 java 下的 jr 包下创建测试类 DempTest 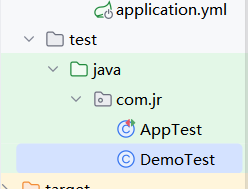
6.2.1 调用其他应用的 无参 构造器方法
java
public class DemoTest {
// 调用其他应用的无参构造器方法
@Test
public void test01(){
RestTemplate restTemplate = new RestTemplate();
ResponseEntity<String> resp = restTemplate.getForEntity("http://127.0.0.1:8081/ts", String.class);
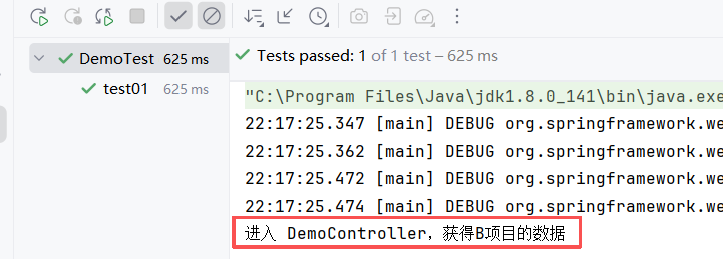
System.out.println(resp.getBody());
}
}运行 test01(CLIENTB 得开着,不然会报错的,运行一个就够了)
6.2.2 调用其他应用的 有参 控制器方法1
6.2.2-1 在 B 项目的 Controller 里添加有参方法 str1
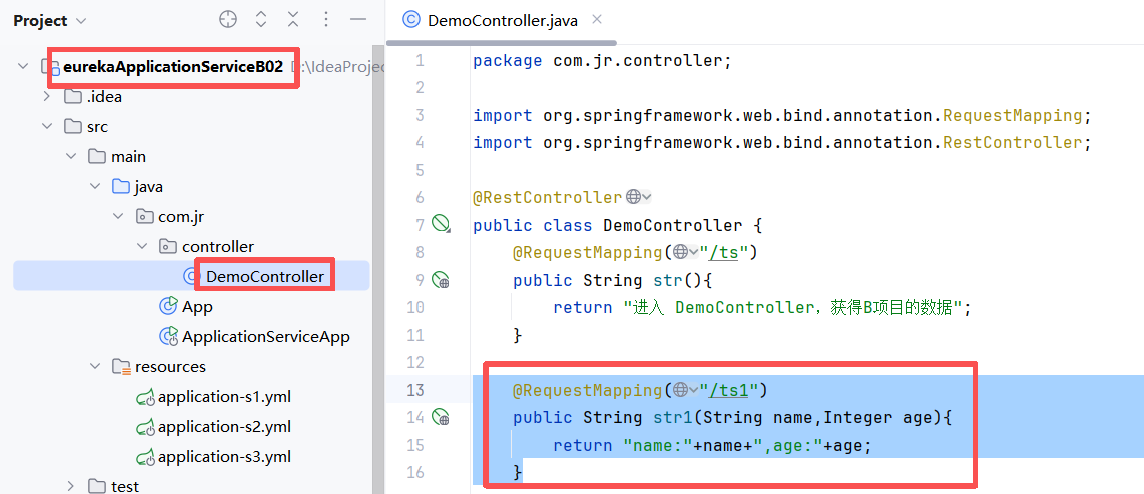
java
    @RequestMapping("/ts1")
    public String str1(String name,Integer age){
        return "name:"+name+",age:"+age;
    }
6.2.2-2 编写测试方法 test02(eurekaClient02 的 DemoTest)
java
    // 调用其他应用的有参控制器方法
    @Test
    public void test02(){
        RestTemplate restTemplate = new RestTemplate();
        ResponseEntity<String> resp = restTemplate.getForEntity("http://127.0.0.1:8081/ts1?name=zs&age=23", String.class);
        System.out.println(resp.getBody());
    }
重新启动 B 项目,运行 test02,输出:
6.2.3 调用其他应用的 有参 控制器方法2
java
    // 调用其他应用的有参构造器方法2
    @Test
    public void test03(){
        RestTemplate restTemplate = new RestTemplate();
        ResponseEntity<String> resp = restTemplate.getForEntity("http://127.0.0.1:8081/ts1?name={1}&age={2}", String.class,"zs",25);;
        System.out.println(resp.getBody());
    }
测试结果: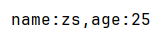
6.2.4 调用返回值为 对象 的方法1
6.2.4-1 在两个项目里都创建 Student 实体类,在项目 B 的 Controller 里添加有参方法 str2
Student 实体类: 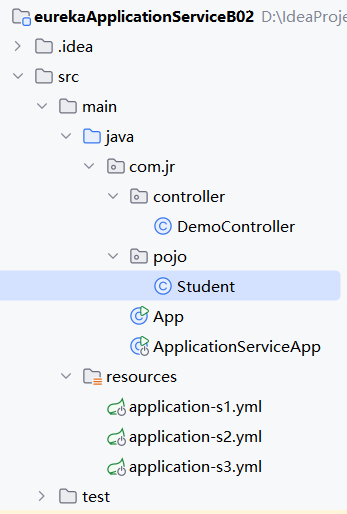
java
@Component
public class Student {
    private String name;
    private int age;

    public Student() {
    }

    public Student(String name, int age) {
        this.name = name;
        this.age = age;
    }

    @Override
    public String toString() {
        return "Student{" +
                "name='" + name + '\'' +
                ", age=" + age +
                '}';
    }

    public String getName() {
        return name;
    }

    public void setName(String name) {
        this.name = name;
    }

    public int getAge() {
        return age;
    }

    public void setAge(int age) {
        this.age = age;
    }
}
6.2.4-2 在项目 B 的 DemoController 里添加方法 str2:
java
    @RequestMapping("/ts2")
    public Student str2(String name, Integer age){
        Student stu = new Student(name,age);
        return stu;
    }
6.2.4-3 编写测试方法 test04(eurekaClient02 的 DemoTest)
java
    // 调用返回值为对象的方法
    @Test
    public void test04(){
        RestTemplate restTemplate = new RestTemplate();
        Student stu = restTemplate.getForObject("http://127.0.0.1:8081/ts2?name={1}&age={2}", Student.class, "Vernon", 28);
        System.out.println(stu.getName()+";"+stu.getAge());
    }
重启项目 B ,运行 test04: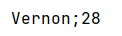
6.2.5 调用返回值为 对象 的方法2
6.2.5-1 在项目 B 的 DemoController 里添加方法 str3:
java
    @RequestMapping("/ts3")
    public List<Student> str3(String name, Integer age){
        List<Student> list = new ArrayList<>();
        list.add(new Student(name,age));
        list.add(new Student(name,age));
        list.add(new Student(name,age));
        list.add(new Student(name,age));
        return list;
    }
6.2.5-2 编写测试方法 test05(eurekaClient02 的 DemoTest)
java
    // 调用返回值为对象的方法2
    @Test
    public void test05() {
        RestTemplate restTemplate = new RestTemplate();
        ParameterizedTypeReference<List<Student>> pt = new ParameterizedTypeReference<List<Student>>() {
        };
        ResponseEntity<List<Student>> exchange = restTemplate.exchange("http://127.0.0.1:8081/ts3?name={1}&age={2}", HttpMethod.GET, null, pt, "BAE", 21);
        List<Student> list = exchange.getBody();
        for (Student stu : list) {
            System.out.println(stu);
        }
    }
重启项目 B,运行 test05: 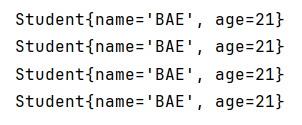
七、get 请求通信
上面 6.2 里的就是 get 请求通信
八、post请求通信
修改上面 6.2 里的测试方法里的代码------把 getForObject 或 getForEntity 改为 postForObject 或 postForEntity,改一下参数
九、exchange请求通信,接收集合
上面的 6.2.5 调用返回值为 对象 的方法2
十、Ribbon 整合 RestTemplate
10.1 重新启动 ApplicationService( eurekaApplicationServiceB02 ) 的三个集群项目
目的是为了,把多个 Controller 方法,同步更新到三个集群里。
10.2 修改 ApplicationClient( eurekaClient02**) 项目的 Service 接口**
在 StudentService 添加 edit 方法: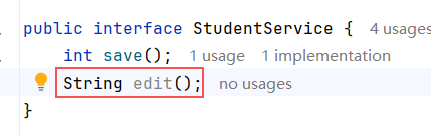
10.3 修改 ApplicationClient( eurekaClient02**) 项目的 ServiceImpl 实现类**
在 StudentServiceImpl 重写 edit 方法:
java
    @Override
    public String edit() {
        ServiceInstance clientb = loadBalancerClient.choose("CLIENTB");
        System.out.println("clientb.getUri():"+clientb.getUri());
        RestTemplate restTemplate = new RestTemplate();
        String forObject = restTemplate.getForObject(clientb.getUri() + "/ts1?name=Vernon&age=27", String.class);
        return forObject;
    }
10.4 修改 ApplicationClient( eurekaClient02**) 项目的 Controller**
在 StudentController 添加 edit 方法:
java
@RequestMapping("/edit")
@ResponseBody
public String edit(){
return studentService.edit();
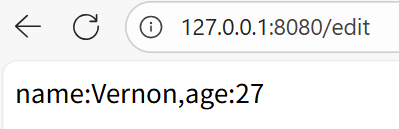
}10.5 测试
运行 eurekaClient02 的SpringBootMain ,输入网址 127.0.0.1:8080/edit