Vue3 + VitePress 搭建组件库文档平台(结合 Element Plus 与 Arco Design Vue)------ 超详细图文教程
简介
【代码仓库,拉取即用,https://github.com/wuyongGitHub/wuyongGitHub.github.io】 其实下面的安装和配置步骤完全可以不用细看,那些只是辅助性的说明文档。你只需要从代码仓库中克隆或下载项目源码,然后在本地简单运行一下,再将代码推送到自己的 GitHub仓库,就可以快速搭建并部署一套属于你自己的组件文档平台或知识库系统。整个过程非常简便,无需复杂的配置,开箱即用,特别适合用于展示项目文档、技术笔记或团队知识沉淀。
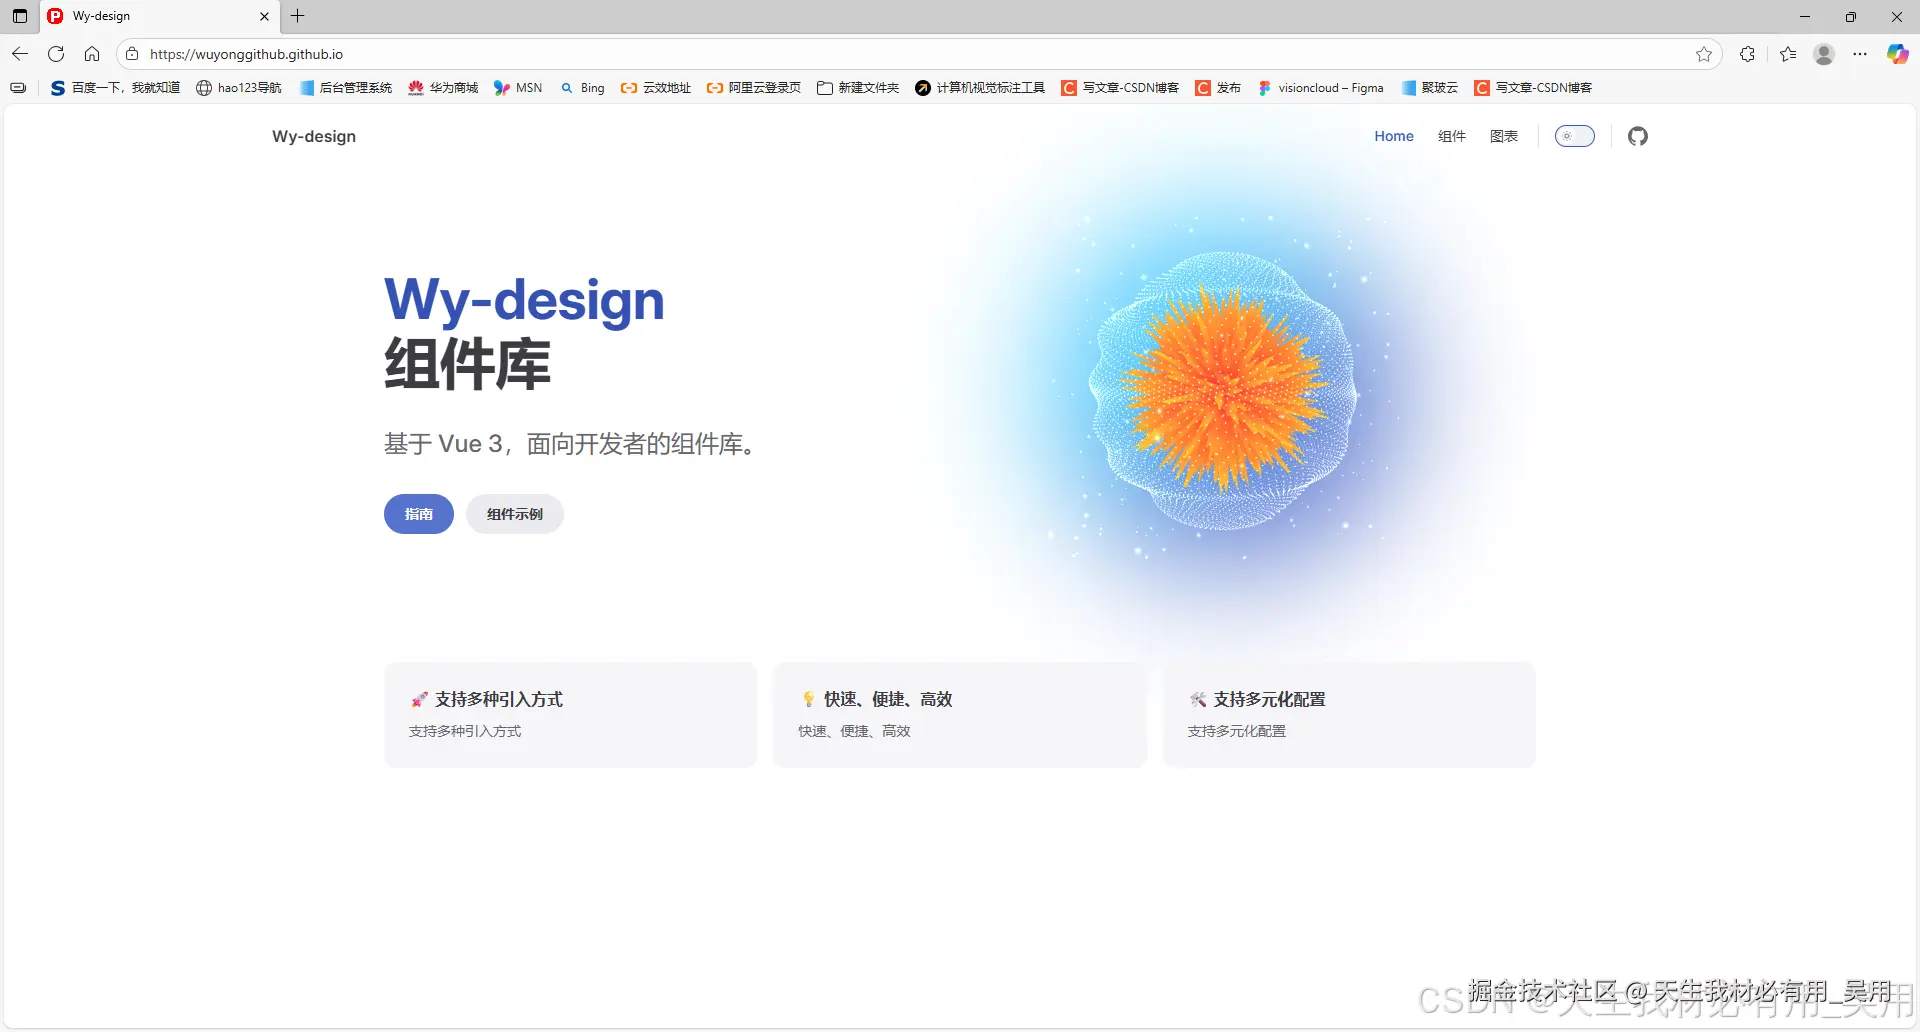
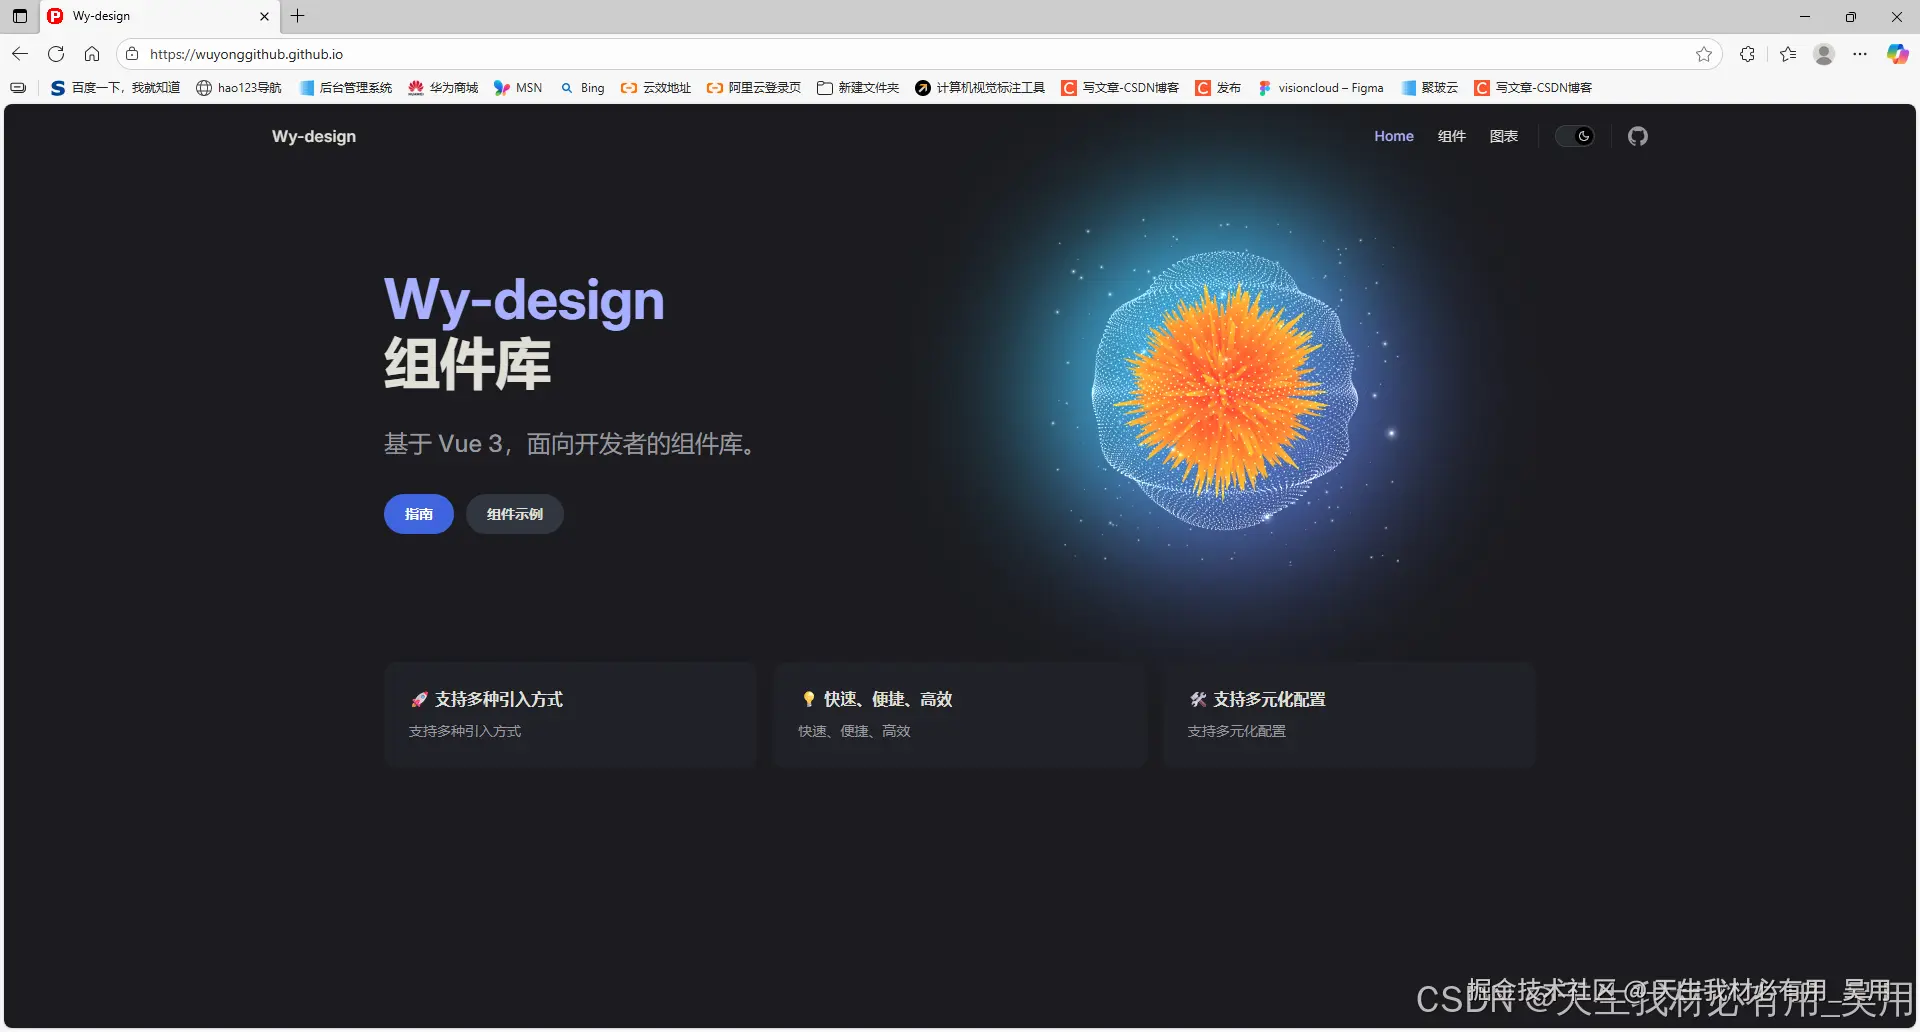
预览效果
部署后的成品地址:https://wuyonggithub.github.io/
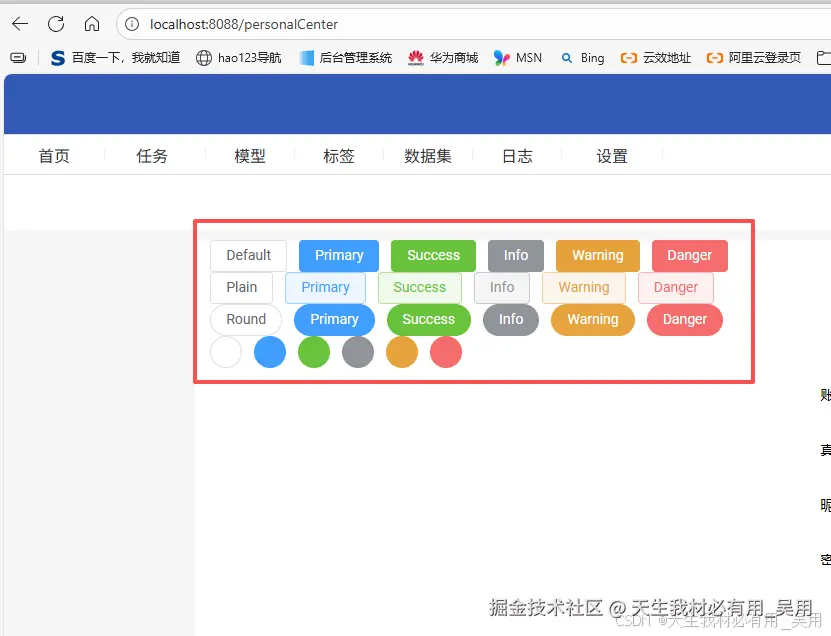
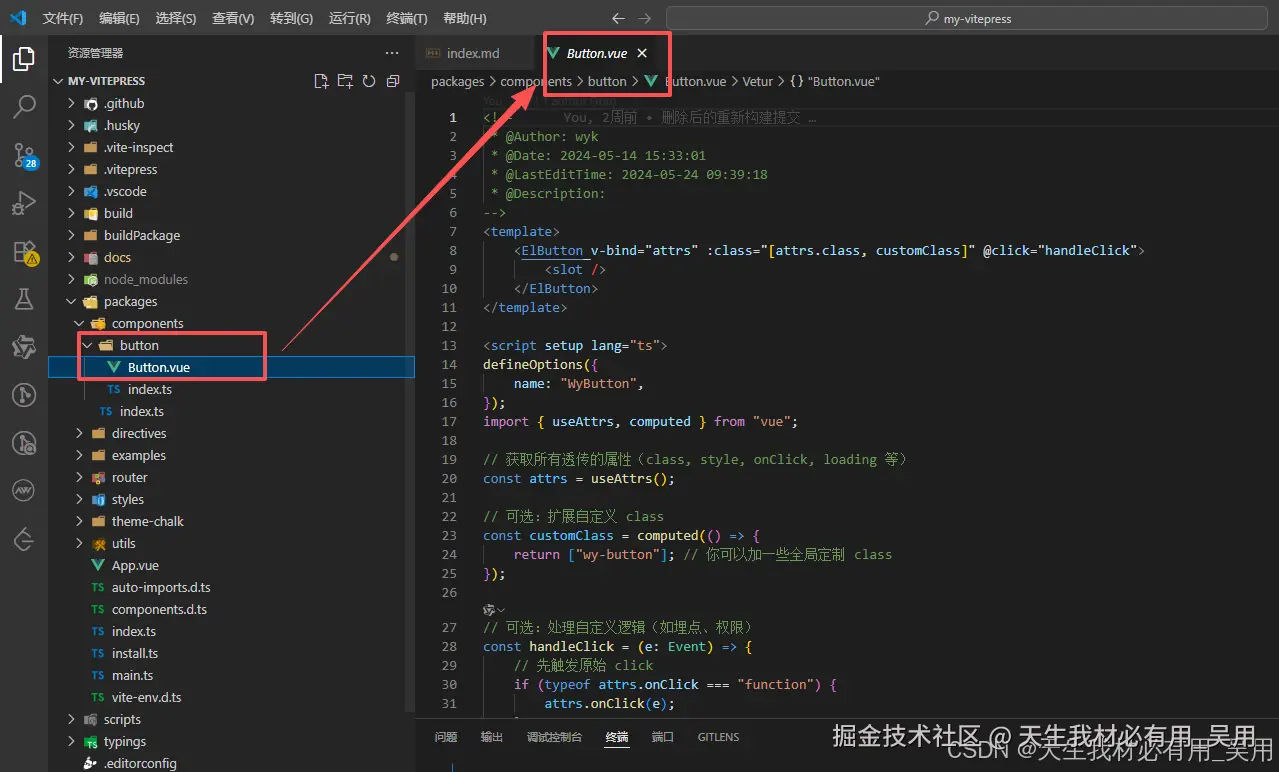
 简易二次封装的按钮组件:
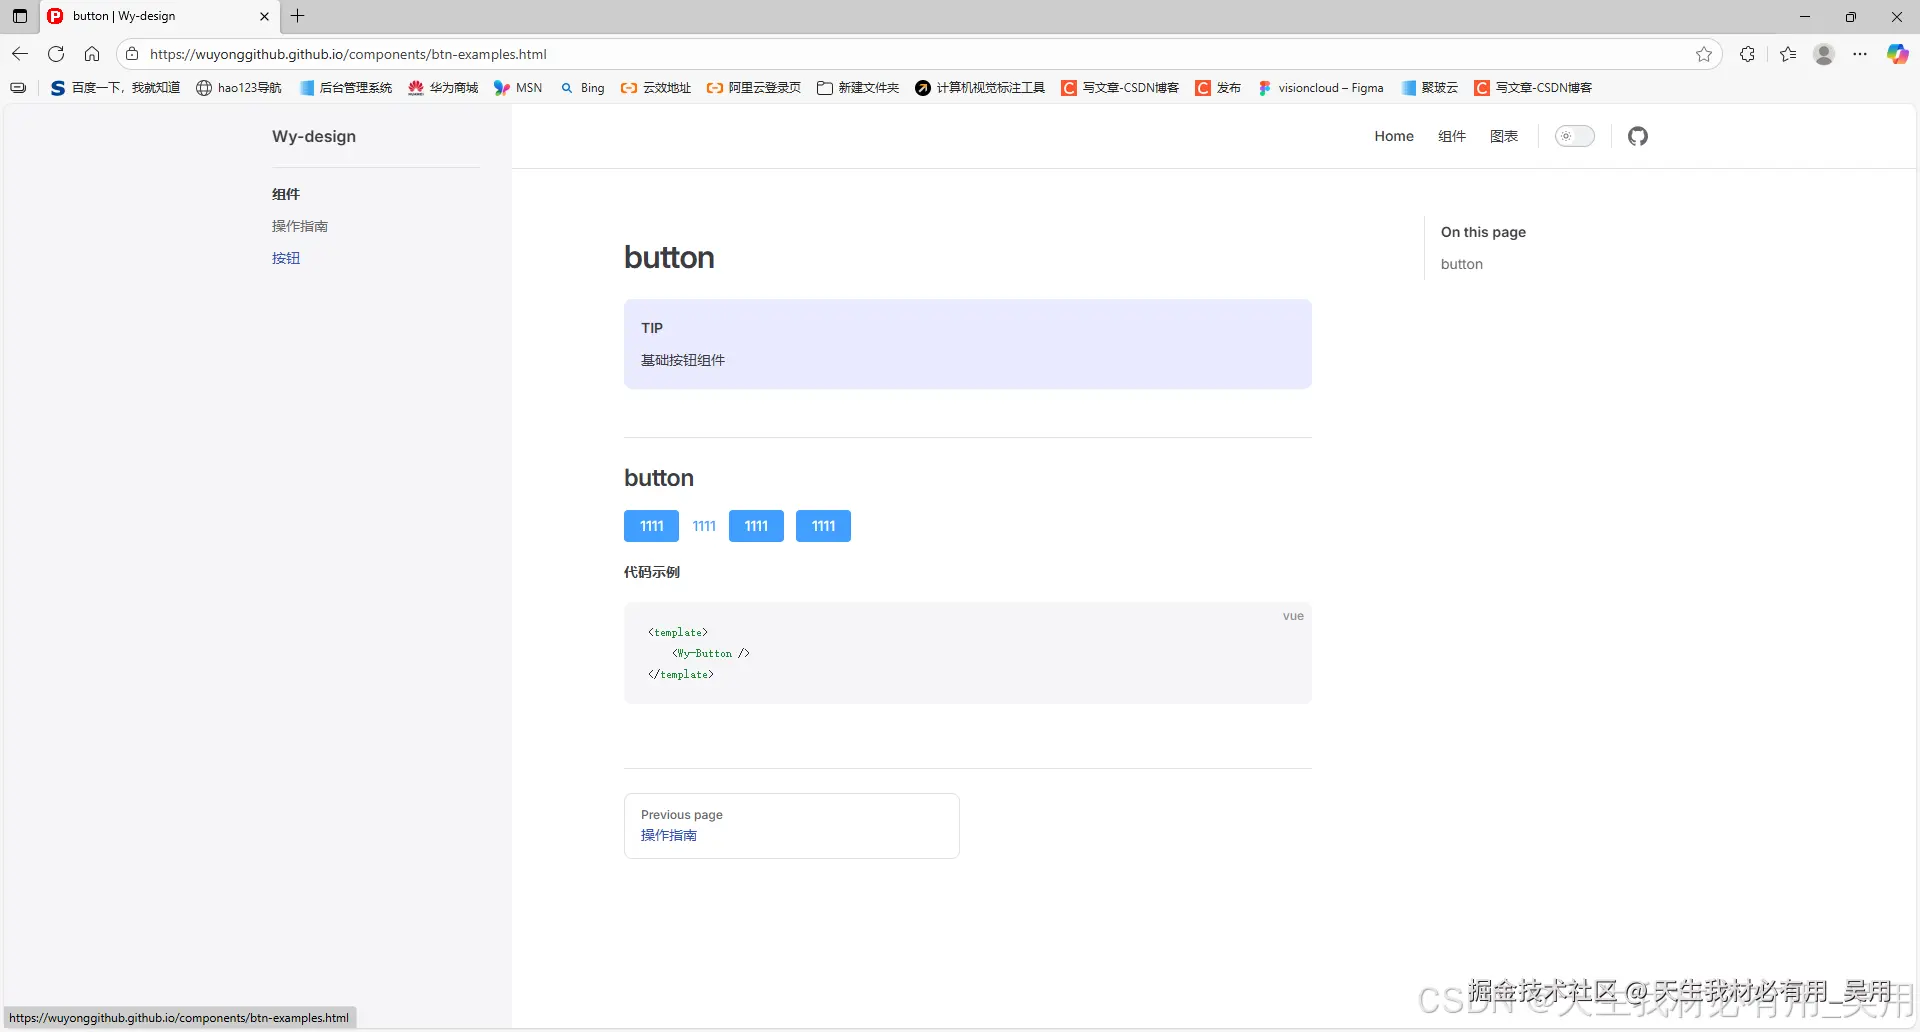
本文内容
由于前端组件数量较多,如果没有一个固定的组件库平台进行统一管理,很容易导致组件被遗忘或不清楚如何使用的情况。为了解决这一问题,我将结合自己在企业项目中的实战经验,分享如何利用 Vue3 和 VitePress 搭建专属的文档站点,打造个性化的知识库平台,并实现对组件库的二次开发与定制化。该方案不仅结构清晰、维护便捷,还能随着组件库的持续演进,同步更新文档内容,真正做到文档与代码协同发展,提升团队协作效率与项目可维护性。
VitePress安装与配置。- 组件封装与注册。
- 在
Markdown中使用组件预览。- 同时引入
Element Plus与Arco Design Vue。- 自动构建 & 部署到
GitHub Pages。- 实际案例演示。
详细实现步骤【自用】
下面步骤仅仅做个人搭建向导,如看不懂还挺直接拉取github【github.com/wuyongGitHu...】仓库代码,根据步骤进行理解配置。
第一步、项目目录结构及说明
MY-VITEPRESS/ ├── docs/ # 文档内容(Markdown) │ └── components/ # 示例页面 │ ├── btn-examples.md │ └── index.md ├── packages/ # 封装的组件源码 │ ├── components/ # Vue 组件 │ │ └── MyButton.vue │ ├── directives/ │ ├── examples/ # 使用示例代码 │ └── theme-chalk/ # 样式变量 ├── .vitepress/ # VitePress 配置 │ ├── config.ts │ └── theme/ ├── vite.config.ts └── package.json
注意:docs 是文档入口,packages 是组件源码,两者分离但通过 VitePress 动态绑定。
第二步、项目初始化
新建MY-VITEPRESS文件夹
typescript
mkdir MY-VITEPRESS
cd MY-VITEPRESS
npm init -y
第三步、安装核心依赖
typescript
npm install vue@3 vite @vitejs/plugin-vue -D第四步、安装 VitePress
vitepress 是独立运行的,不依赖 vite 项目本身,但可以共存。
typescript
npm install vitepress -D第五步、创建 VitePress 文档站点
创建/docs/index.md,并写入内容
typescript
---
title: 我的组件库文档
description: 基于 Vue3 + VitePress + Element Plus 的组件库文档
---
# 欢迎使用我的组件库
这是一个基于 Vue3、VitePress 构建的组件库文档平台,集成了 Element Plus 和 Arco Design UI 的功能。
## 快速开始
```vue
<template>
  <my-button type="primary">点击我</my-button>
</template>

<script setup>
import MyButton from '../packages/components/button/index.vue'
</script>在根目录执行npm run docs:dev 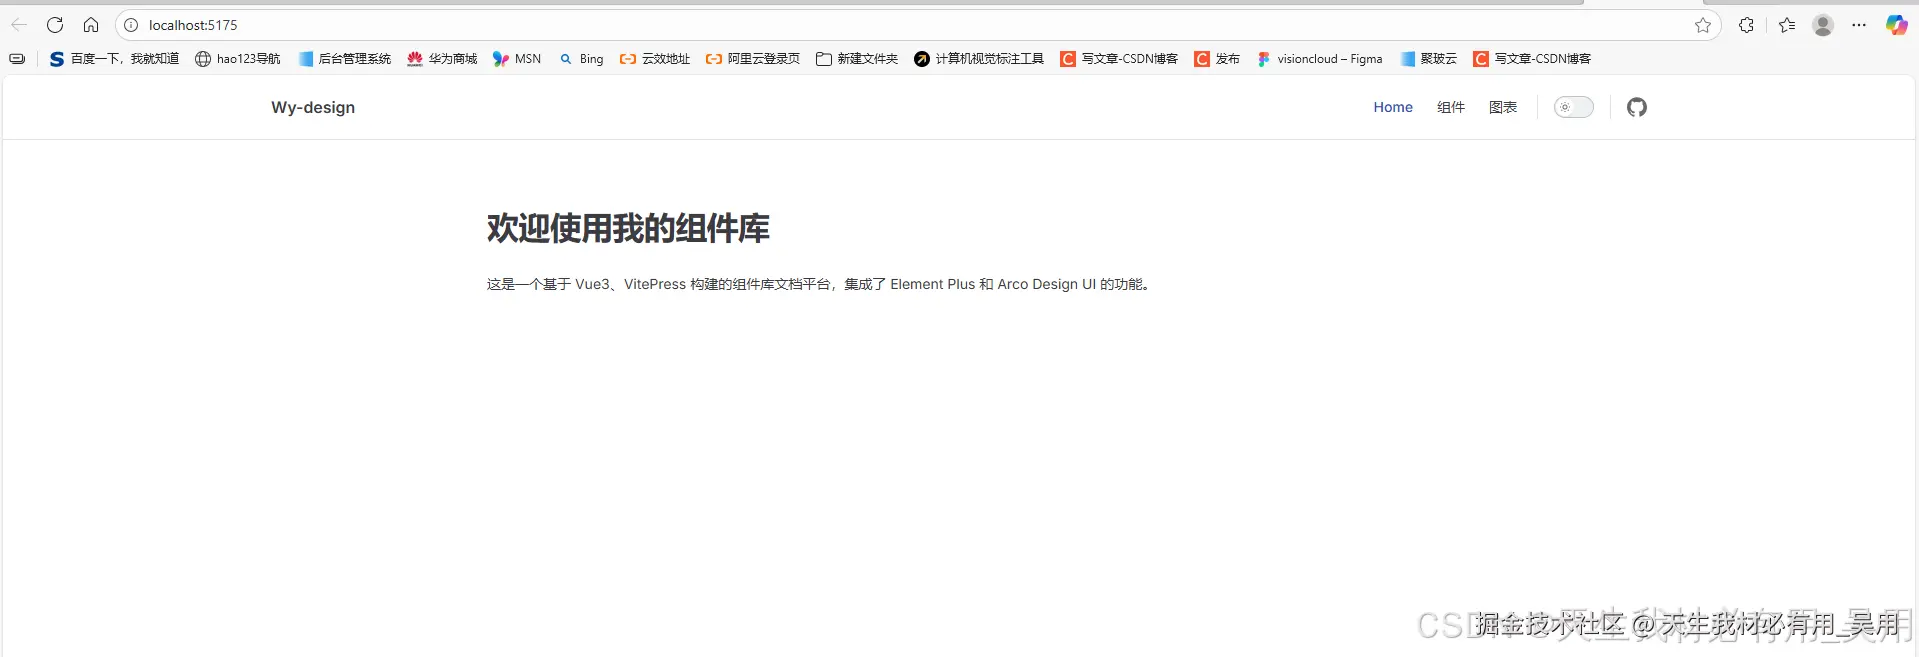
第六步、构建组件库(packages)
-
创建
packages文件夹,与docs同级目录。
-
创建
components/button,封装你的组件。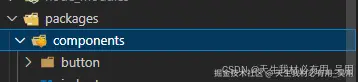
-
创建
packages/components/index.ts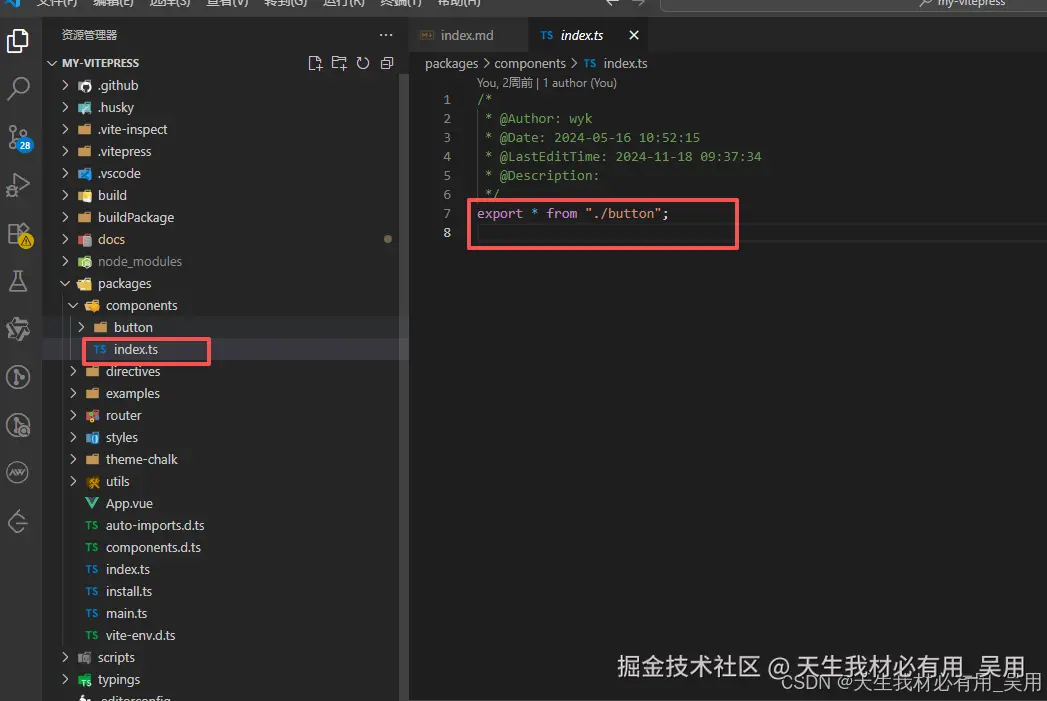
-
创建
packages/directives/domResize.tstypescript// packages/directives/domResize.ts import { DirectiveBinding } from 'vue'; export const domResize = { mounted(el: HTMLElement, binding: DirectiveBinding) { const resizeHandler = () => { binding.value?.(el.offsetWidth, el.offsetHeight); }; window.addEventListener('resize', resizeHandler); resizeHandler(); }, unmounted(el: HTMLElement) { window.removeEventListener('resize', () => {}); } };
第七步、集成 Element Plus & Arco Design UI
-
安装 Element Plus,安装 Arco Design Vue
typescriptnpm install element-plus -S npm install @arco-design/web-vue -S -
引入样式(在 main.ts 中)
typescriptimport { createApp } from "vue"; import App from "./App.vue"; /* 样式文件 */ import router from "./router"; import { domResize } from "./directives/domResize"; import "./theme-chalk/global.scss"; import ArcoVue from '@arco-design/web-vue'; import ElementPlus from 'element-plus' import '@arco-design/web-vue/dist/arco.css'; import './styles/element/index.scss' const app = createApp(App); app.directive("domResize", domResize); app.use(ArcoVue); app.use(ElementPlus) app.use(router).mount("#app");
第八步、批量注册组件
创建packages/index.ts文件,内容如下:
typescript
/*
 * @Author: wyk
 * @Date: 2025-09-25 09:44:38
 * @LastEditTime: 2024-05-24 18:58:39
 * @Description:
 */
export * from "./components";
import { installer as install } from "./install";
export default install;
将你封装的所有组件进行批量注册,使其能够通过 app.use() 的方式全局安装到 Vue 应用中。
第九步、配置 VitePress 主题与组件演示
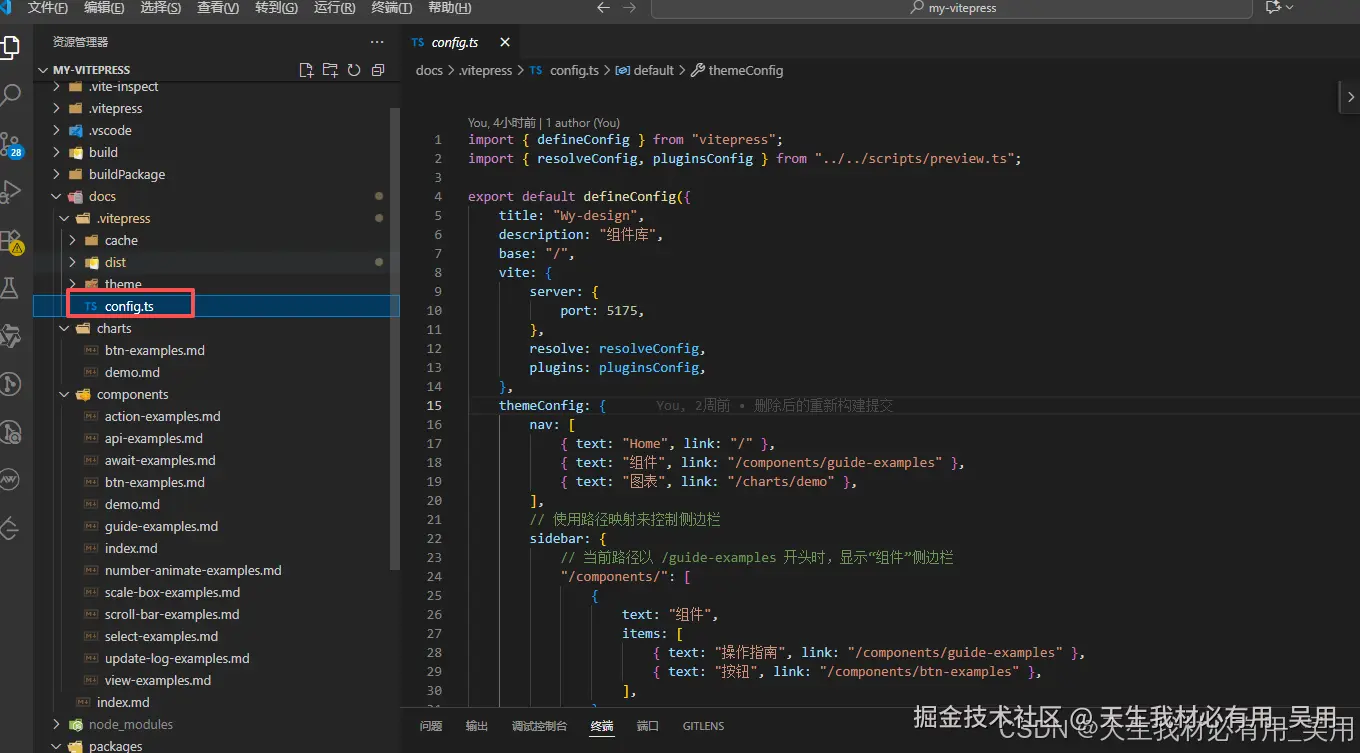
typescript
import { defineConfig } from "vitepress";
import { resolveConfig, pluginsConfig } from "../../scripts/preview.ts";

export default defineConfig({
    title: "Wy-design",
    description: "组件库",
    base: "/",
    vite: {
        server: {
            port: 5175,
        },
        resolve: resolveConfig,
        plugins: pluginsConfig,
    },
    themeConfig: {
        nav: [
            { text: "Home", link: "/" },
            { text: "组件", link: "/components/guide-examples" },
            { text: "图表", link: "/charts/demo" },
        ],
        // 使用路径映射来控制侧边栏
        sidebar: {
            // 当前路径以 /guide-examples 开头时,显示"组件"侧边栏
            "/components/": [
                {
                    text: "组件",
                    items: [
                        { text: "操作指南", link: "/components/guide-examples" },
                        { text: "按钮", link: "/components/btn-examples" },
                    ],
                },
            ],
            // 当前路径以 /demo 开头时,显示"图表"侧边栏
            "/charts/": [
                {
                    text: "图表",
                    items: [{ text: "demo1", link: "/charts/demo" }],
                },
            ],
        },
        socialLinks: [{ icon: "github", link: "https://github.com/wuyongGitHub/wuyongGitHub.github.io" }],
    },
});
第十步、vitpress使用组件打包配置
新建docs/.vitepress/theme/index.ts,引入打包后的dist
typescript
import Theme from "vitepress/theme";
import { App, h, defineAsyncComponent } from "vue";
import asyncComponents from "@/examples/index";
import { domResize } from "@/directives/domResize";

// 样式
import "element-plus/dist/index.css";
import "@arco-design/web-vue/dist/arco.css";
import "../../../packages/styles/element/index.scss";

// 必须引入并注册组件库
import ElementPlus from "element-plus";
import ArcoVue from "@arco-design/web-vue";

const WyBasicsDocsImage = defineAsyncComponent(() => asyncComponents.then((Components) => Components["WyBasicsDocsImage"]));

export default {
    ...Theme,
    Layout() {
        return h(Theme.Layout, null, {
            "home-hero-image": () => {
                return h(WyBasicsDocsImage);
            },
        });
    },
    async enhanceApp({ app }: { app: App }) {
        let Components = await asyncComponents;
        app.directive("domResize", domResize);

        //  注册 UI 库
        app.use(ElementPlus);
        app.use(ArcoVue);

        //  注册你二次封装的组件
        for (let i in Components) {
            app.use(Components[i]);
        }
    },
};
第十一步、本地开发和构建
typescript
"scripts": {
        "start": "vite --host --mode development",
        "build": "vue-tsc --noEmit && vite build --mode developmentBuild && node buildPackage/vetur.js  &&  node buildPackage/index.js ",
        "preview": "vite preview",
        "lint": "eslint . --ext .vue,.ts,.js,.jsx,.mjs --fix --ignore-path .gitignore",
        "prettier": "prettier --write .",
        "style": "stylelint 'packages/**/*.(css|scss)' --fix",
        "prepare": "husky install",
        "docs:dev": "vitepress dev docs",
        "docs:build": "cross-env NODE_ENV=production vitepress build docs",
        "docs:preview": "vitepress preview docs"
    },
typescript
npm run start:启动案例使用预览
npm run build:打包组件生成/build/dist目录
npm run docs:dev:启动本地文档预览,热更新
npm run docs:build:构建文档输出静态文件
npm run docs:serve:预览构建结果
第十二步、打包优化
vite.config.ts进行打包优化,排除了 vue, element-plus 等大型依赖打包。
typescript
/*
 * @Author: wyk
 * @Date: 2022-11-22 10:22:48
 * @LastEditTime: 2024-08-30 17:19:06
 * @Description:
 */
import { defineConfig } from "vite";
import vue from "@vitejs/plugin-vue";
import { resolve } from "path";
import { pluginsConfig, resolveConfig } from "./scripts/preview";
import Inspect from "vite-plugin-inspect";
import dts from "vite-plugin-dts";
export default defineConfig(() => {
    return {
        build: {
            outDir: "build",
            cssCodeSplit: true,
            rollupOptions: {
                external: ["@ant-design/icons-vue", "ant-design-vue", "element-plus", "unplugin-vue-components", "unplugin-auto-import", "vue"],
                output: [
                    {
                        format: "es",
                        entryFileNames: "[name].js",
                        exports: "named",
                        name: "JbDesign",
                        dir: "./build/dist",
                    },
                    {
                        format: "es",
                        entryFileNames: "[name].js",
                        exports: "named",
                        preserveModules: true,
                        preserveModulesRoot: "packages",
                        dir: "./build/es",
                    },
                    {
                        format: "cjs",
                        entryFileNames: "[name].js",
                        exports: "named",
                        preserveModules: true,
                        preserveModulesRoot: "packages",
                        dir: "./build/lib",
                    },
                ],
            },
            lib: {
                entry: resolve(__dirname, "./packages/index.ts"),
                name: "JbDesign",
                fileName: (format) => `Wy-design.${format}.js`,
                formats: ["es", "cjs"],
            },
        },
        plugins: [
            vue(),
            dts({
                tsconfigPath: "./tsconfig.prod.json",
                outDir: "build/lib",
            }),
            dts({
                tsconfigPath: "./tsconfig.prod.json",
                outDir: "build/es",
            }),
            ...pluginsConfig,
            // Inspect({
            //     build: true,
            //     outputDir: ".vite-inspect",
            // }),
        ],
        resolve: resolveConfig,
    };
});
第十三步、打包测试
执行npm run build命令,进入打包 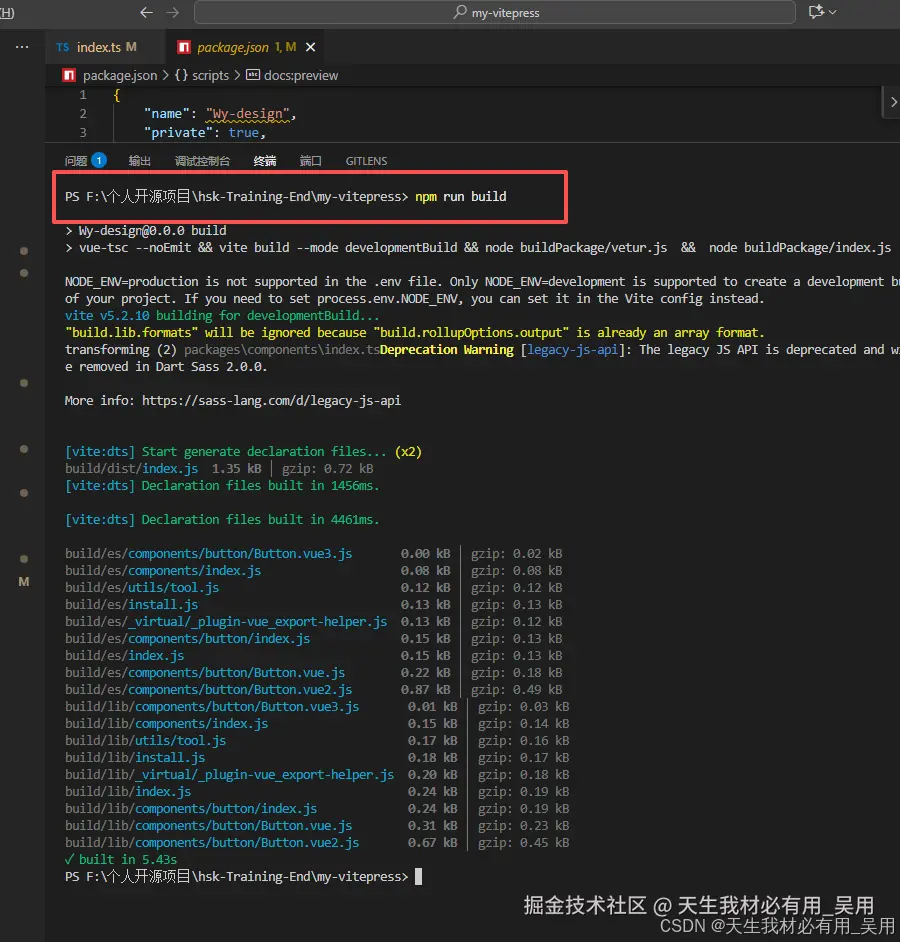
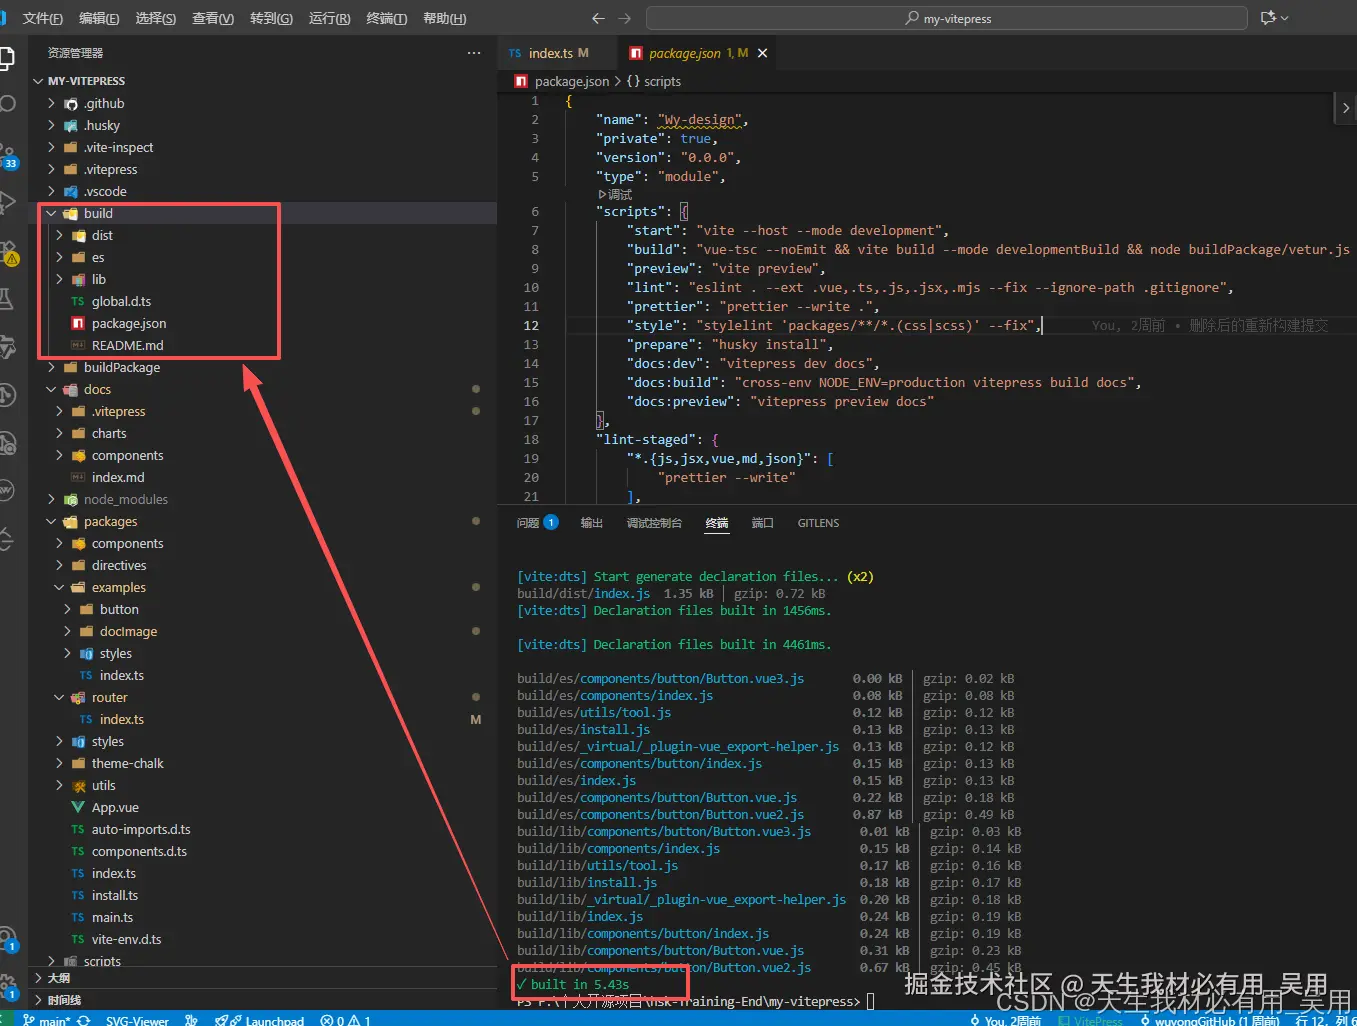 将
将build文件名改成Wy-Design,移入需要使用的项目,后期会将该包上传到npm服务或者npm私服中,通过install进行安装拉取使用。 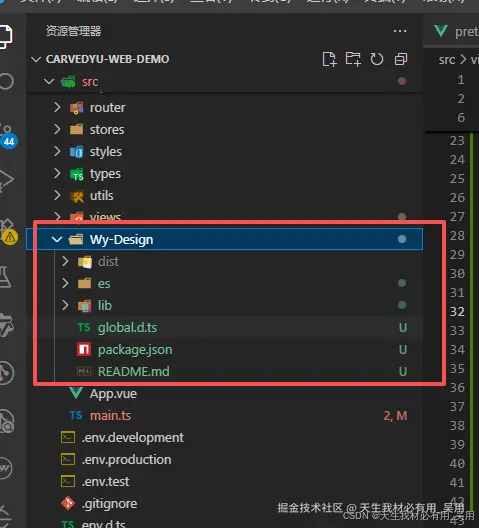 在需要使用该组件包的项目中全局注册使用:
typescript
import wyDesign from "./Wy-Design/dist/index";
import "./build/dist/index.css";
app.use(wyDesign);
或者按需引入
typescript
import { WyButton } from "../../Wy-Design";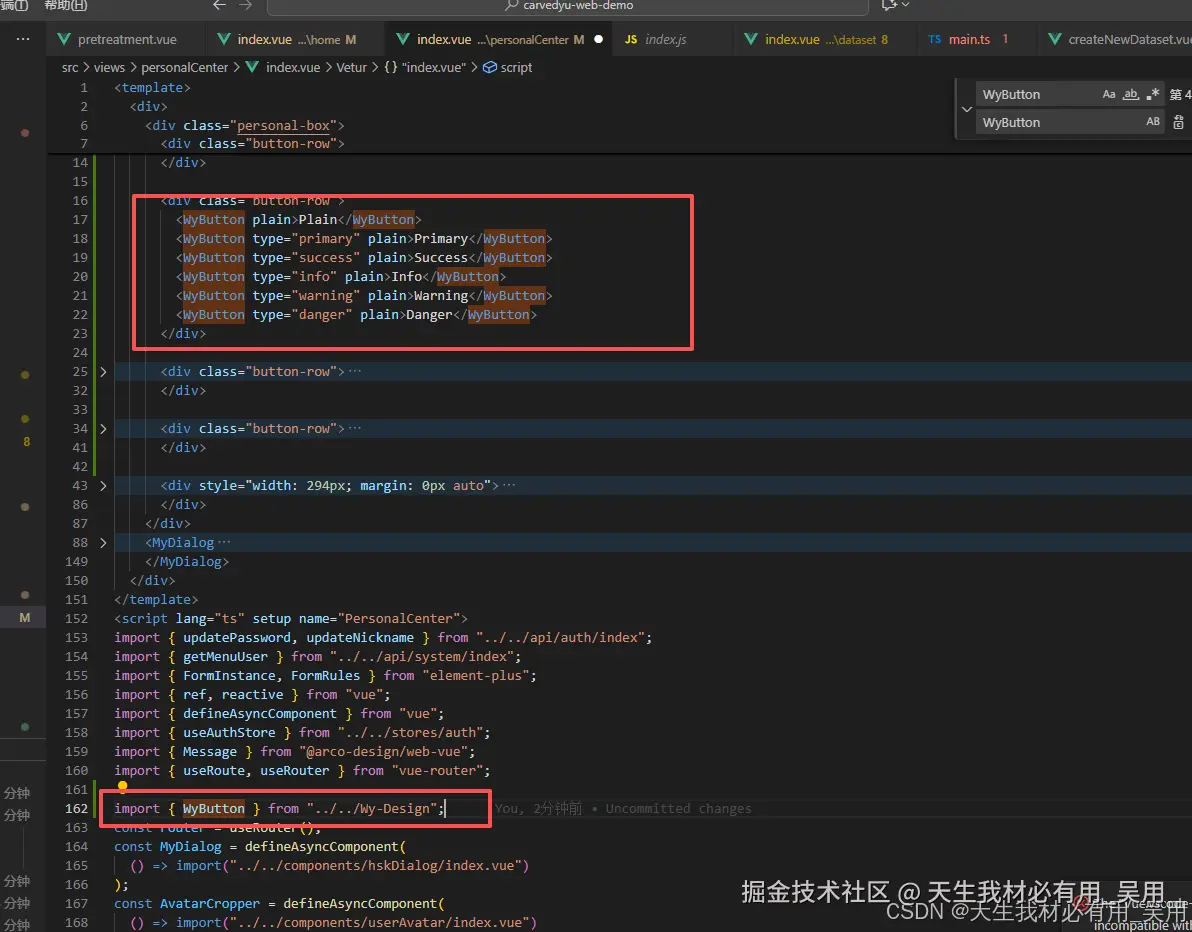
第十四步、使用组件
typescript
      <div class="button-row">
        <WyButton plain>Plain</WyButton>
        <WyButton type="primary" plain>Primary</WyButton>
        <WyButton type="success" plain>Success</WyButton>
        <WyButton type="info" plain>Info</WyButton>
        <WyButton type="warning" plain>Warning</WyButton>
        <WyButton type="danger" plain>Danger</WyButton>
      </div>

      <div class="button-row">
        <WyButton round>Round</WyButton>
        <WyButton type="primary" round>Primary</WyButton>
        <WyButton type="success" round>Success</WyButton>
        <WyButton type="info" round>Info</WyButton>
        <WyButton type="warning" round>Warning</WyButton>
        <WyButton type="danger" round>Danger</WyButton>
      </div>
      .
      .
      .
第十六步、查看使用效果